
Does Lynnhaven still allow boat runs?
-
Of the approximately 40,000 men who served on U-boats in WWII, it is estimated that around 28,000 to 30,000 lost their lives. -
We need a Regatta in Virginia Beach.Of the approximately 40,000 men who served on U-boats in WWII, it is estimated that around 28,000 to 30,000 lost their lives.Comment
-
I pulled this photo of the first Type-23 kit I assembled to show you one of the bow 'guards' in place on the hull. There is another set of guards projecting from the hull at the stern. The guards primary function is to serve as physical barriers to protect the vulnerable bow and stern plans from damage from tugs deadheads, pier pilings, and collisions with other craft at sea.
It was common German marine Architect practice to use non retractable bow planes on almost all submarine types during the two Great wars. However, it was the Type-23's big brother, the Type-21, that ushered in the use of retractable bow planes in the closing months of the second World War.

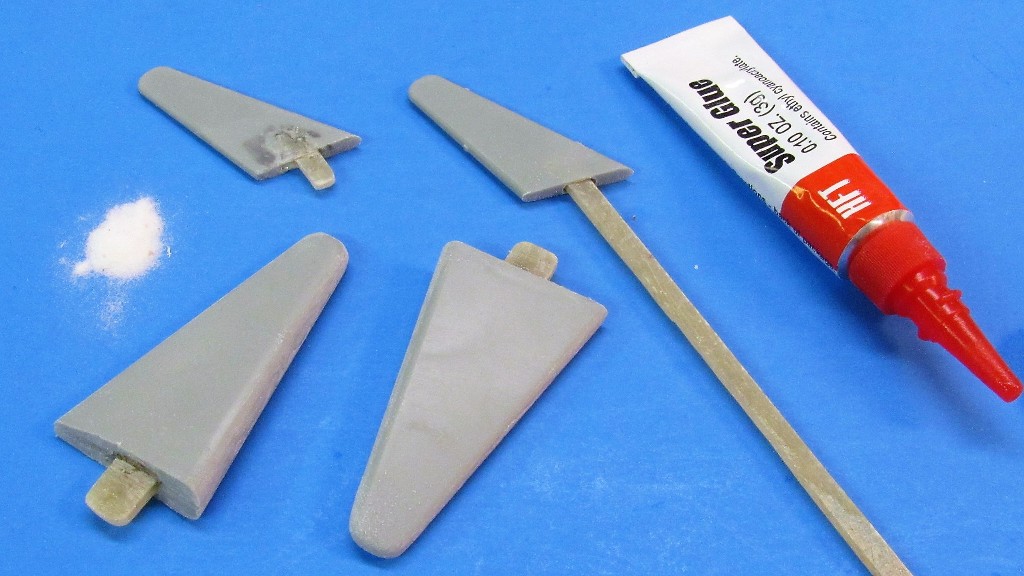
And just as I did with the larger guards that fit at the bow, I equipped the smaller guards that attach at the stern with GRP strengthening spars to better brace them against breakage as a result of handling accident or collision.
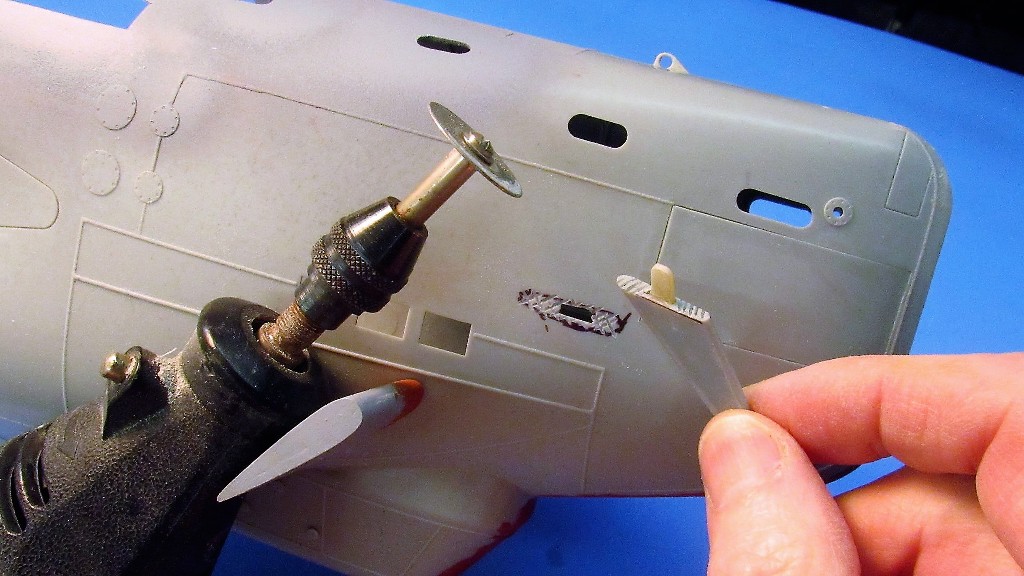
The two small guards were, unlike their two-piece larger brothers, cast as solid units and had to be milled out to accept the GRP strengthening spars.
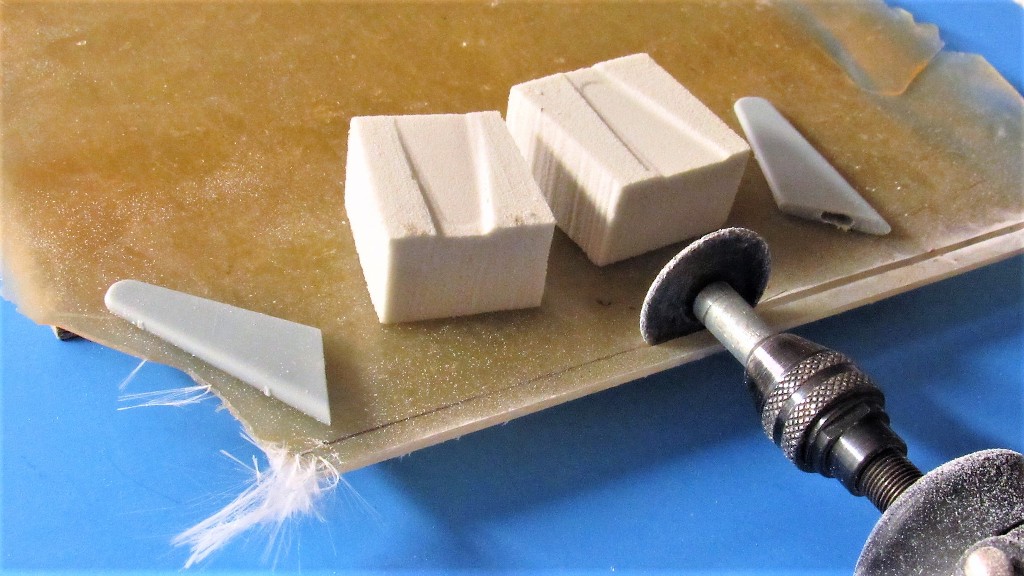
The tapered and semi-trapezoidal shape of the stern guards presented a problem: how to hold them securely in the jaws of the mills vice without damaging them? The solution came in the form of two little blocks of lightweight RenShape modeling medium. Hard enough to hold the work, but soft enough to conform to the geometry of the parts when subjected to the compressive force of the jaws. A compliant holding fixture, the perfect solution.
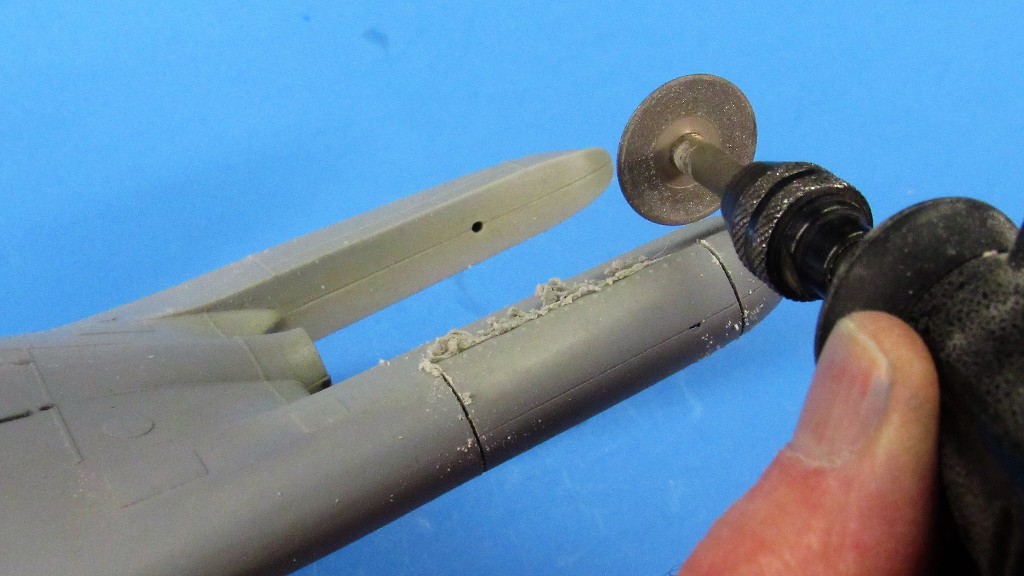
I'm slitting my forty-year old slab of sheet GRP to come up with the spars that will be glued into the small guards -- a Carbide or diamond cut-off wheel is ideal for this kind of nasty work as the glass content would quickly dull even my so-called 'metal cutting' band saw blade. Never cut GRP with a hobby razor-saw, knife, or file as you will quickly blunt the teeth... you, after all, are attempting to cut into solid, silica GLASS!
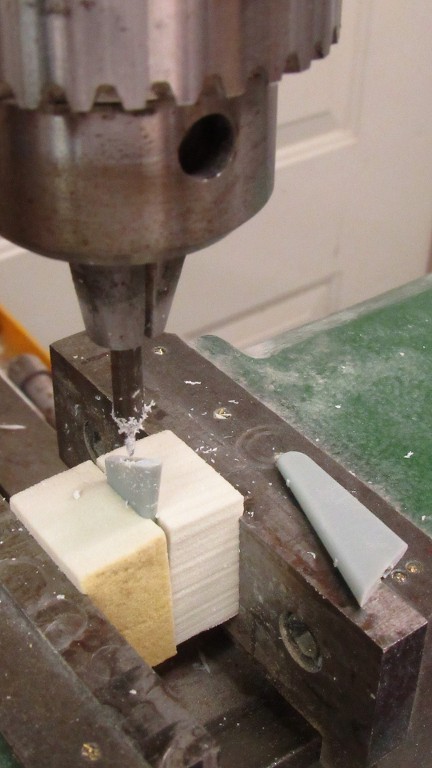
A 1/16-inch end-mill was used to dig out the square bore needed to accept the spar. Care had to be taken to dial down the tool speed and to feed the work with gentile, stabbing force. Otherwise, the heat generated would melt the polystyrene plastic and bugger up the job... which, on one of the guards, I did ANYWAY. What a Dumb-ass!!
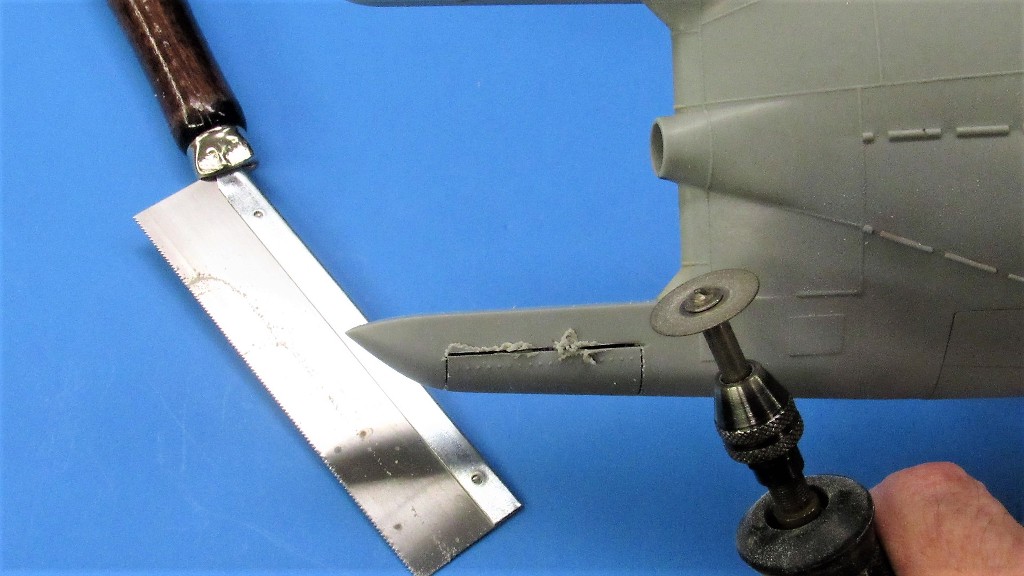
Just like on the real boats, the upper skeg of the Type-23 contained the control horn that swing the big rudder that resides aft of the propeller. And in the exact same spot as the real boat, I cut away and made removable the access cover.
After all the painting and weathering is completed the access cover will be secured in place with a small amount of RTV adhesive, affording me the ability to easily remove it should work ever have to be done on the rudder and/or its linkage.
Removing the access cover from the upper skeg was easy: First, a razor-saw was used to make the radial cuts, followed by a very slow plunging of a diamond wheel to make the longitudinal cuts. All I had to do was follow the engraved lines built into the models surface. Easy-Peasy!
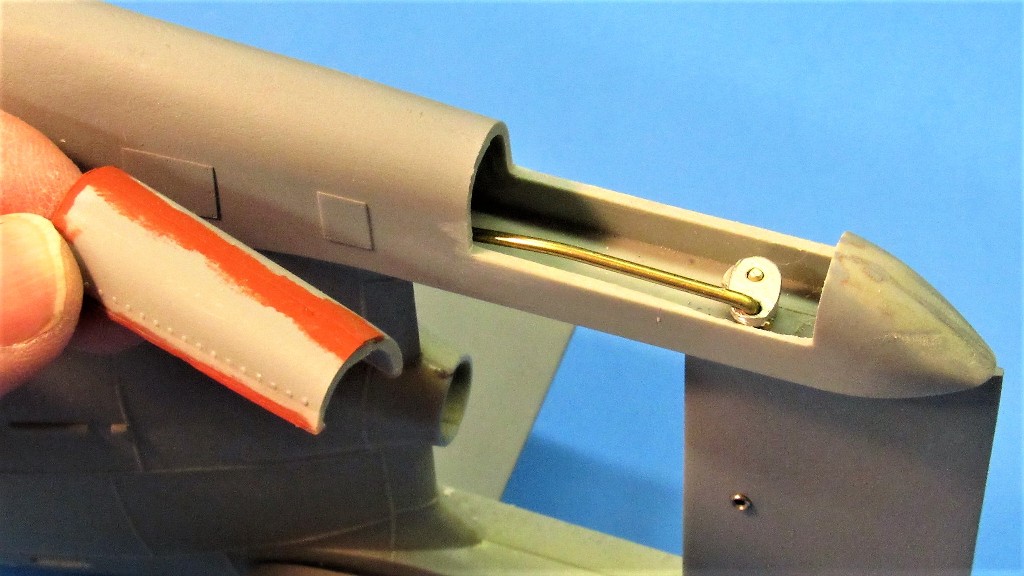
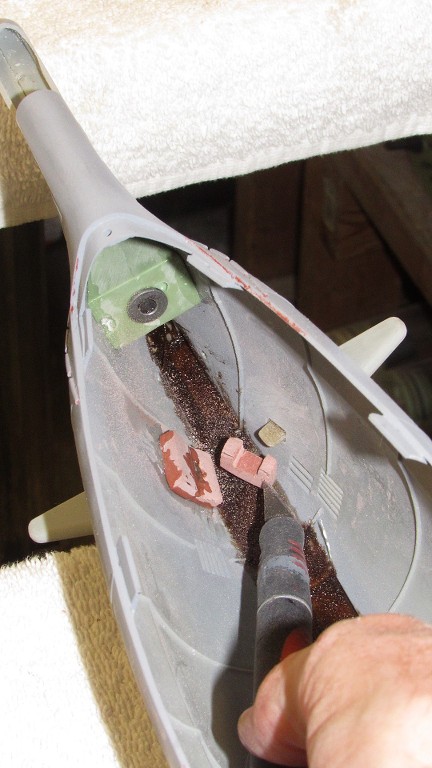
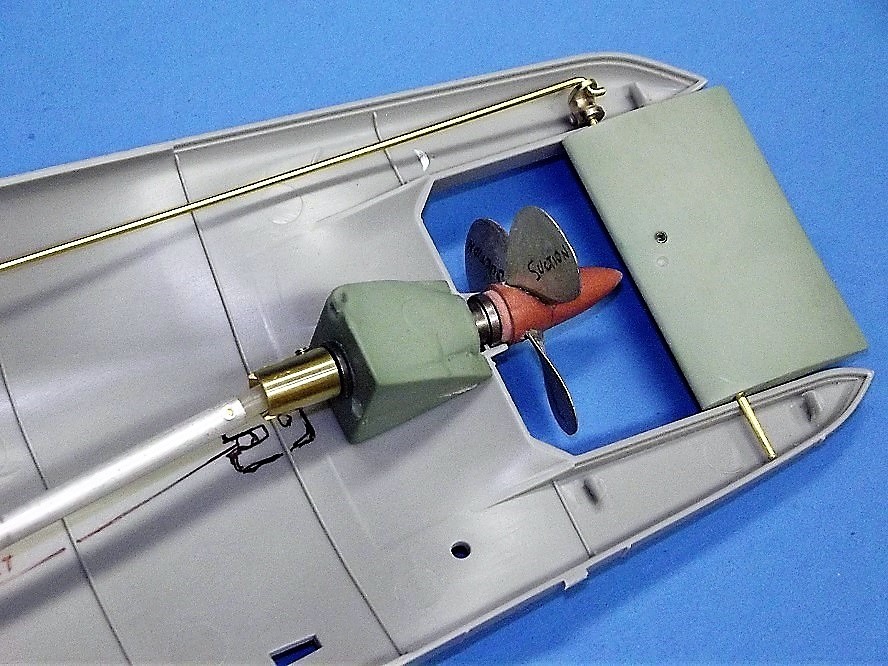
Before addressing the running gear (stern tube foundation, propeller shaft and propeller, couplers, and intermediate drive-shaft) I worked out the linkages between the WTC and three control surfaces: bow planes, stern planes, and rudder.
Note that the connecting interface are magnetic couplers. Easy to make/break -- no tools required -- and absolutely no back-lash.
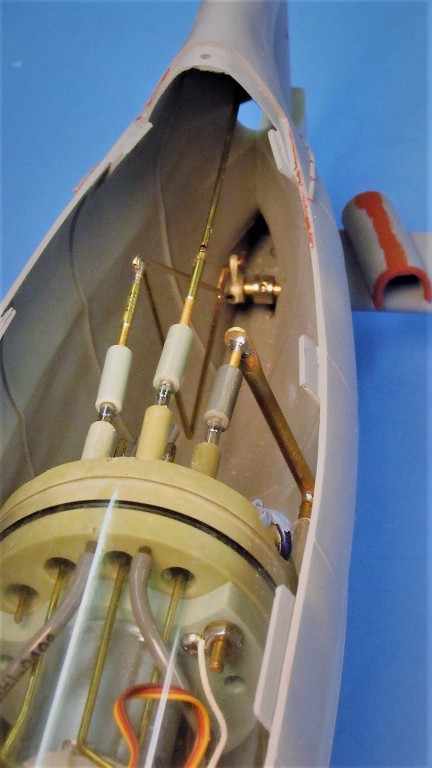
The stern plane pushrod, connecting to the WTC's starboard coupler, because of its long Z-bend, would have flexed to an unacceptable degree without the soldered truss piece, which worked to render the pushrod more rigid.
The rudder pushrod that mated with the WTC's center coupler was almost a straight run to the rudder horn.
The bow plane pushrod was made rigid by using a long length of aluminum tube (running through channels cut into the two WTC foundation saddles) with a 'L' shaped brass tube at the stern to place its magnetic coupler in alignment with the WTC's port magnetic coupler.

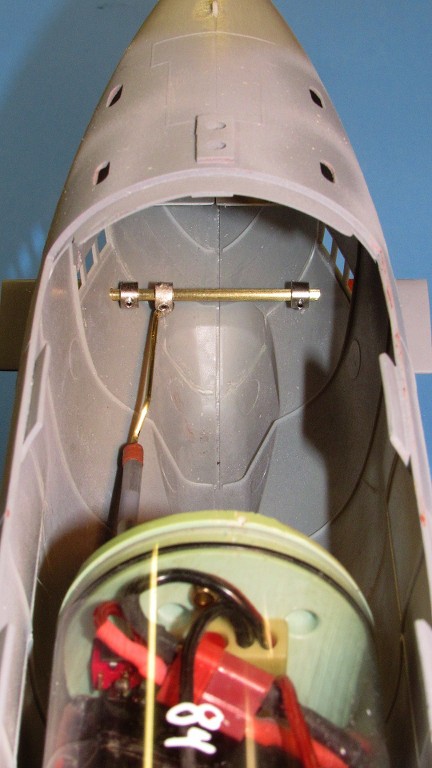
You can just make out the bow plane pushrod aluminum tube where it transitions to a length of 1/16-inch brass rod that makes the connection to the bow plane operating shaft control horn. The two wheel-collars prevent lateral motion of the operating shaft.
Who is John Galt?Comment
-
An RC Sub man spends his life getting into tense situations.Of the approximately 40,000 men who served on U-boats in WWII, it is estimated that around 28,000 to 30,000 lost their lives.Comment
-
David,
the strengthening spar you put inside the plane guard pieces only extend through the thickness of the hull right?
Any issue if you use one long piece that bridges both guards?Make it simple, make strong, make it work!Comment
-
I substantially increased the surface area where a guard butted up against the side of the hull by digging in shallow grooves in both hull and root of the guard itself. Even so, relying on this CA bonded attachment point alone is not enough as the bond is still terribly weak against a shearing force. Hence the need of the installed strengthening GRP spar within the guard that projects well into the hull.
A guard was tack CA'ed in place with a few dabs of thick CA -- the slower cure time of this glue provided a few moments in which to align the part. Once the tack had set the joint was saturated with thin formula CA -- capillary action drawing the glue into the voids between the two items being bonded.
To prevent getting glue where you don't want it it's good practice to apply the adhesive, one drop at a time, with the aid of an application tool. Typically, a length of 1/16-inch diameter brass rod with a spatula head.
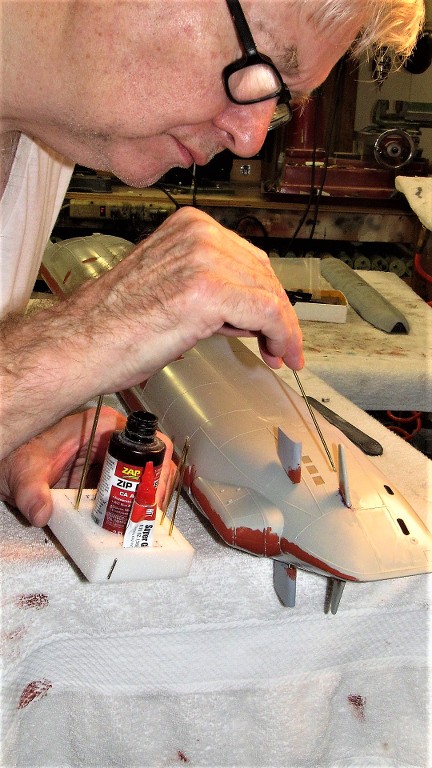
The guards GRP lengthening spar projects into the hull and is sheathed in a two-piece block of dense RenShape. This firmly anchors the guard against shear loads that would be encountered as a result of rough handling or collisions. Once the block foundation is tacked in place the entire assembly is slathered with thin formula CA.
And that's how these otherwise useless appendages transitioned from fragile elements of a nice-looking display model into practical, tough, guards to ward off impact without damage to themselves or the control surfaces they are intended to protect.
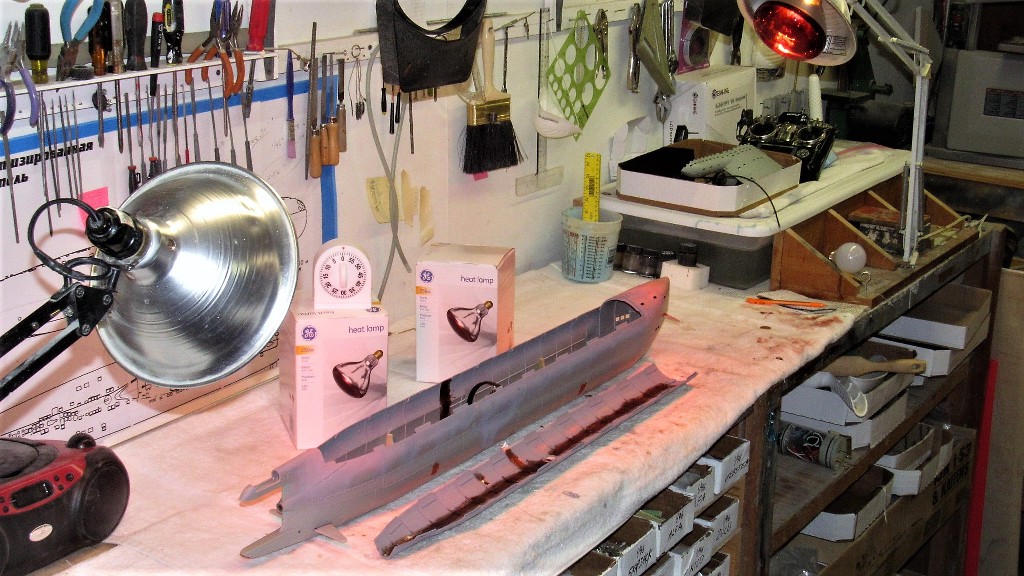
I don't trust polystyrene. It's not the ideal medium from which a model -- subject to the typical rough handling and occasional collision of an r/c submarine encounters -- is made. Most plastic model kits are engineered for looks, not strength.
So, all major seams were backed up with fiberglass cloth saturated with laminating epoxy. All hull longitudinal and radial joints received this treatment.

Heat-lamps were used to speed up the cure of the epoxy.
The running gear is a propeller; propeller shaft; cast resin stern tube foundation containing two flanged Oilite bearings; propeller shaft coupler; intermediate driveshaft; and the motor output coupler at the after end of the WTC. The after bearing takes the ahead load, and the forward bearing takes the astern load. These loads transferred to the hull via the cast resin stern tube foundation.
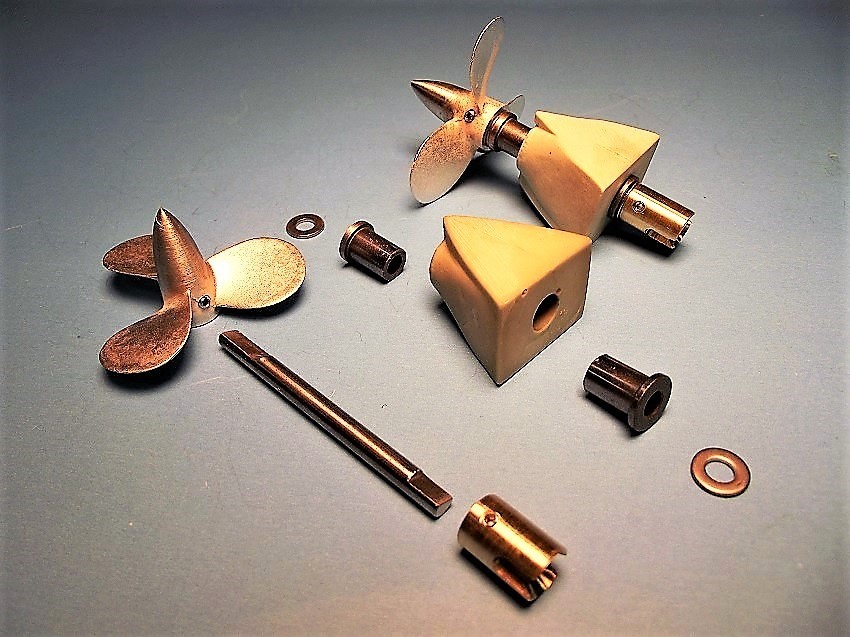
Years ago, I developed a resin and metal 'fittings kit' to make conversion of the Bronco 1/35 Type-23 kit for use as an r/c model submarine a simple matter. Not currently available these kits are planned to be put back into production soon. Here we see two of those items: the running gear, and the rudder. The stern tube, propeller shaft, coupler, and propeller were provided, 'ready to install'.
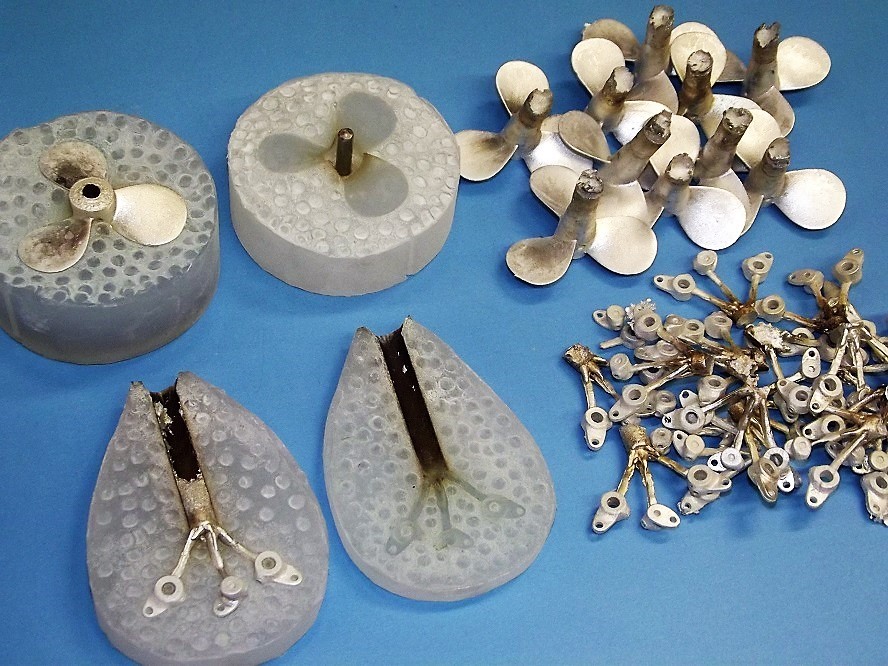
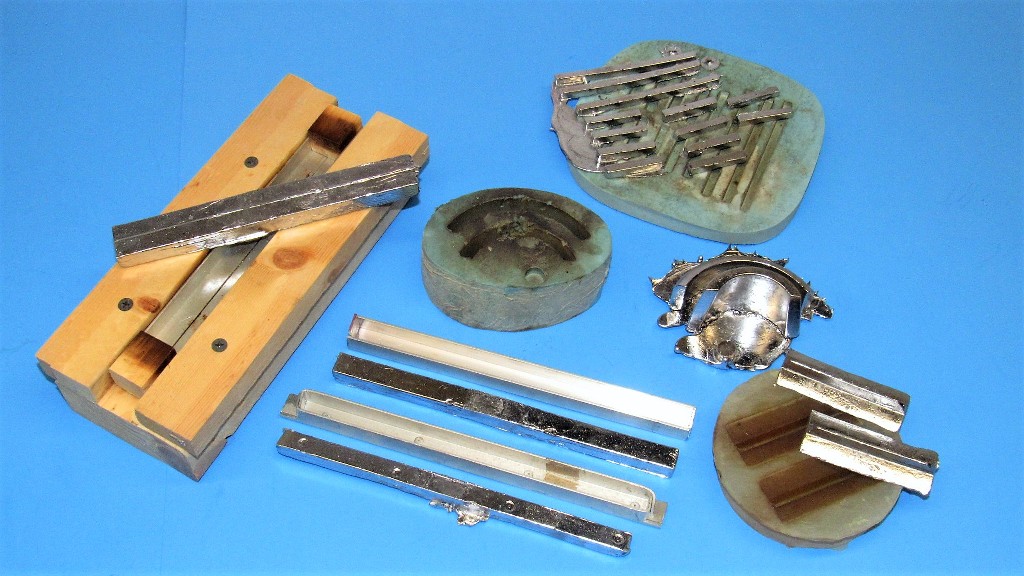
A quick look at the tooling and white-metal parts produced for the fittings kit.
Any brass alloy or white-metal part that is to be glued, primed and/or painted has to first be 'pickled' in acid to etch the surface, which greatly increase the ability of an adhesive to bond than would be the case if adhesion was attempted onto the virgin metal, no matter how well you de-greased and cleaned it.
After filing and sanding away any flash the part is dunked in Ferric chloride acid and agitated with an acid-brush till the entire surface is oxidized black (white metal) or a darkened brass color (copper, or alloys of copper). The work is then scrubbed clean in fresh water, that water spiked with some baking soda to kill any acid remaining on the work. The part is then dried off and set aside for priming or adhesion to another item.
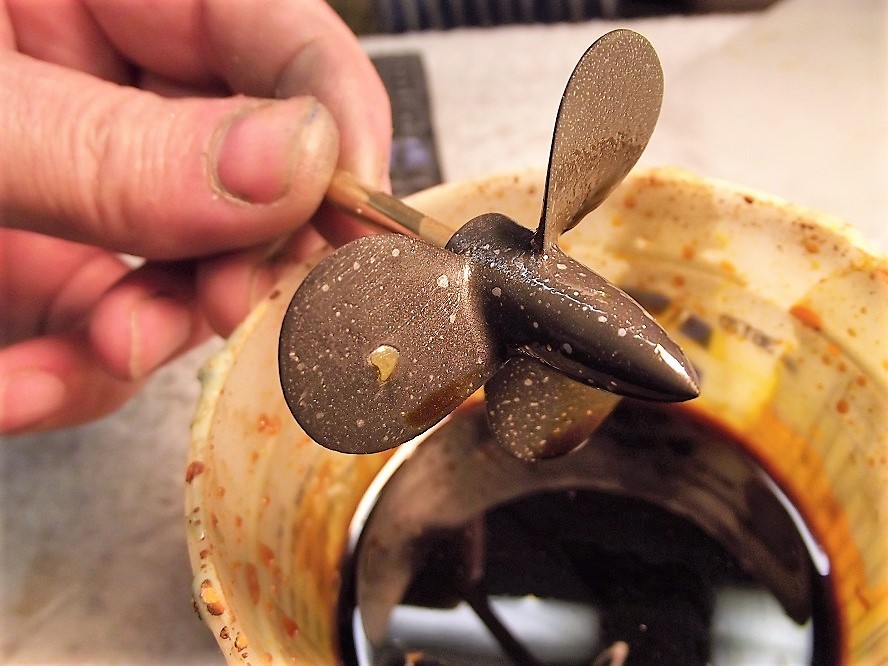
The white-metal propeller to the left has been pickled, rinsed, dried and ready for adhesion of another part or coating. It appears to be smooth, but in actuality has zillions of microscopic pits that do wonders to enhance the 'stick' of an adhesive. The propeller to the right has only had the dunce-cap turned to shape -- other than that it is fresh out of the mold that gave it form.
Pickled good. Virgin bad.

I'm getting to the point where I'll be trimming the boat in water soon. Outfitting the models hull for in-water use starts with about three-pounds of fixed lead weight mounted within and at the bottom of the hull. The weight is needed to position the vehicles longitudinal center of gravity to the center of the boat and place that c.g. as low as possible. It's the low c.g. and high center of buoyancy that makes the submarine statically stable about the roll axis (and to a very small extent, statically stable about the pitch axis). The greater the vertical distance between c.g. and c.b. the greater the vehicles static stability will be.
Short coupling between c.g. and c.b. bad. Long coupling between c.g. and c.b. good.
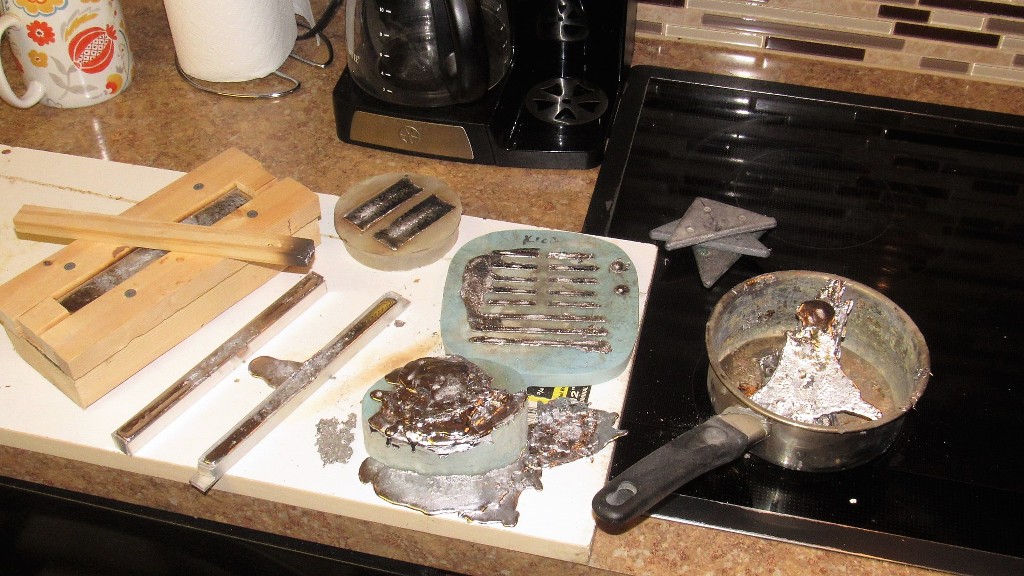
I cast my own weights. Nothing to it: some dedicated cookware, select a day when the little lady is out shopping, start cooking metal, and break out the molds. And, most important of all: don't forget to clean up and hide all the evidence back into the shop before she gets back.
Though the Bronco kit represents the actual ballast tank flood-drain opening, they were just not enough in number or sized to conveniently flood-drain the practical model as it was put into and pulled out of the water. So, I marked off and opened up a series of ovoid holes at the bow and stern of the keel. Not scale, but necessary. Sometimes you have to be pragmatic and depart from scale when the situation demands it.
Who is John Galt?Comment
-
Certainly a great step to ensure you have strength there, and there is absolutely nothing wrong with taking that step. I just wonder if it's necessary? I've built three? (I think) of these kits now and the styrene plastic is pretty darned solid if you use liquid styrene cement to secure the parts together rather than an adhesive. The liquid cement actually dissolves the mating plastic faces and they fuse together forming one, continuous part. Basically what I'm saying (not to David, who knows this and more, but to everyone else tackling these plastic kits) is don't use CA or other adhesive for plastic to plastic parts. Get the liquid cement. It's pretty awesome stuff if used correctly.I substantially increased the surface area where a guard butted up against the side of the hull by digging in shallow grooves in both hull and root of the guard itself. Even so, relying on this CA bonded attachment point alone is not enough as the bond is still terribly weak against a shearing force. Hence the need of the installed strengthening GRP spar within the guard that projects well into the hull.
David's internal reinforcement is an awe-inspiring extra step to ensure no issues down the road, but if you don't have the engineering or practical chops to pull it off, using the correct glue can make a difference!
BobLast edited by RCSubGuy; 02-07-2022, 05:56 AM.Comment
-
I take these extra strengthening steps because of the way I drive. I tend to bounce off walls and collide with anything that gets in my way. The average driver need not take my measures as he assembles his kit as his boat will be at substantially lower risk of impact damage.
DavidWho is John Galt?Comment


Comment