
Ever tried using static grass or flocking to simulate thick algal growth?
-
Make it simple, make strong, make it work! -
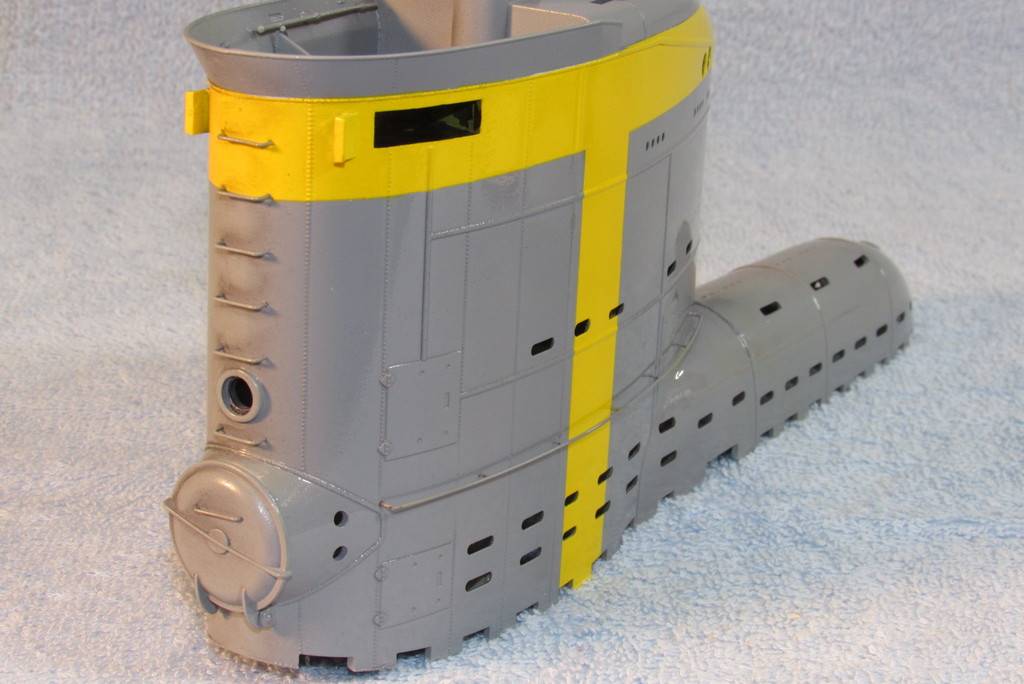
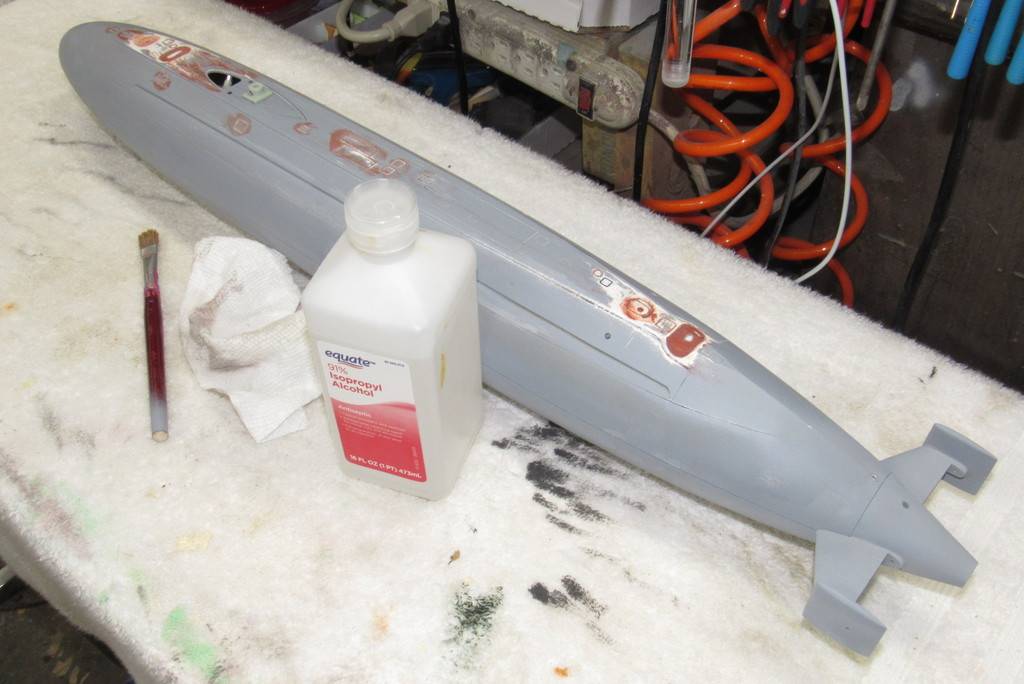
Yup. This Small World Models 1/96 TRENCHANT.


David
Not My First RodeoWho is John Galt?Comment
-
These are all incredible! I may have missed it somewhere in the 119 pages, but how well does the flocking hold up on the “hula skirt”, or is the Trenchant a static model?Now if you'll excuse me, I'm going to go on an overnight drunk, and in 10 days I'm going to set out to find the shark that ate my friend and destroy it. Anyone who wants to tag along is more than welcome.Comment
-
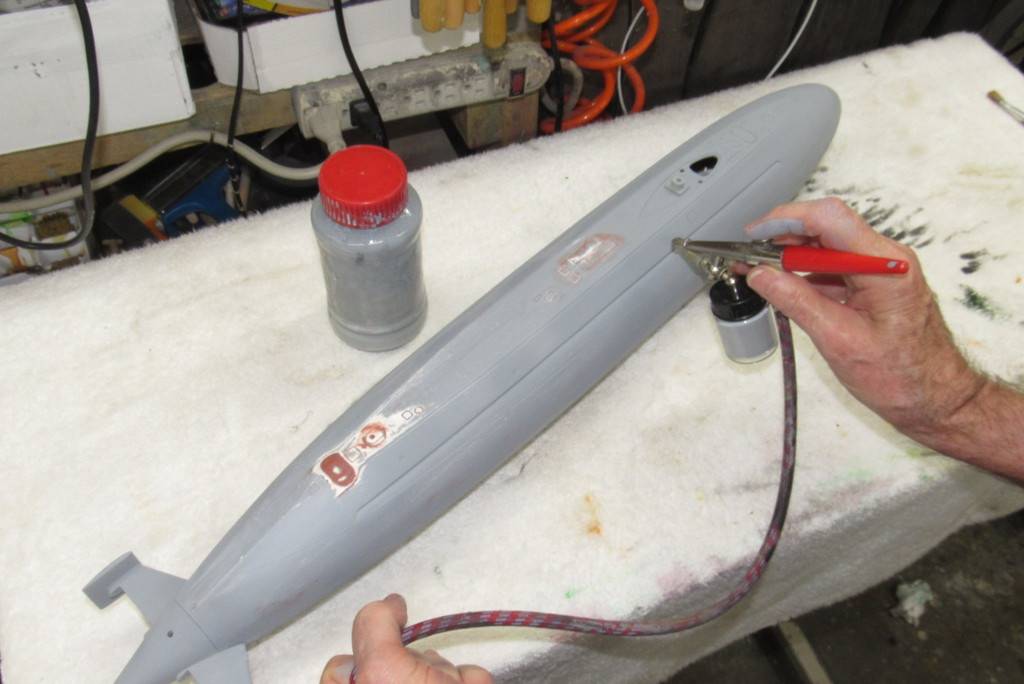
My TRENCHANT is an r/c model submarine. The only water-time so far is in the test tank, no underway time yet. But it will hold up. I learned this trick from the Master himself, Gene Berger, and his big GATO has been cruising around for decades with no apparent failure of the adhesive holding the 'grass' in place.
USS BALAO SS-285 – SHIP MODELS by GENE BERGER (geneberger-models.com)
David
StudentWho is John Galt?Comment
-
Gene brought her to the IPMS show here in Richmond a couple years back, when she had been returned to static model status. I helped Gene shlep that boat in and out of Trashmore a couple times… It was great to see the model again, and it looked just as magnificent as it did back in the 90s.Comment
-
I did not realize Gene used flocking as algae.If you can cut, drill, saw, hit things and swear a lot, you're well on the way to building a working model sub.Comment
-
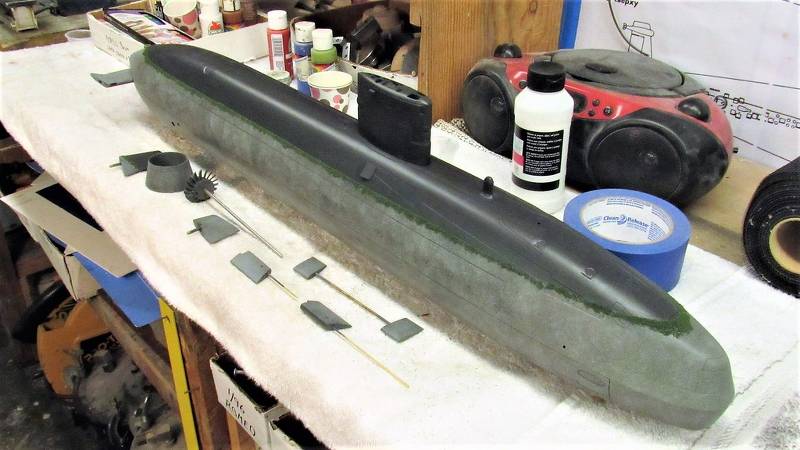
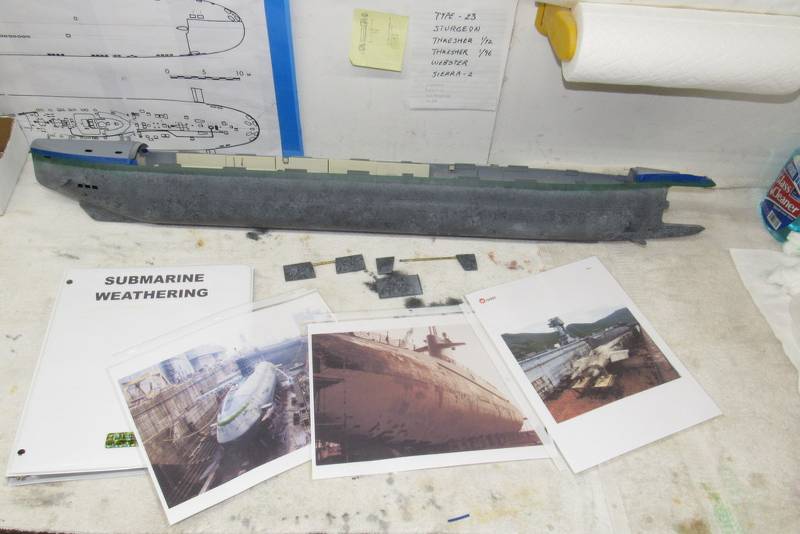
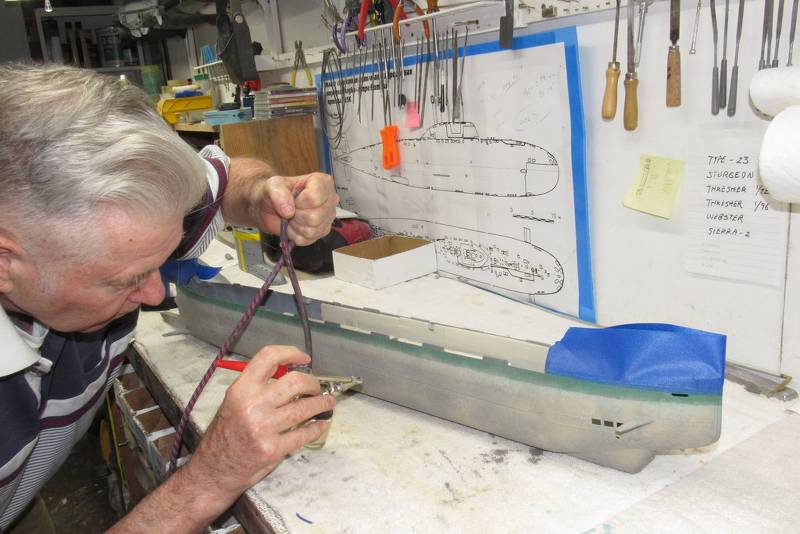
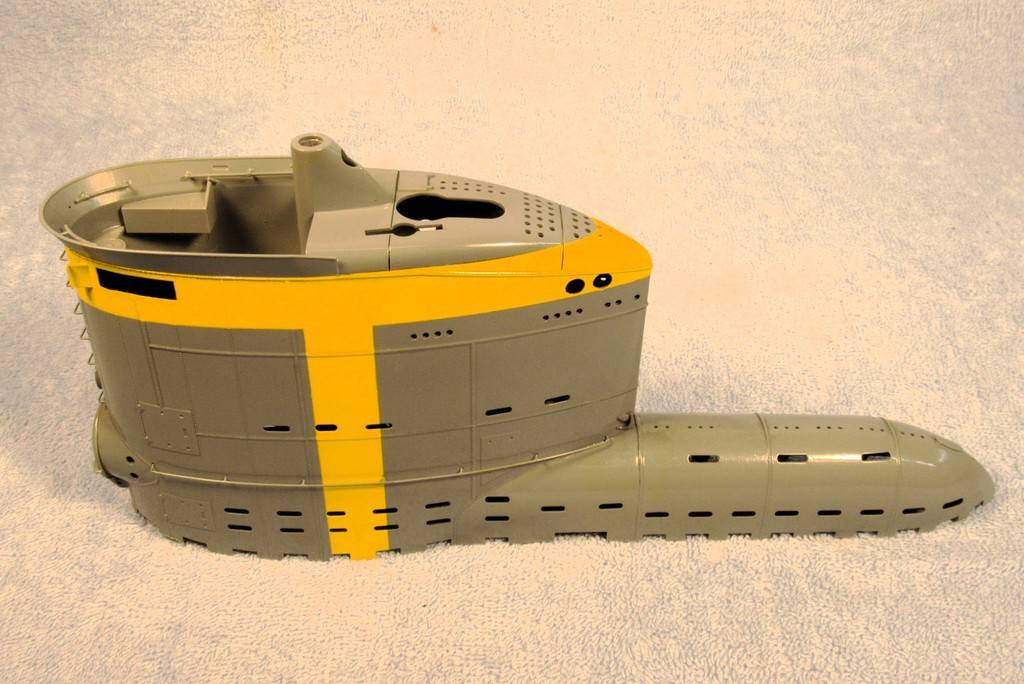
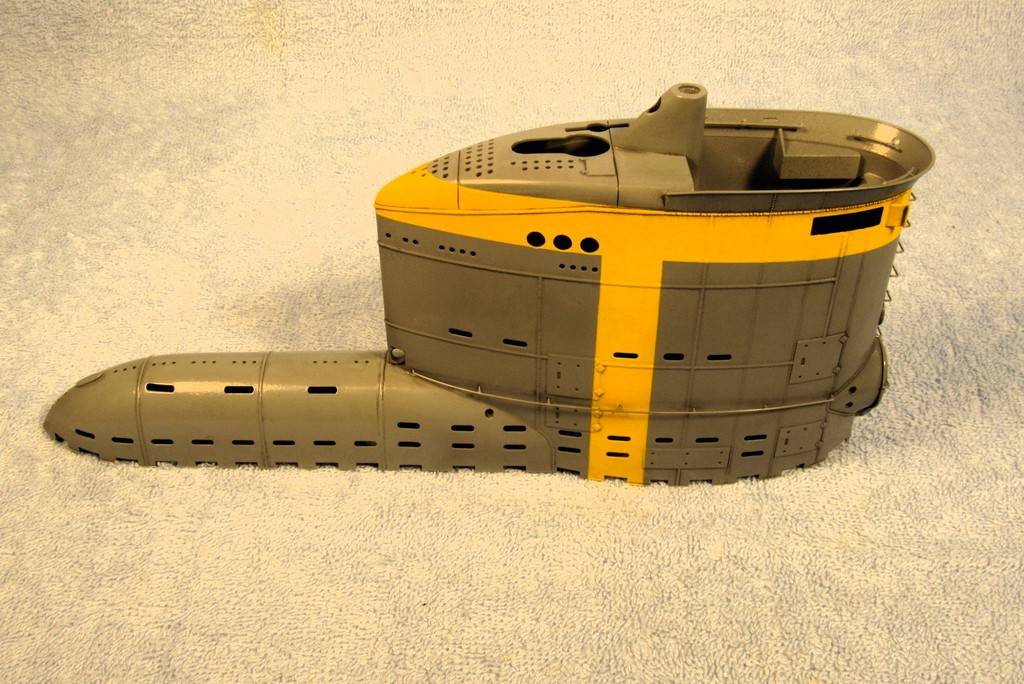
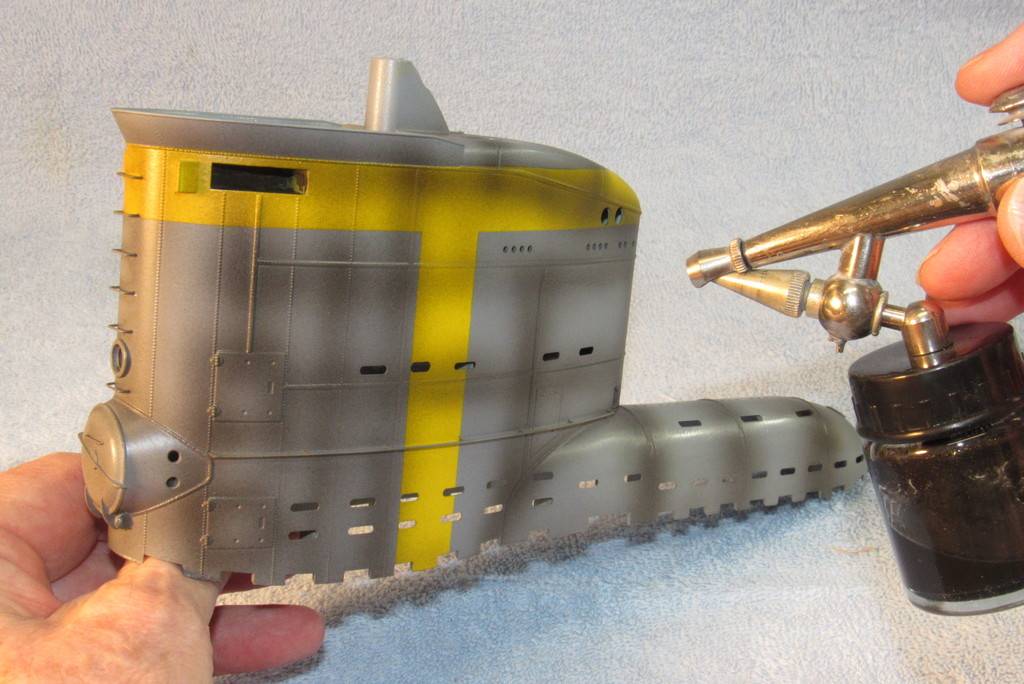
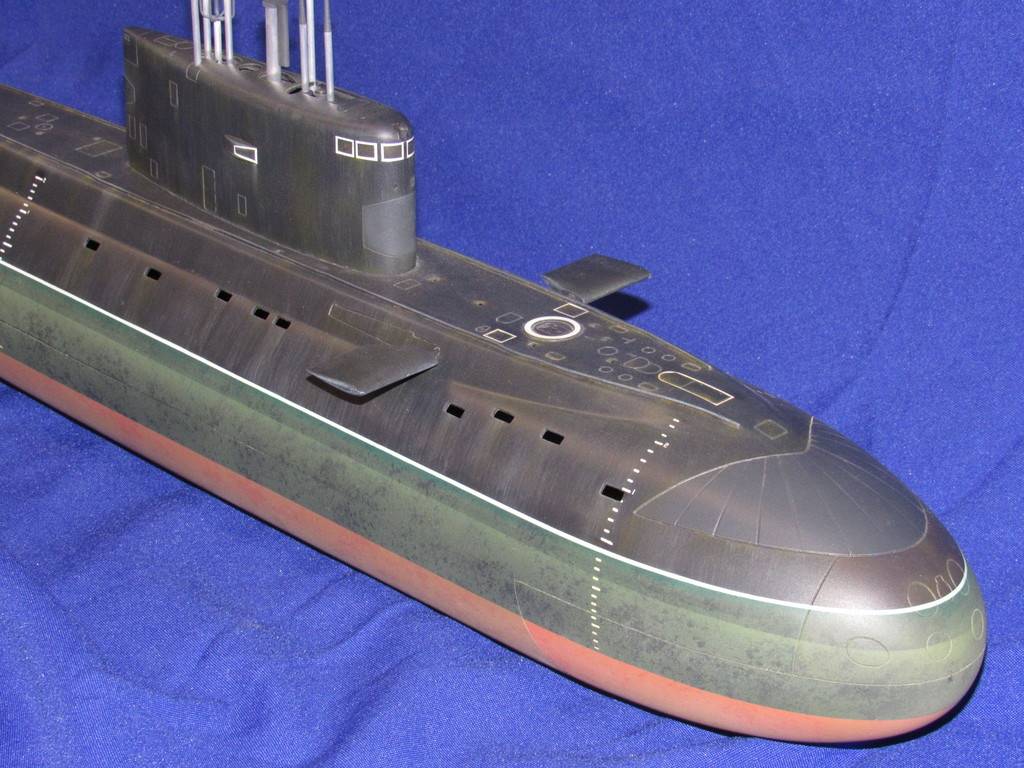
To this point the below waterline portions of the Type-23 hull were simple raged edged shades of gray. However, the eventual hue would present a bleached tan. That paint, mixed with solvent and reducer to render the coating semi-opaque; the tan would still permit the observer to see the underlying mottled grays. Further, this semi-opaque tan would be applied in random densities over the length of the hull, suggesting a chaotic randomness of varied marine fauna and animal growth.
Before all that, I took the precaution of scrubbing clean the sail and upper half of the hull with dish detergent, followed by a thorough water rinsing. This to prepare those surfaces for a clear coat – I wanted to be sure of a good bond that would not be weakened by dirt and oils those surfaces would have collect as they sat idle for nearly a year in my nasty shop environment.
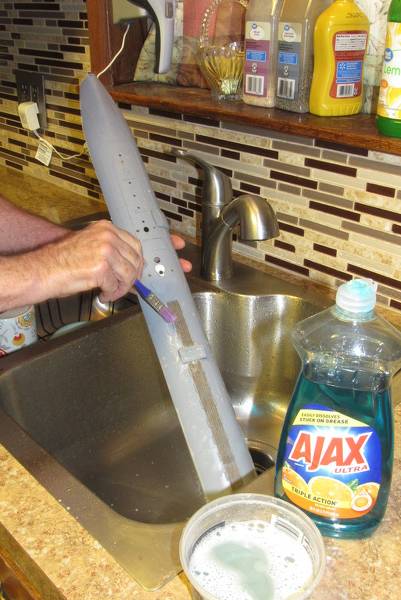
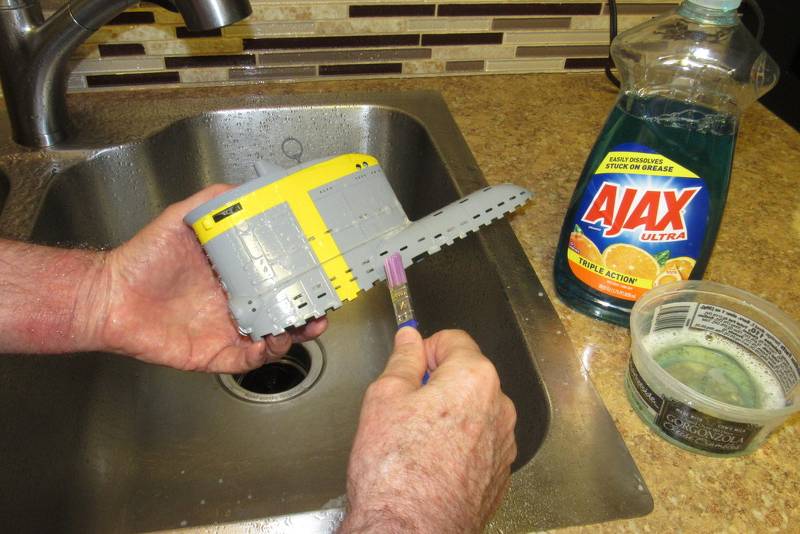
Blowing the sail and upper hull half down with low-pressure air to insure that all water was driven out of nooks and crannies. Followed with the hot-air gun to get at any water previously missed.
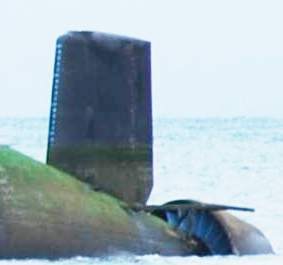
When weathering I've found it to be useful to have real-life examples on hand for reference. Here are some images temporarily liberated from my submarine weathering binder.
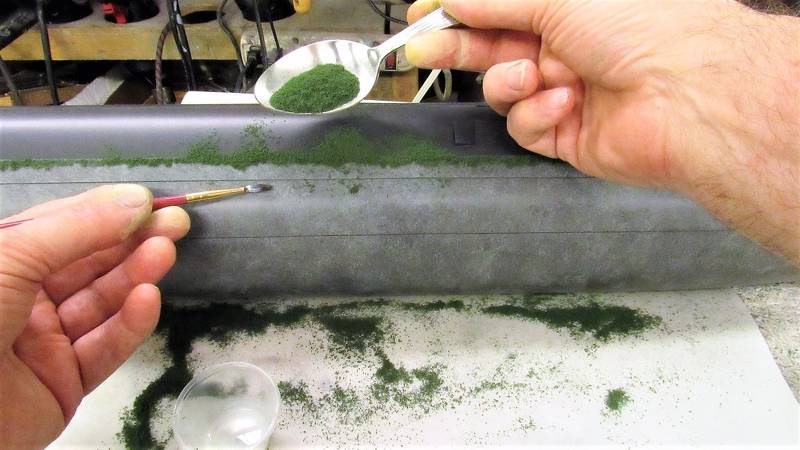
Beginning to represent the green grass often observed growing just below a submarines designed waterline. Done in two stages, employing two different mediums. The first medium to go on is a water soluble wax, Gel Sticks Gel Sticks | KINGART (kingartco.com) . This type 'smear', which has the texture and spread-ability of lipstick – unlike traditional oil based Artist's crayon – is easily blended and feathered onto the work; with the bonus property that if a goof is made the problem can be washed off with a damp rag. An ability exploited later.

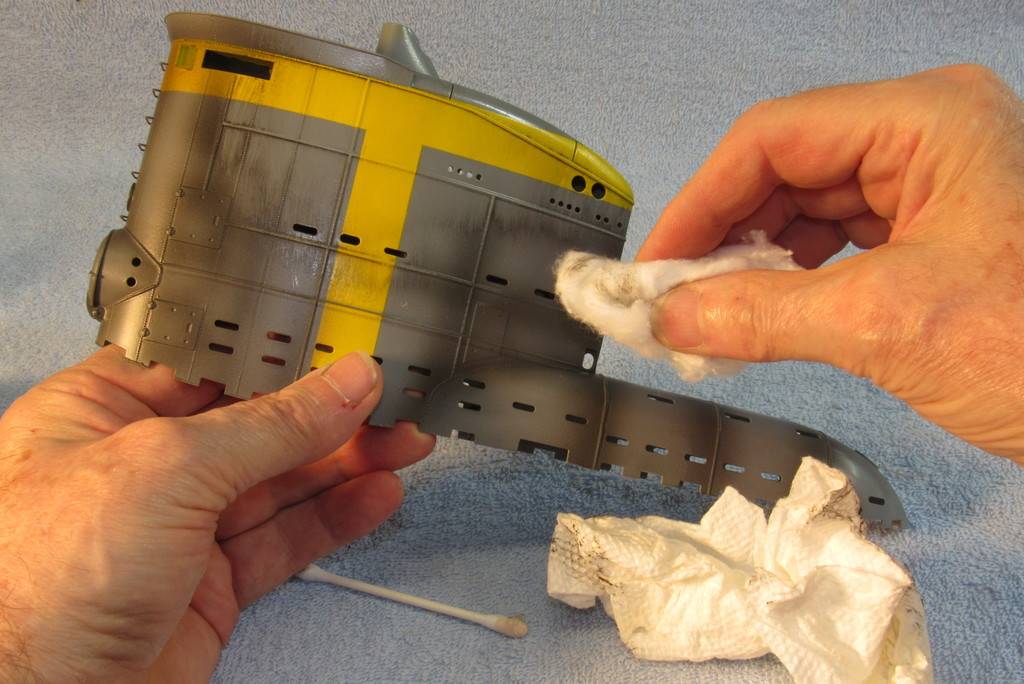
A smear from the gel stick is dabbed onto the work, then pulled down to a feather edge with a stiff hog-bristle brush or fiberglass scratch brush.

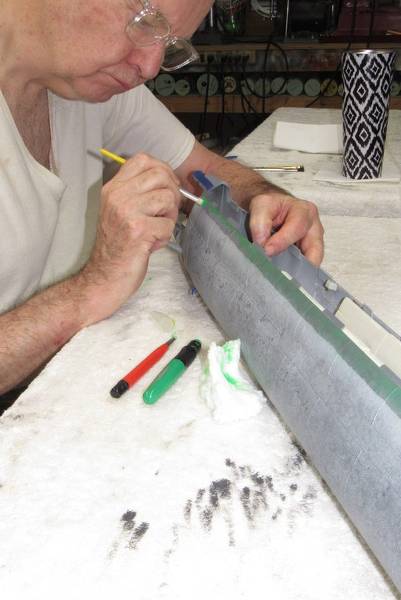
Finally, the feathered smear is pulled down with a cotton wad.

The initial representation of marine grass done, I mixed up the tan acrylic paint with a lot of water solvent. Doing so thinned the paint to the point where its adhesive quality was dangerously low. To increase the binder content of the paint I added clear acrylic medium to restore the sticking power of the paint. The objective of all that was to make the tan paint semi-opaque so the underlying paint work could be observed through it.

I sprayed on some tan, then hit the work with my hot-air gun to flash dry the paint. The work – the entire below waterline areas of the hull and appendages – was completed in only minutes!
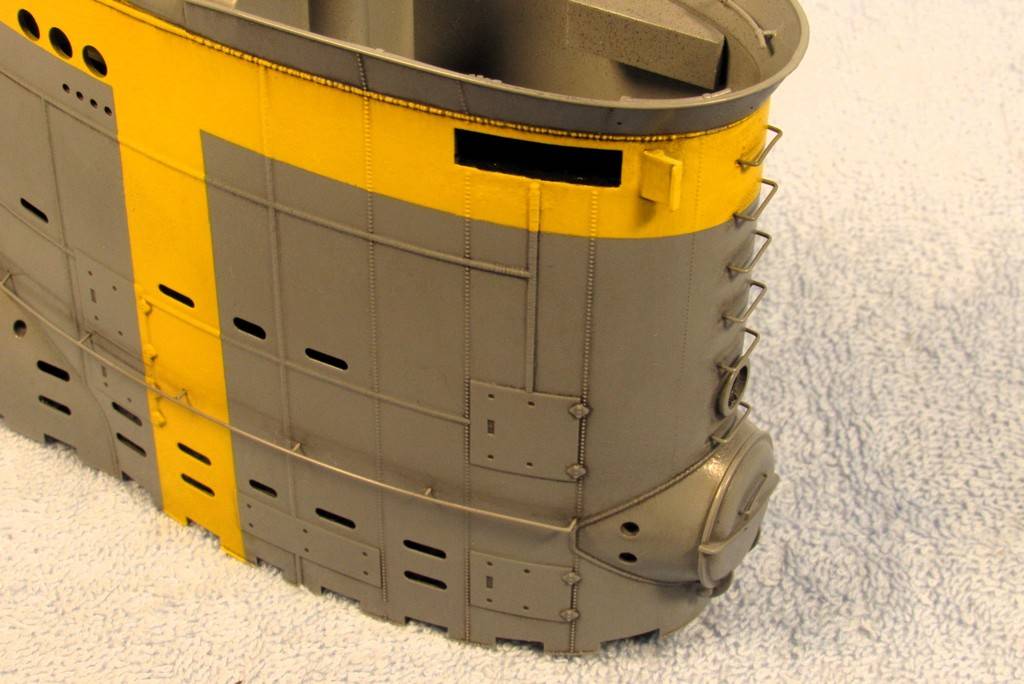
Note that masking has been applied to the forward and after portions of the hull to keep the paint off the gray upper surfaces.
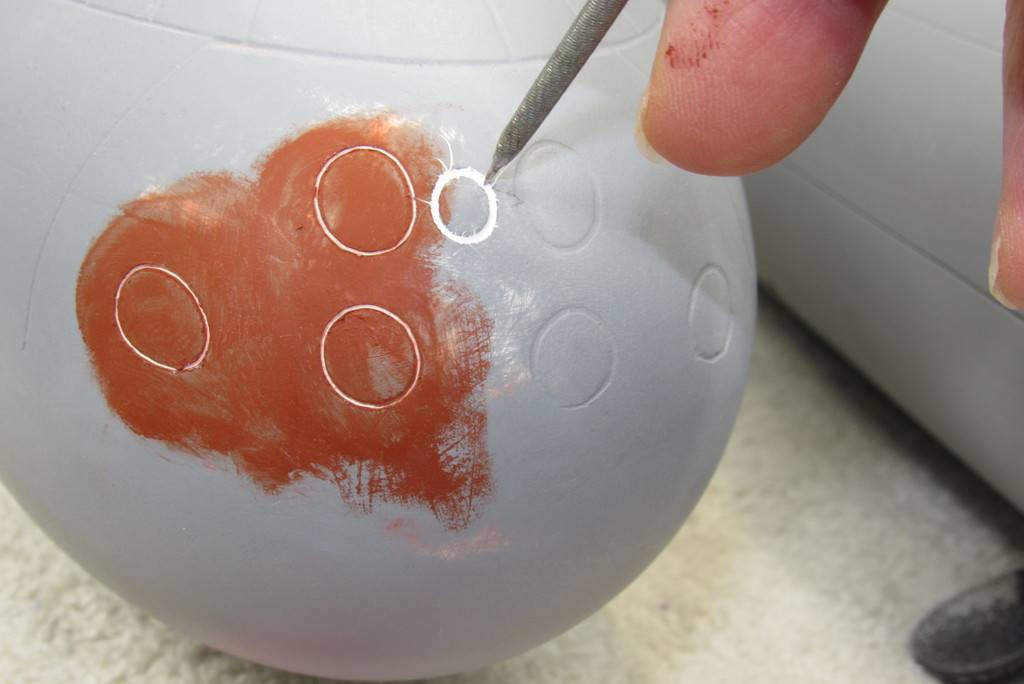
Demonstrating the semi-opaque quality of the tan paint, here I've painted one control surface, but left the other unpainted. Though paint has been sprayed onto the substrate, you can still clearly see the varied grays underneath.

This red-handled little scratch brush is a remarkable tool. The bristles are tiny strands of fiberglass thread. Owing to the strength of that material, and the ability to dial those bristles in or out of the ferrule – which permits you to vary the rigidity at the working end of the bristles – you have a precision abrasive tool.
Here I'm using the scratch brush, it's bristles saturated with water, to selectively remove portions of the feathered gel stick smears to take on the appearance of drooping marine grass. Once I've done a portion of the grass I blot off any water clinging to the work with an absorbent towel.
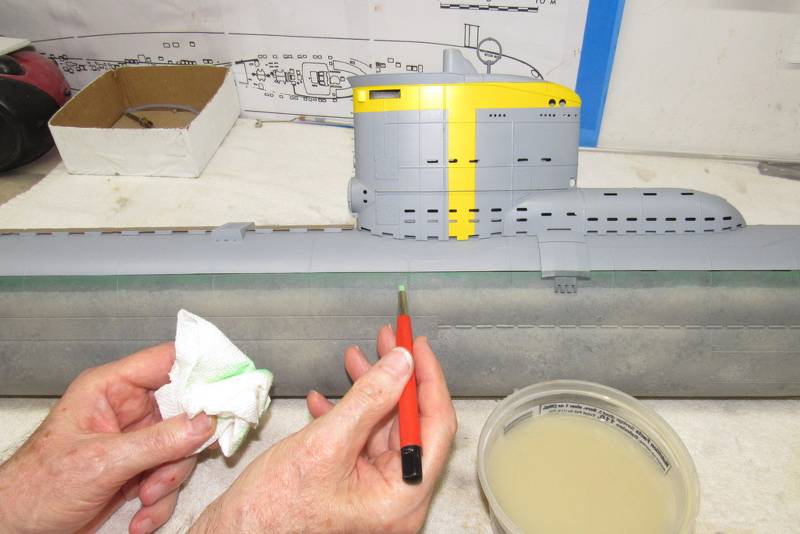
The paint, green gel stick smear, and tools used to achieve the grass and hue of bleached marine growth covering everything below the boats waterline.
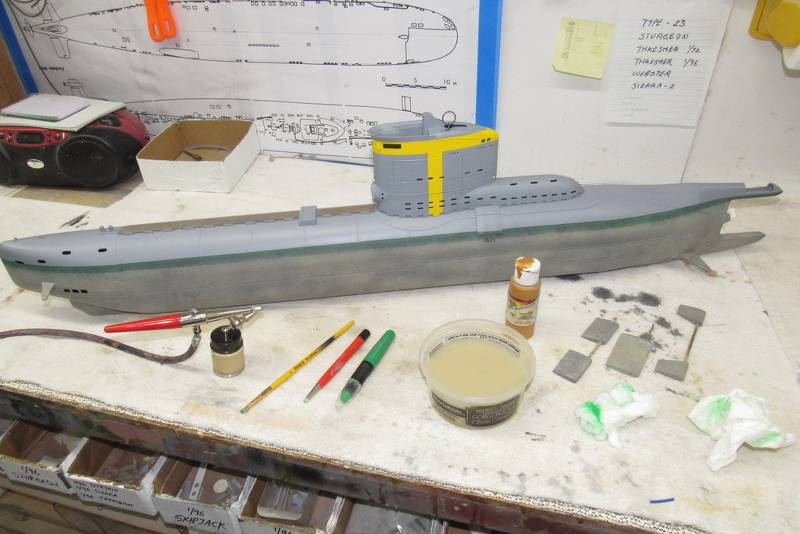
The only below waterline job left is to glue a band of model rail-road 'static grass' just below the design waterline. But first, I'm going to give the entire model a heavy clear gloss coat to protect all the work. Once the clear coat has cured hard I will give everything a very heavy black wash to pick out details; weather the above waterline structures; glue on the static grass; and complete the display with a coat of well flattened clear coat.
Who is John Galt?Comment
-
No pictures?Make it simple, make strong, make it work!Comment
-
They look fine to me.
Will Rogers
SSBN659Comment
-
Photos look great here on my screen Dave.Comment
-
Ok. I see them now.Make it simple, make strong, make it work!Comment
-
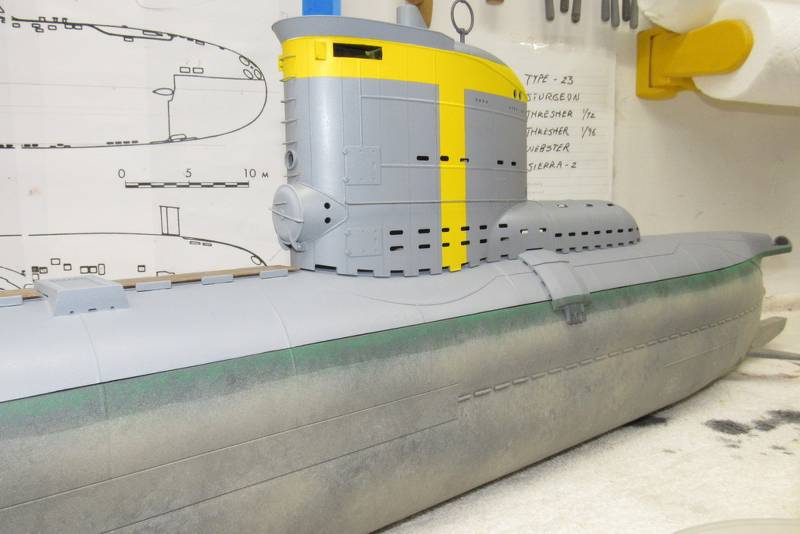
A means of highlighting engraved and high relief surfaces is to darken the depths of the engraved lines such as breaks between adjoining plate; and edges of the high relief items, such as access panels, external stringers, weld beads, and other projections. The Bronco kit of the Type-23 is very rich in such surface detailing – some of which is very subtle – which would be missed by the observer if they were not so highlighted.
Below is exhibit-A: The starboard side of the Type-23's sail that has received a 'wash' of heavily thinned black artist oil. Note how the engraved and high relief items now project a 'real look' because of the black paint that has been worked into every crevasse, be it sunken or raised.

Application and manipulation of the wash is best done on a smooth, glossy surface as the wash, if applied to a rough surface tends to darken everything it touches – the objective is to highlight, not stain; you only want the wash to adhere to the depressions and projections.
The models surfaces (in this case everything above the designed waterline) were given a heavy clear, glossy coat. Once cured hard, those surfaces were ready for an extremely thinned down artist oil black paint wash.
Again, I turn to my old reliable ChromaClear two-part polyurethane clear coat for the job. A chemistry that is benign to almost all formulations of primer, paint and weathering mediums, and is touch as nails.

The lower the viscosity of the wash, the easier it is to work it into the desired surfaces of the model. The mechanism at work here is capillary action; the ability of free-flowing liquids to migrate, even against the force of gravity, into irregular regions of an otherwise undisturbed surface.
Artist oil paint is the ideal medium for a wash. The thinner employed, distilled turpentine, has such a low viscosity that when used to cut a small amount of paint, it becomes the ideal liquid for the job, i.e. when applied to the work, the very 'runny' nature of this wash will seek out those items on the models surface to be highlighted.
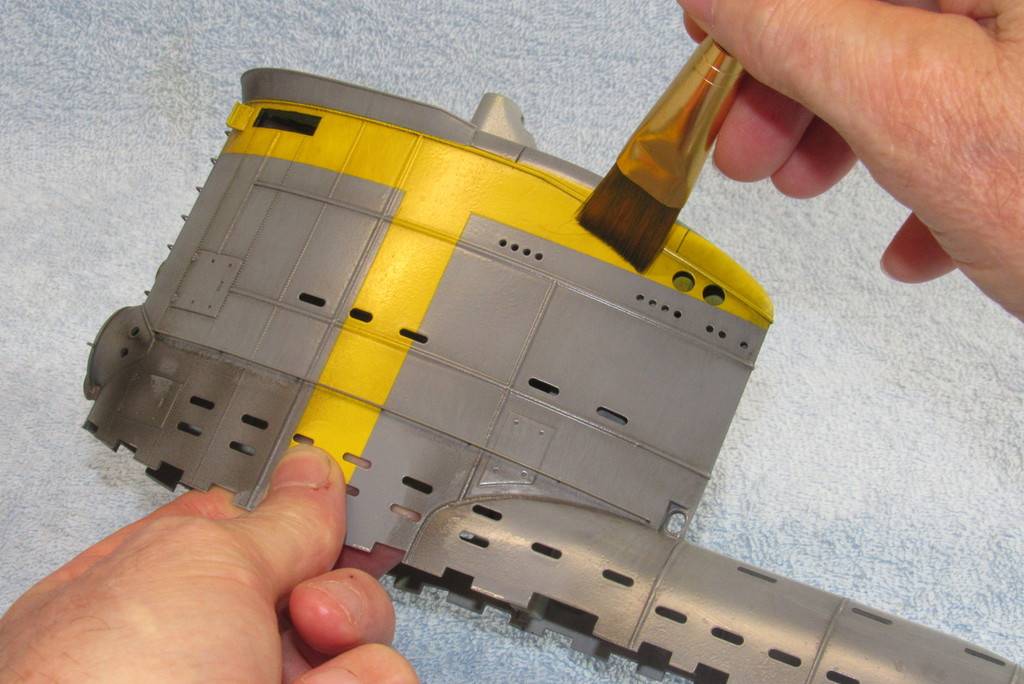
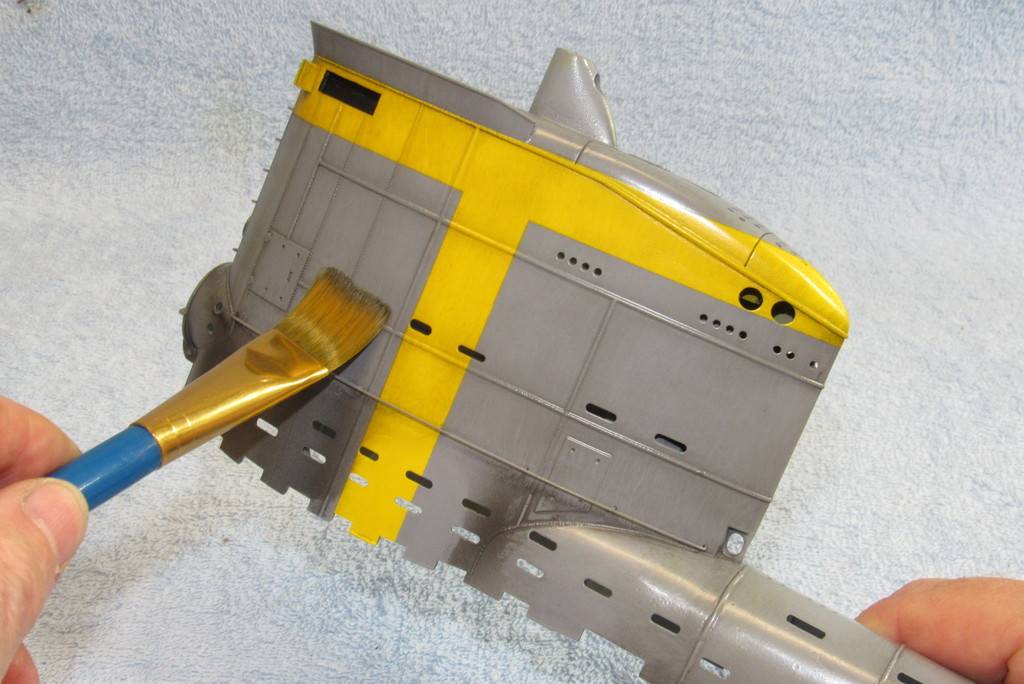
Application is simple: the wash is sprayed on and most of it blotted off with pieces of an old T-shirt, paper towel, cotton ball, and cotton swabs. The remaining black colored wash is then teased into position with a soft bristle paint brush.

Port side of the 1/35 scale, Bronco Type-23 kit, sporting its shiny gloss clear coat ready for a heavy application of wash. Without the wash you wind up with a rather toy-like model submarine. Like the model at this stage. No thank you!
… but something magical happens to the appearance of the model once the wash has been applied and worked into all the subjects nooks and crannies. The effect, though a false representation of shadows, does a fine job of overcoming 'scale effect' by providing a reasonably good presentation of shadows where they should be. What reads to the viewer as shadows in reality is black paint applied as a wash.
A very small dab of black artist oil paint, heavily cut with distilled turpentine, is lightly sprayed over all areas of the models surface needing the false shadowing. The nice thing that makes the process work is the glacially slow drying time of Linseed oil as the binder/resin of the paint polymerizes in three to four days. Plenty of time to work the stuff.
The majority of the wash is first blotted off those portions of the models surface that don't have negative or positive relief items, that initial work done with rag, cotton ball, and cotton sticks.
Finally, a soft bristle brush is lightly wiped – always vertically! – over all surfaces to drive any remaining wash into the high relief areas that need shadow 'enhancement'.
The gloss substrate will shrug off the wash easily, but a small amount of the wash will darken the flat surfaces just a bit, and the vertical brush strokes present as natural running streaking – something you see on any vehicle exposed to polluted air, handling, and the occasional rain storm.
Here I've applied a wash to one side of the upper half of hull. Note the contrast between the wash applied side and the virgin side.


Who is John Galt?Comment
-
While awaiting some iron filings, from which to make some 'rust paint' to further weather the 1/35 Bronco Type-23 model, I've shifted my evil attentions to two 1/96 scale cold-war submarine models I started to assemble over four months ago.
These to replace the KILO and BLUEBACK kits I gave away to a friend. The two cold-war boats I'm currently putting together are slated to join my fleet a month-and-a-half from now at the big all-submarine SubFest event at the Red Clay Resort outside pool in Cohutta, Georgia.
But before any new work was started on these two long-suffering projects, I scrubbed all model exterior surfaces with a Scotch scratch-pad soaked with isopropyl alcohol. This to ensure that the substrate of all parts will be free of gunk that would otherwise impede a tight bond between them and new applications of adhesives, filler, putty, primer and paint.
First thing after preparing the surfaces, was to cover previous puttied areas with gray primer to pick out scratch-marks and other imperfections. The neutral gray also serves to make less confusing the surfaces still requiring scribing and scratch removal tasks.
I worked both the KILO and BLUEBACK at the same time; each specific task done on the second boat right after the first – to capitalize on the simplicity of only once gathering the tools and consumables needed to do the same work on two boats – the efficiency of the production-line on display!

Here's a picture of the bow of the first BLUEBLACK model I completed almost a decade ago. This shows off the scribing and paint job applied, representing the end-game: the narrow, deep, well executed engraving of the torpedo tube shutter doors. The following discussion will deal with how to improve on the shallow, and unrealistically wide engraved details of the original kit parts.

When straightening and deepening engraved lines with little to no radius I'll use a modified small razor-saw like this one. The first pass within the original engraving is done with a very light sawing motion, progressing along the length of the line till nearly to the corner. From there I switch from the sawing to a jabbing motion using the sharp 'tip' of the modified razor-saw to complete the line.
Yes! It looks like hell with all those over-strikes, but we'll fix that in a moment. Be patient, ******!!
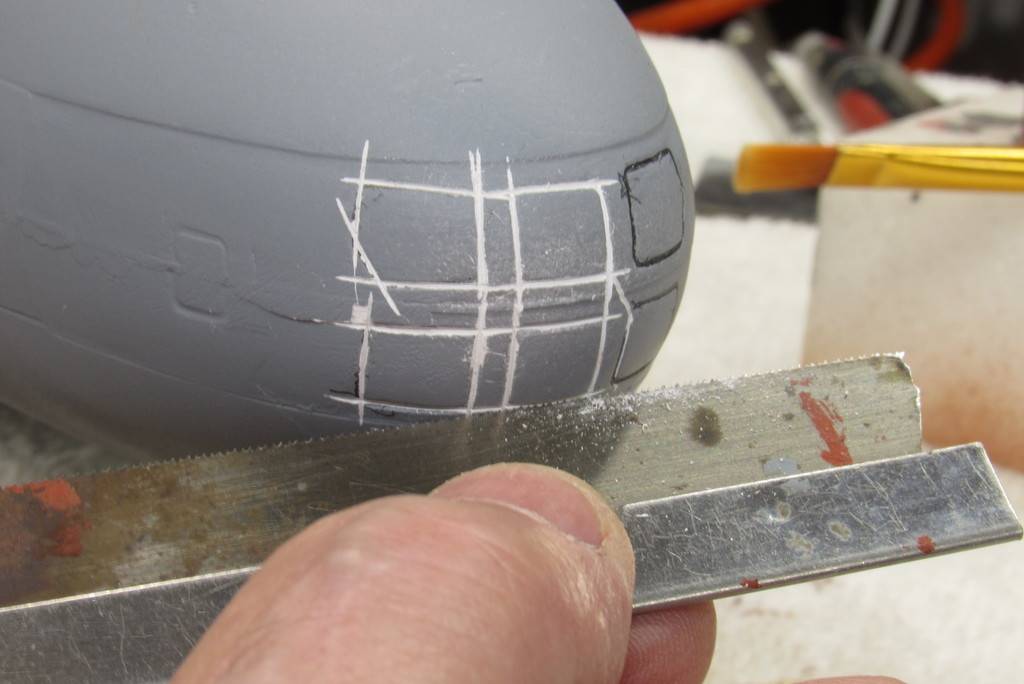
On a difficult scribing enhancement job like this – the sharp, compound curves of the bow here a perfect example – I don't worry about over-strikes with the saw or engraving tool to this point; such deep artifacts of the process soon filled and made to go away through use of a two-part automotive filler, such as Bondo.
Immediately after the catalyzed Bondo is rubbed into the work any filler that got into the improved engravings was chased out with the scribing tool.
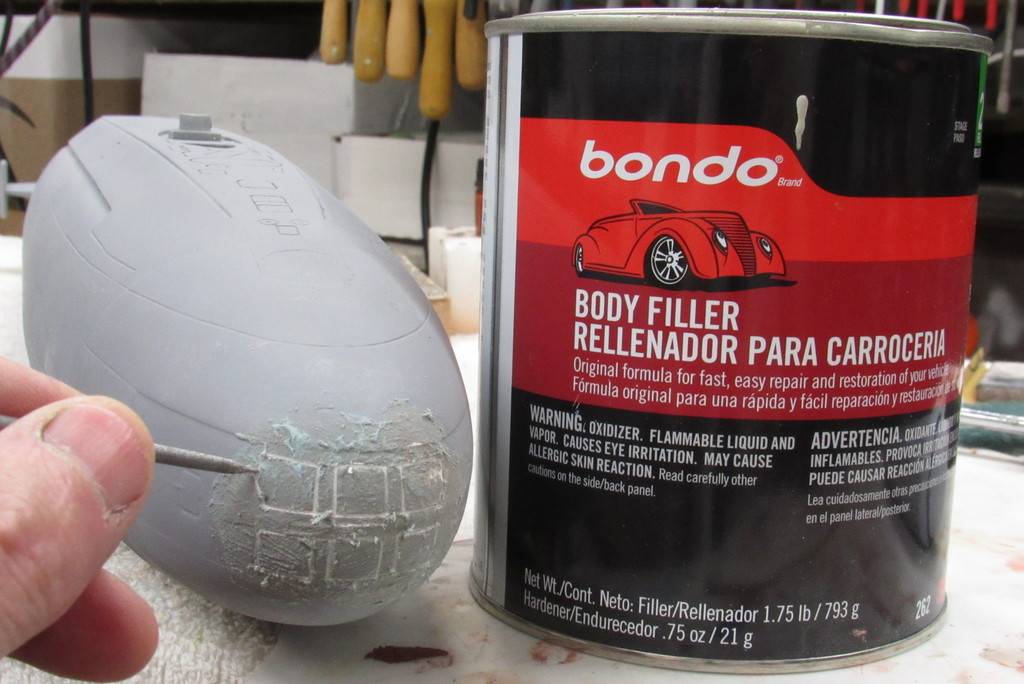
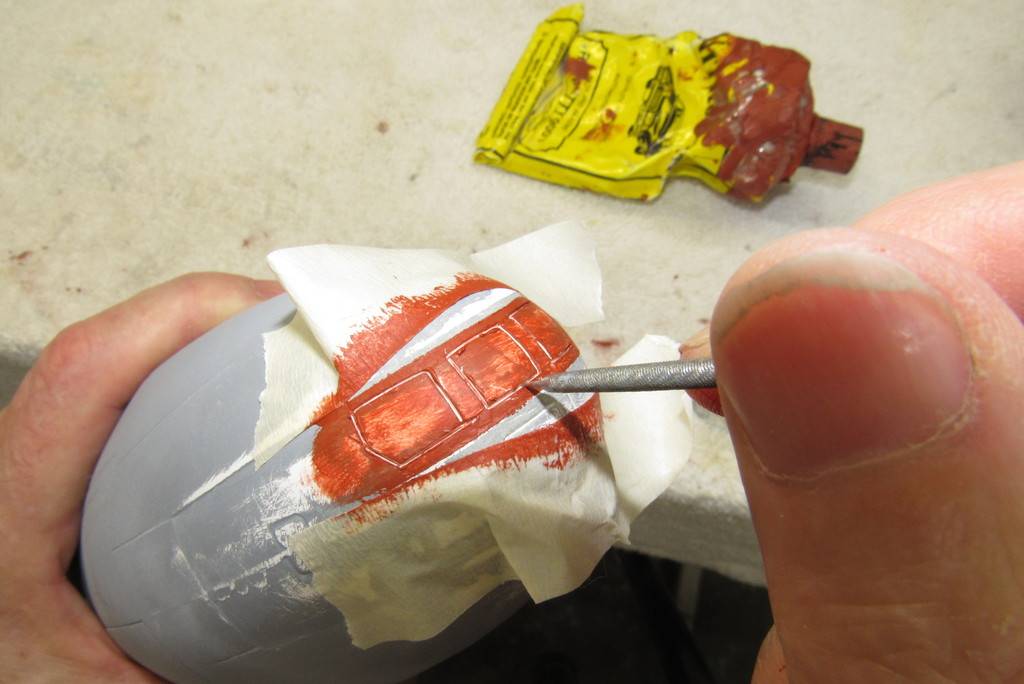
Once the Bondo had cured reasonably hard the entire bow was wet sanded with #240 sandpaper, and all the goo rinsed off and wiped down with a paper towel. A light re-scribing to chase out all the dust, and the torpedo tube shutter doors were ready for some touch-up putty.
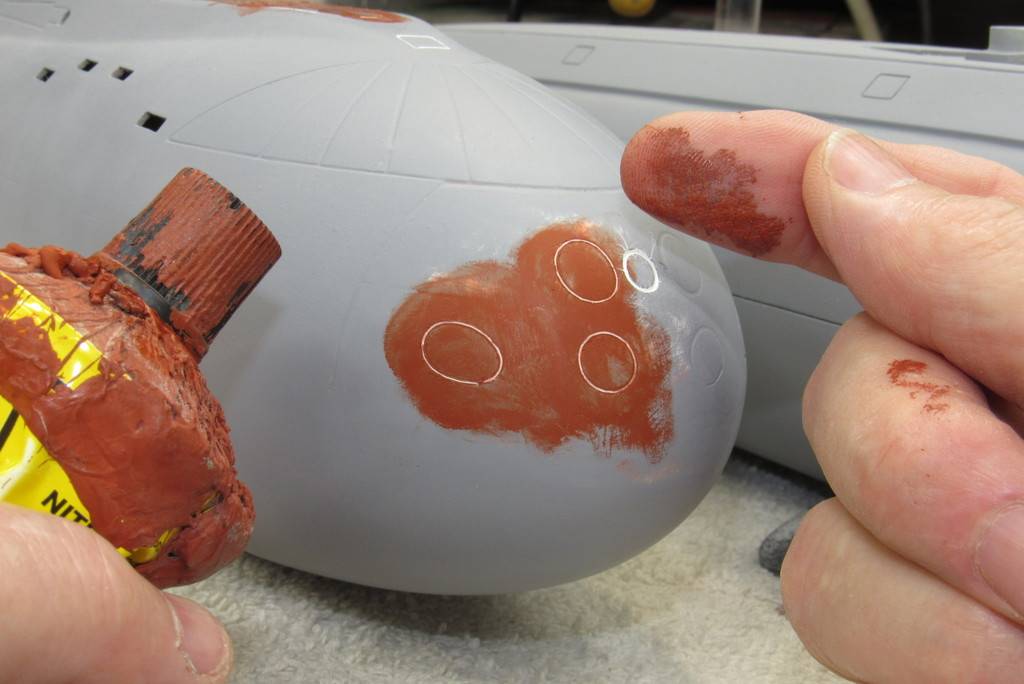
Though the Bondo filled almost all of the deep over-strikes and corrected other boo-boo's, there always remains, after the wet-sanding there remain small, shallow tool marks and sandpaper scratches to fill. That task performed with air-drying lacquer based touch-up putty, suitable for scratches of shallow depth.
The go-to stuff in my shop is Nitro-Stan, red. You can still get this foul-smelling putty (stink is usually an indicator of quality!) through evil-bay (unless the California PC police have even managed to shut down that source of useful hydrocarbons) at a criminally high price. Don't use hobby-shop putties, they're all crap – formulated to be safe, not good!
The putty is driven in with a finger and the engraved lines chased out with the scribing tool before the stuff dries hard.
Note the use of masking tape to confine the putty coverage area to only those areas of the model that needs it.
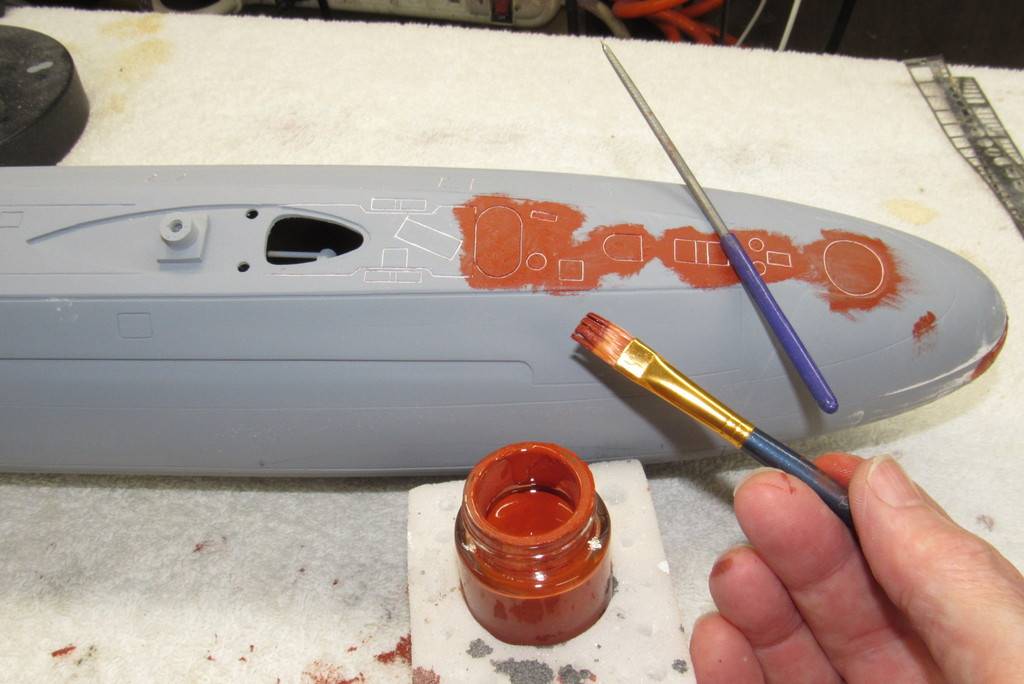
The only reason you can make out the engravings that represent the torpedo tube shutter doors at the bow of this 1/96 KILO model submarine – originally produced by Small World Models – is that I went through the effort of deepening the original engraved oval-shaped circles. Had I not engraved deeper lines the observer would be hard pressed to differentiate between hull and shutter door.
The shallow and out-of-scale wide engraved lines at the bows of the KILO and BLUEBACK hulls are not exceptions, they are the norm. For a good reason, I must add. Such details had to be marginalized owing to the production technique used to fabricate these fiberglass hulls.
During lay-up, the tools used to give form to the fiberglass laminates are of the 'hard-shell' type; easily capable of producing hundreds of parts without damage. The disadvantage of this type tool is that it will not tolerate any extreme or negative 'draft' projections or depressions within the cavity of the tool i.e., high relief detailing, such as engraved lines. So, such items must be shallow of height/depth and wide enough to resist damage to part and/or tool during part removal.
Because the shutter doors are on an area of the hull that are nearly at a right-angle to the direction the completed fiberglass part is yanked from its tool, there is a high likelihood of entrapment if the draft of the engraving (positive on the tool, negative on the part) is too severe. Hence, the very shallow and wide engravings at the bow of the model part, rendering such detail very low visibility and utility as far as being able to be seen on the completed model.
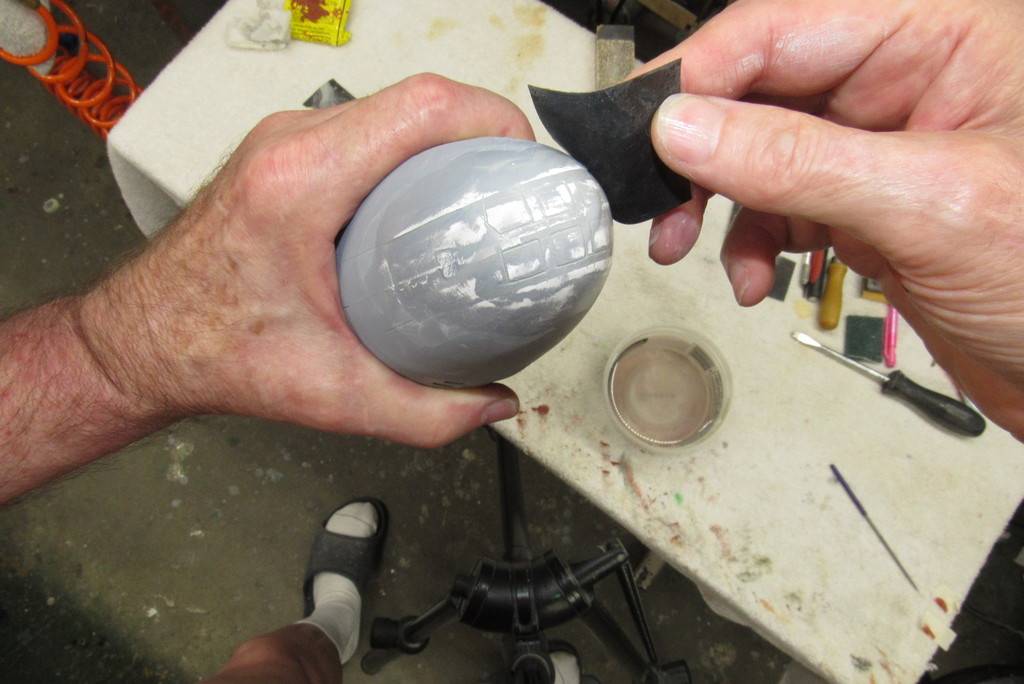
To use the existing shallow and wide engraving as a guide I take a scribing tool who's shank above the tip is a diameter that matches the width of the original engraving. That scribe is free-handed around the original engraving until it has scratched away the gray primer, revealing the white gel-coat beneath. This establishes a uniform, slightly deeper engraving which is followed by a much narrower tipped scribing tool to further deepen the engraving, but this time with an engraving depth and width more in scale with the subject.
Here I'm using the 'finishing scribe' to deepen the engraving with a very narrow width.
After deepening the engraving, air-dry touch-up putty is pushed into and around the new engraved line, and the putty chased out with the scribe before it can dry hard. This fills the original, wide portions of the engraving near the surface. The result is a narrow, deep engraved enhancement of the original engraved lines (ovoids in this case).
This picture, better than anything else, demonstrates the difference between original and enhanced engraved lines applied to this KILO and BLUEBLACK model hulls.
All of the re-worked, straight running engraved lines were initially deepened with the tip of my modified razor-saw, followed up with the scribing tool. For the few circle and semi-circle items on the deck and sides of the superstructure, they were scribed with the aid of stainless-steel or plastic drafting scribing/marking templates.
Using the razor-saw like this inevitably results in some over-strikes, but these are quickly addressed with touch-up putty later as I refine and further deepen the engraved lines.
Note that I've glued narrow strips of sandpaper to the face of the metal templates. This to assure a non-slide situation as I hold the template down with only finger-pressure as I guide the scribe within a template opening, digging out a narrow and deep engraved line.

For ease of application I've placed a quantity of Nitro-Stan putty into a little paint jar. As most of the application will be with a brush, the putty is cut and mixed with a little lacquer thinner. Here I'm applying the putty to fill over strikes and other miss-adventures on and around the reworked engraved lines.
Who is John Galt?Comment


Comment