Type 212

Collapse
X
 
  • Time
  • Show
Clear All
new posts
  • MFR1964
    Detail Nut of the First Order

    • Sep 2010
    • 1510

    #181
    I sneaked into the shop and quickly shot some pictures before the wife realised i was there, yeah still faster than my shadow.


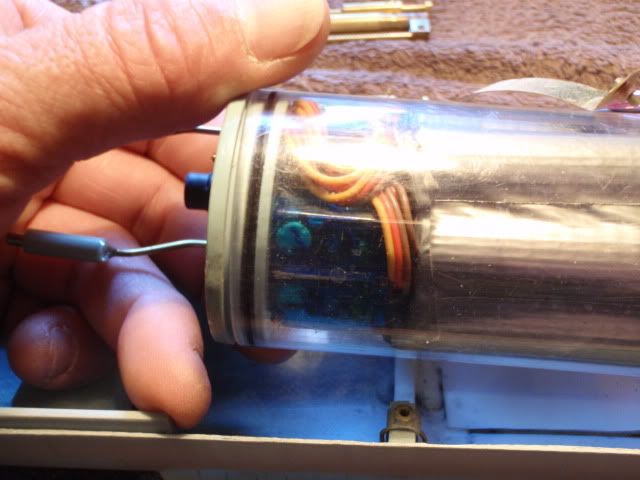
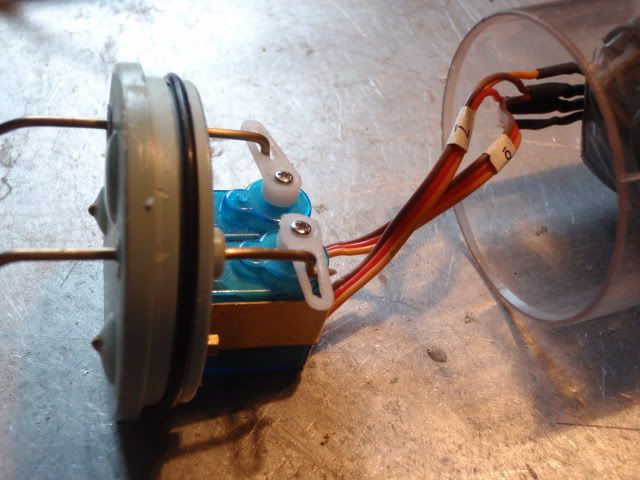
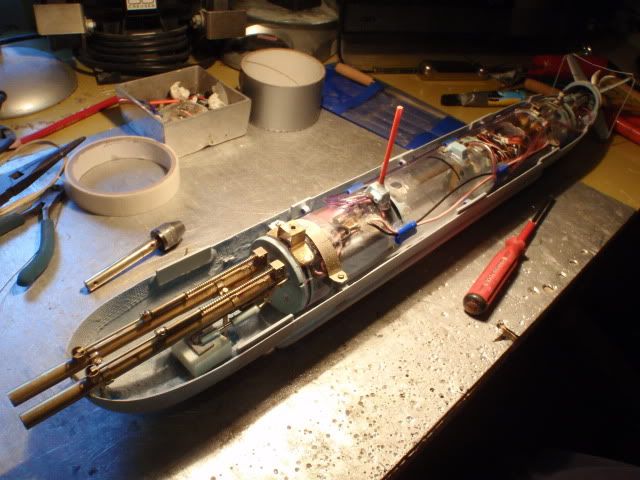
    First picture to show the servo's will fit inside, i just stuffed the cables inside, still have to change that.


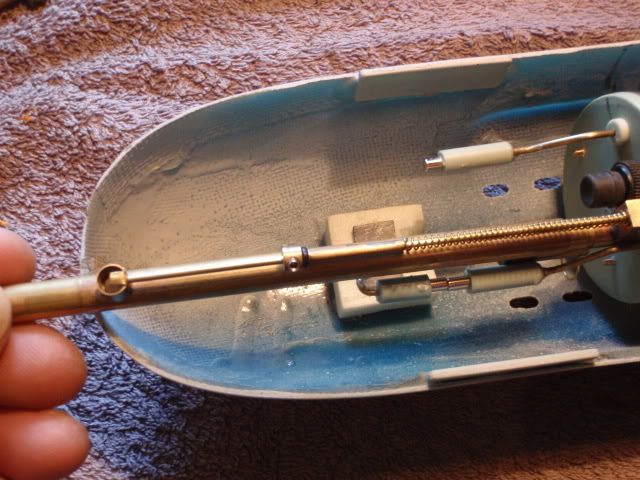
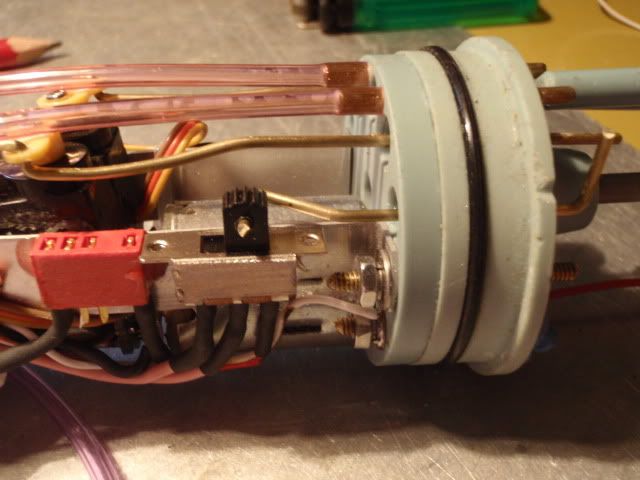
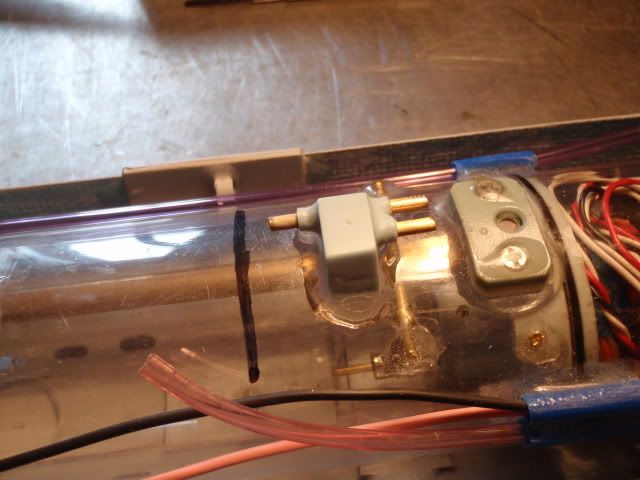
    Added the watertight switch and placed the ADF on top of the battery, next was to see if the tubes will fit.


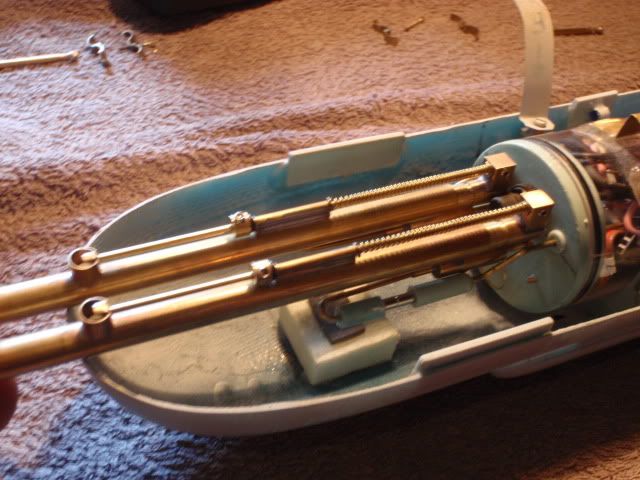
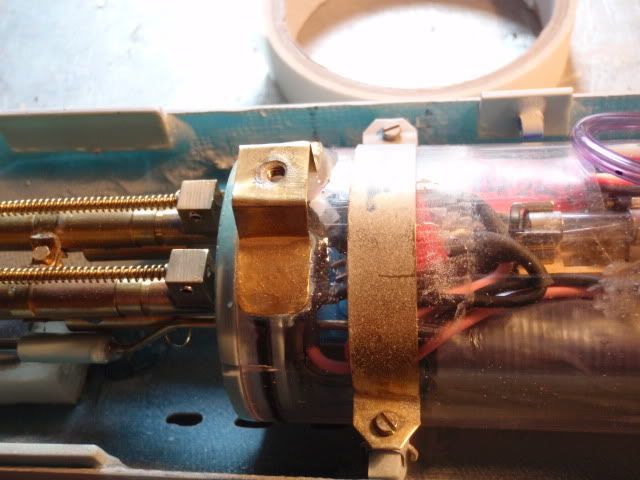
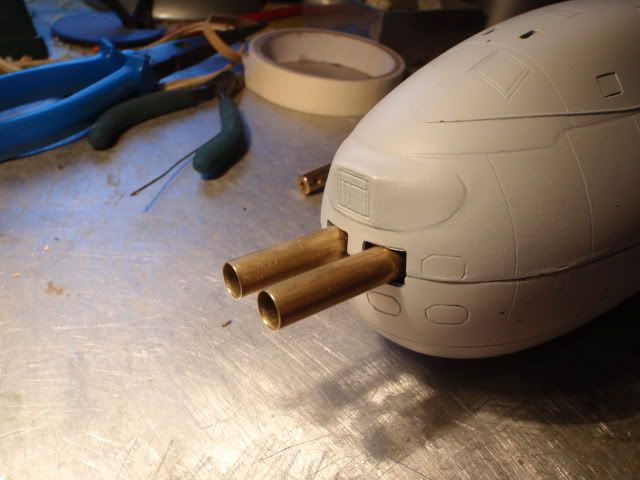
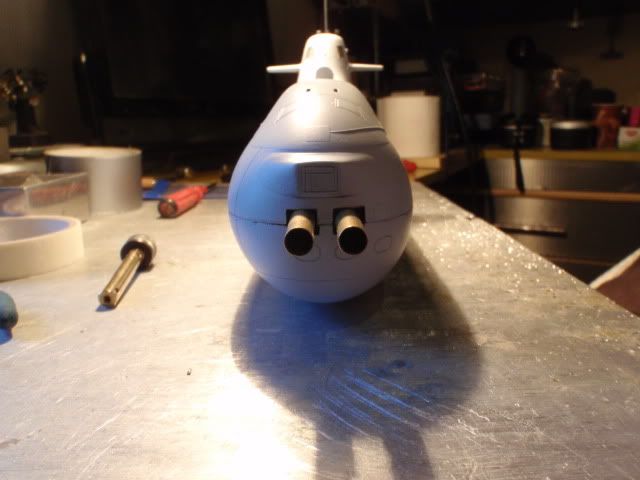
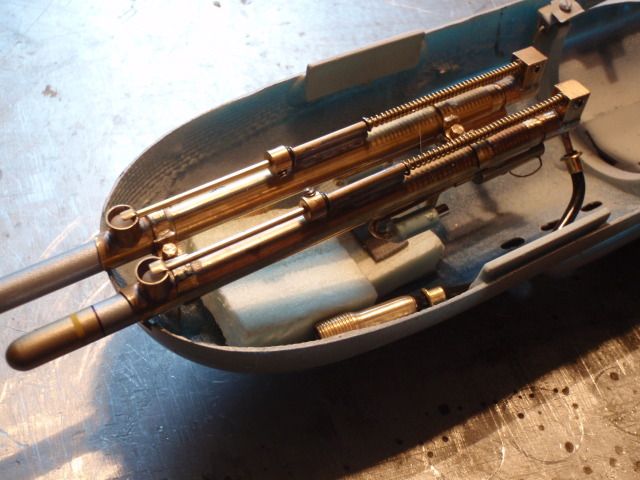
    Shoving the SD back untill i've got me just enough room, if i cut the tube just before the lockingball like David suggested i'm saved.


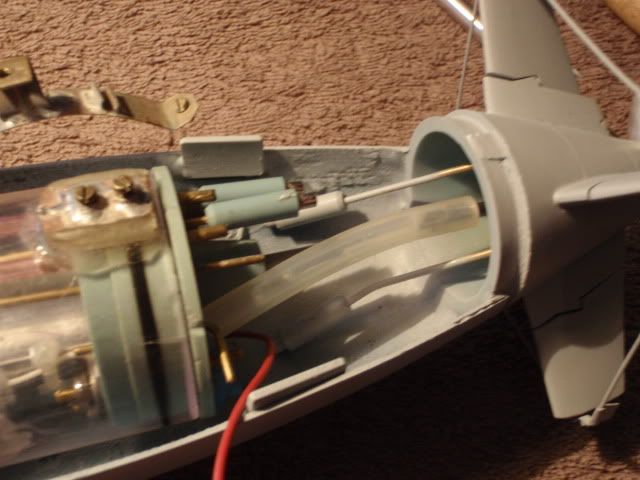
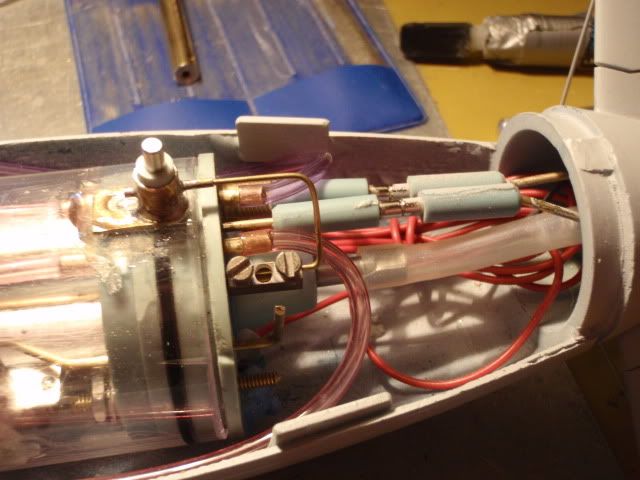
    The dryfitt of both tubes revealed a problem, the switch won't allow me to join both tubes together, so i have to remove it, there is still a provision at the rear endcap with a unused rod, want to place a other type of switch controlled by that rod, to create more room in the front i'll also place the chargingpoint at the rearpart.


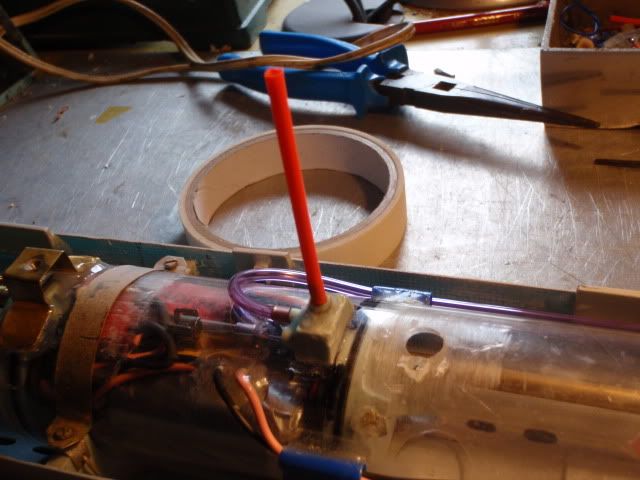
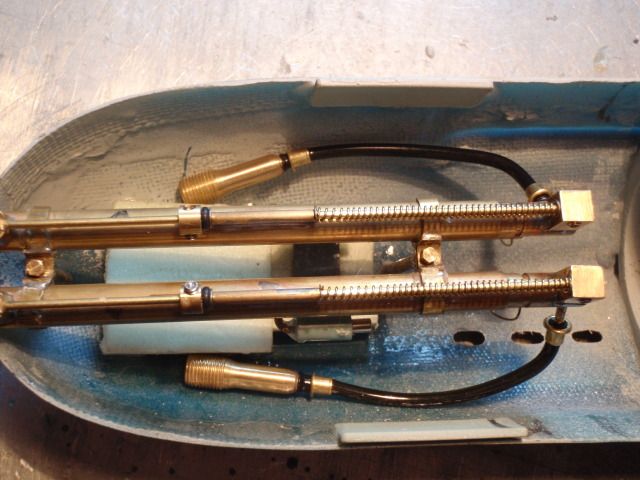
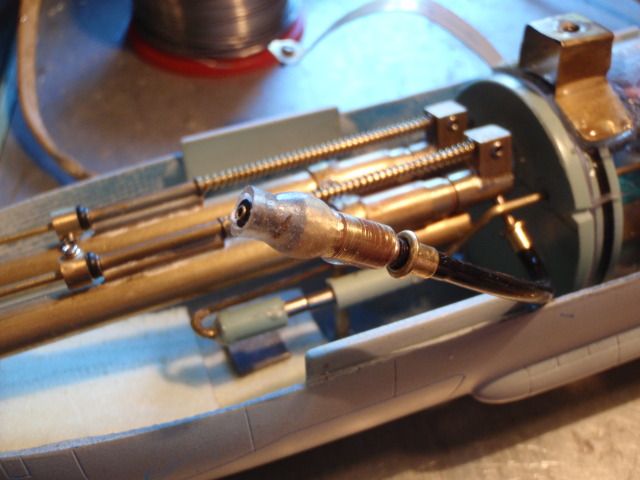
    I have to adjust all rear rods, and the shorten the propellorshaft to make this fit, all in all i shoved the SD 1,5 cm backwards, you can also see the L bended rod which now is not in use, that's the one i want to use for the switch.
    It will take some days to make all the changes, most work will be the extra wiring for controlling the front servo's and connecting them, if i'm lucky i only have to add one wire, want to do a little cheating trick to make it work.


    Greetings Manfred.
    I went underground

    Comment

    • He Who Shall Not Be Named
      Moderator

      • Aug 2008
      • 13390

      #182
      Ah, I see; you're going to run both servoes in parellel off one channel! Good.

      David
      Who is John Galt?

      Comment

      • He Who Shall Not Be Named
        Moderator

        • Aug 2008
        • 13390

        #183
        You want something done ... just tell Manfred he can't do it!

        David
        Who is John Galt?

        Comment

        • MFR1964
          Detail Nut of the First Order

          • Sep 2010
          • 1510

          #184
          My intension is to run each servo on a separate channel, how?, i'll try to explain, i've got me one cable (3 wires) unused from the ADF, it's the input failsave connection cable, if you take that cable and add one wire more it's possible to steer them independed.
          You can use the positive and negative together to both servo's, that's 2 wires, add both puls wires for both channels to the sum and you've got 4, so i only need to get me one more wire through the copper connection tube, it will be tricky but can be done.

          Motivate me with it can't be done gives me a extra drive, i wish it was possible with all the things in live, but you've got to know your limitations, on the other hand if it can be done i'll take a shot at it, it gives you a unique experience if you succeed.


          Greetings Manfred.
          I went underground

          Comment

          • He Who Shall Not Be Named
            Moderator

            • Aug 2008
            • 13390

            #185
            I understand now -- you're dividing the red and black (power) wires between the two servos, and running an additional white (signal) wire to control the second servo up in the forward dry space. Neat!

            So ... one of the ingredients to being a successful Mad Scientist is to be bull-headed. I knew that!

            David
            Who is John Galt?

            Comment

            • MFR1964
              Detail Nut of the First Order

              • Sep 2010
              • 1510

              #186
              Yep, you've got to act like a raging bull to accomplice the impossible, there is a thin borderline in being mad or a genius.

              It has been a few busy days, i'm speeding up, because i want to have the launchsystem up and running before next weekend, there is another submeeting in Belgium which i want to attend, the water over there is cristalclear so some underwater pictures would be nice.

              First i rewired the SD, connected the servo's, ripped out the SAS, and replaced it by snort, i did a test with the safetyfloat valve inside the ballasttank, but the result was poor, couldn't get her up to the waterline, if i added more foam she wouldn't sink, all due to the added weight of the launchers, so i made the sacrifice to remove the SAS.
              Replaced some connectionpoints on the SD, made a new inlet for the blower, replaced the connection for my safetybouy, and replaced the on/off switch and chargingplug, pictures.


              Rewired the servo's, as you can see i only need 4 wires to get them running, i like the idea of running them seperate.


              Replaced the switch and chargingplug to the rearpart and placed them on the frame, by using the spare rod i can turn the boat on/off simple by removing the safetybouy hatch, this way you don't have to unscrew the model each time.


              Replaced the front brackett for fastening the front upperpart, as you can see i allready removed the fillingtubes at the back of the breechblocks, have to replace them to the outboard sides, a job for this week.


              Used some spare parts from the Kilo SD for making this, placed the inlet more to the front, and made a new entry into the ballasttank.


              Replaced the connectionpoint for the safetybouy and modified all rods including the propulsionshaft.


              Last cosmetic thing to do is, clipping the nails of this little critter, beside the fact that she is small, it's still impressive to see those tubes.


              One last picture to show the complete modified SD, last days where long, but due to the coming next meeting i'm running with the devil at my heels, i still have to make a vid to show how all things are working, that i'll do today.

              Further planning for this week will be, clipping the nails of this critter, modifiing the breechblocks, get me some gas and retrim the boat.


              Greetings Manfred.
              I went underground

              Comment

              • Scott T
                Commander

                • May 2009
                • 396

                #187
                Great stuff.
                Attached a sketch that might allow you to remove one servo to operate both
                torpedos. It might save a little weight and if you turned the servo sideways
                (not like the sketch) give more room up front. It depends which direction
                the pushrods and connectors need to move to activate the firing of the
                torpedos. One direction pushes the bar toward the endcap and releases the
                magnet coupler on the other side.

                Click image for larger version

Name:	servo mech.jpg
Views:	1
Size:	77.5 KB
ID:	67675

                Scott T
                Attached Files

                Comment

                • MFR1964
                  Detail Nut of the First Order

                  • Sep 2010
                  • 1510

                  #188
                  Thanks Scott,

                  If the weight issue stays a problem the provided drawing by you is the next step, due to the use of the magnetic couplers the direction doesn't matter, if one will push the other will get itself free.
                  Today made the new tubes at the sides of the breechblocks and stuffed the old connections with solder, tomorrow i'll conduct some tests to see if the steering will work with gas charged torpedo's, after that i'll shorten the tubes, i decided to go full ahead and use every bit of time left, i've got me 3 days to finish and test the launchers, and 1 day to trim the boat, a busy scheduale but it can be done.


                  Greetings Manfred.
                  I went underground

                  Comment

                  • trout
                    Admiral

                    • Jul 2011
                    • 3657

                    #189
                    Manfred,
                    We have missed you posting updates. Anything new?
                    Peace,
                    Tom
                    If you can cut, drill, saw, hit things and swear a lot, you're well on the way to building a working model sub.

                    Comment

                    • MFR1964
                      Detail Nut of the First Order

                      • Sep 2010
                      • 1510

                      #190
                      Tom,

                      Last few weeks done some other needed things ordered by She who must be obeyed, she barricaded the Cave, next week i'll chase away the spiders and start up the Cave.


                      Manfred.
                      I went underground

                      Comment

                      • trout
                        Admiral

                        • Jul 2011
                        • 3657

                        #191
                        Manfred,
                        It is good to bless the wife! I am glad you are O.K. and will patiently await your next post!
                        Peace,
                        Tom
                        If you can cut, drill, saw, hit things and swear a lot, you're well on the way to building a working model sub.

                        Comment

                        • MFR1964
                          Detail Nut of the First Order

                          • Sep 2010
                          • 1510

                          #192
                          Finally the jar with honeydo things is empty, she who must be obeyed is pleased and i've broken the seals of the cave, i'll show you guys first what i've done before she barricaded the cave.


                          Clipped the claws of the 212 just before the lockingballs, it's a tight fit.


                          Replaced the fillingtubes to the outside of the breechblocks and plugged the old connection with solder.


                          Despite the torps are scale 1:72, it's looking good, now i've got to get me some gas to blow them out.

                          I allready made some runs with empty tubes at the submeeting in Belgium, and i ran into a problem, with empty tubes there stays a airpocket inside the tubes, just by flipping it over i can relieve them and regain a balanced boat, i allready discussed with David about a solution of making some vent holes at the end of the tubes, that will be the next step after shooting some torps at the testrange.


                          Manfred.
                          I went underground

                          Comment

                          • He Who Shall Not Be Named
                            Moderator

                            • Aug 2008
                            • 13390

                            #193
                            You gotta shorten the length of flexible hose between the weapon charge fitting and the breech-block, Manfred. Even with the holes in the after end of the torpedo tube, there remains too much raw propellant liquid in the flexible hose line -- when you launch the weapon that massive amount of propellant will flash to gas giving way too much launch velocity to the weapon.

                            Weapon instability (often broaching out of the water) is the consequence of a too quick launching velocity. The holes in the tubes to vent the tubes also will serve as a means of dumping much of that launching gas. But, that presents the problem of the gas bubbles impinging on the internal hull structure as they fight their way up and out deck vents. The result of all that off-gassing at launch is a pronounced tendency of the boat to pitch up at the moment of launch.

                            Turn your straight brass nipples nearly 90-degrees and you can make those charging hoses very short.

                            Wow! What a project you have there!

                            David
                            Who is John Galt?

                            Comment

                            • MFR1964
                              Detail Nut of the First Order

                              • Sep 2010
                              • 1510

                              #194
                              Dragged myself into the shop and started completing the torpedo system, i had some issue's, first i couldn't find the right bottle with gas, that means not with the right feeding nipple.
                              Since i allready builded a gastorpedo system for a fellowbuilder i decided to make some filling nipples from my own design.


                              First step, take a gaslighter that can be refilled, and cut out the filling nipple carefully, used some copper tubing for making the holder.


                              Insert the nipple into the copper tube, by pressing it slightly it will get stuck inside the tube.


                              The old nipple and the new one.


                              Used some 2K glue to get me a leakfree connection, i could re use the old hoses and securing rings.
                              I'm now able to use standard butane lightergas or airspray gas which i can get at the local store, still have to tinker a bit on the tubes and get me some gas to try some live shooting.


                              Manfred.
                              I went underground

                              Comment

                              • trout
                                Admiral

                                • Jul 2011
                                • 3657

                                #195
                                Manfred the Maniac! Glad to see you back at the desk working on this! You smoke right? Don't get too close to those torpedoes or they will turn into missiles! LOL
                                If you can cut, drill, saw, hit things and swear a lot, you're well on the way to building a working model sub.

                                Comment

                                Working...