Welcome to our forums. For the best in R/C submarine kits, components and accessories, be sure to visit the Nautilus Drydocks
If this is your first visit, be sure to
check out the FAQ by clicking the
link above. You may have to register
before you can post: click the register link above to proceed. To start viewing messages,
select the forum that you want to visit from the selection below.
Manfred, you are a maniac! :-) Please do not go faster, I do not want to rush you in anyway. I am learning a lot from you and I look forward to what you are going to do next.
Peace,
Tom
If you can cut, drill, saw, hit things and swear a lot, you're well on the way to building a working model sub.
You are amazing Manfred, This boat is SOOOO much smaller than your other builds but you are still putting the same amount of detail on it.
I take my hat off to you. Keep leading from the front Sir.
For me size doesn't matter, i'm used to build plane kits scale 1:72, those idiots added PE parts, so you need a sharp pair of eyes and a battery of pliers, and for me this boat is another learing curve, going to the extreme i like the most.
Frankly said, i get bored when i drive these boats, the major challence is solving mechanical problems, for me i like the most the complete journey of building a boat, you've got to torture your brains to keep them awake.
Photos, plans, and other info about the radio controlled model submarine the Walter S Winans
Found it in Modelboatmayhem forum before it crashed. A chap in the UK built a 27 inch static diver complete with working snorkel which is quite compact. Looks like a nice thing to copy and put on the 212. Instead of using a servo a float connected to the clevis closes of the snort head in a dive.
Thanks, it's surely a candidate if my floatingdevice will fail, have to see about that, for now i'm covered with dust from perforating the type 212 with holes on the conningtower.
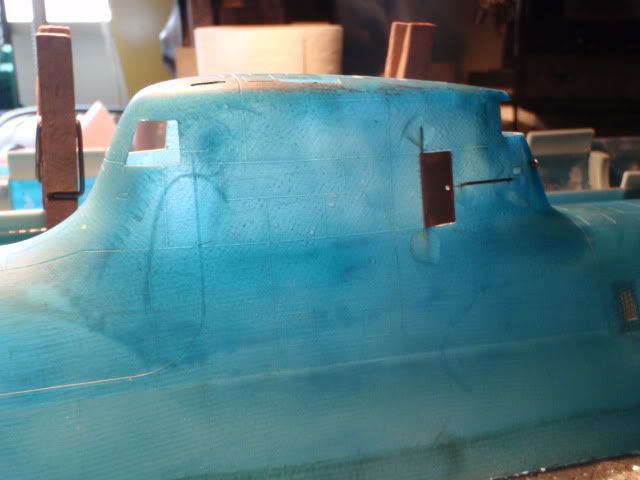
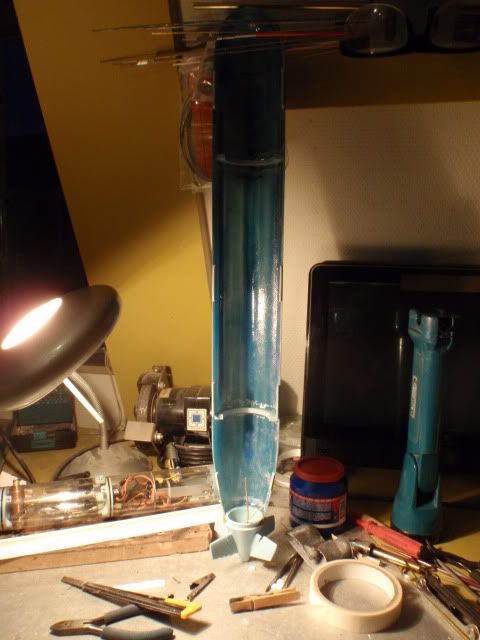
This weekend i attacked the conningtower, and started inside the lower hull.
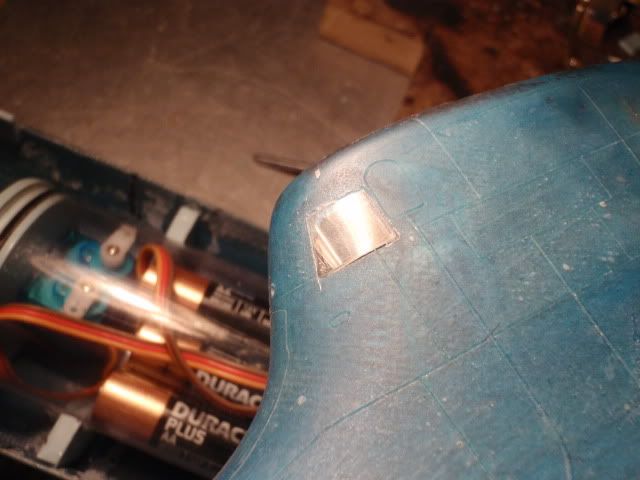
Opened up the front and rear places where the nav lights are positioned.
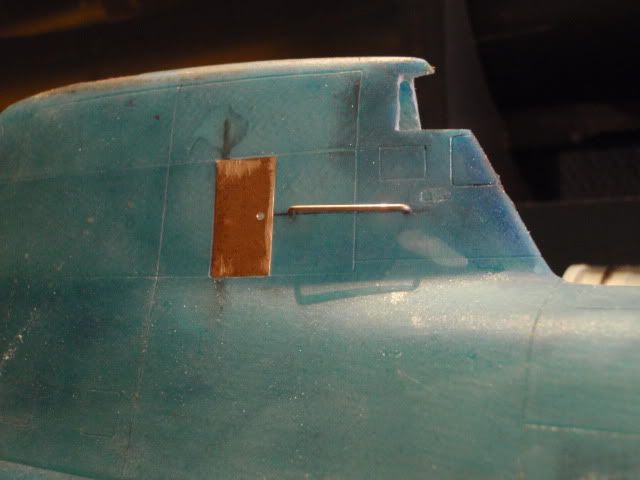
Also replaced the door by a copper one.
Yes, it can be opened, just for the fun, also added a real stainless steel railing.
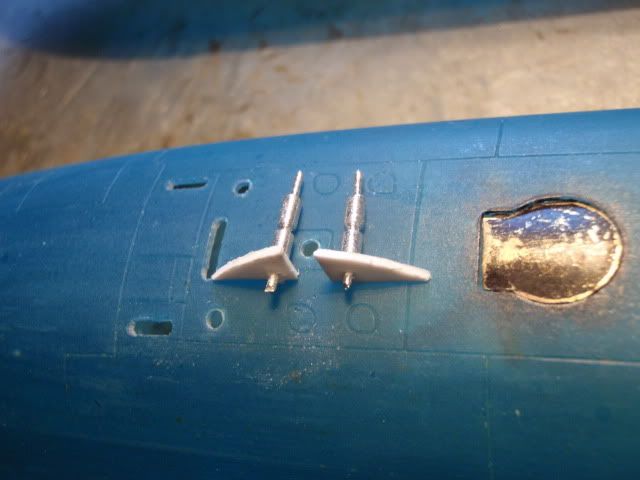
A type 212 has three double nav lights positioned above each other.
This way you get the impression how big you have to work for making the nav lights.
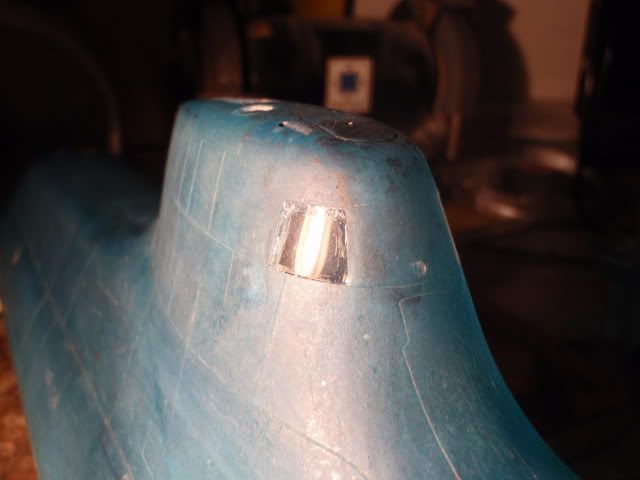
Made some frames to keep them at their places behind the front windows.
By using some long pliers i could made a dryfitt, to see if the result is succesfull, they will be glued on when the windows are placed.
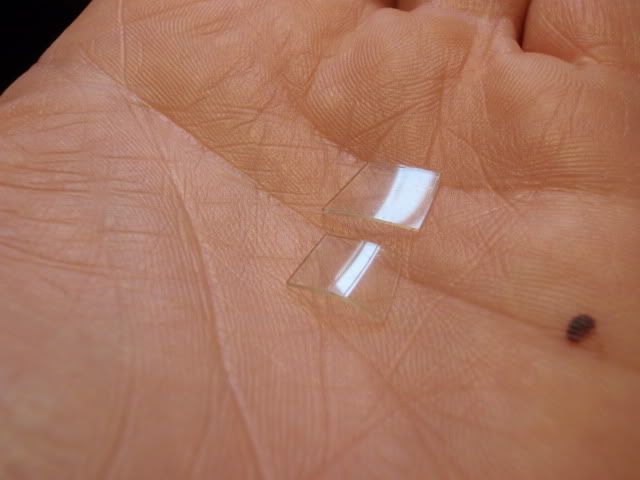
The windows i've made from clear styrene, bended a strip of styrene into shape after heating it with a flame, marked them on the holes inside the tower and made them to the right size.
I'll use some special glue to get them in, if you use CA you will mess them up, the glue i use is less aggressive and will turn clear after hardening leaving no white haze.
And finally some work inside the lower hull, placed the bracketts which will hold the WTC on it's place.
High praise coming from bassplayer there, Manfred. You've seen his work, right? I can only chip in and second what bassplayer said here.
Manfred: you are that rare bird that not only is a mechanical wizard (and know your way around a soldering iron too), you also are a model builder of extraordinary capability and scope; you have a wide array of techniques and tools at your disposal -- and you've developed the knowledge and skill to employ the talent and tools effectively.
Your WIP (work in progress) threads here, and elsewhere, are a joy to read, and I always turn away from them just a bit smarter and capable for the experience. And what a treat to see one of our Caswell-Merriman kits get the, 'Manfred treatment'. An honor indeed.
There! ...
... I now mightily heave backwards and yank my head out of Manfred's butt (Pop!). I'm not used to dishing it out like this.
Its easy to look at some of your other work, marvel at the features and move on thinking, maybe i should try something like that, at that scale!!! Seeing the same attention to detail at 1/96 is mind blowing
Opening hatches, cool, retracting masts, blimey
Next time someone points out it takes 42 muscles to frown, point out it will only take 4 muscles to b1tch slap them if they tell you how mnay muscles you need to smile:pop
Yeah, it is O.K. work... I am disappointed no working lights. The least Manfred the Maniac could do is manufacture some scale working bulbs.....sigh. (just joking) I love your work and I too am enjoying watching you detail out this sub!
If you can cut, drill, saw, hit things and swear a lot, you're well on the way to building a working model sub.
Yannis thanks, you also know your way around, like you've shown with your build.
David, you won't believe me if i say i've seen better builders, yes they are rare, but i had the honour to learn from the best, gathering skills and guts to try it on your own is a different story.
I age back from the days where selfbuiding was normal, if it don't exists, make it your self, and learned it the hard way.
I'm glad to hear that people learn from my builds as i do from them, never over estimate yourself, and stay firmly on the ground, it sound boring but that's the way i'm.
Albion,
In the past i also was amazed what was possible, just try and you will see there is no limitation, you only know if something will work if you try it.
Tom, I know you are greatly dissapointed, my humble excuses for that, now you know even i can fail :)
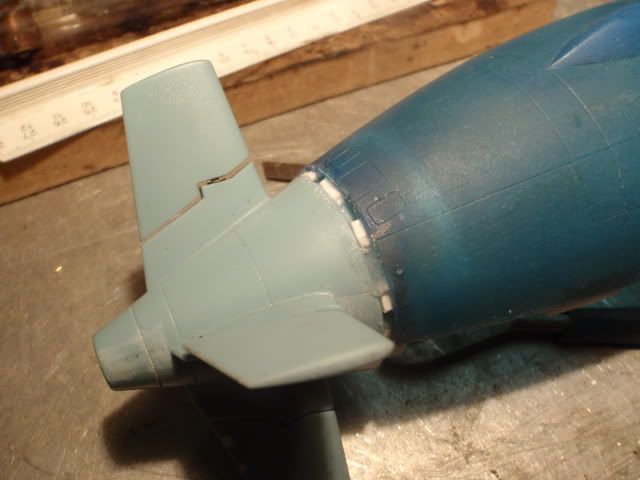
Done some work on the type 212, glued in the windows and glued in the rearpart, she's starting to look like a sub.
Both windows are in, it took some work to get them right, the residue you see on the windows is on the inside, and will be covered by the eyebrow they've painted on the windows.
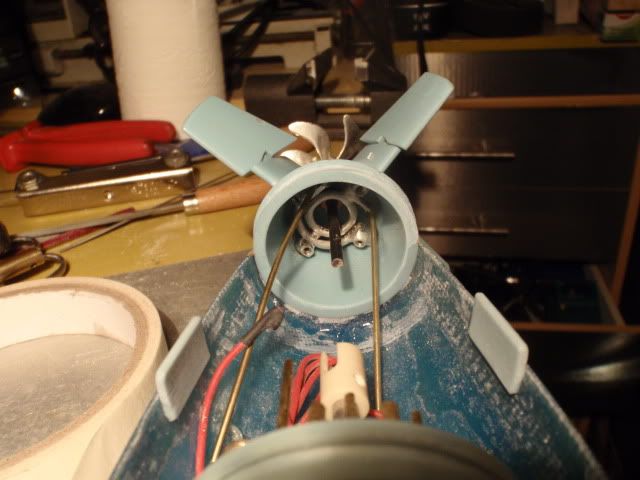
I decided to use styrene tabs to fill the gap between the hull and the X tail, used the dremel to get the right height and tacked it with CA.
The proces of final glueing the rearpart, leaving the hull standing upright gives the glue the oppertunity to creep in every hole, taped the other side tight to prefent lekage from the glue.
I decided to get the rods in before the X tail was glued, this way you won't have the trouble to work inside the cramped space of the X tail, worked fine for me.
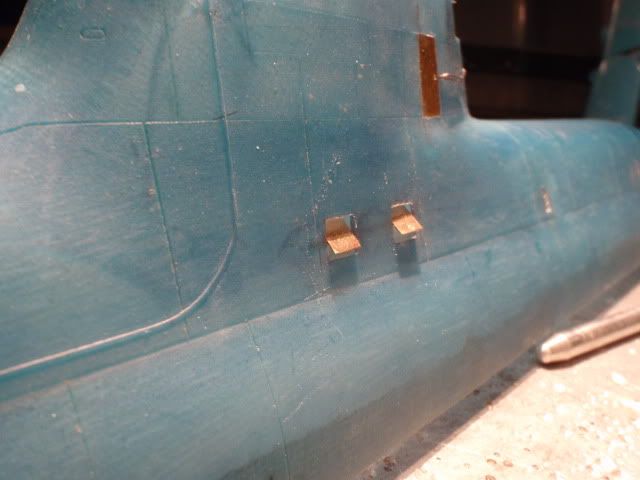
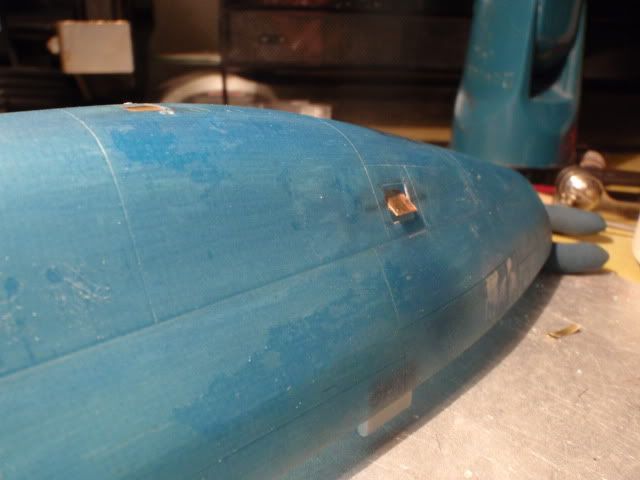
Found a nice vid which shows the ballast vents, and went a step further to drill out the holes and replaced it by some copper parts.
Getting them functional was a different story, those hatches are really small, it took some time, but one side is ready, one other side still to go.


Comment