-
Who is John Galt? -
David,
You are going to hate me even more, i think i found a workable solution to drive the 212 at high speed.
If you've got the Wfly it's possible to adjust the amount of deflection by the flip of a switch, did some buttonwork yesterday and it worked.
You have to make your adjustments in the dual rate chapter, first be sure that rudder is rudder and elevator is elevator, next step will be, select the switch which will control your deflection in three steps.
I took switch F for this, following step is to adjust the rate of deflection, don't bother about the curve setting, i made the following setup for my switch.
Position 0 = maximum deflection 100%
Position 1 = deflection 50 %
Position 3 = deflection 25 %
You have to do this for both the rudder and elevator, leave the aileron setting untouched.
By doing this i've got me three setting in which i can drive my boat,
Position 0 means full rudder/diveplane control, used at normal scale speed.
Position 1 means reduction of 50% deflection for off scale speed.
Position 2 means reduction of 75% deflection in german sportscar modus.
edit, did one more test, if you only change the setting of your elevator you will keep the same turning radius at all speeds, only have the lesser deflection on the diveplanes when needed.
The way i programmed it first has the disadvantage of a lesser turningradius at higher speed, i think that would be unwise.
Greetings Manfred.Last edited by MFR1964; 04-23-2012, 10:27 AM.I went undergroundComment
-
To make the result more visible i made a short vid to show what is possible with dual rate setting, i must agree that the WFly is a sturdy little transmittor, never suspected that it would give you so much for so little.
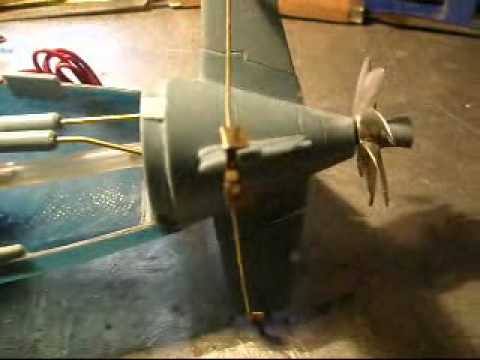
Greetings Manfred.I went undergroundComment
-
Excellent presentation. I'll try it, Manfred. Thanks.
DavidWho is John Galt?Comment
-
Ditto what the wizard said!
This is really helpful, thank you!
Peace,
TomIf you can cut, drill, saw, hit things and swear a lot, you're well on the way to building a working model sub.Comment
-
Well done my multi skilled friend. I applaud your skill set.
Cheers ChrisComment
-
Thanks Chris, in this kind of hobby you have to be multi skilled, building a sub is not cheap, so every item you can do yourself will save me money that i can spend for other parts.
I hope you have a Wfly, or other programmable transmittor, it will take some time before i can take the plunge, very curious how she will behave with the reductions of the dive planes at high speeds.
Greetings Manfred.I went undergroundComment
-
This time no work at the hull, but the real stuff, i'm always amazed how much you can cram inside such a small space with micro parts, i have the same amount in my bigger boat which does the same.
First i took apart the frame David designed, took the dremel and drillingmachine to fit it to my needs, pictures.
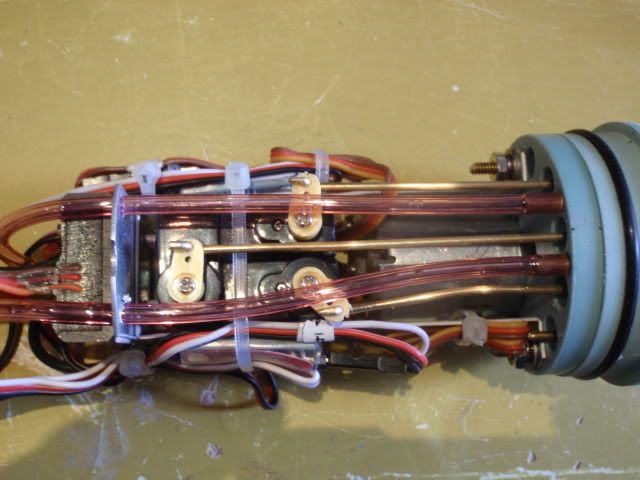
This the result without the SL8 receiver, took the rounded parts away to create more space, this contains the V tail mixer, levelkeeper, ESC and micropump.
The V tail mixer is hidden under the cables, using the small T-raps to make it more organised.
Placed the levelkeeper on the other side, i surely have my thoughts about placing it so near the E motor, have to see if this will influence the levelkeeper doing it's proper work.
Normally i give them a place far away from vibrating and electrical parts, but this time i have limited space.
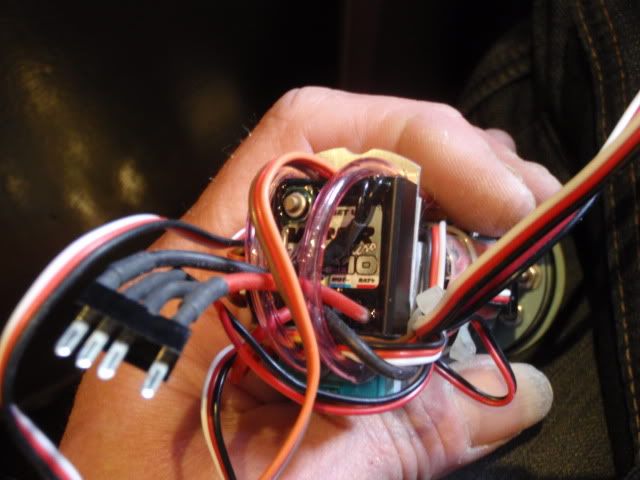
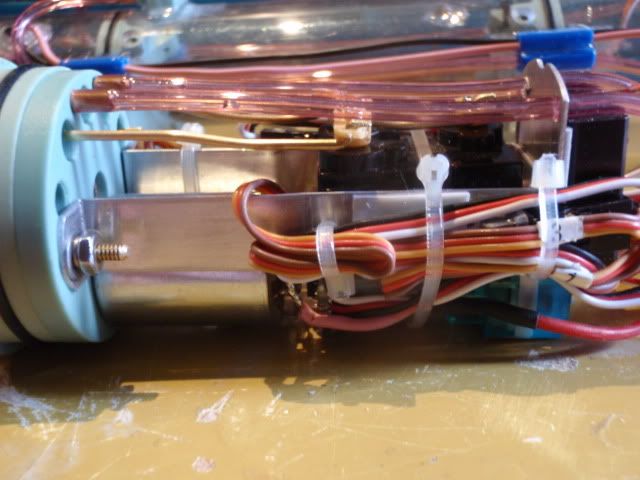
Placing the ESC at the backside of the plate gives me the room to place the micropump underneath.
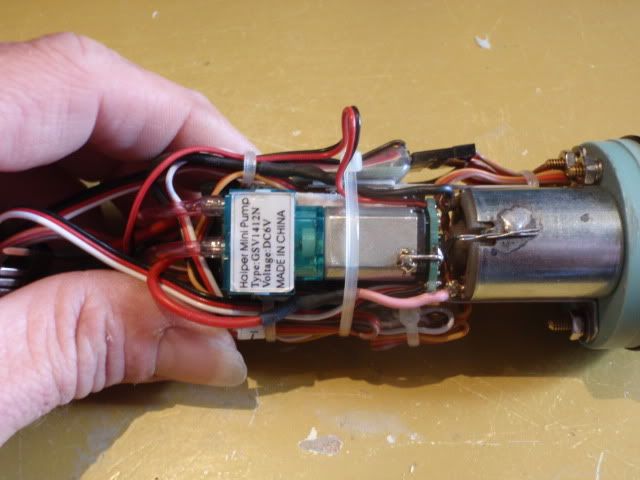
It's a tight fit, but there is just enough space.
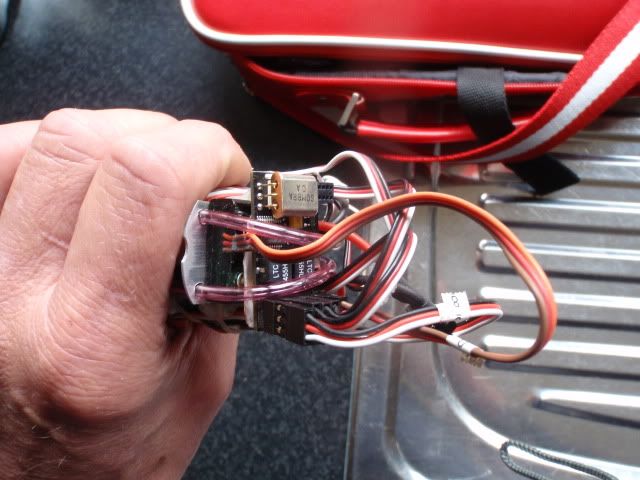
The final step was adding the SL8 on top of the ESC, still amazed about the size, compared to the old class receivers this is a little gigant.
Pressed the endcap on the rearpart of the SD to see if it will fit, believe me, it does.
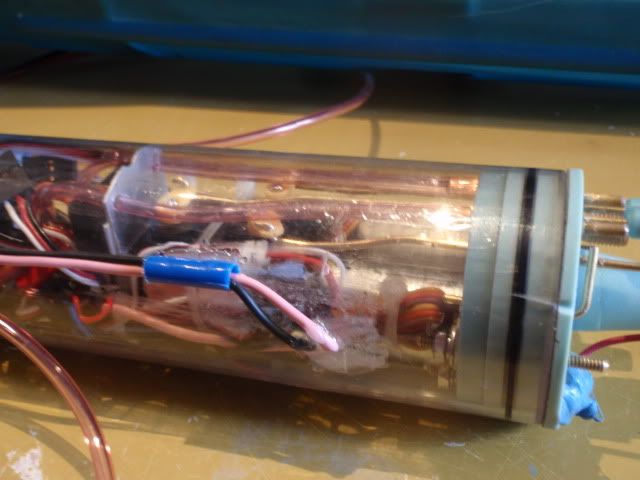
Now working hard to get me all the SAS parts, on the left you can see some tubes which allready are added to the SD using the old parts of the SD, i decided to use clear tubing, which allows me to see what the system will do when active.
Greetings Manfred.I went undergroundComment
-
Yikes! My baby!!!!!......Who is John Galt?Comment
-
I'll be gentle, waaahhaahaahaa (laughter of a mad man)I went undergroundComment
-
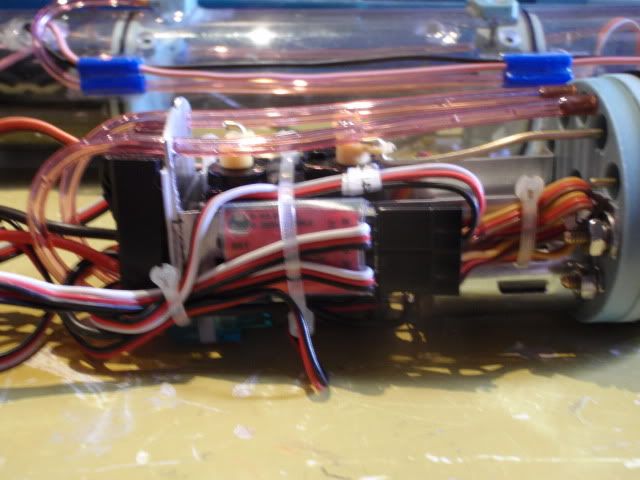
It's going to be SAS time, allready did some of the plumbing on the outside of the SD, have to wait to tomorrow before i can finish it up because some parts are freshly glued, then i can assemble the floatingvalve to finish it up.

The rearpart with the tubes, made some clamps to secure the tubes, also placed the bracket to connect the upperpart.
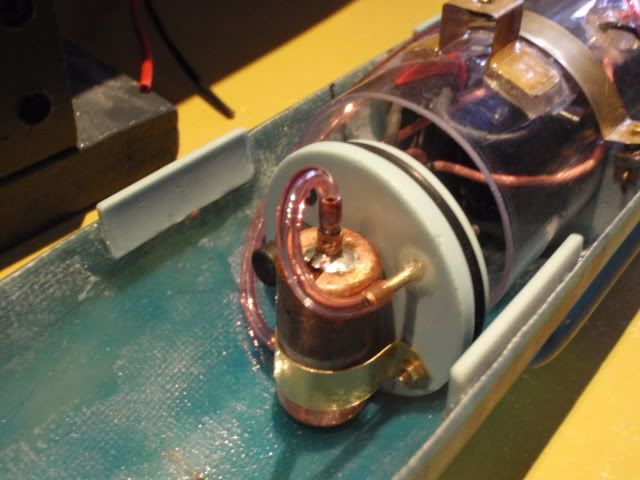
The frontpart with the safetyvalve outside the SD, also placed the front bracket for the upper part.

The watertight switch.
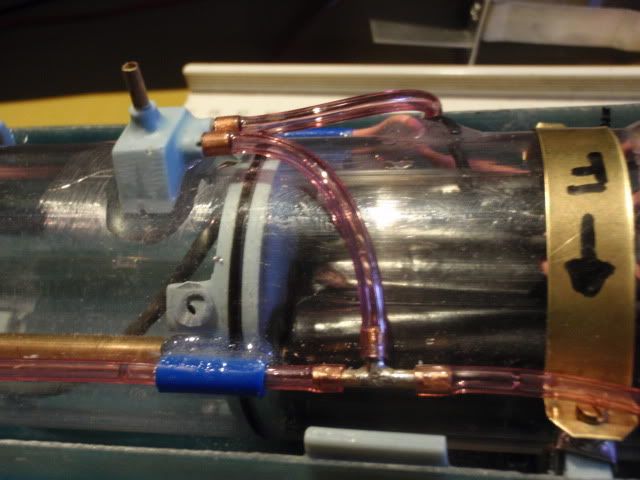
Some more plumbing and re-used the delivered parts from David, why build something when you allready have it on hand.
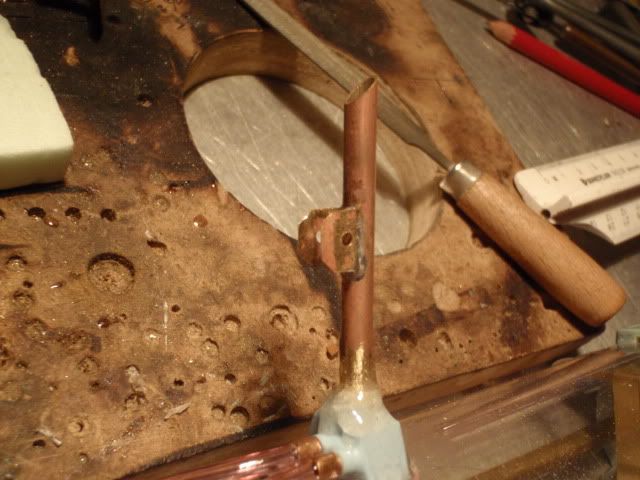
Placed the tube on top of the tubingpart and glued it tight.
The other parts for the floatingdevice are also ready, but the glue has to dry, arrrggghh, it have to wait, i can't stand the pressure, tomorrow i'll build up all the parts and inform you guys with the progress.
Greetings Manfred.I went undergroundComment
-
Still got room for launchers in the bow?
Send me you mailing address -- I lost the one you sent me. Sorry.
Love the plumbing -- nice touch putting the safety float-valve up front.
Operated my Moebius SEAVIEW with the rest of the crew at Mount Trashmore Lake this afternoon. Using a SAS set-up very much like yours. Has a gas emergency back-up -- never used it. SAS worked like a charme. Just a tad of fog in the after dry space, but no visible water droplets found during SD post mission checks and tasks. A good days sailing. I love your snorkel system, Manfred, and all the excellent advice you provided helped me mature the design. Good stuff! You should ask me for money -- that's how good it was
E-mail me, please.
dmeriman@aol.com
DavidWho is John Galt?Comment
-
David,
Glad i could help, just like the other guys with their input, in my opinion we have to help each other to solve issue's, that the true nature of a forum.
Greetings Manfred.I went undergroundComment
-
Manfred,
Thank you for your talent and heart to share! You are right we all benefit when we share the good, bad, and ugly of our builds!
Peace,
TomIf you can cut, drill, saw, hit things and swear a lot, you're well on the way to building a working model sub.Comment
-
I thought you were going to swap out the gas bottle for the float valve.
I just remembered you need the extra volume in your ballast tank to support all that extra weight.
How will you work the torpedo launcher granting you'll still be able to fit them in there?Make it simple, make strong, make it work!Comment


Comment