
Thanks Guys,
Still in the crawling proces, the positive side is, the bucketlist is getting shorter, to entertain you i'll sum things up.
- tinkering the magnet adjustments for firing the torpedo's
- testing if everything works like intended on dry land, if not, i'll have to rip her open to alter that.
- trimming the beast again, because i've altered the tubes into a lighter construction
- testing firing the torpedo's inside the water testing facility
- and finally doing my outdoor maiden run in open water
As you can see, there is light at the end of the tunnel, my estimate will be, a few months.
Manfred.
-
I'm loath to post unless I have something critical or positive to contribute to the thread; I hate those pointless, "Gee, nice job" comments. Yet here I am, gushing out praise for this wonderful example of the model-builder's craft. You are amazing!
MLeave a comment:
-
Thanks Gary,
It has been hectic times over here, She Who Must Be Obeyed is whipping my back with the honeydo list, my job eating up most of the time, so progress is slow, i've finished up the painting on the tower, and started playing around with the bollards, Tom has given me a idea which i want to sort out, did some of my homework allready, pictures
Did the last paintjob on the flagpoles and finished up the tower, moving on to the bollards.

Like Tom i took the effort to hollow them out, i copied the bar inside from pictures i've seen from the type IX, i know the one's on my type VII and XVII are different, so taking the type IX model is my best guess.
Had to put the XXIII together once again for testing, to me retracted bollards are logical, less noise underwater.
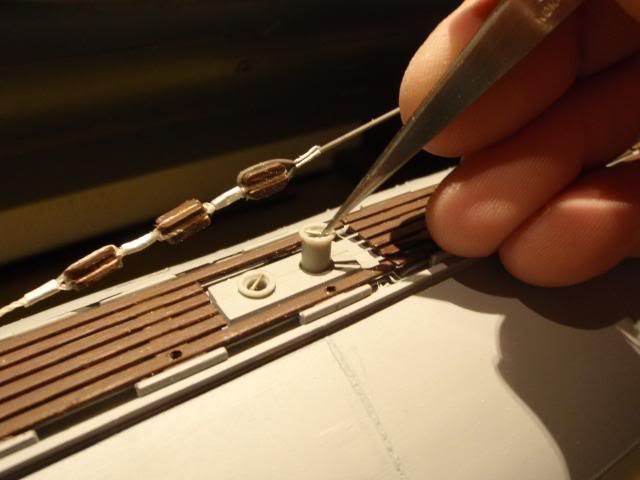
You can pull them up with a pair of tweezers, normally the crew had to lift them by hand, rotate them 90 degrees and lower them again, there is a kind of bajonetlock underneath the bollard, i know this first hand from Kriegsmarine survivors, interviewed them during the early 90's, those guys earned my respect, working on that boats under horrible conditions.
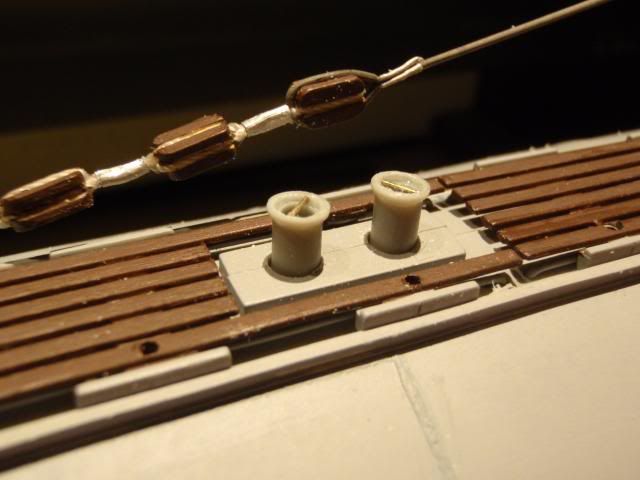
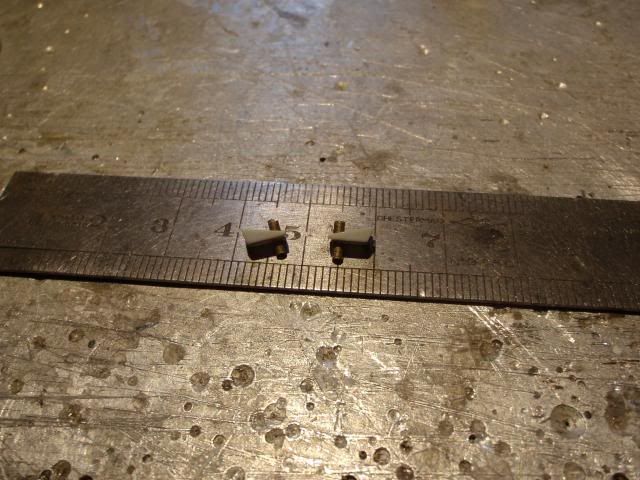
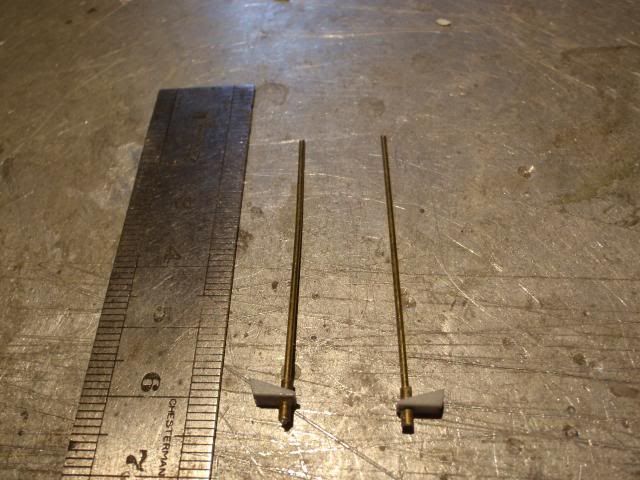
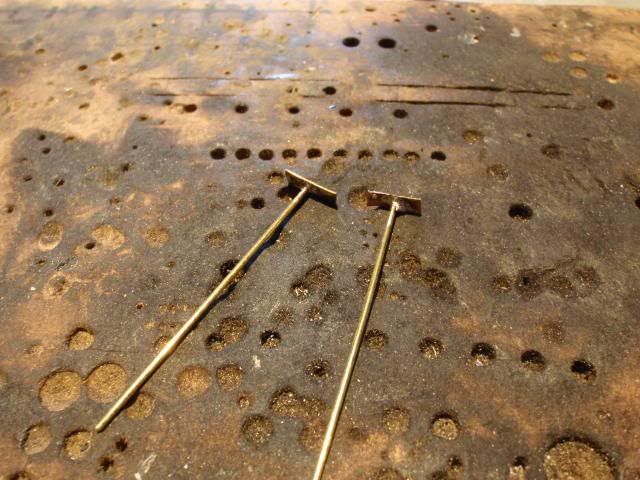
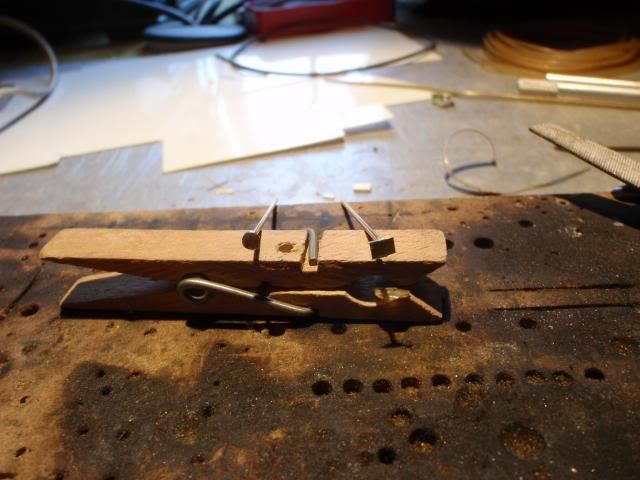
After pulling those bollards up they stay tight into the deck, a slight touch pushed them inside the deck again, so i'm playing around with little magnets to get them firm above the deck.
Plan will be, prepare the bollards for some magnets and make me a mockup, simply to check if this will work.
Manfred.Last edited by MFR1964; 03-17-2014, 03:17 PM.Leave a comment:
-
Pretty slick there, Manfred!!! Nice!!
Also, with regard to the "speaking tube thingy", I just like the heck out of technical terms!!(LOL)
But, it works!!!
CGLeave a comment:
-
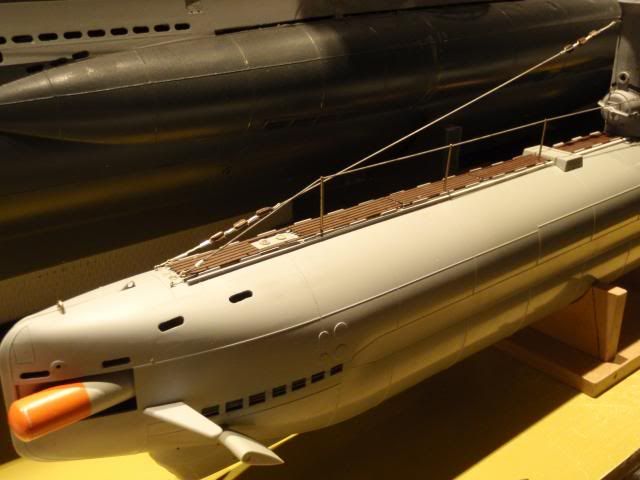
Initially i wanted to start with painting the speaking tube thingy, but i remembered there was something else to do, so i went all the way with the details, last job to do was, making me some sturdy copper flagpoles, it's a bit fiddling due to the size of the flagpoles, used the plastick one's only for the size, pictures
Stage one, beefing up the brackets by inserting a little tube as a holder for the new flagpoles.
Took over the length of the plastick one's, and cutted some brass rods to size, when you lightly squeeze the lower part of the tube inside the bracket, it will give you a nice tight fit of the future flagpole.
First stage in making those rounded parts on top of the flagpoles, soldered a strip of copper on top of the rods.
Second stage into the process, used a pair of siccors and some smooth files to get me the right shape/size.
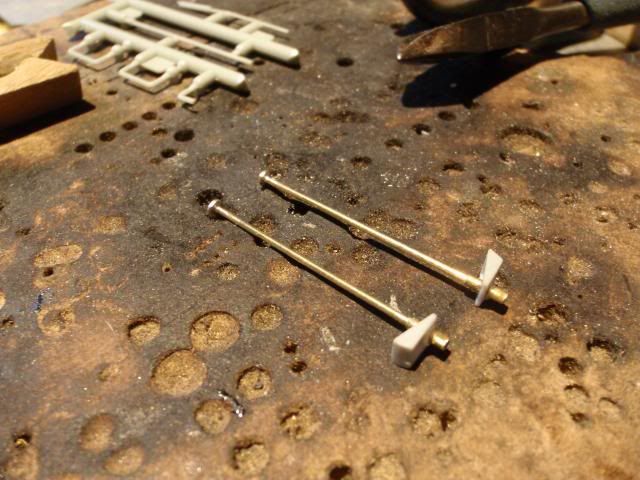
Dryfitting the new flagpoles inside the brackets.
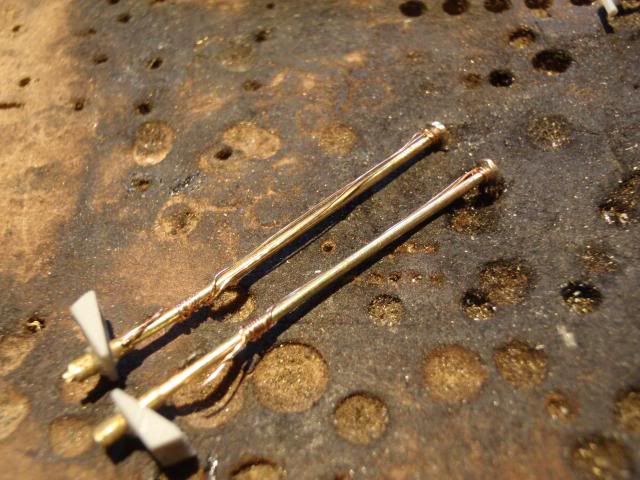
I know it's insane, but what are flagpoles without some cables?, took some very small gauge wire, and placed this on to the masts.
Glued the brackets on, and did some dryfitting with the flagpoles, if you ask yourself, why no flags?, well, this is a bit sensitive at meetings, in Germany it's forbidden by law to use any sign related to the Nazi regime, had several encounters when using my kriegsmarine flag on the type VII.
For now i have some painting to do, the weather is improving overhere, so i have high hopes to get this done quickly.
Manfred.Leave a comment:
-
Albion,
Once i stop the LPB, the scope stays into the desired position, there is no pressure needed to keep it that way.
Romel,
This is a single action scope, with a double action there would be another inlet at the top of the scope cilinder, both the inlet and the outlet are connected to the Robart switch, so no outlet for you, it is as Albion stated, a closed loop system, as for the used LPB, it's the small one, the same type as used for both the snort and SAS system.
Manfred.Last edited by MFR1964; 03-04-2014, 11:01 AM.Leave a comment:
-
Mornin', Albion!!
Yup, edumacation am good!!
Geez! Ah thot ah wuz th' onlee won whut uses that wurd!!
Thank ye fer the mornin' chuckle!!
Y'all have a good one!
crazygaryLeave a comment:
-
Manfred, is your periscope mechanism single or double acting? I'm curious where the LPBs exhaust go?Last edited by redboat219; 03-04-2014, 08:53 AM.Leave a comment:
-
Manfred,
Regarding your periscope pneumatics, looks like with a large LPB, you could use it for venting/ blowing a ballast tank.Leave a comment:
-
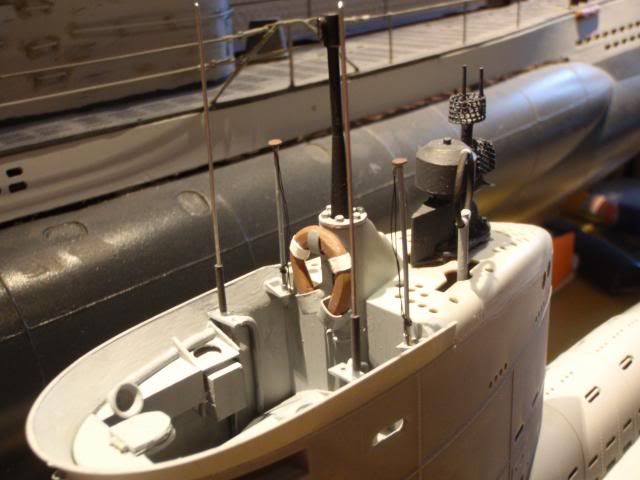
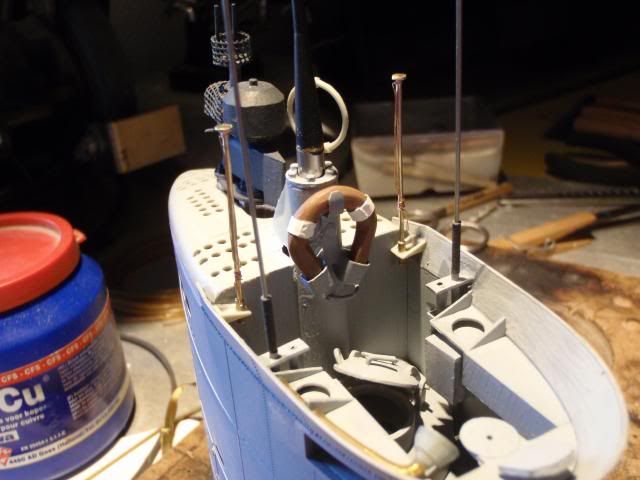
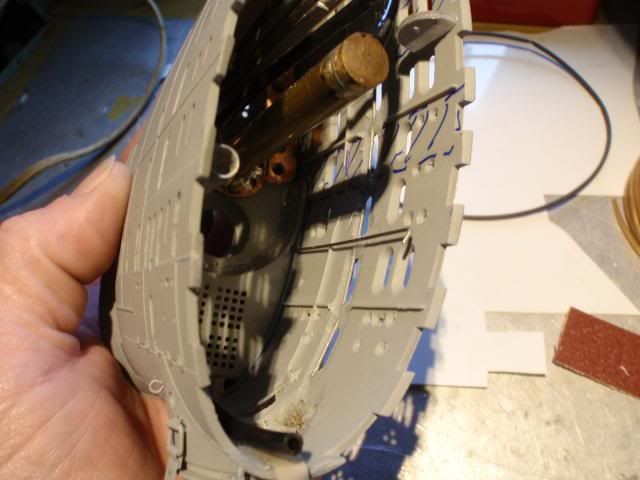
This was a productive weekend, finished my hose project, and fitted the antenna's and made the scematic of my moving stuff on air, pictures
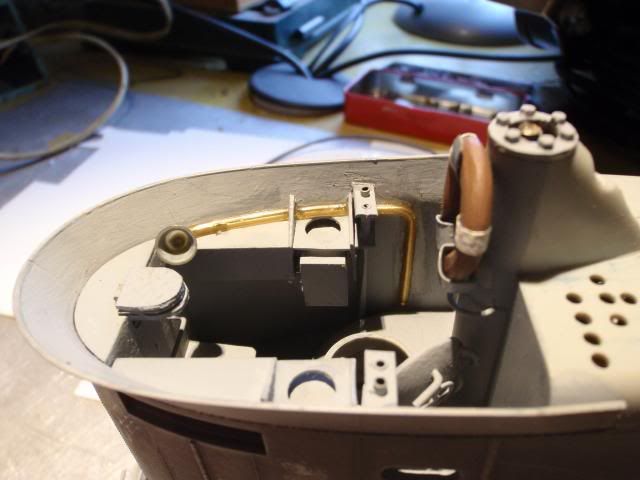
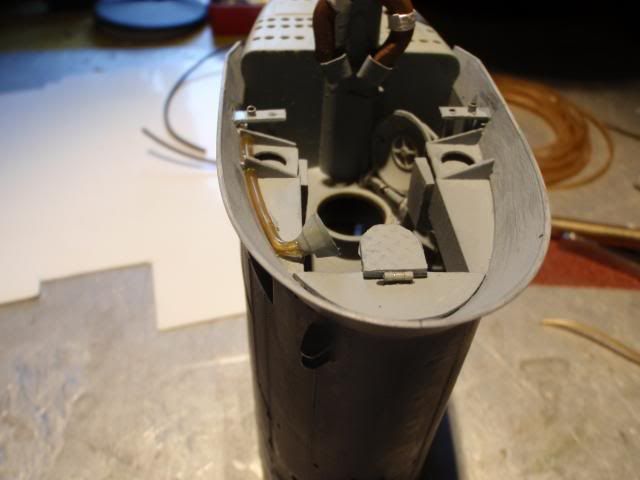
Two shots of my hose project Mark, i've added a speakingtube inside the conningtower, the diameter of my hose was exactly what i needed, to get the shapes right i inserted a 1 mm brass rod, which made it possible to bent it into the desired curves.
The conical shaped speakerinlet came out of the spare parts draw, a conical propellorhub, shaped into this form with some smooth files and sandpaper.
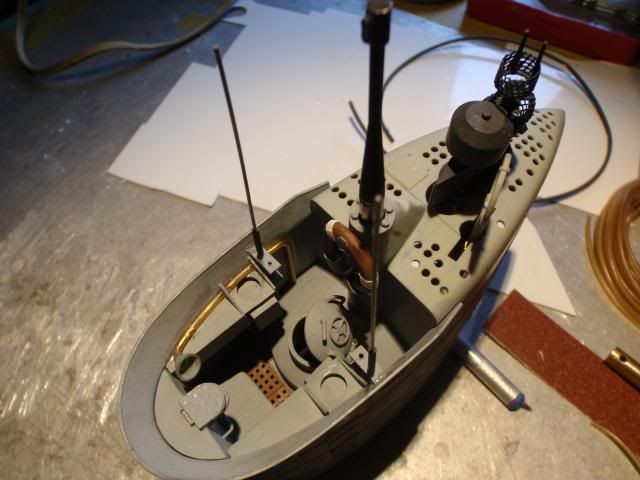
Inserted the antenna's and placed the small shrink hoses to keep them extended, it's starting to look something.
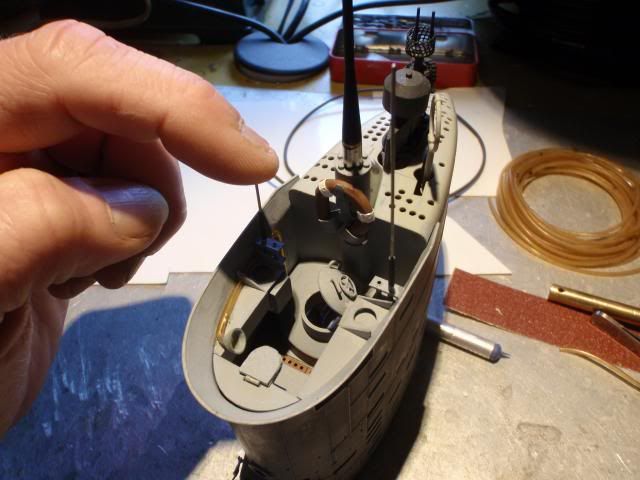
Retracting the antenna's goes manual, just by slightly pressing they will slide into the tower, lowtech, but effective.

Both antenna's retracted, only the piece of shrink hose stays visible, that will be not scale, so be it !!!, this way i know on duty patrol i won't mess up my antenna's.
This is the view inside my conningtower, both antenna's near the wall of the tower, lot's of room to play around, now i'll slap some paint over the speakingtube and will rebuild the flagpoles and holders to be more sturdy.
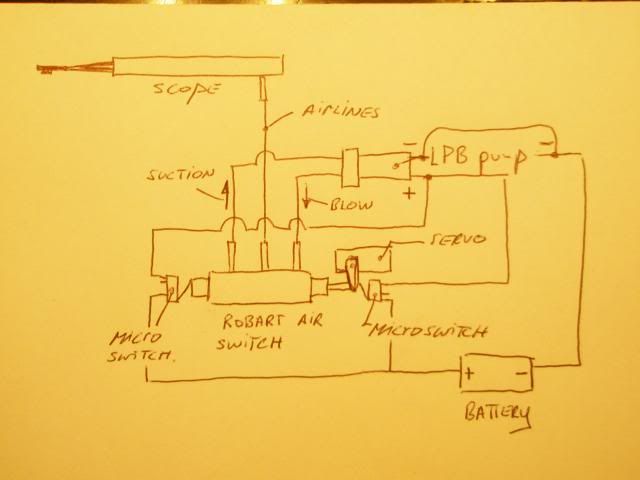
This one is for you Albion, my scematic for my airmoved stuff, i'll explane how it is working.
On both sides of the Robart switch i've placed a microswitch, which will be activaded on both sideways movements, since the LPB only pumps air into one direction, i've used this airhose rigging to get me a reverse switch.
Drawn into this position it's neutral, the LPB can pump the air freely, shoved into one of the directions, the middle part, which has the connection of the scope, will either suck or blow the air into the scope, giving me the right movement.
Tricky part is the build of the scope, it has to run as smooth as possible, i can move my scope and snorkel by only using my own breath, this way it won't be a problem to run the LPB, if this goes heavier the LPB will die, believe me i know!!!, this due to my demonic experiments i burned up a LPB.
Manfred.Leave a comment:
-
You won't regrett that buy Mark, there are excellent pictures and drawings inside, even some reports from active duty, i also have the same books about the type VII, type XXI, and the type XVII.
Rossler and Kohl did make a fantastic job of recreating all the data into good documentation, they even dedicated a chapter on builded models.
Manfred.Leave a comment:
-
OK dudes, I just bought it for $16.74. Even being in German the pictures and drawings should be good.Leave a comment:

Leave a comment: