-
Thank you both of you gentlemen for this thread. All very useful information and stuff I might bug David for like appendages and fish. I am going with the water line cut. Arrows hurt! ;) -
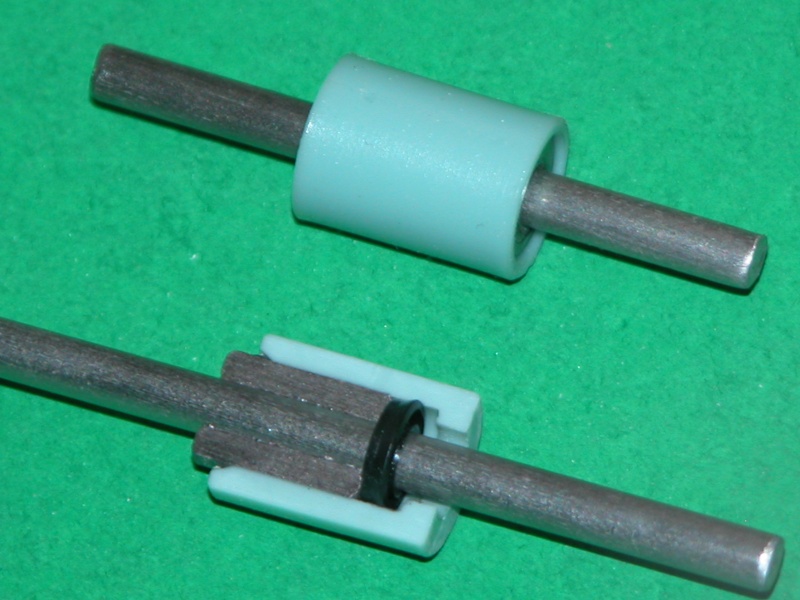
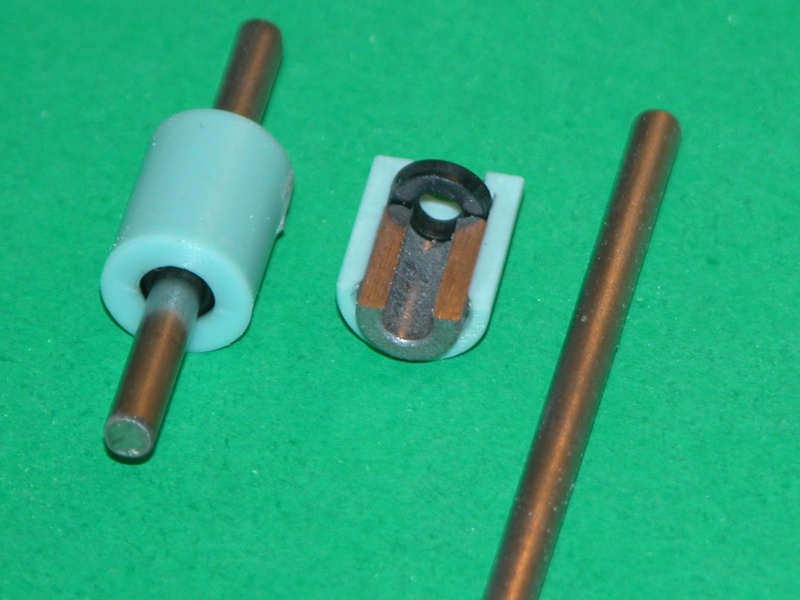
Alain, the float under the tower is part of the SAS system onboard delevered with the SD, this float will seal off the SD when underwater, once above it will level the airpressure inside the SD
Yup Sam, it was a gamble, had only a few pics and no drawings, turned out nice, a good fingerpractice to check if i still could do the trick, still have to paint it, i like the bling, bling copper style.Last edited by MFR1964; 01-11-2017, 01:51 PM.Leave a comment:
-
t's been a while since I checked on this thread. Holy crap, Manfred. Holy. Crap. The loader, too?Leave a comment:
-
Hello Manfred, I am a beginner and then converting the type XXIII BRONCO to RC model your structure is a good guideline but immediately I have a question, namely the float under the tower where is it used for ( the function).I namely using a water pump to fill the ballast tank and emptying.Leave a comment:
-
Thanks David, no parts needed.
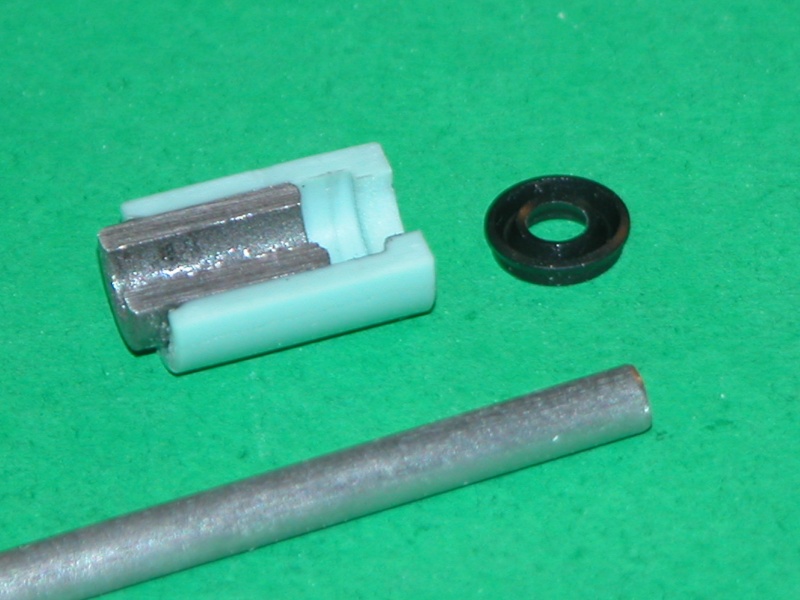
I've cleaned up all parts, no visible damage to the bearing or seal, repolished the shaft, sealed the part with bearing and cupseal with RTV, the only thing i discovered was, it seemed that the resin plug was not totally round, more a bit oval, fixed that with a file, i suspect that it was not centered with the shaft, so the seal couldn't work at it should, now this problem is fixed i can proceed with the rest of the SD.
It's a kind of habit to do this once a month, more to tackle this kind off issue's.
Manfred.Last edited by MFR1964; 12-15-2015, 08:01 AM.Leave a comment:
-
Sounds like some water got past the drive-shaft seal, that seal backed up by an Oilite (oil impregnated) bearing. Sometimes those Oilites have an iron content, hence the rust. When you pull the motor plate, that permits you to pull the drive shaft with attached spur-gear away from the seal. Do so. Examine the Oilite bearing and cup-seal that sits on its after face. Are they free of rust and crude? If so, pull the cup-seal and clean the seal body and cup-seal. Reassemble and squirt some silicon lubricant on the Oilite and around the cup-seal. Reassemble the motor-bulkhead and test.
Need any parts, Manfred?
M
Leave a comment:
-
David,
Today i started my SD up for maintenance, the driveshaft was stucked, opened up the gearpart and cleaned this up, there was some residue of rust inside, do you use a sort of grease inside, or do the gears run dry?
Manfred.Leave a comment:
-
Wow, at least i don't need a magnifyer to read your comment.
Manfred.Leave a comment:
-
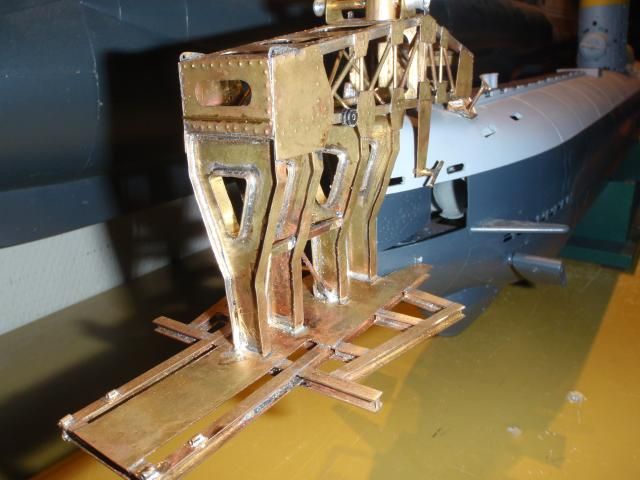
IT'S DONE!!!!!, at least the constructive part.
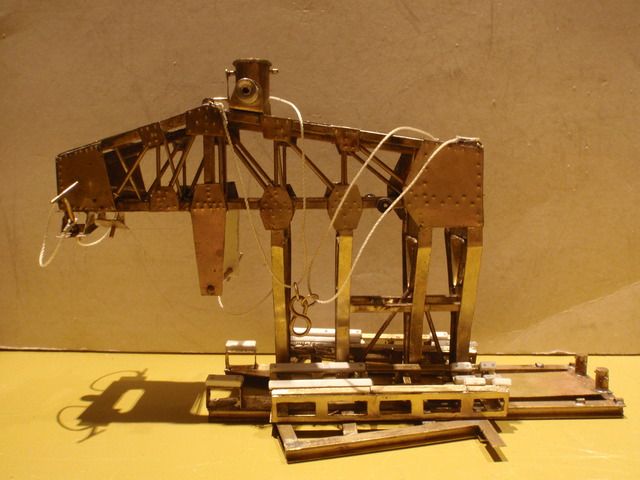
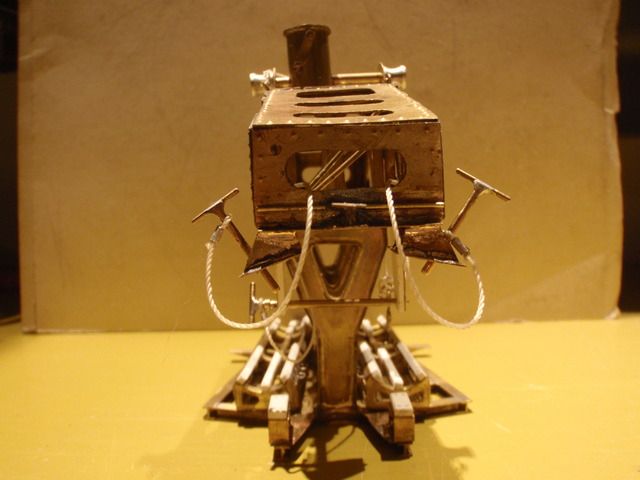
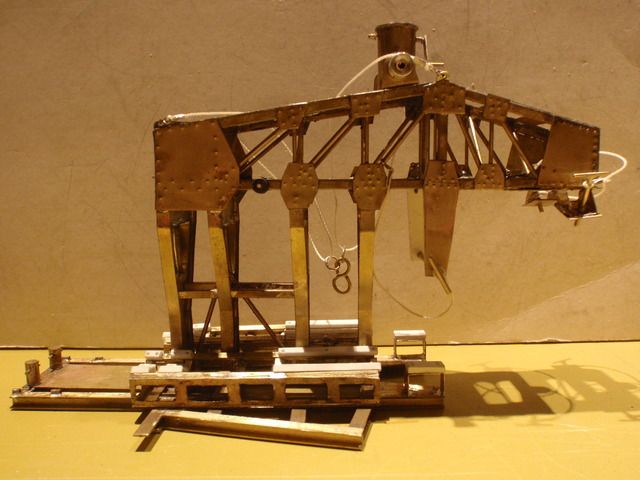
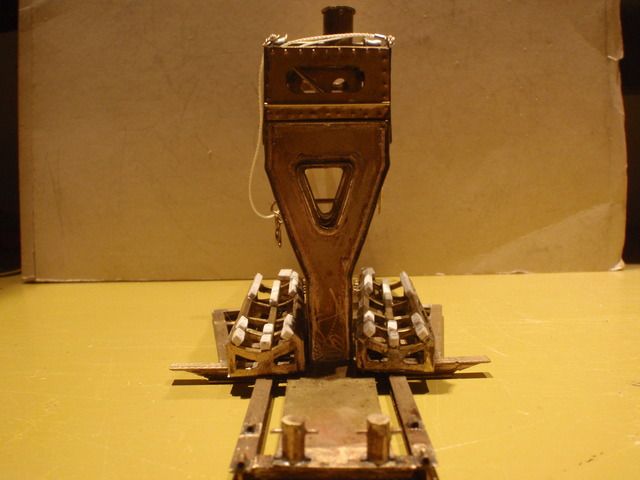
A all around view of my little subject, still in need of a layer of paint.
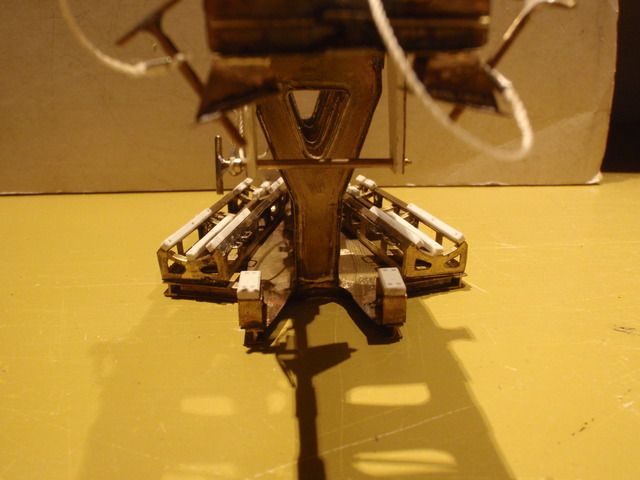
Both tables can be swiffled outside, for now these are not permanent locked on the lower part.
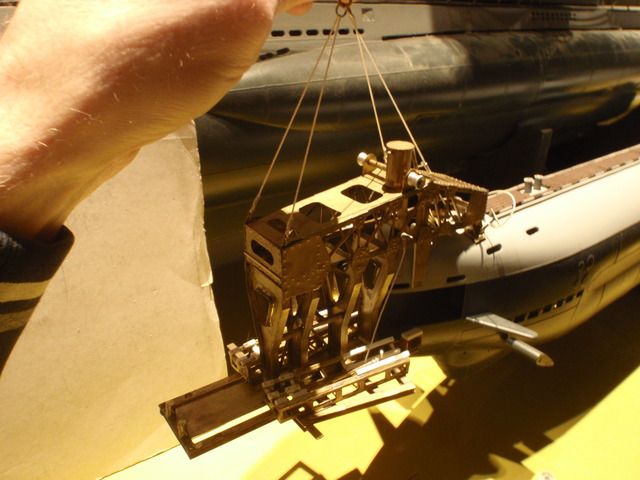
I added the cables which hoist the complete construction to the bow of the type XXIII.
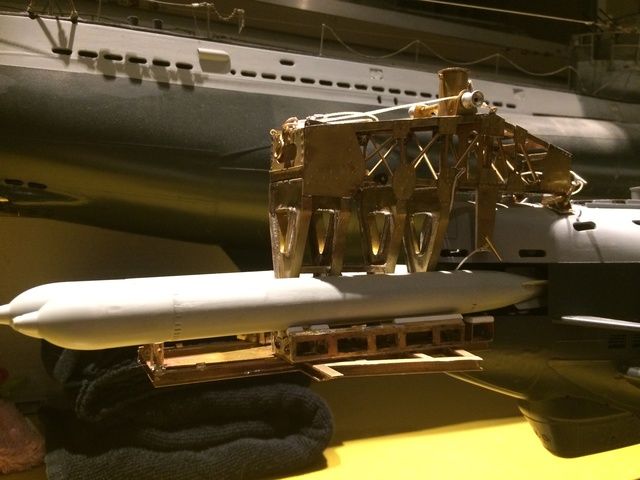
All these time this was the goal, a display for loading torpedo's, actually i discovered one error, i placed the tubes from my boat slightly outwards, now i'm not able to push the torpedo inside the tube.
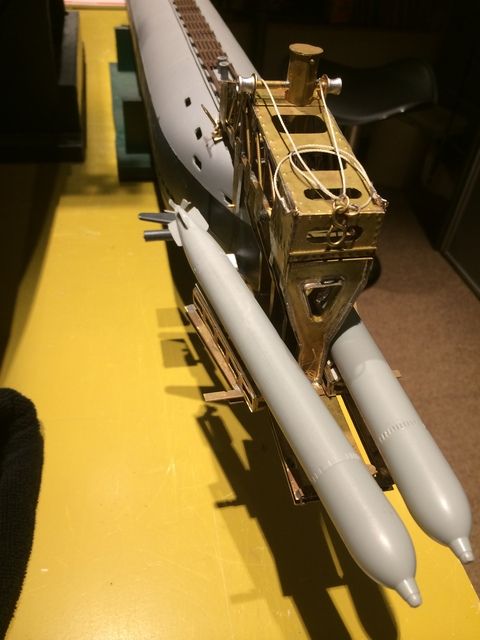
Another picture from the other side, once painted it will be a nice addition to my type VII display stand.
Manfred.Leave a comment:
-
Made the other different rib and added some reinforcement to the top of the ribs, soldering this would be madness, so i used CA.
One step closer to completion, it does look the same as the one on the picture, phew!!!!
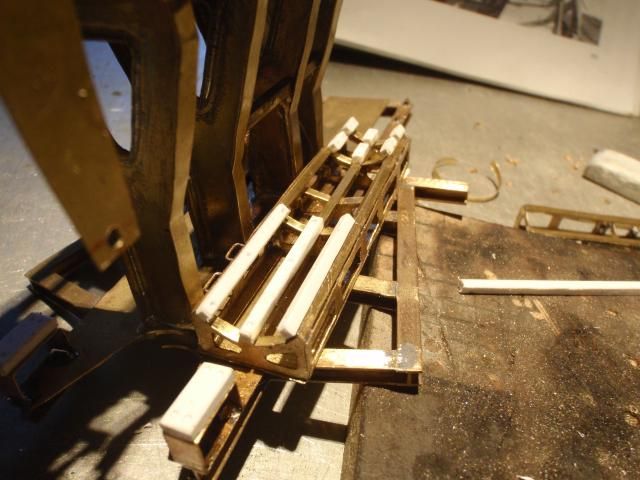
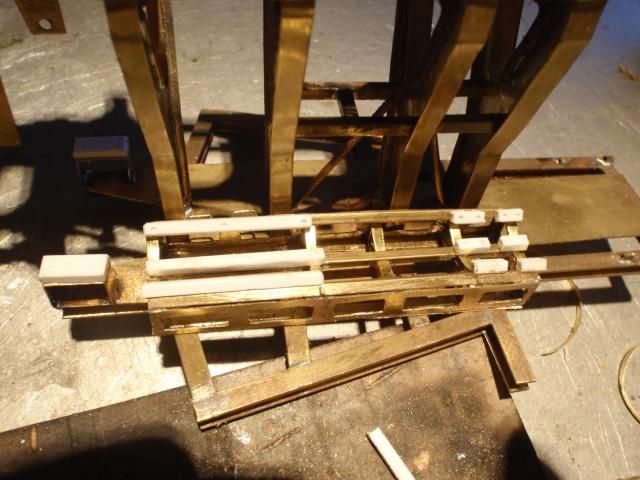
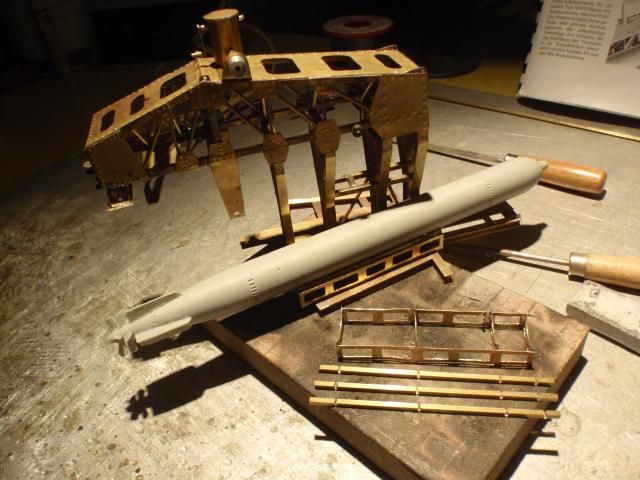
By using styrene i could imitate the wooden sliding blocks, after painting you won't see the difference.

Dryfitting a torpedo proved to me that the height was level to the torpedotubes, on the left underneath the torpedo you can see the block which is positioned near the bow of the boat, i suppose it's used to get a smooth ride all the way into the tube without tipping the torpedo.
Okay, back to reality, still one to finish, the stuff is allready present, so back to the cave.
Manfred.Leave a comment:
-
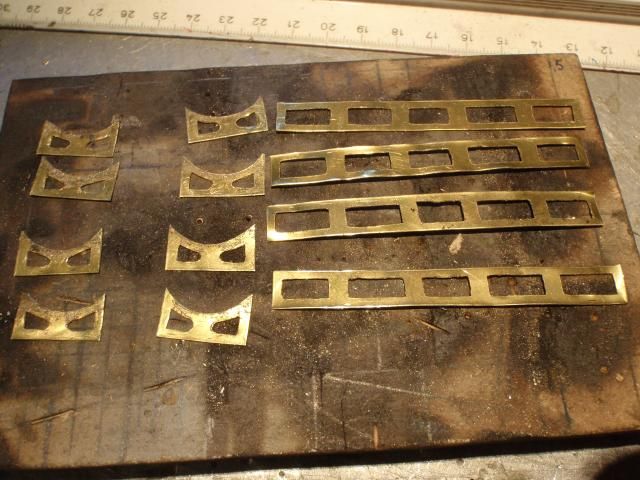
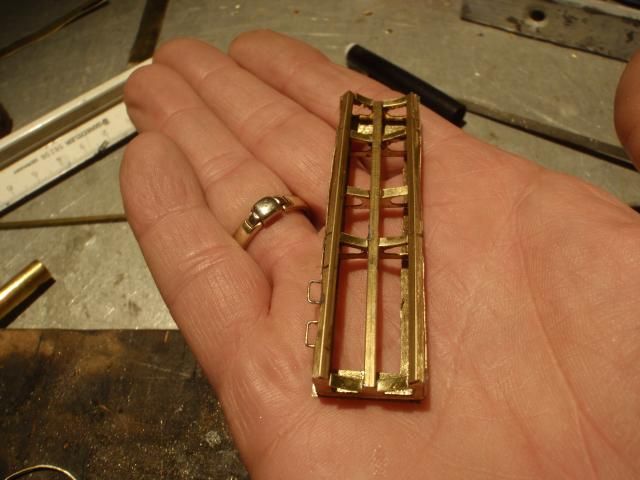
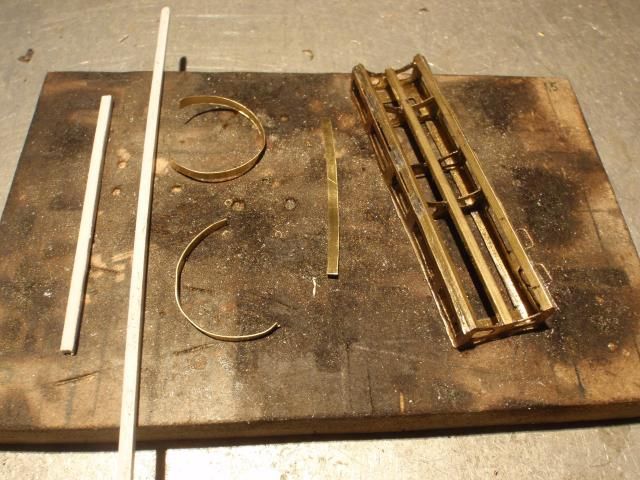
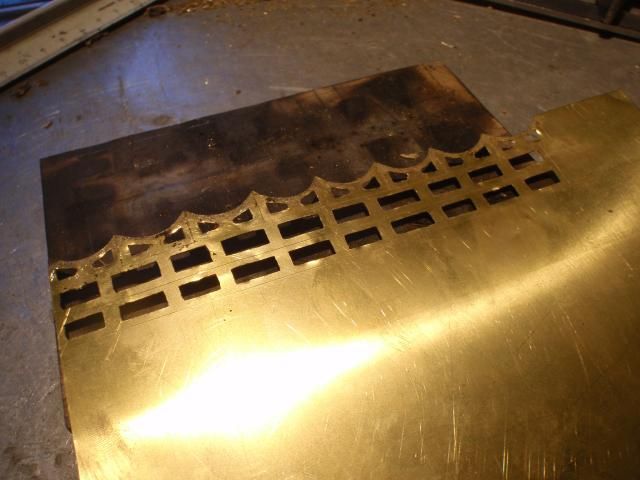
Took a pair of siccors and cutted all pieces.
The one on the left has allready the bars soldered, the right one still has to be done, took this picture to show how the bars will fitt in, cutted some slits with the dremel, this way the bar fitts over the ribs.

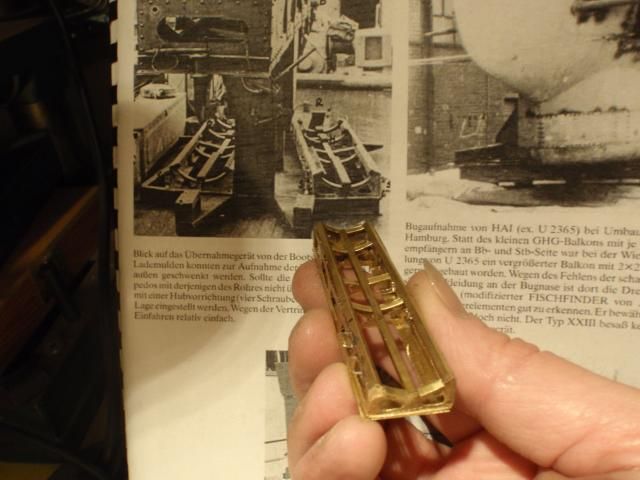
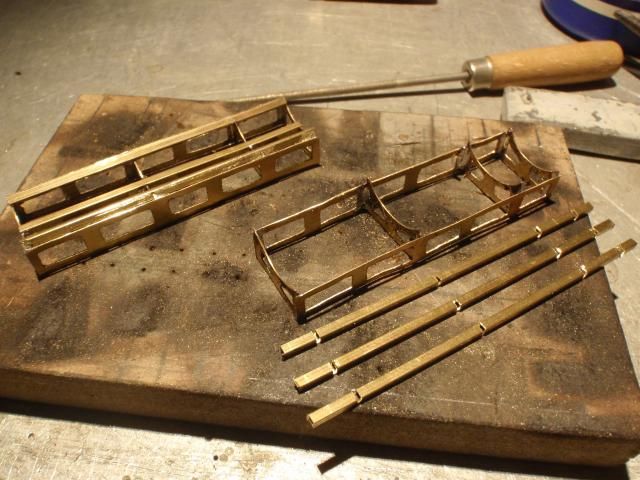
Dryfitting on the loading stage, pure to see if the size fits.
Dryfitting one of the Bronco torpedo's, done this to see if the height was right, because i have to add some wooden slidingblocks at a later stage.
Another dryfitt with both tables done, now i'm ready for adding one more rib, this one is different compared to the others, so it has to be placed afterwards, when placed i can start with adding the wooden slidingblocks.
Manfred.Leave a comment:
-
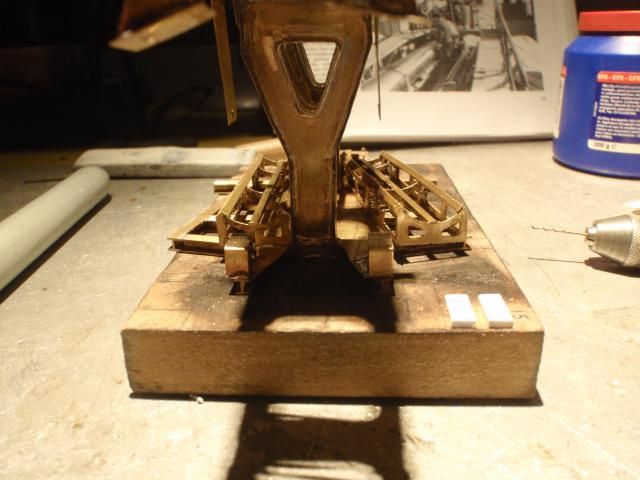
Finally i can secure this contraption to the bow of my type XXIII, one hurdle taken, still one to go.
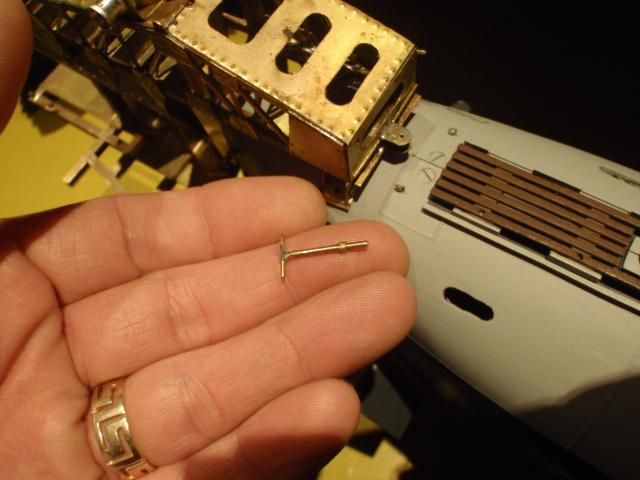
Made this kind of lockingpin for both upper brackets.

By inserting the pins into the predrilled holes i can secure the top-part, the bigger pin is slided through all the way, makes lives easier instead of another two pins.
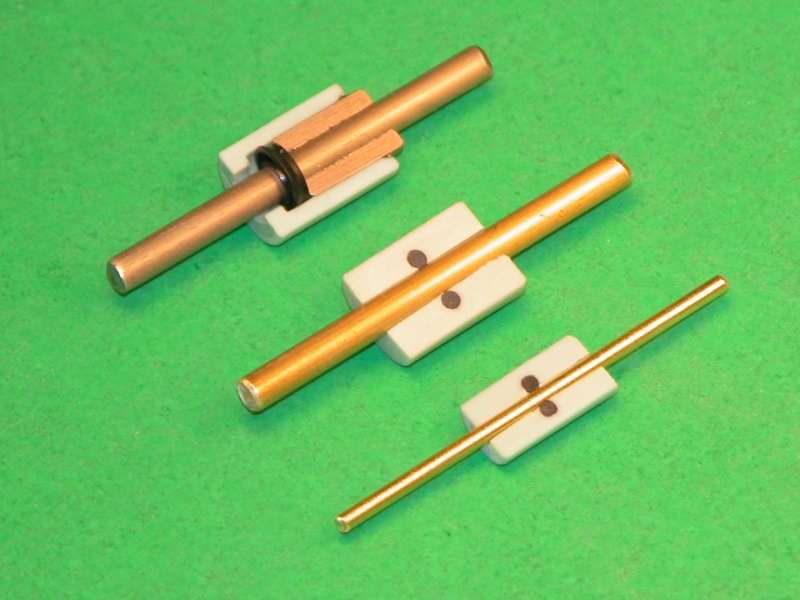
Right now i'm playing around with this sheet of copper, this will be the start of making the platforms which can hold the torpedos.
Manfred.Leave a comment:


Leave a comment: