
No problem David, i've got myself a tolerance of 10%, :), hopes that make you feel better.
To be honest, i hope Spring starts early, have two boats drying out, Winter sucks!!!!!
Manfred.
-
God help me ... I caught myself actually counting the rivets on the face of your model, Manfred. Sorry.
MLeave a comment:
-
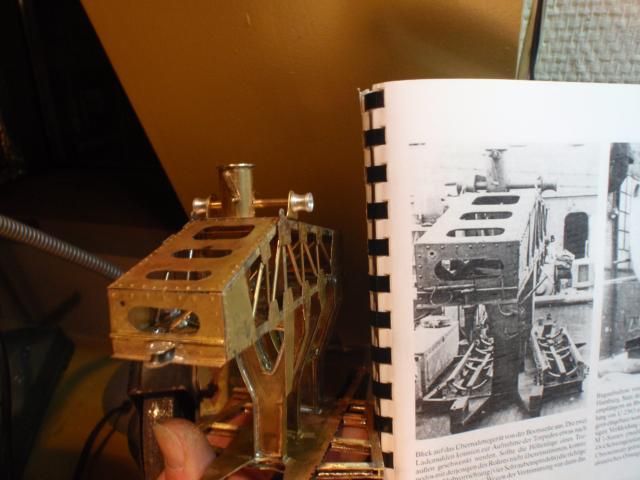
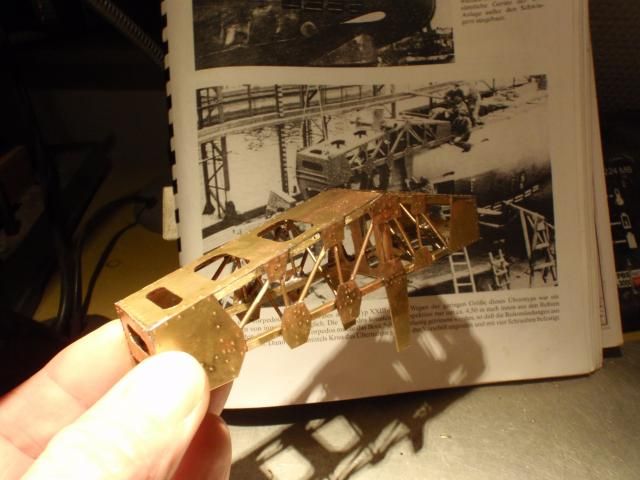
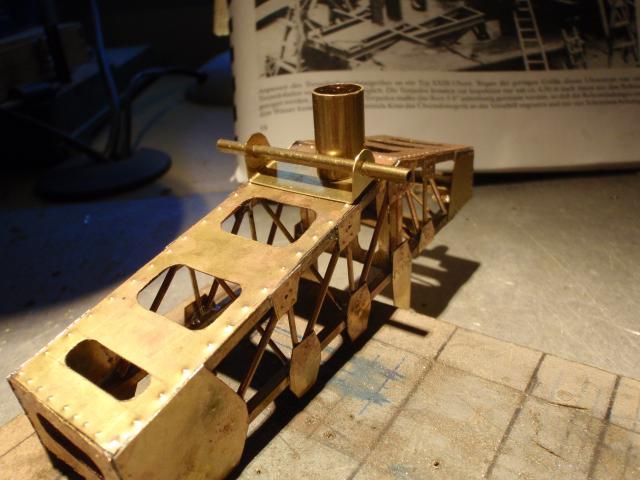
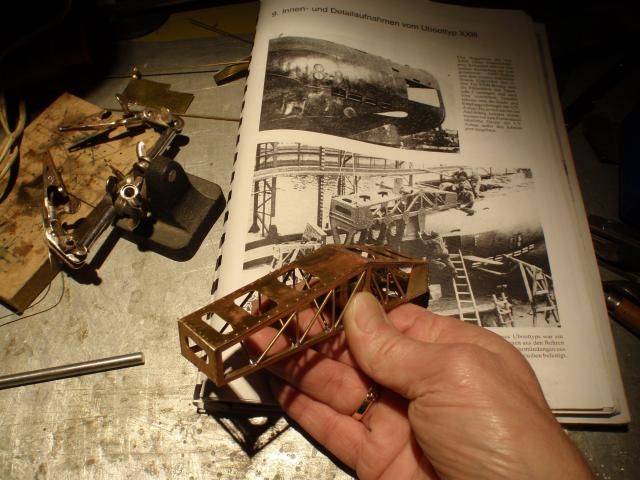
Some more results on making the details,

Added that strange thing on top, i suspect it's a kind of winch, becauce there is a rotating lever at the back present.
The other side of the loadingdevice, just noticed a error, that bar has to be level with that hook-up thing, have to modify that.
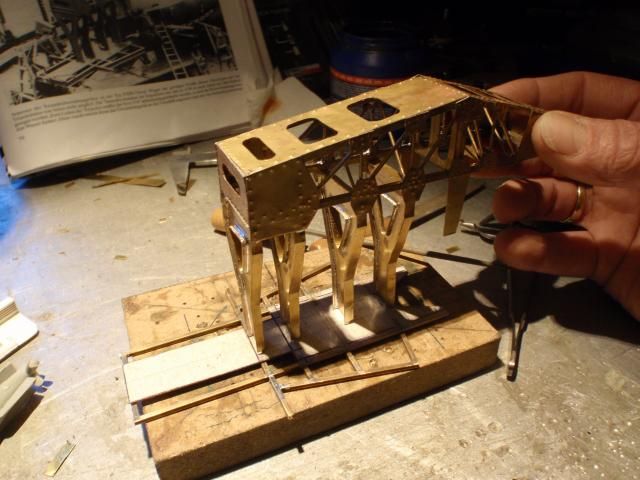
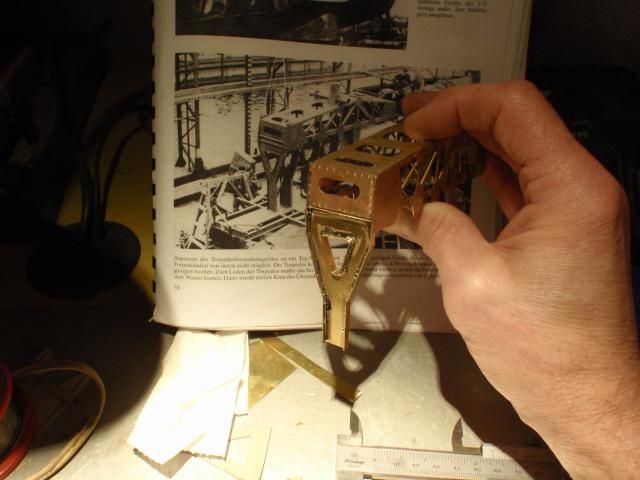
Again placed on the nose, now i have to sign off the points where is was fastened to the bow, two holes are allready made on the XXIII by Bronco, have to determen where the other two will be placed,
When marked i can build those small brackets and start thinking how to build the tables for the torpedos, this project is not yet over.
Manfred.Last edited by MFR1964; 02-22-2015, 01:09 PM.Leave a comment:
-
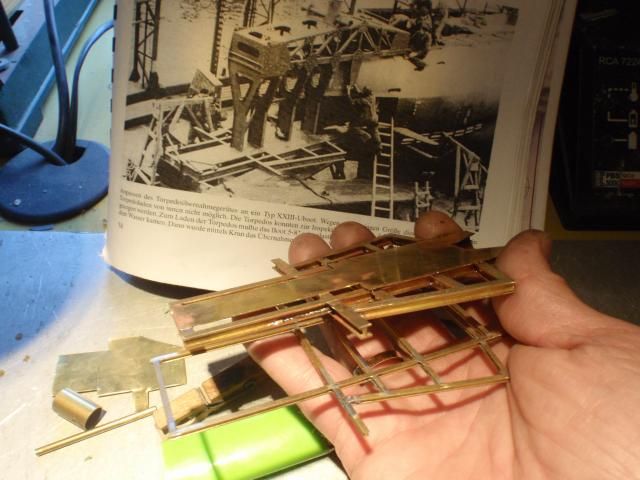
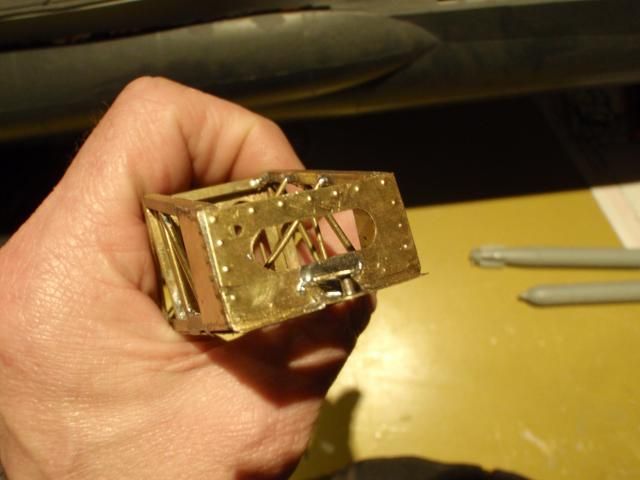
Yep, some oldfashion handwork, some tools, some copper, crappy documentation and a sharp eye.
Don't forget the pleasure of rebuilding parts when you messed up, yep, i love this hobby.
Manfred.Leave a comment:
-
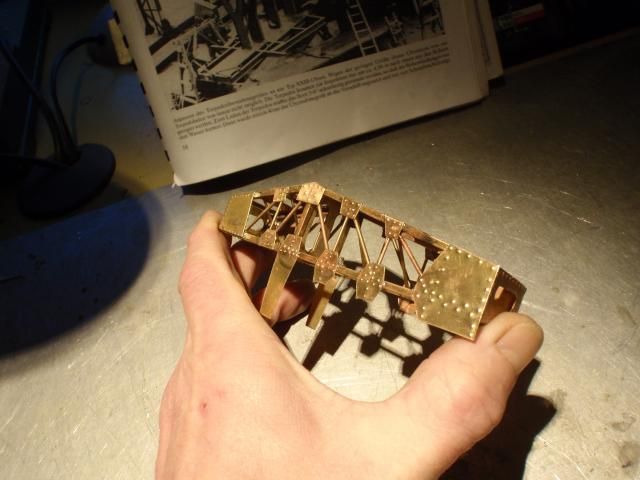
Compared to the mark 1 version, the next version is much better.
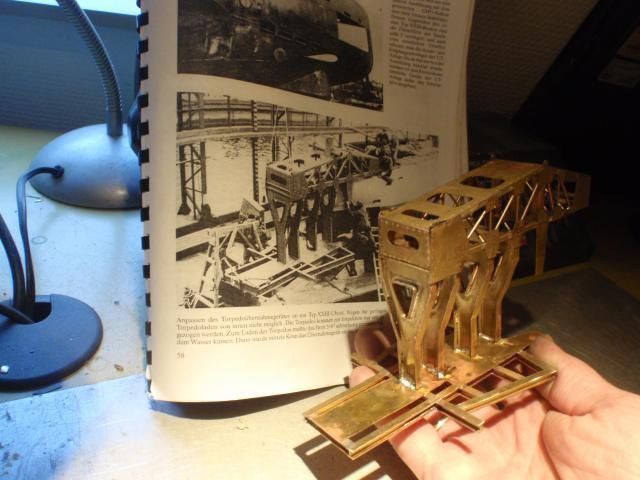
Satisfied with the newly builded lower part i married both parts with some soldering.

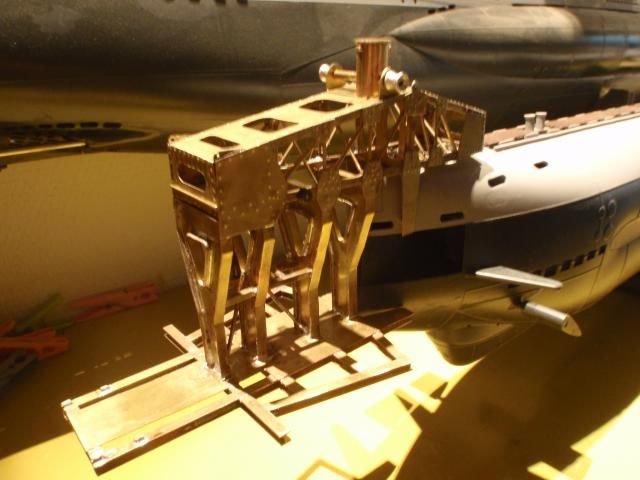
Finally i could dryfitt the loadingdevice as one piece on the bow of my XXIII, still a lot of work to do on the details, but now i know there's light at the end of the tunnel.
Manfred.Leave a comment:
-
Thanks Peter,
As i mentioned before, i still had to build three more pillars, as expected i got the hang of it, and made the rest of the pillars in two evenings, once i dryfitted them with the lower part i ran into a problem, the pictures will clarify,
Two more gave me this.
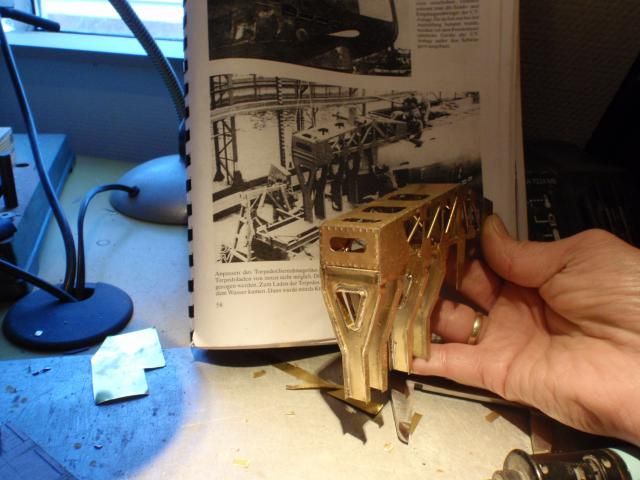
Added number four and soldered them to their places by carefully using a mini-torch.
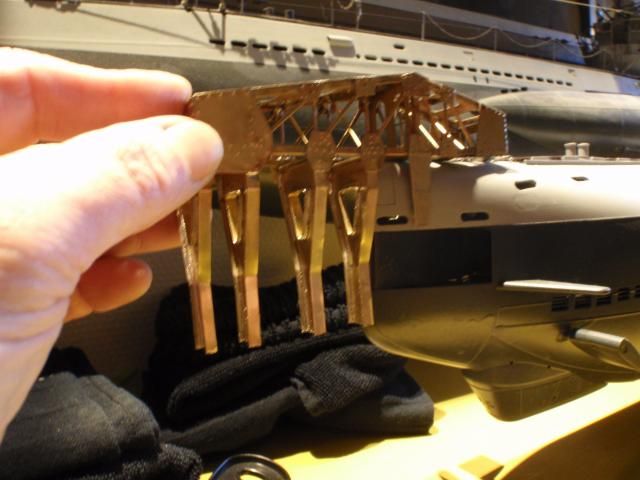
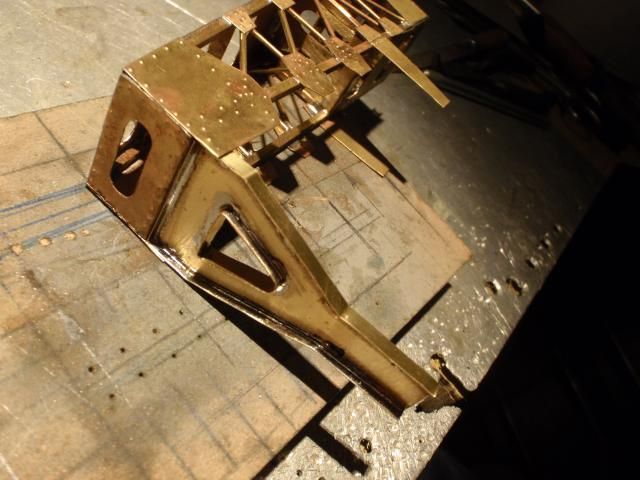
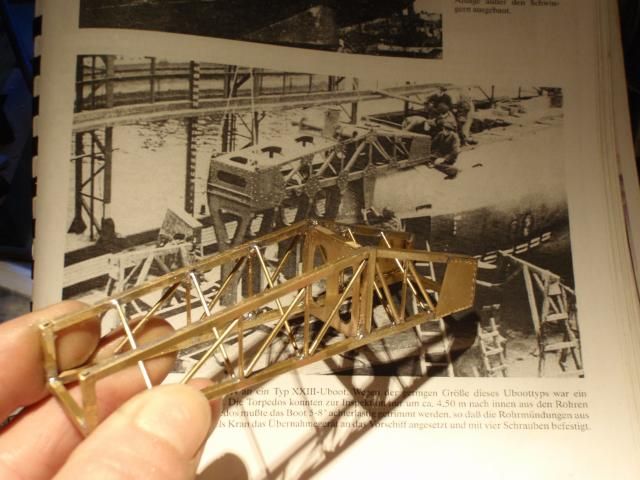
I couldn't resist it to dryfitt it to the bow of my type XXIII, i'm not really far off compared to the picture i have.
Now my little problem, i made a dryfitt to the lower platform, it struck my eye that the lower part wasn't that beefy compared to the picture i have, i've been using 2 mm H shaped bars, ran to the shop and got me some new 4 mm H bars, i have to remake the platform.
Luckely the old one can be used as a mold to get me the new one, another lovely day in scratch building!!!, hope to finish up the new one next week.
Manfred.Leave a comment:
-
Thanks Tom,
It has become a bit of a challence without drawings, so getting as near as possible is good enough, since the water is solid overhere it's keeping me off the street, both the XXIII and the V80 are ready to run this spring, and there will be a major overhaul this year of the type VII, the main batteries are dead and have to be replaced.
Manfred.Leave a comment:
-
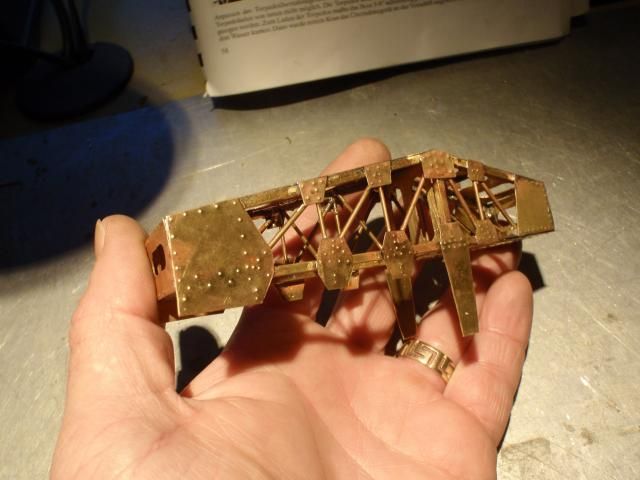
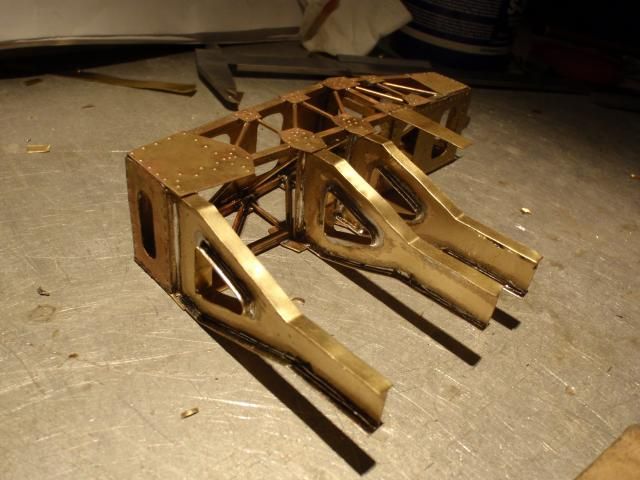
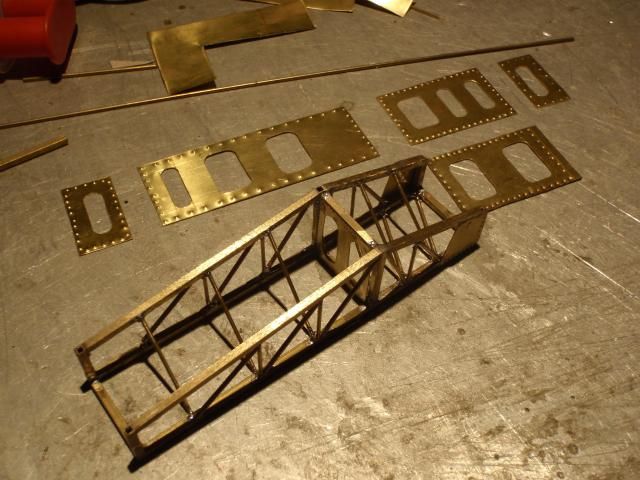
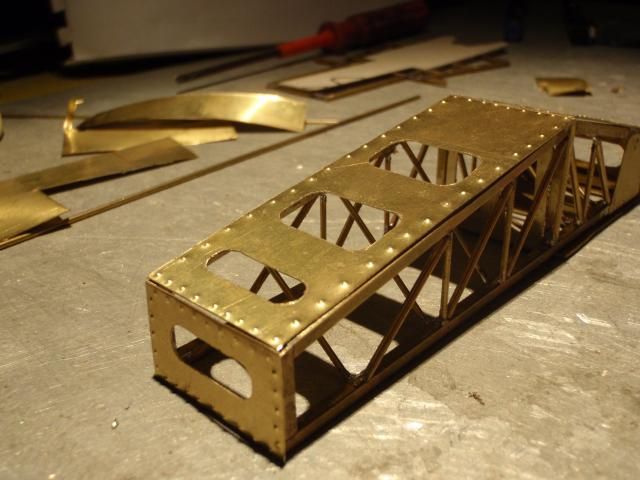
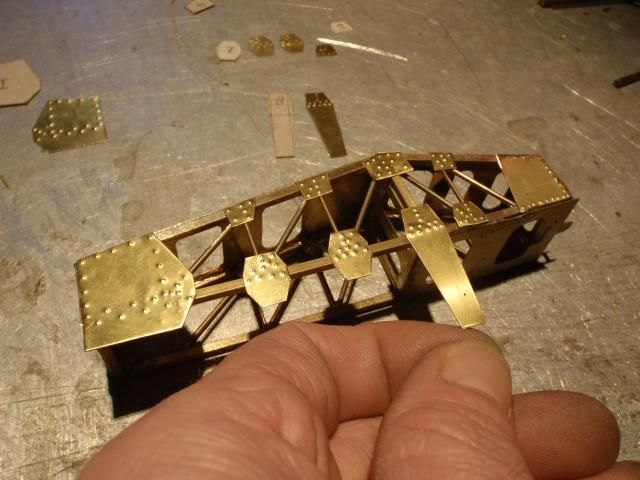
All reinforcement plates are soldered to both sides.
After each step i compare it to the pictures i have, would have been easier with some actual drawings.
Preparation for the stuff which is placed on top of the crane-part, still working on this.
The beginning of the pillars, made a cardboard mold to keep them even, in total i have to make four.
The first one is allready build, still have to make three more, from this one i learned a lot, next three will go faster.
Again comparing, just to see if the dimensions are much the same.
Manfred.Leave a comment:
-
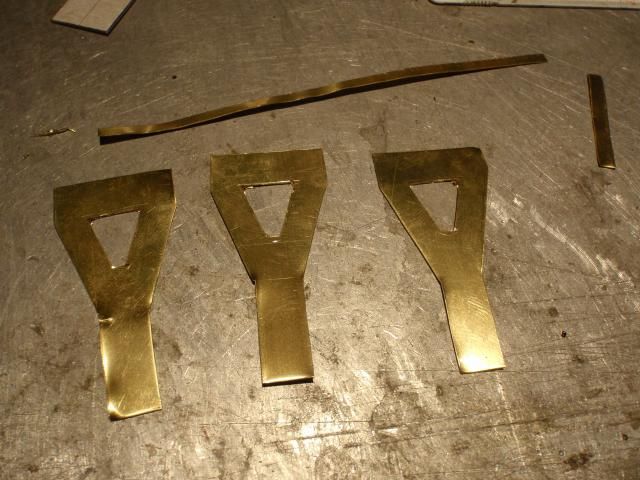
Still playing around with my little project, made all components to clad my construction and started with the reinforcement plates, pictures.
First i had to cut all plates to the right size, make all needed openings and added all rivets.
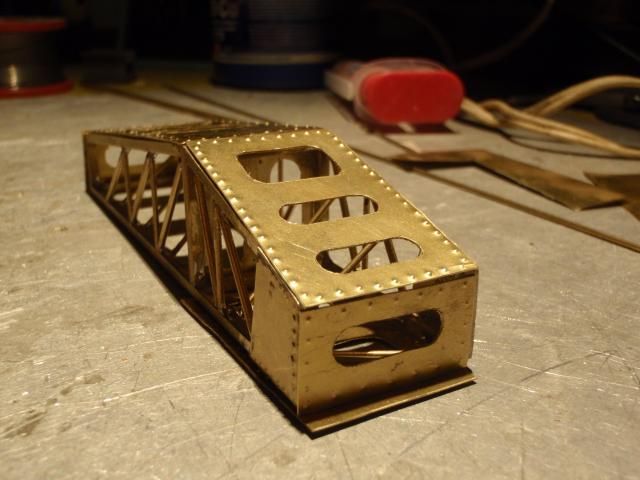
Dryfitting all plates before soldering.
Carefully used the torch and got me this.
Adding some details, as you can see i did this before soldering the plates, made live easier todo it before.
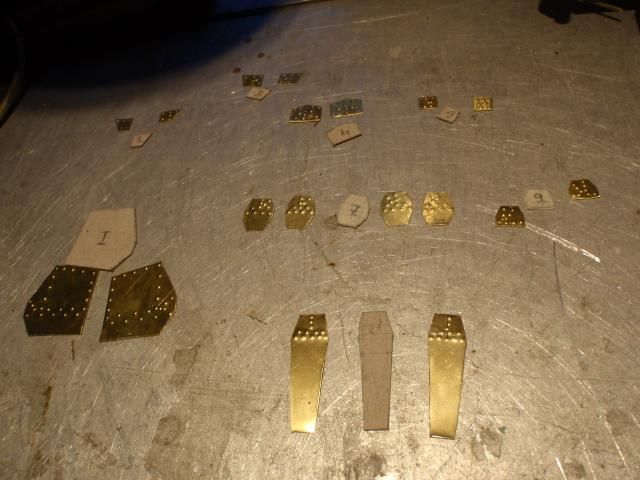
Then the fun started with making all reinforcement plating, first made some cardboard molds, and started cutting copper plate, added the rivets.
Dryfitting the parts on one side before i can solder , this is were i stand now, for now it was easy, making the pillars to connect the lower platform with the upper part will be a challenge.
Manfred.Leave a comment:
-
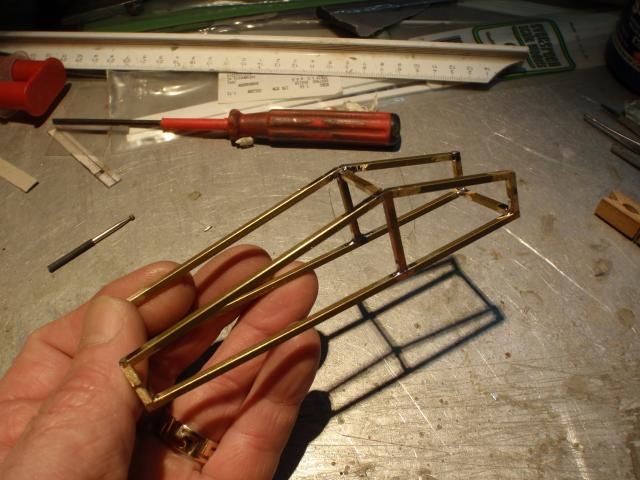
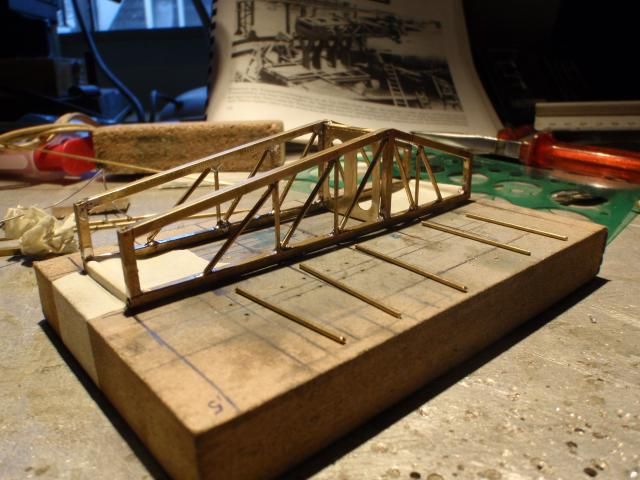
Builded up the upperpart, this gives me the base to start with.
A basic dryfitt to see if the dimensions are right, used some wooden clamps to keep it fixed.
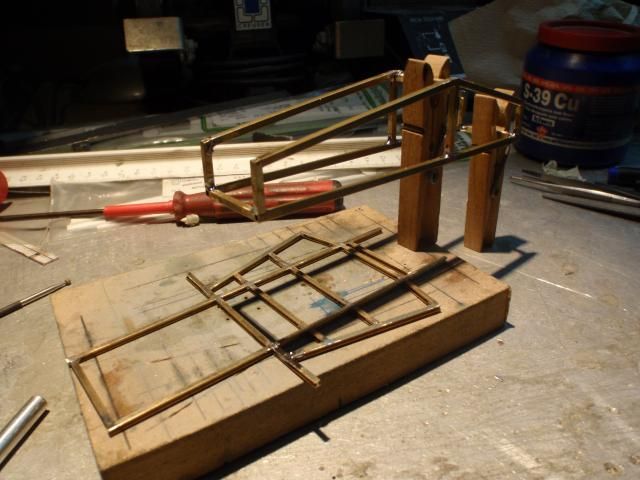
The fun part started with adding the stringers, used a drawn grit on the wooden plank to get it even for the other side.
Another dryfitt to see how it will stand against the XXIII.
Mirrowed the grit on the plank and added the stringers to the other side, the fun started again with adding the diagonal stringers.
Added another internal frame and the first pair of reinforcement plates on the end, it's starting to become something, next week i'll start with making the needed sheets for cladding this construction.
Manfred.Leave a comment:
-
Not sure if it's worth the effort, that was my initial thought, but once i did some research i took up the gauntlet.
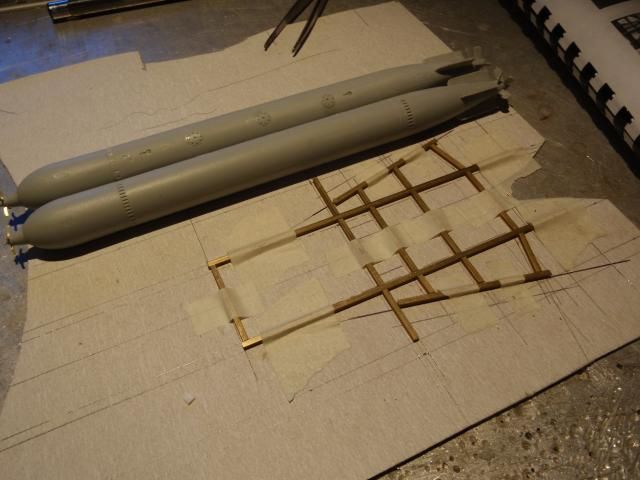
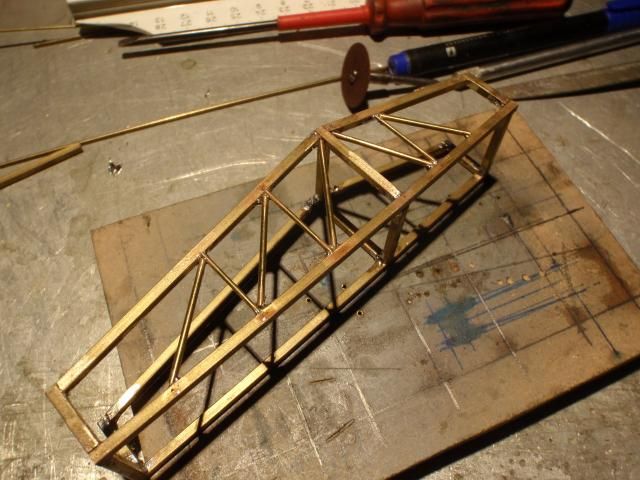
Like so many of my projects, it all starts on making a drawing on a piece of cardboard, got me some 3mm brass H bars and started cutting, immobilised the parts with some tape, in this stage i can tinker with the dimensions to customize it from the pictures i have.
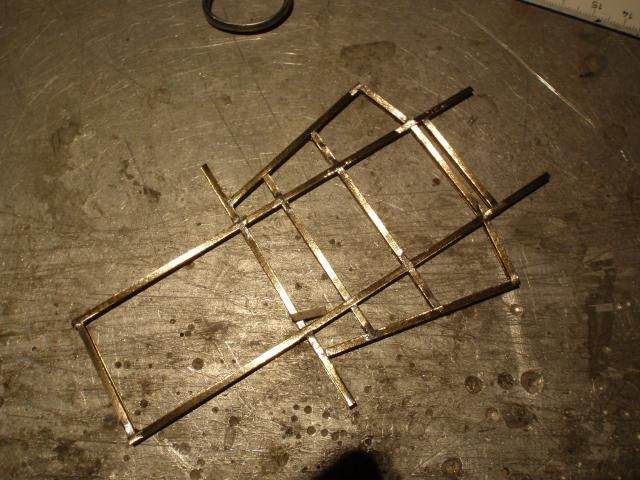
Heated up the soldering iron and went bananas, smearing enough solderingpaste gave this as the result.
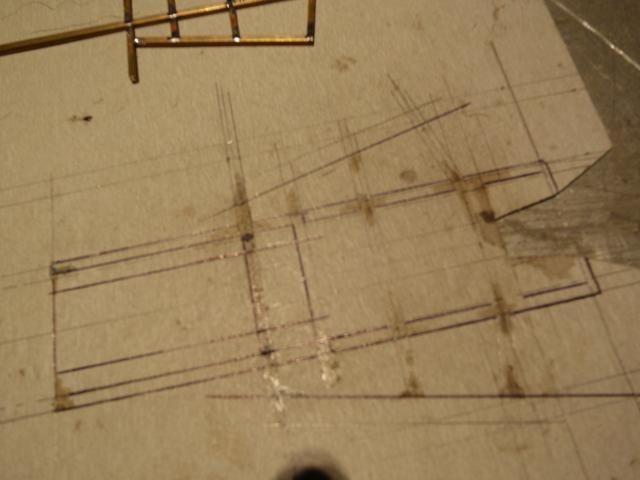
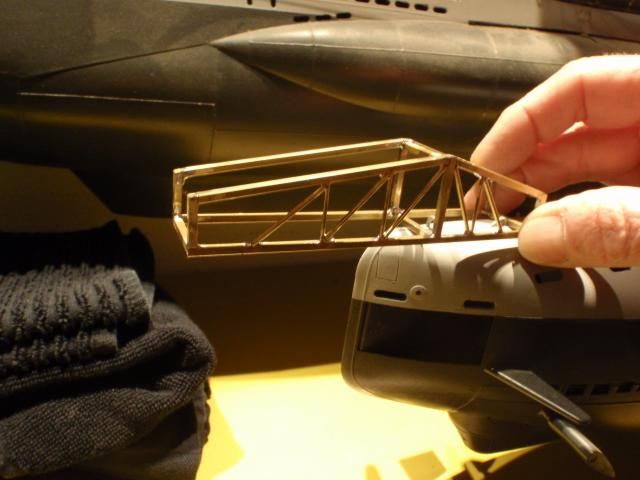
The cardboard mold was used for another item i needed.
After some clipping and cutting the mold has become the master for this deck, at the end it will support the torpedo's during loading, for now it is put aside, next week i'll start up the work on the upper component.
Manfred.Leave a comment:
Leave a comment: