
I like what you did with the bouy! The use of a magnet makes sense to me.
-
If you can cut, drill, saw, hit things and swear a lot, you're well on the way to building a working model sub. -
Thanks guys,
Driving this gritter in the open water will take some more weeks, it first has to complete my usual testcycle, this is the way i allways work, you've got to be patient otherwise you can loose your model by going too quick, with all the effort and hours of work that would be a shame.
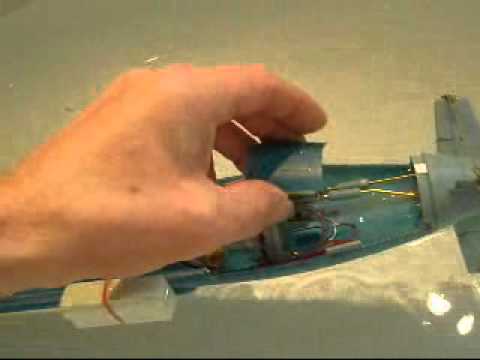
As for using the magnets, i needed a non complicated way of connection, the way your steering rods are connected gave me this idea, strong but easy to disconnect, only issue could be that the foam would give to much force on the magnets disconnecting premature,this however was tested before i cutted open the upperdeck.Last edited by MFR1964; 05-06-2012, 02:18 AM.I went undergroundComment
-
This weekend i did some testing regarding the SAS and the liftmechanism, well, the SAS is a winner, but the liftmechanism a bummer, when attached to the SD the boat rocks over to one side, i was able to compensate it with foam, but diving the SD gives me the next problem, she won't go under with the added foam.
This kind of testing gives you the impression how the model will act for real, in case of the liftmechanism i have to go to plan B, that by the way, was my initial thought, if only the model was slightly bigger it would work.
Also testing proved to me me i have to tinker the float and add some more attention to the safety bouy, had forgotten to do the dry check before plunging into the bath, another lesson learnt, check all freaking things before you enter the water!!!!!!
I let you guys enjoy my failure on the safety bouy, a bummer, and yeah, i still put it on youtube worldwide, my ego down the drain, i think i start knitting.
Greetings Manfred.I went undergroundComment
-
Lead to counter the bout..... lead and shift foam towards back.
Your close! and I look forward to your creative solutions.If you can cut, drill, saw, hit things and swear a lot, you're well on the way to building a working model sub.Comment
-
Knitting is so peacefull, just some wool, knittingpins, some classical music on the background, do you guys want sweaters of socks?I went undergroundComment
-
Instead of the rocker style induction closure mechanism maybe you could try the sliding type similar to your Type VII and V80.Make it simple, make strong, make it work!Comment
-
Ok, ok, i surrender, i'll throw my knittingpins into the basket, back to basic.
I'm starting up plan B for the peroscope stuff, had allready made some items in the past, untill i decided to build the liftingmechanism, at least i know how to build it for future subs, so to my opinion it's not waisted time.
As for the floater, just have to add some lead to get some weight at the float, have to refine that further, the solution is simple, dunk the SD into the tub and start adding enough lead untill the float will open, take some lead away, and presto, you've got your balanced counterweight.
With my test i was eager to get her into the water to test the SAS, i knew i was going to bumb into the floatproblem, first i wanted to know if the SAS would work, because you use a much smaller SD than it's bigger bothers, so it was critical to see if the volume inside the SD would do the job.
As i know now, it's working, now it's time to start tinkering to get me a smooth run.
Greetings Manfred.I went undergroundComment
-
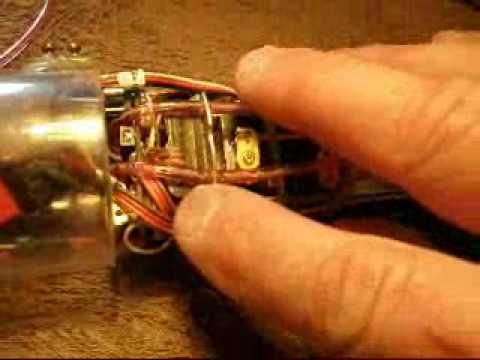
It's going slow with plan B, so to entertain you guys i've made a vid to show how i succeeded to stuff everything inside the SD, it's cramped, but it's working.
greetings Manfred.I went undergroundComment
-
I bet this little thing makes you better appreciate your bigger boats, Manfred.
DavidWho is John Galt?Comment
-
David,
If i look at my 'fleet' it's shrinking compared to lenghts, i'll sum them up, type VII 2 meter, type XVIIb 1,5 meter, V80 1 meter, little marder 20 cm and now this 212 gritter 58 cm long.
For me it's a challence to get this boat done, and yes, you're getting lazy inside those roomy dry hulls, only exception is the type VII, she is so crammed with stuff onboard, that even on that 2 meter boat i don't have room to add a rabbitfoot.
The type 212 is a good project to see if i still can do the trick with much smaller boats, you got to love her with the X tail, i'll also give a update about the mini SAS.
Made some more testruns inside the bath, balanced out the floater with some lead, works fine now, however, there is a catch with the mini SAS, done some deep submerged runs, it broached the surface but even with the balanced float i couldn't equalize the pressure, it stayed stuck due to the underpressure, changed the weight on the float by adding more.
Next problem which occured was, near the surface the float started to leak and the safetyfloat was activated, being carefull with my boats i would advice to leave the gassystem inside or trim your boat with full tank to the top of your conningtower, leaving the lead weight enough to equalize at that depth
I think the main problem is, the size of the dry parts of the SD compared to the ballasttank, in a way they seem to be just too small to deliver the air with a lower pressure so the float can equalize the pressure easely, as you can see there is some work to do, i'll certainly will do some more testing to look for a solution.
Greetings Manfred.I went undergroundComment
-
I gotta see some shots of your little MARDER! Wow! 20 cm!
Yeah, not much free air in the two dry spaces, what with all the devices in there gobbling up the volume -- you don't have to pump much air out of there till you reach a very high differential pressure. All too quickly, with the LPB running, pulling air out of the SD will only put enough air into the ballast tank to get a partial discharge of water
And it's that very high differential that is holding your snorkel head-valve open, even against the weight of the float and the ballast you added to it to pull the valve open one the float broaches into the air. The cure here is a simple one: lower the area of the valve opening. As pressure applied to hold the valve shut is directly proportional to surface area and differential pressure (one atmosphere outside, a low fraction of one-atmosphere within the SD), reducing the area of the valve elements will reduce the force exerted on them holding the valve elements in the 'shut' position. Sleeve some brass tube within the open end of your head-valve till it's about 1/16" diameter inside (just at the head-valve, not the entire length of the stand-pipe that leads down into the SD). Your head-valve will open, no matter how sever a vacuum you pull in the SD. Yes, the restricted valve area will slow air flow a bit, but not enough to matter in a system that requires so little air-flow to effect equalization of the SD with atmosphere and discharge of ballast water through the snorkel head-valve induction line.
You're induction line is flooding likely because of the added ballast you put on the float to fight the pressure tending to keep the valve shut when the SD has a sizable vacuum inside. That weight is reducing the seating force of the head-valve. Another good reason to reduce the head-valve valve element area: you can take off some of the float ballast weight, achieving a tighter seat on the closed head-valve when you dive the boat. So, the safety float-valve did its job? Good. I recently ran my 1/72 SKIPJACK with a like SAS aboard and on one run forgot to hook up the snorkel head-valve flexible hose to the SD nipple ... the safety float-valve saved my ass! No water in the SD. Whew!
DavidWho is John Galt?Comment
-

This i my scratchbuild marder, by the way, i measured it up, sorry to say, but she is 25 cm long, i know, much too big.


Some close up shots of the cockpit area, those guys really had balls to get into such contraption and attack the enemy at dusk.
Due to the size and used transmittor she is a surface runner, most rc parts came out of little RF toyboats, designed a special construction with the rudders to steer left and right, by using the buttons on the transmittor i can go forward, backwards,left and right.
Runningtime is for about 1 hour, drove her as well inside the open water as in the pool, range is about 5 meters due to the toy transmittor.
David,
I will give it a try with making the diameter of the headvalve opening smaller, let's see what it will bring me.
And today mister postman arrived, thanks for all the stuff, tried the launchers in the 212, with some adjustments it's a tight fit, don't want to mutulate your nice designed tubes.
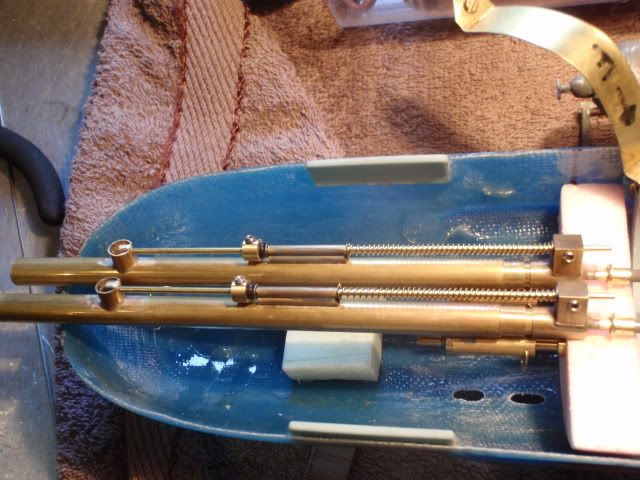
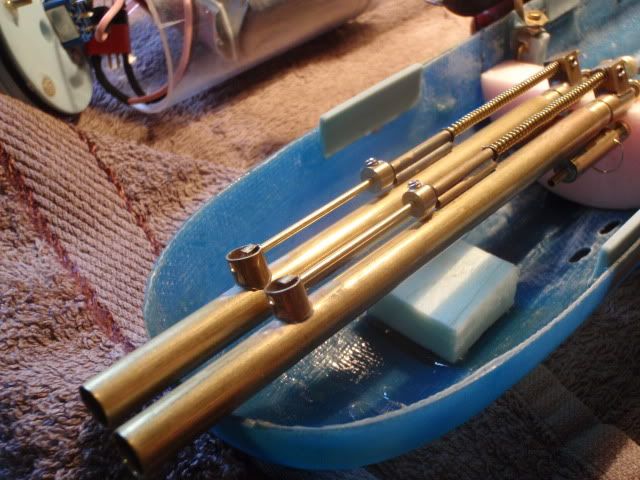
As you can see it is possible to fit them in, adding the torpedohatches will be tricky, i wonder if it's worth the effort of making them, have to see about that.
I will re design the spare bulkhead of the kilo SD to get a idea how i have to fit everything together, if i can make this work i'll join it later with some modification on the SD to the type 212.
Greetings Manfred.I went undergroundComment
-
That MARDER is fantastic! What a feat of model building.
You can cut the forward end of the tubes back to the stop-bolt housings. And you can cut off the breech-block nipple, blank it off, and put a new one on the side of the breech-block -- that to give you clearance to the fowarward end of your SubDriver.
Oh ... COME ON!? You're not thinking of a set of practical shutter doors are you!?.............
DavidWho is John Galt?Comment
-
Do it! Do it! Do it! (please - if it helps)If you can cut, drill, saw, hit things and swear a lot, you're well on the way to building a working model sub.Comment


Comment