-
Make it simple, make strong, make it work! -

 Who is John Galt?
Comment
-
Just beautiful David. You continue to inspire me! Thank you!Comment
-


 Who is John Galt?
Comment
-
David, at Groton we spoke about what type of Alumiite you use for moldmaking. Seems appropriate here to ask what that is. It's probably mentioned somewhere in 'Toady's work', but not easy to find that answer. And others may benefit from knowing.
I'll still send you an email on the o-rings and double o-ring push rod seals.
I've been on & off about resistance soldering. Been put off by the price when my cheapo Radio Shack or other soldering iron does the job. Is a 20 watt resistance unit suitable for what we do in this hobby? Again, others may be interested.
Last edited by Ken_NJ; 06-08-2022, 03:29 AM.Comment
-


 Who is John Galt?
Comment
-


 Who is John Galt?
Comment
-
Dave, you have outdone yourself.Last edited by Das Boot; 06-10-2022, 09:50 PM.Of the approximately 40,000 men who served on U-boats in WWII, it is estimated that around 28,000 to 30,000 lost their lives.Comment
-
Of the many facets of radio controlled modeling, r/c helicopters and r/c submarines stand out as the two types that demand the most user involvement in their construction and maintenance. This screed describes just some of the 'after action' procedures that must be performed on an r/c submarine after a days outing at the local lake or pool.
maintaining an r/c submarine (and I'm talking about hand crafted, fully capable submarines, not Walmart or mail-order ready to run toys) requires work before, during, and after a days outing. I've broken these tasks into three parts: pre-mission, mission, and post-mission.
Pre-mission is what has to be done to ready, check out, and assemble the WTC to the models hull and get the two sub-systems to work as one. Mission checks are done at the boating site during the operation of the model submarine -- it's during this phase that problems encountered are either corrected or logged for later referral and action once the model is back home. Post-mission operations deal with the preservation and, where required, repair of faults identified during the mission phase.
This discussion will focus on the post-mission checks and operations.
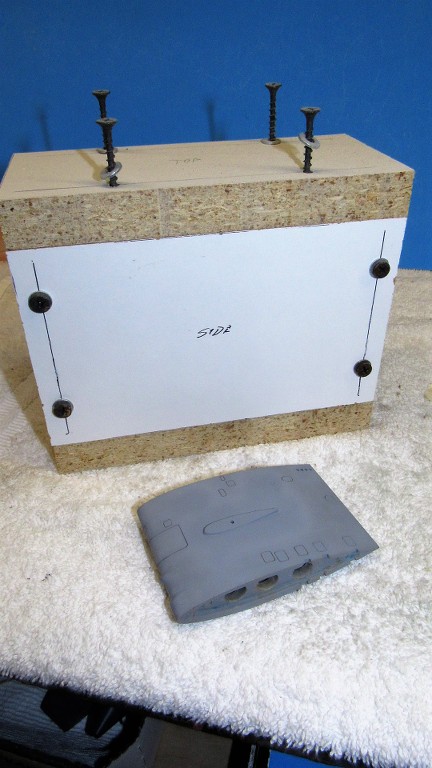
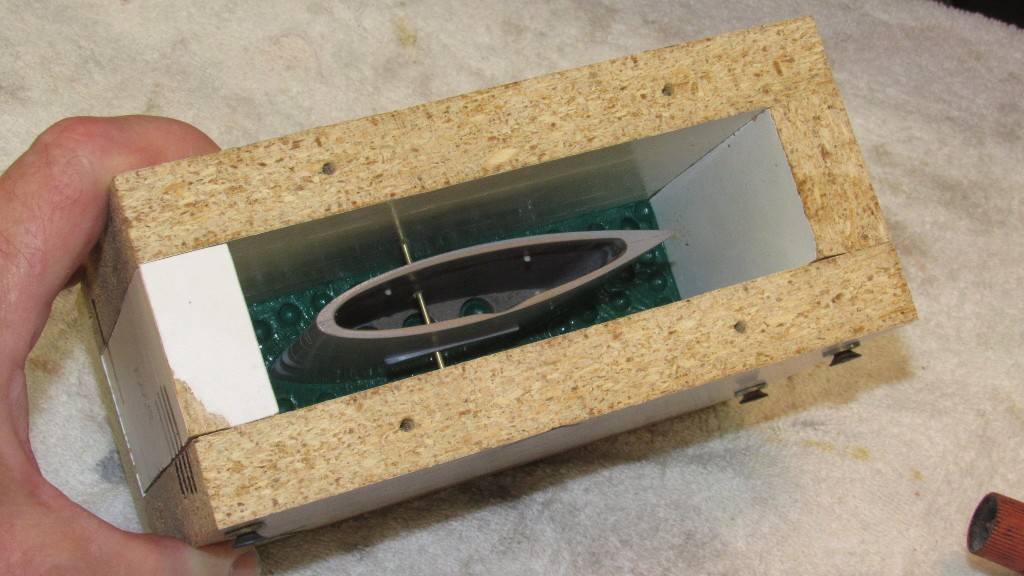
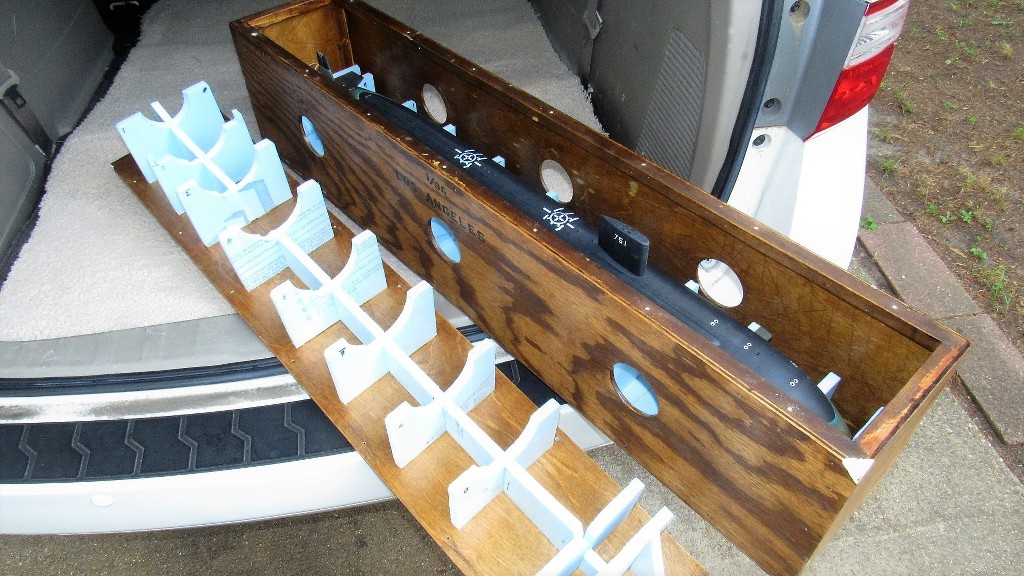
Unboxing the model(s) after running at the local lake or pool. A little appreciated necessity -- and a vital element in support of the safe stowage and transportation of the model -- is manufacture and use of a well padded, stout box, as seen here. Think about it: you put so many hours of work and laid down so much money to achieve the model, why risk it all to a simple fender-bender on the highway (ain't' that right, Johann!?...). It's not enough to wrap the model submarine in a blanked, and toss it into the back-seat. No. You place it into a well designed, purpose built storage-transportation box!
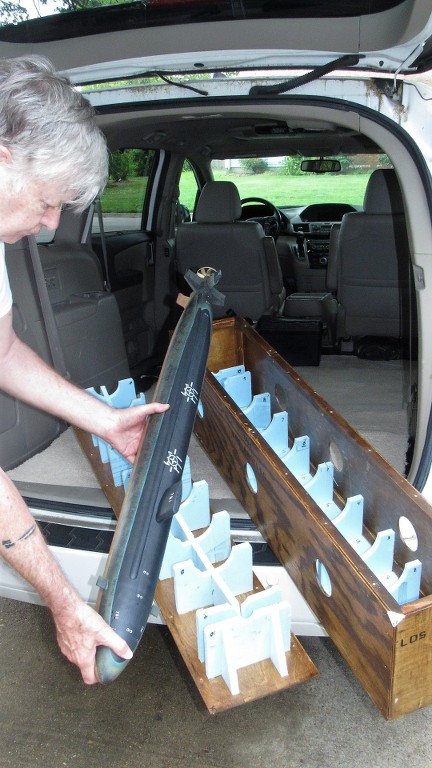
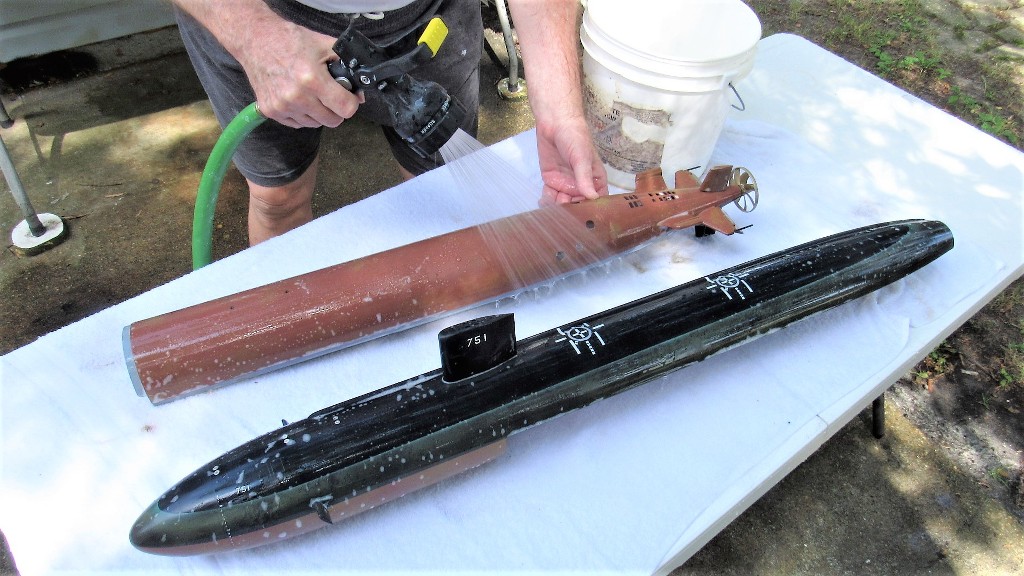
This 1/96 LOS ANGELES class model submarine had been operated at a distant lake that was thick with duck poop, leaves, and algae. As there was no fresh water on site to give the model a preliminary rinse-down the model went into its shipping box for the trip back home covered in lake gunk. Obviously the first post-mission check would be to clean off the crud.

Cleaning is a simple matter. Some soapy water is prepared and the model hull and WTC, outside and interior, are aggressively scrubbed with a soft-bristle paint-brush to break loose all the gunk.
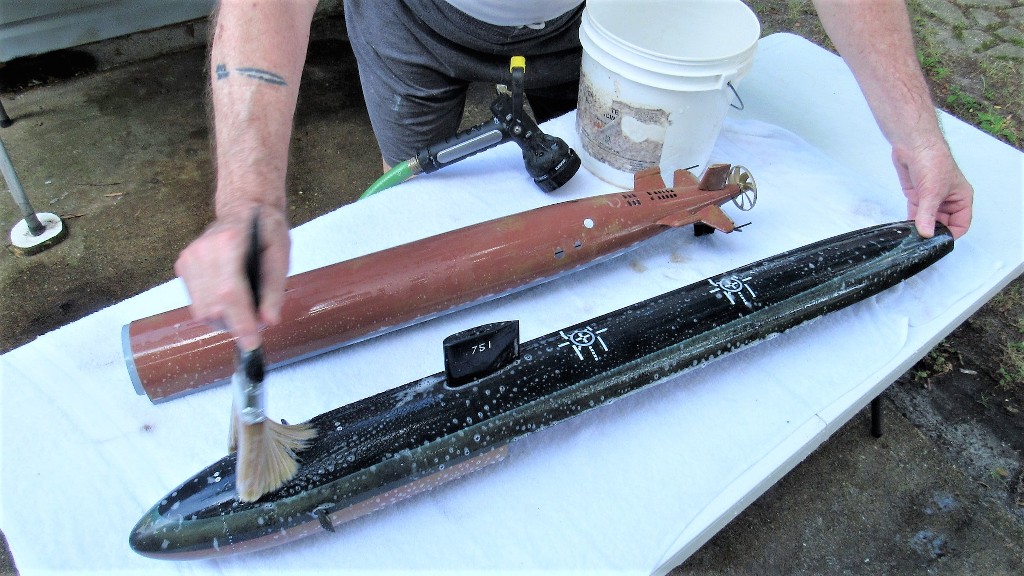
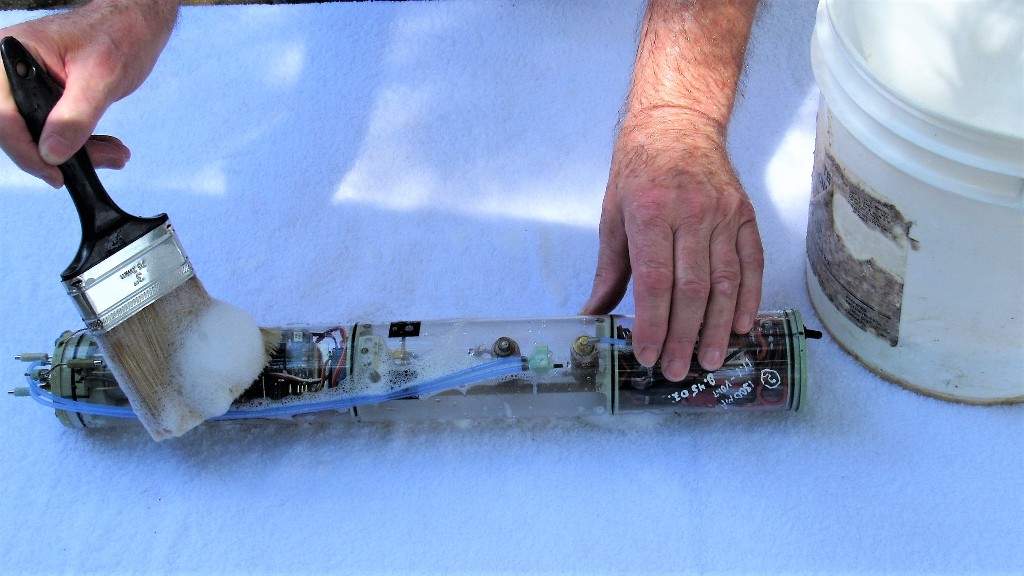
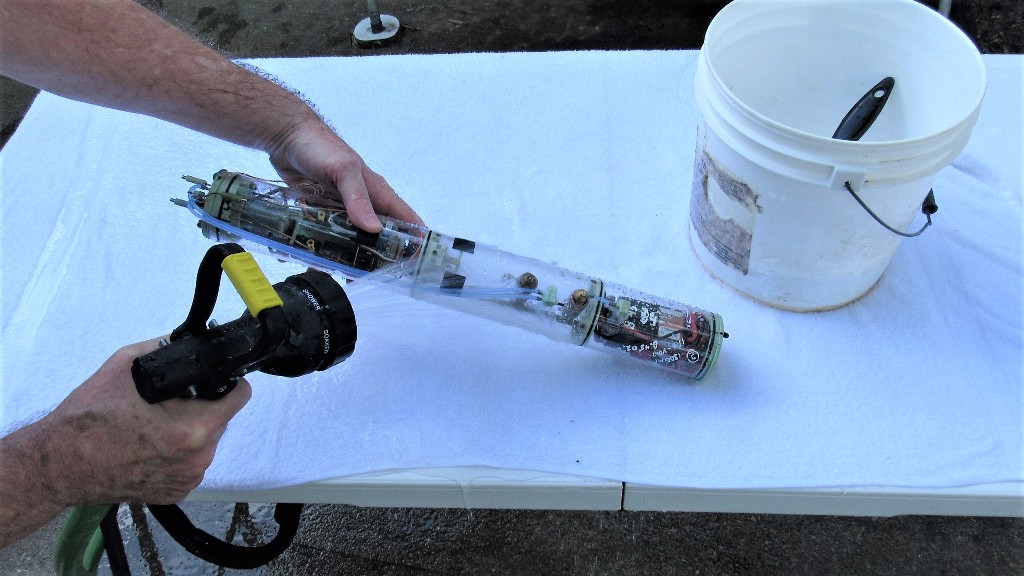
The removed WTC gets the same treatment. Not forgetting to get plenty of soapy water into the ballast tank as well.
And the hull and WTC get a complete rinsing with fresh water applied as a low-pressure shower.
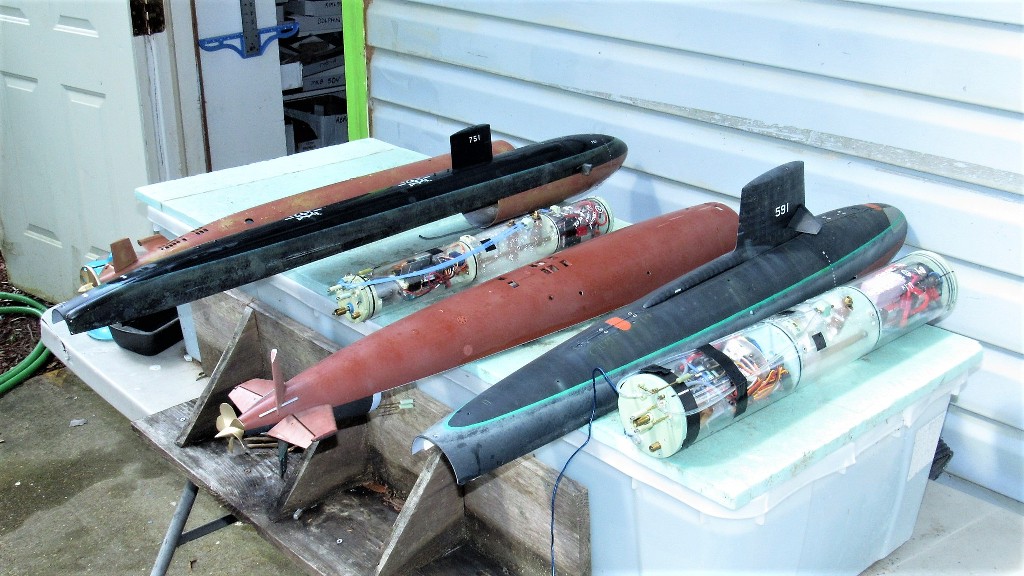
The cleaned hulls and WTC's are left to dry off.
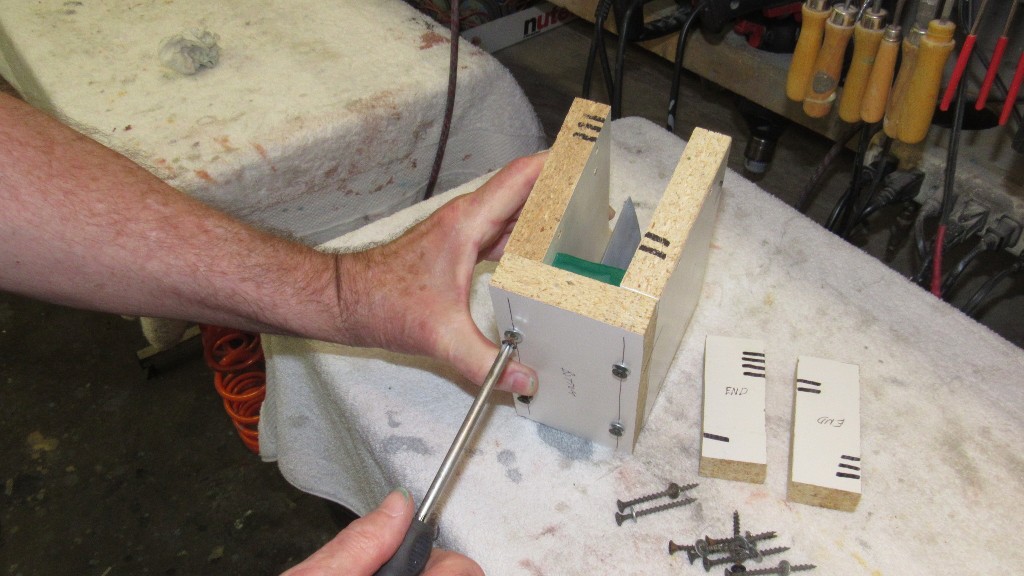
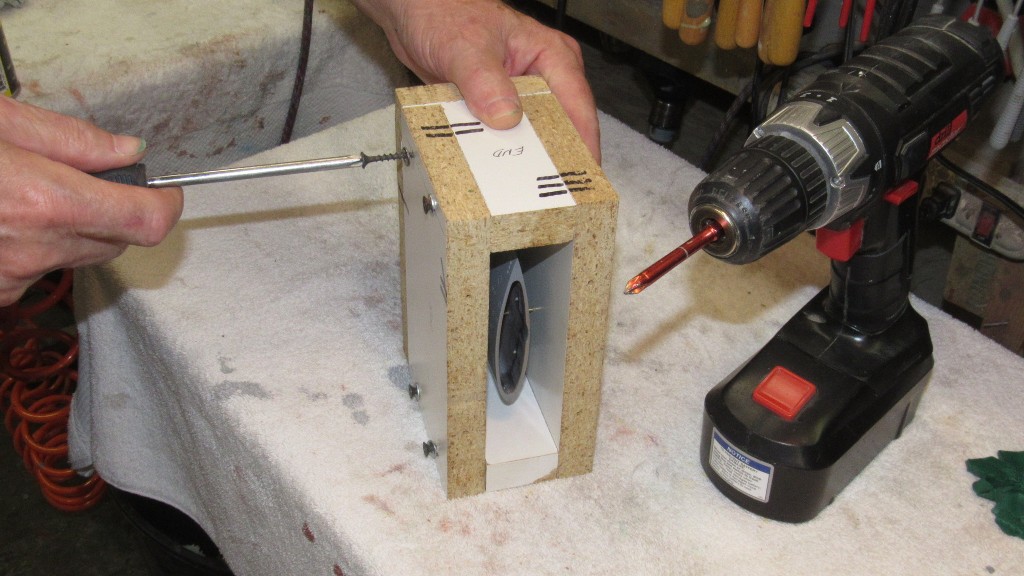
At this point each WTC is taken into the shop, opened up and any issues identified during the mission phase addressed. The WTC is made safe by venting off the gas charge in its emergency blow bottle, and the battery removed and put into storage. The forward and after bulkheads removed and the entire unit put into a dry, dark environment for storage.
And the hull returned to its transportation-storage box which in turn is taken inside and placed in storage.
 Who is John Galt?
Comment
-
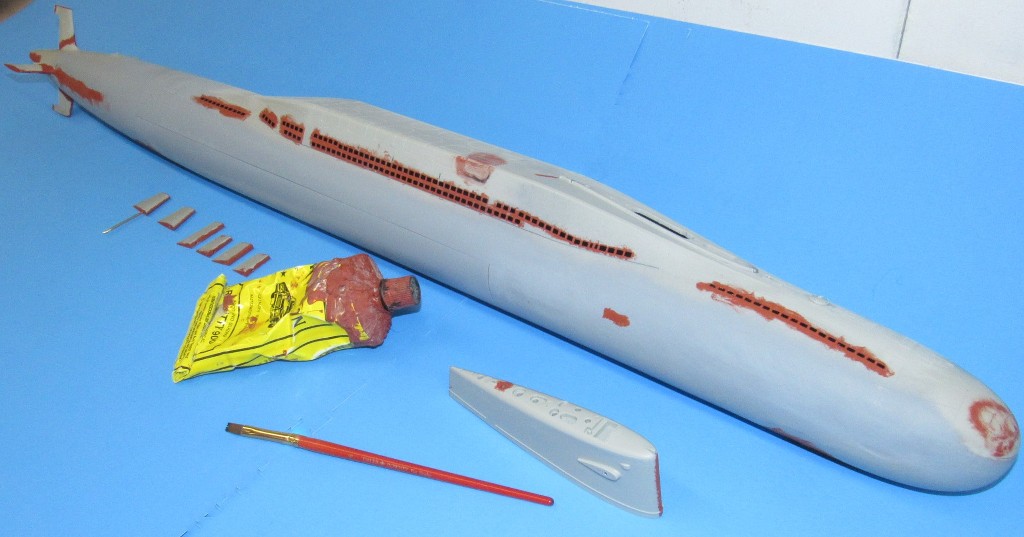
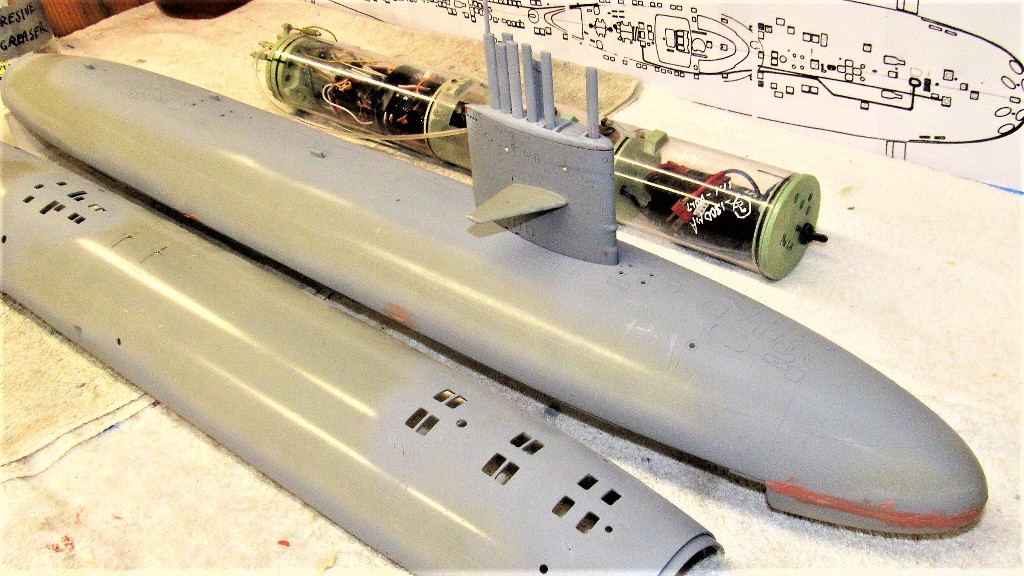
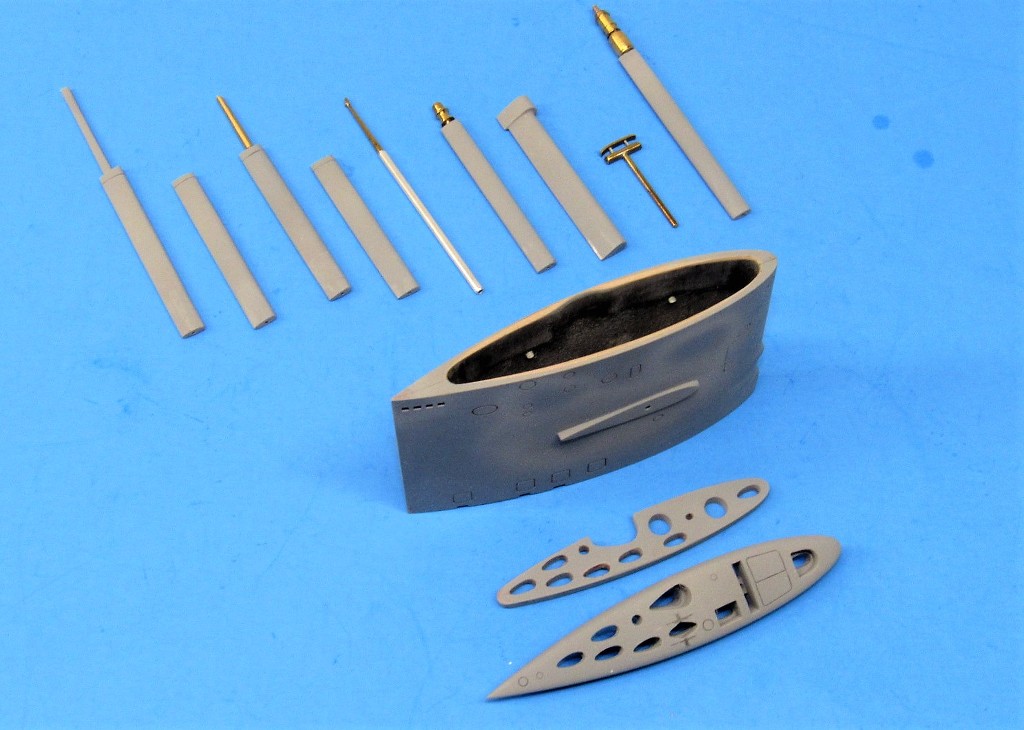
Well over a year ago I agreed to 'improve' a 1/96 STURGEON set of masters Bob received for kit production. That job (finally) is nearing completion and Nautilus Drydocks will soon be offering GRP-resin-metal kits for sale. Below is a build-up 'proof' kit to give you an idea of how the eventual product will look.
The following is a quick re-cap of the work done to correct some flaws found on the hull masters. New masters were created to further enhance the accuracy and ease of assembly of the eventual kit parts. And, finally, the creation of the production tools Bob and his crew will use to manufacture kits for sale.
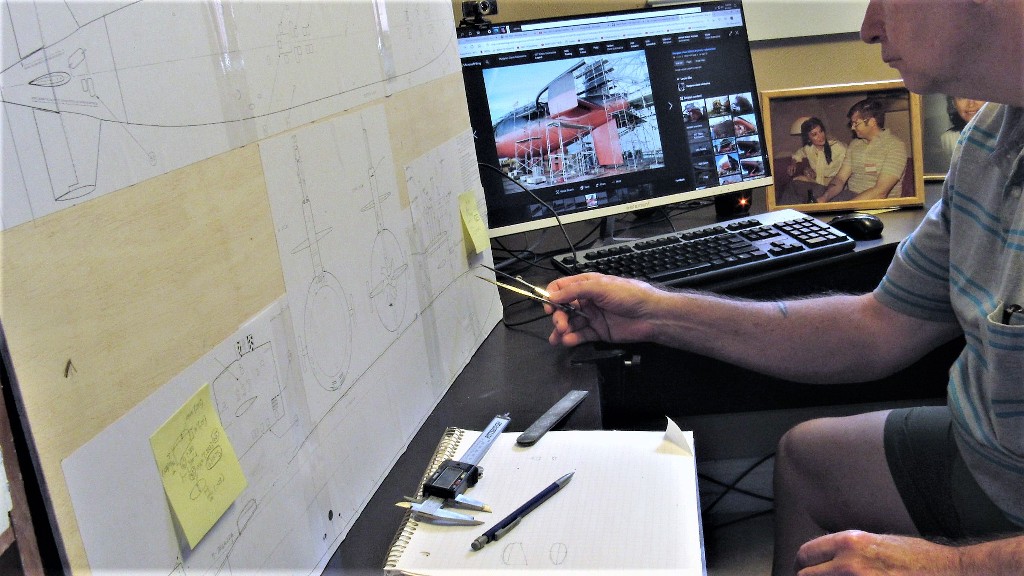
When we received the masters, I broke out my copy of the excellent Greg Sharpe (Deep Sea Design) plans of the STURGEON and opened up the hard drive to spill out all the STURGEON stuff I had collected over the decades. These resources used to validate/correct the hull master, as it was found during this validation phase that I would be better served to scratch-build my own tail-con, sail, propeller control surfaces, and appendage masters and tools. The job started out as an assumed quick upgrade, but quickly took on the proportions of a major re-work; it grew from simply making production tooling to a complete rehab!
****!
 e
e
The only useful original item of the package I received for improvement and tool making was the two halves of the hull master. The rest were put into safe storage for eventual return to Bob. This job was going to turn into a handful!

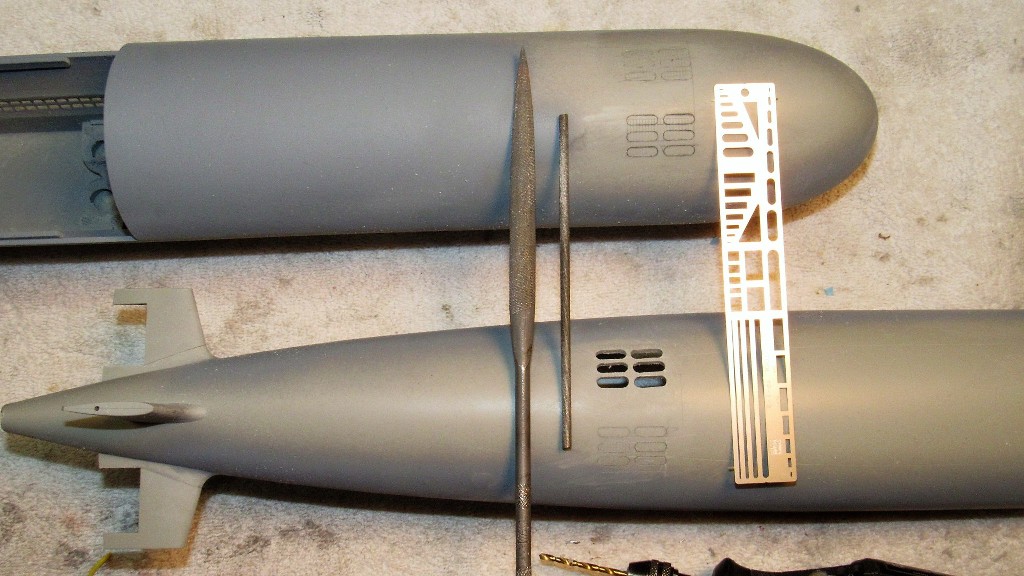
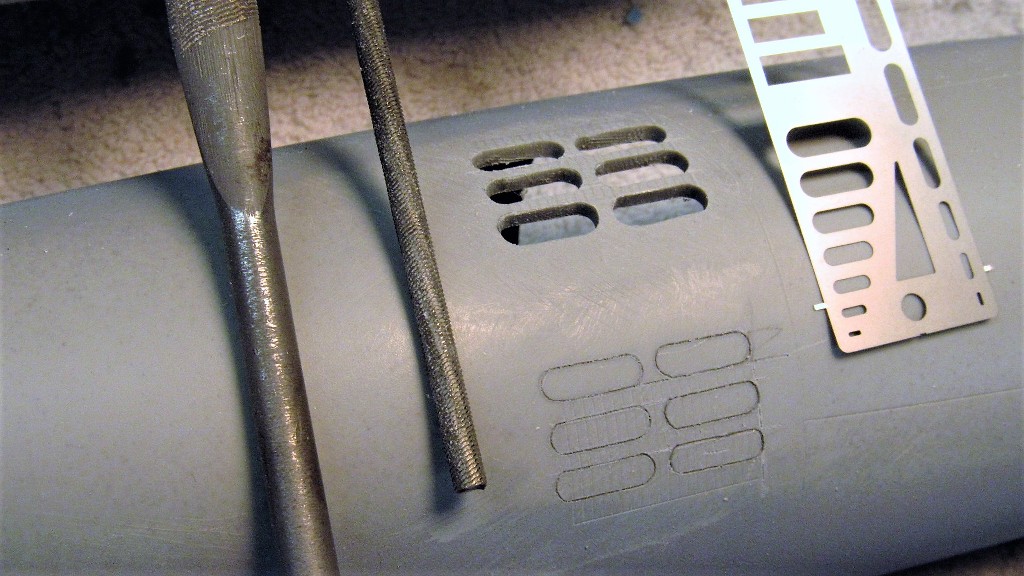
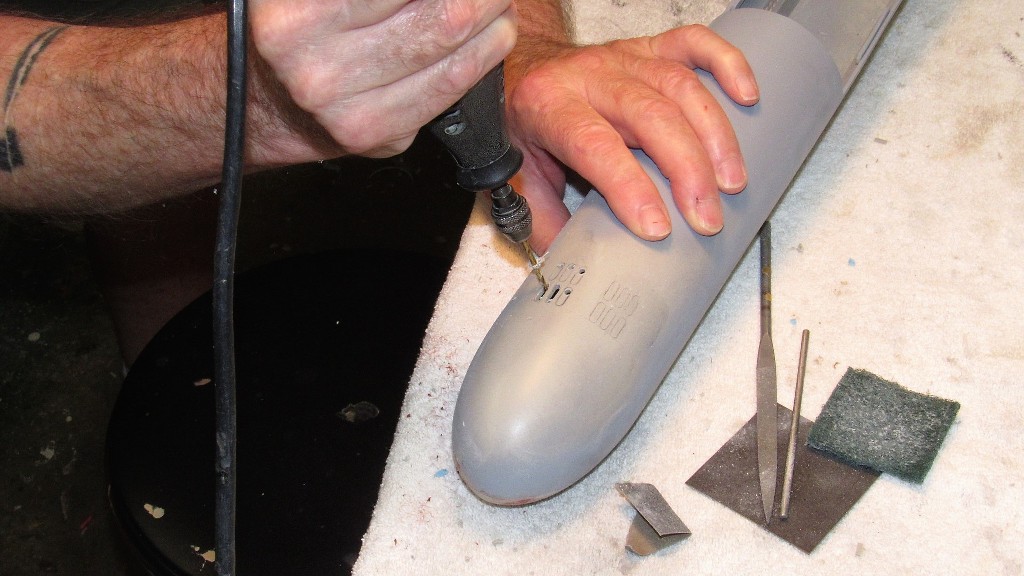
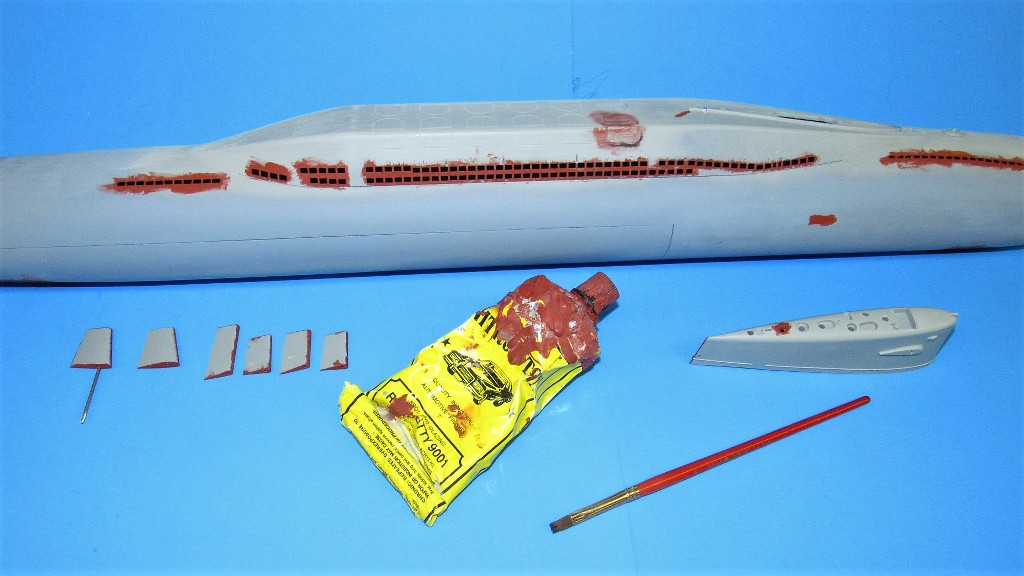
I found the hulls scribed (engraved) detail to be fine -- no wonder, I did that part of the work for the originator of this kit about 25-years ago! However, for some unfathomable reason, he raised the two escape trunk hatch flats well above deck level!
Nope.
Aint' so on the real boats. So that had to be fixed.
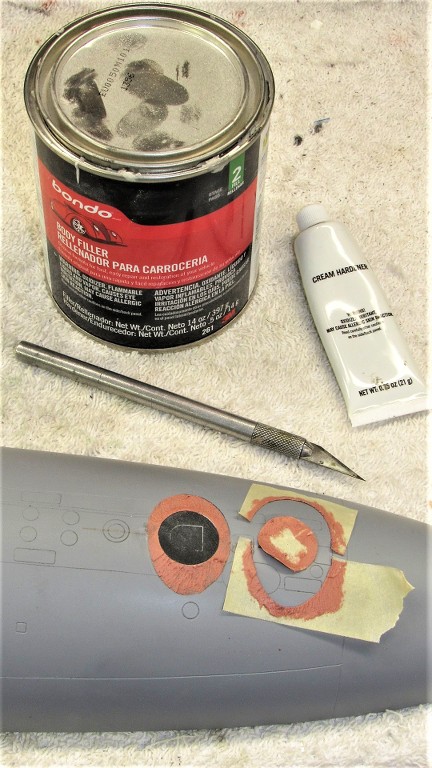
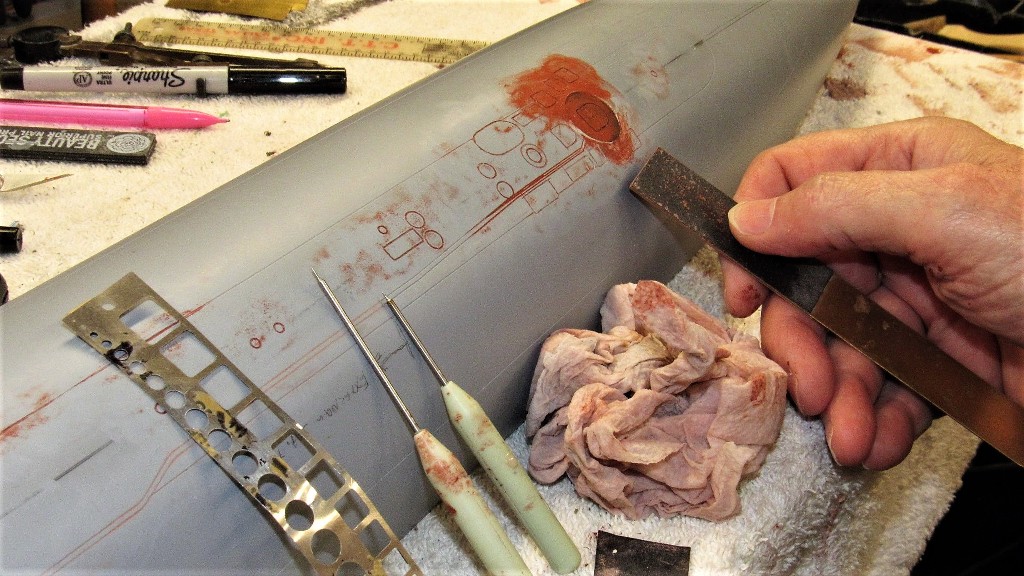
The existing engraved lines were deepened and enhanced -- I've learned a few more things about STURGEON class boats since my initial work scribing the master. By the way, what I received was not the original wooden master, but a 'copy-master'. This master [sic] formed from GRP. Who knows how many 'masters' of this hull are floating around the world as I write this? I hear the originator sold masters to several kit producers. Did the originator inform those guys that they do not have an exclusive deal?
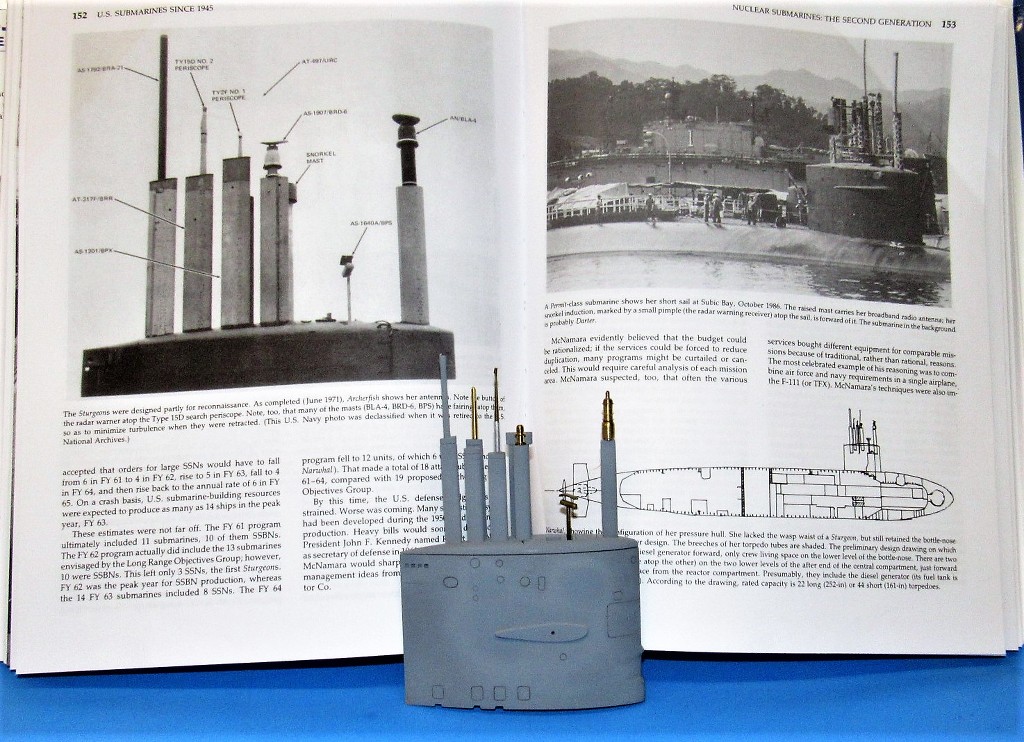
The completed sail and mast-antenna masters I scratch-built in support of this job. Note the use of Norman Friedman's excellent book, U.S Submarines Since 1945 as one of my sources on this class of submarines.
One must be careful as to who is your source of documentation, as there is a lot of bull-**** and repetitive crap out there. Vet your sources:
Friedman, Rossler, Christley, Sharpe, Traplet Publications -- good.
Palmar, Batchelor, Weisswesser, Challenge Publications -- iffy or just plain crap.
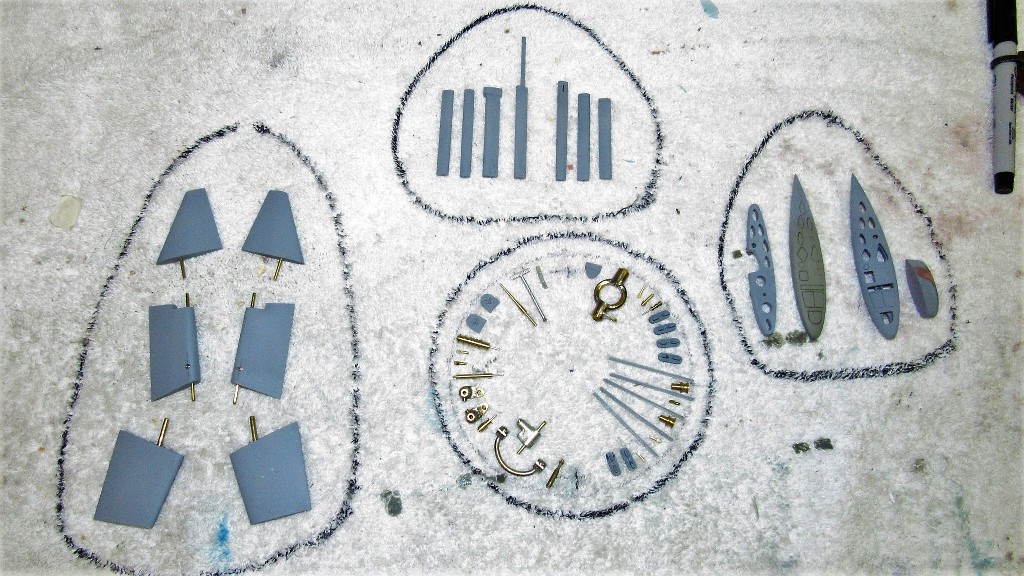
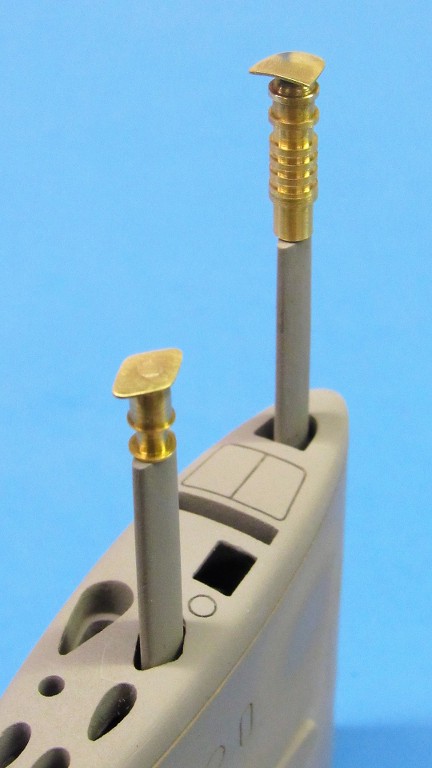
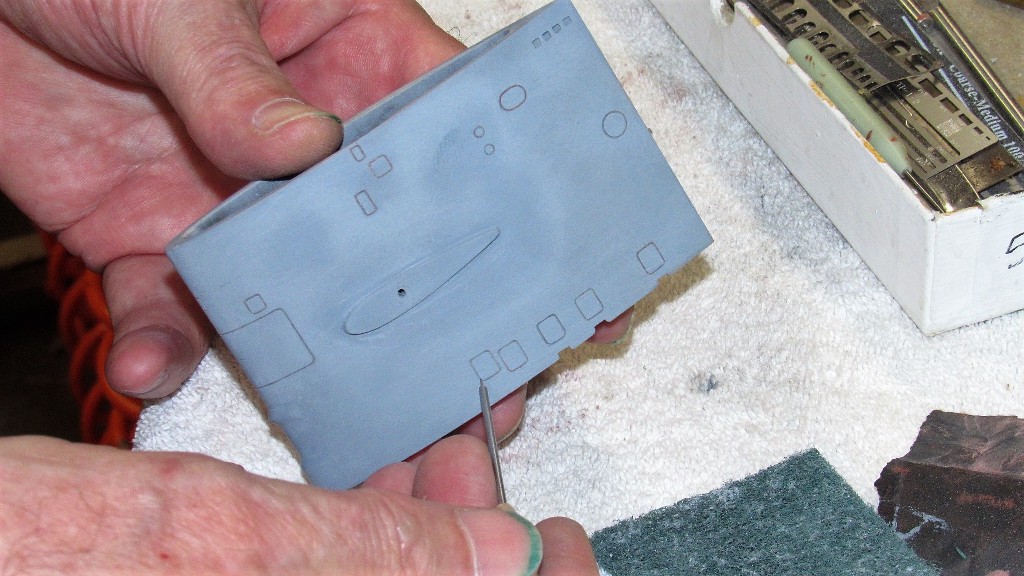
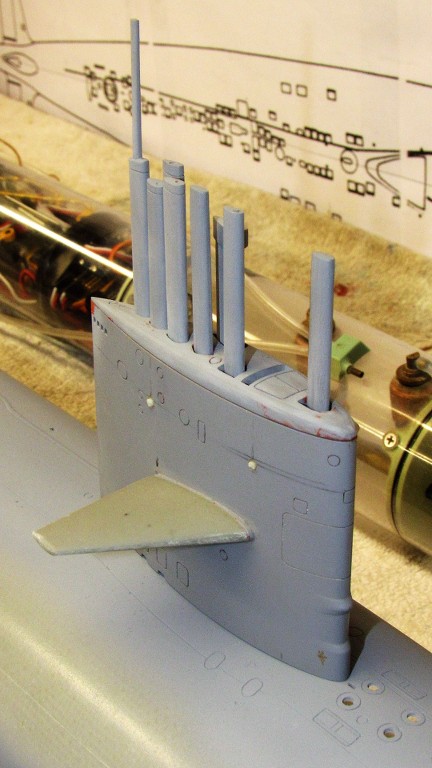
Always endeavor to give the customer more than they expect. These are the masters of the sail, sail top, mast foundation, and fairings. Most of these built up from dense RenShape.
A model plane's cockpit is the first thing you look at. Likewise, a model submarines sail with its distinctive array of masts and antennas will draw the viewers eyes. So, I took the effort to provide the sail with the entire array of fairings, antennas and scopes unique to the STURGEON class. I've engineered things so the fairings and masts can be easily installed/removed. For an r/c submarine I leave most of them off and in safe storage when running, and only mount the entire array when the model is on static display.
Yes, I'm a dumb-ass! at this point in the work I stupidly provided a fairing sticking through the lookout opening atop the sail... I have since fixed that screw-up.
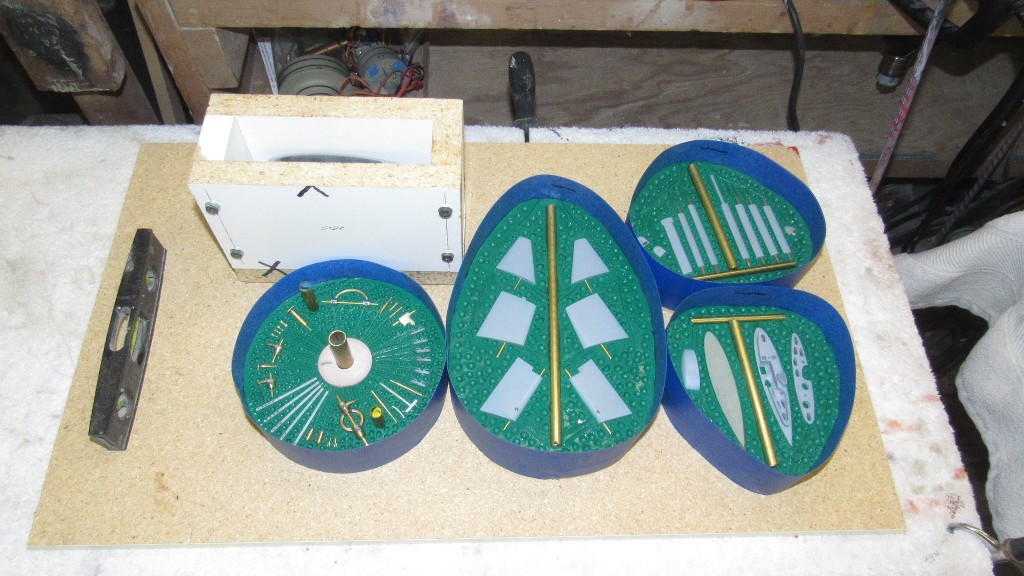
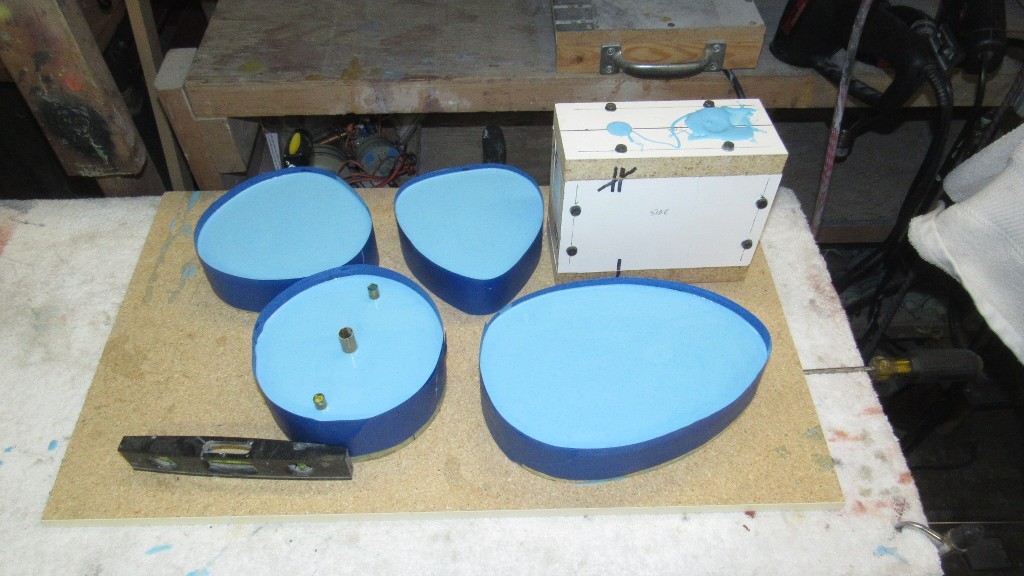
Once the masters were completed, I used them to give form to the production tooling needed for kit production.


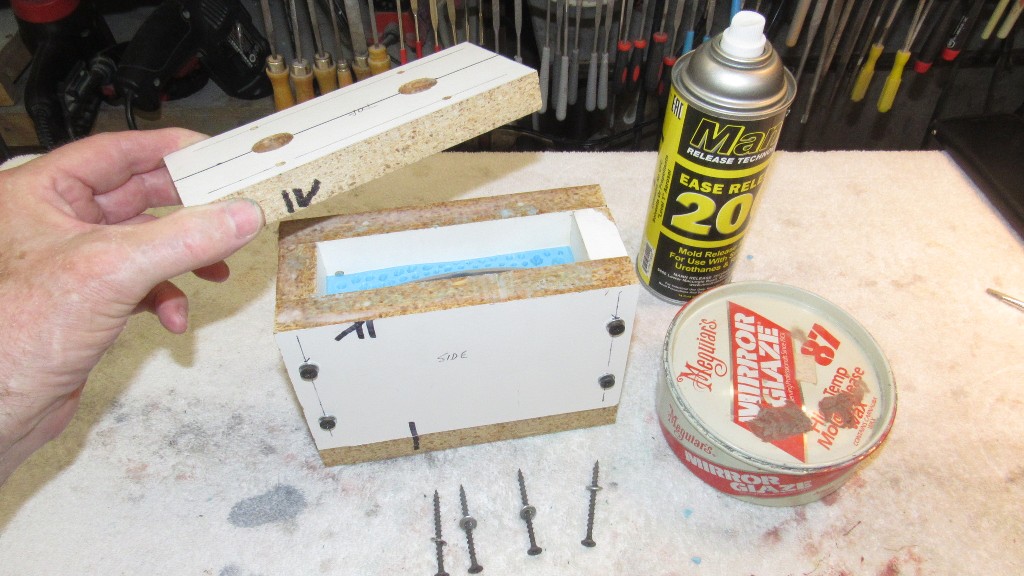

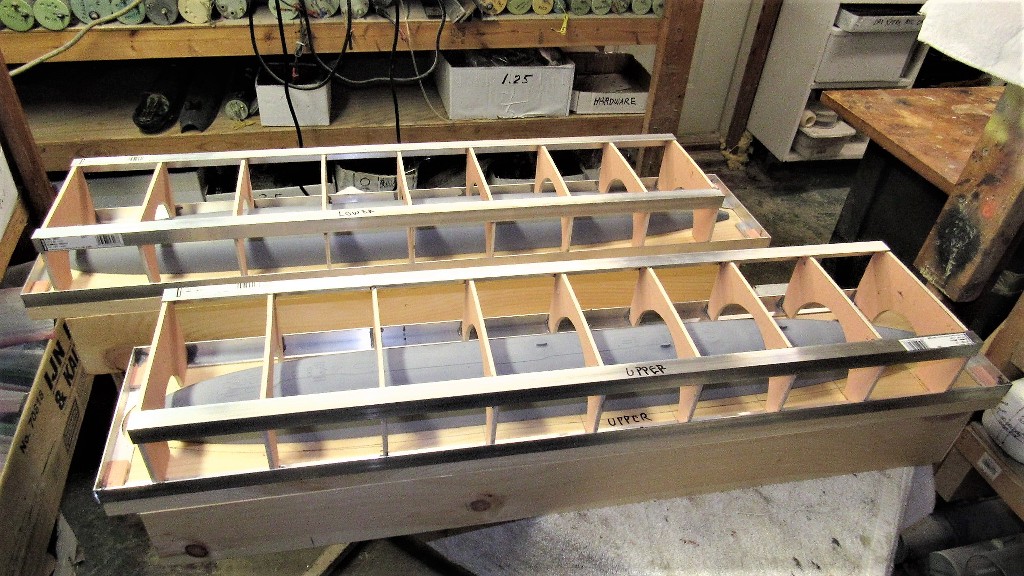
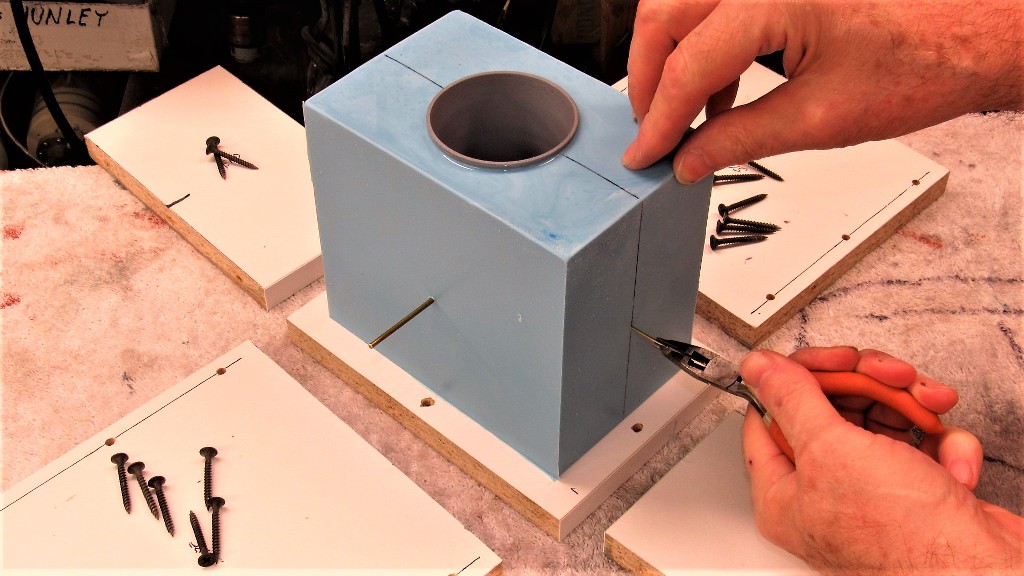
Making the hull tools started by assembling an 'egg-crate' structure that eventually is secured to the mother-mold of the tool. This structure both produces a stout, non-warp superstructure to each tool half, it also provides for a stable work stand when inverted for GRP part lay-up.
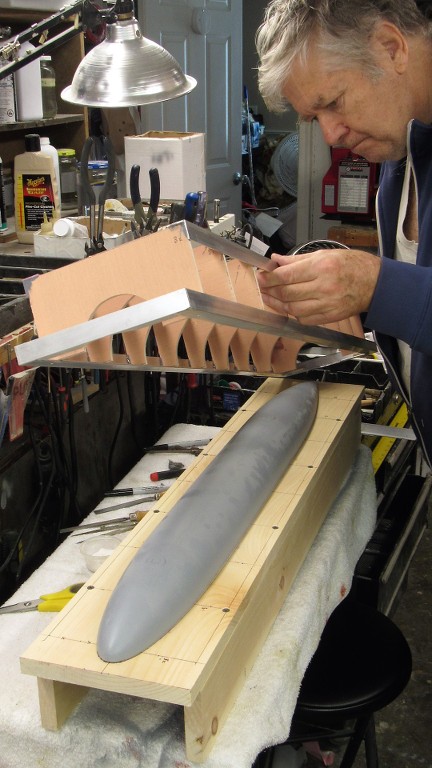
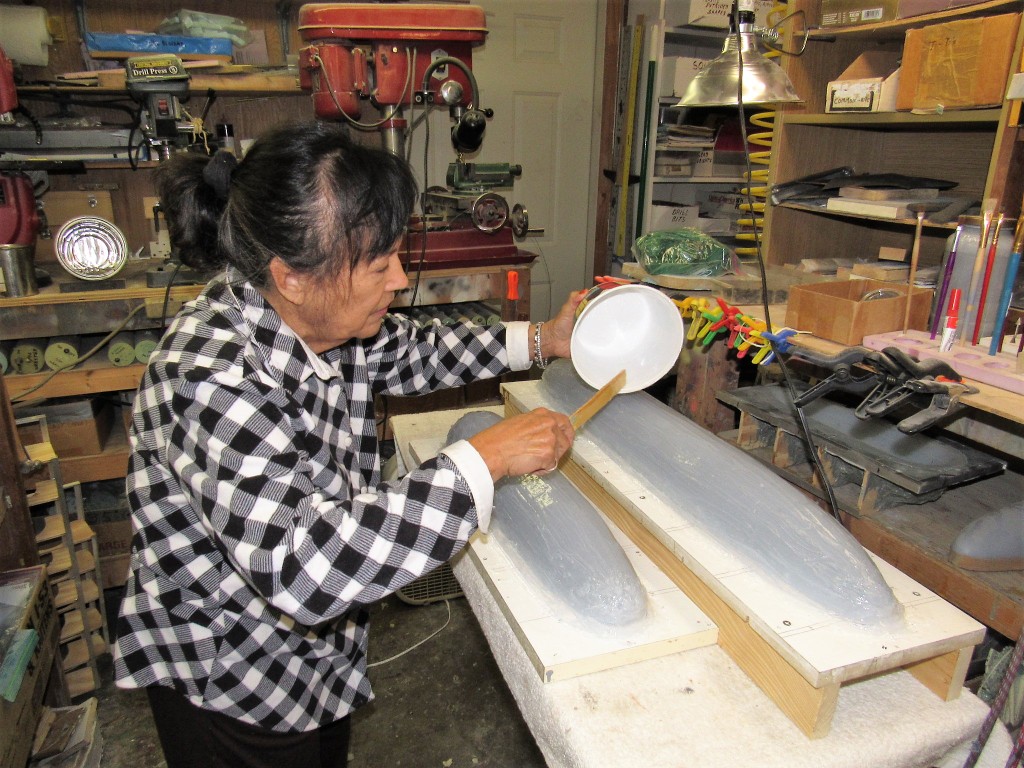
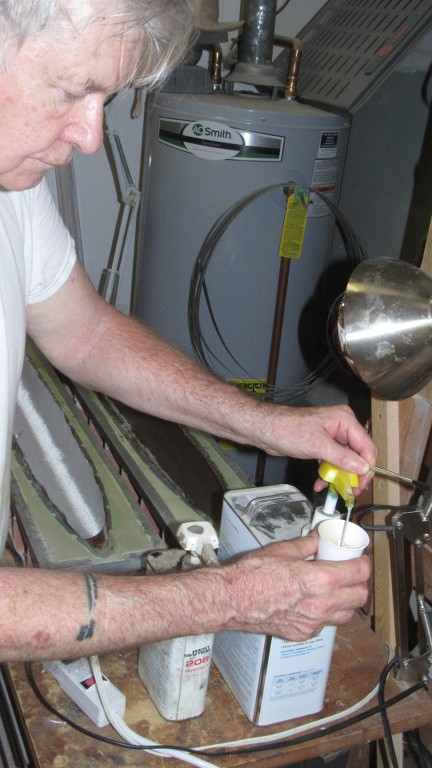
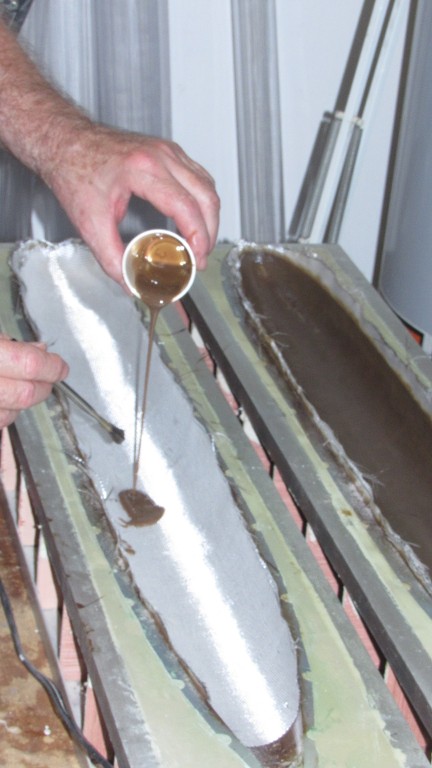
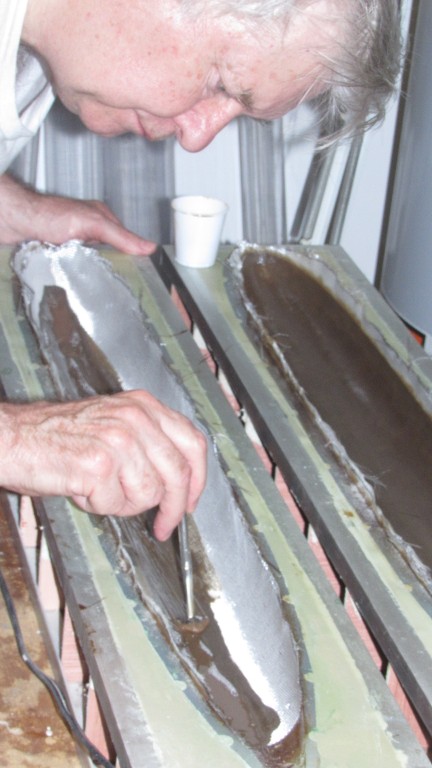
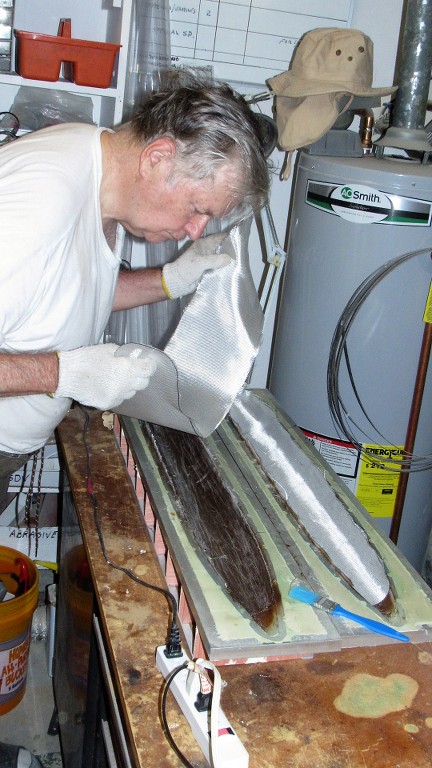
With each detailed hull half master mounted to its respective moldboard, Ellie mixed up and applied four layers of 'brushable' tool making rubber. This will form the flexible glove element of the hybrid tool. As this process took a few days I busied myself with control surface, tail-cone, and yoke master fabrication tasks.
Years of experience taught us both the dance moves required to work around each other in the tight confines of a converted one-car garage.
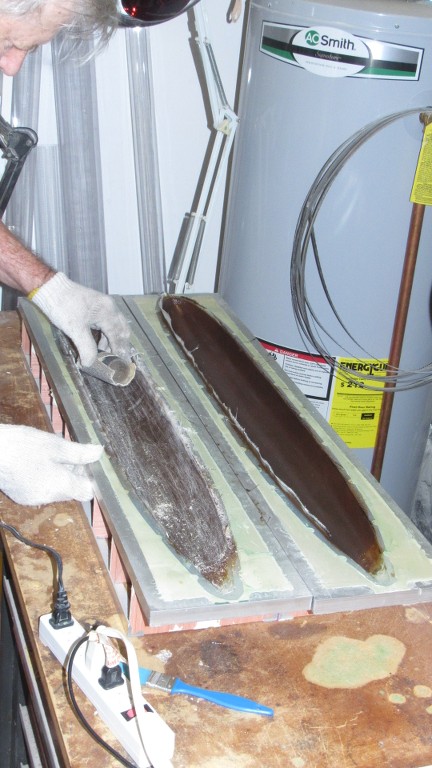
Once the last layer of brushable rubber had cured, Ellie rubbed everything down with part-release wax, preparing the surface for creation of the supporting mother-mold.
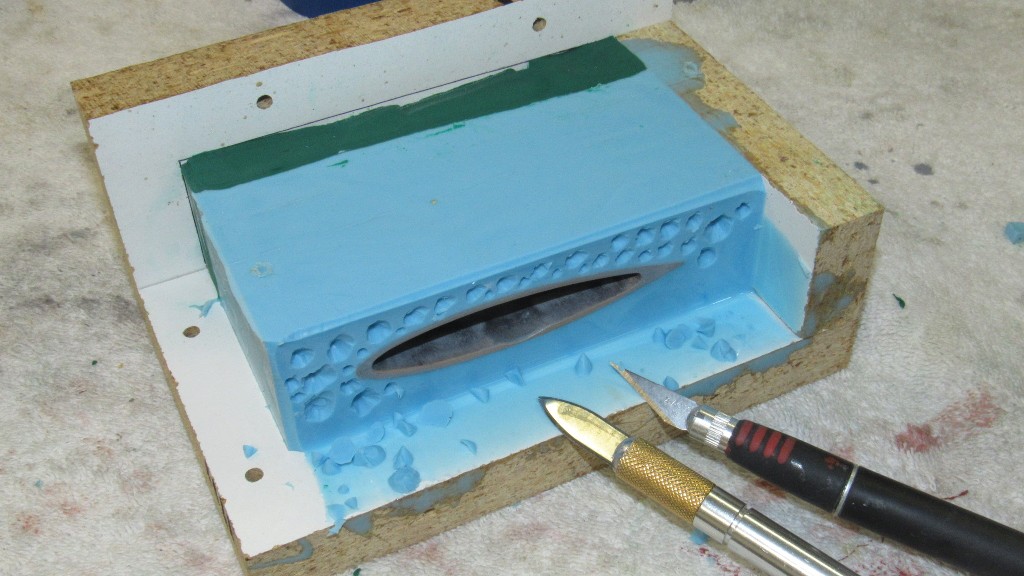
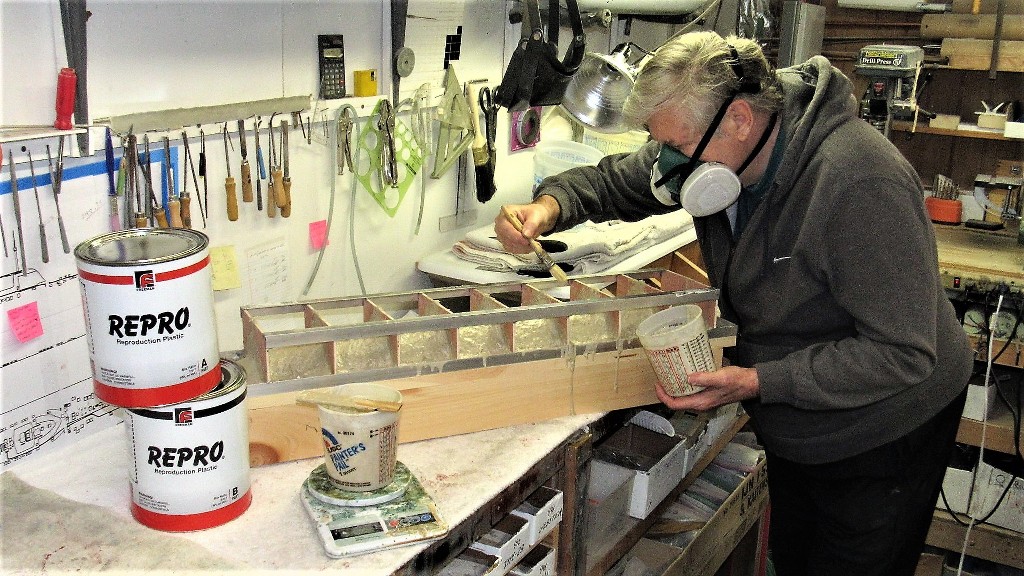
Once the glove had cured I secured an egg-crate superstructure to the mold board and built up several layers of a polyurethane tooling resin that had been mixed with fiberglass shards to further stiffen and make warp resistant the eventual mother-mold.
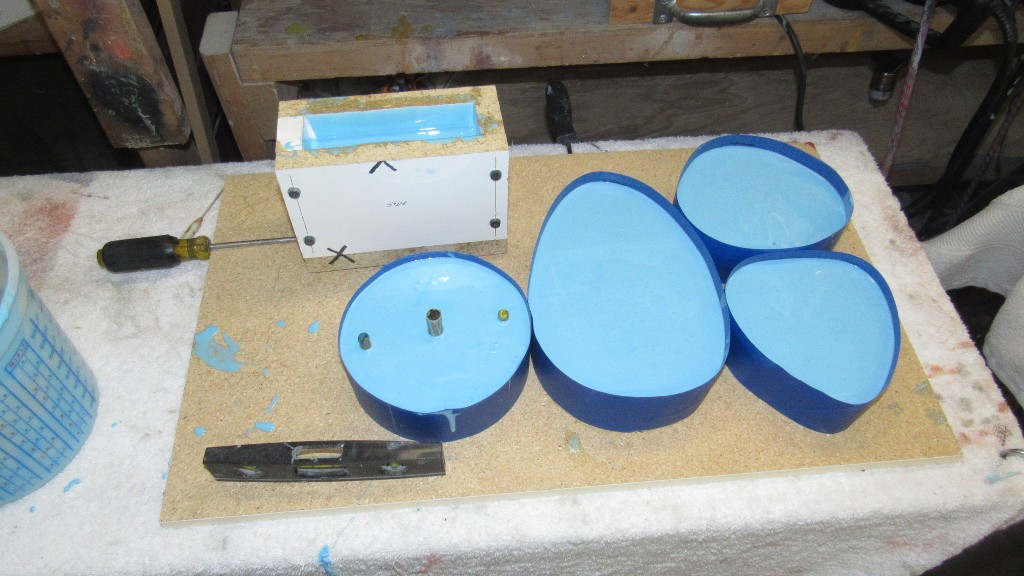
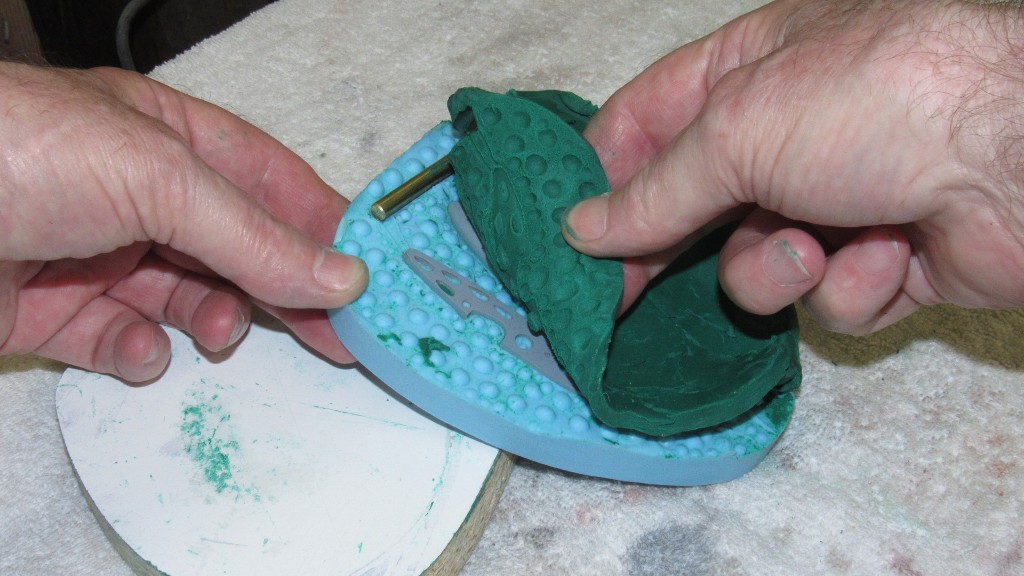
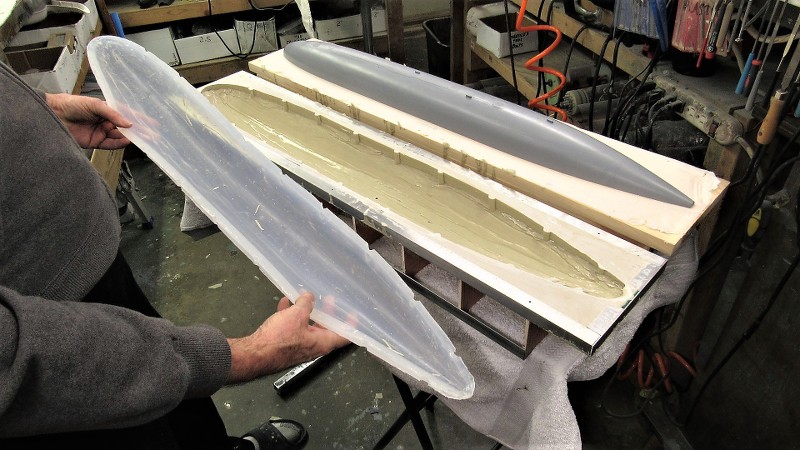
The flexible rubber glove-mold will impart the most involved engraving and even negative draft undercuts to the eventual GRP part. As you can see, the glove can be removed/inserted with perfect registration between it and the mother-mold. Part extraction starts with removal of the GRP part still attached to the rubber glove that gave it form. Once the glove is free of the mother-mold it's an easy task to peel the rubber glove away from the GRP part.
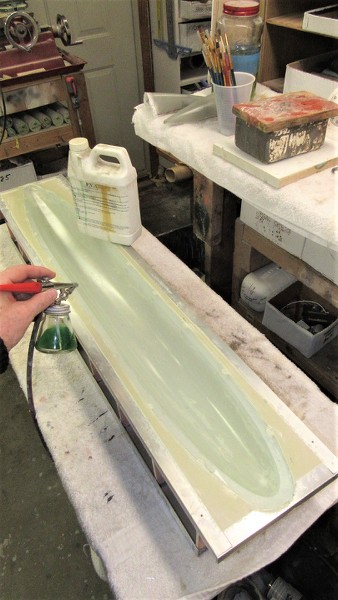
Another great feature of using a rubber glove is that the only part-release needed are several air-gun shot coats of polyvinyl alcohol (PVA). That's all that is needed to keep the GRP's epoxy laminating resin from attacking the surface of the rubber tool. Lay down a coat of PVA, dry it with a hot-air gun, and repeat those steps about five times,
and you're ready to do the glass work.
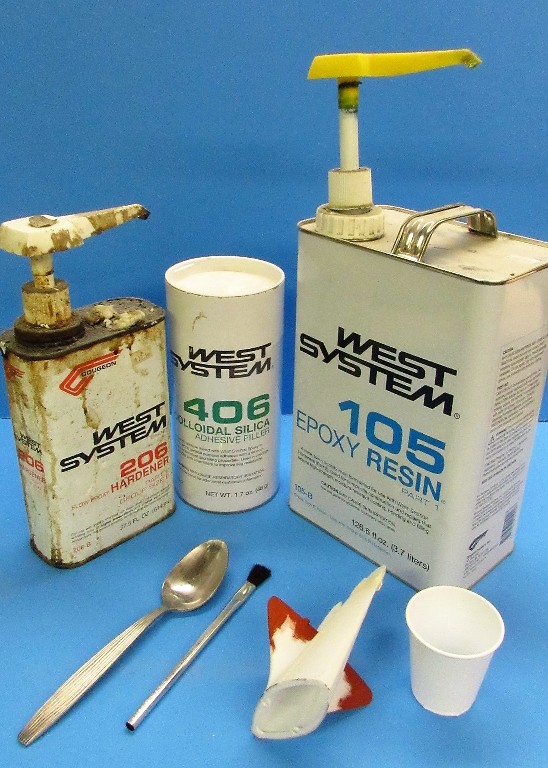
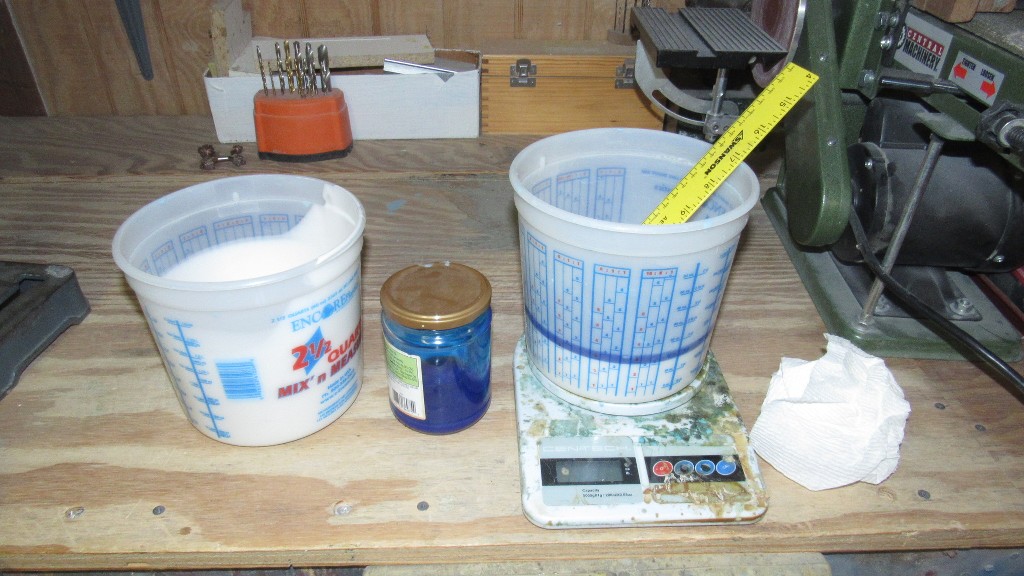
West System laminating epoxy is what I use to wet out the 6-10 ounce fiberglass cloth I use with this sort of GRP construction. It typically is a 5:1 ration between resin and hardener. I use their paired hand-pumps to insure this ratio is maintained as I prepare a mix for wetting out.
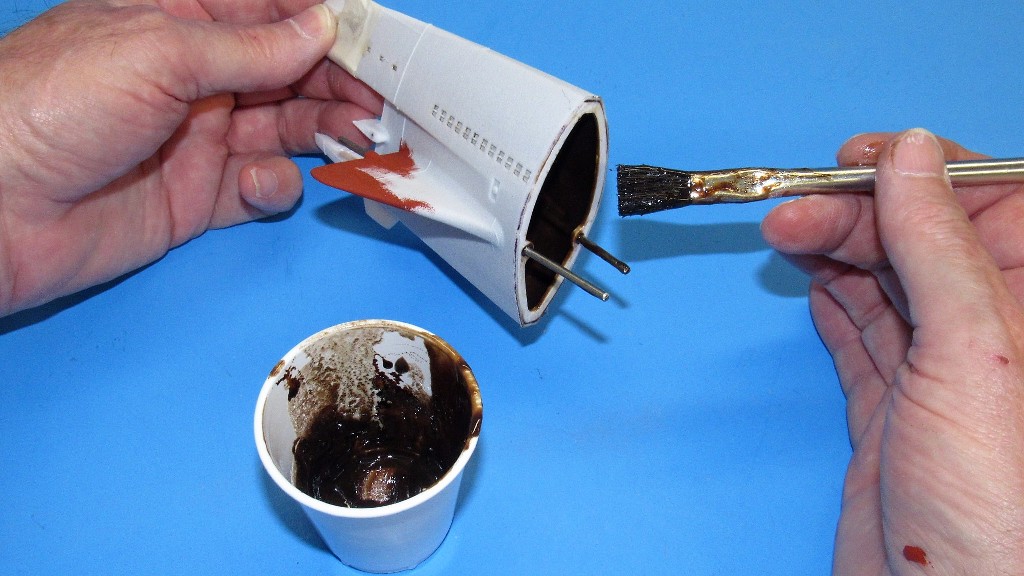
As I'm using the lightweight 6-ounce cloth (one square yard of cloth weighs 6 ounces) it took three laminates to achieve the nominal .080" wall thickness desired for the GRP hull halves. Lay down a laminate, wait for it to cure reasonably hard, then rough sand the interior, remove the dust, lay in another layer of glass and wet out with epoxy.
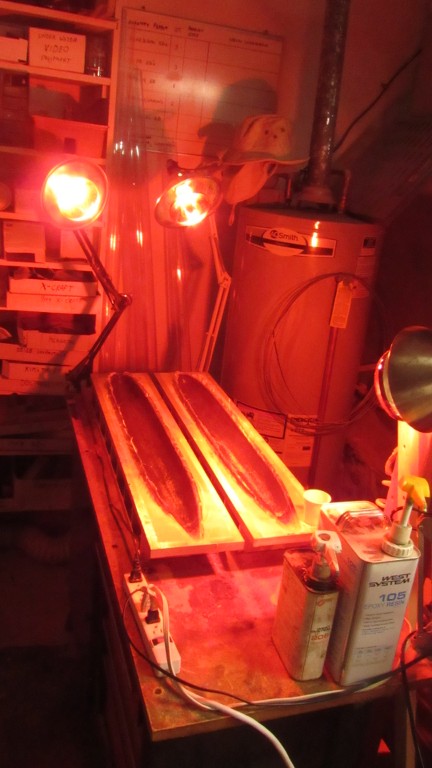
A couple of days under the lamps and I'm ready to strip the parts out of the gloves.
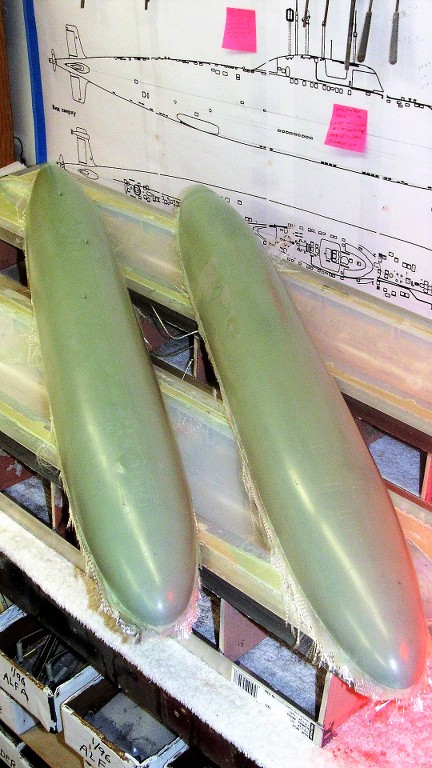
The GRP hull halves are yanked out of the tools and the PVA removed with a rinsing of water and a good soap-and-water scrubbing.
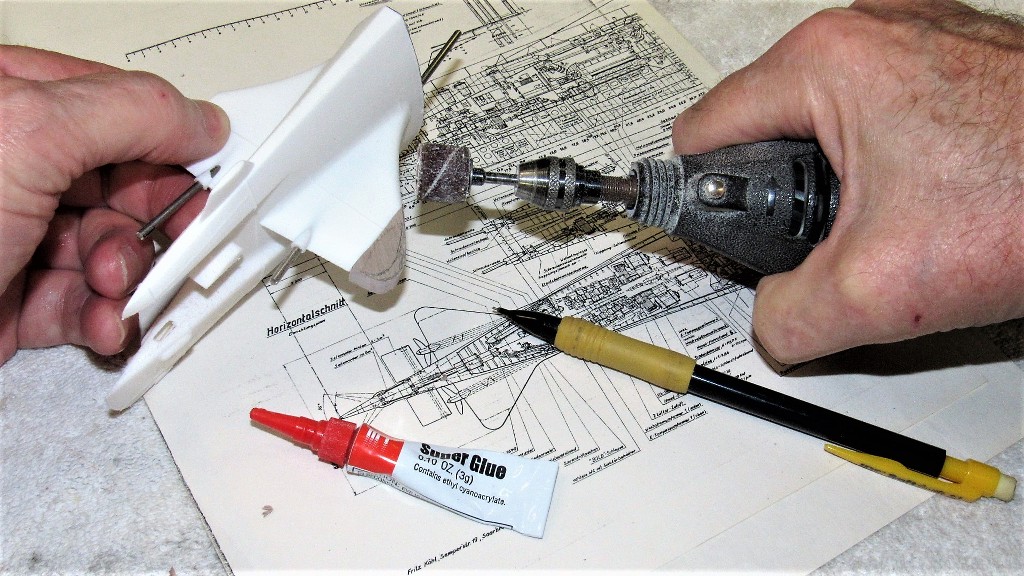
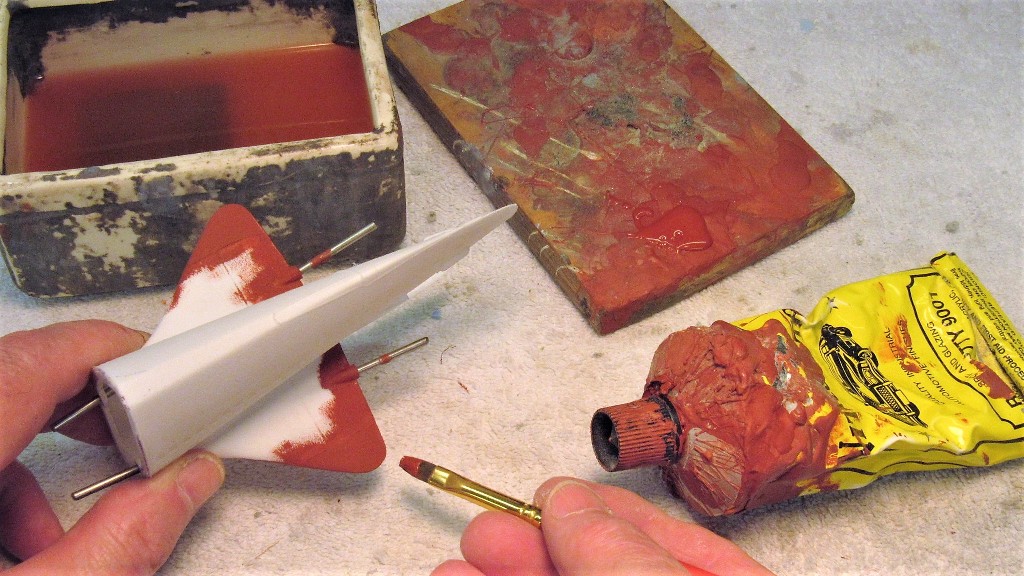
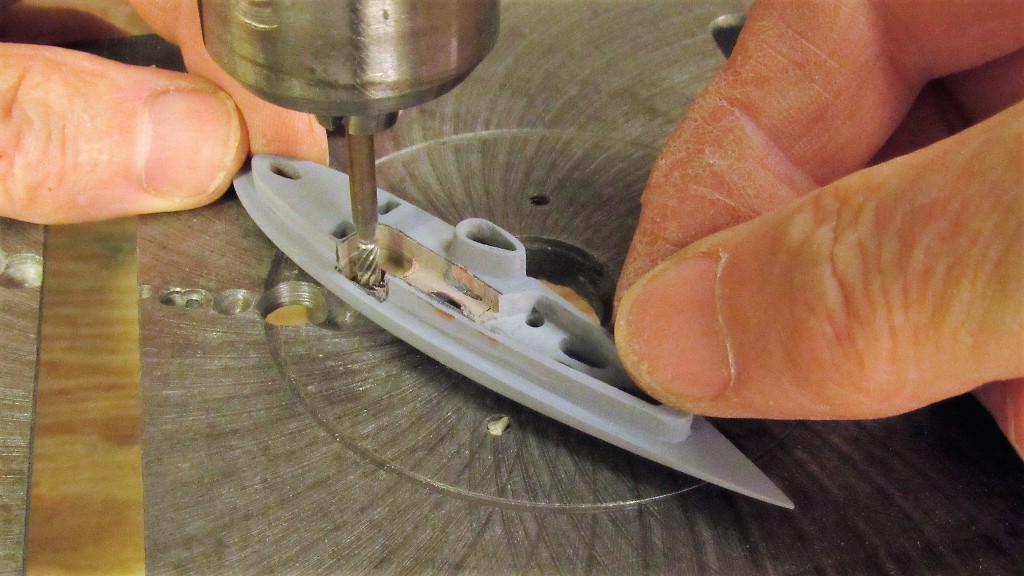
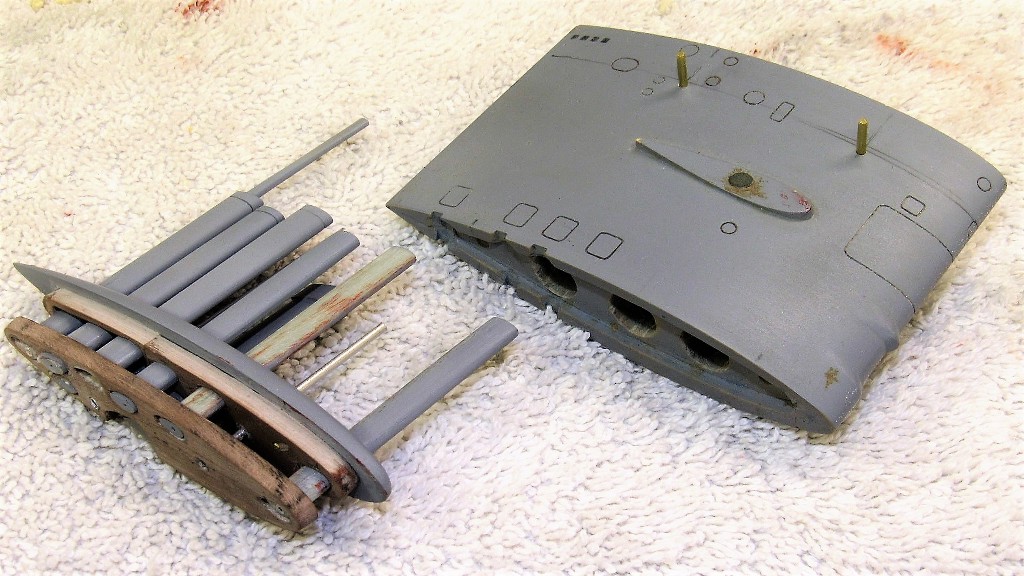
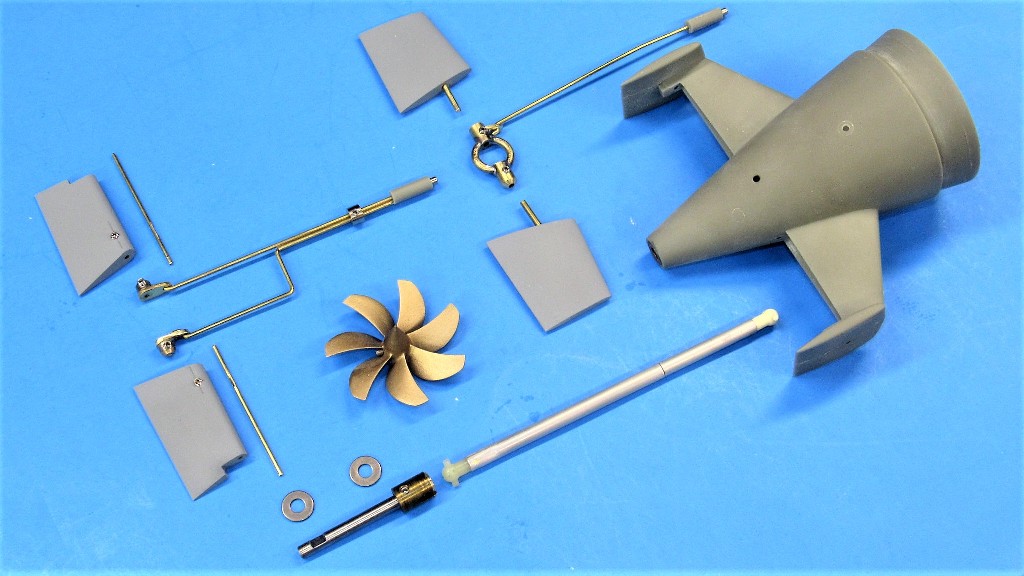
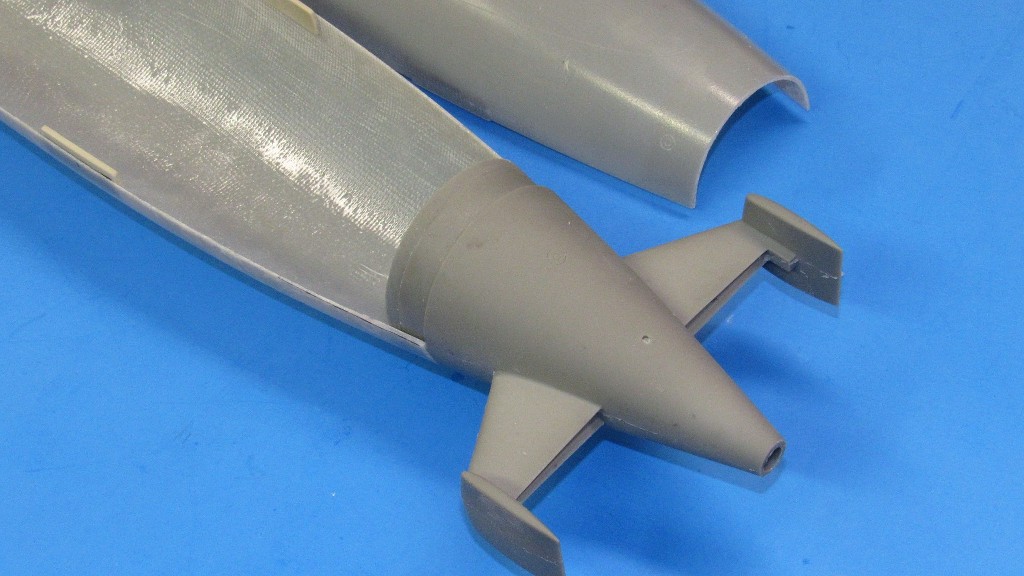
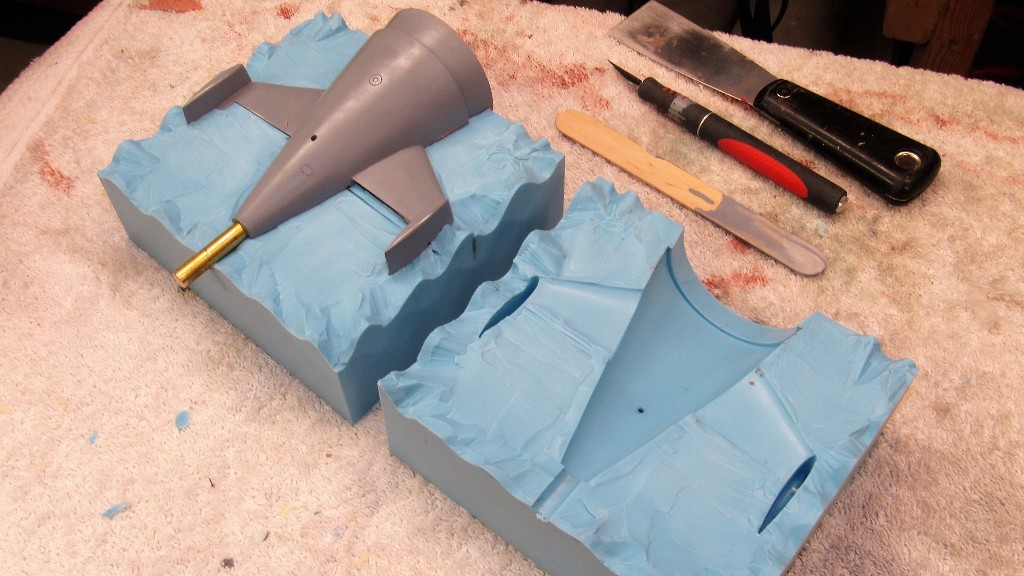
I built an entirely new ass-end for this model submarine kit. Instead of requiring the customer to glue horizontal stabilizers to the tail-cone, I produced a tool that would produce a tail-cone with the horizontal stabilizers -- with their outboard vertical stabilizers -- cast as integral parts of the assembly. This greatly reduced the work-load of the customer and assured near perfect symmetry at the same time. As you can see, a lot is going on within the tail-cone: the yokes, pushrods, and drive shaft all have to fit within, and do so in such a manner as to not to interfere with one another when things are in motion. No small trick!
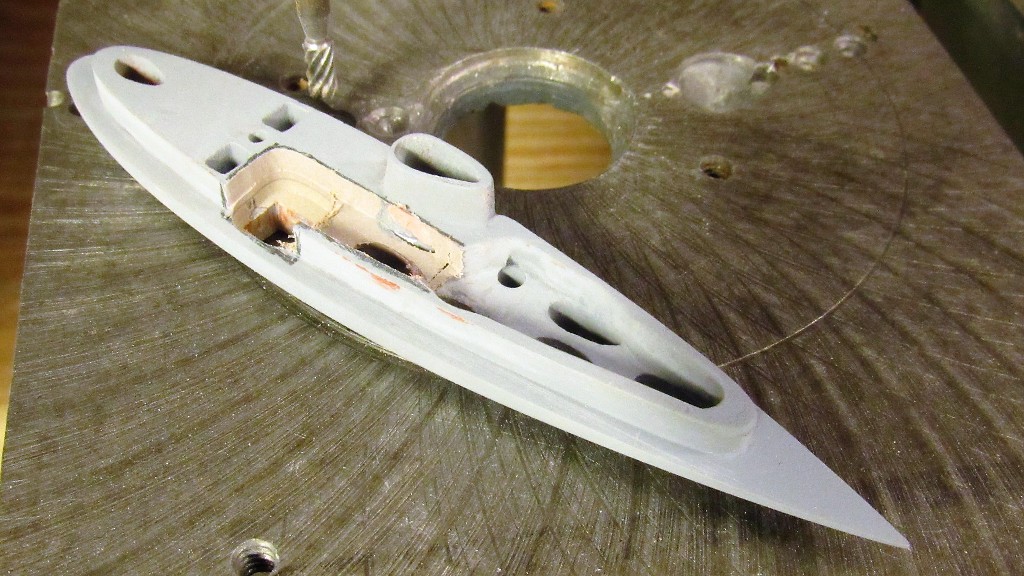
Here a hollow, cast resin tail-cone shows off how its radial flange is used to bond itself to the after end of the GRP lower hull. The upper half of the tail-cone radial flange is a seating surface upon which the upper GRP hull after end sits and held in place with a single machine screw.
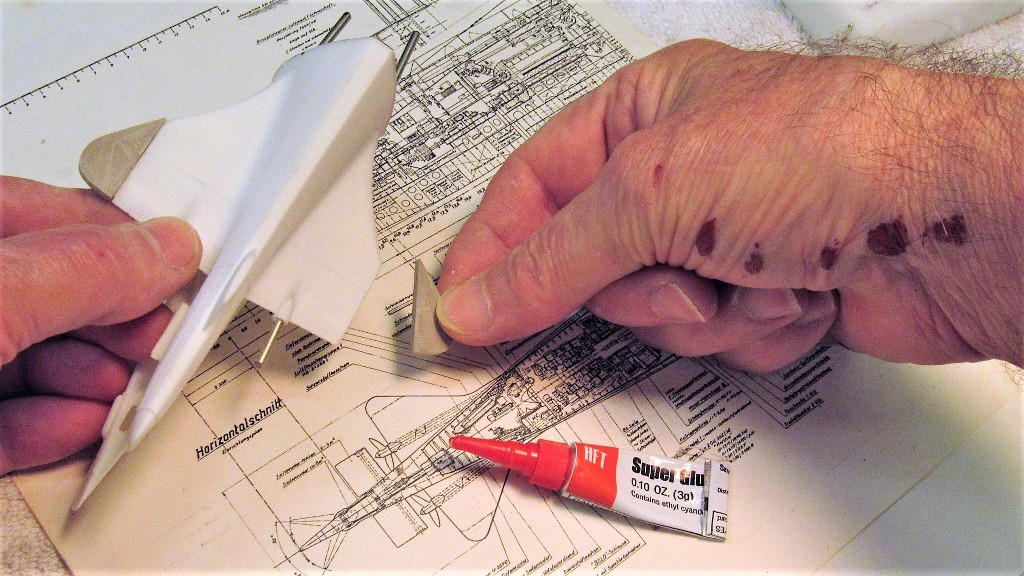
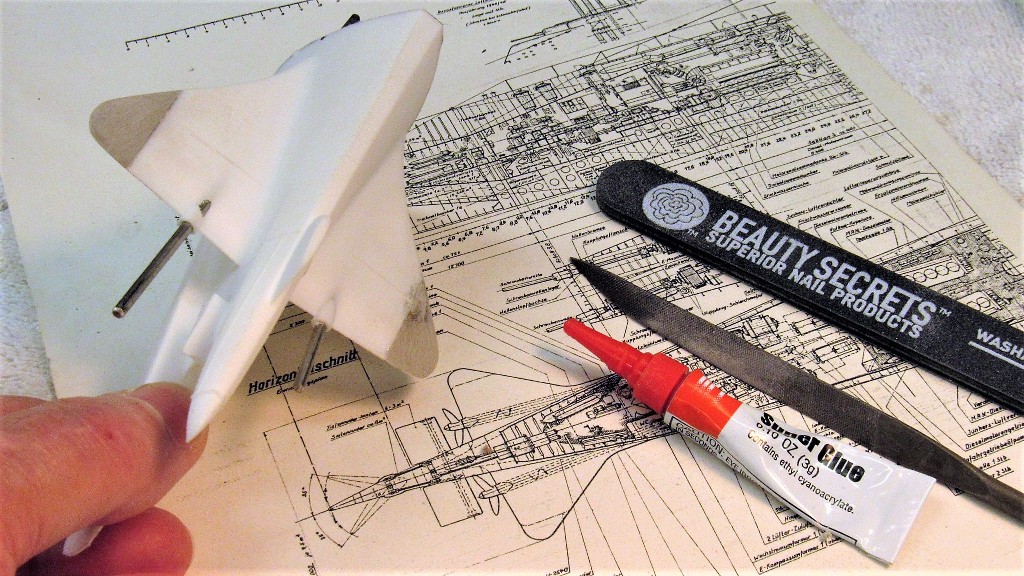
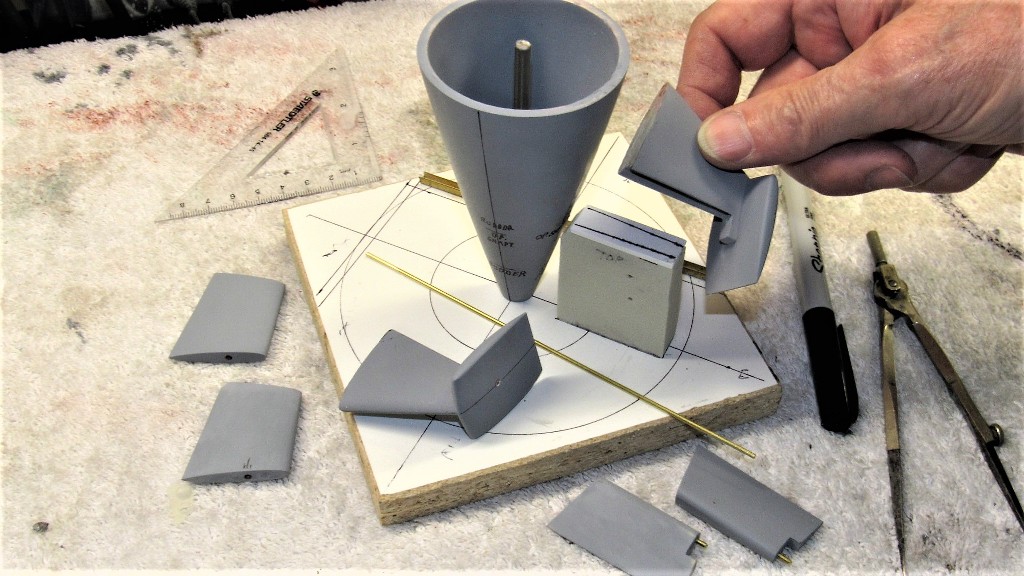
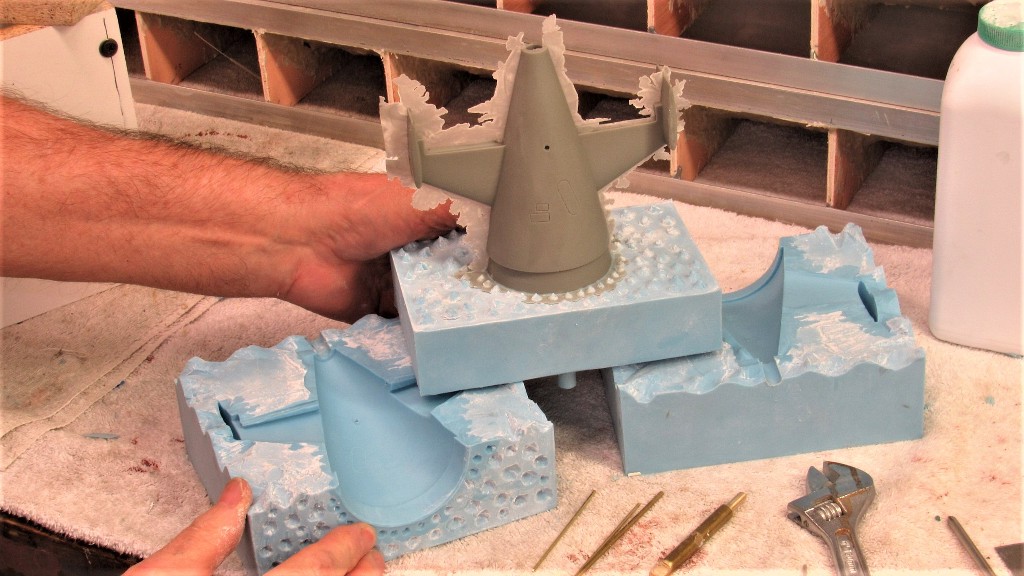
I turned a hollow tail-cone from dense RenShape and mounted it on a horizontal stabilizer assembly jig -- a rig that insured correct alignment between stabilizers (both horizontal and vertical) and the tail-cone. Preceding this work was creation of the stabilizer and control surface masters and tools from which intermediate masters were cast and seen here being glued and test fitted to what will eventually be a complete tail-cone master.
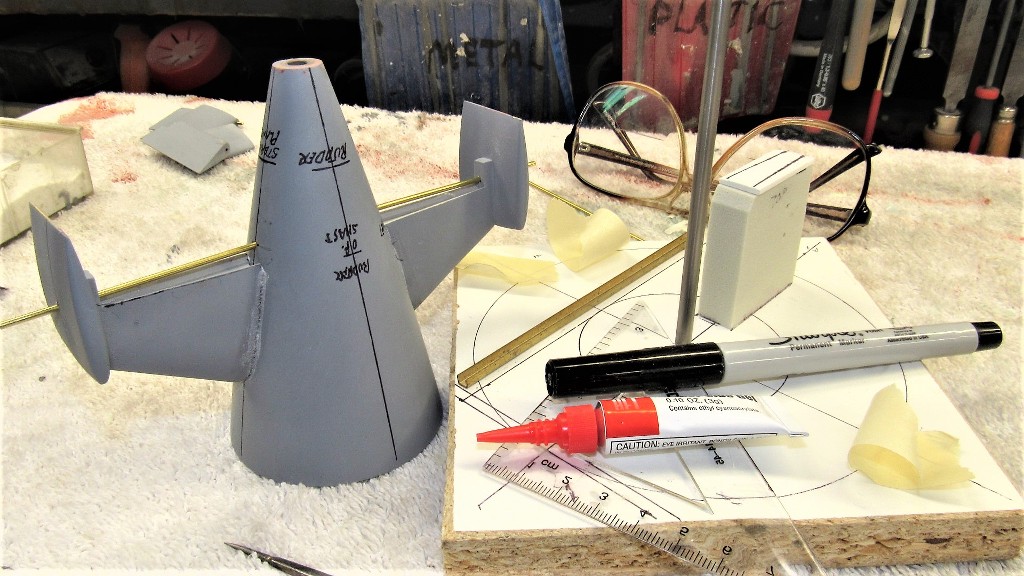
The completed tail-cone master was then used to make the rubber production tool used to create resin kit parts.
Wa-la!
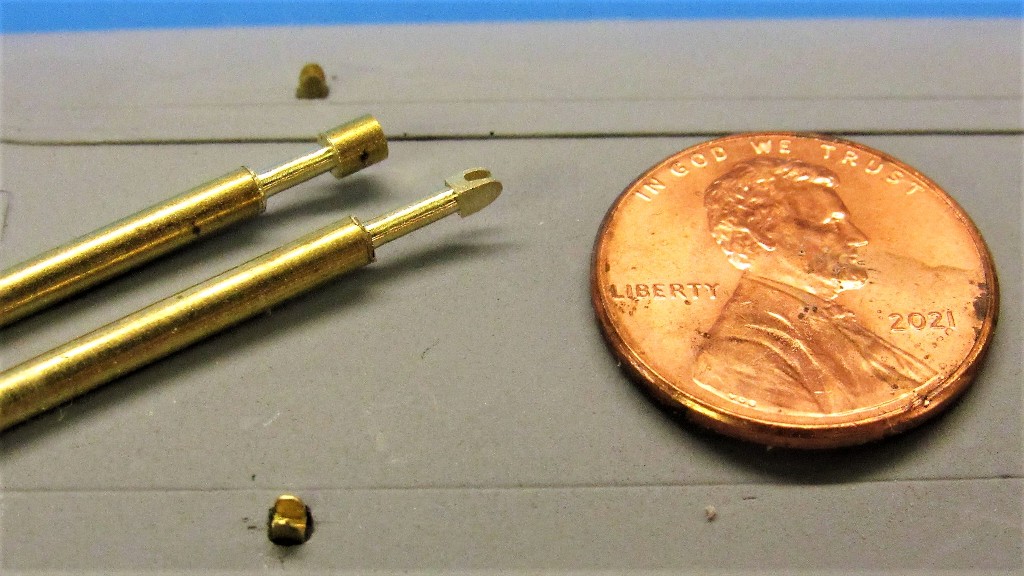
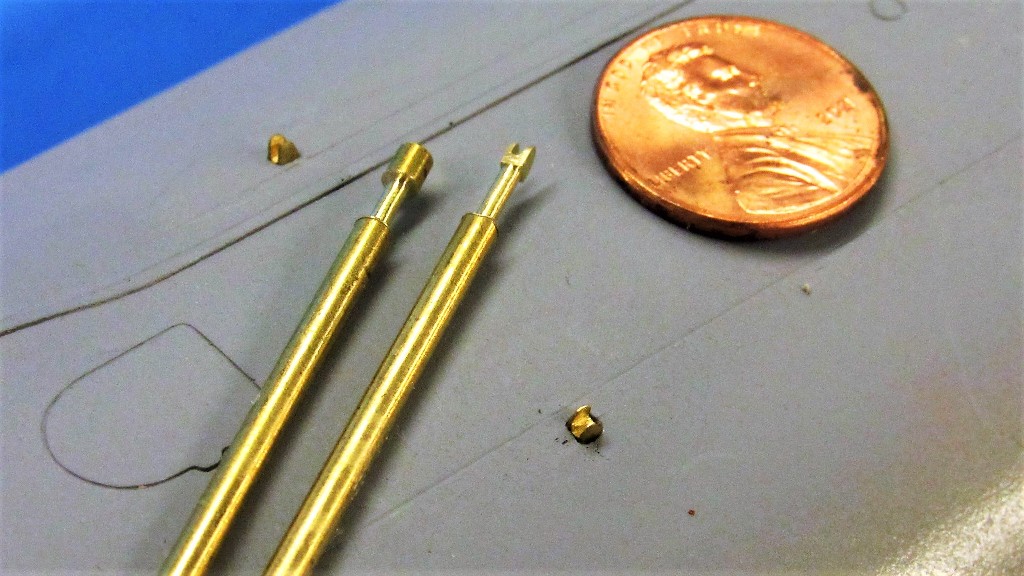
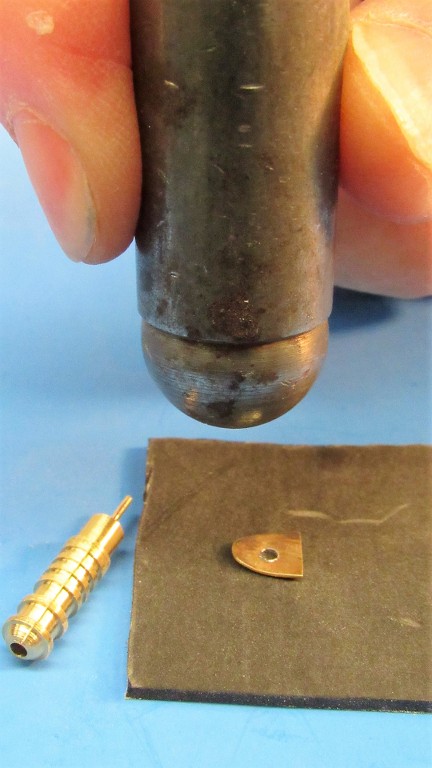
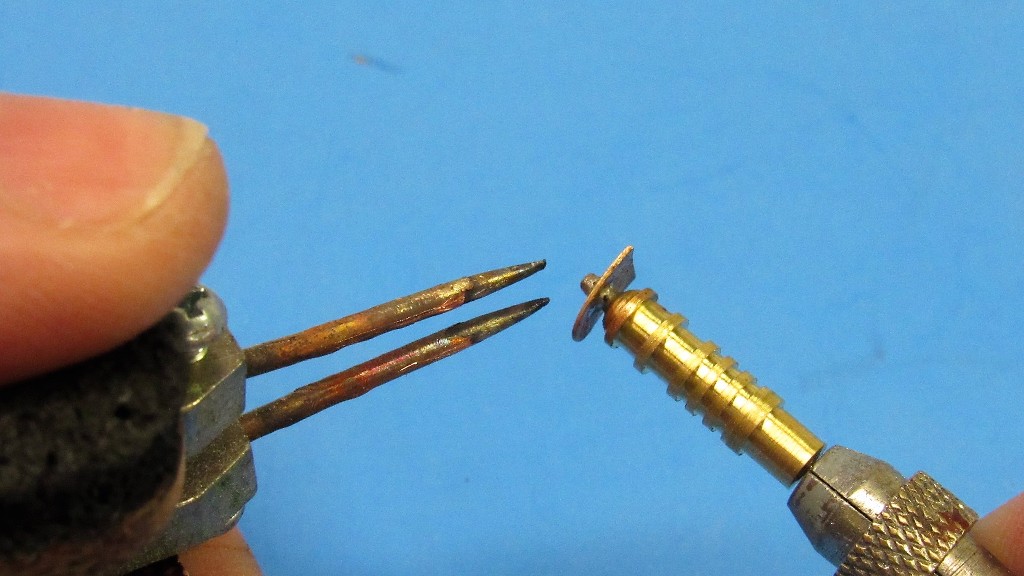
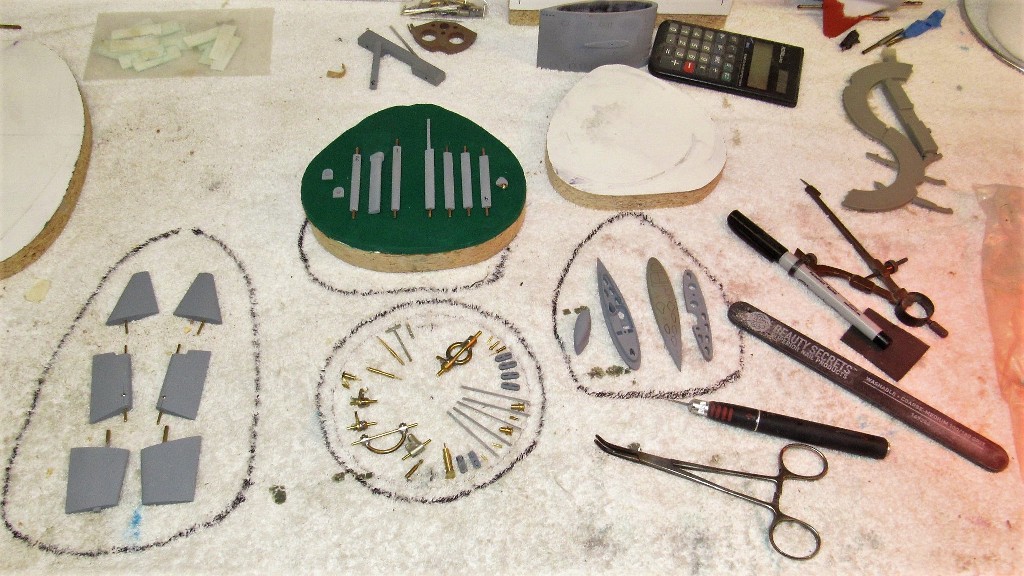
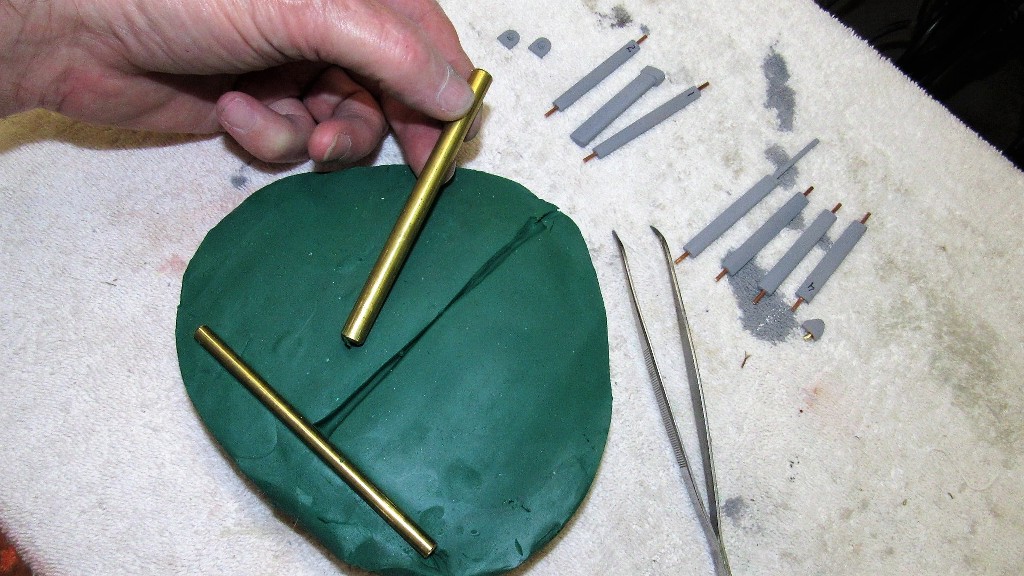
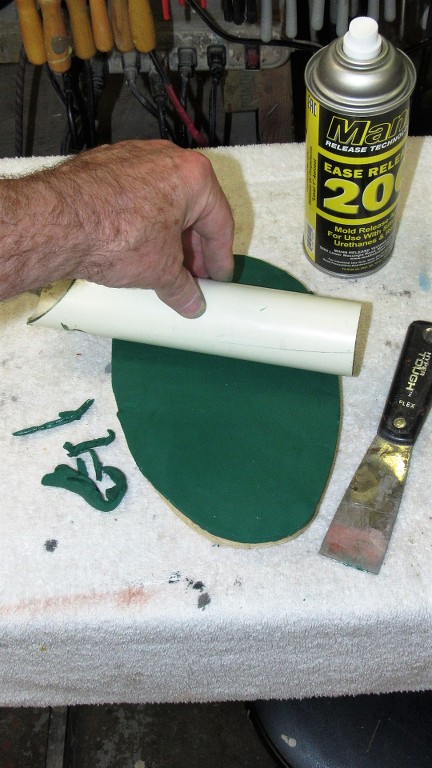
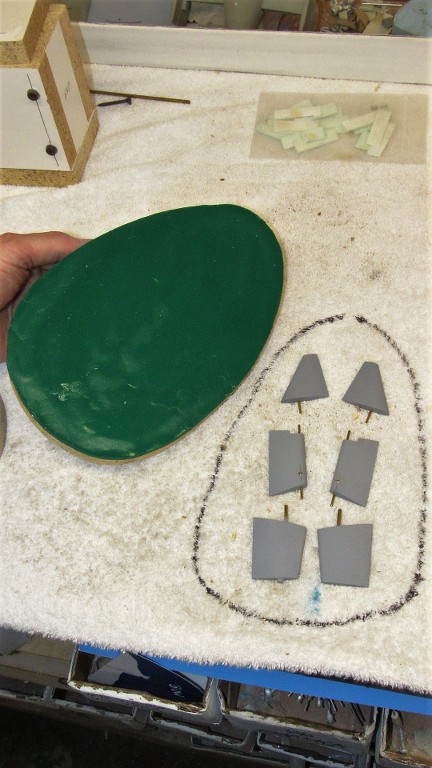
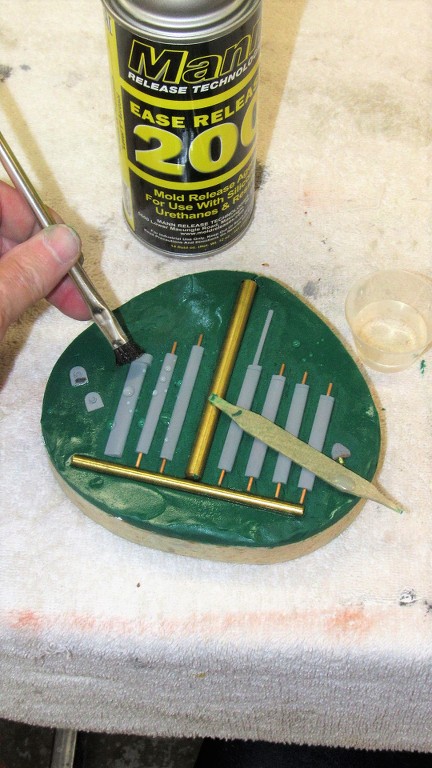
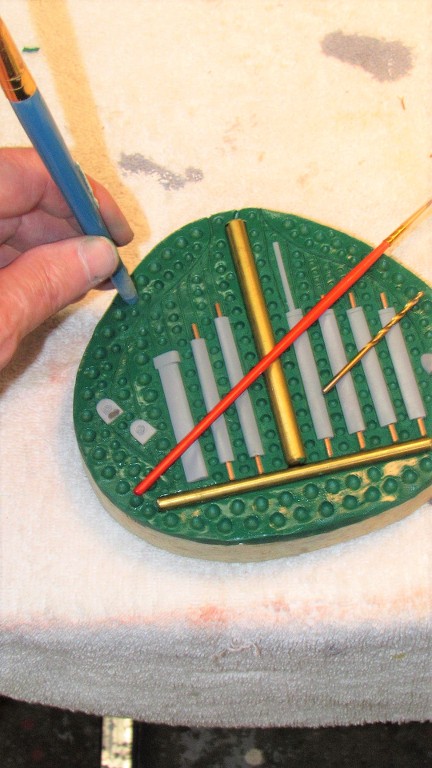
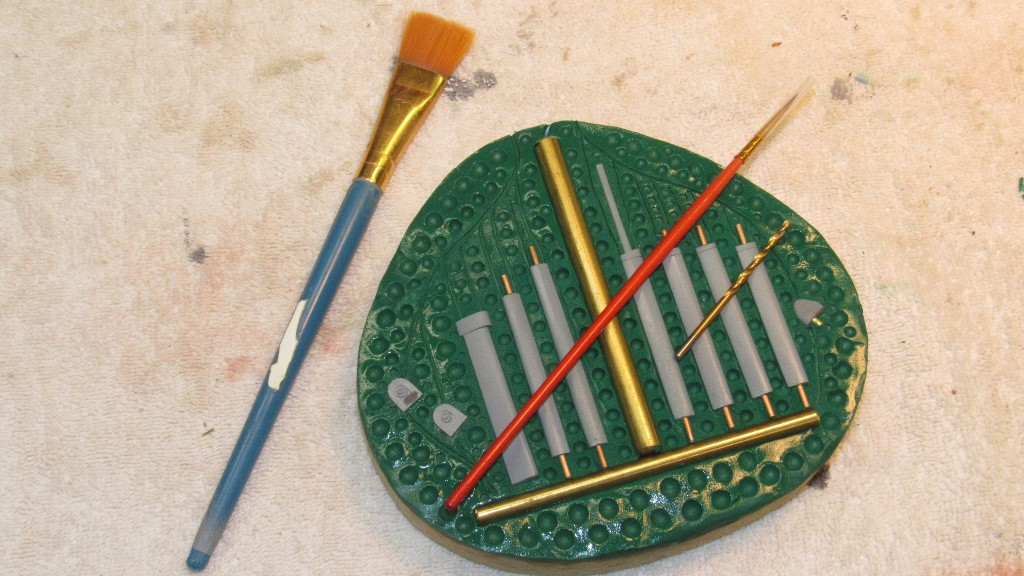
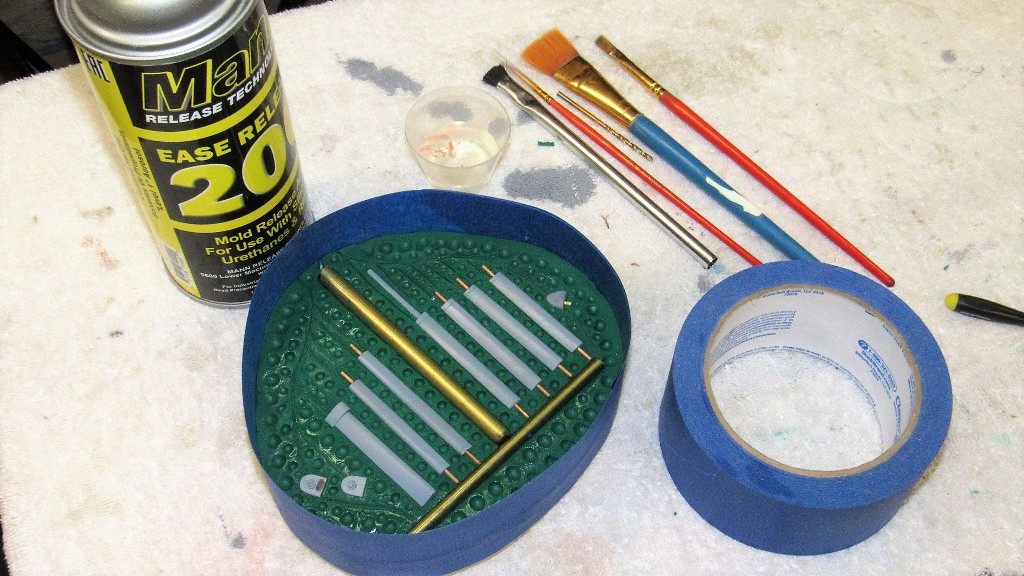
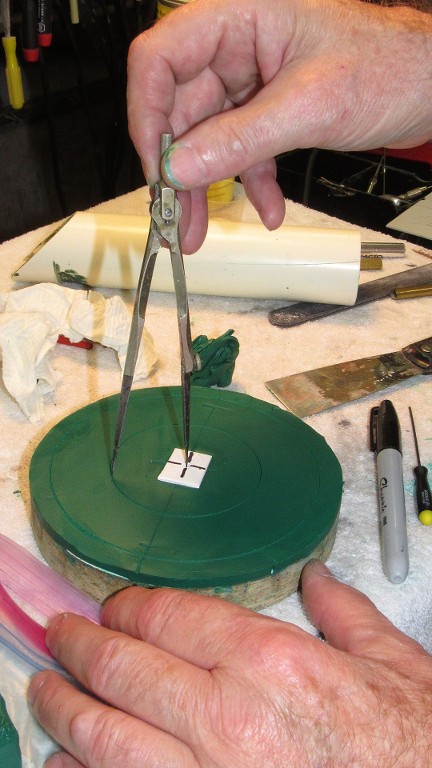
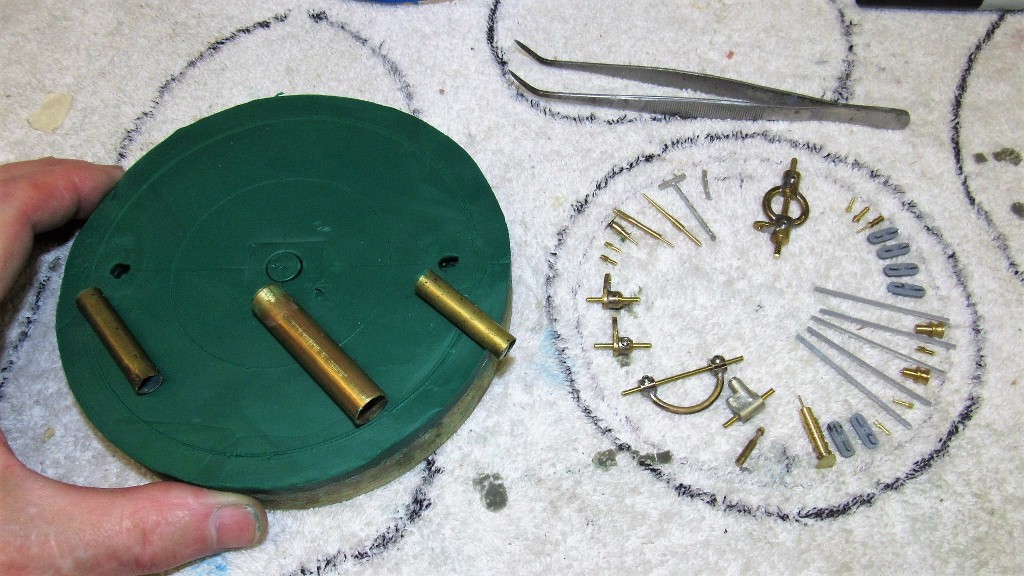
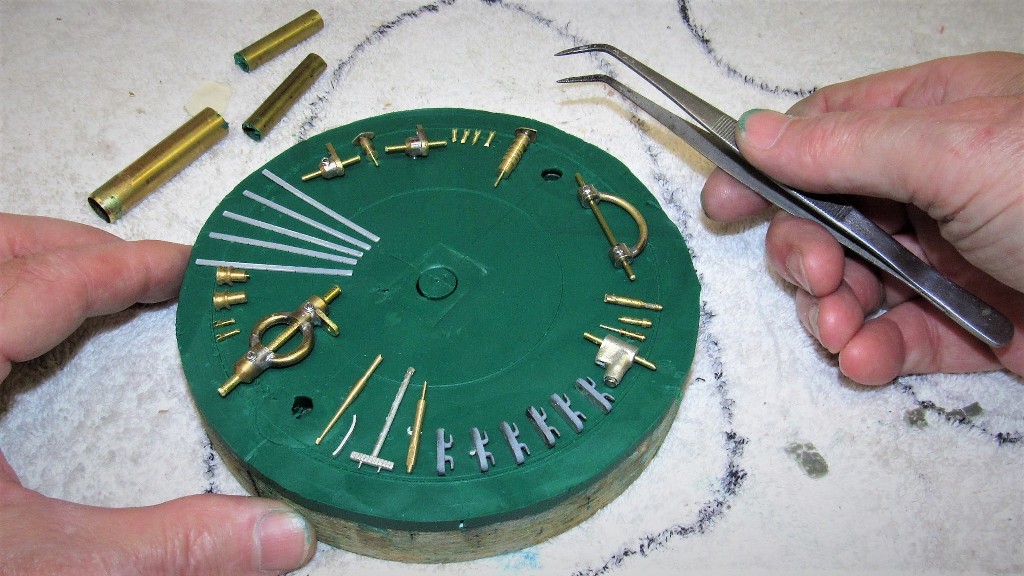
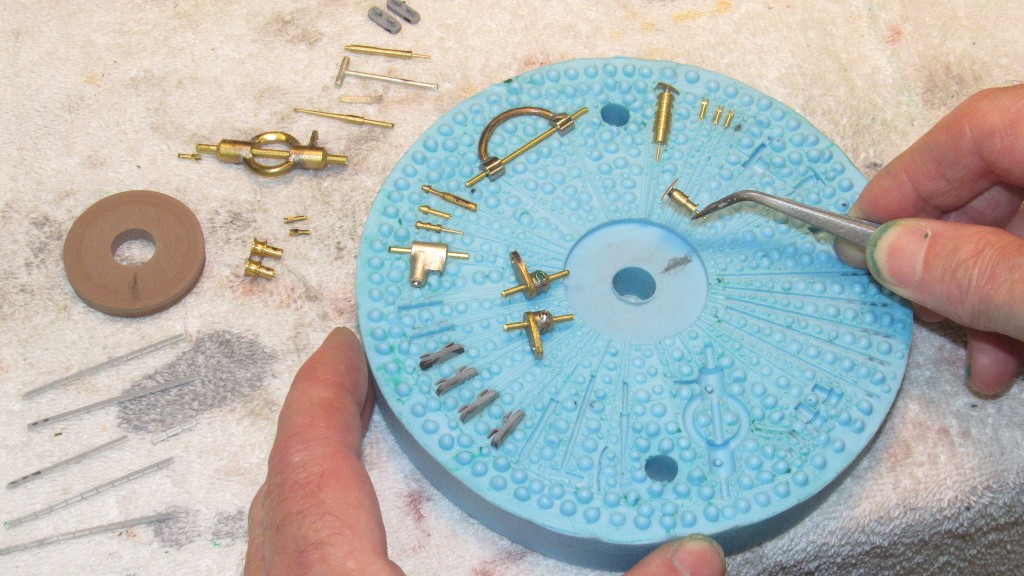
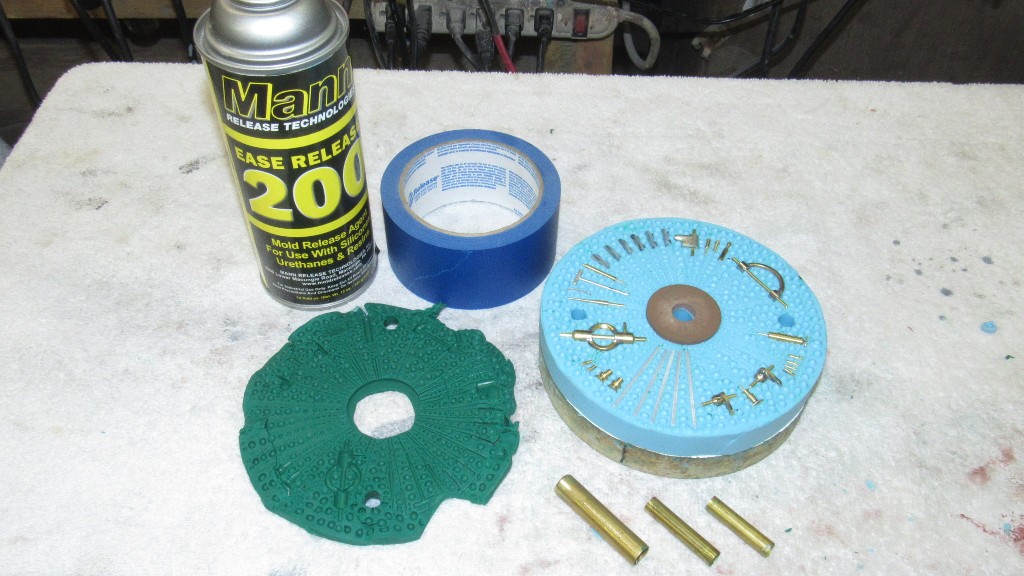
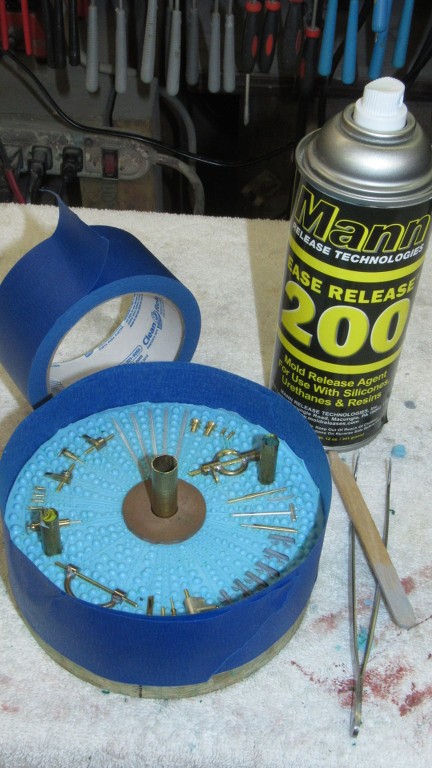
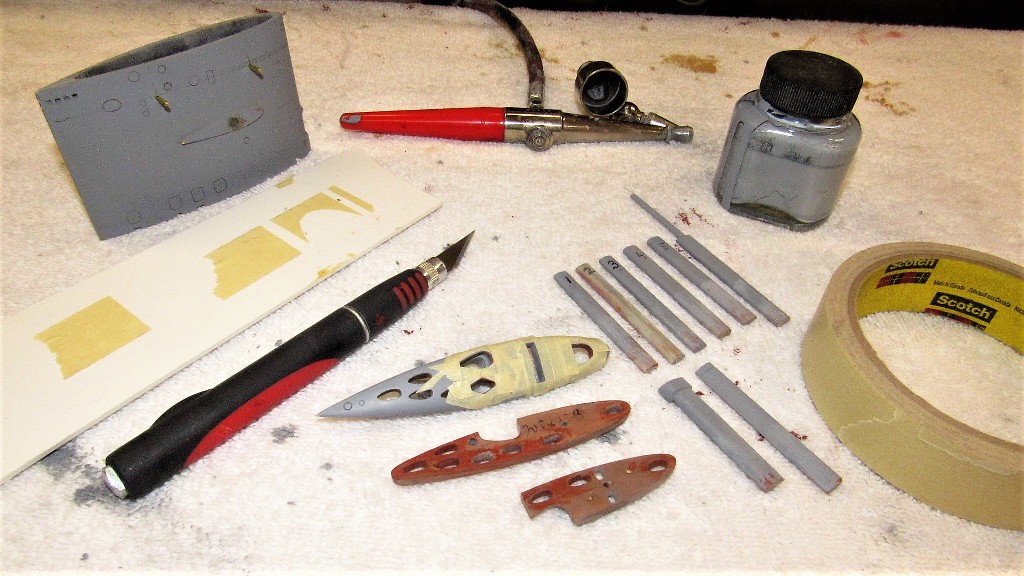
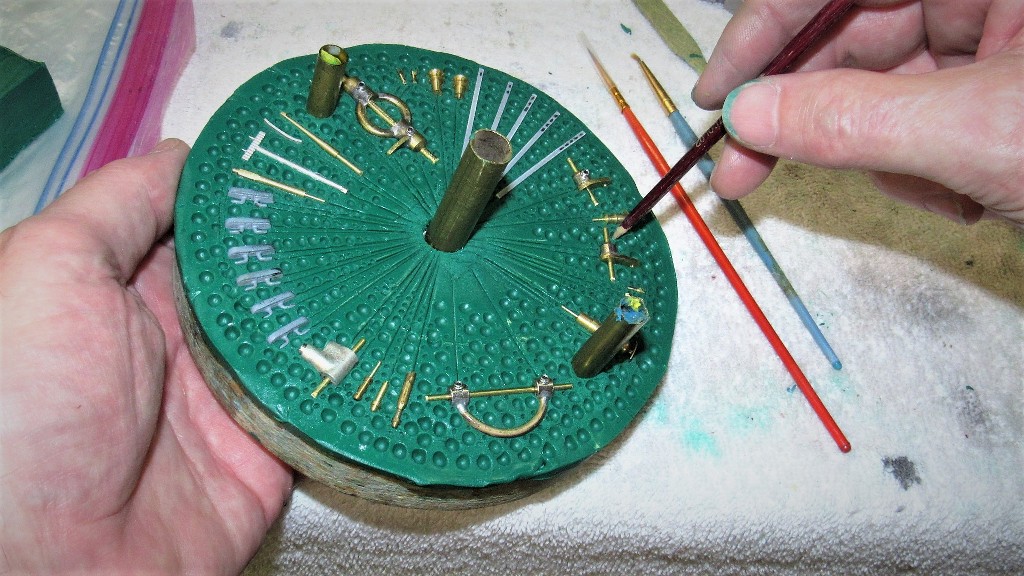
Just some of the brass work done to make the yoke, control horn, and other masters needed to eventually produce the spin-casting rubber tool used to form cast white-metal production parts.
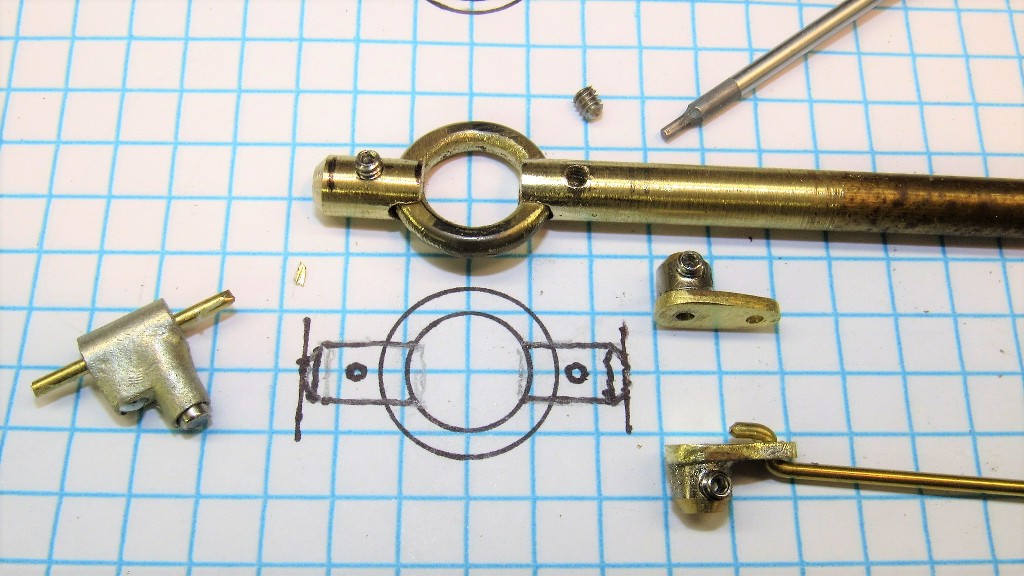
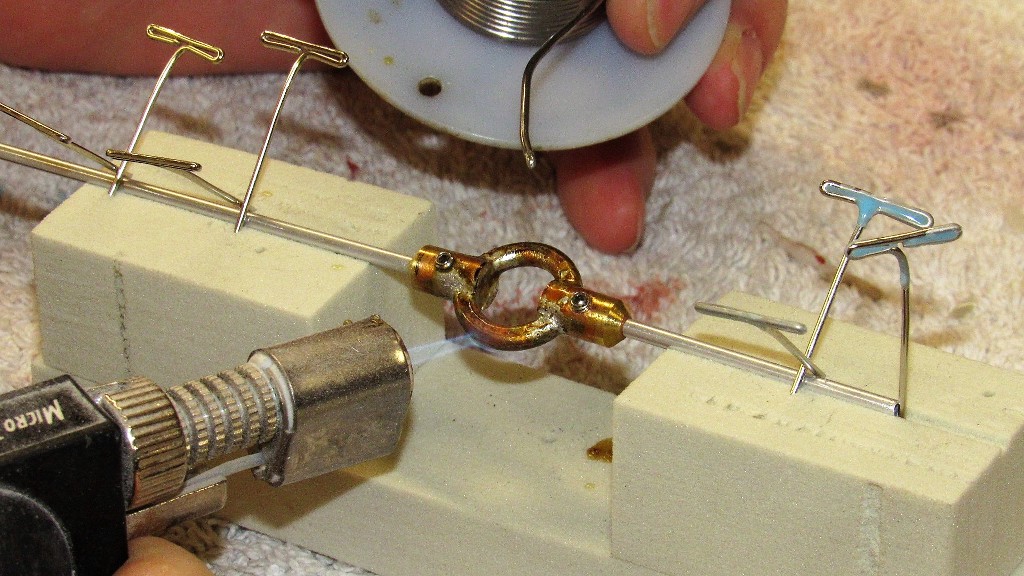
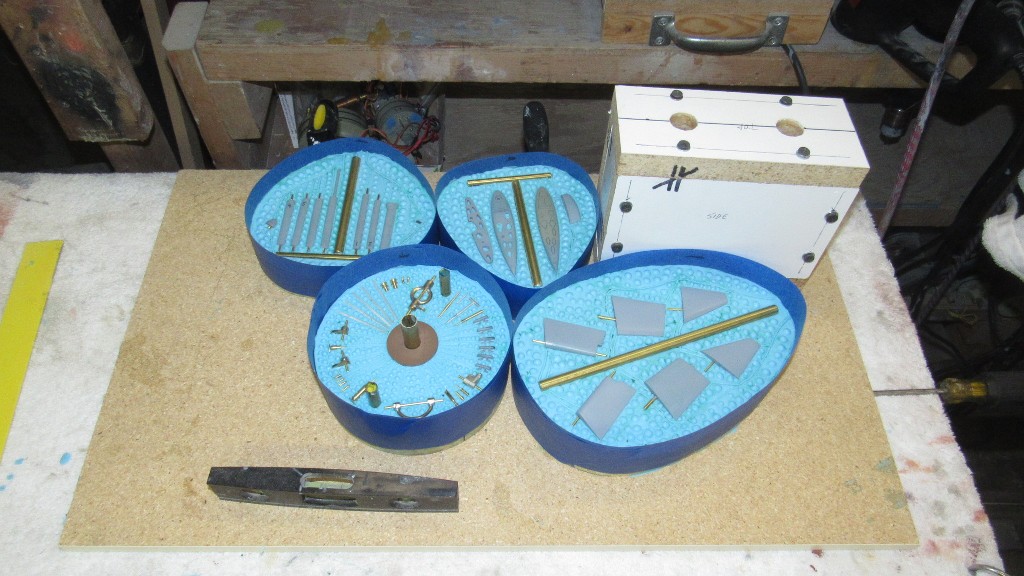
All masters are eventually used to produce two or three-piece tools used to cast production parts either from polyurethane resin or whit-metal (95% Tin, 5% Antimony).
Who is John Galt?Comment


Comment