-
Who is John Galt? -
I’m used to that. I use tweezers and a magnifying glass to pee.Of the approximately 40,000 men who served on U-boats in WWII, it is estimated that around 28,000 to 30,000 lost their lives.Comment
-
-
Hi David,
It's been a long time since I have bugged you! I do have a question for you!
Not to long ago, right after I purchased the Albacore kit from Bob. You were nice enough to send me some old Albacore parts that you had. (again, I thank you) The parts included some of your custom made up yokes.
My question for you is: Can these yokes be cut and then solder back together? If that is possible, then I might be able to re-size them to fit in the stern of my current Alfa project!
Thanks David!
Rob
"Firemen can stand the heat"Comment
-
I do it often. You simply weld the solder to the solder after making the cut, reducing/repositioning as required. Jig the parts back together and applying heat to fuse the parts together. Don't forget the flux.
Resistive soldering is the best way to localize the heat, but without that machine you can make do with an iron.
Wrap all solder elements with a damp paper-towel (heat-sink) except for the union you wish to weld. Flux, apply heat, and provide filler solder to bridge the gap. An acquired art.
There's no 'too many' questions as long as the info is eventually put to practical use. Waste anything but my precious time. I'm here to serve. Not entertain.
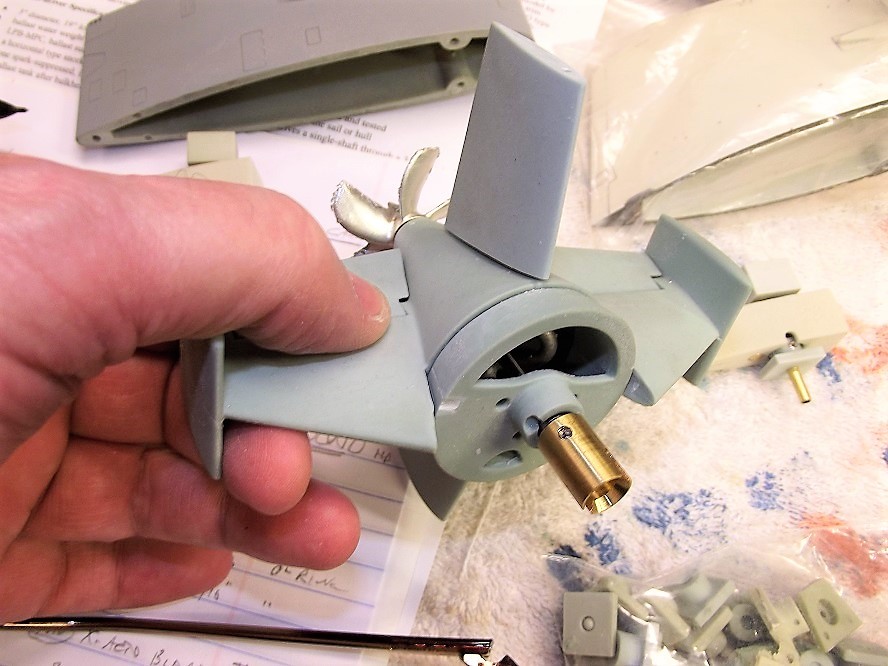
I have tons of various sized yokes. What is the inside diameter where the two operating shafts are located?
DavidAttached FilesLast edited by He Who Shall Not Be Named; 12-28-2021, 07:07 PM.Who is John Galt?Comment
-
-
Thank you for the information David.
The inside diameter is 1" at the stern dive planes and the rudder. With your instructions, I am pretty sure I can make the required cut and solder to make what I need from the selection I have.
Thank you David. As always, you are a gold mine of knowledge and help!!
Rob
"Firemen can stand the heat"Comment
-
Keep me informed, Rod. I'll bail you out if need be.
DavidWho is John Galt?Comment
-
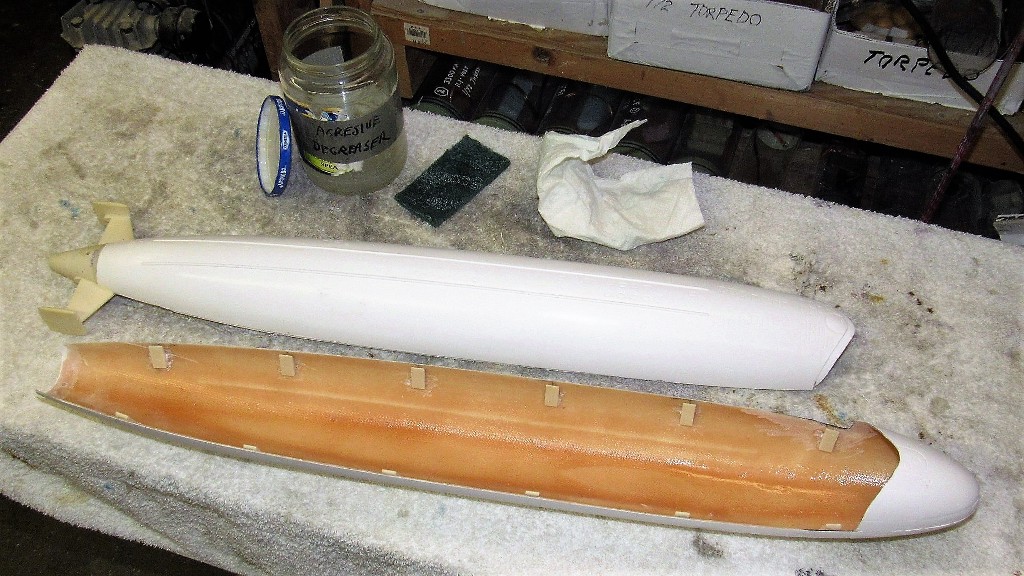
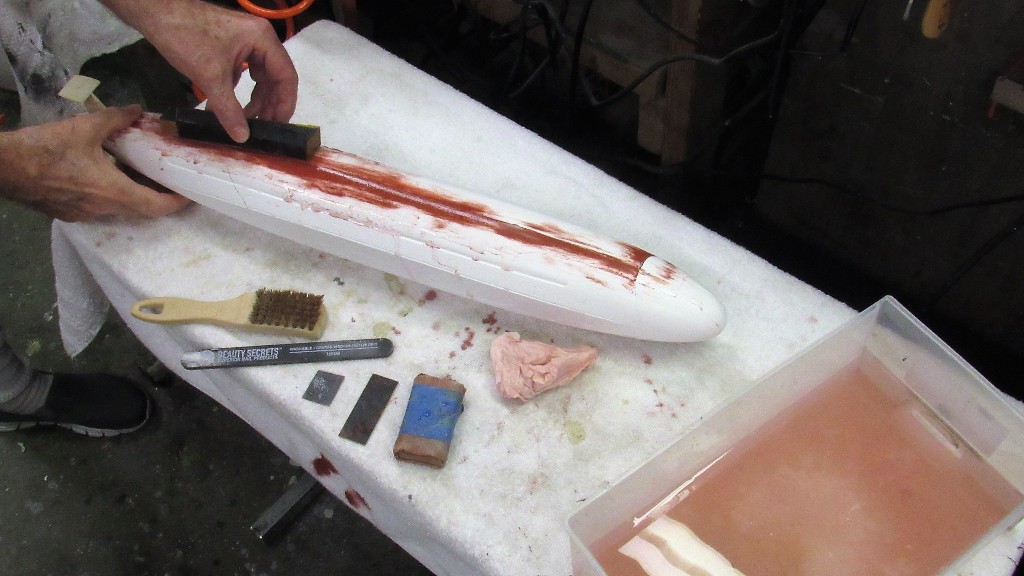
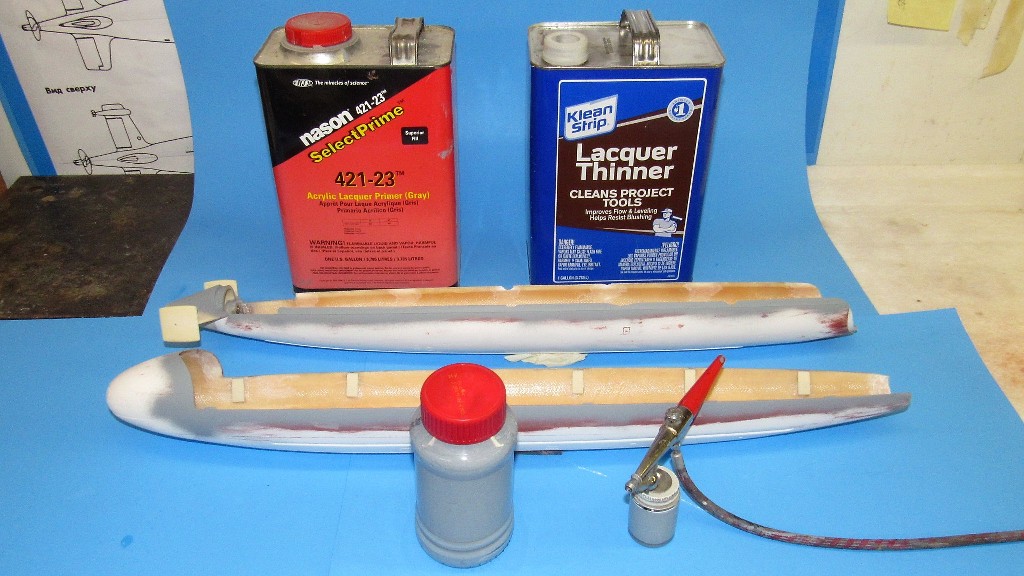
The tail-cone and lower hull now one, it came time to assemble the model and Bondo fill the inevitable longitudinal and radial gaps and miss-matches. But, before all that, I scrubbed the entire model with an abrasive green-pad soaked with Prep-Sol, a mild hydrocarbon solvent used by auto refinishing guys to prepare a surface for adhesion to fillers, putties, and primer. Same with model building -- clean that sucker right or your stuff won't stick with any permanence.
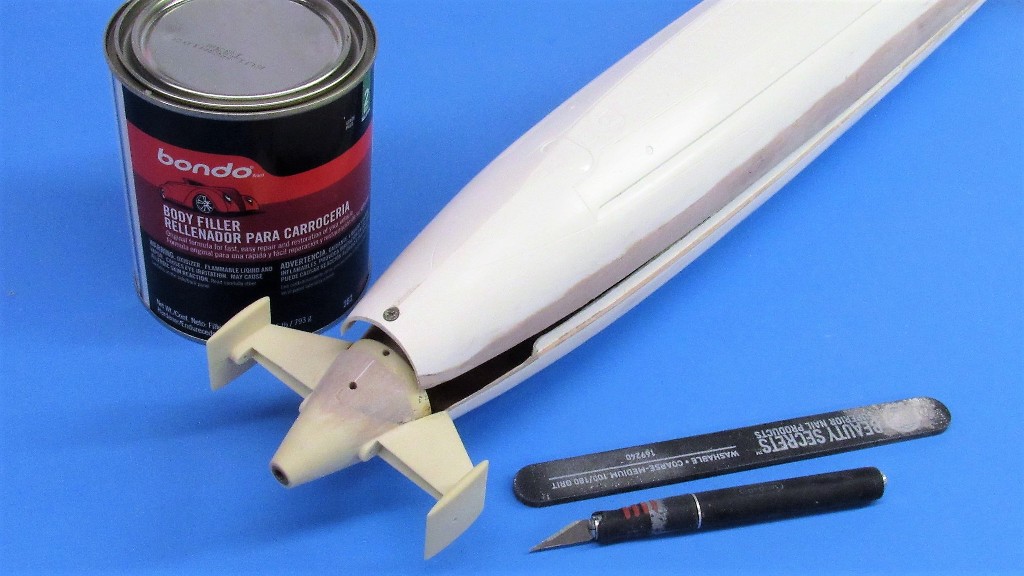
Here are the consumables and tools used to build up automotive filler to the low spots as well as those spots that out and out require a re-contouring --specifically the point where the stern of the upper hull half sits atop the tail-cone radial flange.
The Bondo is a two-part, heavily filled polyester paste that is trolled on with putty-knife, finger, or purpose shaped screeding blade. The wax is applied to areas I don't want to stick to the Bondo. The tools are used to knock down the cured Bondo till the low spots are brought to proper contour with the high spots. The file-card and stiff brittle brush are used to clean the teeth of the files as the Bondo quickly clogs the tools which markedly reduces their effectiveness.

The biggest non-conformance between the hull halves was at the stern where the end of the upper hull sits down on the tail-cone radial flange of the lower hull.
There is a sharp 'spine' atop the end of the upper hull which I've picked out here with a pencil lead. I not only had to apply filler atop the stern-cone, I had to continue the spine a bit. The hash-marked area is my estimate of how far the Bondo build-up will travel atop the tail-cone.

I've CA'ed a piece of plastic sheet to continue the spine atop the tail-cone. this will help me guide the putty-knife as I trowel on the Bondo.

After hash-marking where Bondo would be built up I dis-assembled the hull halves and applied wax to the areas I did not want the goo to stick.

The assembled hull was then given the Bondo treatment with the aid of a spatula type putty-knife used at the bow and stern, and a custom shaped screeding blade to address the longitudinal seam areas.
Once catalyzed the Bondo cures quickly, so once a batch was mixed up on the palette I had to get it transferred to the model and troweled out lickity-split.

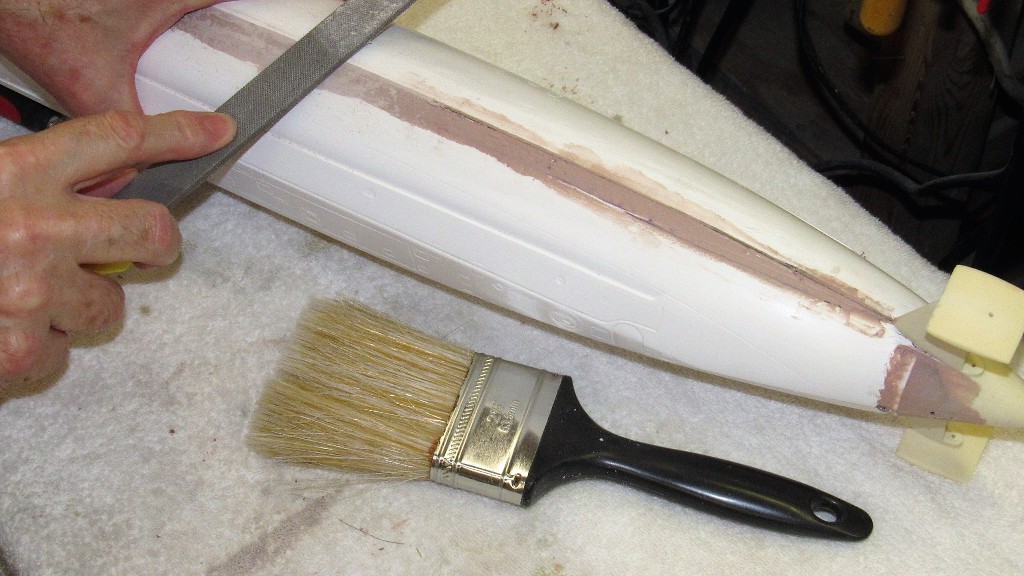
Once cured hard the Bondo was carefully ground down with a big coarse file, followed by a second-cut file, then a sanding block faced with #200 grit sandpaper. It takes several applications of the Bondo till all the low spots are identified and filled. But, the work goes quickly. All the operations you see in this installment were done in a ten-hour period.
Almost there.
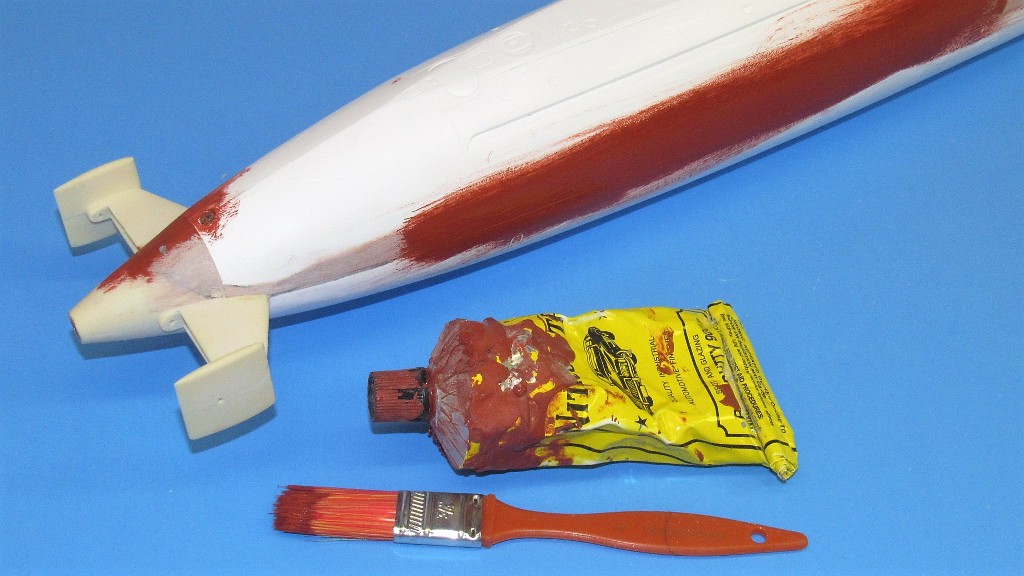
After block sanding the Bondo I brushed on a thick coat of air-dry touch-up putty (good old, Nitro-Stan) to fill file and sanding marks. Tomorrow I'll wet sand everything, then hit the model with a check-coat of gray primer.
I should note that after each application of Bondo and putty, the radial and longitudinal seams were chased open with an X-Acto blade. Gotta do this to keep from sticking the hull halves together once the Bondo or putty had hardened. Forget to do that and you are sooo screeewwweeeeddd!
 Who is John Galt?
Comment
-
Same bondo I use. I get my body filler from Oreillys.Of the approximately 40,000 men who served on U-boats in WWII, it is estimated that around 28,000 to 30,000 lost their lives.Comment
-
Oh yes. The routine we have done so many times with the same materials and always the same results. A beautiful fitting hull. Never get s old. I first learned these things and Evercoat metal glaze from david over 14 years ago. I'm still learning.Comment
-
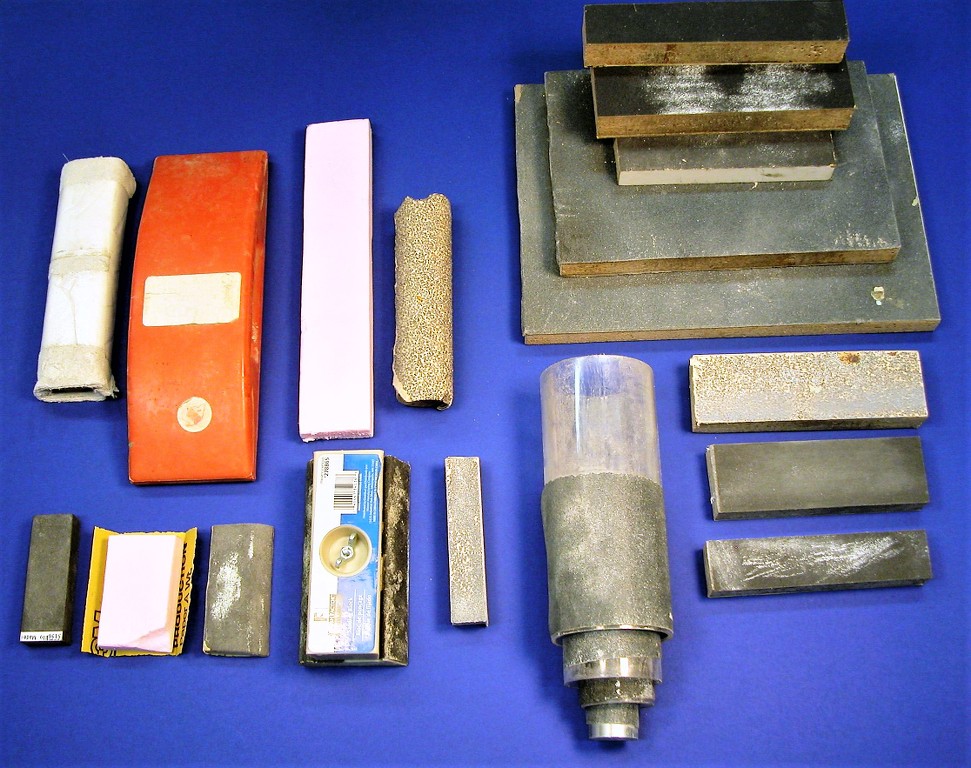
The hardened touch-up putty was wet sanded initially with #240 sandpaper, followed by #400. Along the length of the constant diameter portions of the hull, where the surface is a simple curve, I used a block to back-up the abrasive. However, when I got to the bow and stern tappers, where the surfaces of the hull transition to compound curves, I switched to a soft block. The soft block having the 'give' required to permit the abrasive to conform to those convex surfaces.
A look at just some of the abrasive tools I've gathered over the decades. Nice to have choices! For the tight, right-angle areas I use double-backed sanding squares and sanding sticks. Rolled up abrasive paper is used for chamfering and round and oval hole refinement.
When all the putty sanding was done, I wiped the work down with a well rung out damp paper towel and waited for everything to dry thoroughly. I then sprayed on automotive grade air-dry acrylic lacquer primer to check the work. Initially, with the two hull halves apart, I primed the edges, both radial and longitudinal.
Once those area had dried (this primer flashes hard enough to handle in no time), I assembled the hull and primed all areas that had been worked with filler and primer.

Time to turn my attention back to the WTC:
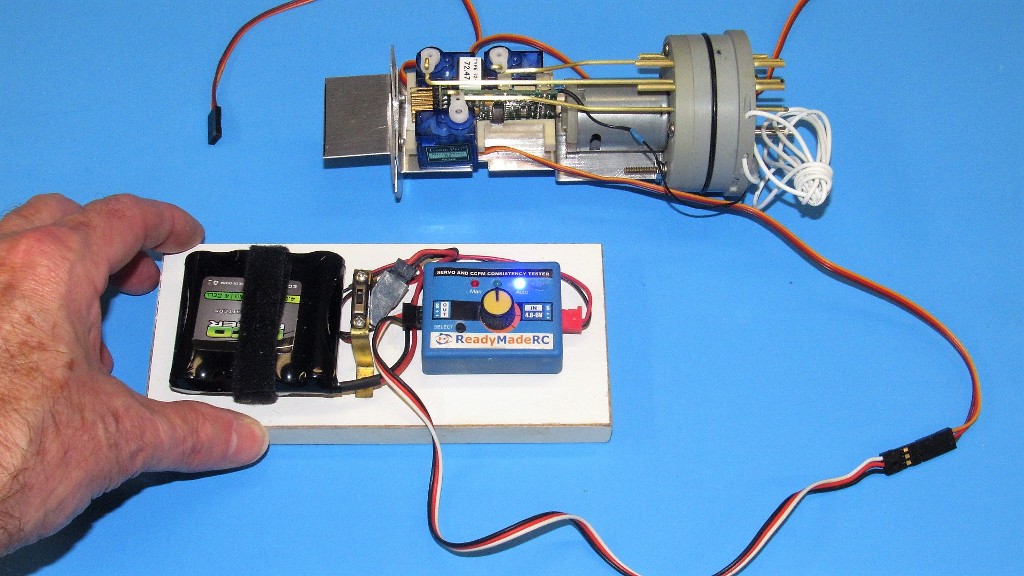
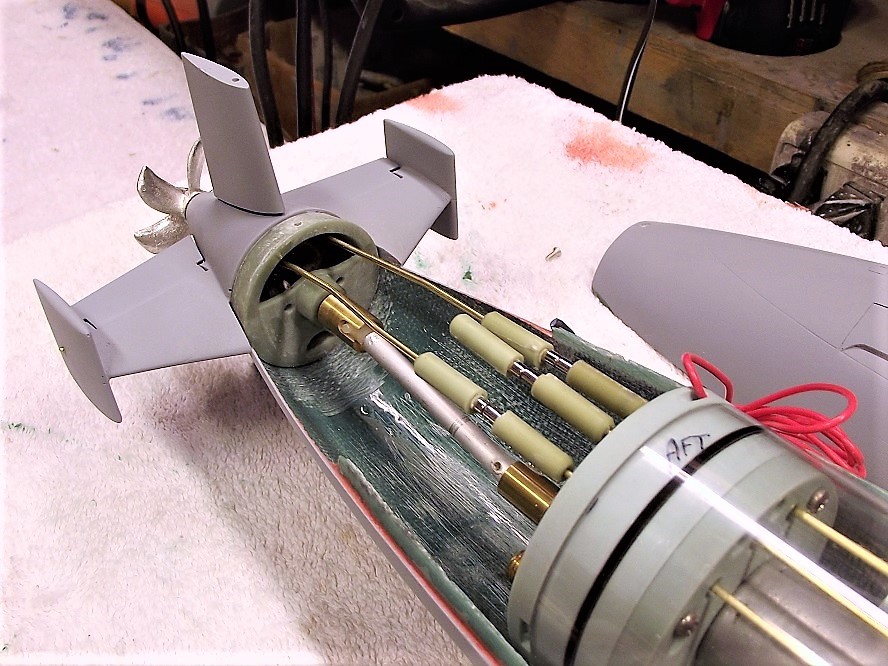
The motor-bulkhead was outfitted with a stern plane servo, a bow plane servo, and a rudder servo. The big deal was bending the servo pushrods so that they would experience the minimum amount of drag as they traveled through their respective watertight seals.
In hand is a vital piece of test-equipment, a servo-setter. This device produces the same pulse amplitude and width (variable from 1ms to 2ms) produced by the transmitter for a specific servo. Most helpful while working out the bends in the pushrods. Use of the servo-setter side-steps the need of hooking up the servos to the receiver and fiddling with the transmitter to wag the servos.
A little mill work to get the servos to fit their respective positions on the servo foundation.

Note the extensive milling done to the center of the cast resin servo foundation. This done to drop the receiver well below the servo control horns -- to avoid any contact between the moving parts of the servo and attached pushrod and the receiver.

It took some effort, but I was able to get the receiver to nest tightly between the three servos.
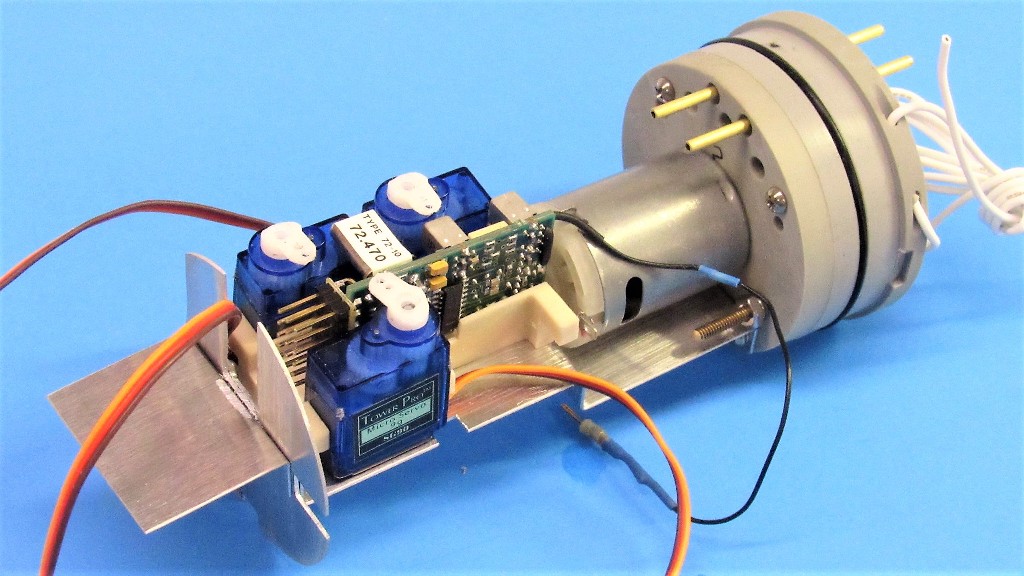
Each servo was set in place with two drops of thick-formula CA adhesive. As there is so little room within the tight confines of the cylinder, I had snipped off the mounting flanges that projected from the ends of the servo case. That move necessitated the need to make them fast with glue.

Who is John Galt?Comment
-
Prepare your minds for a new scale of scientific values, gentlemen.Of the approximately 40,000 men who served on U-boats in WWII, it is estimated that around 28,000 to 30,000 lost their lives.Comment

 Tweet
Tweet


Comment