OK, it's official: you're the King of complexity.
David
-
Today i took some pics, so buckle up and enjoy
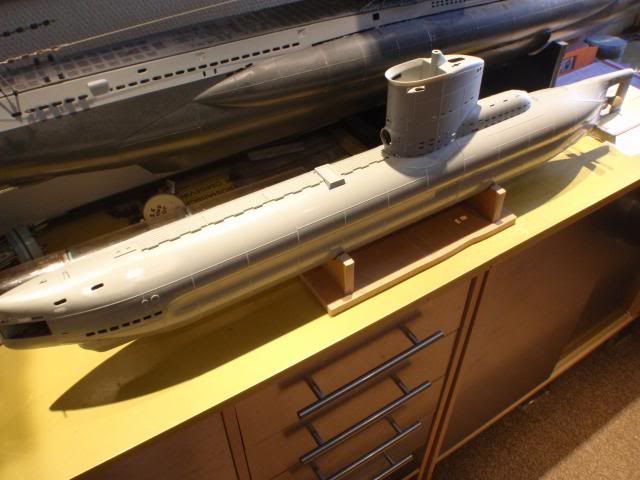
This is where i stand now, all parts placed semi-permanent by using small brass M2 screws
Now she is looking like a humpback whale, the first stage in separating both hull parts.
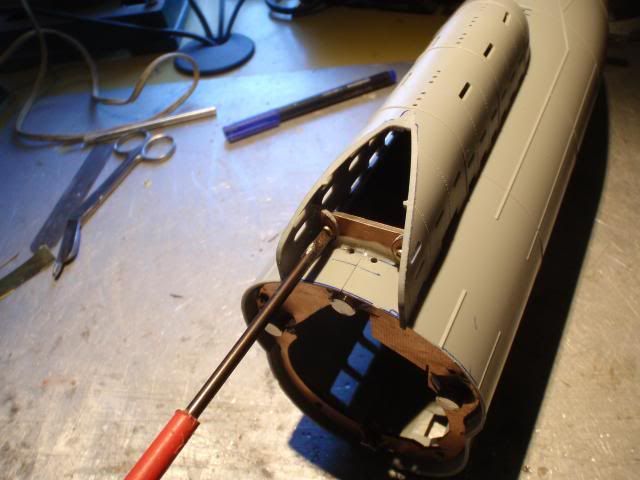
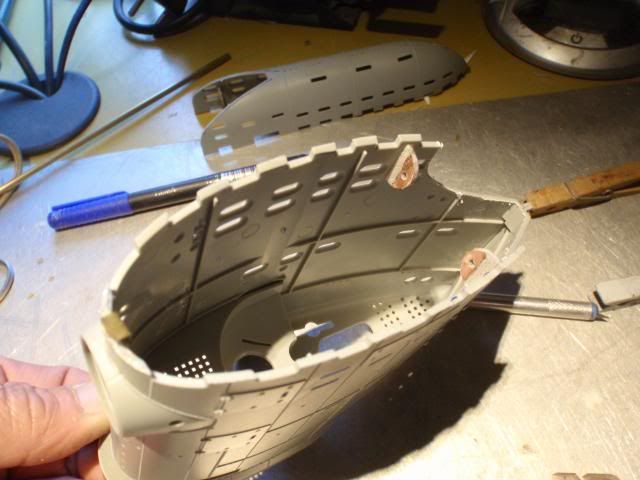
Made some lips onto the exhauscover, by unscrewing this you can lift it up.
Made a small brass hook at the end of the exhaustcover, this will ensure that it can't lift up during driving the boat.
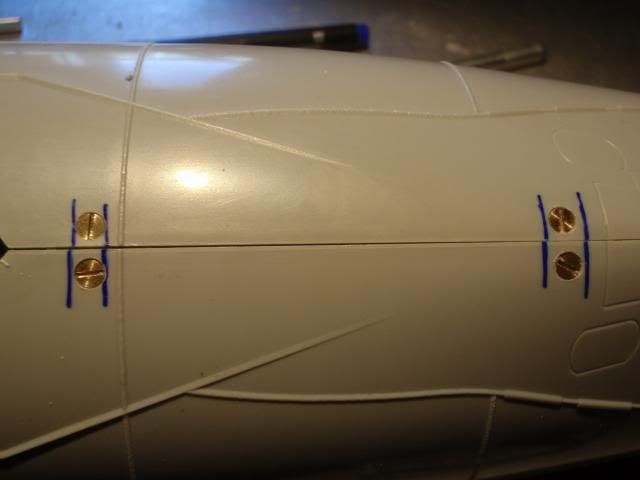
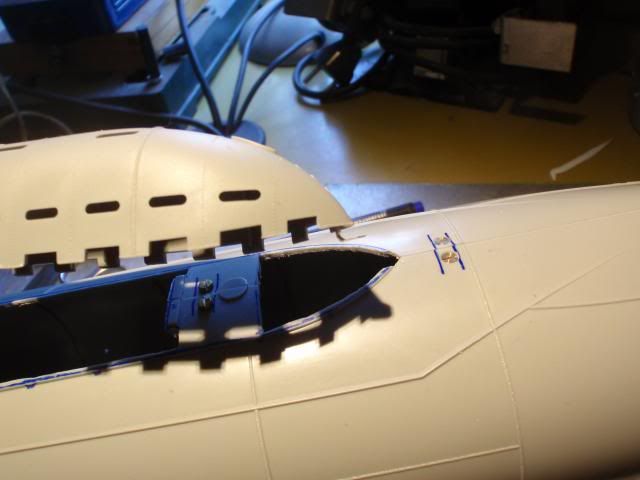
To connect both halves together i came up with this, small conical head screws, once placed i can cover them by filler.
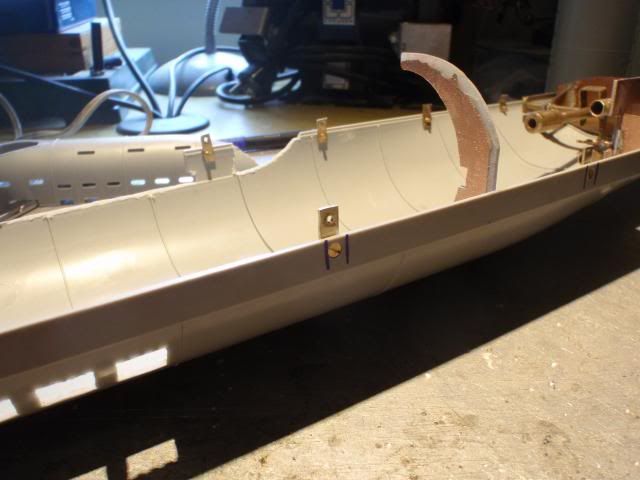
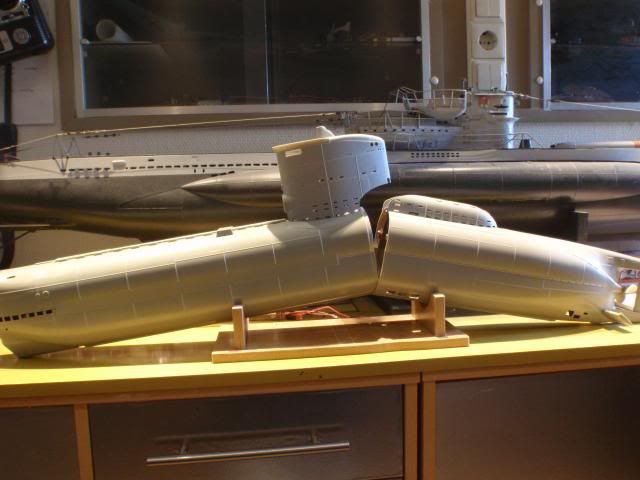
Once you removed all screws you can separate both halves, the brass lips are now visible, a hell of a job to make them all, i'm not too patient at making parts massproduced, it's boring.
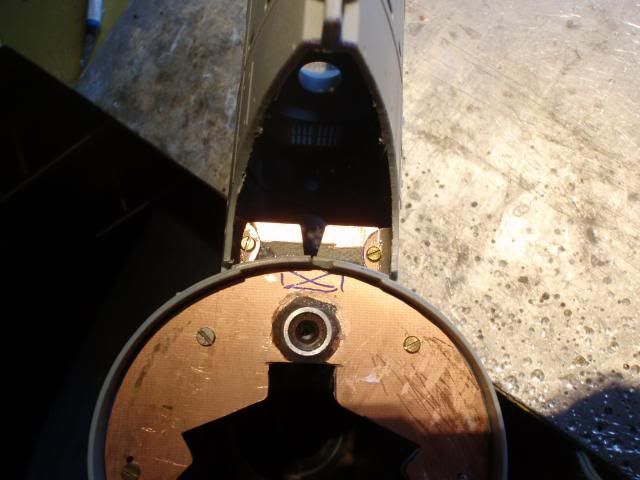
The conningtower is more or less connected the same way as my exhaustcover.
Once the conningtower is removed you can see the lips and again a small brass hook in front to keep everything thight at the hull.
Are you guys satified yet?, or do you want to see more?
Manfred.Leave a comment:
-
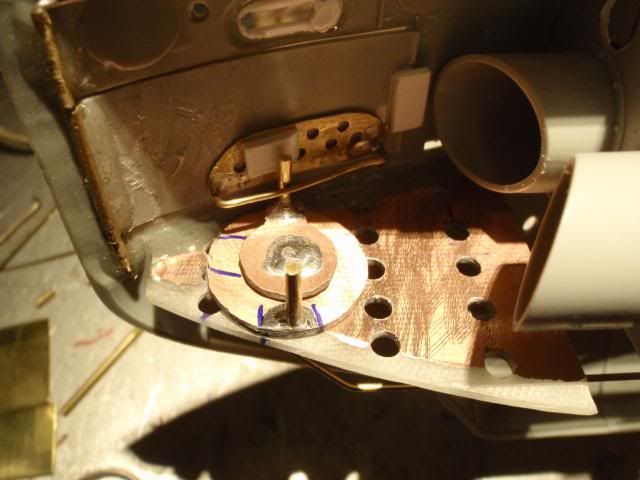
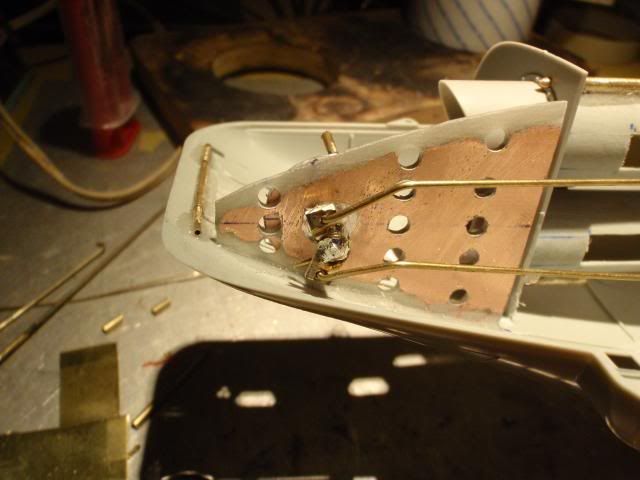
It has been some time, but while i was busy with the diorama, i solved the issue of splitting the boat when i have problems inside.
Unlike David i can't reach inside when the boat is glued together, i went for a screw connection all the way around, made the last provisions today, i'll post some pictures later to show what i've done, be patient.
Manfred.Leave a comment:
-
... the things we do to get the right lighting!
The Goddess of the house temporarily pleased, her humble minion scuttles quickly to the Cave, genuflecting all the way.
DavidLast edited by He Who Shall Not Be Named; 05-09-2013, 08:43 AM.Leave a comment:
-
Last few weeks i had another project to be made, She Who Must Be Obeyed had gotten from a friend some little stone guys, project Emperor Li was born.
I'll show you guys the results,

This i like her the most, laying on the ground at my feet, admiring my God devine work.

I was inspired by pictures from those guys standing inside their dugged up trenches, and decided to give it a try to replicate it.


Those trenches are made from one piece styrodure high density foam, and cutted into the desired shapes, given a shower of real sand and little rocks from the backside garden, used simple white wood glue to keep all the stuff at their places.
In the early days i've made more diorama's, but i was a bit rusty on this one, She Who Must Be Obeyed is pleased, so i can finally get back to the Skunk Works for some serious stuff.
Within a few weeks there is the annual meeting overhere, so all boats have to be serviced and ready to drive, busy times ahead.
Manfred.Leave a comment:
-
-
Sam,
Like you mentioned, the best solution would be, rebuilding both bulkheads to bring the tubes near the outer hull, i stick to the position provided by Bronco, only disadvantage is, i can only give a snapshot each, instead of firing both, for me that won't be a problem.
It's way too much effort to rebuild those tubes, only with the goal to fire both torpedo's at once, i rather put more time in getting this baby turned into a working rc sub.
Manfred.Leave a comment:
-
Manfred-
Wwhat about modifying the bulkhead that holds the tubes themselves? Could you split the bulkhead down the center, insert a section of styrene/plasticard and move the tubes closer to the side of the hull?
-SamLeave a comment:
-
Romel,
It seems simpler, but it's not going to work that way, there is not enough travel to open the doors completely across the centerline, the problem with the Bronco XXIII is, they placed the tubes near the centerline, more ideal would be a position against the outer hull parts, i've build it this way at my type VII and type XVIIb, giving me more clearance for the torpedo's, and lesser motion at the doors.
Modyfing the Bronco in such way would create more work than it's worth the time, even when you've done that, you still have to solve the mechanics to open the doors.
Manfred.Leave a comment:
-
Why not cut 2 grooves through the PCB like this, ( ). Much simpler...Leave a comment:
-
NEWS FLASH!!!!, NEWS FLASH!!!!!!!,
I managed to get into the highly secured development area, and could take some pics before security discovered me,
As i can analyse from this picture they use a double disk to get the doors open.
They used two rods to get independent action, O boy i gotta run !!!!!!, i hear the bloodhounds!!!!!, more to be followed.
Manfred.Leave a comment:
-
All those idea's with using a spring, T-rap or foam won't work, your servo's can't pull that much force, as for the room for shooting both torpedo's, i have to open up the door across the centerline of my boat to get enough clearance for my torpedo, there is simply not enough room.
So molesting your doors to get the magnet lower won't help, i tested this configuration with different postions of the magnets on the doors, if you place the magnet more into the direction of the tube, the force to keep the door shut will be too less, so that's a bummer too.
For now i'm refining the design with good results, most time consuming is testing, rebuilding, testing, rebuilding, testing, etc, i allready had my eureka moments, but you guys have to wait for the results, i've got my goldplated !!!!!! parts from the shop, have to secure them first inside the safe.
Manfred.Leave a comment:
-
Could you get a little extra door movement by drilling a hole through the door and glueing the magnets
flush with the outside surface?
Spring? How about using a nyon wire tie as a spring. It won't rust.
Sorry we are just filling the time till we get some more of Manfreds amazing build.Leave a comment:
-


Leave a comment: