Type 212

Collapse
X
 
  • Time
  • Show
Clear All
new posts
  • MFR1964
    Detail Nut of the First Order

    • Sep 2010
    • 1518

    #166
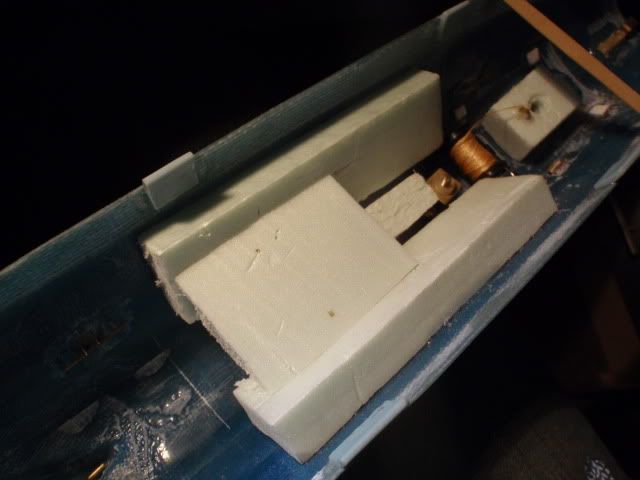
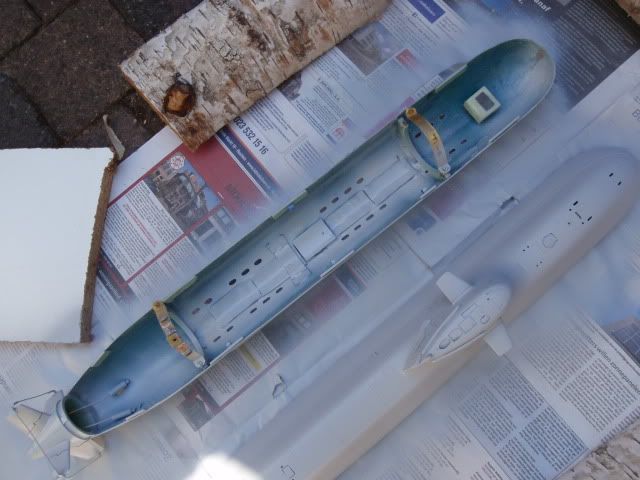
    Well, i'm fiddling around with the lead and the foam, and decided to finish up the peroscope part, i've seen some details on the real live pictures so i took a shot at it, see for yourself.


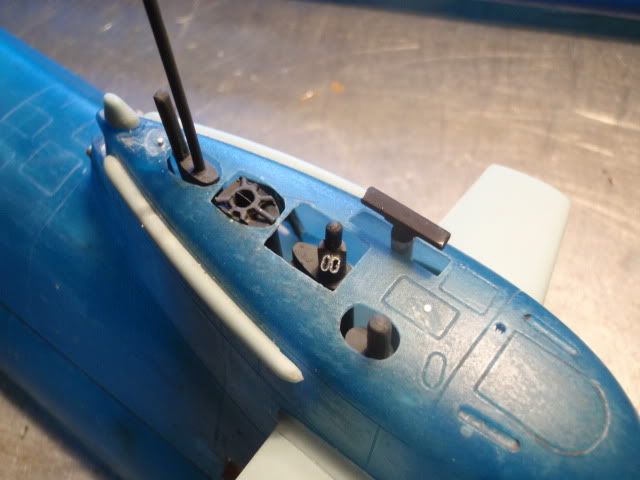
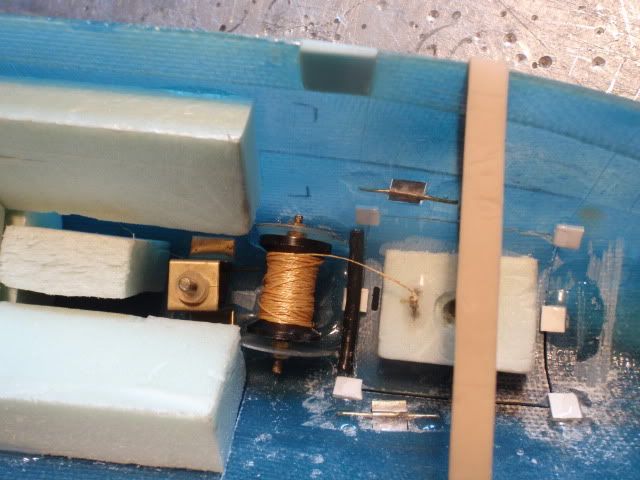
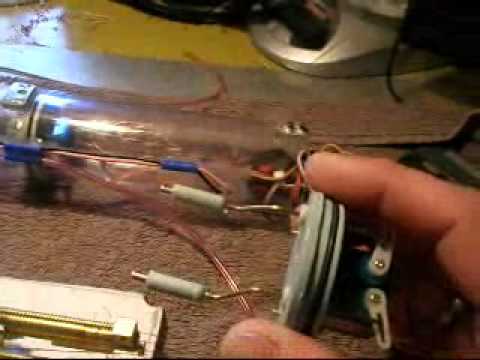
    I found out on some pics there is a kind of structure on top of the snorkeldevice, carefully hollowed it out, and made that item in copper, i even could reproduce the seperation inside the tube, tricky but possible.
    Used some thin aluminum tube rings and squeezed them into oval shapes, just to reproduce the lenses that are located at the peroscope.


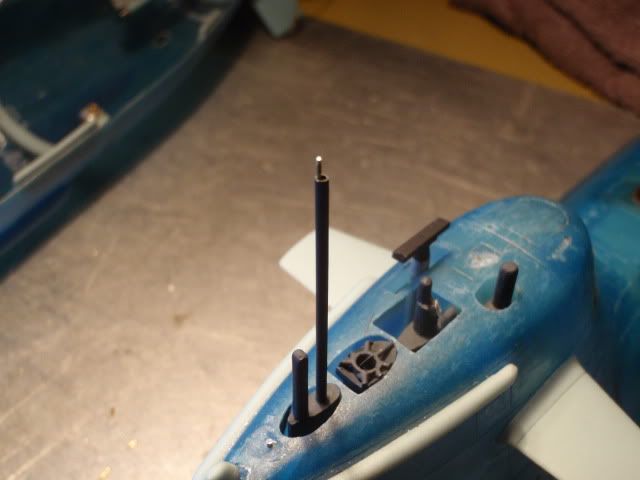
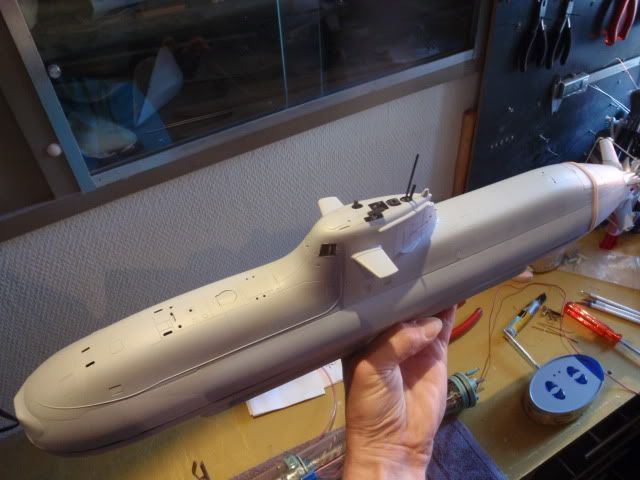
    The front radio mast i've replaced by a thin copper tube, why?, well to be frankly, i've broken the earlier example due to being not carefull, glueing it back would leave a weak spot, so i took it off and made the copper example.


    Other advantage is, i've placed a antenna inside, which you can extend or retract by hand.


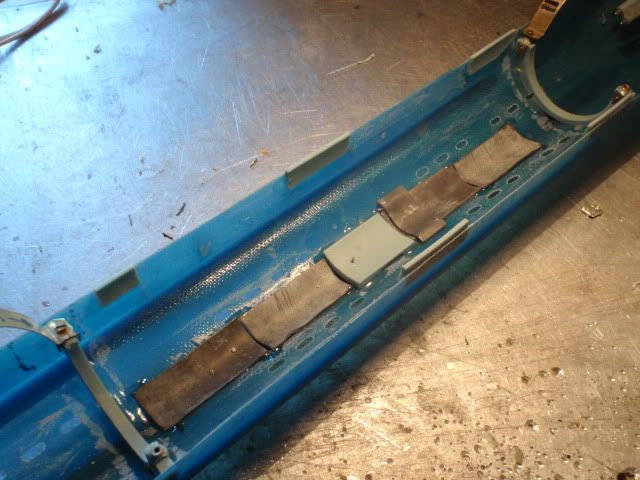
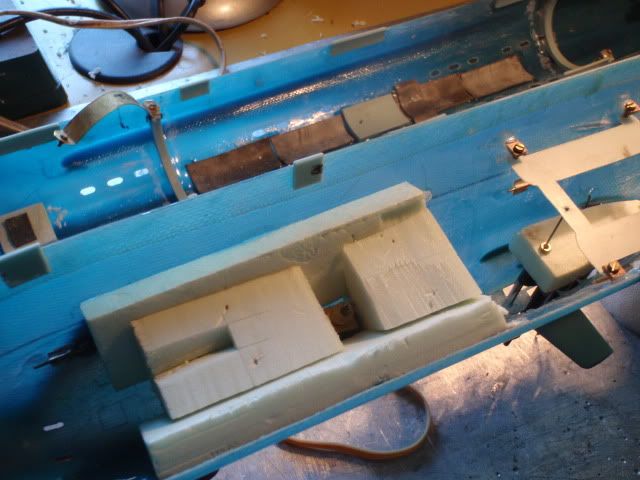
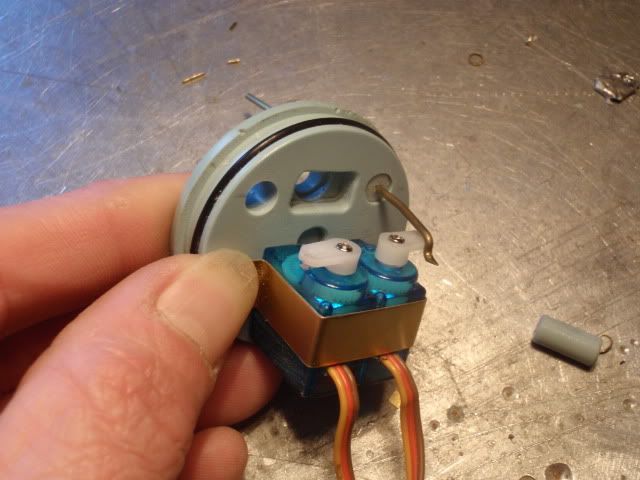
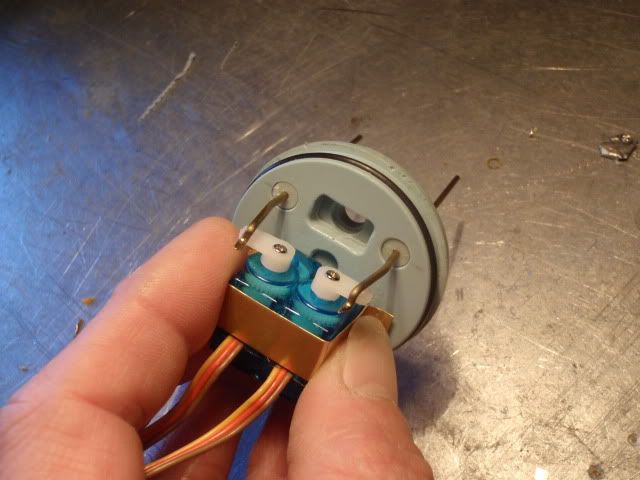
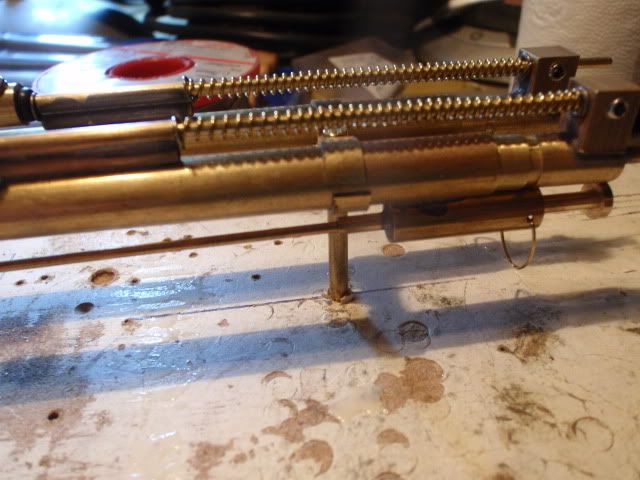
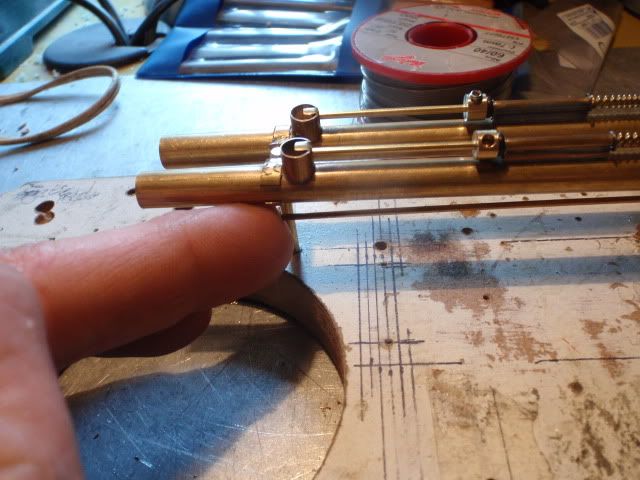
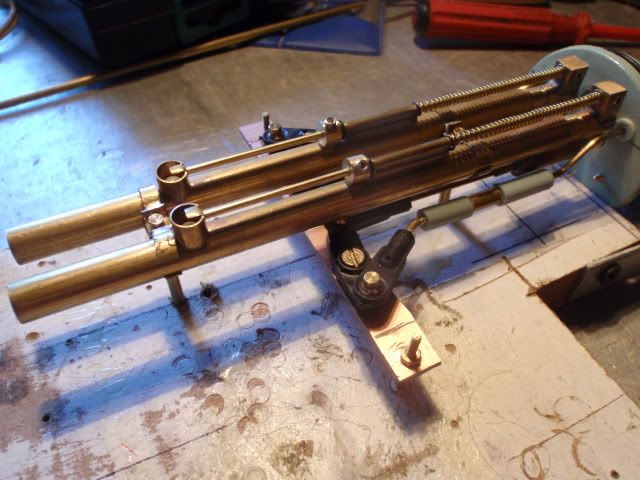
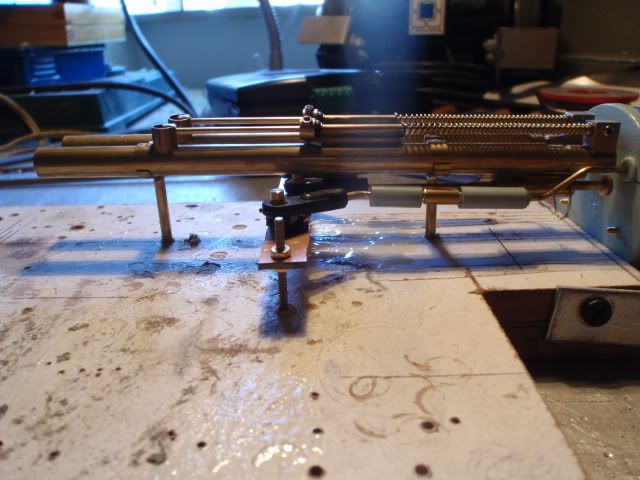
    And there is something else growing in the shop, this was the easy part, making the clamps to support the tubes.


    Greetings Manfred.
    Last edited by MFR1964; 05-22-2012, 02:20 PM.
    I went underground

    Comment

    • trout
      Admiral

      • Jul 2011
      • 3658

      #167
      Can't wait to see the firing of those tubes!!!!! Excellent work Manfred the Maniac!
      If you can cut, drill, saw, hit things and swear a lot, you're well on the way to building a working model sub.

      Comment

      • ManOwaR
        Lieutenant Commander
        • Jul 2009
        • 217

        #168
        It's great watching your threads, Manfred. A guy stands to learn a lot by following your work!

        Joel
        https://www.facebook.com/HMKcreations

        Comment

        • MFR1964
          Detail Nut of the First Order

          • Sep 2010
          • 1518

          #169
          Tom,

          It will take a while before they will be placed into the 212, first have to build me a mockup with the right dimensions, solve the way of activating the tubes by the servo's, and keep in mind that removing the SD still has to go easy.

          Thanks Joel,
          Just like i learn from other builders, i hope other builders can learn from me, if so, than i've reached my goal of passing the knowlegde just like inteded on a forum.


          Greetings Manfred.
          I went underground

          Comment

          • trout
            Admiral

            • Jul 2011
            • 3658

            #170
            Manfred,
            I can wait! No matter when it will happen, I will learn something from you Manfred.
            Thank you for your passion for this hobby!
            Peace,
            Tom
            If you can cut, drill, saw, hit things and swear a lot, you're well on the way to building a working model sub.

            Comment

            • MFR1964
              Detail Nut of the First Order

              • Sep 2010
              • 1518

              #171
              Hm, passion, David and i call it sickness, anyway, when you start the journey you have to finish what you started, next week i've got me a sub meeting in the Netherlands, so i have to service all my boats and make them look pretty.
              Also finish up the type 212 with the lead and foam thingy, i'll probably make the next testrun at the meeting, it's not my favourite choice but i don't have a option.
              The torpedo system has to wait, i only can build it inside my head like i usually do, next week i'll make a pass at it to see if my idea's will work.


              Greetings Manfred.
              I went underground

              Comment

              • MFR1964
                Detail Nut of the First Order

                • Sep 2010
                • 1518

                #172
                Added some lead to the keel, and placed some more foam into the upperpart, it seems that the rocking is almost gone, this evening i want to shoot some primer on the hull, she will at least look better at the coming sub meeting.


                First i added the lead, used the thin type which i could form to the hull without obstructing the SD, at this point she was exactly on the waterline with the present foam.


                I needed to add some extra blocks of foam in the front and made the slit in front because the tube of the safetyvalve needed some room.


                Rearpart same story, compared to the front i needed some more.


                This is the winch i made, length of the line about 6 meters, the material is a strange kind of plastick that will float by itself, only CA glue can be used all others won't stick.
                At the coming submeet i'll make some more testruns because i'm running out of time testing her now, the others boats are on the chargers and they will be pre checked to winkle out the last issue's.


                Greetings Manfred.
                I went underground

                Comment

                • MFR1964
                  Detail Nut of the First Order

                  • Sep 2010
                  • 1518

                  #173
                  Yesterday i've shot some primer on the hull, i'm amazed how many details there are on the hull, wasn't possible to see them all without some paint.


                  Did the paintjob late in the afternoon because of the tempartures, bloody hot during the daytime over here.


                  To give some protection to the lead i also shot some primer on the inside.


                  Just to show how many details there are present on this hull, due to the grey primer they all show up, a nice surprice.


                  Greetings Manfred.
                  I went underground

                  Comment

                  • He Who Shall Not Be Named
                    Moderator

                    • Aug 2008
                    • 13420

                    #174
                    Thank you for the positive words about the details in the kit. The master was built by Steve Neil. The great detailing you see, raised and engraved -- as well as a lot of bodywork to address some asymmetry problems -- was performed by Brian Stark. I simply made the tools and GRP and resin parts.

                    It's looking good, Manfred. And we can't wait for your after-action report at the end of the weekend. Have fun, and be safe!

                    David
                    Who is John Galt?

                    Comment

                    • MFR1964
                      Detail Nut of the First Order

                      • Sep 2010
                      • 1518

                      #175
                      Now the submeet is done and succesfull i can focus myself back onto the launchers, let's give this little critter some claws.
                      From a previous dryfitt i know that the two servo's needed for the launchers could be fitted just before the batteries, knowing that i started with converting the endplug of the Kilo SD for my needs, pictures.


                      First i made a brackett to keep the servo's at their place, and drilled the holes for fitting the watertight connections that David had send me.


                      For now they are just pressed in, later on i will glue them with RTV to get it watertight.


                      I placed the servo´s in such way that a switch can be placed, if not, nothing is lost so i can switch to plan B.


                      Frontview of the endcap, from this point i allready knew that i had to bent the rods into the desired shape to meet the launchers.


                      I took the liberty of duplicating the lever used to control the vent valve, when you have linear motion with such short rods it´s the best way to go, they can move freely now.


                      Took the breechblock apart, reworked it on the lathe, and soldered a rod onto the release mechanism.


                      By pushing against the rod you can release the breechblock, this was the first step for adapting it to my release mechanism.


                      By using a levermechanism and magnetic couplers i made the first attempt to get it working, the magnetic couplers work fine, the levermechanism did work activated manually, however doing the testrun using the servo´s it´s giving some frictionproblems.
                      Right now i´m changing the system to something that will work better without to much force, this kind of things happens when designing a system, next week i´ll give it a go with the plan B system.


                      Greetings Manfred.
                      I went underground

                      Comment

                      • MFR1964
                        Detail Nut of the First Order

                        • Sep 2010
                        • 1518

                        #176
                        I've broken up the first design and made something less difficult, tested it by hand and servo, in both chases it works fine, made a vid to show how things work,
                        next step will be, altering the SD to get the servo's inside.


                        Greetings Manfred.
                        Last edited by MFR1964; 06-07-2012, 11:24 AM.
                        I went underground

                        Comment

                        • He Who Shall Not Be Named
                          Moderator

                          • Aug 2008
                          • 13420

                          #177
                          As they say, simple is better. Nice arrangement. How about placing the safety float-valve into the ballast tank, Manfred? That's what I've done for my single-shaft 2" SD's.

                          David
                          Who is John Galt?

                          Comment

                          • MFR1964
                            Detail Nut of the First Order

                            • Sep 2010
                            • 1518

                            #178
                            Thanks David,

                            Placing the safety float valve inside the ballasttank also has crossed my mind, first i want to rebuild the electrical things inside the SD, from what i've fitted i allready know i have the shove some things to the rearpart, the switch has to go to the back as well the chargingplug.
                            This way i get the needed room for the servo's, the ADF does fit on top of the battery, a tight sqeeze but it works.
                            Did also a dry fitt with the tubes inside the sub, i'll post some pics later on the evening to show my dryfitt.


                            Greetings Manfred.
                            I went underground

                            Comment

                            • He Who Shall Not Be Named
                              Moderator

                              • Aug 2008
                              • 13420

                              #179
                              This project has grabbed you, hasn't it, my friend?!

                              You've been a this with the throttle fire-walled since you got the kit and SD. Mike and I are flattered. And watching you perform your own very special brand of magic on this model has been a real treat to watch!

                              I assume you'll put the weapon charging nipple on the outboard side of the breech-blocks?

                              David
                              Who is John Galt?

                              Comment

                              • MFR1964
                                Detail Nut of the First Order

                                • Sep 2010
                                • 1518

                                #180
                                Yep, i decided to let go the type XVIIb for the moment, and focus all the attention to the 212, it takes some time, but she deserves it, i will alter the charging nipples to the outboardside of the breechblocks, you suggested it allready sometimes earlier if i remember right.
                                It's a zippy model and if you build this straight out of the box you've got a nice thrillseeker, adding some more stuff on this scale is a challence, giving this critter some claws is the ice on the cake for me, some guys told me, it's to small to add, i'm intended to prove they had it wrong.


                                Greetings Manfred.
                                I went underground

                                Comment

                                Working...