USS Tucson

Collapse
X
 
  • Time
  • Show
Clear All
new posts
  • SSBN659
    Commander
    • Feb 2009
    • 405

    #16
    Work on Tucson continues slowly. Scraping ,sanding and filling on the hull to rid of epoxy that didn't cure. A real mess. Then my wife fell and fractured her femur so that's my priority for awhile.

    Will Rogers
    SSBN659

    Comment

    • He Who Shall Not Be Named
      Moderator
      • Aug 2008
      • 12256

      #17
      Originally posted by SSBN659
      Work on Tucson continues slowly. Scraping ,sanding and filling on the hull to rid of epoxy that didn't cure. A real mess. Then my wife fell and fractured her femur so that's my priority for awhile.

      Will Rogers
      SSBN659
      First things, first. Our best to her, Will.

      David
      Who is John Galt?

      Comment

      • Davjacva
        Lieutenant Commander
        • Nov 2022
        • 233

        #18
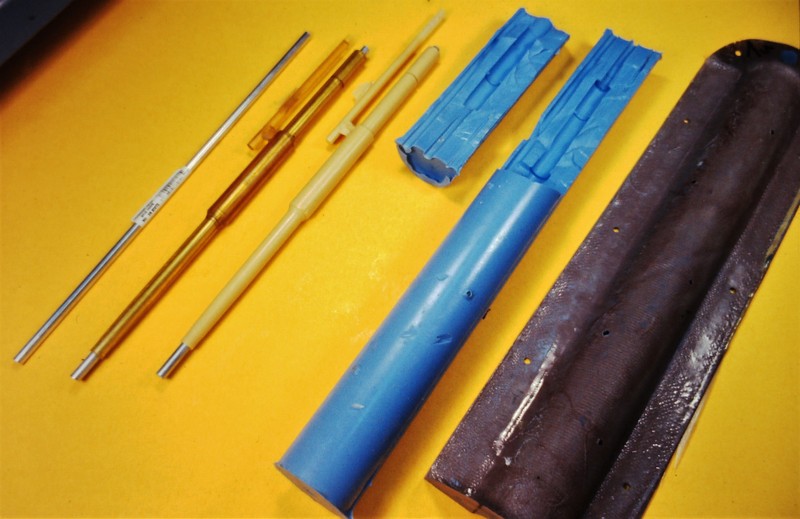
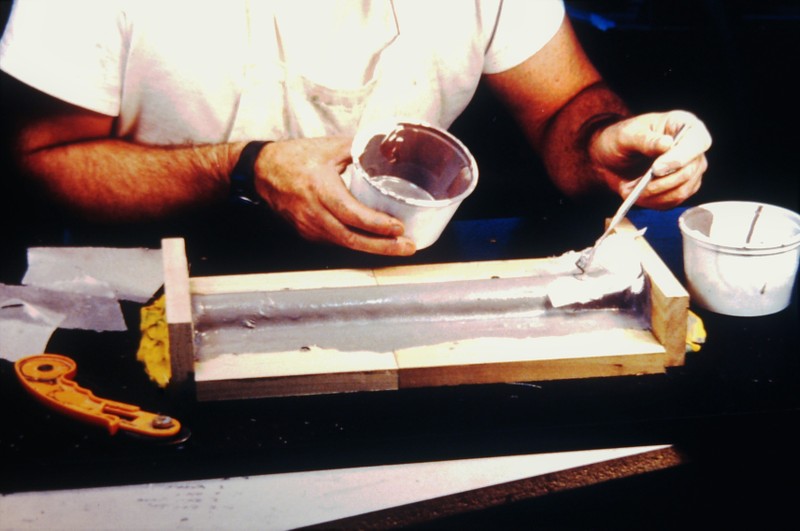
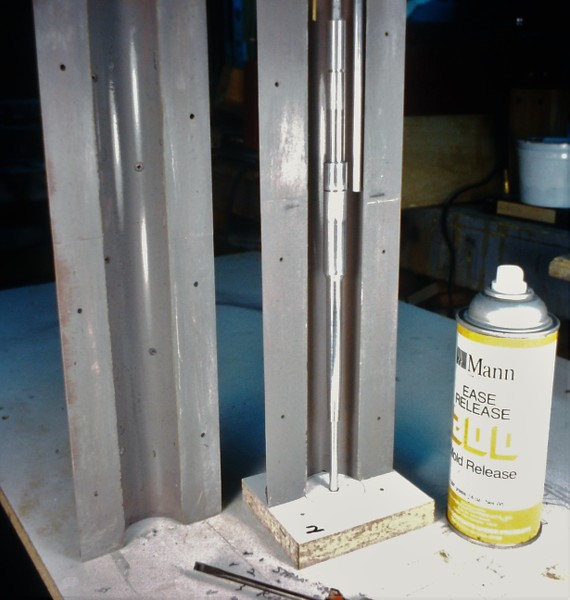
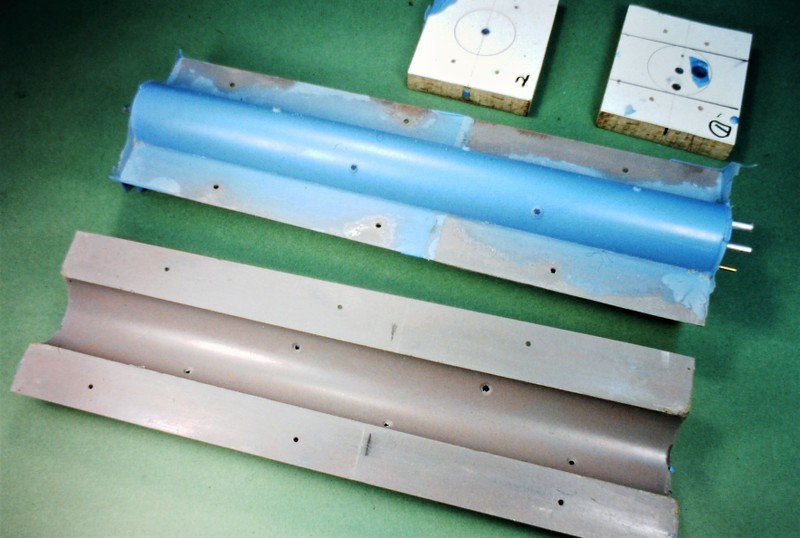
        ***WARNING-NOT A SUB*** You have a few choices once you've made that master, which is looking awesome. I love working in foam, as it's so fast to work up a form. I use autobody fillers, which partially dissolves your master while you go, but it builds back pretty fast, as enough of it is left to move forward. I use styrene as rough templates, then keep drawing grid work on it and fill and sand to shape. Dave talked me into casting this work, and roto-cast some in Alumulite, then we laid up one in GRP which I used that one. Did the mantlet the same way, but just cast that piece conventionally. The gun was machined in three parts, then cast. Sorry, I don't have photos of the casting process. This work actually made it into some Cabal reports back in '06-07. The ones on here only go back to about 2008. Your sail work looks great, that's a showcase by itself for detail.
        Attached Files

        Comment

        • He Who Shall Not Be Named
          Moderator
          • Aug 2008
          • 12256

          #19
          Originally posted by Davjacva
          ***WARNING-NOT A SUB*** You have a few choices once you've made that master, which is looking awesome. I love working in foam, as it's so fast to work up a form. I use autobody fillers, which partially dissolves your master while you go, but it builds back pretty fast, as enough of it is left to move forward. I use styrene as rough templates, then keep drawing grid work on it and fill and sand to shape. Dave talked me into casting this work, and roto-cast some in Alumulite, then we laid up one in GRP which I used that one. Did the mantlet the same way, but just cast that piece conventionally. The gun was machined in three parts, then cast. Sorry, I don't have photos of the casting process. This work actually made it into some Cabal reports back in '06-07. The ones on here only go back to about 2008. Your sail work looks great, that's a showcase by itself for detail.
          This is just some of the work Dave and I got into to produce a stout, yet light weight gun barrel part for his tracked bang-bang machine.


          Who is John Galt?

          Comment

          • SSBN659
            Commander
            • Feb 2009
            • 405

            #20
            After several months I'm back at work on the Tucson model. Recall the problems I had with the epoxy that didn't cure. In addition the exothermic reaction of the epoxy melted some of the pink foam and made an even worse mess. It reminded me of the picture below.
            Click image for larger version

Name:	IMG_7419.jpg
Views:	374
Size:	65.0 KB
ID:	166666Click image for larger version

Name:	BOW DAMAGE.jpg
Views:	363
Size:	47.5 KB
ID:	166667

            So I started over turning the bow and stern sections from wood covered in Evercoat. My drill press became my lathe. A tool bit I made in metal shop over 50 years ago was put to work again. The dowel on the bottom of my tool rests against the guide for an accurate contour.

            Click image for larger version

Name:	IMG_6881.jpg
Views:	364
Size:	65.8 KB
ID:	166668Click image for larger version

Name:	IMG_7964.jpg
Views:	364
Size:	61.9 KB
ID:	166670Click image for larger version

Name:	IMG_7954.jpg
Views:	356
Size:	52.1 KB
ID:	166671Click image for larger version

Name:	IMG_7965.jpg
Views:	343
Size:	64.3 KB
ID:	166669

            More later.

            Will Rogers
            SSBN659

            Comment

            • SubDude
              Captain
              • Dec 2019
              • 803

              #21
              For future reference, painting the foam board part with 4-5 coats of interior latex paint will seal the foam from the effects of polyester resin which granted has its issues but is typically much less expensive than epoxy resin. Either way, keep at it.

              Comment

              • SSBN659
                Commander
                • Feb 2009
                • 405

                #22
                Some recent work. Before priming I established upper and lower hull centerlines. Then drilled 1/16" holes to hold upper and lower centerlines. These will be filled in after the scribing is finished. Primed, filled with glazing putty, and sanded where needed (several times). Also drilled 3/4" holes for mounting rods. Starting to lay out lines for scribing.

                Click image for larger version

Name:	IMG_7983.jpg
Views:	375
Size:	57.1 KB
ID:	166793Click image for larger version

Name:	IMG_7984.jpg
Views:	369
Size:	53.1 KB
ID:	166794Click image for larger version

Name:	IMG_7987.jpg
Views:	361
Size:	53.9 KB
ID:	166795Click image for larger version

Name:	IMG_7991.jpg
Views:	365
Size:	52.0 KB
ID:	166796Click image for larger version

Name:	IMG_7998.jpg
Views:	361
Size:	51.1 KB
ID:	166797Click image for larger version

Name:	IMG_7999.jpg
Views:	373
Size:	51.2 KB
ID:	166798

                A question. I noticed drawings show main condenser intakes and discharge on P&S sides. Merchant ships I sailed on had the main condenser intake and discharge on one side only.

                Why do subs have them on both sides?

                Will Rogers
                SSBN659

                Comment

                • Davjacva
                  Lieutenant Commander
                  • Nov 2022
                  • 233

                  #23
                  Not to confuse the model makers, but Tuscon is a Mod-25 boat, that is, it's a Flight-6, 688 ( I know everyone spews out about 3 flights, but that is very erroneous. Flight-3 for example is only comprised of 719 and 720). This gave is a lot of the Seawolf improvements to powerplant/ propulsion, much larger steam generators, and I think the main seawater grates were a different size than a standard S6G hull. Greenville, Charlotte, and one of the EB last hulls have this.

                  Comment

                  • He Who Shall Not Be Named
                    Moderator
                    • Aug 2008
                    • 12256

                    #24
                    Originally posted by SSBN659
                    Some recent work. Before priming I established upper and lower hull centerlines. Then drilled 1/16" holes to hold upper and lower centerlines. These will be filled in after the scribing is finished. Primed, filled with glazing putty, and sanded where needed (several times). Also drilled 3/4" holes for mounting rods. Starting to lay out lines for scribing.

                    Click image for larger version

Name:	IMG_7983.jpg
Views:	375
Size:	57.1 KB
ID:	166793Click image for larger version

Name:	IMG_7984.jpg
Views:	369
Size:	53.1 KB
ID:	166794Click image for larger version

Name:	IMG_7987.jpg
Views:	361
Size:	53.9 KB
ID:	166795Click image for larger version

Name:	IMG_7991.jpg
Views:	365
Size:	52.0 KB
ID:	166796Click image for larger version

Name:	IMG_7998.jpg
Views:	361
Size:	51.1 KB
ID:	166797Click image for larger version

Name:	IMG_7999.jpg
Views:	373
Size:	51.2 KB
ID:	166798

                    A question. I noticed drawings show main condenser intakes and discharge on P&S sides. Merchant ships I sailed on had the main condenser intake and discharge on one side only.

                    Why do subs have them on both sides?

                    Will Rogers
                    SSBN659
                    Two steam plants, two sets of MSW's.
                    Who is John Galt?

                    Comment

                    • wlambing
                      Commander
                      • Nov 2020
                      • 291

                      #25
                      Redundancy, a hallmark of safe submarine operation! They are also relatively high up on the sides to remain clear of seabed material. Not good to clog things up in your condenser intakes!! That's helpful if doing a "bottoming" procedure, too.

                      Comment

                      • SSBN659
                        Commander
                        • Feb 2009
                        • 405

                        #26
                        I'm using K&S rectangular and square tubing to create the floods aft on the underside of Tucson. Evergreen plastic shapes would have been much easier to use but my local Ace Hardware did not stock them and Hobby Lobby was much farther away. I created a jig to cut the brass tubing since I need several. It's been a long time since I did any scribing so my first attempt wasn't worth keeping. I'll rework that after some more practice. I thought about modeling the SPM (the Outboard) as I did on my Will Rogers several years ago but at this scale that was not going to be practical.
                        Click image for larger version

Name:	IMG_8035.jpg
Views:	337
Size:	52.1 KB
ID:	167227Click image for larger version

Name:	IMG_8039.jpg
Views:	317
Size:	53.1 KB
ID:	167228Click image for larger version

Name:	IMG_8036.jpg
Views:	323
Size:	53.6 KB
ID:	167229Click image for larger version

Name:	IMG_8069.jpg
Views:	318
Size:	53.7 KB
ID:	167230Click image for larger version

Name:	IMG_8061 2.jpg
Views:	323
Size:	54.6 KB
ID:	167231

                        I just started to work on the forward floods and will have more on that later.

                        Will Rogers
                        SSBN659

                        Comment

                        • He Who Shall Not Be Named
                          Moderator
                          • Aug 2008
                          • 12256

                          #27
                          Good stuff, Will. As always.
                          Who is John Galt?

                          Comment

                          • SSBN659
                            Commander
                            • Feb 2009
                            • 405

                            #28
                            A question looking for an answer. This is a photo from the drawing showing Tucson underside aft. I'm guessing one is the cover for a stern anchor and the other is for a secondary propulsion motor but I'm guessing. So, what are numbers 1, 2 and 3? Anybody have an answer?

                            Click image for larger version

Name:	IMG_8149.jpg
Views:	246
Size:	54.7 KB
ID:	167274

                            Will Rogers
                            SSBN659

                            Comment

                            • SubICman
                              Lieutenant
                              • Jun 2022
                              • 87

                              #29
                              1 is anchor, wrong shape tho, 2 is secondary propulsion skid and 3 is a flood grate on said skid

                              Comment

                              • SSBN659
                                Commander
                                • Feb 2009
                                • 405

                                #30
                                Thanks SubiCman. Do you have something that shows the correct shape for the anchor?

                                Will Rogers
                                SSBN659

                                Comment

                                Working...