-
It isn't slick it is witchcraft ! Manfred that is Beautiful. I especially love the the torpedo doors. Alright it is slick.
PeterLeave a comment:
-
That is soooooo slick! What a piece of engineering there, Manfred.
MLeave a comment:
-
Yet again it's buzzing at the Skunkworks, i builded up the complete kit, closed the frontpart and got her a conningtower, tinkered the hatches and the front divingplanes.
It was time to do some real testing, at this point i got my answer if my effort at the vertical split would work like intended.
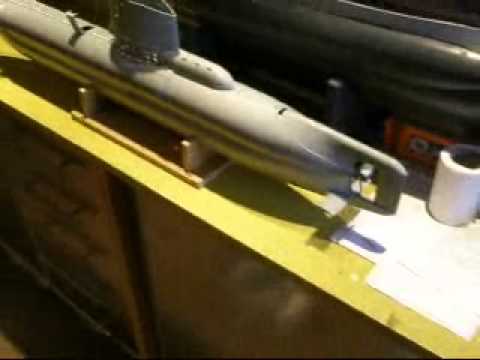
Now i can start making me the peroscope and snorkel, have some idea's to get this working, it still has to fit inside the narrow space of the SD.
Manfred.Leave a comment:
-
Yep, that was my initial idea, it took some tinkering to get the right bore, in the past i made some adjustable seals, which you could tighten/release by turning, giving you the right pressure to seal your rods.
There is one catch with my trick, you've got to lubricate them as often as possible, due to the pressure/friction you've got the risk of more wear/tear on your O rings when they become dry, for me just a added item on my checklist before driving my boat.
Manfred.Leave a comment:
-
So, the smaller bore pushed the o-ring tighter around the pushrod? Neat!
MLeave a comment:
-
Last few days i adressed some attention to my pressure leak problem by using 1,5 mm brass rods, made some modifications to the bulkhead, and did a pressure test, to my relieve she survided the test, even the rear bulkhead popped loose due to the high pressure.
Used some soapy water to check all O-ring seals, not a bubble to see, still have to do my regular 1 hour underwatertest, but i have high hopes she will pass.
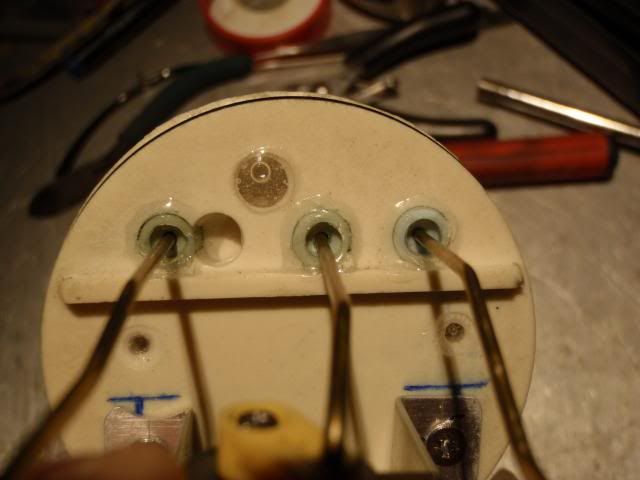
I decided to leave David's seals intact, and drilled a hole slightly smaller as the diameter of those tiny O rings, you can see the idea at this side of the bulkhead, this was by the way my first attempt, which failed, i needed to drill a even smaller hole.
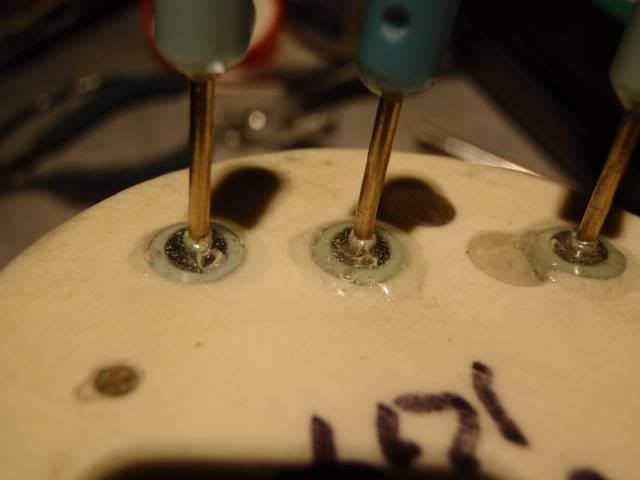
Luckely you always have two sides on the bulkhead, so armed with the knowlegde of my first attempt, i drilled some even smaller holes, pressed in the O rings and sealed them with 2K epoxy glue, this stuff becomes rocksolid after 24 hours, using RTV can give the risk of pushing out those seals by pressure or friction.
Now this concept works i can convert my SD to metric if needed, this adventure is logged in my archives.
Manfred.Leave a comment:
-
OK brads, enjoy the vid, one step closer to get this sucker into the water,
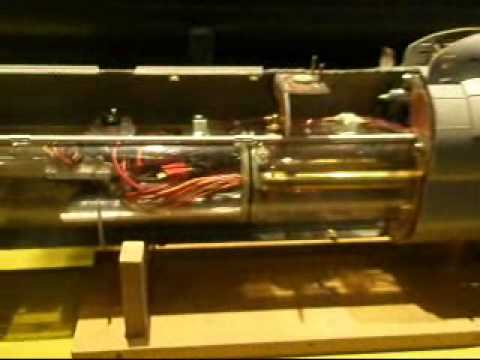
Manfred.Leave a comment:
-
Glad to see I'm not the only one impatient to see this boat in the water.Leave a comment:
-
Hmmmmmm, Manfred the Maniac, i know, i know, i've earned that title due to my demonic experiments, which accourding to some people are madness, but for me new adventures.
Once this hurdle is taken, all pieces of my puzzle will come together, hope to get more results next week, have some problems to solve with my SD, it's not pressure proof, have to play around with the O rings, i had used some new rods, which offcourse are slightly different in diameter as the rods of David.
He uses 1,6 mm rods, i only have 1,5 mm rods, cladding some solder around will not be the solution for me, i want to compress the O rings slightly, just enough to get a tighter seal around the shafts, have to alter the O ring thingys for that, it can be done, but yet again a setback.
If it works well, it can be done with all future models, every setback has a advantage, they call it learningcurve, i would say, UP YOURS!, i want to see some water and now!
Manfred.Leave a comment:
-
Enjoying your build. I see your point. Call you nitpicker? No, you will always be Manfred the Maniac to me.Leave a comment:
-
It turned out nice Tom, since i use a slide in/out SD there was no other solution, as you mentioned, using it in a standard boat it can solve your disconnecting problem.
Did this trick before with the torpedo tubes of my 212, works like a charm, you never have to fiddle to get your rods into the right place.
I'll go with the baking soda trick, using styrene strip will work, but also more visible from outside, call me a nitpicker, in the real live they welded those bars inside the vents, baking soda or micro balloons will be less visible.
Manfred.Last edited by MFR1964; 09-29-2013, 02:06 PM.Leave a comment:
-
Nice mod Manfred! I have been wanting to do something like this on the Gato (and we will see on the Scamp). Every now and then if I do a fast reverse my rudder loses the Klik-on connection. Having a holder like this would allow it to reacquire the connection. The other option is build a modified connector.
Nice grill work. Because this is styrene, use a styrene strip, get it soft with solvent and press it into the grill ends. It should form around the wire and bond to the hull. Looking at the picture you may need to get some of the CA removed to get a plastic to plastic cohesion.Leave a comment:

Leave a comment: