-
Make it simple, make strong, make it work! -
Romel,
I would have to agree with you, that looks more like a drag boat!
Tonight, I 3D printed two new WTC end caps to replace the originals that went south on me.!
This time around I am using my old tried and true sealer (Z-Poxy Finishing Resin) and not the spray sealer as before! I will let it cure overnight and then begin installation of the motor, motor wiring, and the rudder and dive plane bellows for the linkages!
Rob
"Firemen can stand the heat"
Comment
-
While I have been reworking the WTC end caps!
I applied a coat of Red Oxide primer to the upper and lower hull sections, and in my opinion, it gives the interior more of a finished off look, and also adds in sealing the PLA!
Rob
"Firemen can stand the heat"Last edited by rwtdiver; 10-02-2022, 02:53 AM.Comment
-
The WTC is finally completed!
I have corrected the issue with the two end caps, and remounted the motor and installed the rudder and dive plain rubber boots and linkages to the new end cap.
I also fabricated an improvement on the two magnetic linkage couplers. I installed brass threaded inserts into the magnet couplers which will allow me to gain access into the WTC without having to cut the brass rods to slide through the rubber boots.
Rob
"Firemen can stand the heat"Comment
-
Today I put the Holland 1 together and did a quick run in the pool just to see how everything was working and checking for any leaks in the WTC!
It all went very well. I am going to add an extension onto the bottom rudder in order to give it more surface area so I can improve on the turning radius. I may need to add two pieces of foam in the upper hull just to stabilize the boat a little more.
Rob
"Firemen can stand the heat"Last edited by rwtdiver; 10-09-2022, 02:13 AM.Comment
-
Lpoks a bit too high in the water. Could do with a bit more lead in the keel, which will help stability and rudder authority.
Comment
-
I am going to adjust the weight in order to achieve some semblance to the photo! Yesterday was more of test run to see how the motor and prop were working together and to double check the WTC for any leaks!
I understand what you are saying about getting the stern down as well for increasing my turning radius
Thanks Subculture for your input and the great photo! :-)).
Rob
"Firemen can stand the heat"Comment
-
I spent some time today adding addition weight to keel!
In order to add the weights, I had to scrap away some primer sealer in the area that the weights would be installed.
Tomorrow after the adhesive has cured, I will put the boat back in the water and check the water line on the hull.
Rob
"Firemen can stand the heat"
Comment
-
Looking great, Rob! I'm a bit surprised that the rudder authority is lacking. It should turn really well. What sort of throw do you have on the rudder?
BobComment
-
Hi Bob,
My statement may have misled a little bit as to how it was turning, when I said I was going to add a piece to the bottom rudder to get a better turning radius.
The Holland actually turns better than most of my submarines! It will turn a full 360 in my pool, if I do not over throttle it. The YouTube I put up makes it look as though it may not turn very well, because it actually does quite well right and left turning. I was just trying to show how the boat looked running in the water, and to also do a recheck on the WTC.
I am going to put it back into the water today after adding more weight to the keel in order to get the stationary water trim set up as close to the photo that Subculture put up. I am very pleased with the overall control responses on this boat.
Rob
"Firemen can stand the heat"Comment
-
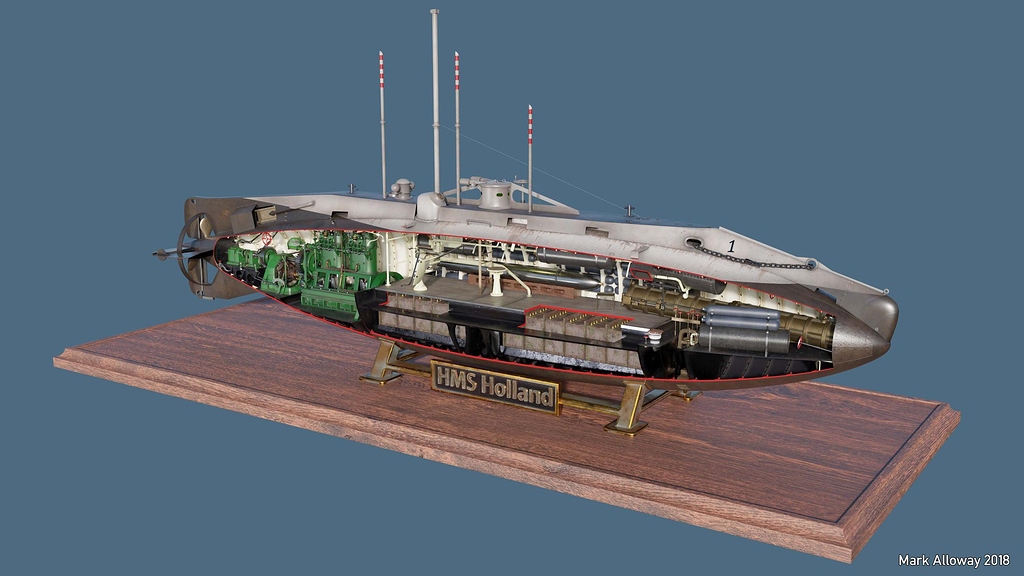
Hi Andreas,
Thank you very much for posting up the link to the HMS Holland 1 photos! Some excellent photos of the boat exterior and interior. I am in the process of completing the exterior of my Holland, and the placement of the deck piping. I have other photos that I found that are basically similar to the ones you posted, but nowhere as detailed and accurate as yours are!
Thank you very much!
Rob
"Firemen can stand the heat"Comment
-
Starting the exterior accessories!
Used brass tubing to duplicate piping comming up from the deck. I used brass rod to duplicate the ladder runs!
This photo shows the 3D printed chain links to fabricate the chains for the anchor.
These two photos show where the chain is located on the bow of the boat.
Rob
"Firemen can stand the heat"
Comment
-
Does actually someone have good plans of the HMS Holland? Would be a nice little "cut away" display project.....Comment

 Tweet
Tweet


Comment