Airbrushing, new to me, looking for help advice

Collapse
X
 
  • Time
  • Show
Clear All
new posts
  • Ken_NJ
    Captain
    • Sep 2014
    • 744

    #46
    I should have pointed out I did not apply the thinned out top coat yet Tom. It will tone it down a bit, or maybe alot. Will try that tomorrow. Will be practicing this more to get consistency right.

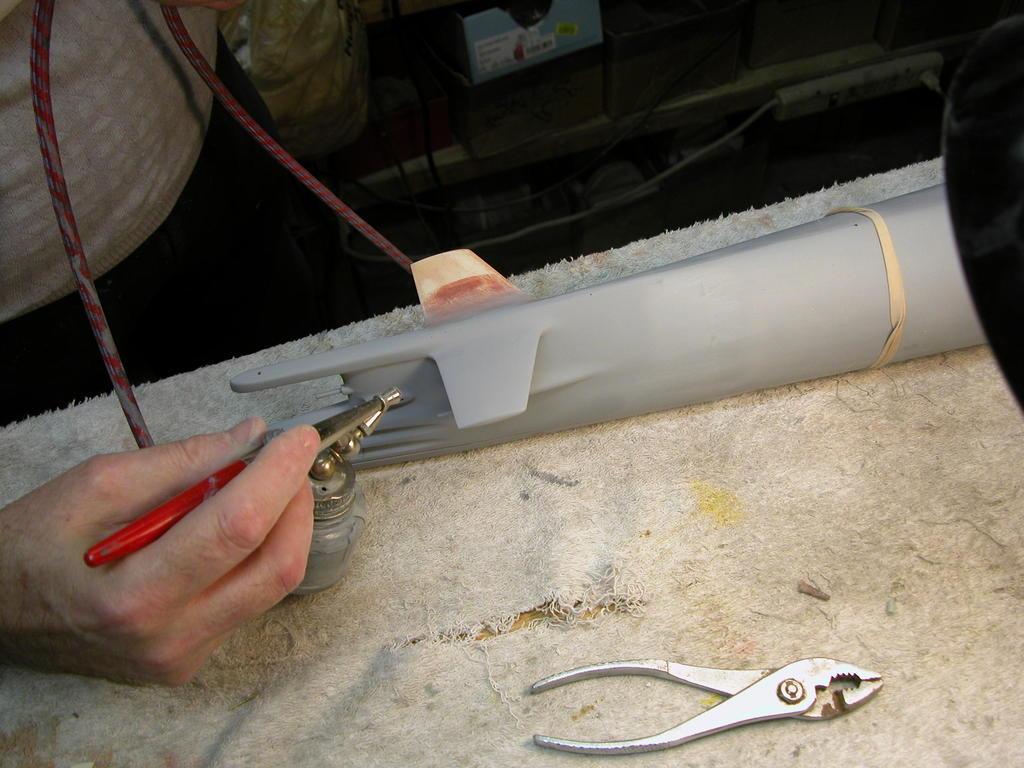
    I used a top feed Master airbrush which is double action so its hard to get the same air feed each time you let up. AND, trying to follow David's procedure to a T! Since he is always right.
    Last edited by Ken_NJ; 01-12-2022, 07:14 PM.

    Comment

    • He Who Shall Not Be Named
      Moderator
      • Aug 2008
      • 12253

      #47
      Originally posted by Ken_NJ

      David? What do you think?
      Awful... embarrassingly awful! How dare you post this here. I feel violated! I've seen better work done with a pressure-washer!

      This is a good study. Registration and density issues will come with practice, Ken. This is a very good start. Yes, the pattern is very stark. But take one of those panels and mist coat over it with the background black, and as the work becomes less pronounced, it will look better. Examples of the 'darkening' and the effect it has on the contrast of the formerly raw weathering effort.

      Click image for larger version  Name:	DSCN0033.JPG Views:	0 Size:	56.7 KB ID:	157909


      Click image for larger version  Name:	DSCN0035.JPG Views:	0 Size:	52.4 KB ID:	157910


      Click image for larger version  Name:	DSCF7120.JPG Views:	0 Size:	47.2 KB ID:	157911


      Keep swinging, Champ. You're on your way.

      David
      Last edited by He Who Shall Not Be Named; 01-12-2022, 07:40 PM.
      Who is John Galt?

      Comment

      • Das Boot
        Rear Admiral
        • Dec 2019
        • 1149

        #48
        Personally, I think the smaller scale boats can be overdone weathering wise. 1/96 is hard to get correct. I’m not talking about the scum line, I’m speaking of the oil canning, and streaks of white. While it may look good at a distance, up close it seems out of scale. Let the chiding begin.
        Of the 40,000 men who served on German submarines, 30,000 never returned.”

        Comment

        • He Who Shall Not Be Named
          Moderator
          • Aug 2008
          • 12253

          #49
          Originally posted by Das Boot
          Personally, I think the smaller scale boats can be overdone weathering wise. 1/96 is hard to get correct. I’m not talking about the scum line, I’m speaking of the oil canning, and streaks of white. While it may look good at a distance, up close it seems out of scale. Let the chiding begin.
          No. You make a valid observation, Casey. As one has to get closer to the smaller model, one can begin to pick out the flaws, such as the weathering and other items either over-done or are just plain wrong. I agree, weathering a smaller model -- that will survive close and distant observation -- is a tall order.

          The scale r/c plane guys took the cowards way out of this situation by, at least a half-century ago, adopting a new competitive category, stand-off scale, where the model is judged from a specific distance away from the display. Lazy! Why even try? Either do it right... or don't do it at all!

          David
          Who is John Galt?

          Comment

          • Ken_NJ
            Captain
            • Sep 2014
            • 744

            #50
            Got the Pasche airbrush working. Probably a combination of things. Nozzle adjustment, air pressure and thinned the paint further. But I'm getting spittle, not a smooth outflow. Maybe that's due to the paint being to thin?

            Learned a few things.
            Have a few strips available as spacers.
            First spray, laid the vertical & horizontal tape.
            Second spray, move the horizontal tape down a row. That completes one vertical row.
            Remove all tape and place the vertical strips over the completed row.
            Lift the top of the first and last vertical strips and use the already sprayed squares to position the horizontal strips, place vertical strips back.
            Do the same with the bottom of the first and last vertical strips. This will give you perfect (almost) positioning.
            Spray the third set of squares.
            Forth set, move the horizontal strips down one row. Wallah.

            So I did not get over spray on adjacent squares, I made a spray template to keep the over spray confined. When I sprayed a square I aimed on the template allowing the outside edge of the spray to hit the square. This helped not making the density too heavy. BUT, I still need to experiment-adjust the airbrush so I can control the spray better. This is new to me so figuring things out here. Trail and error.

            Click image for larger version  Name:	IMG_3953.jpeg Views:	0 Size:	49.0 KB ID:	157944

            Click image for larger version  Name:	IMG_3954.jpeg Views:	0 Size:	50.3 KB ID:	157943

            Better consistency and registration. Still have to work on the registration.

            Click image for larger version  Name:	IMG_3956.jpeg Views:	0 Size:	45.3 KB ID:	157942

            Up close, its spotty, like the airbrush is spitting. Paint to thin maybe? Spraying over with black may help.

            Click image for larger version  Name:	IMG_3958.jpeg Views:	0 Size:	46.1 KB ID:	157941

            My way to control where I'm spraying.

            Click image for larger version  Name:	IMG_3955.jpeg Views:	0 Size:	48.9 KB ID:	157940

            Comment

            • He Who Shall Not Be Named
              Moderator
              • Aug 2008
              • 12253

              #51
              Originally posted by Ken_NJ
              Got the Pasche airbrush working. Probably a combination of things. Nozzle adjustment, air pressure and thinned the paint further. But I'm getting spittle, not a smooth outflow. Maybe that's due to the paint being to thin?

              Learned a few things.
              Have a few strips available as spacers.
              First spray, laid the vertical & horizontal tape.
              Second spray, move the horizontal tape down a row. That completes one vertical row.
              Remove all tape and place the vertical strips over the completed row.
              Lift the top of the first and last vertical strips and use the already sprayed squares to position the horizontal strips, place vertical strips back.
              Do the same with the bottom of the first and last vertical strips. This will give you perfect (almost) positioning.
              Spray the third set of squares.
              Forth set, move the horizontal strips down one row. Wallah.

              So I did not get over spray on adjacent squares, I made a spray template to keep the over spray confined. When I sprayed a square I aimed on the template allowing the outside edge of the spray to hit the square. This helped not making the density too heavy. BUT, I still need to experiment-adjust the airbrush so I can control the spray better. This is new to me so figuring things out here. Trail and error.

              Click image for larger version Name:	IMG_3953.jpeg Views:	0 Size:	49.0 KB ID:	157944

              Click image for larger version Name:	IMG_3954.jpeg Views:	0 Size:	50.3 KB ID:	157943

              Better consistency and registration. Still have to work on the registration.

              Click image for larger version Name:	IMG_3956.jpeg Views:	0 Size:	45.3 KB ID:	157942

              Up close, its spotty, like the airbrush is spitting. Paint to thin maybe? Spraying over with black may help.

              Click image for larger version Name:	IMG_3958.jpeg Views:	0 Size:	46.1 KB ID:	157941

              My way to control where I'm spraying.

              Click image for larger version Name:	IMG_3955.jpeg Views:	0 Size:	48.9 KB ID:	157940
              Now you're cooking with gas! You cure the spitting by thinning the paint a bit more, shift to the #2 tip, and jack up the air pressure a few PSI.

              David
              Who is John Galt?

              Comment

              • Ken_NJ
                Captain
                • Sep 2014
                • 744

                #52
                The USS Orleck (Gearing class destroyer) is becoming a museum in Jacksonville FL. She's in drydock getting the hull inspected & painted. They posted these pics on the FB page which show a great example of 'oil canning' on a surface vessel. Interesting to see this. I'm sure there plenty of these pics for submarines.

                I'll return to Pasche testing on Monday, thanks David.


                Click image for larger version

Name:	USS Orleck_1.jpg
Views:	172
Size:	56.5 KB
ID:	157990

                Click image for larger version

Name:	USS Orleck_2.jpg
Views:	161
Size:	57.2 KB
ID:	157983

                Click image for larger version

Name:	USS Orleck_3.jpg
Views:	169
Size:	87.7 KB
ID:	157982

                Click image for larger version

Name:	USS Orleck_4.jpg
Views:	158
Size:	55.9 KB
ID:	157988

                Click image for larger version

Name:	USS Orleck_5.jpg
Views:	161
Size:	57.7 KB
ID:	157985

                Click image for larger version

Name:	USS Orleck_6.jpg
Views:	158
Size:	57.3 KB
ID:	157986

                Click image for larger version

Name:	USS Orleck_7.jpg
Views:	167
Size:	54.7 KB
ID:	157989

                Click image for larger version

Name:	USS Orleck_8.jpg
Views:	161
Size:	54.7 KB
ID:	157987
                Attached Files

                Comment

                • Ken_NJ
                  Captain
                  • Sep 2014
                  • 744

                  #53
                  I think I'm done practicing.

                  This is before applying the base color (black).
                  Click image for larger version

Name:	DSC_0446.JPG
Views:	141
Size:	86.8 KB
ID:	158432

                  This is with the base color overspray. Without a clear coat.
                  Click image for larger version

Name:	DSC_0448.JPG
Views:	154
Size:	57.1 KB
ID:	158429

                  One of the five practice sessions with the base coat overspray.
                  Click image for larger version

Name:	DSC_0450.JPG
Views:	151
Size:	46.7 KB
ID:	158431


                  This last one in the upper left (top bow of the sail) I tried the smaller 'oil canning' effect you can see in David's example.
                  I guess that smaller framework is there for reinforcement for the forward motion of the boat against the forces of the water?
                  Click image for larger version

Name:	DSC_0449.JPG
Views:	154
Size:	45.4 KB
ID:	158430

                  At this point I'll be cutting new tape strips (3/8 inch) to actually do the sail. Don't think I'll do any better than this.

                  Comment

                  • Ken_NJ
                    Captain
                    • Sep 2014
                    • 744

                    #54
                    In the meantime, had a warm day that I could prime my 'test hull' for doing the streaking and below waterline practice. Still need warm days to spray the hull base color and clear coat.

                    Click image for larger version  Name:	IMG_3963.jpeg Views:	0 Size:	45.6 KB ID:	158434

                    David. Looks like you used diluted white acrylic paint for the streaking?

                    I'll also be doing the streaking on the sail. Is the streaking done over clear coat which is over the base color & 'oil canning' coat on the sail?

                    https://forum.rc-sub.com/forum/tips-...arkings-part-2
                    Last edited by Ken_NJ; 01-24-2022, 07:05 PM.

                    Comment

                    • He Who Shall Not Be Named
                      Moderator
                      • Aug 2008
                      • 12253

                      #55
                      Originally posted by Ken_NJ
                      In the meantime, had a warm day that I could prime my 'test hull' for doing the streaking and below waterline practice. Still need warm days to spray the hull base color and clear coat.

                      Click image for larger version Name:	IMG_3963.jpeg Views:	0 Size:	45.6 KB ID:	158434

                      David. Looks like you used diluted white acrylic paint for the streaking?

                      I'll also be doing the streaking on the sail. Is the streaking done over clear coat which is over the base color & 'oil canning' coat on the sail?

                      https://forum.rc-sub.com/forum/tips-...arkings-part-2
                      Correct ken, water soluble acrylic paint. You only put a clear coat down between layers if you think the current application might have to be abraded off because of mistakes or part of the weathering process (streak with brush followed by streak with #000 steel-wool, etc.) -- the clear coat protects the work beneath it.

                      I usually don't clear coat the completed oil-canning but will take care not to overdue the streaking. Start the streaking with a big ugly 2" house-brush but make it a new one; thoroughly soak it with well diluted white then wring the hell out of it with rags/paper towels. You want the streaking to go down as though you were dry brushing on highlighter (which is pretty much what you're doing).

                      Go ape-****, Ken! Show that test-article who's boss!

                      David
                      Who is John Galt?

                      Comment

                      • Ken_NJ
                        Captain
                        • Sep 2014
                        • 744

                        #56
                        What I did this week.

                        I happy on the results. Next up, practicing on streaking.

                        Questions. I now need to spray a base color to darken it. But I also need to do streaking on the sail. Do I spray base color now but maybe not to dark, then do streaking, then spray more base color which will further darken both?

                        Click image for larger version

Name:	IMG_3970.jpeg
Views:	133
Size:	49.5 KB
ID:	158581

                        Click image for larger version

Name:	IMG_3971.jpeg
Views:	135
Size:	45.6 KB
ID:	158578

                        Click image for larger version

Name:	IMG_3972.jpeg
Views:	122
Size:	44.5 KB
ID:	158579

                        Click image for larger version

Name:	IMG_3973.jpeg
Views:	138
Size:	48.2 KB
ID:	158580

                        Comment

                        • He Who Shall Not Be Named
                          Moderator
                          • Aug 2008
                          • 12253

                          #57
                          Originally posted by Ken_NJ
                          What I did this week.

                          I happy on the results. Next up, practicing on streaking.

                          Questions. I now need to spray a base color to darken it. But I also need to do streaking on the sail. Do I spray base color now but maybe not to dark, then do streaking, then spray more base color which will further darken both?

                          Click image for larger version

Name:	IMG_3970.jpeg
Views:	133
Size:	49.5 KB
ID:	158581

                          Click image for larger version

Name:	IMG_3971.jpeg
Views:	135
Size:	45.6 KB
ID:	158578

                          Click image for larger version

Name:	IMG_3972.jpeg
Views:	122
Size:	44.5 KB
ID:	158579

                          Click image for larger version

Name:	IMG_3973.jpeg
Views:	138
Size:	48.2 KB
ID:	158580
                          Exactly as you described the procedure, Ken. You're a quick study, pal. Soon you'll be teaching me tricks.

                          David
                          Who is John Galt?

                          Comment

                          • Ken_NJ
                            Captain
                            • Sep 2014
                            • 744

                            #58
                            Another question.

                            The first attempt on this side I had the registration off. I needed a do-over, was not happy with it. I started to remove the 'oil canning' by using water and a scrubby. Surprising, it came off very easy. Little to no effort except wiping it. Why? Was the surface not prepped properly? Was the paint diluted to thin causing it's holding power to change? Curious as to why this was. If this was used as is with no protective clear coat I would think after running a while it might come off on it's own. But, we do clear coat to protect it.

                            Click image for larger version

Name:	IMG_3968.jpeg
Views:	130
Size:	47.5 KB
ID:	158607

                            Comment

                            • He Who Shall Not Be Named
                              Moderator
                              • Aug 2008
                              • 12253

                              #59
                              Did you scrub the raw plastic parts with scouring powder and an abrasive pad? Did you prime the surface before the black base-color? All injection kit parts arrive with a coat of oil on them -- this has to be completely removed to insure proper adhesion of primer and paint.


                              David
                              Who is John Galt?

                              Comment

                              • Ken_NJ
                                Captain
                                • Sep 2014
                                • 744

                                #60
                                The parts were washed, scrubbed, washed, scrubbed and sanded and washed. Then primed, lightly sanded, base color, lightly sanded then clear coat, then washed. The acrylic shading was applied on top of the clear coat.

                                Comment

                                Working...