Welcome to our forums. For the best in R/C submarine kits, components and accessories, be sure to visit the Nautilus Drydocks
If this is your first visit, be sure to
check out the FAQ by clicking the
link above. You may have to register
before you can post: click the register link above to proceed. To start viewing messages,
select the forum that you want to visit from the selection below.
Now that the HL Hunley project is finished, I will be giving my FULL attention to the 1:77 scale Disney Nautilus build!
As you can see, the Nautilus is on my work bench and ready for some serious work!! But along the way I wanted to share with you my precious (Sunhokey) Pursa i3 printer is back with me again! I built this printer from a kit 8 years ago! Perhaps some of you that are into 3D printing remember this kit from the past! Just had to share with you what a beauty she is! OK! Enough! On to the Nautilus build!
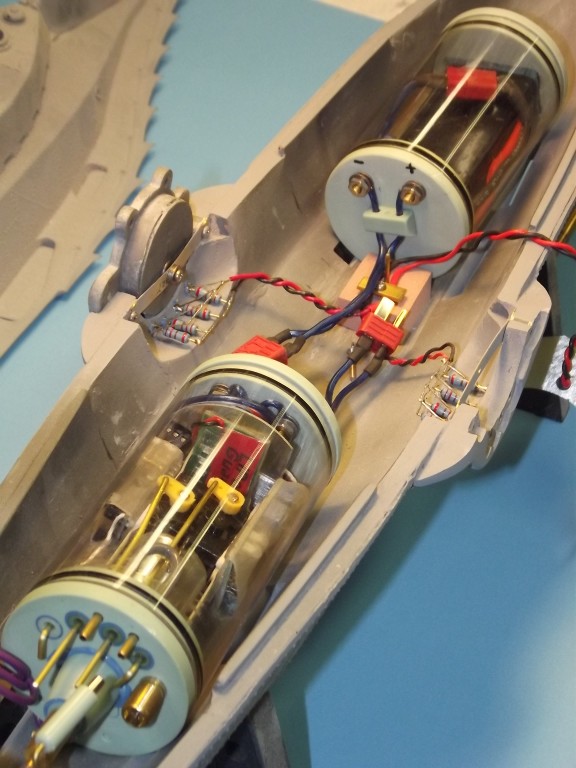
I am going full out on this build in every respect! And with some needed help along the way, it will be a full diving sub with some lighting and special effects.
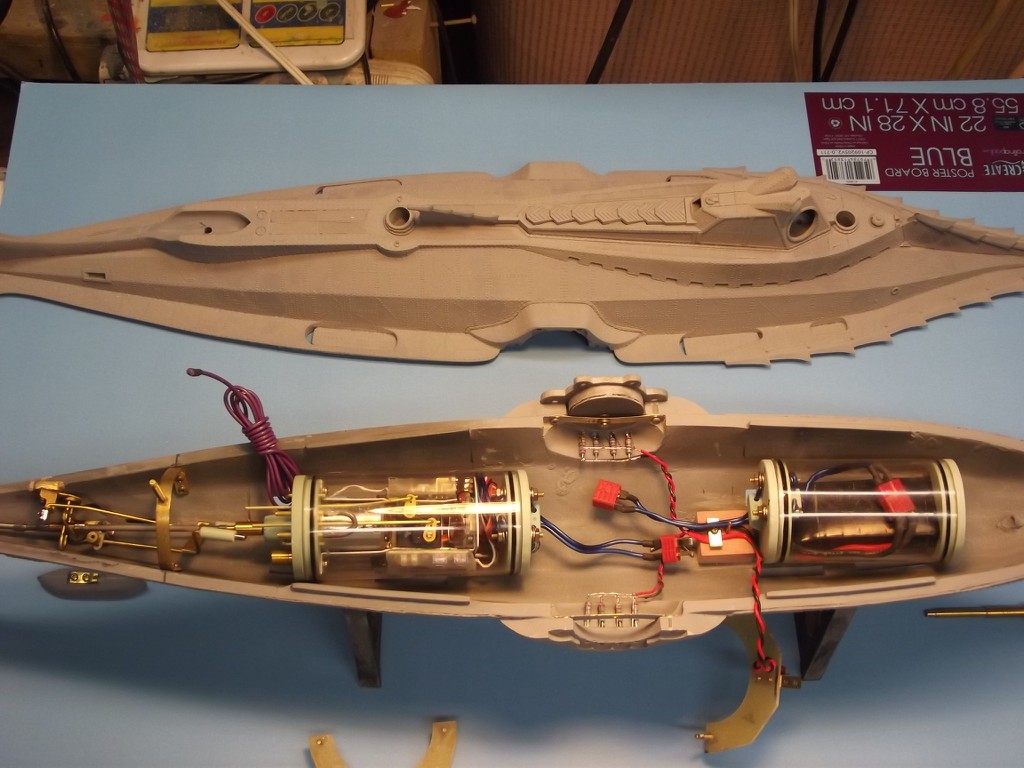
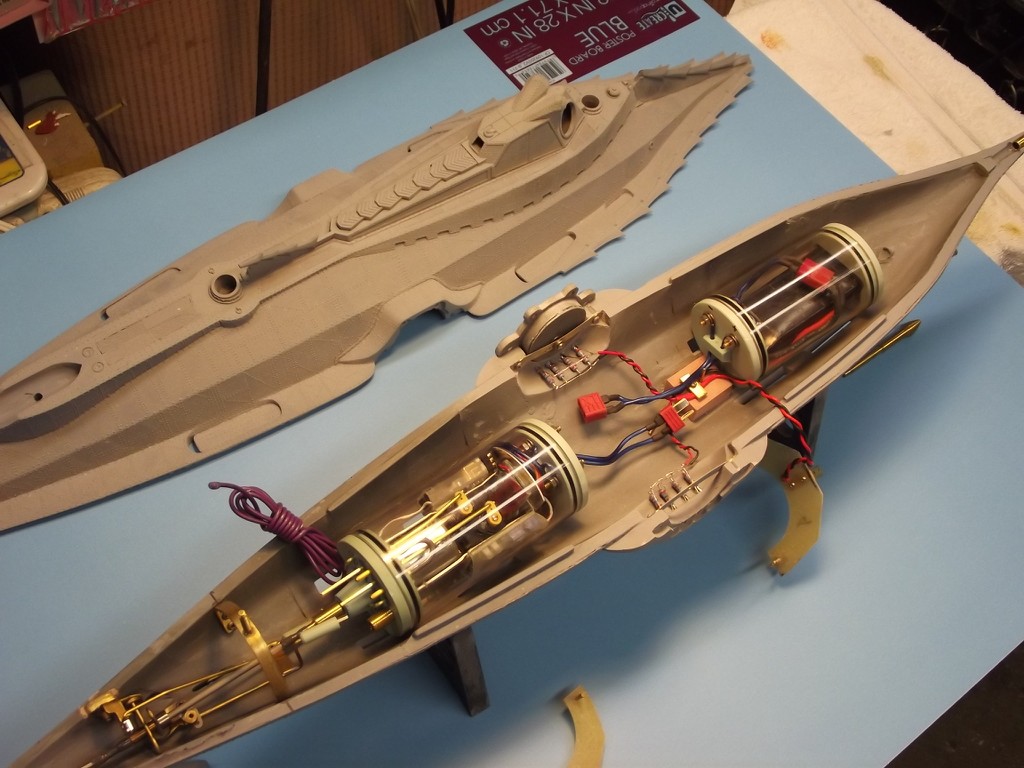
Now that my HL Hunley is complete, I can now my resume the Disney Nautilus build! I Have the stern cut off and the mounting system complted!
I have also completed the bow hold down assembly as well! I am trying to follow Bob Martins 5 YouTube assembly videos on the Disney Nautilus, as well as David M's photos and suggestion on this build!
Thanks to both Bob and David for all the great building information they have for this Nautilus build!
More to come!
Looking good, Rob! I saw you started a message on my site, but there was no content. You cool? Need anything?
Bob
Thank you Bob!
Today I installed the port and starboard salon frames, and did some fill in around the outside of the frame as needed! I also cleaned up the bottom and top of the hull.
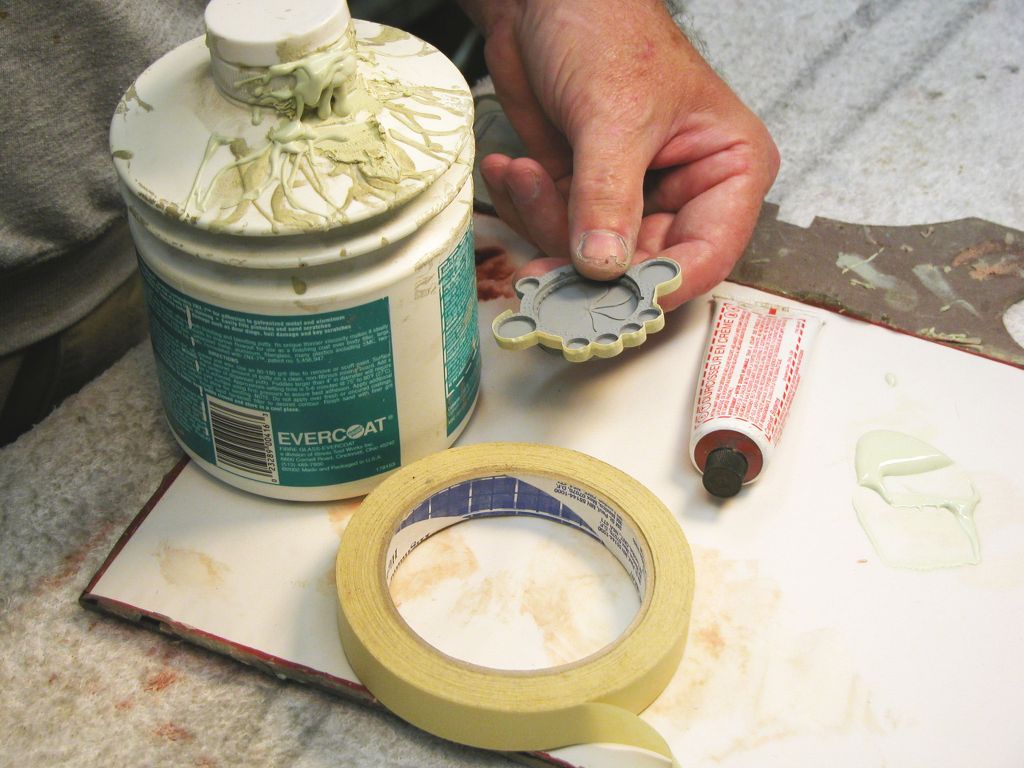
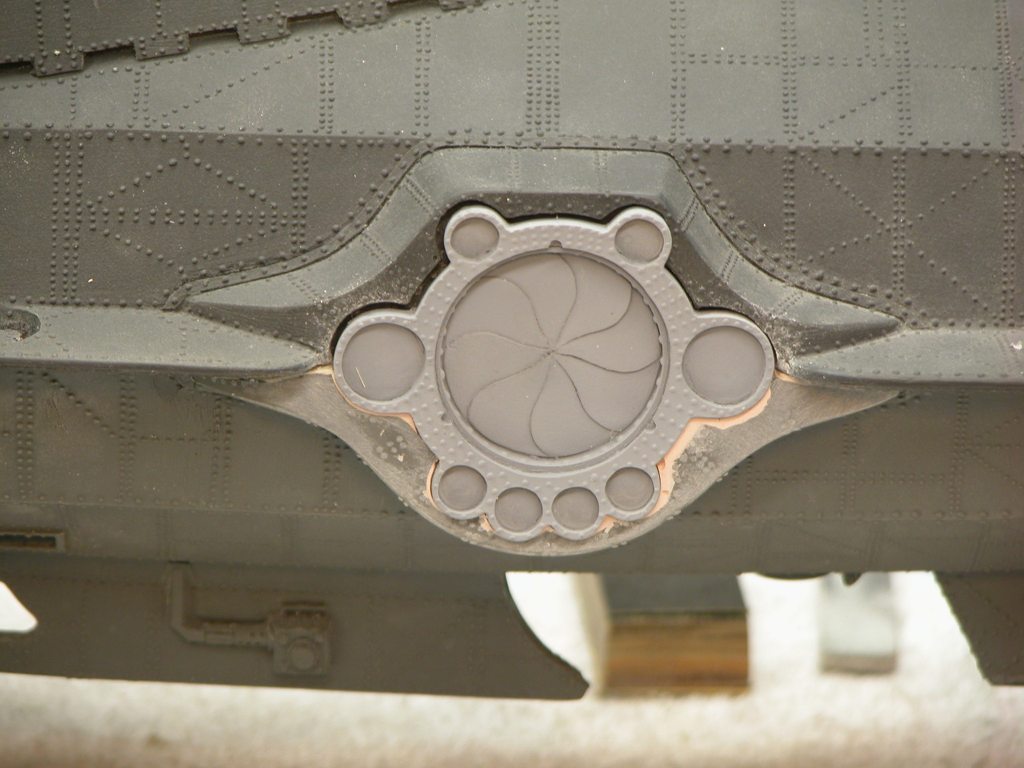
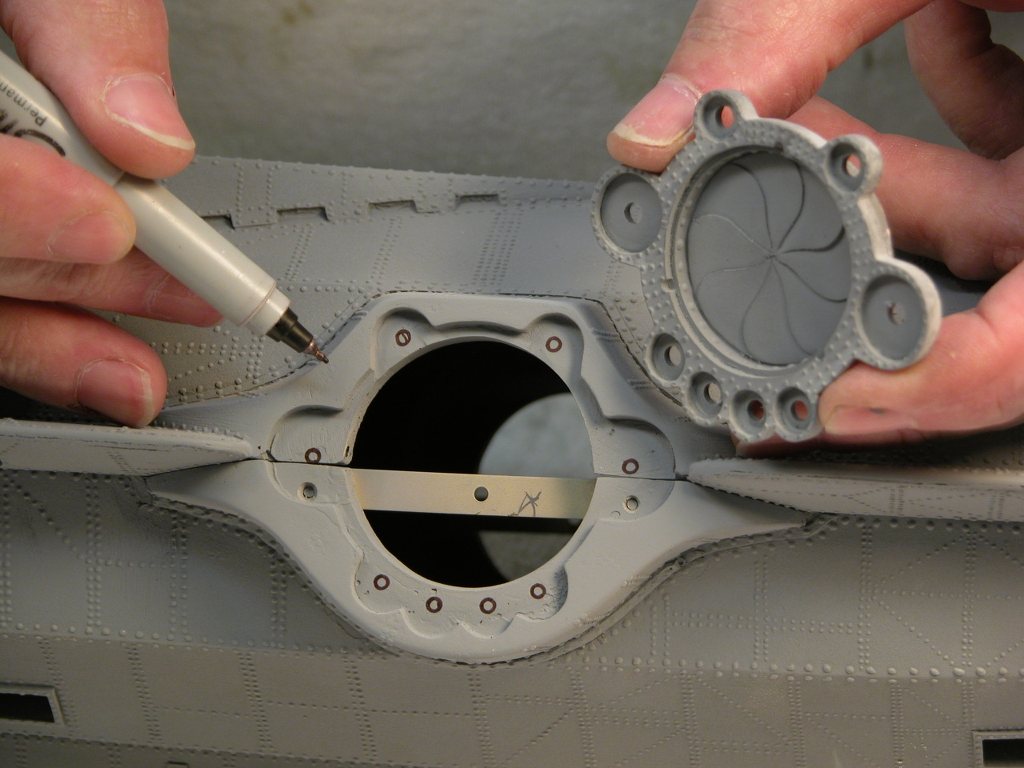
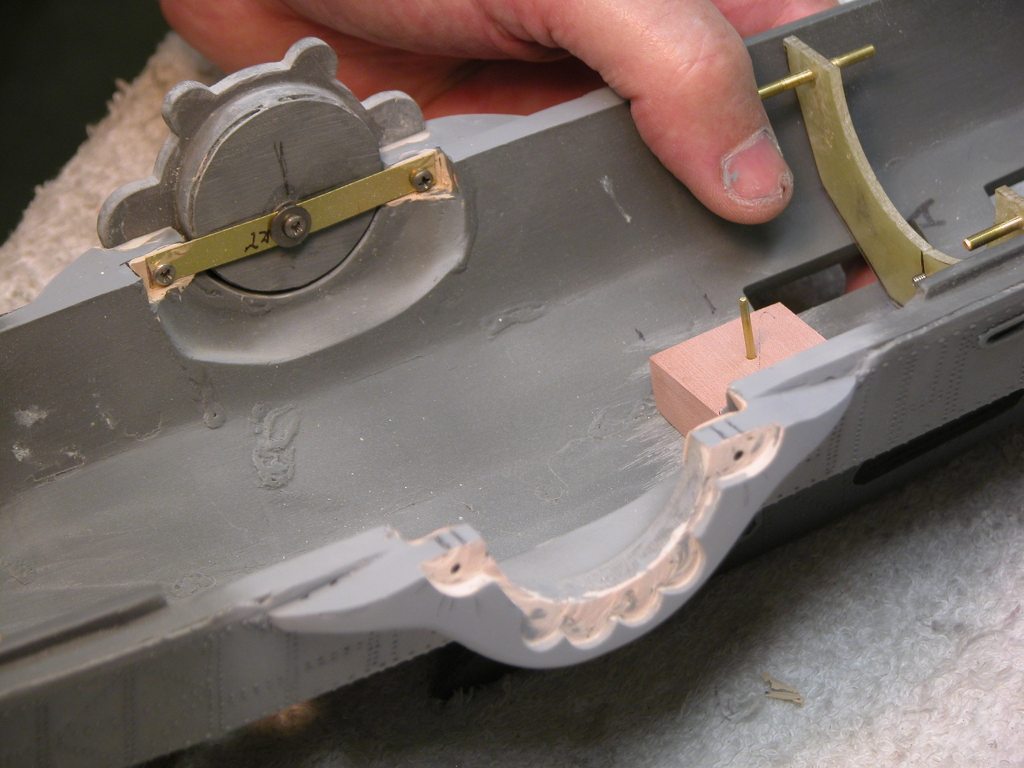
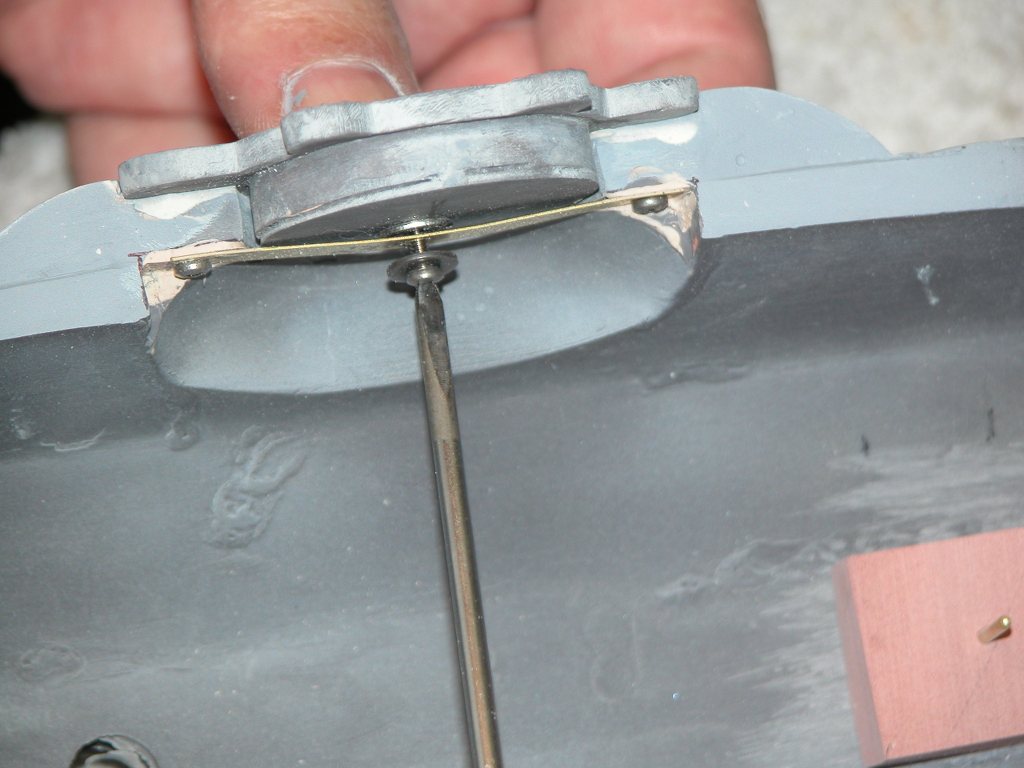
Today I worked on the stern of the boat, and notched out the area around the prop shaft exit. In order to install the prop shaft adaptor that will allow the prop to move up and down in a slight vertical movement to allow the boat to submerge and surface more effectively!
There was some material removal to allow this fitting to be installed. If you go to Nautilus Drydocks you will see this installation and how it will operate on his YouTube!
I have a question? I know this has most likely been answered a hundred times! I am thinking about purchasing from (Nautilus Drydocks) the seven piece photoetch kit for the Disney Nautilus! I do not want to paint or damage the top of the photoetch, I want the brass to show. I am going to do a rusty look for my final finish and then apply the photoetch. If I sand away some of the rusty finish and just do a light sanding to the underside of the photoetch and glue it down with super glue will that be adequate to hold it in place?
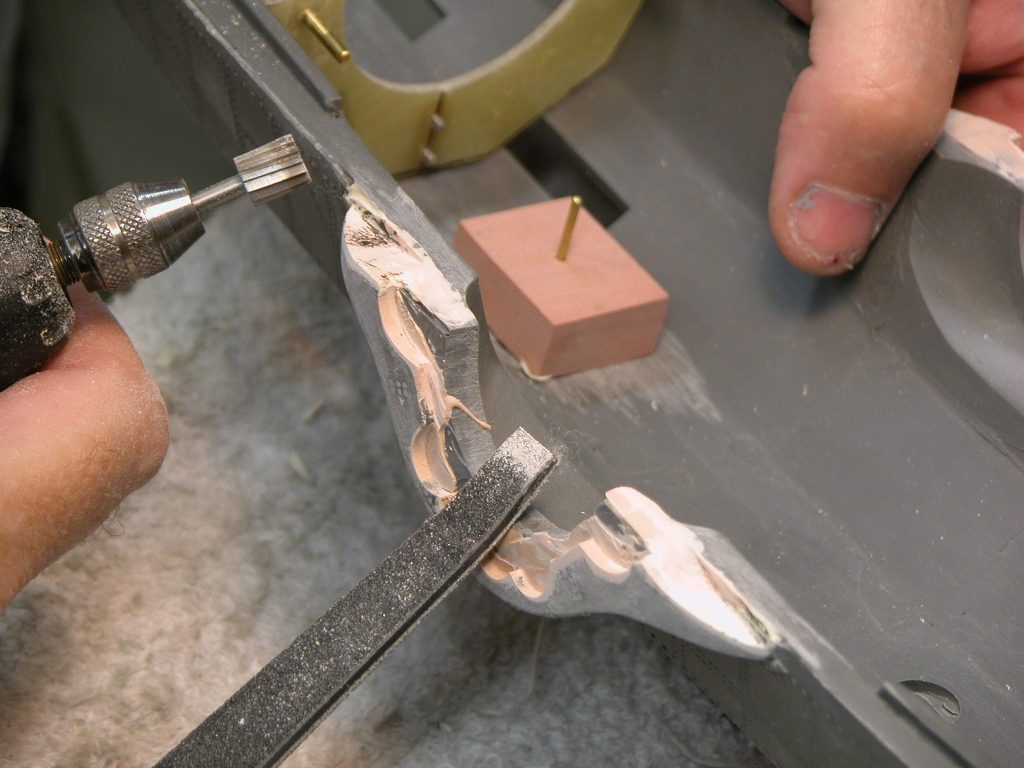
In order to install the prop shaft adaptor, I am going to have to remove more material from the bottom of the hull at the stern. This will allow the movement required for the shaft adaptor to work correctly!
I have a question? I know this has most likely been answered a hundred times! I am thinking about purchasing from (Nautilus Drydocks) the seven piece photoetch kit for the Disney Nautilus! I do not want to paint or damage the top of the photoetch, I want the brass to show. I am going to do a rusty look for my final finish and then apply the photoetch. If I sand away some of the rusty finish and just do a light sanding to the underside of the photoetch and glue it down with super glue will that be adequate to hold it in place?
Rob
"Firemen can stand the heat"
Yep, should be fine. The big thing is creating a rough surface for your glue to adhere to.
Thank you for the YouTube David! That is one nice looking Nautilus!
Bob! Thank you for the answer to my question on the brass photoetch! I know we covered that question on our ZOOM last week, just trying to learn all I can and do it the right way!
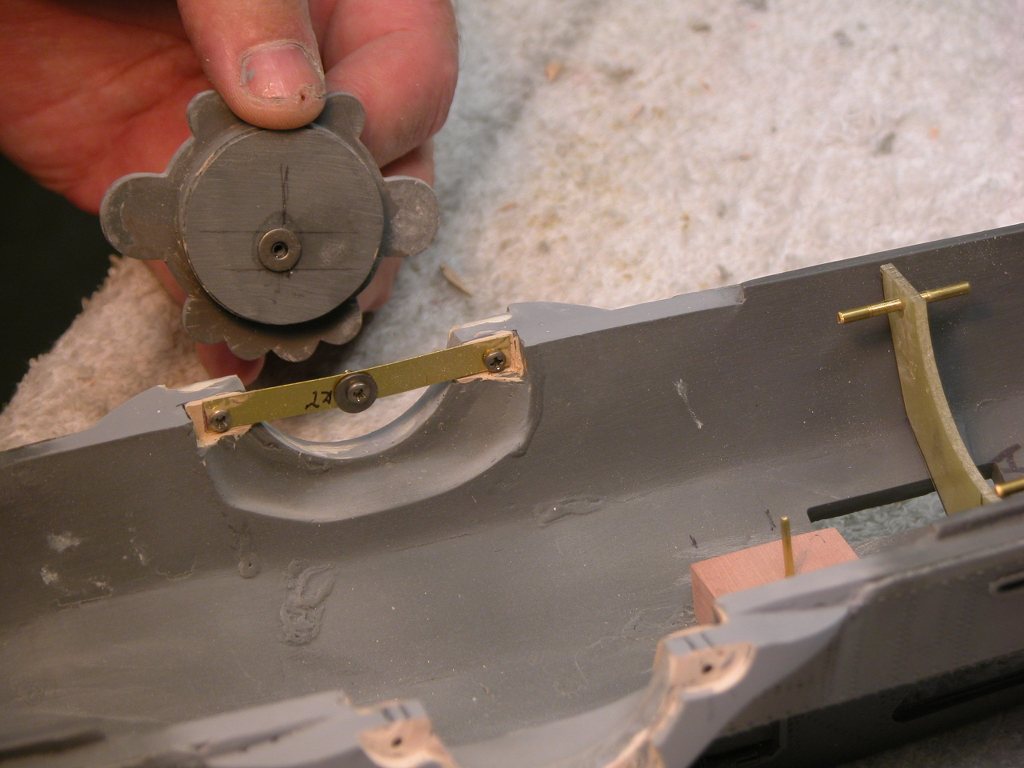
I have completed the stern prop shaft adaptor system on the upper hull and the lower hull!
As stated above, this stern prop shaft system will allow the prop shaft and prop to move in the vertical up and down.
I have really learned one thing about the Disney Nautilus build, there is a lot of cutting and material removal for the build! You just have to take your time, and have the tooling!
I'm thinking of trying to lay up a new hull in epoxy fiberglass with a cast lower section. Would be a hybrid fabrication technique, but it would vastly reduce the weight above the waterline. Not many know, but those hulls are nominally 1/4" thick!


Comment