today's work

Collapse
X
 
  • Time
  • Show
Clear All
new posts
  • He Who Shall Not Be Named
    Moderator
    • Aug 2008
    • 12253

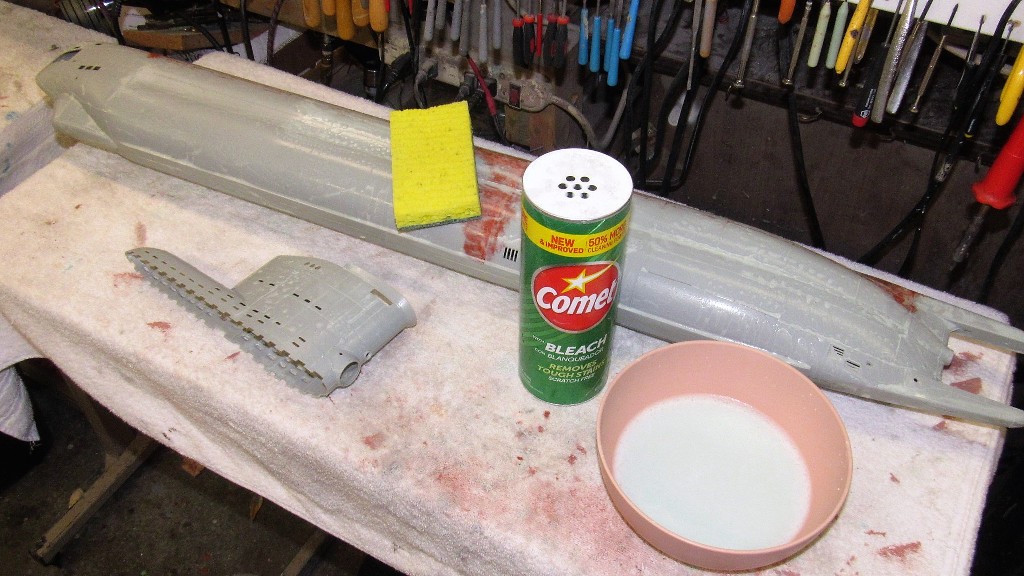
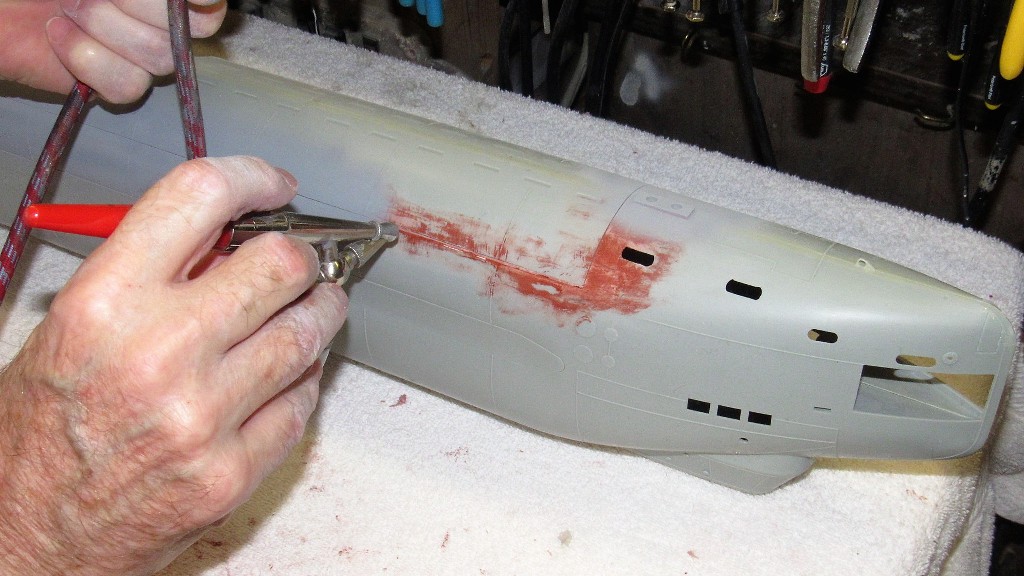
    Well, for some reason, the automotive de-greaser and abrasive pad was not enough to clean the surface of this model good enough to assure tight adhesion of some of the putty I applied. So, after an initial sanding of the putty work I resorted to that tried-and-true method of surface preparation: a slurry of abrasive scouring powder and water, scrubbed ruthlessly on all model surfaces that would receive adhesives, fillers, putties, primer, and paint.

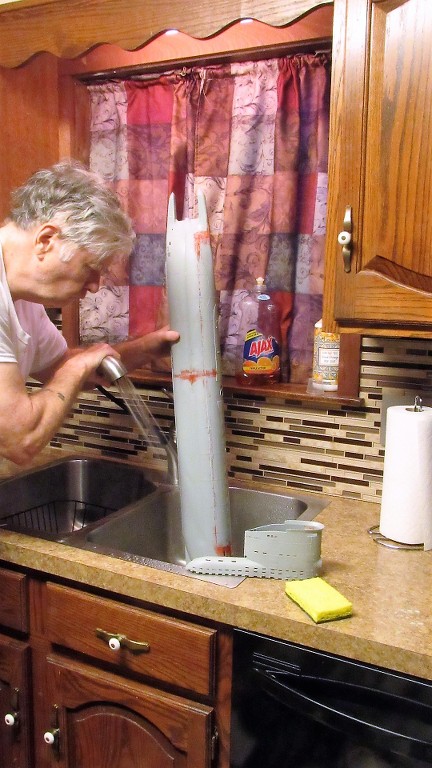
    THERE! Now, stick. ******!


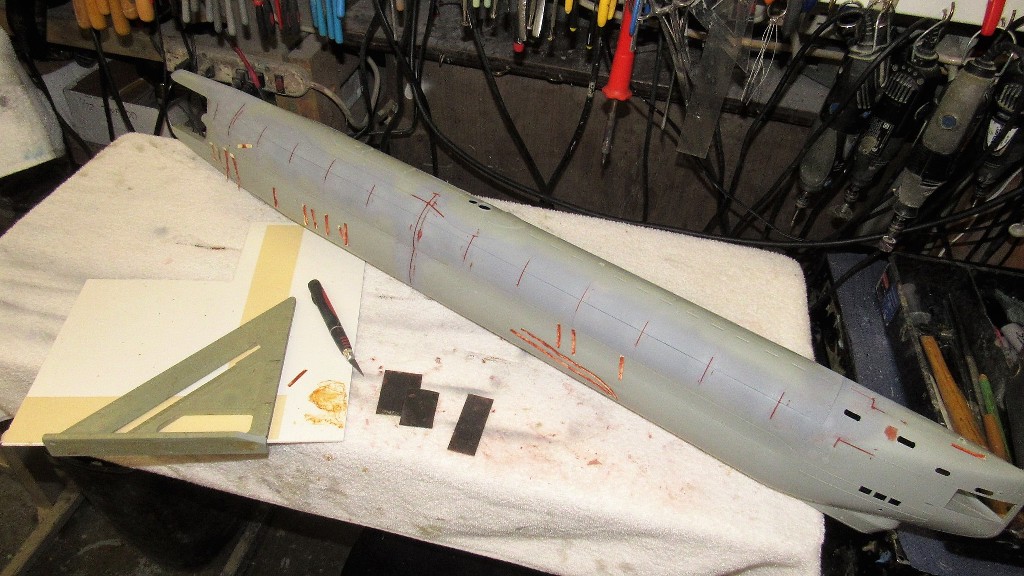
    ... and rinsed off with plenty of fresh water, then toweled and left to dry.


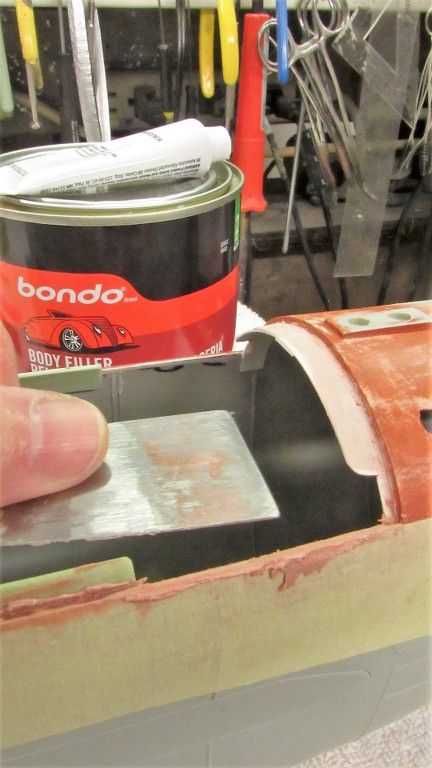
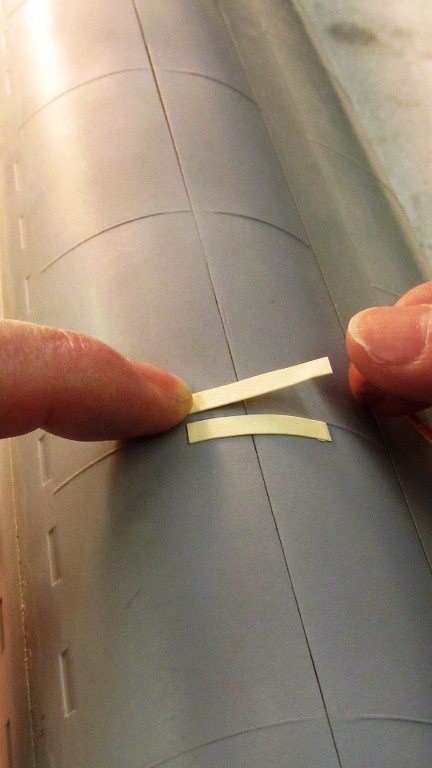
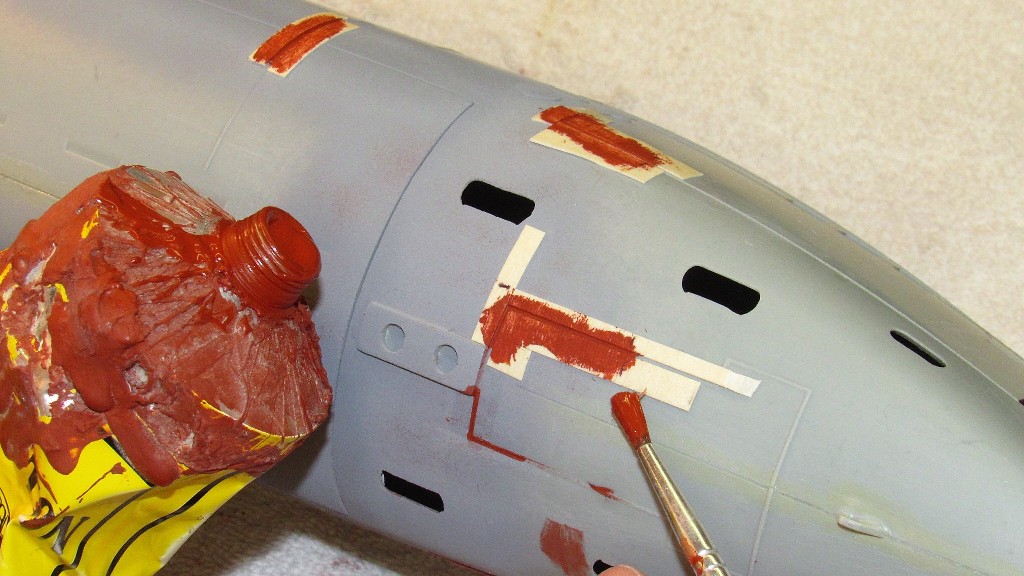
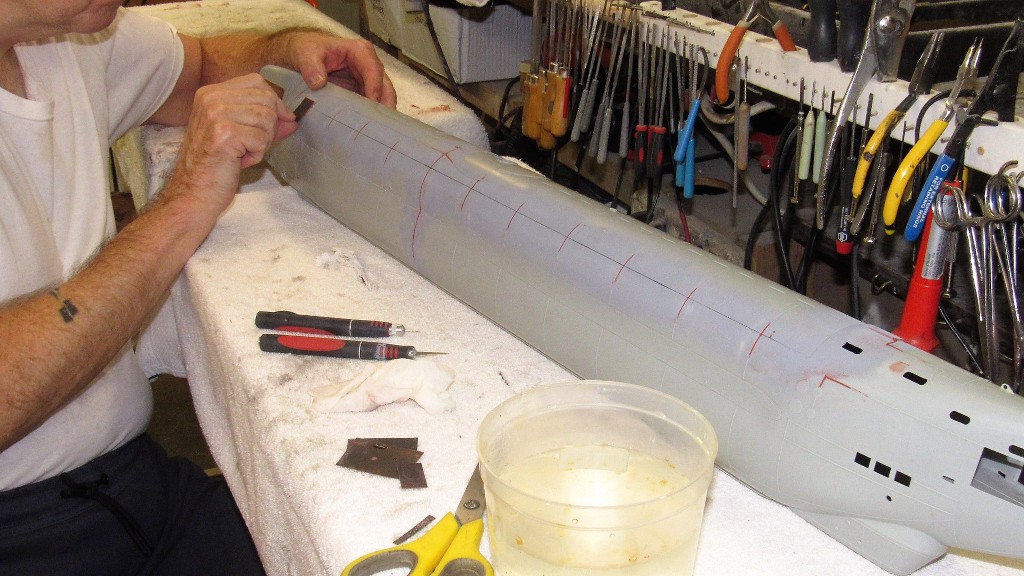
    The forward, starboard longitudinal edges of the upper and lower hull presented a significant gap. Too high for an air-dry putty. So, I elected to build up the lower hull edge with Bondo. First strip in that process it to place two pieces of masking tape, inside and out, with their upper edges even with the upper hull lower longitudinal edge.


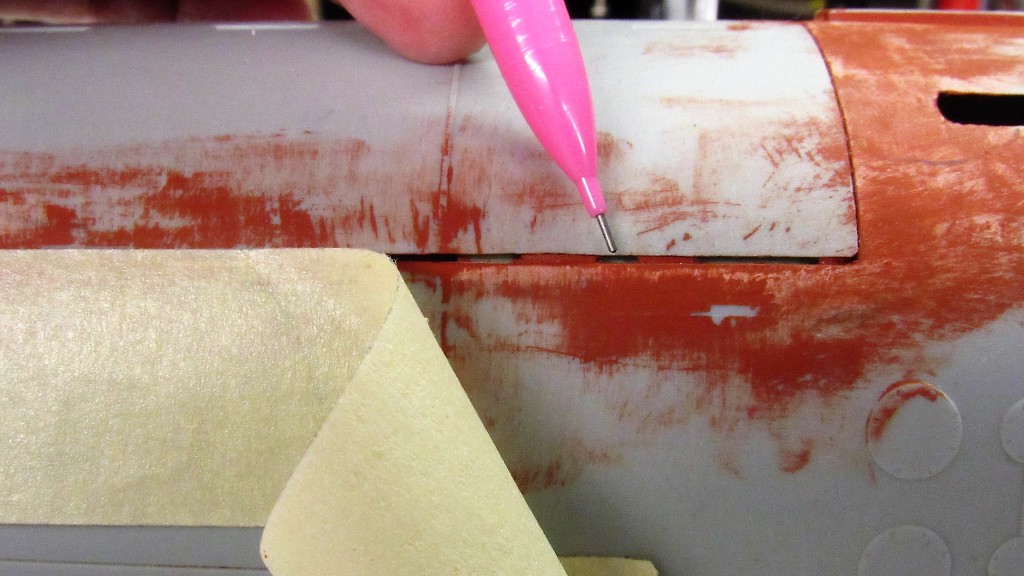
    Like so. Now, with the two pieces of masking tape forming a dam that would not only form the Bondo to the wall thickness of the hull but would also define the depth of the Bondo after it was troweled on and screeded off.


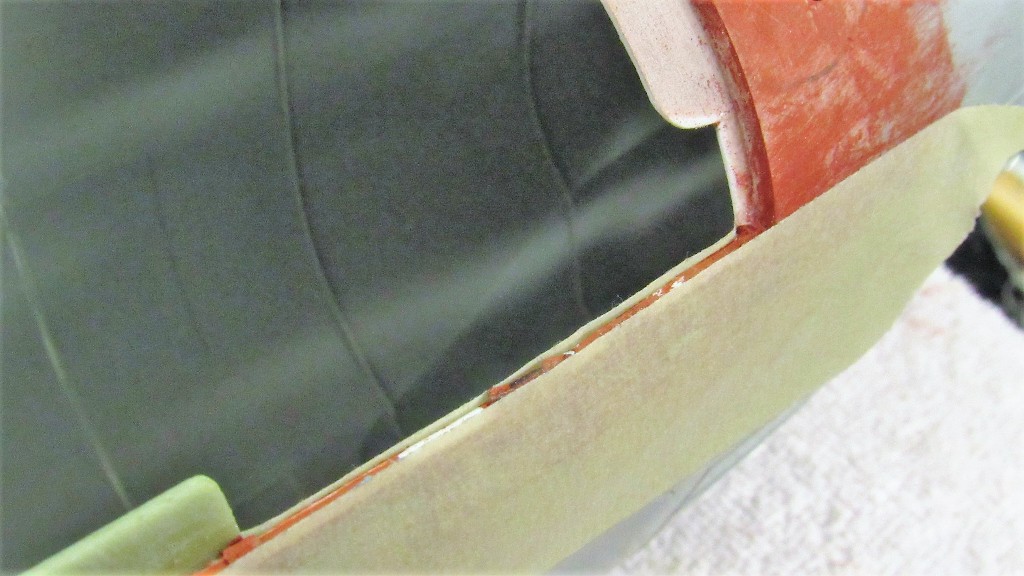
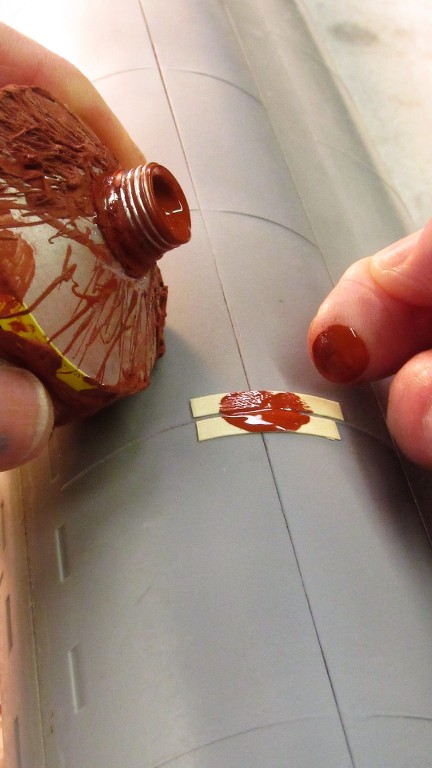
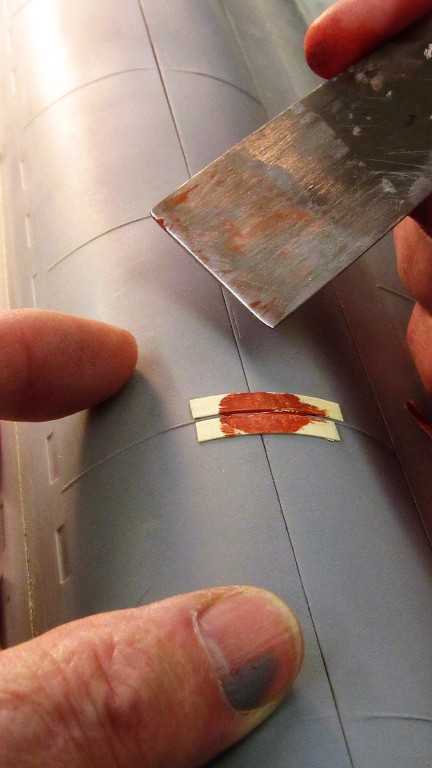
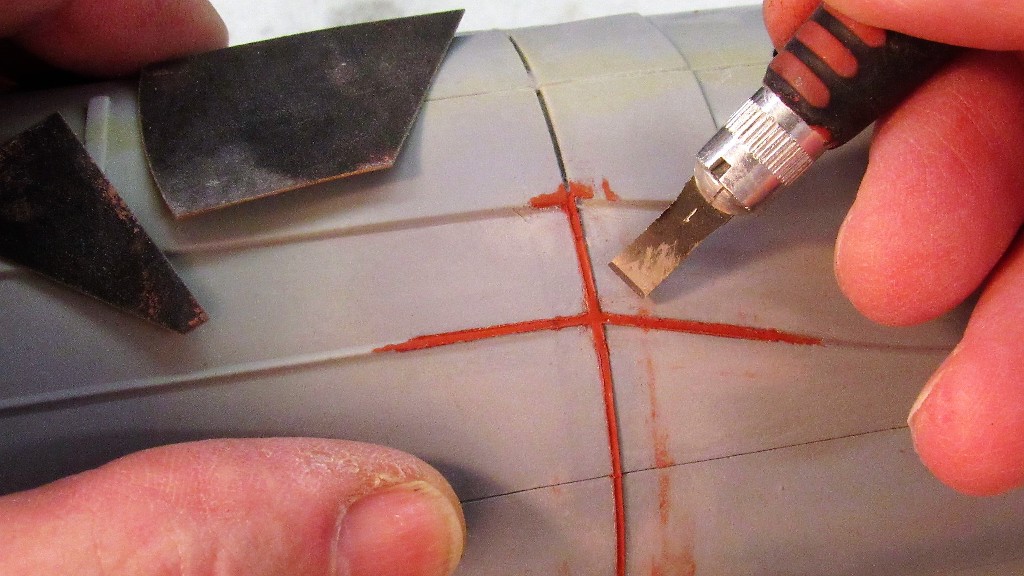
    After troweling the Bondo into the masking tape dam I laid the blade down flat (with very slight pressure) atop the edges of the tape and screeded away the excess Bondo.


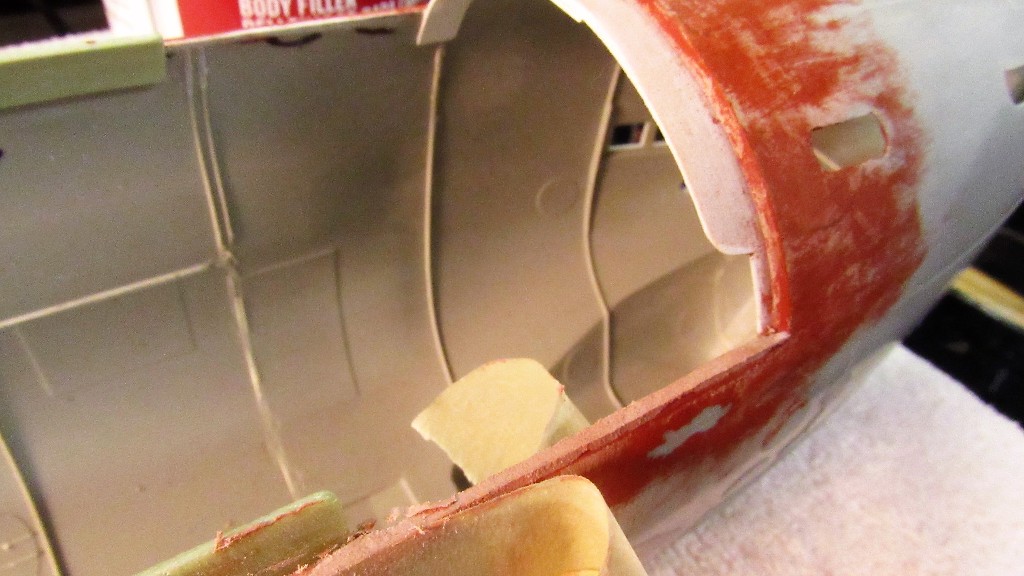
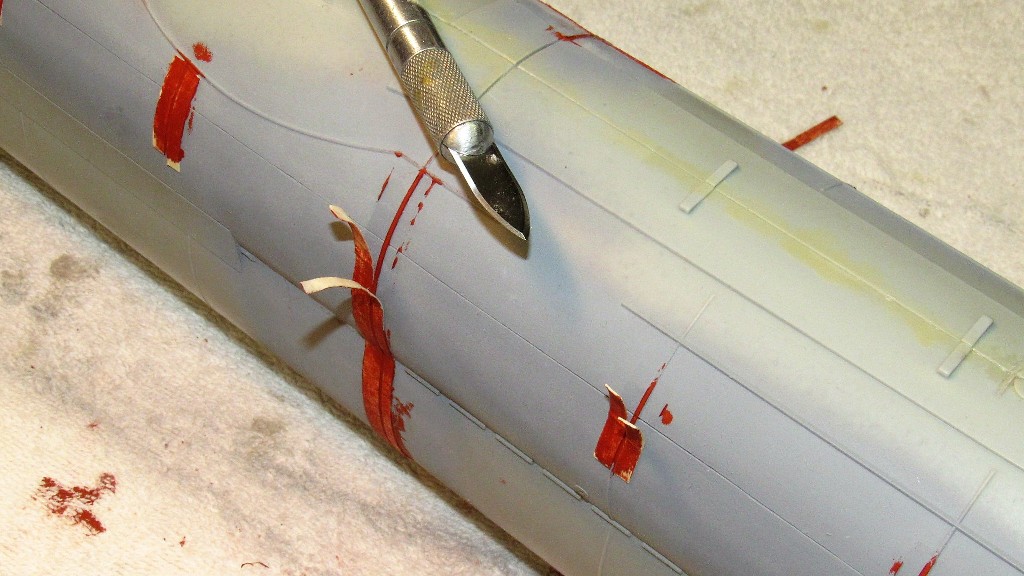
    The work was left to cure to a state where I could remove the tape and proceed with fine-tuning of the built-up edge. As the bond between the Bondo and the previous edge of the lower hull is weak, I took exceptional care as I pulled down and aft on the masking tape as it was removed -- the objective was to avoid any force on the Bondo that would pull it away from the model.


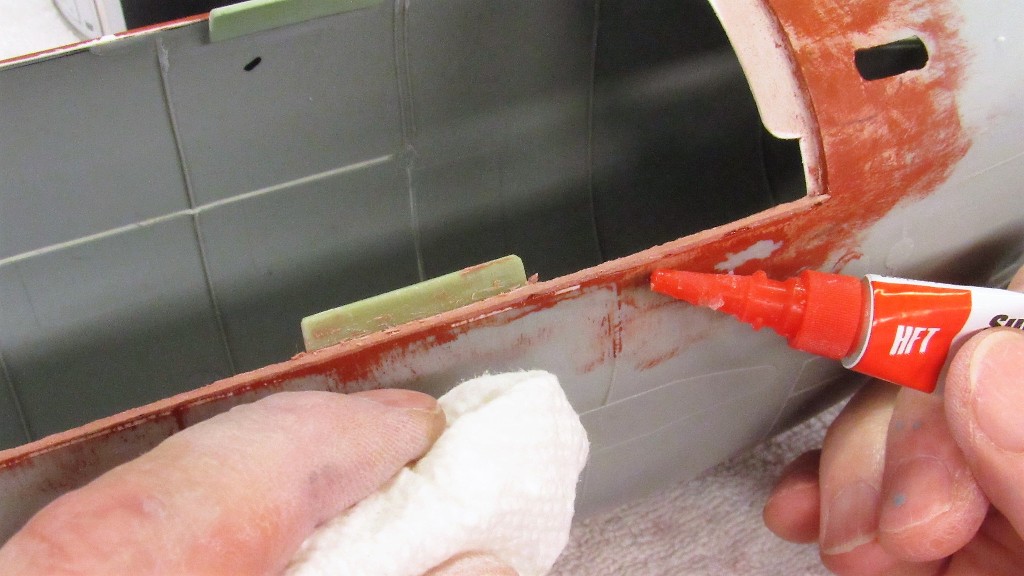
    Before anything else I strengthened the bond between the just applied Bondo and the previous edge of the lower hull by soaking in some thin formula CA. The process was the same as with the previous Bondo work: slather the CA over the work, then quickly wipe away the excess. Enough CA works into the porous Bondo to strengthen it as well as bonding the Bondo to the previous edge with assurance that it won't break off later.


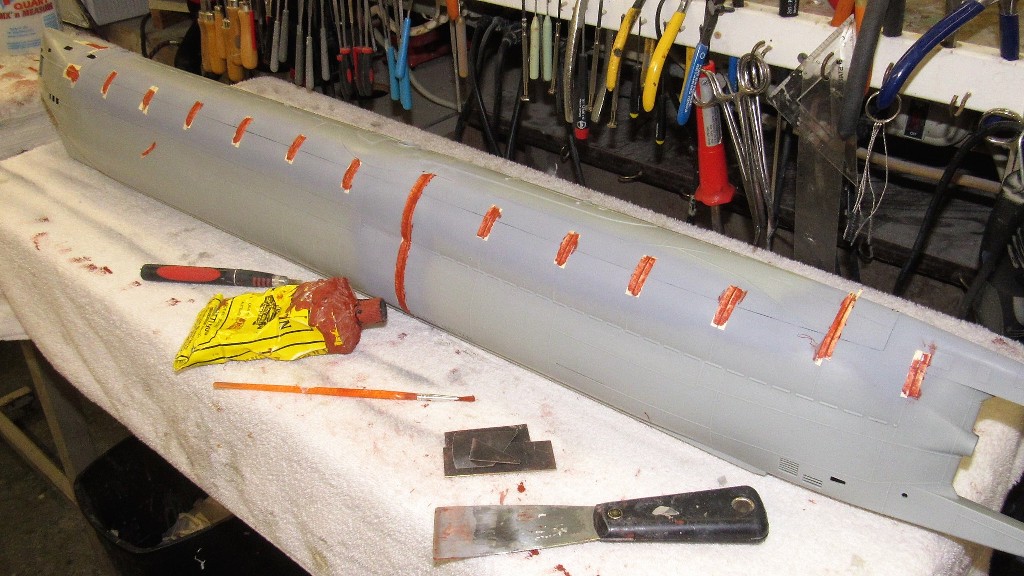
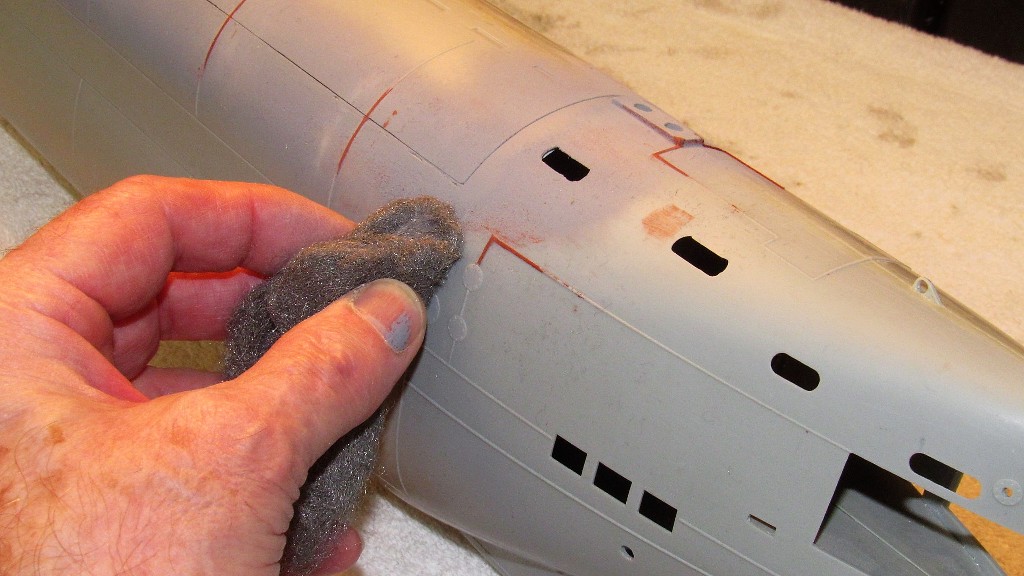
    The edge of the Bondo repair was trued up with file and a stiff length of #220 sandpaper. The hull was then assembled, and the worked areas given a few passes with #00 steel-wool. The model was blown down with low pressure air to dislodge any shards and sanding dust.


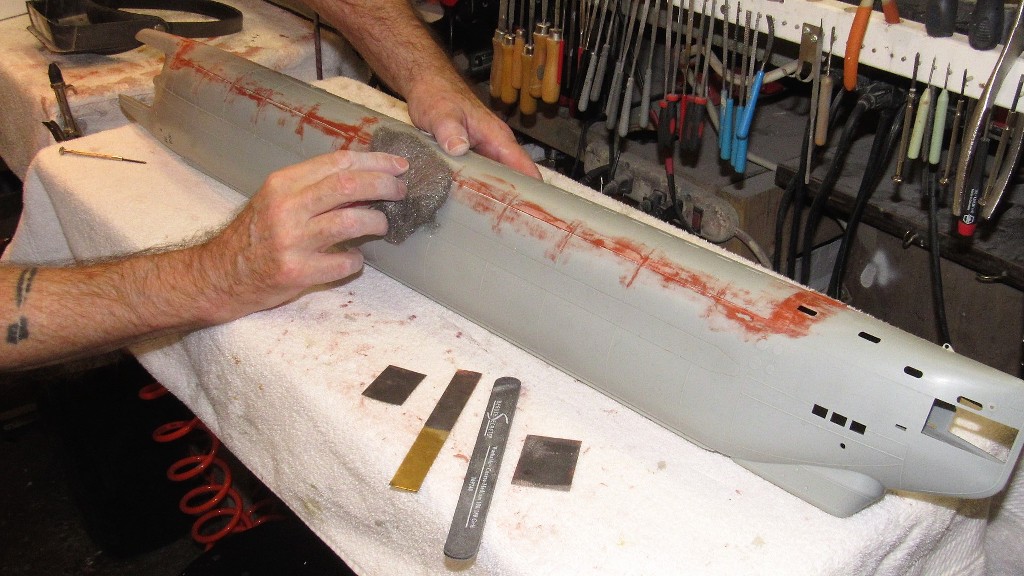
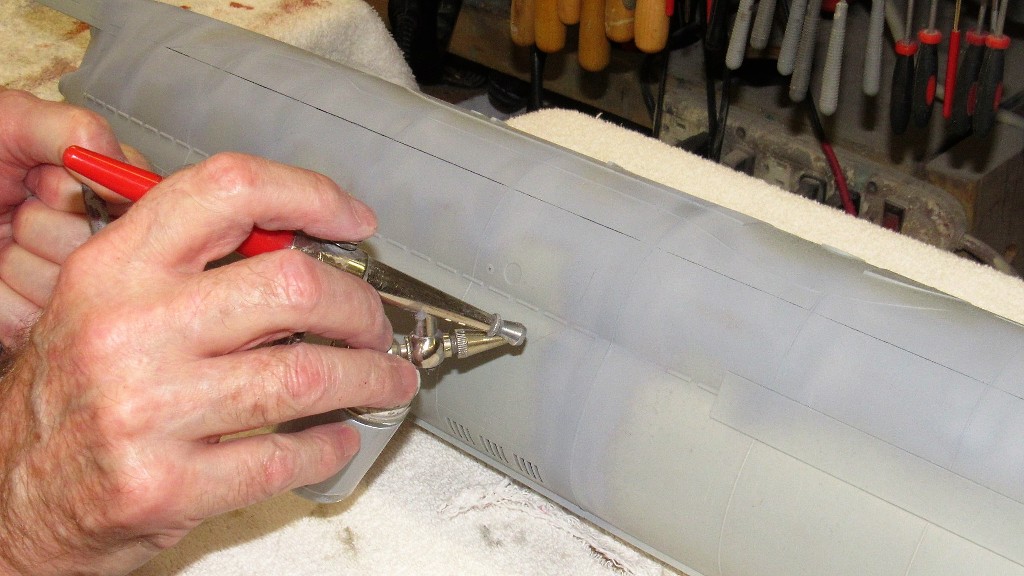
    Time for primer... at last!


    OK. The radial and longitudinal edges between the two hull halves are nice and tight. But all that cutting, grinding, filing and sanding removed some of the nice high-profile 'weld beading'. I want to restore that detail. So that's the next operation: re-building the beading and other high-relief items lost as I worked to separate and make tight the two hull halves.

    Who is John Galt?

    Comment

    • Monahan Steam Models
      Captain
      • Apr 2020
      • 755

      Looking good! Nice clean tight parting line.

      Comment

      • redboat219
        Admiral
        • Dec 2008
        • 2735

        David,

        Which is better, Bondo or CA?

        In your 1/72 Gato conversion DVD you used baking powder with CA to fill in the gap. You packed the space between the masking tape dam with baking powder then put in a drop of CA to cure it.
        Make it simple, make strong, make it work!

        Comment

        • He Who Shall Not Be Named
          Moderator
          • Aug 2008
          • 12253

          Originally posted by redboat219
          David,

          Which is better, Bondo or CA?

          In your 1/72 Gato conversion DVD you used baking powder with CA to fill in the gap. You packed the space between the masking tape dam with baking powder then put in a drop of CA to cure it.
          Where long runs of strong build-up are required (one of the GATO's I assembled), CA.

          Where short runs of build-up are needed (the case with the current Type-23), Bondo.

          Click image for larger version

Name:	DSCN0137 (2).JPG
Views:	285
Size:	68.1 KB
ID:	158051

          Click image for larger version

Name:	DSCN0133.JPG
Views:	274
Size:	61.8 KB
ID:	158052Click image for larger version

Name:	DSCN0134.JPG
Views:	255
Size:	64.4 KB
ID:	158053

          David
          Attached Files
          Who is John Galt?

          Comment

          • Monahan Steam Models
            Captain
            • Apr 2020
            • 755

            You getting nailed by that east coast winter storm? How ya doing Pal?

            Comment

            • He Who Shall Not Be Named
              Moderator
              • Aug 2008
              • 12253

              Originally posted by Monahan Steam Models
              You getting nailed by that east coast winter storm? How ya doing Pal?
              Just wind so far. We avoided the sleet and slippery highways. Not much to worry about. I think they have a word for it. Just on the tip of my tongue... oh, yeah: WINTER!

              Looks like you have things under control, with all the acorns you need to get through all this, Nick.

              David
              Who is John Galt?

              Comment

              • Monahan Steam Models
                Captain
                • Apr 2020
                • 755

                Originally posted by He Who Shall Not Be Named

                Just wind so far. We avoided the sleet and slippery highways. Not much to worry about. I think they have a word for it. Just on the tip of my tongue... oh, yeah: WINTER!

                Looks like you have things under control, with all the acorns you need to get through all this, Nick.

                David
                Good to hear. Don’t even get me started on acorns. Had so many of those damn things fall this year it was ridiculous. I’ll take a photo of the stupid huge pile of them from this year that I cleaned up. At least I’ll have plenty of ammo for the slingshot to keep the squirrels away

                Comment

                • He Who Shall Not Be Named
                  Moderator
                  • Aug 2008
                  • 12253

                  Originally posted by Monahan Steam Models

                  Good to hear. Don’t even get me started on acorns. Had so many of those damn things fall this year it was ridiculous. I’ll take a photo of the stupid huge pile of them from this year that I cleaned up. At least I’ll have plenty of ammo for the slingshot to keep the squirrels away
                  "Hey! Mr. Squirl! Got an acorn for ya... open wide"
                  Who is John Galt?

                  Comment

                  • He Who Shall Not Be Named
                    Moderator
                    • Aug 2008
                    • 12253


                    In the areas where the hull was split some of the raised detail, the weld beads -- an element of the hull detailing on this fine kit -- were lost as I worked those areas with file and sandpaper. Time had come to re-build the weld beads, using old reliable Nitro-Stan touch-up putty.

                    Here you can see the nearly completed weld bead work (those red areas) on the hulls starboard side.


                    Note at the junctures along the longitudinal seam between hull halves, where the radial weld beads just fade away. The result of the evening-up work done to get the edges to match in gap and contour.

                    First step was to lay down masking tape dams. Incidentally, each strip of masking was actually four pieces of masking tape thick.


                    Putty was forced into the gap between the two pieces of masking.


                    And the excess putty screeded off with a putty-knife.


                    The first application of putty was given twelve-hours to harden, and in so doing shrank a bit as the volatile solvents were given up through evaporation during the drying process. A second coat of putty was applied and left to harden for twenty-four hours.


                    The masking tape dams were removed. Where I got sloppy with the putty a knife was used to scrap away the smears.


                    Where putty squirted under the masks a chisel-blade was used to cut and scrape away the putty, tightening up the work.


                    Feathering in the putty to the original weld beads height and width with bits of sandpaper.


                    A few strokes of steel-wool to soften the edges of the putty weld beads to better blend in with the original weld beads.


                    And, finally, a heavy coating of primer to even out the repair work.


                    Who is John Galt?

                    Comment

                    • redboat219
                      Admiral
                      • Dec 2008
                      • 2735

                      In one of our FB group a modeler uses UV resin with a little talcum powder mixed in to replicate weld lines on his 1/72 Gato. He dabs on the paste with a small brush then zaps it with a UV torch to harden it. Click image for larger version

Name:	FB_IMG_1642594645196.jpg
Views:	283
Size:	73.6 KB
ID:	158131Click image for larger version

Name:	FB_IMG_1642594631176.jpg
Views:	265
Size:	81.2 KB
ID:	158132
                      Last edited by redboat219; 01-19-2022, 08:19 AM.
                      Make it simple, make strong, make it work!

                      Comment

                      • Monahan Steam Models
                        Captain
                        • Apr 2020
                        • 755

                        Slow down. You’re making us sloths look bad!

                        Comment

                        • He Who Shall Not Be Named
                          Moderator
                          • Aug 2008
                          • 12253

                          Originally posted by Monahan Steam Models
                          Slow down. You’re making us sloths look bad!
                          Stop inventing ****, you maniac, and assemble that ****ing kit already!
                          Who is John Galt?

                          Comment

                          • Monahan Steam Models
                            Captain
                            • Apr 2020
                            • 755

                            Originally posted by He Who Shall Not Be Named

                            Stop inventing ****, you maniac, and assemble that ****ing kit already!
                            LOL! It’s getting there. Just keep seeing squirrels

                            Comment

                            • Monahan Steam Models
                              Captain
                              • Apr 2020
                              • 755

                              Besides, assembling is too easy. All the crap no one will ever see or appreciate the design work that makes the finished assembled kit work like a fine oiled machine is where I like to put my time in. It has to work well before it looks good

                              Comment

                              • He Who Shall Not Be Named
                                Moderator
                                • Aug 2008
                                • 12253

                                Originally posted by Monahan Steam Models
                                Besides, assembling is too easy. All the crap no one will ever see or appreciate the design work that makes the finished assembled kit work like a fine oiled machine is where I like to put my time in. It has to work well before it looks good
                                If only more practicians of this game put the cart behind the horse and not in front of it as you so eloquently stated it, Nick. I.e., make it work first, then make it pretty.

                                Duh!

                                David
                                Who is John Galt?

                                Comment

                                Working...