
More like this https://youtu.be/tTkY2Od3-OY
-
Make it simple, make strong, make it work! -
Old-school. Vulcanized natural rubber tools. Toby Barrett taught me low-temperature metal tooling and casting methods and he did his tooling that way. I went the RTV silicon rubber route.
Toby personified what a real Craftsman is: a teacher.
THERE ARE NO SECRETS (only fools who think there are)
David
The HorribleWho is John Galt?Comment
-
To get a 'modern' FPV video camera-transmitter into a model submarine and in the water in time for the 2022 submarine regatta season necessitated some quick work. So, I set about completing a long-delayed assembly of my 1/35 Bronco, German Type-23 coastal submarine. Over ten years ago I assembled one and got it operational for our former employer, Mr. Caswell. So, I was well prepared to get this one in operational condition with few hiccups.
As I mentioned in the previous post, this particular model submarine is a good candidate for housing the camera system, as its large sail will fit the camera-transmitters watertight enclosure without spoiling the scale fidelity of the model.
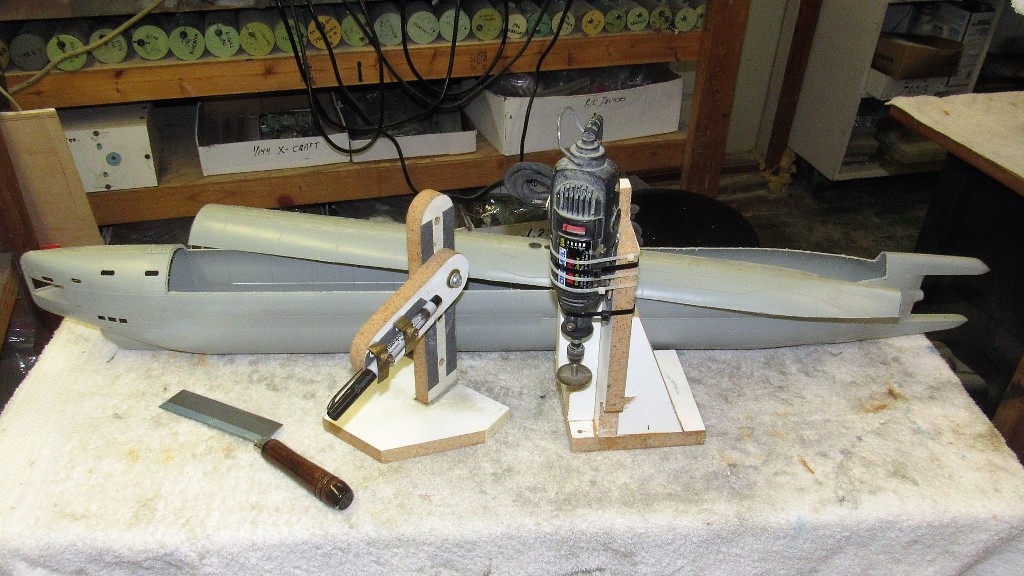
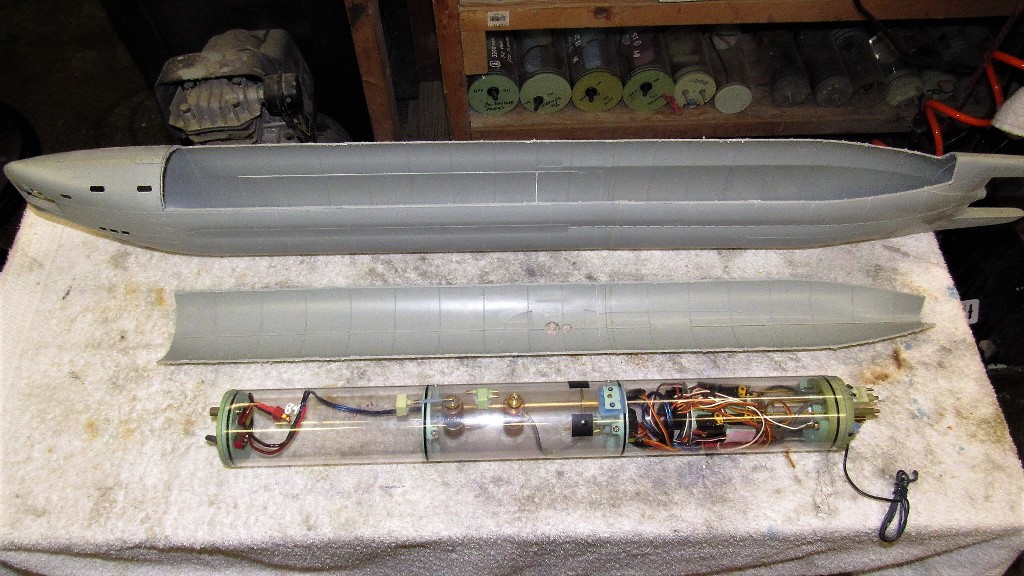
First job was to split the upper portion of hull away from the lower, permitting installation of a watertight cylinder (WTC) and all the goodies required to wag control surfaces and make the spinning thing at the stern to go around-and-around.
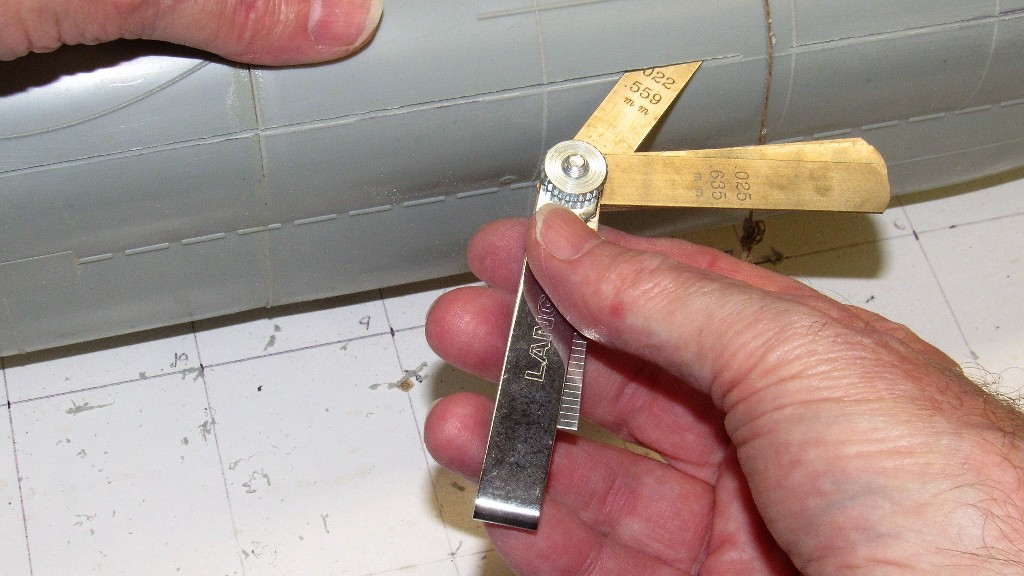
Here are the tools used to mark and cut the hull sections away from one another: A hand razor-saw for the radial cuts. A waterline marking tool. And a Dremel circular saw to make the longitudinal cuts.
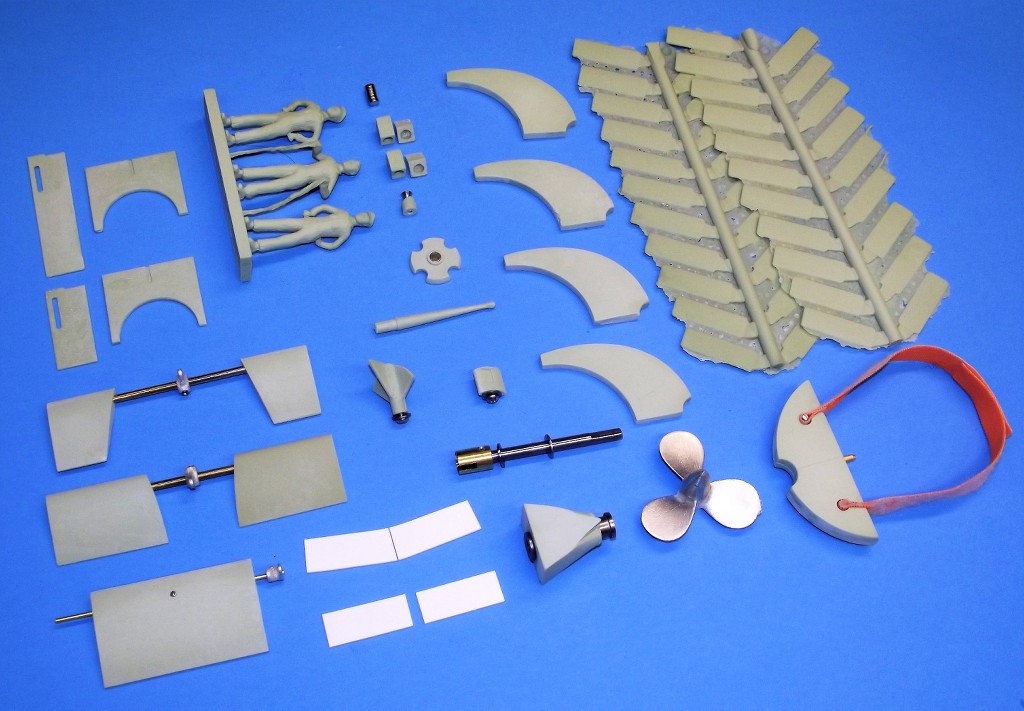
To enhance sales of the kit (Ellie and I were then working for the Caswell Company) we were encouraged to produce a product that would aid the average kit-assembler as he worked to convert the Bronco kit from a simple display piece into a practical well running r/c submarine. So, we produced a 'fittings kit'.
I think the hope was that the fittings kit itself would serve as a loss-leader; enticing customers to buy the real cash-cow of the conversion package, a WTC specifically configured for the 1/35 Type-23 kit.
Unfortunately, the labor-intensive fittings kit -- featuring machined cast resin and metal parts -- sold for more than people wanted to pay. Many observing that our product was more expensive than the plastic model kit itself (they were right). And with that failure all our hopes of brisk hull kit, fittings kit, and WTC sales went down the drain.
Availability of the fitting kits were received with as much enthusiasm as if we were trying to sell a shoe-box full of steaming dog **** with tufts of cat hair in it.
Lesson learned.
Anyway. I had a few fittings kits kicking around taking up space. One of these will speed assembly along as I work to turn this kit into a practical r/c submarine outfitted with a FPV camera-transmitter system.
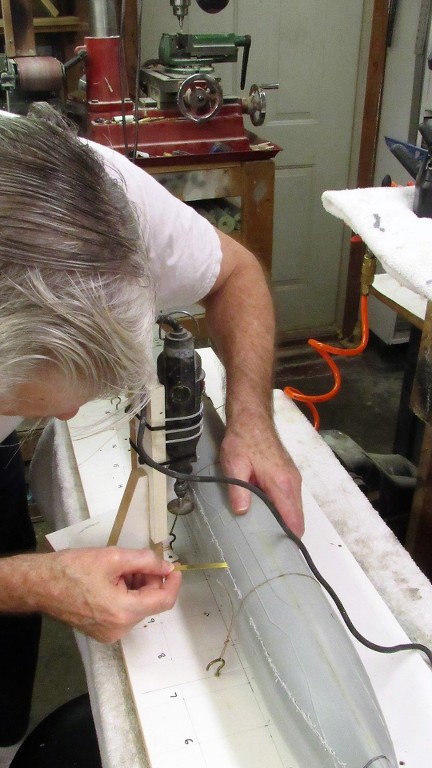
Securing the hull down tight on a flat working board with taught waxed sail-twine.
That strong, slightly elastic, easy to tie twine was liberated from the TRUTTA during my navy days. Back then Torpedomen were the submarine forces answer to the Boatswain's Mate rate, and most of us became the boat practitioners of marlin-spike seamanship and line-handling. Decorative knot-tying a specialty.
Those skills shamelessly exploited by several commands as I caught 'extra duty' and found myself restricted to the ship till I overcame my evil ways. (Never caught brig-time, but boy did I come close sometimes). Those off-hour punishment hours spent producing bunting, bell clapper dog-dicks, macrame adorned door-grabs, monkey-fists, and rope splicing -- that's how I served most of my penance. Not to worry, I stopped being an all-out ******* once Ellie got hold of me. So, the story has a happy ending.
With the aid of a pen loaded waterline marking tool (analogous to the Machinist's surface gauge) I inked the longitudinal cut lines, port and starboard.
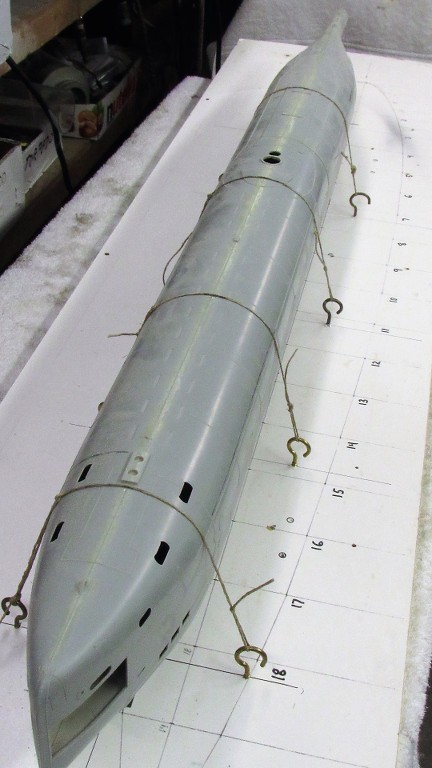
Sliding along the surface of a vertical reference plane, perpendicular to the boat's longitudinal axis, I again used the waterline marking tool, but this time to denote the radial separation lines at the bow and stern. The longitudinal cuts would be accomplished with the Dremel circular saw, the radial cuts done with a hand razor-saw.
Precision layout is EVERYTHING if you want things to be symmetrical and fit properly. Measure twice, cut once!
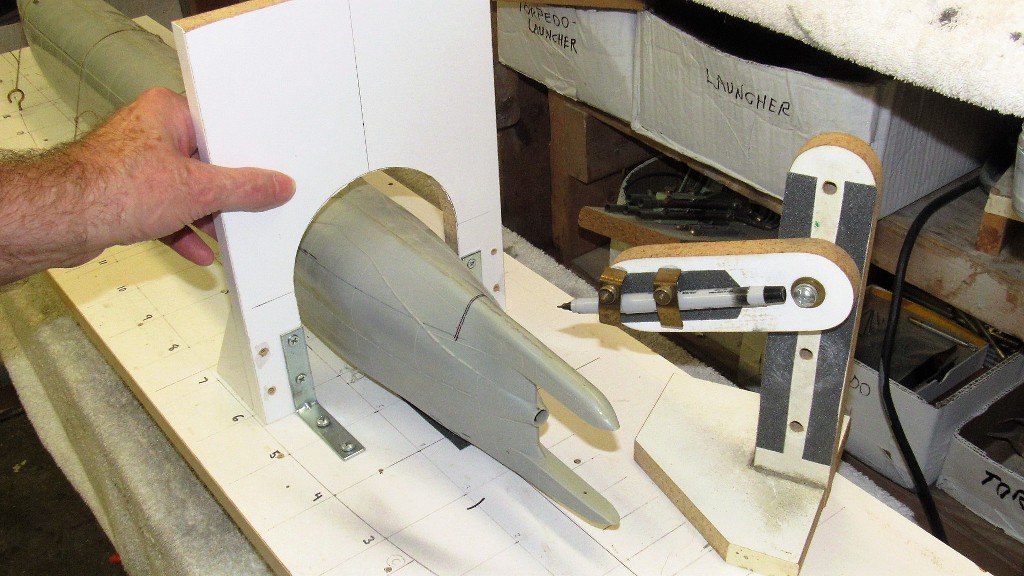
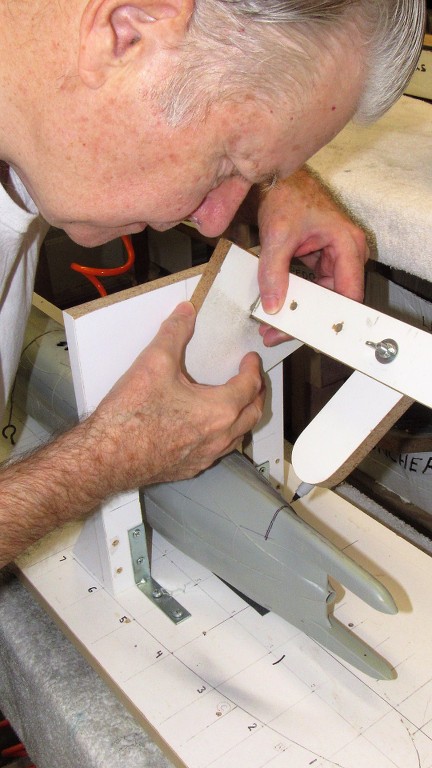
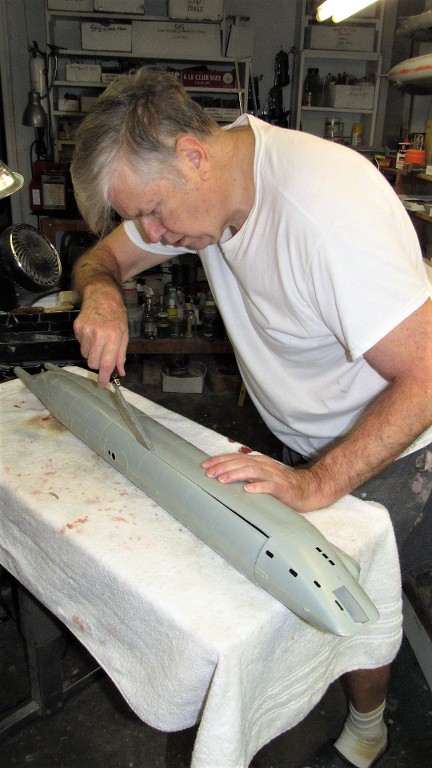
The circular saw, just like the waterline marking tool, is slide along the smooth surface of the mounting board -- the mounting boards surface is the model's longitudinal reference (datum) plane.
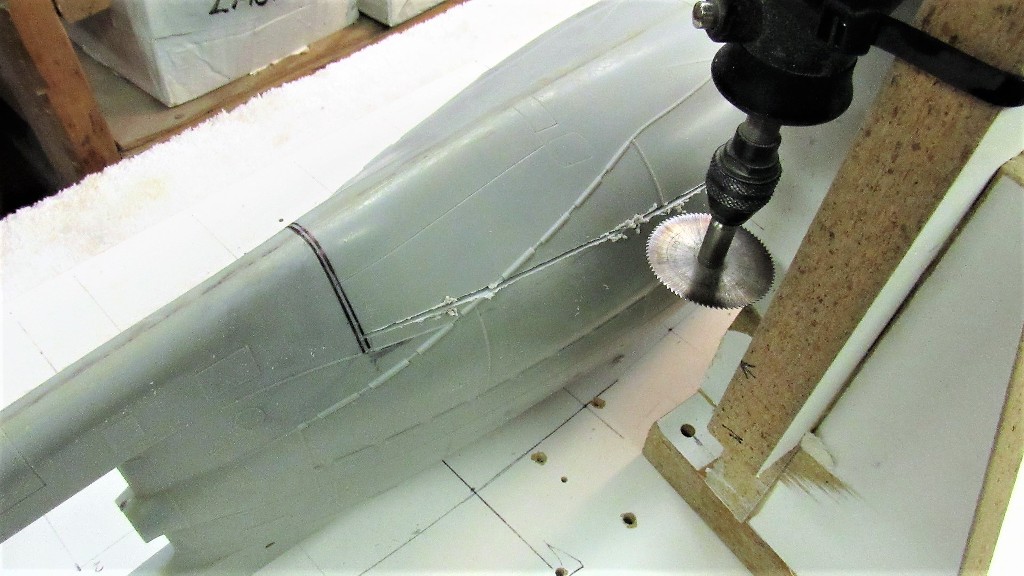
Note the use of a .015-inch-thick piece of strip to check for complete cut-through as I progress the circular saw along the length of the hull. The cutting goes slowly and with light pressure applied. At no time do I permit the plastic to melt. Slow and easy it the word-of-the-day during this operation. I was sure to make this a no-caffeine day!
Polystyrene plastic reacts poorly to high-speed tools as it will melt if the feed-rate is too high and/or depth of cut is too great.
So... duh!... the trick is to minimize tool speed, advance rate, and pressure applied. I found that five slow passes with slight pressure made for clean, wander-free travel of the circular saw along its assigned path. You try to get the cut in one pass and the model is sure to die a horrible death!
Patience!
Once I had made all the longitudinal cuts to the hulls starboard side, it was an easy matter of turning the work around and cutting the port side.
I was pleased to see that the Dremel circular saw produced a very narrow kerf, about .025-inch. I'll build that back up with some plastic strip stock tomorrow.
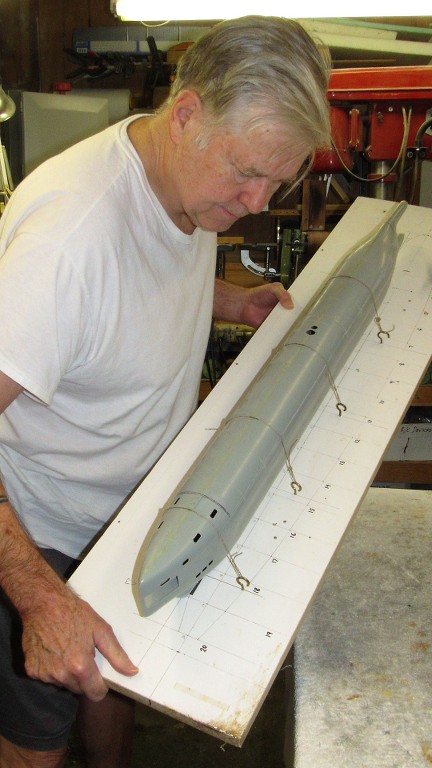
Carefully following the inked on radial lines, I cut the radial breaks at the bow and stern. Nominal wall thickness of the hull was around .050-inch so there was not much plastic to hack through. The work went quickly.
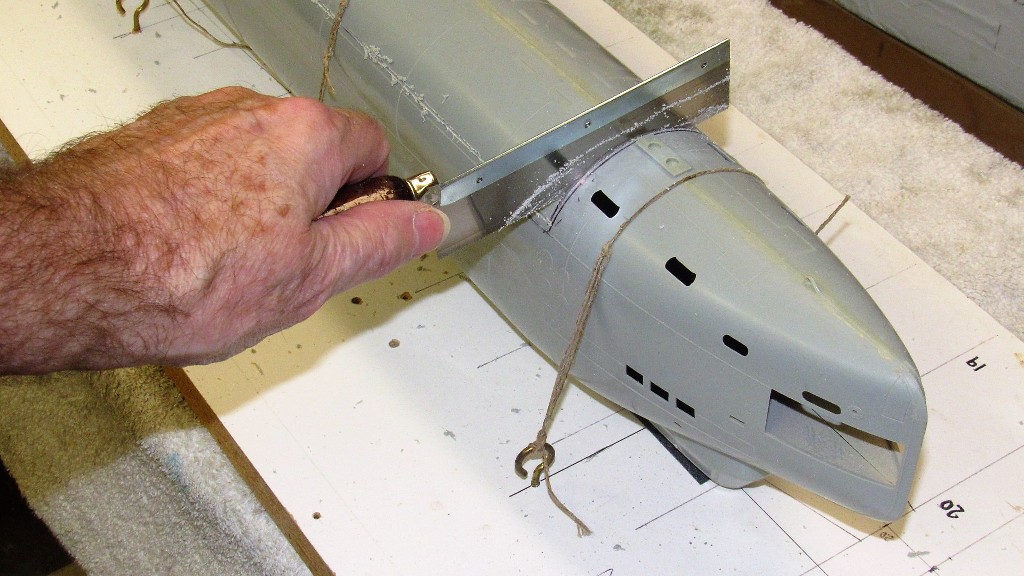
The remaining connective tabs (those portions of the longitudinal split that were hiding under the waxed sail-twine) were cut through with a razor-saw, completing the split between upper and lower hull halves.
This is as far as I got today. However, I'm ahead of the game as I already had in hand a decade old, assembled WTC for the model I just pulled down off the wall. So, in no time I'll be at a point where I can start integrating the camera-transmitter into the submarines sail.
Who is John Galt?Comment
-
Happy to see you building another type XXIII for yourself finally!!!Comment
-
Cut straight ya *******. Don’t make a mess of it.Of the approximately 40,000 men who served on U-boats in WWII, it is estimated that around 28,000 to 30,000 lost their lives.Comment
-
Look forward to seeing this one run. David, I like that you are getting "Me time".If you can cut, drill, saw, hit things and swear a lot, you're well on the way to building a working model sub.Comment
-
If you can cut, drill, saw, hit things and swear a lot, you're well on the way to building a working model sub.Comment
-
Ouch!.. Burn! You cruel, insensitive jerk-wad! https://youtu.be/AnUB4DGcf-4
And, no, I never did resolve that dive-of-death problem. But Mike insisted I send it to him as is. That was the cruelest cut of all... and you just got to know if I could not fix that pitching problem, he would not as well. He sold it. Hope the eventual owner solved the problem.
I hope to have better luck with this one. If not, I'll feed it to a wood-chipper!
It's ON, *****! Consider my gauntlet dually slammed across your kisser, sir!
And if you video-bomb me during a media interview again, I promise severe action will be taken! https://youtu.be/mgeNPI3qHk4
You people!
David
The Horrible
Who is John Galt?Comment
-
OK…I’m drooling over this one. I’m really glad to see you taking this one up again, One of my favorite boats, and with a camera to boot. If this boat were firing torpedoes, I’d be in U Boat heaven.Comment
-
Oh how i love Renshape tooling board... Its uses are endless
Comment


Comment