
Casey Thrower and I, though only physically meeting one another recently at the 2021 SubFest event in Georgia last Summer, have been in this game together for the better part of a quarter-century; we've been kicking around ideas and projects all that time. At the event he drove some of my boats -- and in no time he became infatuated with the easy handling and speed of my little Small Worlds Models, 1/96 BLUEBACK. By time the three-day event was over, and we all started packing our stuff for trips back to our respective homes, I agreed to help Casey get his own BLUEBACK up and running in time for the upcoming 2022 regatta season.
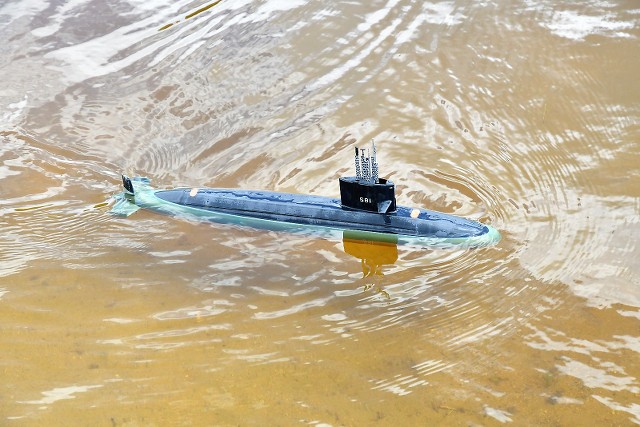
Below is pictured my BLUEBACK at the 2019 Groton Sub-Base fun-run. For video of this and other models in and out of the water I strongly recommend you look over the 2021 SubFest video. https://youtu.be/H4q1NO_IQGk The water clarity was stunning.
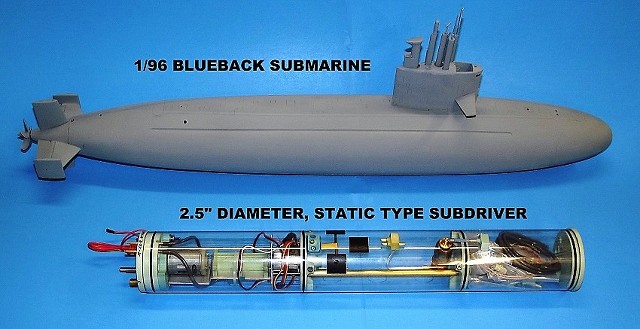
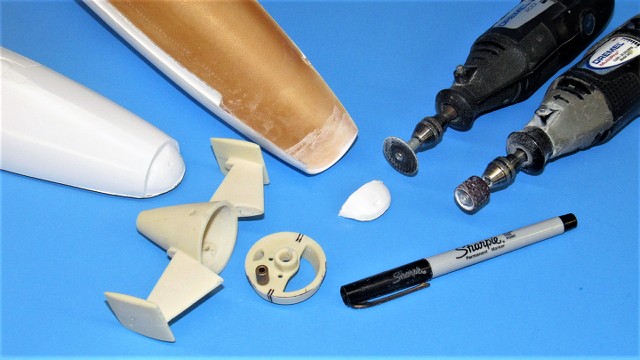
The next few chapters chronicle the work I have done and will do to provide my friend with an assembled, outfitted, and tested WTC for his own BLUEBACK. Included will be a discussion on my partial assembly of a BLUBACK hull kit and integration of Casey's WTC within it. This shot illustrates what it takes to turn a nice fiberglass, resin, and metal kit into a practical, well running r/c submarine: The hull kit itself -- now offered by The Nautilus Drydocks -- and a suitable WTC, under development, but soon available from the same source.
The term, 'static' denotes the mode of operation of the model submarine; this type, like the real thing, takes on an amount of ballast water whose weight counters the buoyant force of the above waterline portions of submarine when they become immersed.
This differentiates the 'Dynamic' type boats from the 'Static' type. The dynamically diving boat can only slip beneath the surface by plowing under at speed; relying on the dynamic force of the hull and appendages to force the always positively bouyant submarine beneath the surface -- not at all scale like. But, good enough if you are OK with toy-like performance. Yes, I'm a snob. Sue me!
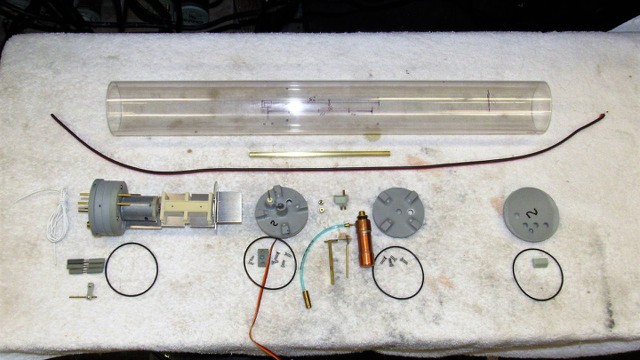
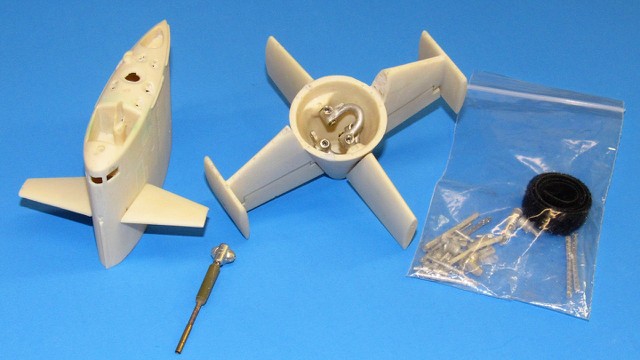
I took this shot yesterday. I had just taken delivery of the BLUEBACK hull kit and box of devices that were dropped shipped to me from the Nautilus Drydocks Remote control submarines | The Nautilus Drydocks (rc-submarine.com) on behalf of my partner in crime, Casey Thrower. It only took me a days work to assemble his WTC. I'll spend the weekend populating it with the servos, receiver, angle-keeper, BEC, ESC, fail-safe, battery, mission-switch and other goodies to make it an operational system.
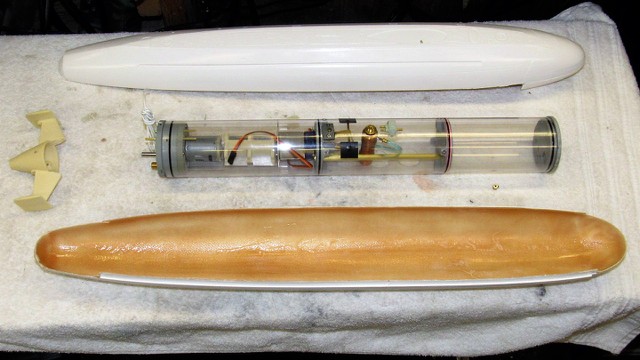
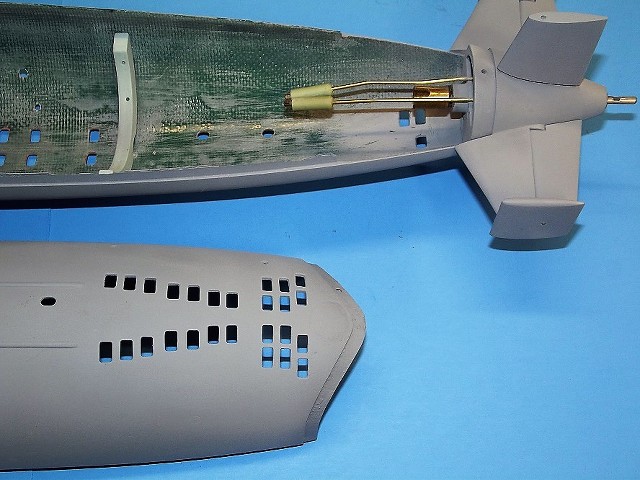
You get an idea here of what a tight fit the 2.5-inch diameter WTC is to the 1/96 BLUEBACK model.
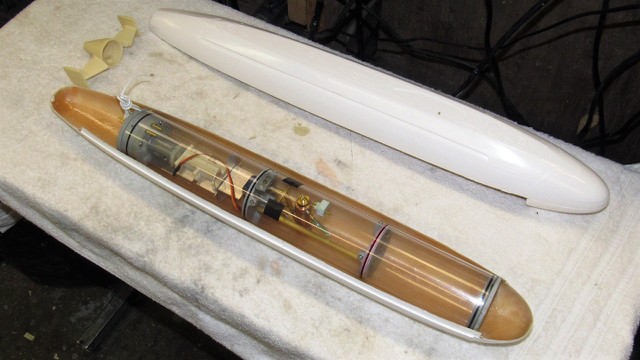
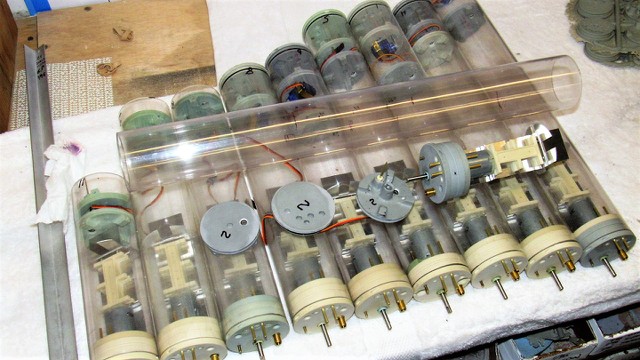
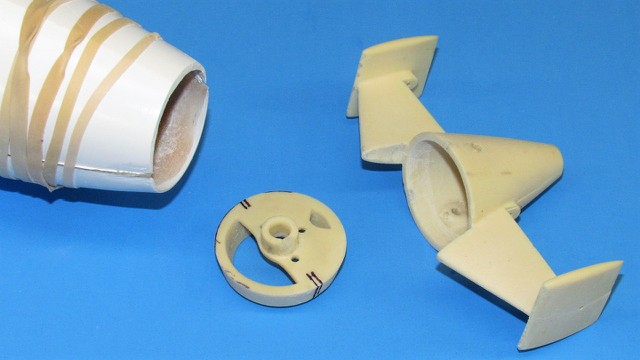
Remember all those WTC's I put together in the ruff? One of those was pressed into service as Casey's BLUEBACK WTC.
Here is the victim, showing off the internal bulkheads, forward bulkhead (removable to access the battery space), and the after removable motor-bulkhead with attached aluminum device tray, mounting bulkhead and resin servo foundation.
OK. Let's stick this sucker together into a coherent whole, shall we?
Though retired I still have bins full of excess parts Ellie and I manufactured while operating under the D&E Miniatures banner. My recent retirement was not planned and occurred with the parts bins nearly full. The result is a shop and two sheds teaming with sub-assemblies, jigs, fixtures, rubber tools, sheet-metal, brass stock, resin, templates, and cylinder stock. Everything needed was at hand.
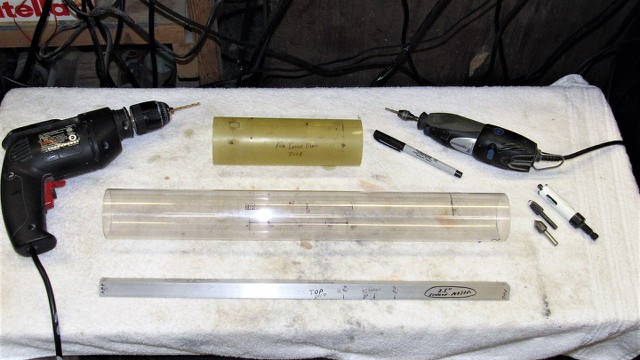
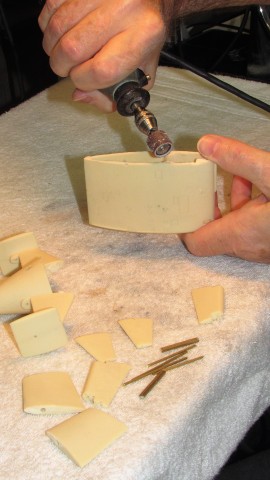
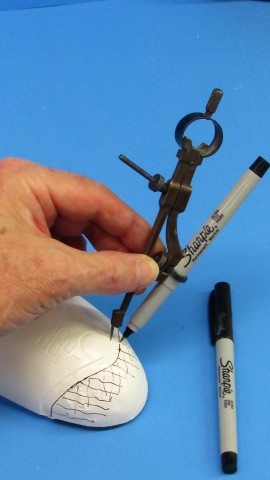
First task was to employ the 2.5" marking templates to identify where to drill holes for the vent valve, internal bulkhead mounting screws, emergency gas bottle neck, flood-drain holes, external manifold ports, and where to cut away the not needed length of cylinder.
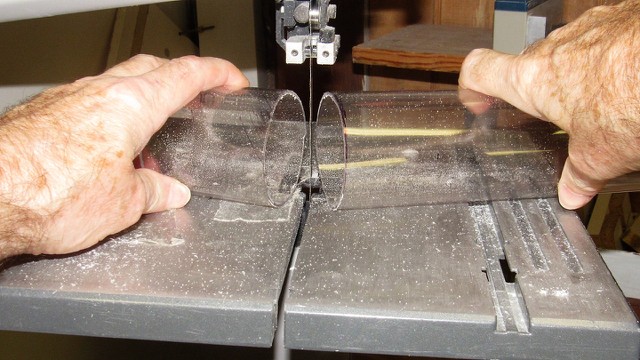
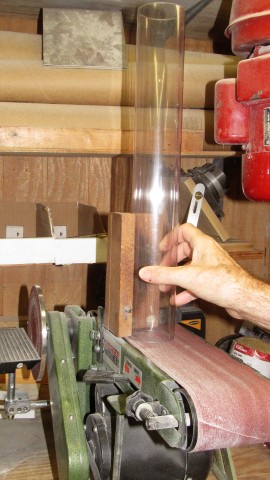
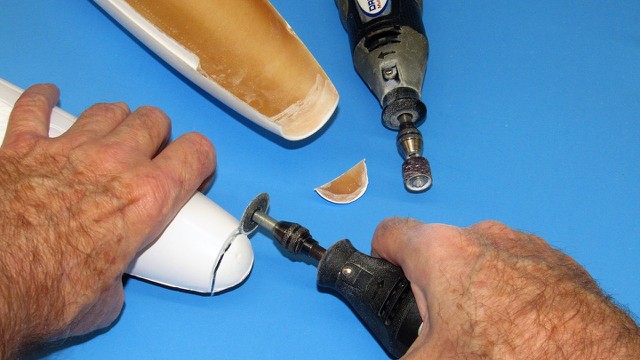
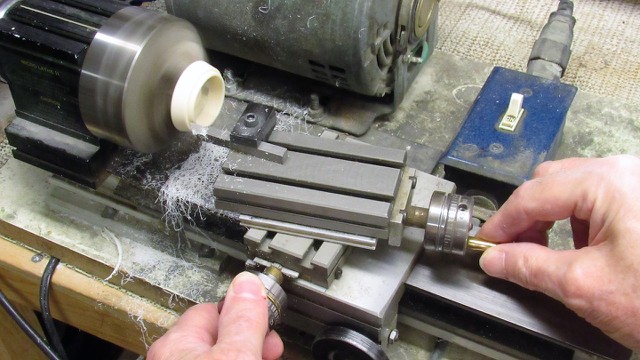
The raw circular edge of the cylinder was trued up on a belt-sander equipped with a specially made fence that holds the work perpendicular to the machines bed -- this is how I face of the cylinder ends. Easy peazy.
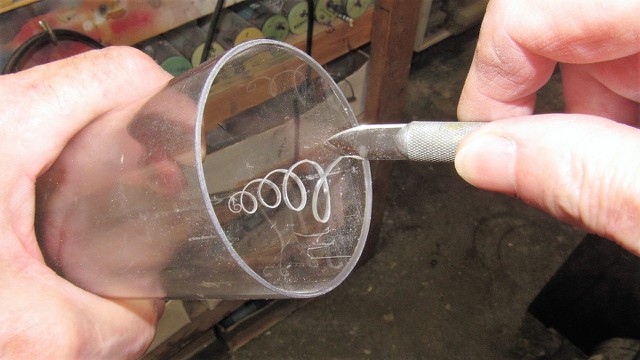
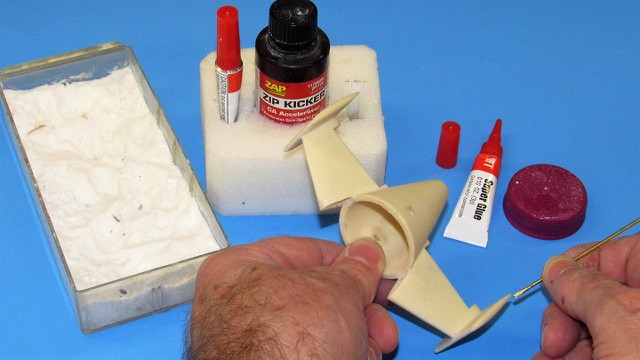
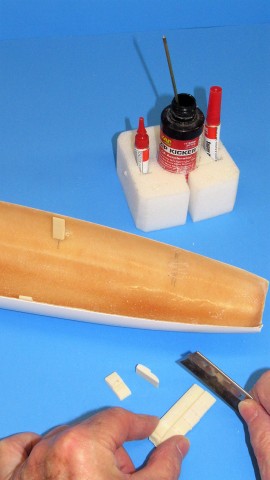
Lexan cuts like hard cheese. That property of polycarbonate plastic makes chamfering an easy task best accomplished with a knife. Lexan is also very forgiving of shock and stress and will not crack as readily as acrylic plastics.
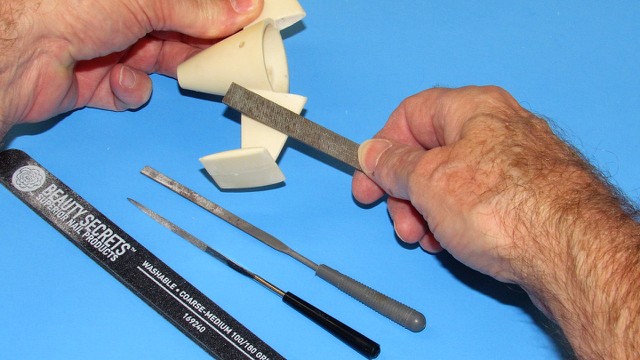
A spray coating of oil within the cylinder eases insertion of an internal bulkhead as it's pushed into position.
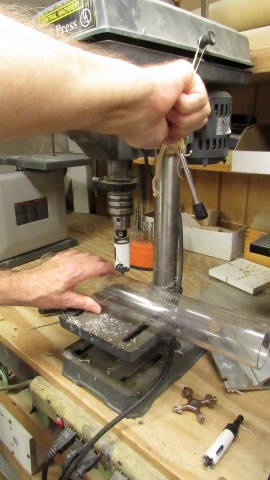
And that's exactly what I'm doing here: pushing in the second of the two internal bulkheads that separate the three spaces within the cylinder. The central one being the ballast tank. Note the use of Teflon 'plumbers tape' to tighten up the O-ring seal between bulkhead and cylinder. Once an internal bulkhead is positioned, holes are drilled through the cylinder to match threaded holes in the foundation nibs of a bulkhead so it can be secured in place with flat-head machine screws.
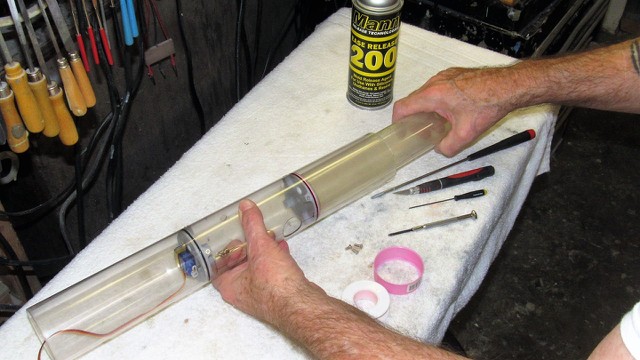
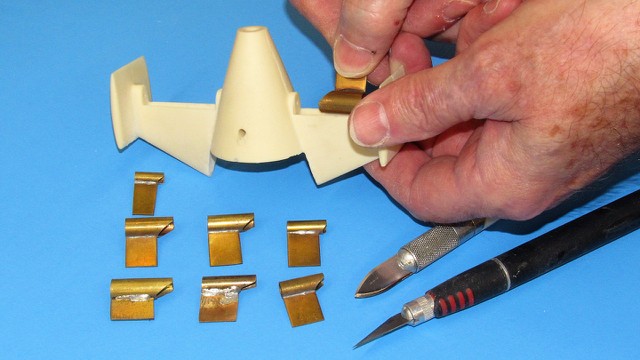
The internal bulkheads in place I then populate the ballast tank with the vent valve bell-crank, pivot-pin, emergency gas bottle and blow-valve, brass tube conduit, and external manifold that will route induction and discharge air from the low pressure blower (LPB) from the after dry space to the ballast tank.
Installing the vent valve.


Comment