today's work

Collapse
X
 
  • Time
  • Show
Clear All
new posts
  • He Who Shall Not Be Named
    Moderator
    • Aug 2008
    • 12255


    Casey Thrower and I, though only physically meeting one another recently at the 2021 SubFest event in Georgia last Summer, have been in this game together for the better part of a quarter-century; we've been kicking around ideas and projects all that time. At the event he drove some of my boats -- and in no time he became infatuated with the easy handling and speed of my little Small Worlds Models, 1/96 BLUEBACK. By time the three-day event was over, and we all started packing our stuff for trips back to our respective homes, I agreed to help Casey get his own BLUEBACK up and running in time for the upcoming 2022 regatta season.

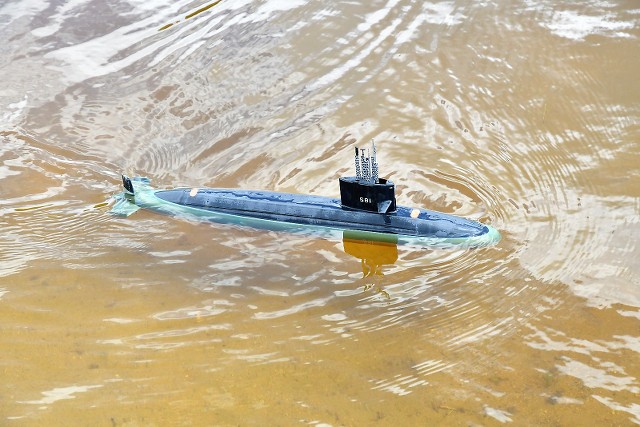
    Below is pictured my BLUEBACK at the 2019 Groton Sub-Base fun-run. For video of this and other models in and out of the water I strongly recommend you look over the 2021 SubFest video. https://youtu.be/H4q1NO_IQGk The water clarity was stunning.


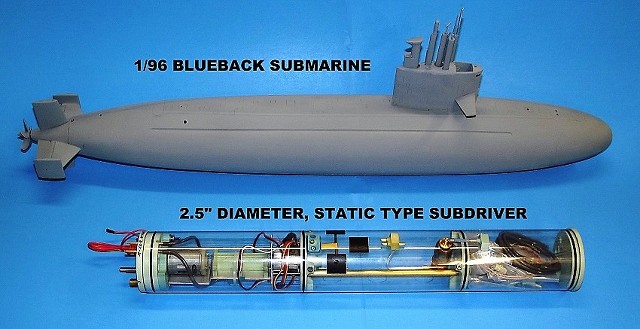
    The next few chapters chronicle the work I have done and will do to provide my friend with an assembled, outfitted, and tested WTC for his own BLUEBACK. Included will be a discussion on my partial assembly of a BLUBACK hull kit and integration of Casey's WTC within it. This shot illustrates what it takes to turn a nice fiberglass, resin, and metal kit into a practical, well running r/c submarine: The hull kit itself -- now offered by The Nautilus Drydocks -- and a suitable WTC, under development, but soon available from the same source.

    The term, 'static' denotes the mode of operation of the model submarine; this type, like the real thing, takes on an amount of ballast water whose weight counters the buoyant force of the above waterline portions of submarine when they become immersed.

    This differentiates the 'Dynamic' type boats from the 'Static' type. The dynamically diving boat can only slip beneath the surface by plowing under at speed; relying on the dynamic force of the hull and appendages to force the always positively bouyant submarine beneath the surface -- not at all scale like. But, good enough if you are OK with toy-like performance. Yes, I'm a snob. Sue me!


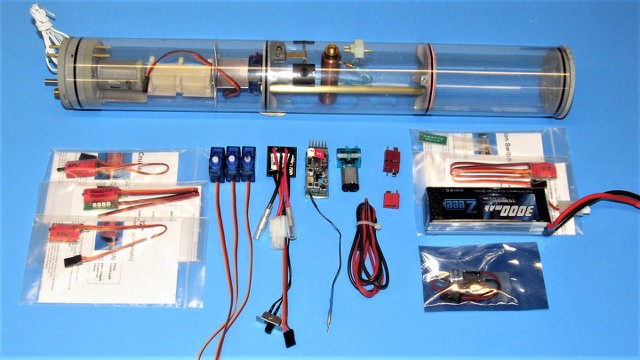
    I took this shot yesterday. I had just taken delivery of the BLUEBACK hull kit and box of devices that were dropped shipped to me from the Nautilus Drydocks Remote control submarines | The Nautilus Drydocks (rc-submarine.com) on behalf of my partner in crime, Casey Thrower. It only took me a days work to assemble his WTC. I'll spend the weekend populating it with the servos, receiver, angle-keeper, BEC, ESC, fail-safe, battery, mission-switch and other goodies to make it an operational system.
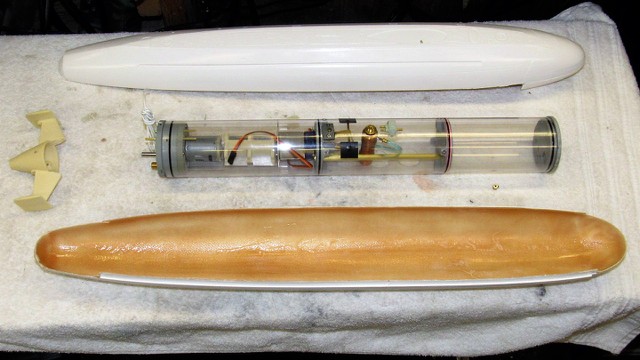


    You get an idea here of what a tight fit the 2.5-inch diameter WTC is to the 1/96 BLUEBACK model.
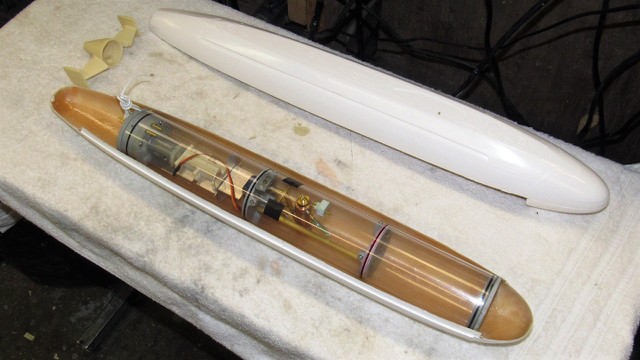


    Remember all those WTC's I put together in the ruff? One of those was pressed into service as Casey's BLUEBACK WTC.

    Here is the victim, showing off the internal bulkheads, forward bulkhead (removable to access the battery space), and the after removable motor-bulkhead with attached aluminum device tray, mounting bulkhead and resin servo foundation.

    OK. Let's stick this sucker together into a coherent whole, shall we?
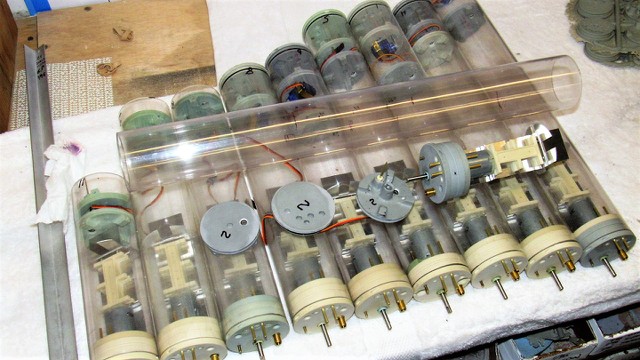


    Though retired I still have bins full of excess parts Ellie and I manufactured while operating under the D&E Miniatures banner. My recent retirement was not planned and occurred with the parts bins nearly full. The result is a shop and two sheds teaming with sub-assemblies, jigs, fixtures, rubber tools, sheet-metal, brass stock, resin, templates, and cylinder stock. Everything needed was at hand.
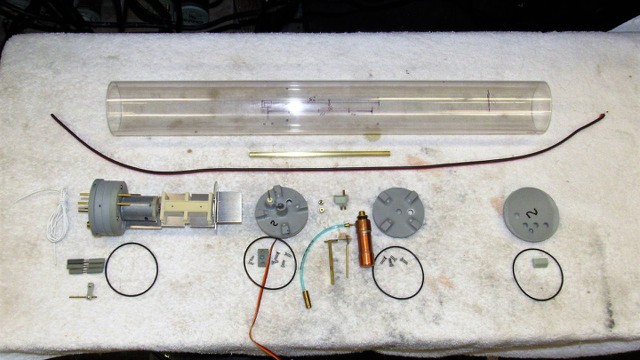


    First task was to employ the 2.5" marking templates to identify where to drill holes for the vent valve, internal bulkhead mounting screws, emergency gas bottle neck, flood-drain holes, external manifold ports, and where to cut away the not needed length of cylinder.
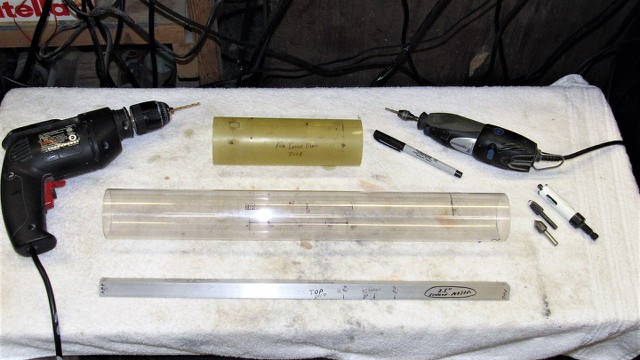
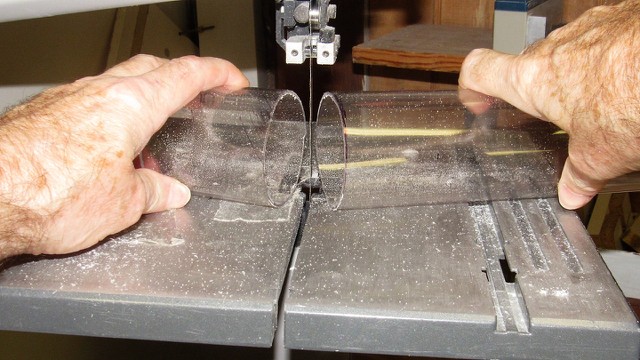


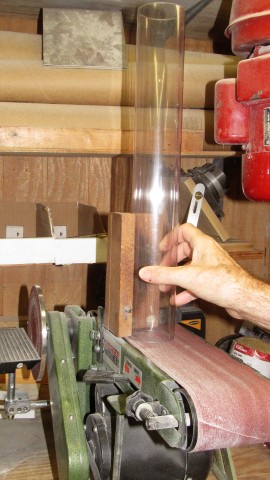
    The raw circular edge of the cylinder was trued up on a belt-sander equipped with a specially made fence that holds the work perpendicular to the machines bed -- this is how I face of the cylinder ends. Easy peazy.


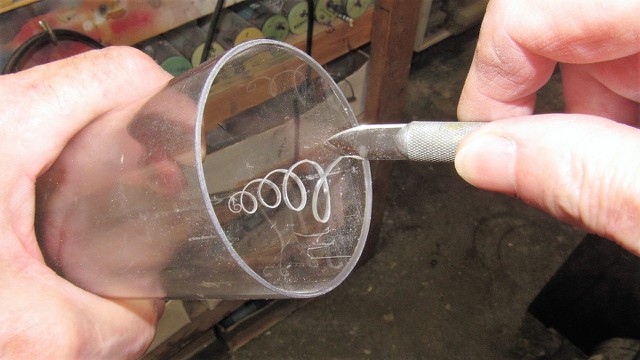
    Lexan cuts like hard cheese. That property of polycarbonate plastic makes chamfering an easy task best accomplished with a knife. Lexan is also very forgiving of shock and stress and will not crack as readily as acrylic plastics.
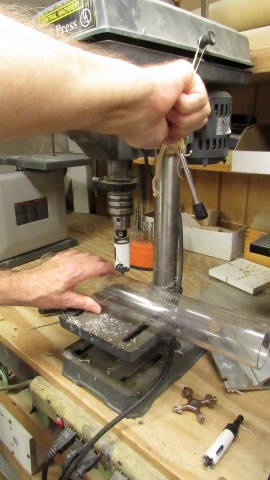


    A spray coating of oil within the cylinder eases insertion of an internal bulkhead as it's pushed into position.

    And that's exactly what I'm doing here: pushing in the second of the two internal bulkheads that separate the three spaces within the cylinder. The central one being the ballast tank. Note the use of Teflon 'plumbers tape' to tighten up the O-ring seal between bulkhead and cylinder. Once an internal bulkhead is positioned, holes are drilled through the cylinder to match threaded holes in the foundation nibs of a bulkhead so it can be secured in place with flat-head machine screws.
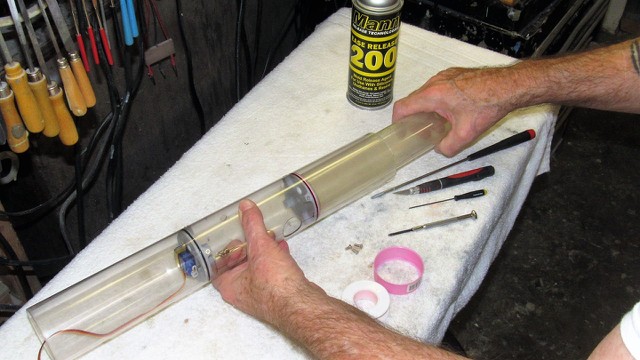


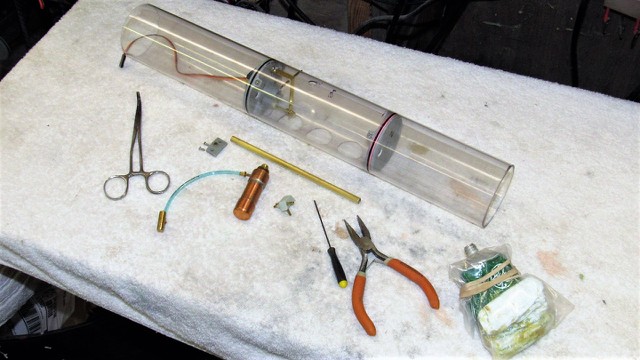
    The internal bulkheads in place I then populate the ballast tank with the vent valve bell-crank, pivot-pin, emergency gas bottle and blow-valve, brass tube conduit, and external manifold that will route induction and discharge air from the low pressure blower (LPB) from the after dry space to the ballast tank.


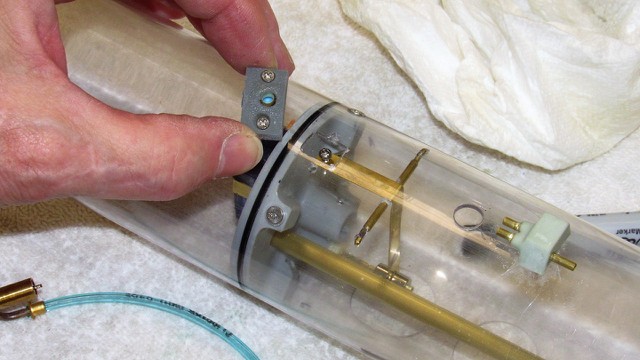
    Installing the vent valve.

    Who is John Galt?

    Comment

    • Das Boot
      Rear Admiral
      • Dec 2019
      • 1149

      I’m glad you started this thread. When I get the goods I’ll complete the rest of the boat and show what I do here. Great job as usual, Dave.
      Of the 40,000 men who served on German submarines, 30,000 never returned.”

      Comment

      • Das Boot
        Rear Admiral
        • Dec 2019
        • 1149

        While everyone else was eating steak, I was running Dave’s Blueback.

        Of the 40,000 men who served on German submarines, 30,000 never returned.”

        Comment

        • redboat219
          Admiral
          • Dec 2008
          • 2735

          Ohhh, cool!
          Make it simple, make strong, make it work!

          Comment

          • He Who Shall Not Be Named
            Moderator
            • Aug 2008
            • 12255


            Your typical r/c model submarine WTC is a system comprising control, ballast, and propulsion sub-systems; everything needed to manage the model submarine in a scale like manner.

            Here is the basic WTC -- already outfitted with most of the ballast, and propulsion sub-systems -- ready to accept the devices needed to bring it to life. I so loath this part of the job!! Electron chasing is not my idea of fun.


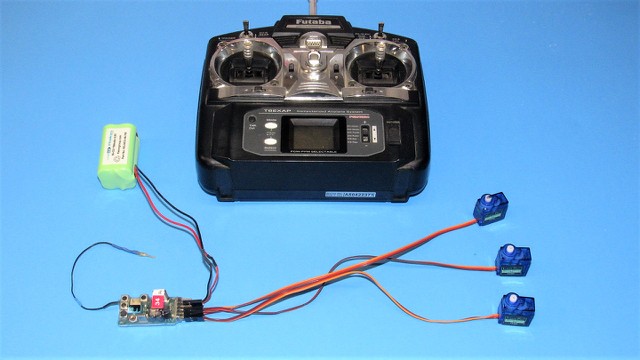
            It's good practice to first validate correct operation of all devices off WTC. Better to trouble shoot with elbow room than to fish around in the tight confines of a cylinder.

            First task was to break out the r/c system Casey sent me and check it out. Good old, rock-solid Futaba gear. I love 'em. That done I was now in a position to set up the devices that interface with the servos and transmitter (through the receiver) and check them for correct operation.


            But, not now. I'm not in the mood! Drank too much coffee today -- system integration often leads me to screams and throwing **** through windows. Not today, no way!

            I instead elected to play with the BLUEBACK's tail-feathers; get them and the sail mounted fairwater planes working properly.

            I want to make it clear, up front, that the kit I was offered by Nautilus Drydocks could be one that had a few production flaws (they would discount me a considerable amount for those shortcomings) or a pristine kit.

            Cheap ******* that I am, I swung for the discounted kit. Upon inspection of the arrived kit the only real issues were some voids in a few of the cast resin pieces. The GRP and metal parts were perfect. So, I spent most of the day working the control surfaces and their adjacent structures.


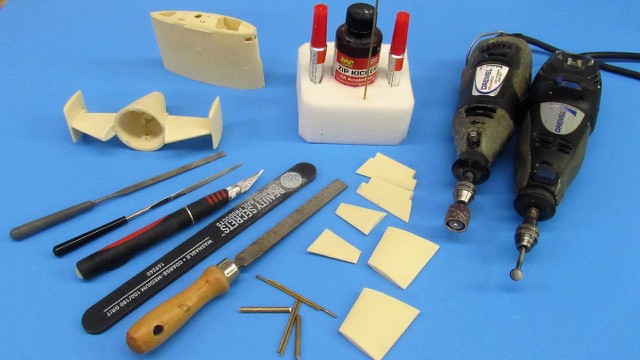
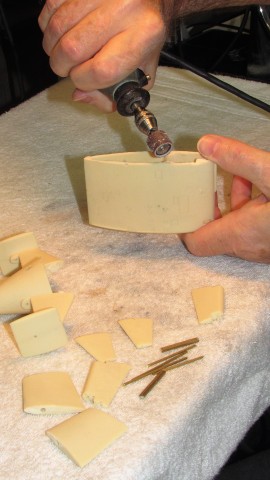
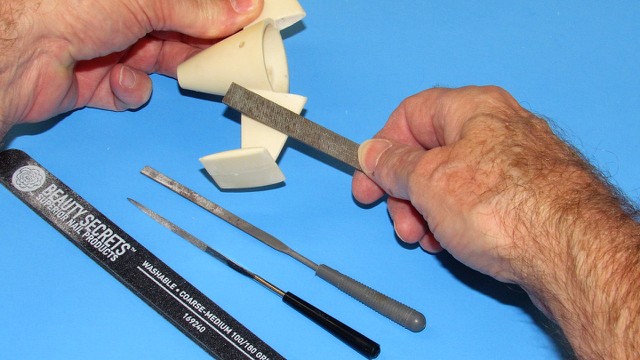
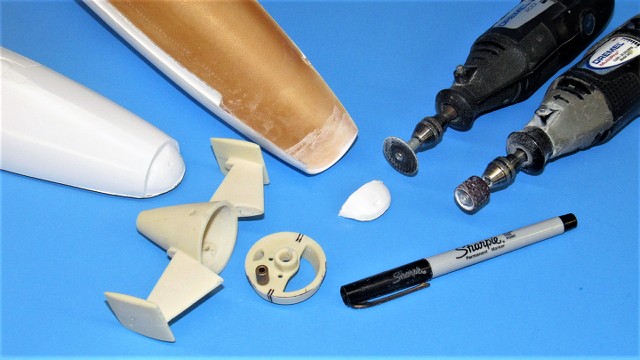
            Initially I ground away at some flash and sprue nubs with moto-tool and hand files.


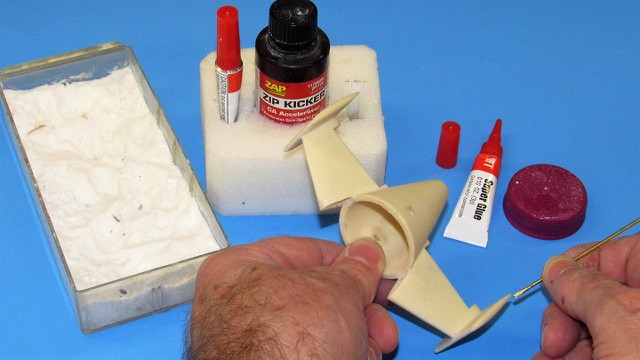
            The resin part voids were filled with CA and baking soda grout. Once those masses had hardened (very quickly, I might add) I got things back to contour with files and sanding block.


            These special round-gouges were used to chase out flash from the stern plane leading edge channels built into the trailing edges of the horizontal stabilizers.


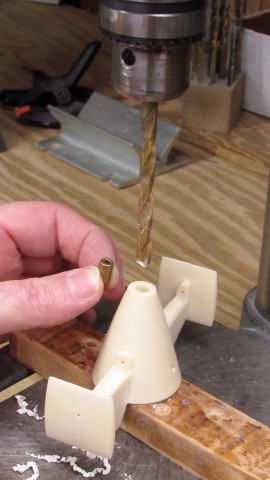
            I bored out a 1/4-inch diameter hole to accept the propeller shaft Oilite bearing.


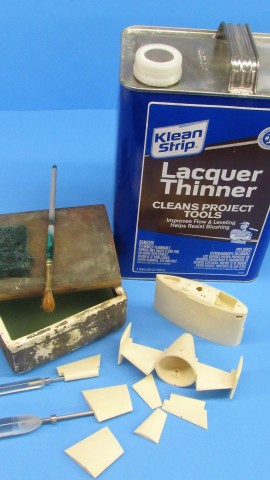
            All resin pieces were then soaked with lacquer thinner and scrubbed wet with an abrasive pad. This to remove all oils and other contaminates that would otherwise interfere with proper adhesion of later applied adhesives, putties, fillers, primers and paint.


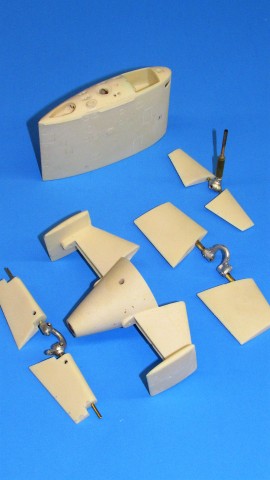
            Operating shafts were made up to the stern planes, rudders, and fairwater planes. The control surfaces were then test fit to their respective connective pieces: yokes for the stern planes and rudders, and a magnetic bell-crank for the fairwater planes.


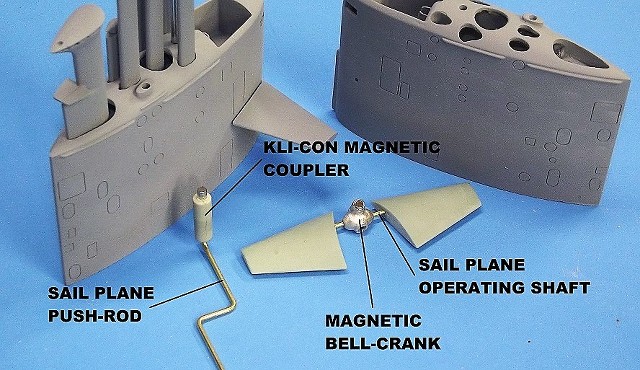
            Here you see how the linkage to the fairwater planes ('sail planes' in this shot) is made up -- a simple set of magnets. Easy to install. And little back-lash.


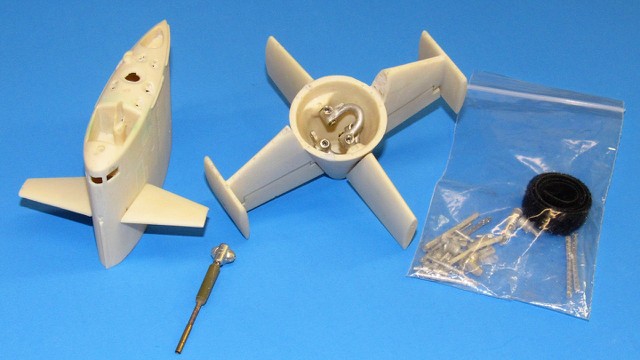
            And a check-fit of the control surfaces to the tail-cone and sail.

            Tomorrow, back to work on getting the WTC operational.

            Who is John Galt?

            Comment

            • Monahan Steam Models
              Captain
              • Apr 2020
              • 755

              I understand your not wanting to deal with electrical components for the WTC completely. I used the rest of this years allotment for curse words when I discovered the other day that I had left the fully charged LiPos plugged in to the WTC for the past 6 or more months since I last touched it. Spent the last day and a half rebuilding the aft equipment compartment….. Luckily no melt downs but the batteries swelled up and deformed the upper and lower equipment trays. Lesson learned. Tossed the batteries. Rebuilt the upper and lower trays. Put everything back together. So yeah, after all that, I’m exactly back at where I was 6 months ago having finished that again…

              Comment

              • He Who Shall Not Be Named
                Moderator
                • Aug 2008
                • 12255


                Sniveling coward me decided not to do battle with the WTC electronics today. Instead electing to continue work getting the hull pieces to fit together.

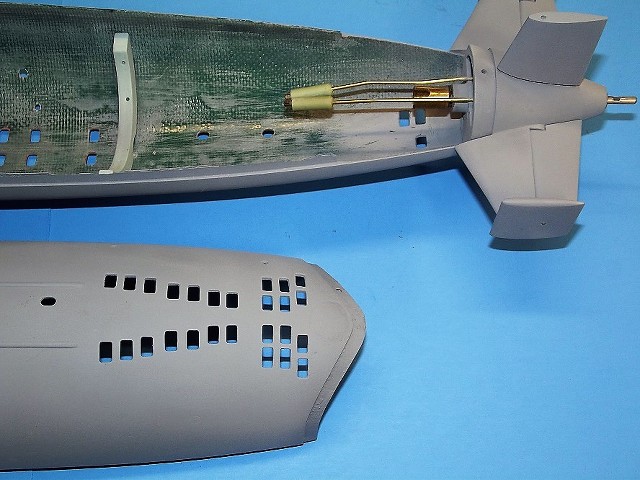
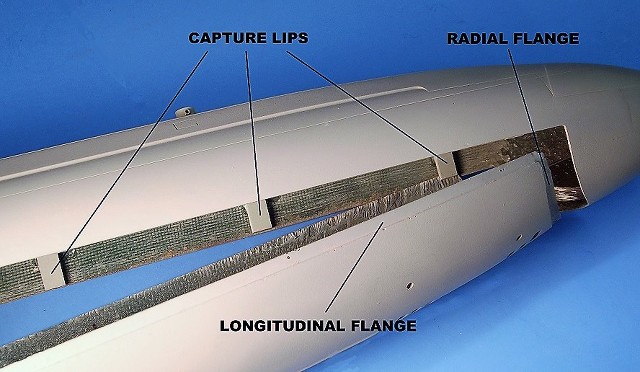
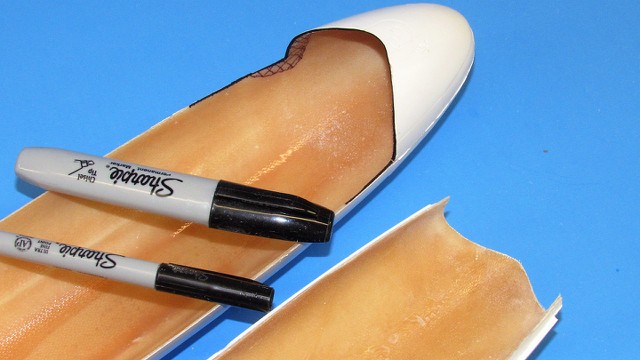
                Pictured is the end-game: an assembled tail-cone permanently bonded to the rear of the lower hull. A second BLUEBACK hull was in work at that time, and its lower hull, this time showing off the radial flange at the bow with its weird curvature -- actually a very clever move by the kits designer, Dave Manley. That curve follows the 'banjo line' of the lower sonar dome window, which neatly fits the slight gap between the radial break between upper and lower bow sections.


                The two GRP hull halves split longitudinally at centerline. The lower hull half has a recessed longitudinal flange over which the upper hull slips over. But, this is not a perfect world, and just the single flange will do nothing to keep the upper hull half from springing out, spoiling an otherwise neat, well hidden separation line between hull halves. That's why I developed these little resin 'capture lips'. Secured within the upper hull they press the inboard side of the lower hull longitudinal flange up tights against the inside of the upper hull, insuring proper registration at the split between hull halves.


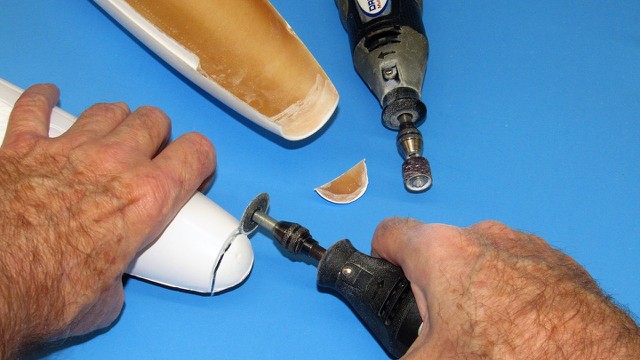
                An artifact of some GRP hard-shell tools are conical waste pieces at both ends of a tapered hull. These were removed with the aid of a carbide cut-off wheel.


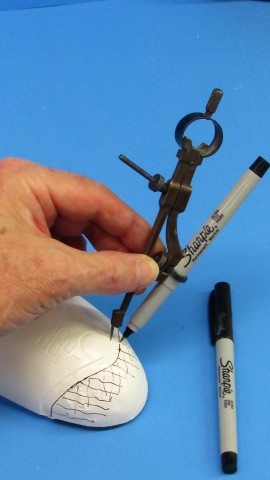
                Most of the lower hull bow fairing was removed, leaving a 1/4-inch radial flange. Marked off here with the aid of a drafting compass equipped with a Sharpie marking pen. This flange, captured under the upper hull bow piece, would lock the forward end of the two hulls together when assembled.

                (A single machine screw at the stern will hold the upper hull down tight on the tail-cone, and is all it will take to hold the assembled hull halves together).


                Hand laid-up fiberglass structures, if great care is not taken to wick out excess resin from the glass weave, tend to vary in wall thickness -- because of gravity, excess resin will pool and produce hull pieces thick and heavy at the bottom of the lower hull and thick and heavy at the top of the upper hull. This excess material has to be ground away at the stern and bow to get the tail cone radial flange to fit properly when installed at the stern of the lower (and later upper) hull.


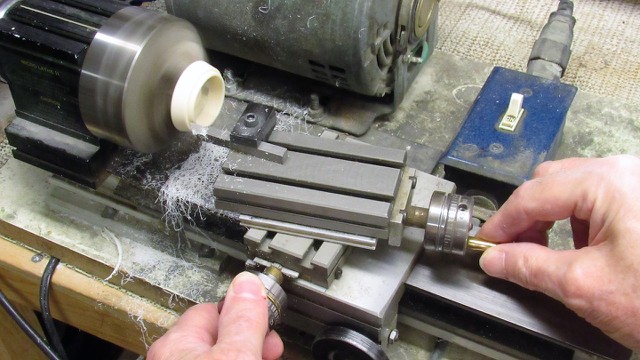
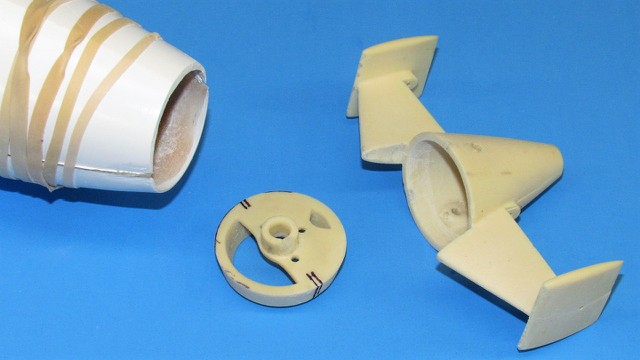
                The wall thickness at the stern of the two hull halves, even after grinding, was a bit thicker than would be accommodated by the stern-cones radial flange, I found it necessary to turn the flange down about .050-inch using my handy-dandy-wonder Taig lathe. A neat attachment to this machine is a tapering tool-holder that can be set to the desired angle, and used to turn the correct taper angle, and do it with great precision.


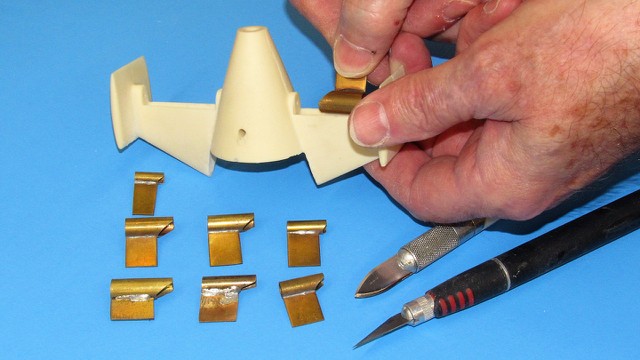
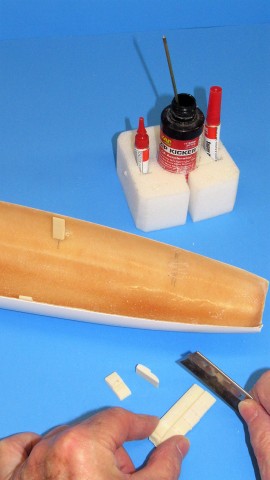
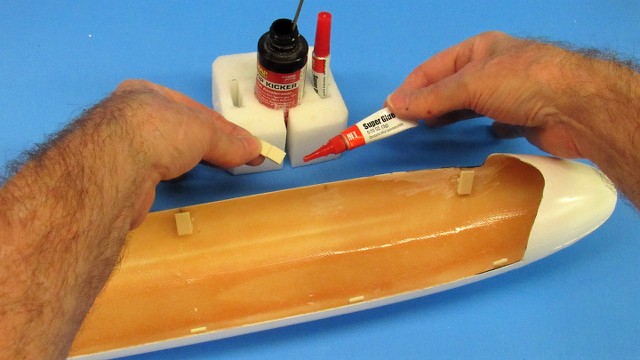
                The kit provided a blank with all the capture lips needed to hold the hull halves tightly together when assembled. All I had to do was break each one free with the aid of a razor saw and a bit of force. The upper hull was prepared by marking where each capture lip would go and roughing up the fiberglass surface with grinder and a sanding stick. The lips were then CA'ed in place.


                The assembled hull is now nice and tight, but will need a lot of block sanding and filler to make the radial and longitudinal seams almost go away. And I'm just about ready to bond the tail cone to the lower hull. Tomorrow, maybe. Another reason to steer clear of the dreaded WTC outfitting!

                Who is John Galt?

                Comment

                • He Who Shall Not Be Named
                  Moderator
                  • Aug 2008
                  • 12255

                  Originally posted by Monahan Steam Models
                  I understand your not wanting to deal with electrical components for the WTC completely. I used the rest of this years allotment for curse words when I discovered the other day that I had left the fully charged LiPos plugged in to the WTC for the past 6 or more months since I last touched it. Spent the last day and a half rebuilding the aft equipment compartment….. Luckily no melt downs but the batteries swelled up and deformed the upper and lower equipment trays. Lesson learned. Tossed the batteries. Rebuilt the upper and lower trays. Put everything back together. So yeah, after all that, I’m exactly back at where I was 6 months ago having finished that again…
                  Ouch! Yeah, this game is only for guy's like us... the criminaly insane!
                  Who is John Galt?

                  Comment

                  • Das Boot
                    Rear Admiral
                    • Dec 2019
                    • 1149

                    You’ve always been insane.
                    Of the 40,000 men who served on German submarines, 30,000 never returned.”

                    Comment

                    • Das Boot
                      Rear Admiral
                      • Dec 2019
                      • 1149

                      Something is wrong. I was right. Dave has the flu.
                      Last edited by Das Boot; 12-22-2021, 03:54 AM.
                      Of the 40,000 men who served on German submarines, 30,000 never returned.”

                      Comment

                      • redboat219
                        Admiral
                        • Dec 2008
                        • 2735

                        Click image for larger version

Name:	images (15).jpeg
Views:	286
Size:	60.5 KB
ID:	157171
                        Make it simple, make strong, make it work!

                        Comment

                        • redboat219
                          Admiral
                          • Dec 2008
                          • 2735

                          Originally posted by He Who Shall Not Be Named

                          Ouch! Yeah, this game is only for guy's like us... the criminaly insane!
                          Click image for larger version

Name:	image_13758.jpg
Views:	287
Size:	67.6 KB
ID:	157174
                          Make it simple, make strong, make it work!

                          Comment

                          • SteveNeill
                            Commander
                            • Apr 2020
                            • 315

                            I love insane people! They are the people that got us into space! Under the water. Across the water. Rolling along the highways. Flying through the air and much much more. We'd be all dead without them!

                            Comment

                            • redboat219
                              Admiral
                              • Dec 2008
                              • 2735

                              Click image for larger version

Name:	20211225_105948.jpg
Views:	253
Size:	50.8 KB
ID:	157272
                              Make it simple, make strong, make it work!

                              Comment

                              • Das Boot
                                Rear Admiral
                                • Dec 2019
                                • 1149

                                Looking at the instructions for this kit, the bow cut isn’t mentioned. Maybe the instructions need to be updated. As a matter of fact, much of the information needs to be updated.
                                Of the 40,000 men who served on German submarines, 30,000 never returned.”

                                Comment

                                Working...