Welcome to our forums. For the best in R/C submarine kits, components and accessories, be sure to visit the Nautilus Drydocks
If this is your first visit, be sure to
check out the FAQ by clicking the
link above. You may have to register
before you can post: click the register link above to proceed. To start viewing messages,
select the forum that you want to visit from the selection below.
Could you possibly find a crappier camera to shoot that footage with?!
But, looks like it's working.
OK, enough chest-puffing. What are your 'hiccups'? Let's fix those, get this thing running reliably, so you can make it all pretty, stuff it in a box, and get on to your next project.
Looking at the vid she seems to run fine, i also wonder what the hiccups are, they don't seem too influence your boat that much, keep up the good work.
LOL - David, night time video with this camera does get grainy and focus is tough. I'll give you that, but it is recorded and heck, I was thrilled with that!....stuff it in a box? I hope that is not in your crystal ball!!!! Yes there will be other projects, but I really like the Gato. I hopefully will not get tired of her.
David, Manfred, and Alec, Thank you!
The big glitch was the ballast servo locking up. I pulled the sub out and reset the power (cycled it off and on again), then the sub ran for a long time before it would happen again. The other glitches were more id 10 t things like forgetting the screw for the deck and after a few reverses and forwards to make some turns, the deck came off. The chlorinated pool gave the boat more buoyancy than my inflatable pool. I will need to make a removable weight. Because of the extra buoyancy, I had to have more forward motion to dive and the planes at a harsher angle. That in turn made it tougher to turn in the diameter of the pool. I will make another trip to grandma's house to try to adjust the weight for those conditions and maybe just maybe get a pond run later this afternoon. It will take time for me to get used to the switches and controls. And not do stupid things like leave the SNORT pumps on and wonder why she is not diving.
If you can cut, drill, saw, hit things and swear a lot, you're well on the way to building a working model sub.
Again got to do a pool run. I adjusted some rudder throws and added weight. 36g of weight just to bring it to a closer submerged profile to what I had in the inflatable pool it still could have used a little more weight in the bow. I did have the same thing happen where the ballast servo freezes. A reset of power fixes it again. Even with the forward throttle cut back to 31% this sub can kick into gear and move underwater! I will post plain old video of the event.
To add weight I took along a spool of lead free solder and cut as needed. It worked o.k. for the most part. at times the weight would shift and slightly tilt the sub.
And here is a panoramic scan of the sub for fun (the stitching messed up some of the it brought pieces together).
I think to be safe, I will switch out the servo that handles the ballast vent/blow as David suggested.
As far as run goes, went through the first Lipo battery in what seemed like no time and the fortunately had the second one with me. The sub lost signal when it was in 2 foot of pool water and about 20 feet away (did that twice). When I walked up to it the controls responded and then the blow valve did.
If you can cut, drill, saw, hit things and swear a lot, you're well on the way to building a working model sub.
Love the panoramic shot. Well done! And may I complement you on the very neat plumbing runs in there.
If the ballast sub-system servo starts working after cycling power, that tells me that either your Lipo-Guard was kicking in (low battery voltage), or there is a problem in the fail-safe side of the ADF. Not the servo!
Since you were near the end of your battery, maybe when you occasionally hit high-throttle, the current drain was enough to lower the battery voltage down to the point where the Lipo-Guard kicked in, denying channel-4 signal to the ADF -- simulating a loss-of-signal situation -- and the fail-safe did its job of freezing the servo to the 'blow' position. Cycling power resets everything (at that point the battery recovers enough to pass the Lipo-Guard voltage test).
Does the servo stick on you with a fully charged battery? That's what I'm asking you to check now.
Thank you David. I was probably unclear or should clarify - it is usually in the beginning of my runs (within the first third time-wise), but not always. Battery is charged enough so that I get decent runs in after resetting.
Peace,
Tom
If you can cut, drill, saw, hit things and swear a lot, you're well on the way to building a working model sub.
Scott,
Thank you! I look forward to us talking more about these subs and what you are up to. I am going camping this weekend (Cub Scouts) and Tina shot down the idea of bringing the sub :-( It is a beautiful lake we are going to ....... sigh, maybe a total body massage at the salon will loosen her up!?!
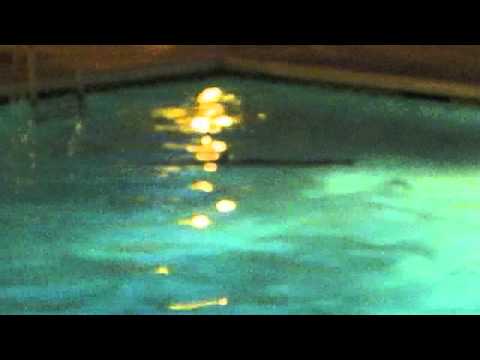
Here is another video of this last weekend pool run:
If you can cut, drill, saw, hit things and swear a lot, you're well on the way to building a working model sub.
Well done! You obviously are in total control of that boat. Your Wife's right, leave the boat home. Last thing you need is 101 screaming crumb-crunchers trying to get their diseased pinkies all over your model and transmitter. Leave it home.
You got the thing working! So, enjoy the moment. And thank you for the credits on that video, very kind and helps people figure out where to get the stuff and ask the questions to get one of these models converted over to r/c. Thanks.
Your WIP thread (and others) has gone a long way in securing sales for Mike and me. And, for that, we wish to express our appreciation.
Sorry for the delay in responding David, those are very kind words, Thank You and I am the one that has gained the most
I did not get to bring the sub with me, but that is o.k. there was little room in the car as it was. The lake was beautiful and I caught a couple of trout. The strange thing was I kept imagining my sub traveling through the crystal clear water - sick I know!. Time for more submarine testing and then an open body of water.
Tonight I am going to do a check over of the cabling again to see if I can figure the issue with ballast tank issue.
Thinking out loud here.... My Snort has two mini pumps on it. One pump has the controller on it the other does not. The one that does not have the controller does not have capacitors either. Could that cause this issue? If so what type of caps should I install?
Last edited by trout; 05-20-2012, 10:10 PM.
Reason: being nice and not teasing David for being nice.
If you can cut, drill, saw, hit things and swear a lot, you're well on the way to building a working model sub.
I do not think the second pump is the issue because it is not running when the ballast is, but it may be wise to put caps on anyways. Thoughts?
I will re-program my ADR2 to see if that helps and look to see if there are any adjustments for the LiPo Guard.
If you can cut, drill, saw, hit things and swear a lot, you're well on the way to building a working model sub.
It is a fantastic day to be at the lake for the Gato open water run..... that will have to wait. Today, In preparation for the lake and to see if i can solve that sticking blow/vent issue, I ran through the testing of systems before heading to the lake, the ADF2 stopped responding to level the boat. I ran the setup again, no response. If I power off the radio, it will go and blow the ballast tank. I tried reseting the ADF2 several times, to no avail. I removed the LiPo Guard to see if that was an issue, nope. Typing this made me think, I wonder if the servo is bad? One moment I will check...That was just a SWAG. The current server works without the ADR2 and the spare servo did not make a difference either. David, you may have called it from the start. I will post to see if Kevin has any thoughts.
In the meantime I will start adding do-dads to the sub. The prop guards are on and working on armament. Still working on running lights.
Side note for those wanting to detail your sub's conning tower interior, while reading, I found that the conning tower barrel had two configurations during WWII. The Gatos for the most part had concave ends (curving inwards) on the barrel and the Balao barrel was convex (curving out). Mine is backwards.... although there were a couple of Gatos rumored to have the Balao barrel installed because their whole conning tower had to be replaced, I have not found it to be sure (photos or plans). Live and learn, right?
If you can cut, drill, saw, hit things and swear a lot, you're well on the way to building a working model sub.
Working on miscellaneous stuff.
The front cannon is removable and was made to elevate. On the down angle, I put in a limiter to prevent it from touching the deck.
Then the running lights.
There are many different types of LEDs out there. I have been playing with a few, but they did not do what I wanted. I needed small and got some SMD LEDs. These are designed to go on circuit boards. These were small enough (they are the light tan rectangles in the plastic holder) as you can see the scale as it sits on the deck of the Gato.
I soldered wire onto the ends of the SMD LEDs - lost 6 different LEDs before I got the hang of it. Then I drilled into the kits clear plastic running light (part #126) deep enough for the LED to fit. Drilled a hole in the lights mounting bracket for the wires to come out. Everything was coming together great. The moment I touched some CA to it the plastic for the mounting bracket, it just broke into pieces. That was unexpected. So, moved over to the other side, exact same thing! I cut out the bracket and put some styrene in. The two new pieces were shaped and cohesive applied to get it affixed into the conning tower. The styrene seemed to be a little more flexible than the original plastic. Touched CA to it and it fell apart. Time to walk away. The next day I tried it again on the other side. Yup, it too came apart....Time to walk away. Finally the third day, I went to repair the mess and used cohesive glue verses CA. That was received better and things started to adhere. I used some glaze to fill in and make somewhat level the pieces of _ _ _ _ I made.
So here are some more shame photos.
Lights off
Clap, clap, Lights on
I used resistors to lower the brightness to make it seem more scale. I will paint the housing gray, the black helped me find light leaks. And now I am wiring the search light.
The wires are from broken parts from Apple laptops. If you need any, let me know.


Comment