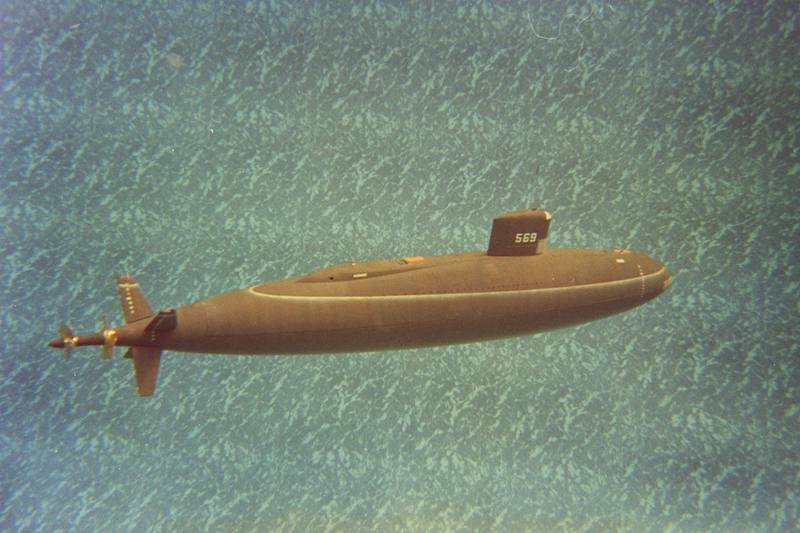
1/96 Albacore (after Phase III coversion 1961)

Collapse
X
 
  • Time
  • Show
Clear All
new posts

  • He Who Shall Not Be Named
    replied
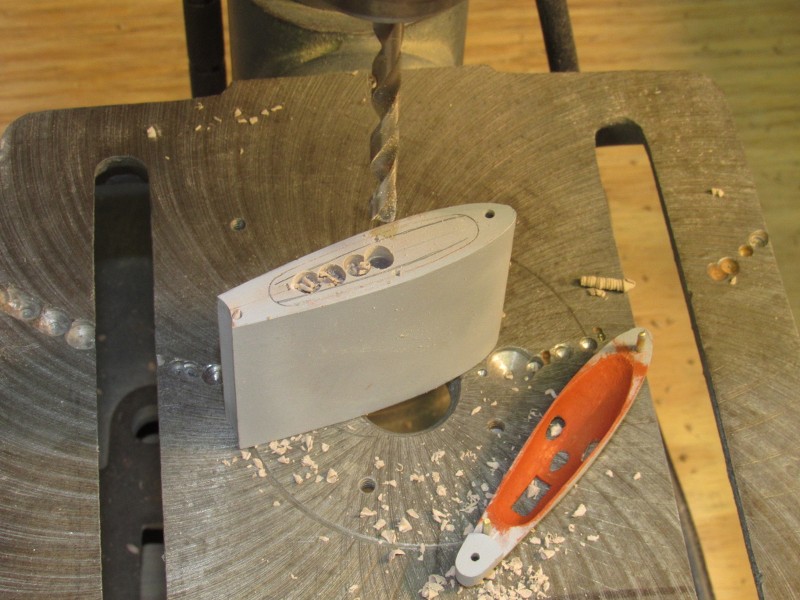
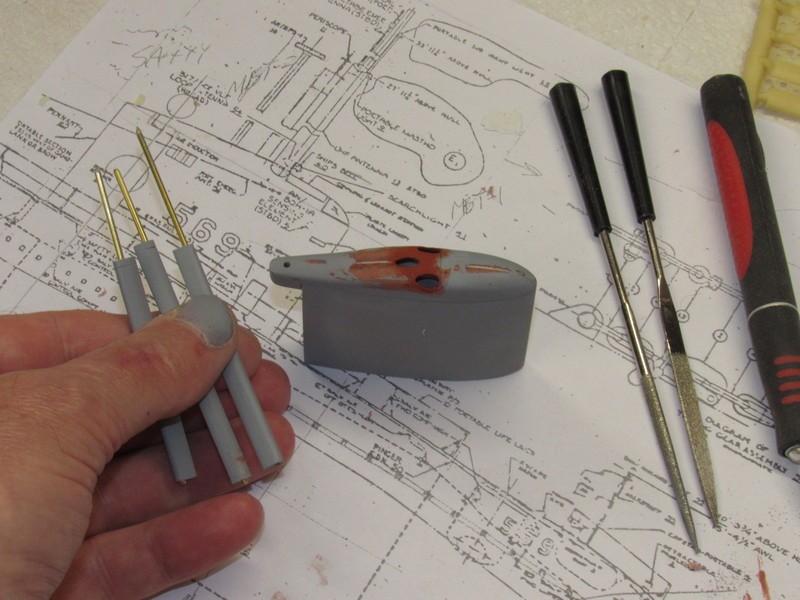
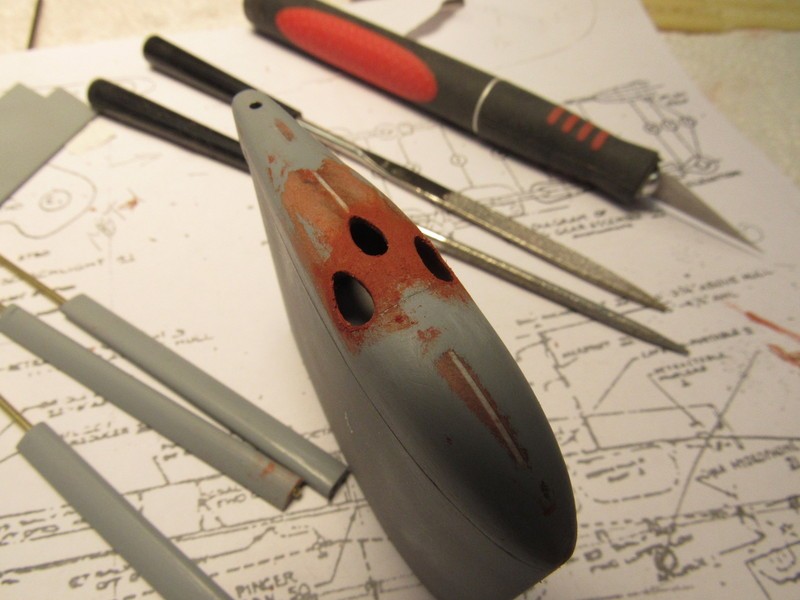
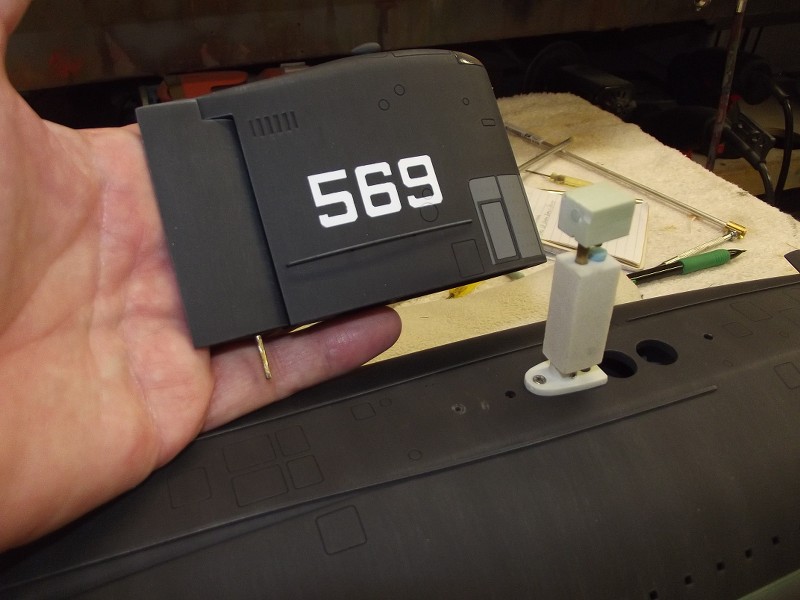
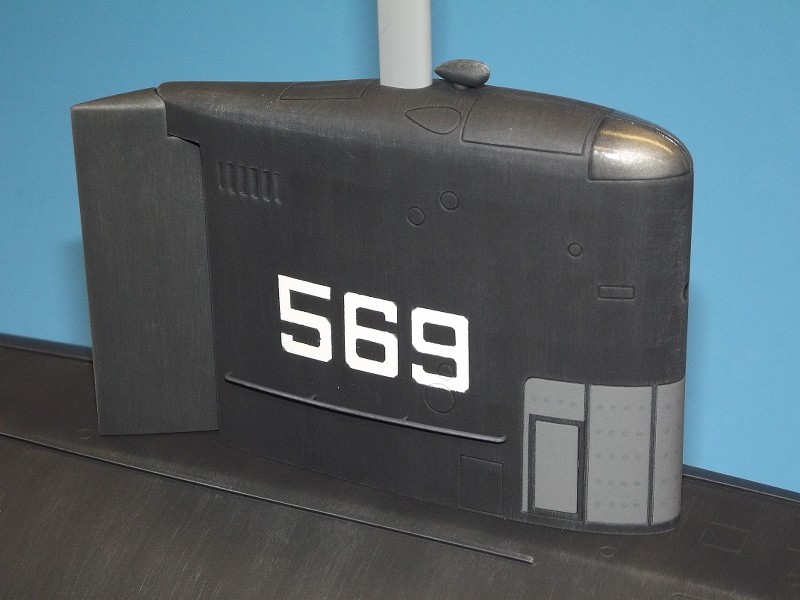
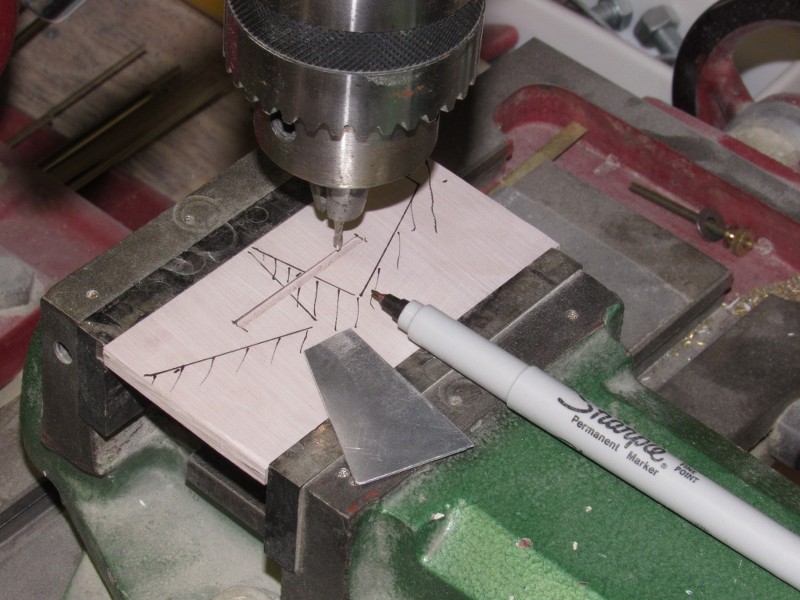
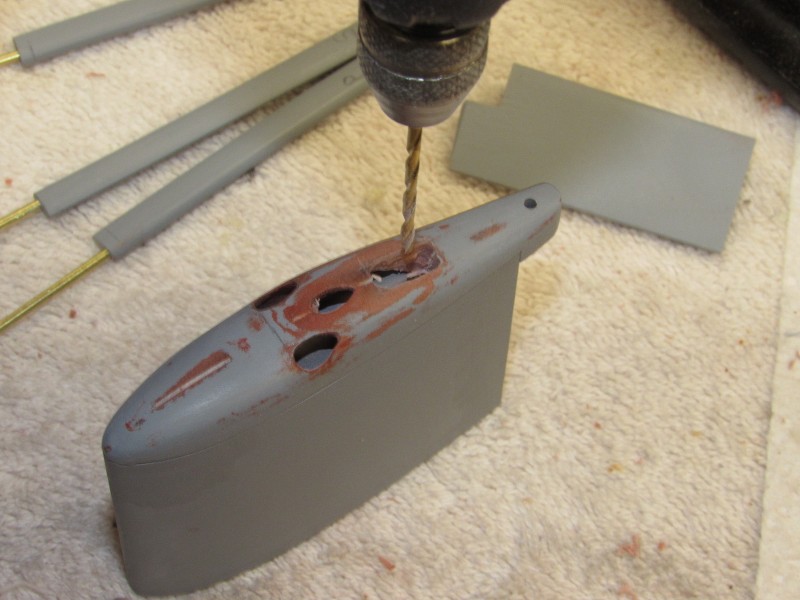
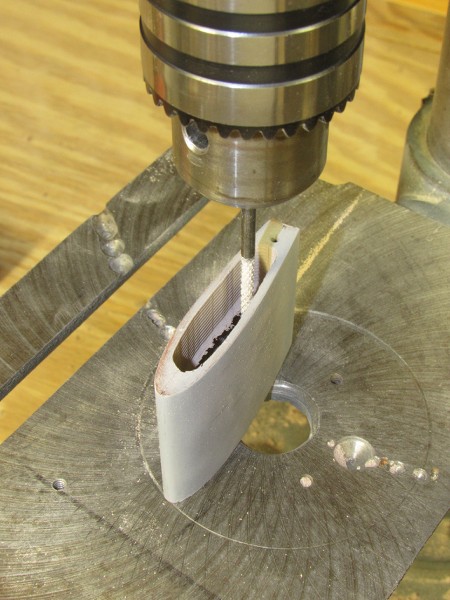
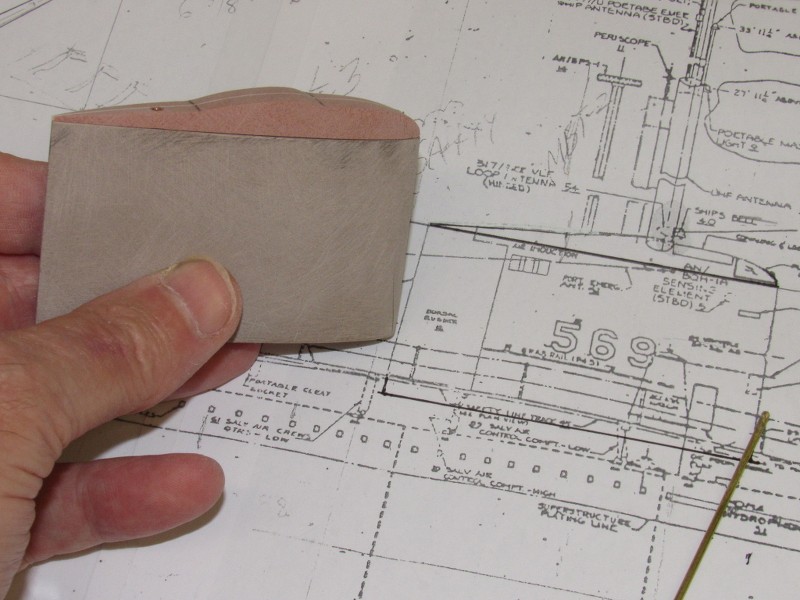
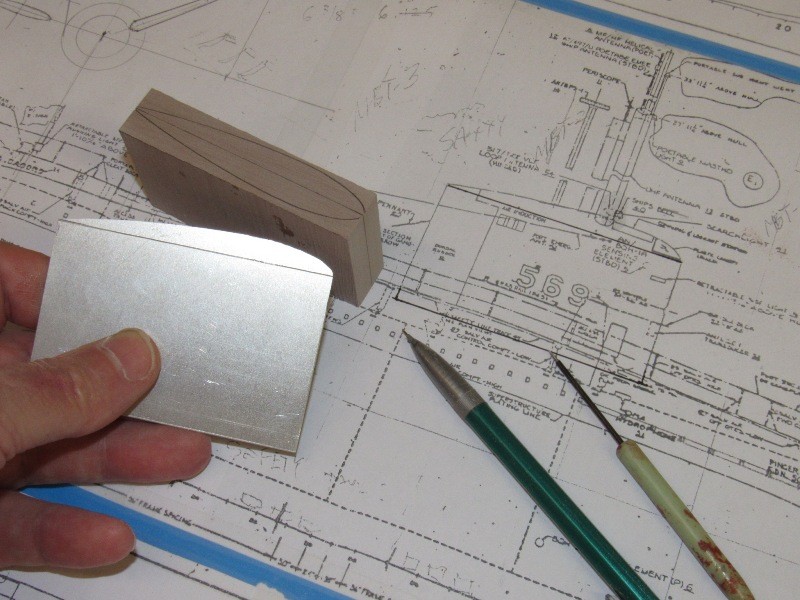
    I’m a bit out of synch here – I’ll cover formation and use of the mast foundation piece later – but here is some advance work on the sail top piece. As you can see I’ve already cut out the opening for the three masts (whip antenna starboard, VHF antenna port, and the single search type periscope center). And here I’m drilling pilot holes for the square opening that represents the opening for the retractable surface search radar. I’m using the sail proper as a handle, once the rough work is done, the removable sail top is pulled away to I can fine-tune the outside and inside of the holes with knife, files, and sanding sticks.


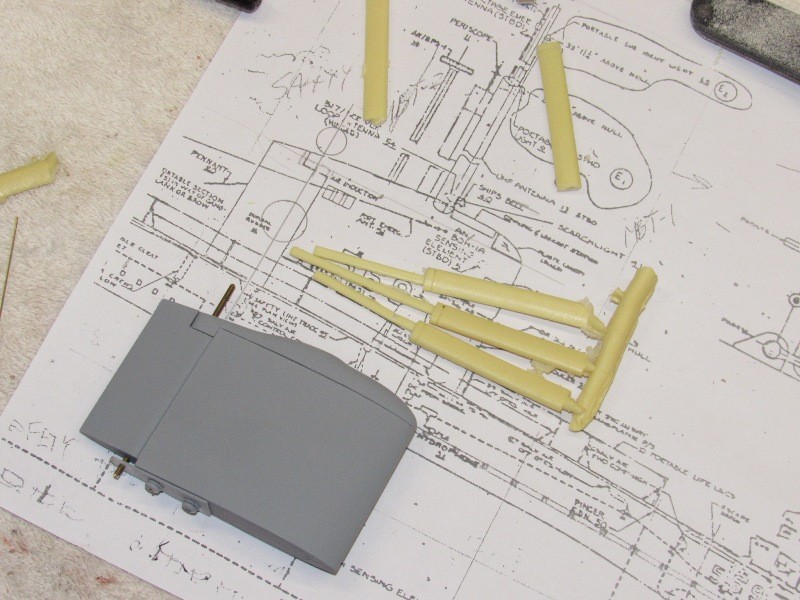
    Test fitting the four masts. I’ll represent the bridge clam-shell type hatch pieces with engraved lines. As will be represented the two halves of the Plexiglas dome at the leading edge of the sail.
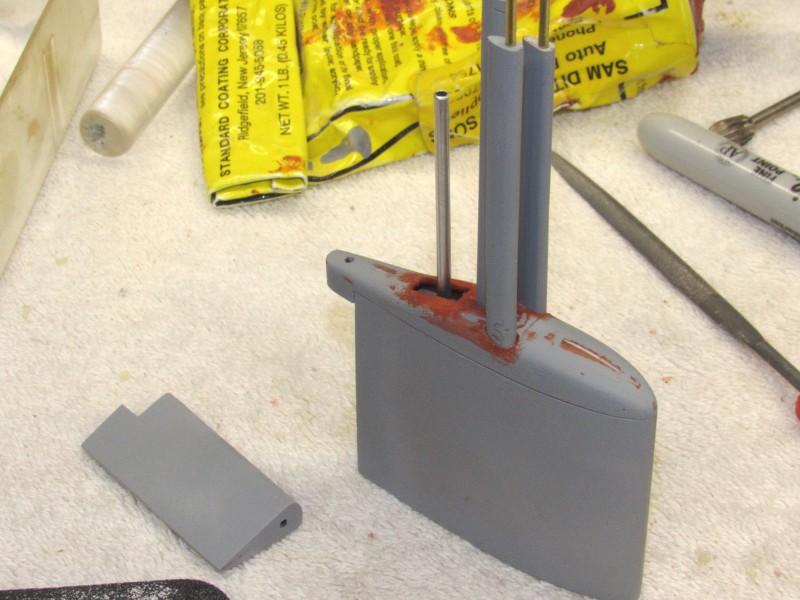


    The sail has to be hollow to make room for the SAS snorkel mechanism as well as the periscope and masts foundation piece; and minimize the displacement of the eventual production sail parts. That work started out by carefully drilling pilot holes within the scribed lines at the top and bottom of the sail master – those lines denoting the wall thickness of the sail sides.

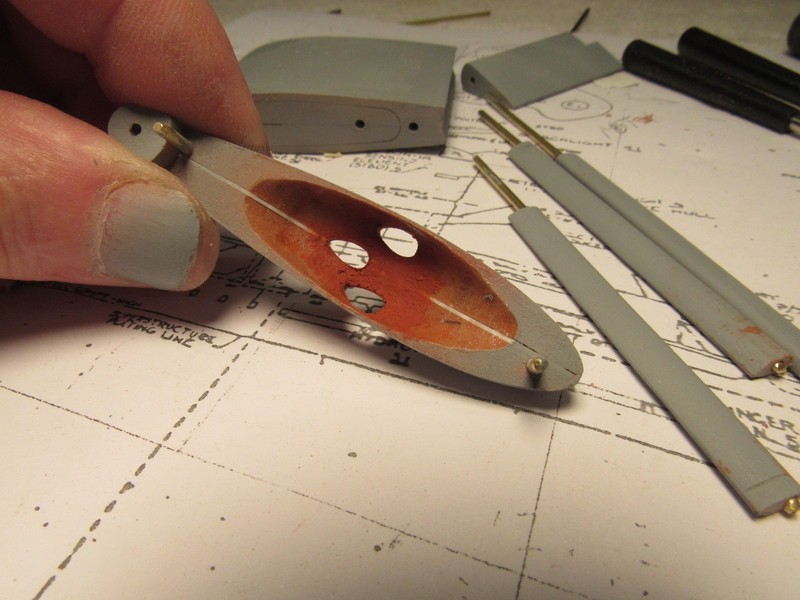
    Note that I’ve already dug out the inside of the sail top piece. If a mast is not installed I want the viewer to see an approximation of the plate thickness one would see on the real thing. It’s all about scale modeling, after all.


    A constant diameter burr bit was used to rough out the inside walls of the sail master. Final shaping was done with round-files and sanding sticks.


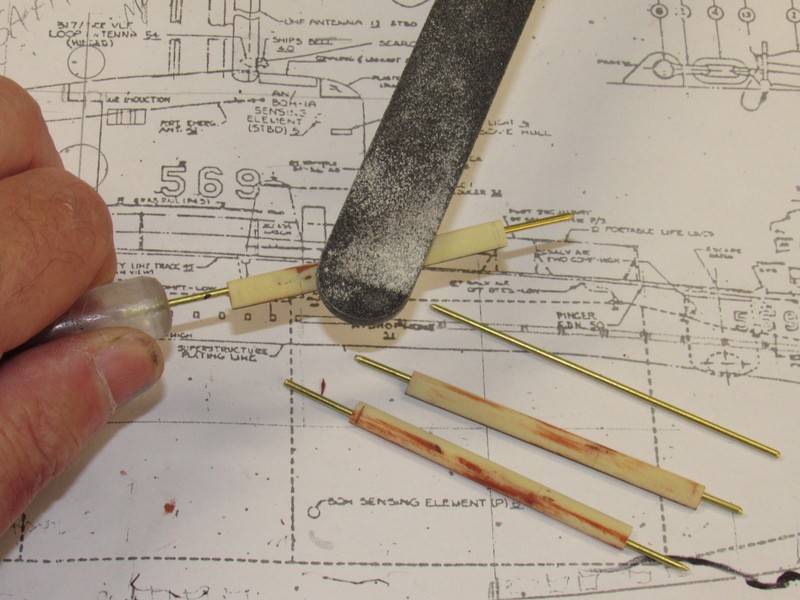
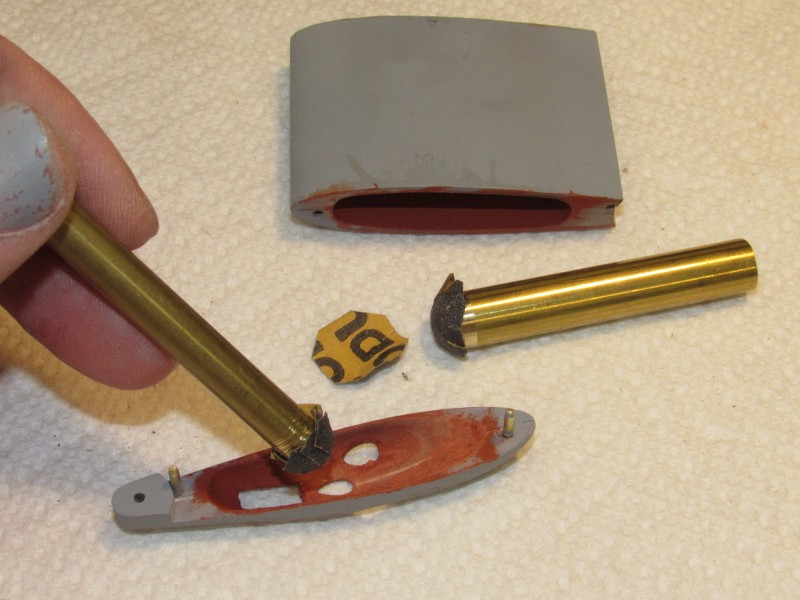
    I made two sizes of the cavity sanding tool -- formed from brass rod turned to a ‘dome’ shape at one end. Onto this dome was glued a small disc of #240 sandpaper. This disc pulled down to roughly contour to the dome shape of the sanding tool. These special sanding tools were then used to smooth out the putty applied within the sail top piece that filled the various dings and tool marks left from the moto-tool I used to render the thin wall thickness between outside and inside of the top sail piece.


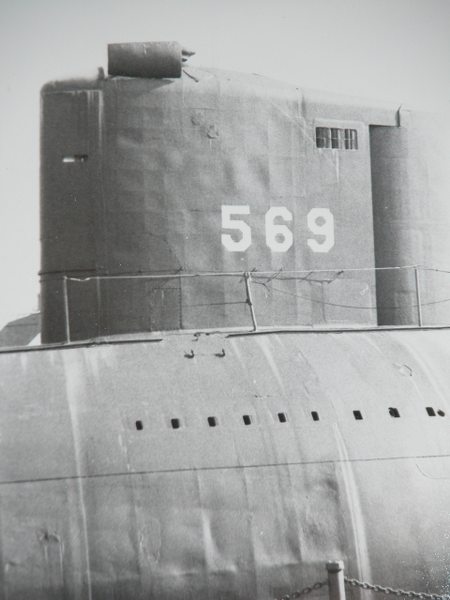
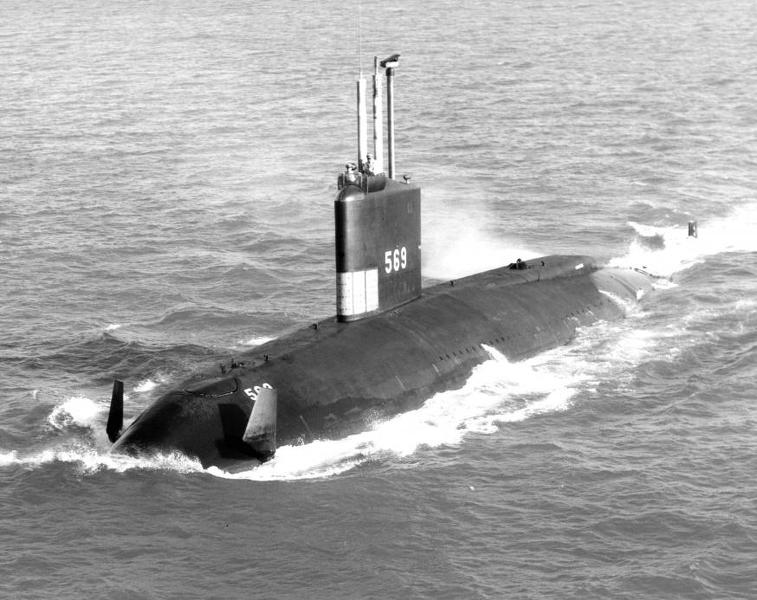
    A major find in my researches was this grainy photo of the ALBACORE configured for her phase-2 work. The big deal here is the good look at how the whip antenna, search periscope (I assume it to be a type-15), and how a fairing plat was mounted above the surface search radar antenna. Solid gold! I can see I have to enlarge the diameter of the rotation device between radar antenna and mast. The drawings I have did not indicate that, and this photo only came to my attention a few days ago.

    ****!


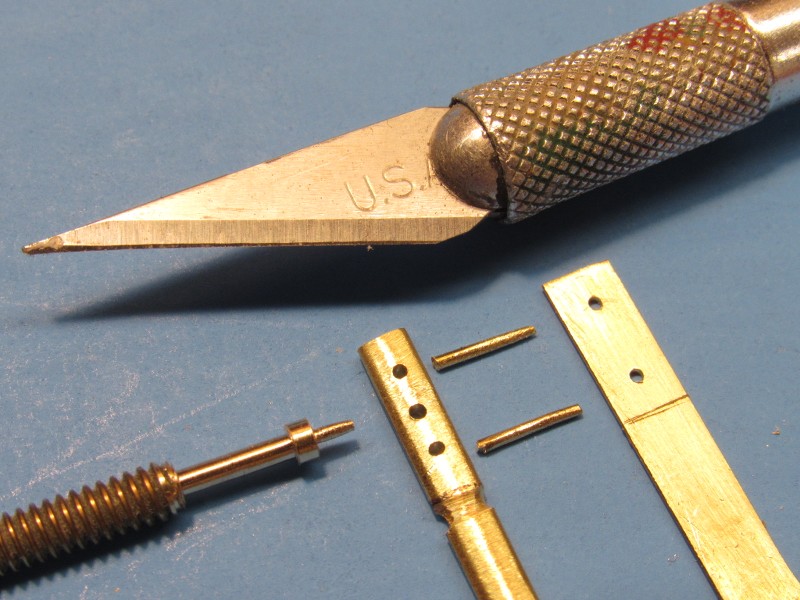
    All pieces of the brass surface search radar master fit tightly together – this friction fit permitted me to solder the various pieces as a whole assembly. That work went very quickly. That #11 X-Acto blade will give you an idea how small this thing is in 1/96 scale.

    Preparation and good planning is everything in this game.


    Brass stock was used to fabricate the surface search radar antenna and fairing plate that sits atop the antenna.

    You may have noticed that the rotation device for the antenna was turned from a length of brass all-thread (5-40, if you must know!). As the brass used to fabricate all-thread is doped with lead, it makes it easier to machine; easier to cut the required thread. This ‘machine brass’, available in various diameter and thread cuts, turns out to be a much cheaper source of this alloy -- most brass is the tough, brittle ‘cartridge brass’ and not suitable for machining -- than the stuff packaged as machine brass. The brass all-thread is a much cheaper version of machine-brass.

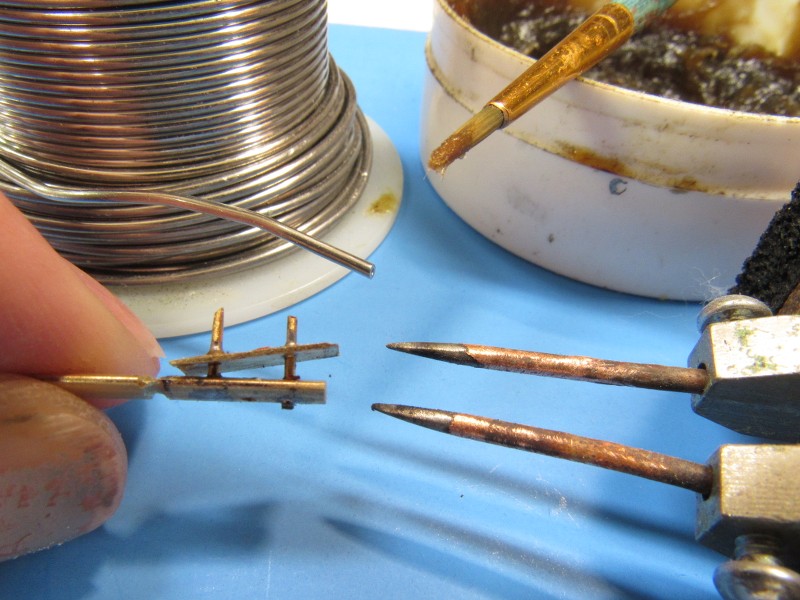
    I took care to insure a tight interference fit between the four parts that made up the radar antenna-fairing assembly. This way all joints are in place and the work can be assembled and soldered in five discrete steps. Notice that I did not part the fairing plate or radar antenna from the brass stock from which they were formed – this gave me a convenient handle that made positioning the work an easy matter during the soldering operation.

    Soldering started by slathering flux over and around a joint; placing a small sliver of Tin-Lead solder at the joint; the resistance soldering machines electrodes positioned; the foot-peddle switch stomped; and backed off the instant the solder melted, filleting the joint.

    Frig’n magic!


    The brass periscope head and surface search radar antenna-fairing masters.
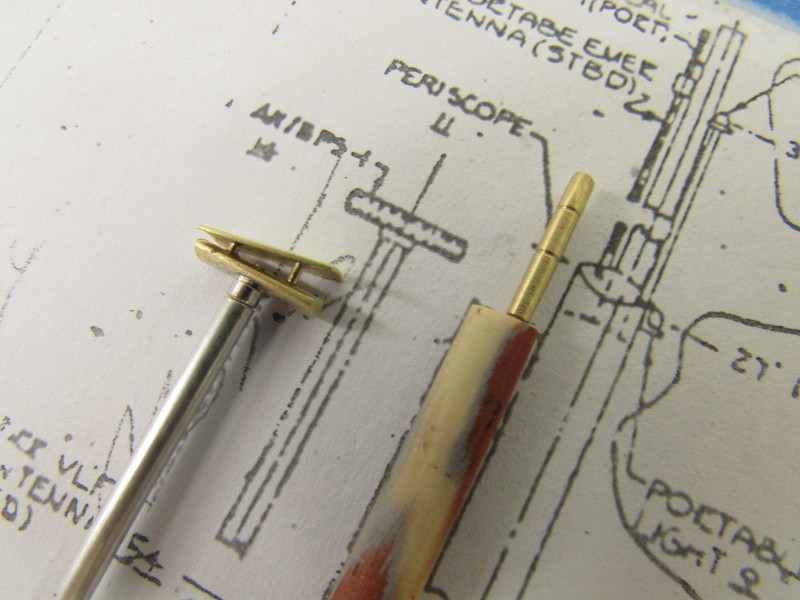


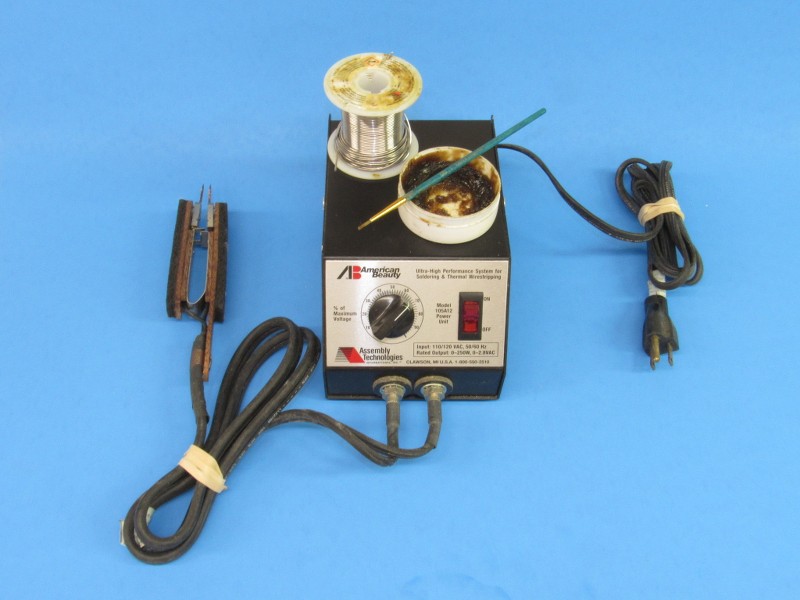
    The resistive soldering machine is pricy but well worth it as it gives you the ability to localize the heat at only the point of union between the pieces you wish to solder -- you can make solder joints right next to other soldered work without fear of melting the previous work.

    The resistive soldering machine works to heat the work two ways:

    The ideal method capitalizes on the high resistance offered by a friction fit union. As current flows easily (no heat) on all parts that fit snuggle together (already soldered); and current bridging unsoldered parts, encounters high resistance (high heat) at the union, only that portion of the assembly gets the heat necessary to effect a good solder union. In this mode one electrode is placed on the body of the work, and the other electrode placed on the piece being joined to the work. Only after the electrodes are in place is the foot-switch stomped.

    Or, if the part being soldered is physically isolated from an electrode, the area near the joint to be soldered is heated locally by placing the electrodes either side of where you want to solder a joint. A bit more local heat is applied in this case, but nowhere as broad a heated area as you would get with a traditional iron or flame. With resistive soldering you can leave your heat-sinks at home!


    David


    Last edited by He Who Shall Not Be Named; 07-20-2018, 10:47 PM.

    Leave a comment:


  • He Who Shall Not Be Named
    replied
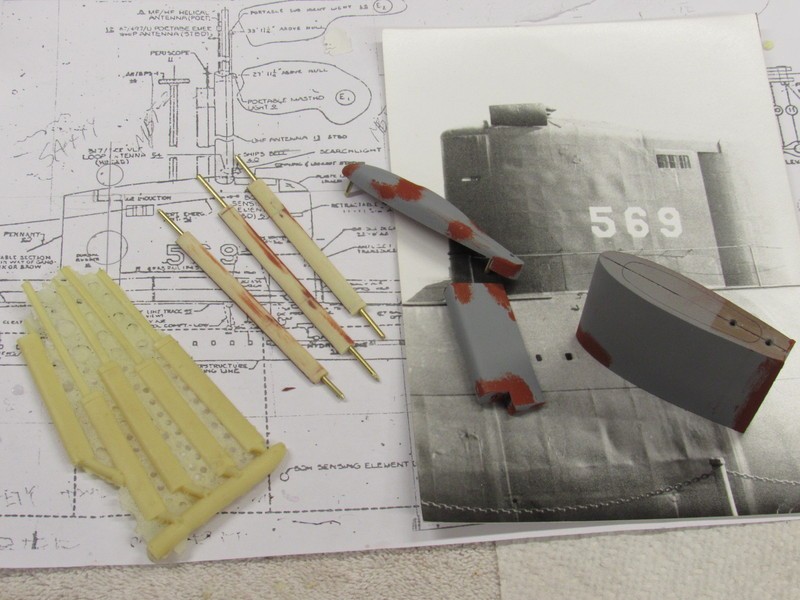
    Today's work on the 1/96 ALBACORE detail parts dealt with the masts and opening atop the sail to pass them:


    David
    Leave a comment:


  • He Who Shall Not Be Named
    replied
    I’m deferring work on project FFOG till I get some consistently sunny weather here. The job entails a lot of GRP work and I need to work from start to finish in a warm (sunny) environment. So, till the clouds depart, I’ll continue work on Scott Terry’s 1/96 ALBACORE project.

    Today I concentrated on the sail with its dorsal rudder. That rudder is more akin to an aileron in function as it was used on the real boat to counter unwanted heeling and inboard rolling as a consequence of radical underwater turns. I’ve assembled a 1/60 ALBACORE kit and made models dorsal rudder practical (its servo slaved to an angle keeper positioned to detect variance about the roll axis) and it worked as advertised. Here’s a video showing that model operation in a local pool: https://www.youtube.com/watch?v=TSr41K5Uaj4

    I took the work as far as a coat of primer. Then it was time to catch an episode of Bob’s Burgers, and then call it a night.

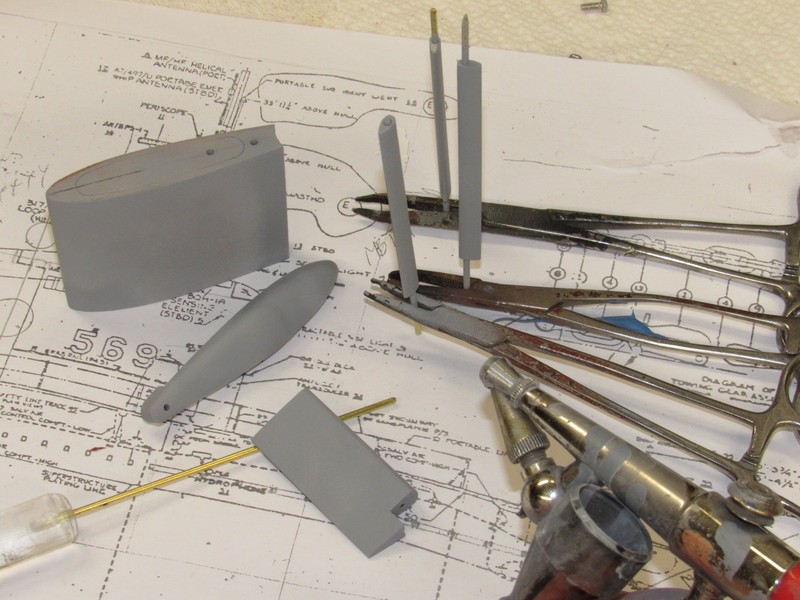
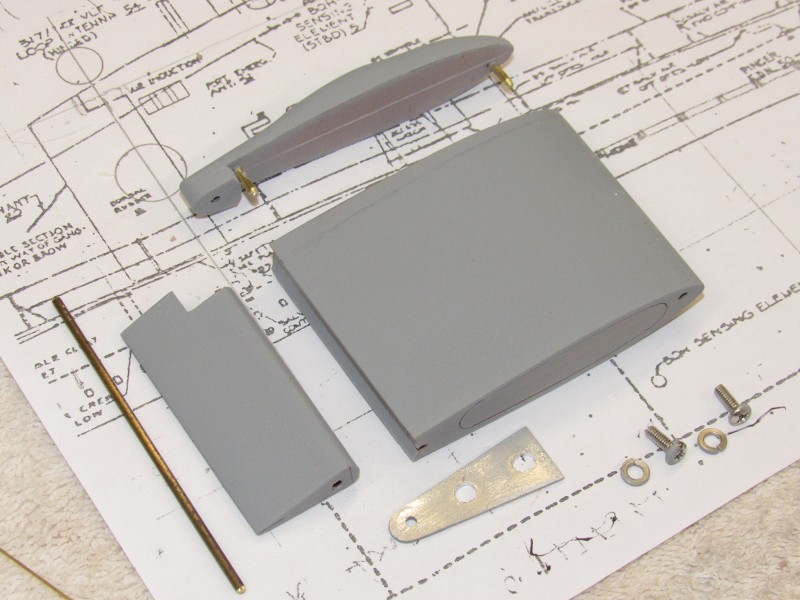
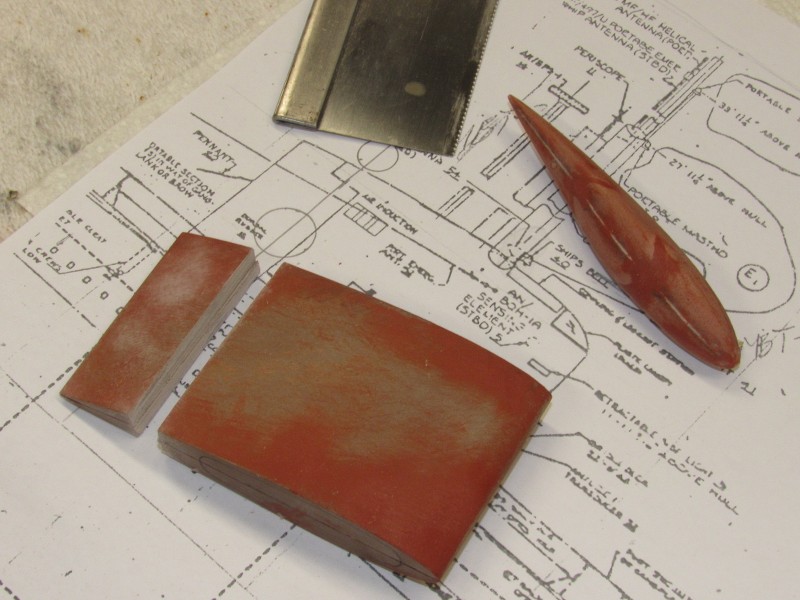
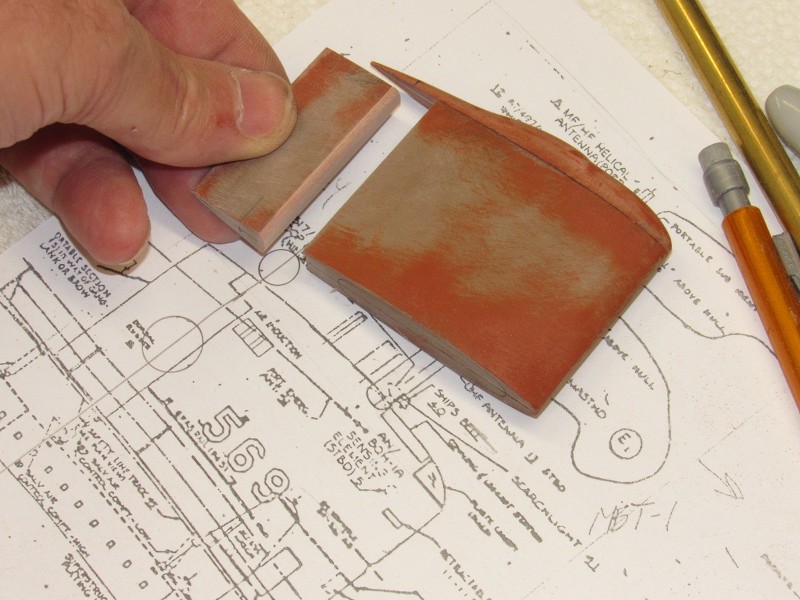
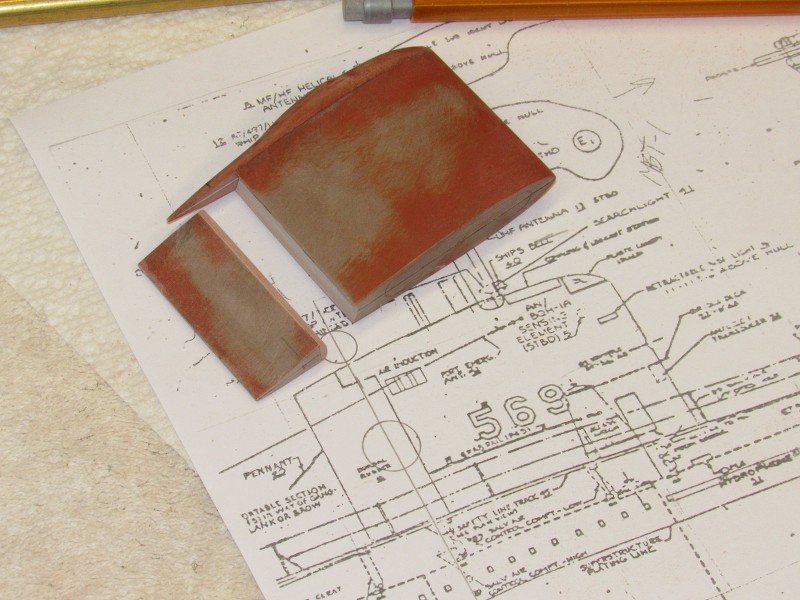
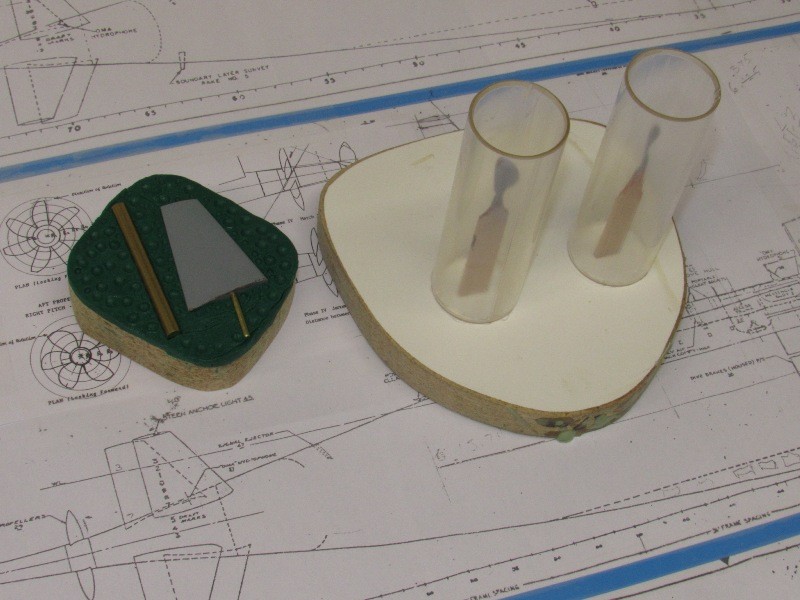
    Below is the work as it stands right now: A working dorsal rudder, removable upper sail piece, and a temporary dorsal operating shaft lower bearing – used as I worked the clearance between sail trailing edge and dorsal rudders leading edge.


    As with all my model building I endeavor to keep as many sub-assemblies removable as I can -- vitally important on assemblies like this, that exhibit practical characteristics, such as the functional dorsal rudder. The removable top piece of the sail makes the job of integrating the masts a much easier task.


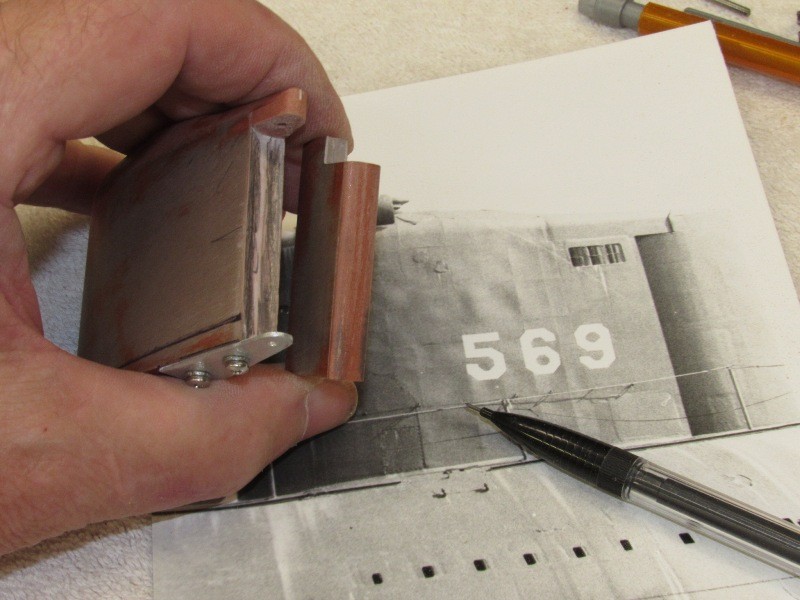
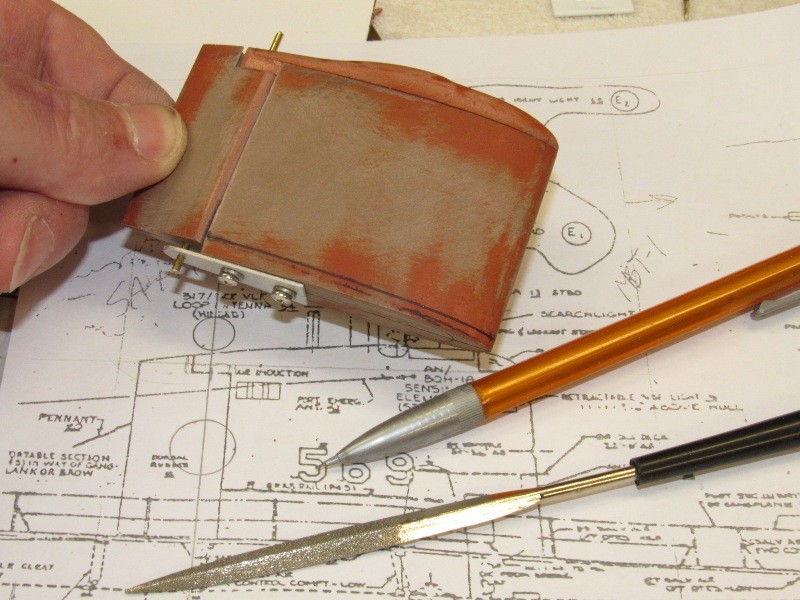
    As I cut, filed, and sanded the leading edge of the dorsal rudder I periodically installed it to the sail and rotated it. Initially it was an interference fit. The high spots were revealed after I laid down some pencil Graphite into the concave well at the leading edge of the sail, installed the dorsal rudder and rotated. Once removed, the Graphite that was picked up by the dorsal rudder indicated the high spots needing to be removed with file and sanding block.


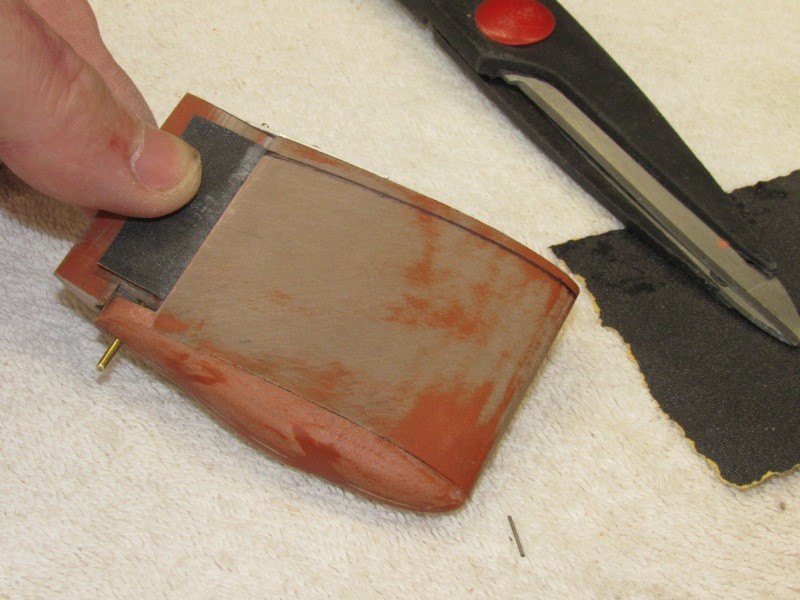
    A piece of #400 sand-paper, wrapped around the leading edge of the dorsal rudder, permitted me to lap grind the clearance between it and the concave trailing edge of the sail. (As a Torpedoman I learned the gentle art of lapping valve seats … same thing, but this time with sandpaper).


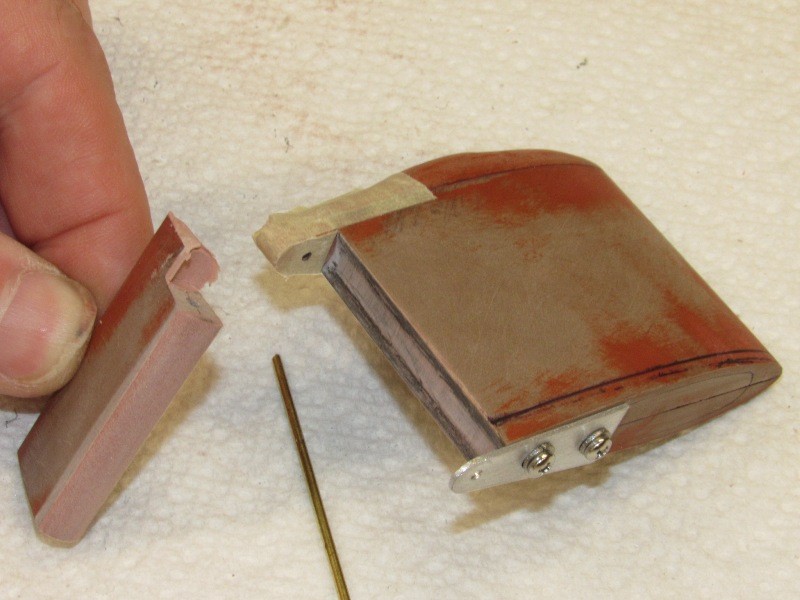
    Using Bondo I tightened up the gap between sail upper bearing and the top of the dorsal rudder. The masking tape under and around the bearing prevents the mold-release wax from contaminating the work.


    David


    Leave a comment:


  • HardRock
    replied
    This is the hull blank ready for scribing - assuming that it matchs the new plans of course. If not, I'll have to start again, groan.

    Click image for larger version

Name:	P1010332.jpg
Views:	230
Size:	126.9 KB
ID:	126792

    Click image for larger version

Name:	P1010328.jpg
Views:	209
Size:	389.0 KB
ID:	126793

    Click image for larger version

Name:	P1010327.jpg
Views:	230
Size:	579.0 KB
ID:	126794

    Leave a comment:


  • He Who Shall Not Be Named
    replied
    Tonight I have to box up the 1/96 ALBACOR work and rejoin the supper-secret Project FFOG. That job for my Overlord, Bob Martin. I’m sworn to secrecy until the Boss says otherwise, so … don’t ask! This forced hiatus, however, will give Scott a chance to catch up.

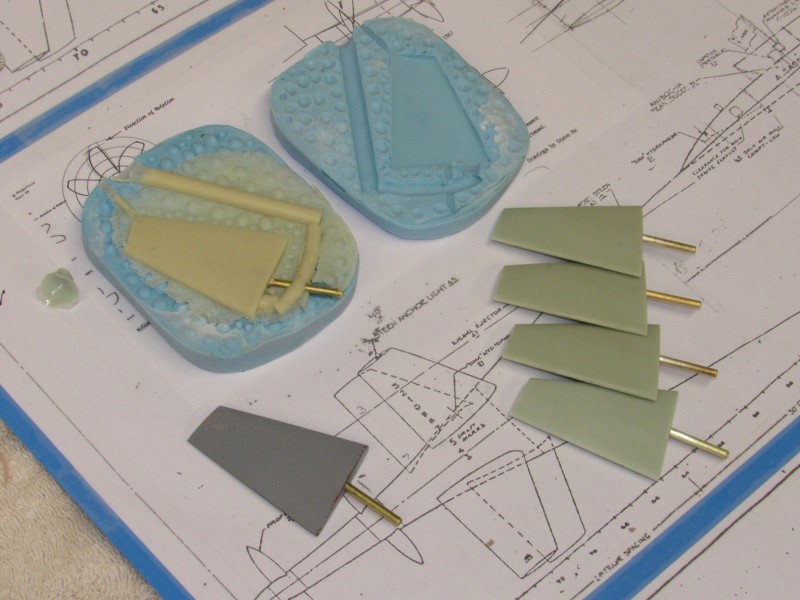
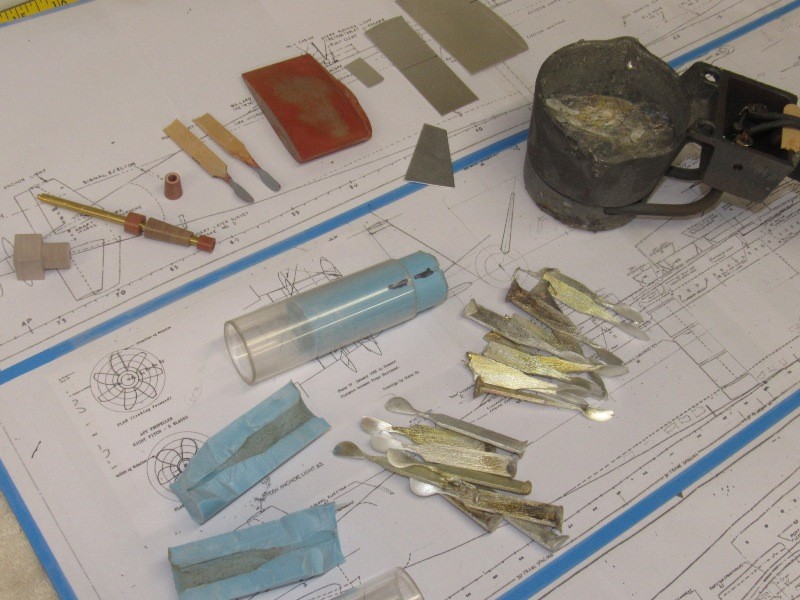
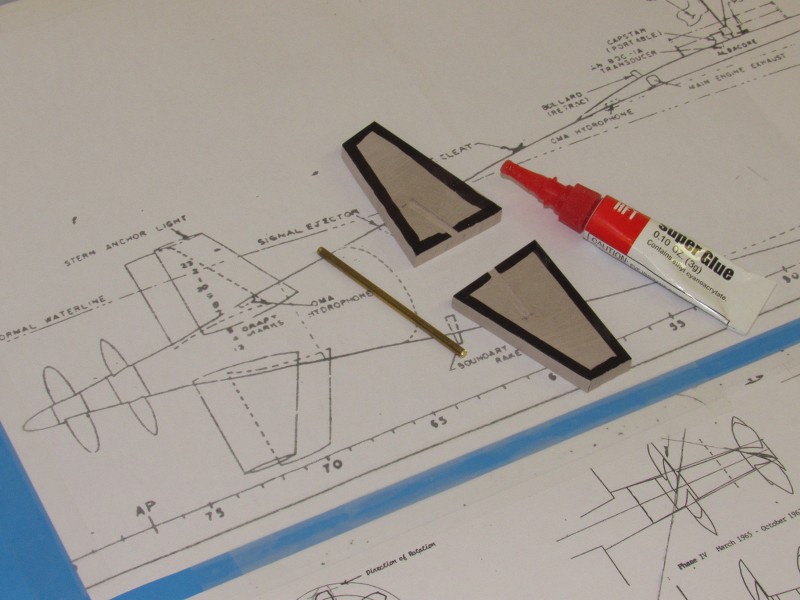
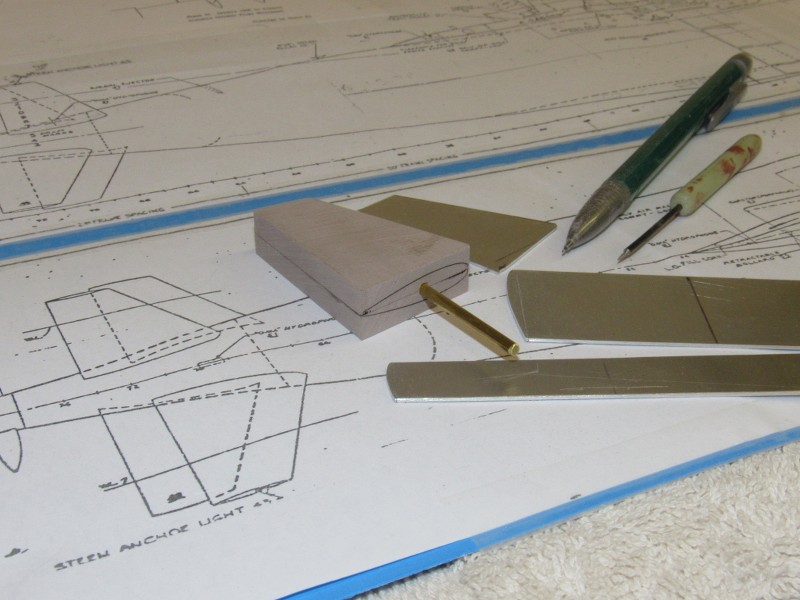
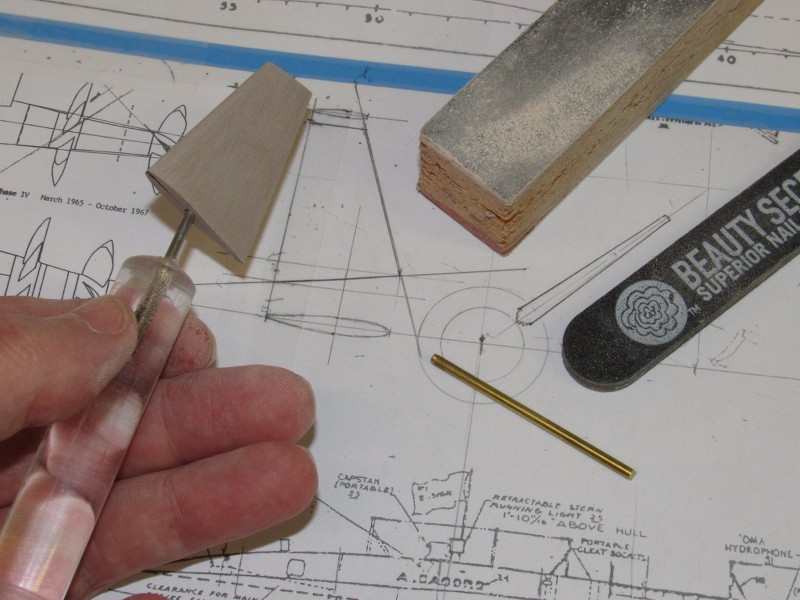
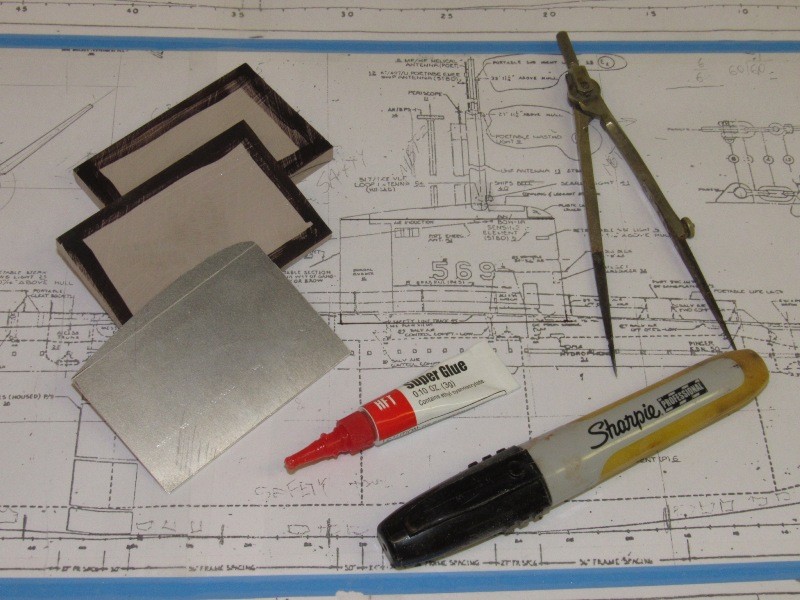
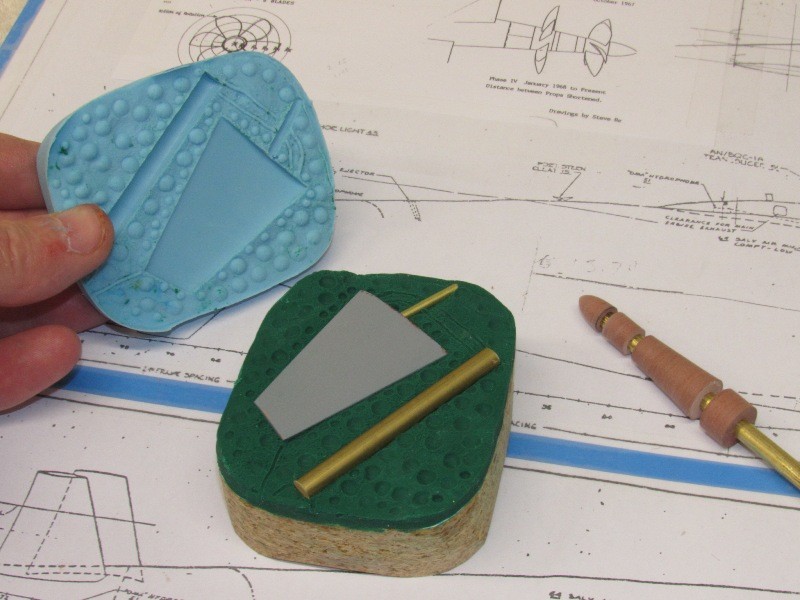
    A rubber tool was made to produce four control surface masters, seen here.


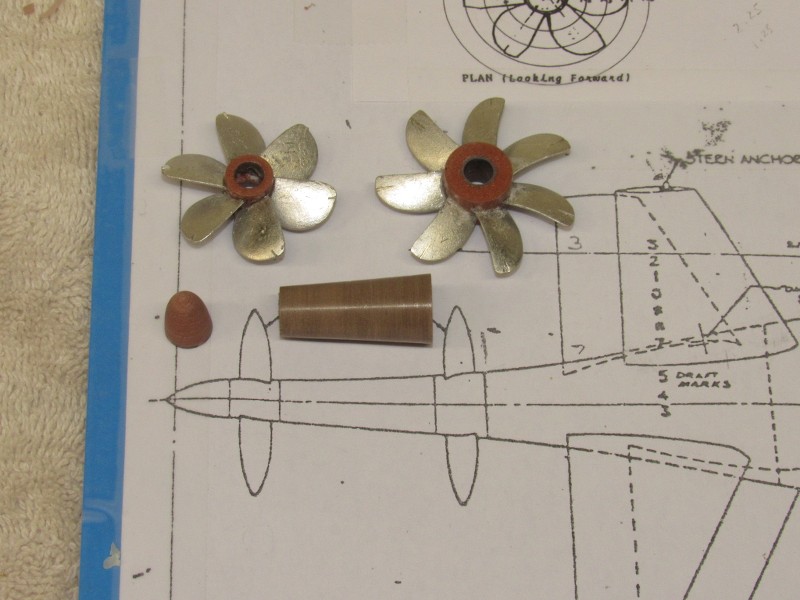
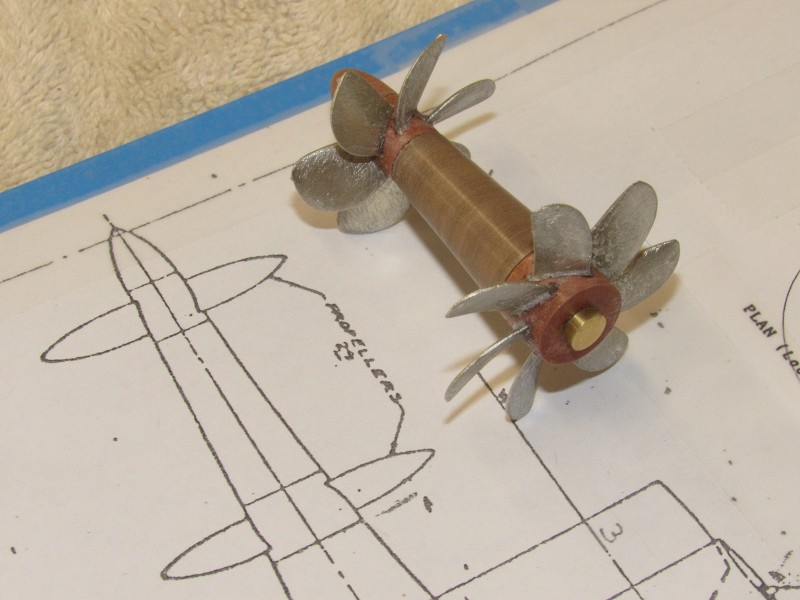
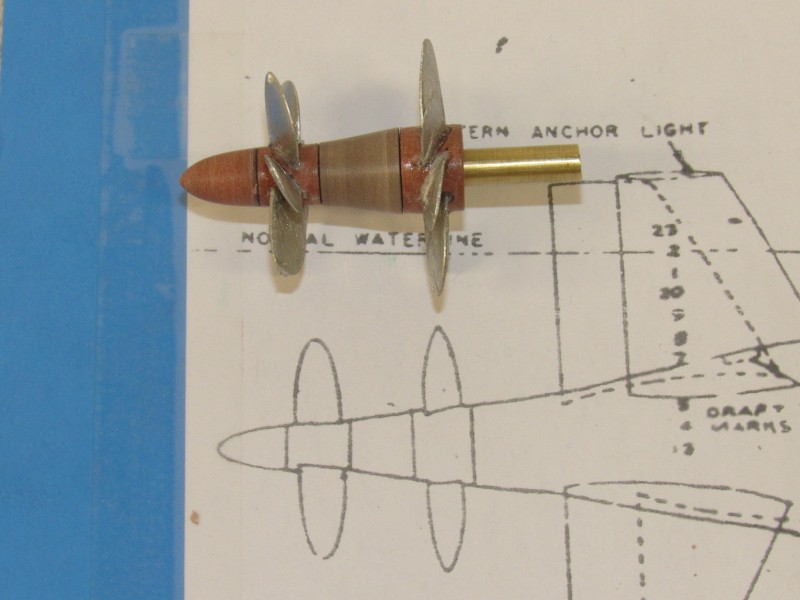
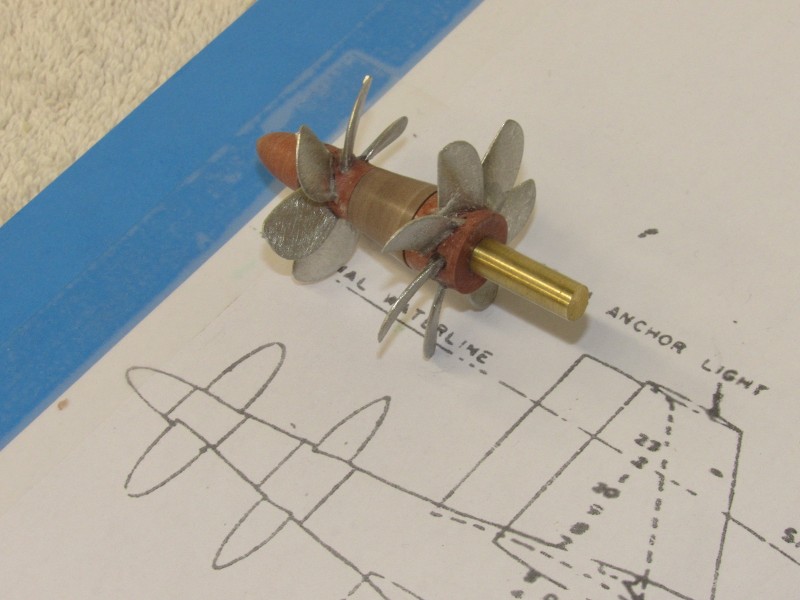
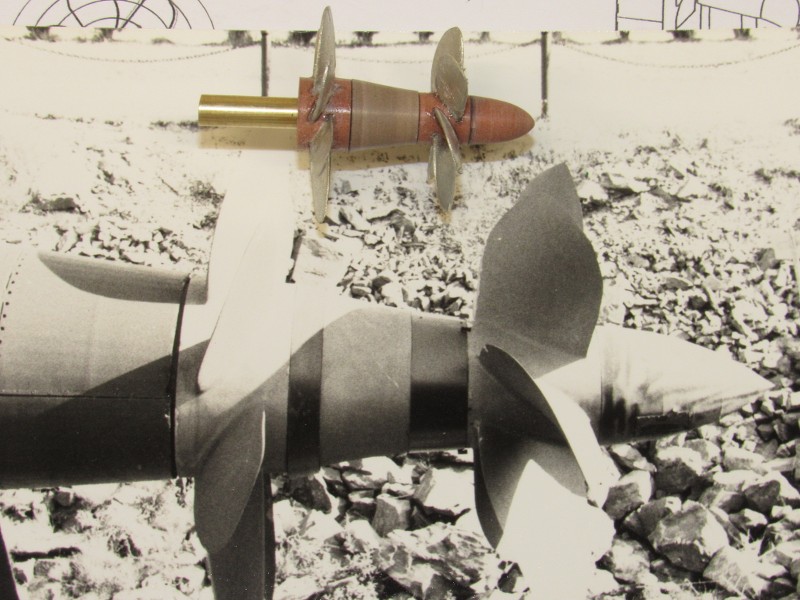
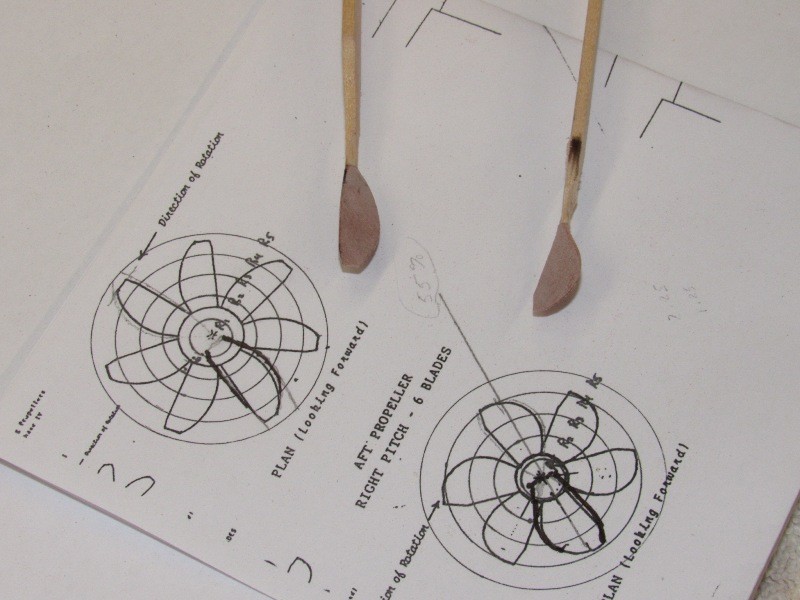
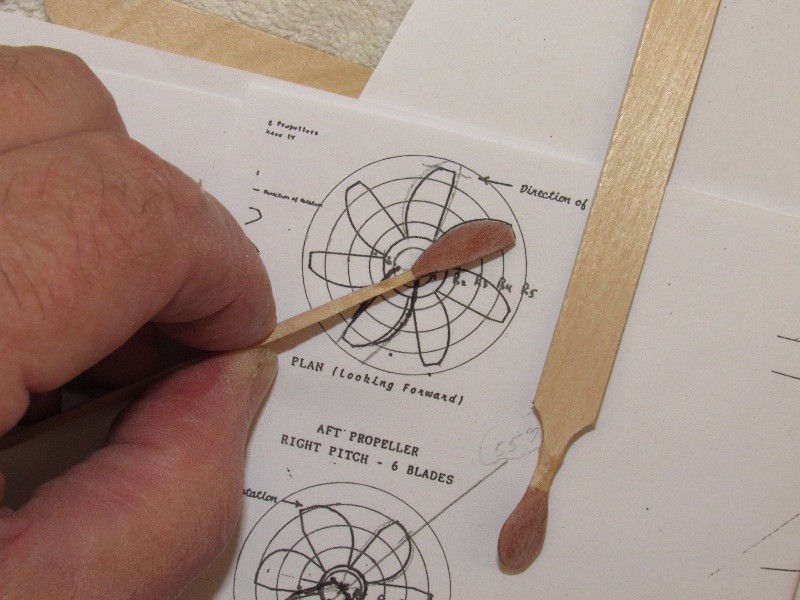
    I completed assembly of the two counter-rotating propellers. Here are the two wheels and long and short stand-offs


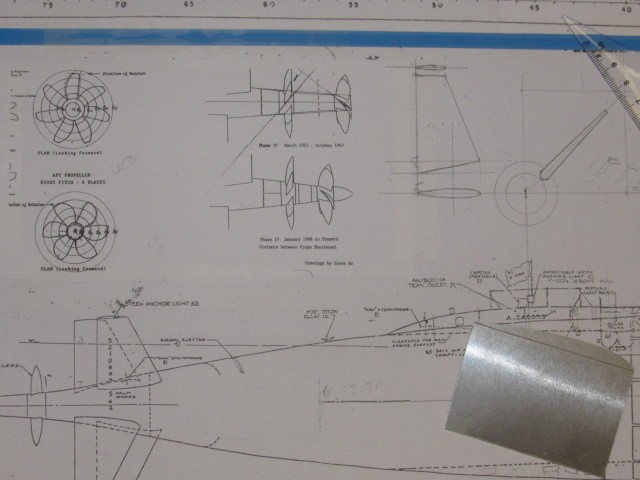
    Scott wants the kit to reflect the later propeller arrangement, with the distance between propellers reduced to only five feet. But, it’s always good to have a choice, so I also built a long stand-off to represent the original installation of the two concentric turning, counter-rotating propellers.


    Starting to give form and function to the sail mounted dorsal rudder.


    David
    Leave a comment:


  • HardRock
    replied
    "The crutch and indexing marks insure symmetry of pitch, rake, skew, and spacing of the blades." Sounds so easy when you write it down; just takes a lifetime of practice to get it right. Outstanding work. I always wondered how you cut the slots in the hub.

    Leave a comment:


  • He Who Shall Not Be Named
    replied
    Took all day to get one and a half propellers done. Will finish assembly of the forward propeller tomorrow, the rest of that day dedicated to cleaning up the glue smears on the hubs and building up CA fillets between blades and hubs. Concurrent with that I’ll cast up the four stern control surfaces production masters.

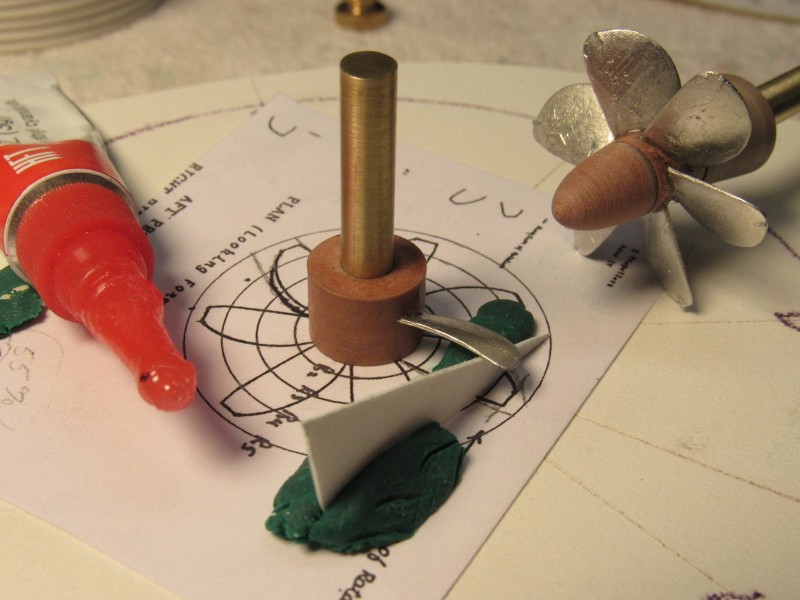
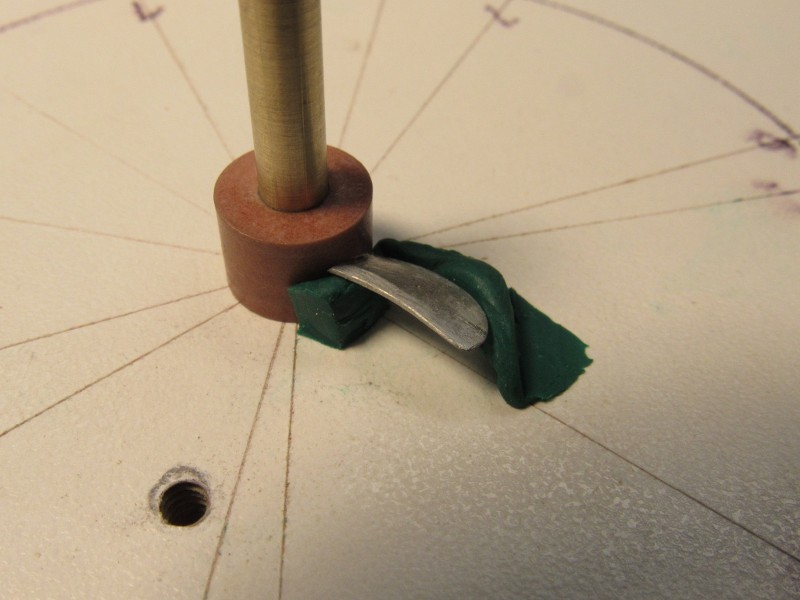
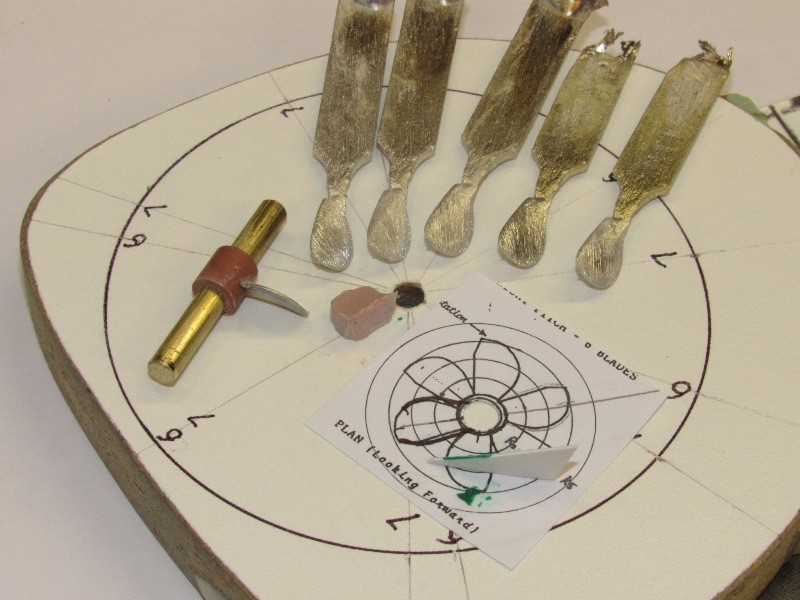
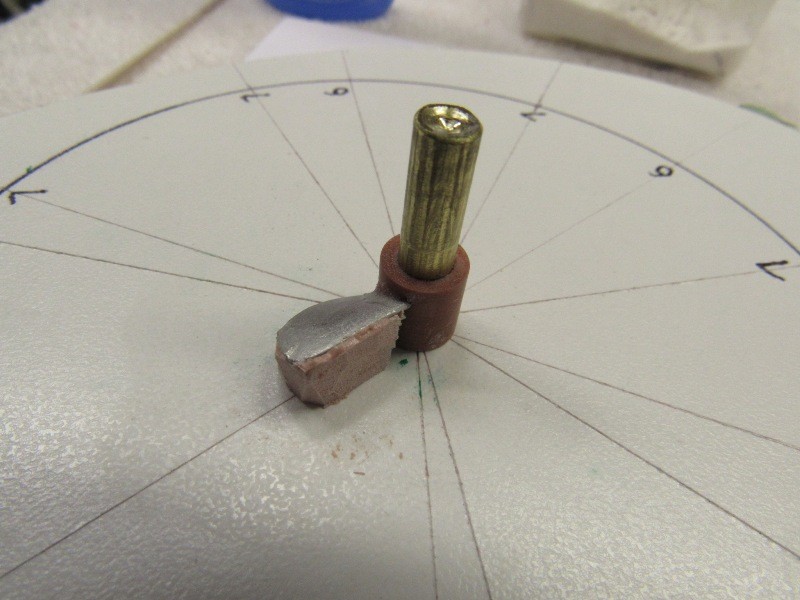
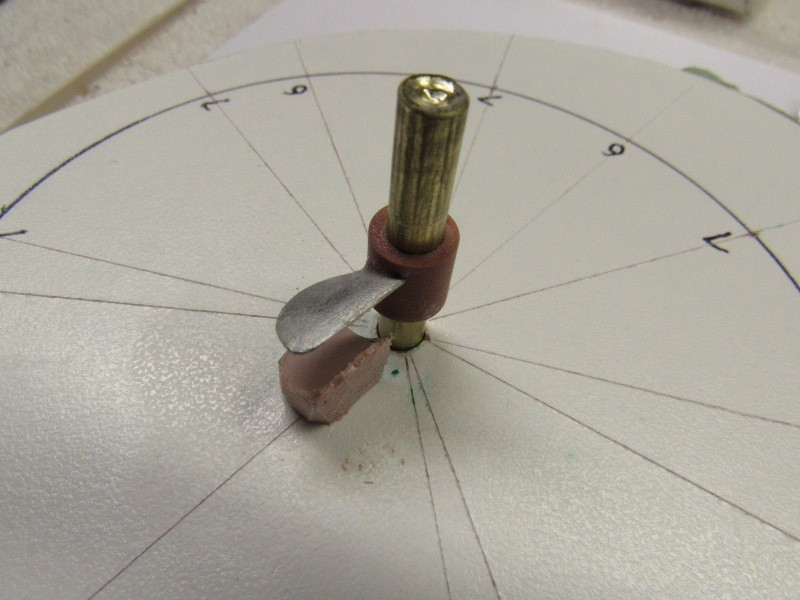
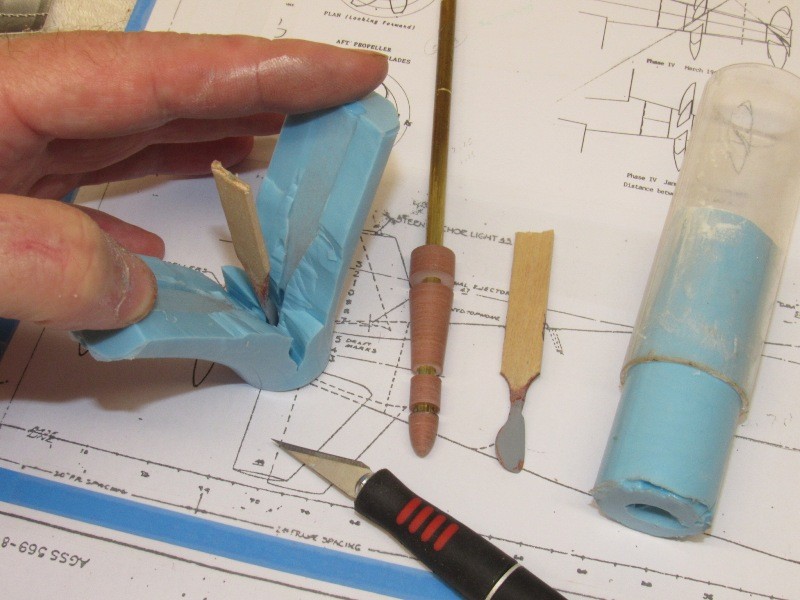
    Work starts as a blade is cut so that its root sits flush with the surface of the hub. Using clay and an inclined piece of plastic – the blades angle corresponding to the angle of the blade at that radius point – the blade is carefully positioned and then temporarily glued to the hub. This will become the forward propeller. The assembled after propeller is to the right.


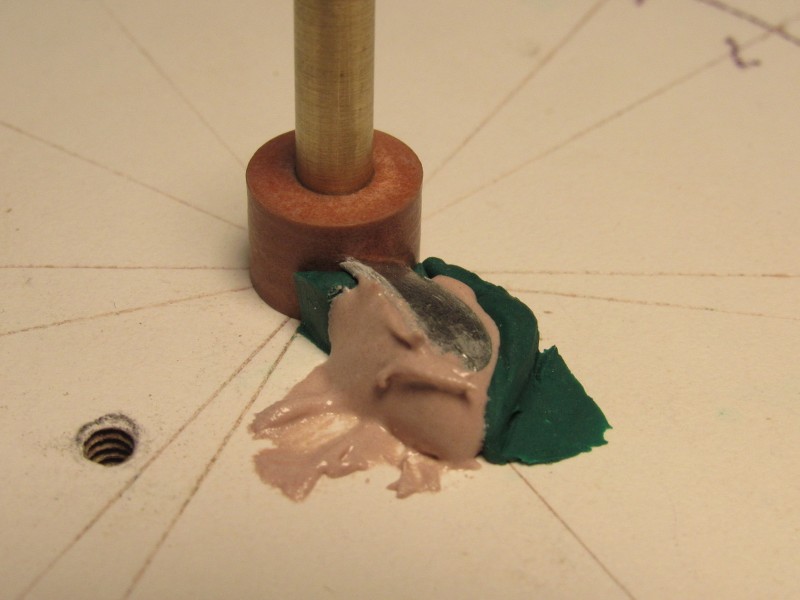
    This single blade will be used to give contour to the eventual blade support crutch, formed from a two-part filler (Bondo). Here I’ve built up a clay containment dam to confine the gooey filler under the blade as the filler changes state from liquid to solid. A coating of way to the underside of the blade insures an easy parting of blade from crutch when this task is done.


    The Bondo pushed into place and left to change state. Then the propeller and hub are pulled away. The propeller broken off and the hub cleaned up. From that point on longer blades, that fit the slots machined into the hub, will be mounted atop the crutch and glue and grout applied to fix them permanently to the hub.


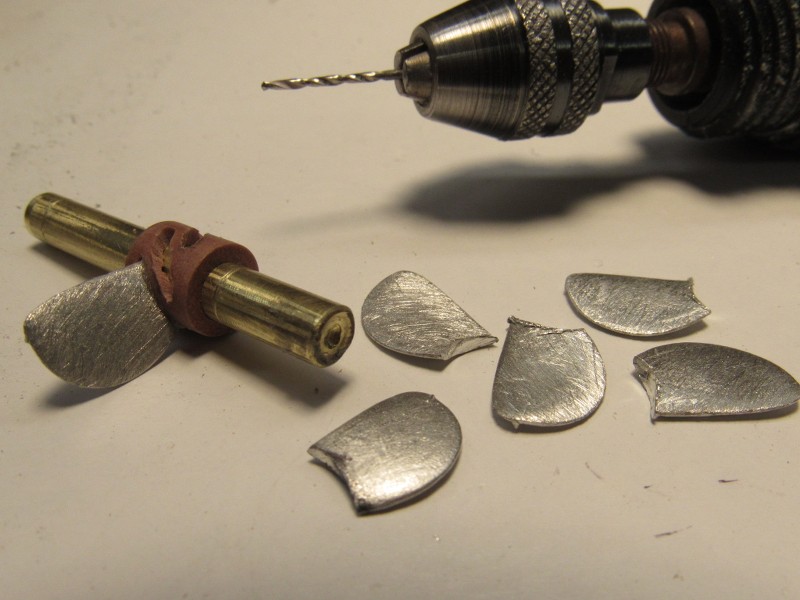
    Each cast white metal blade is inserted into a slot drilled into the hub to receive it. The drill bit, in this application, is maneuvered by hand to act as a milling machine. The inevitable gaps between slot and blade are first filled with baking soda to act as a grout, then the mess soaked with CA to form the bond between blade, grout, and hub.

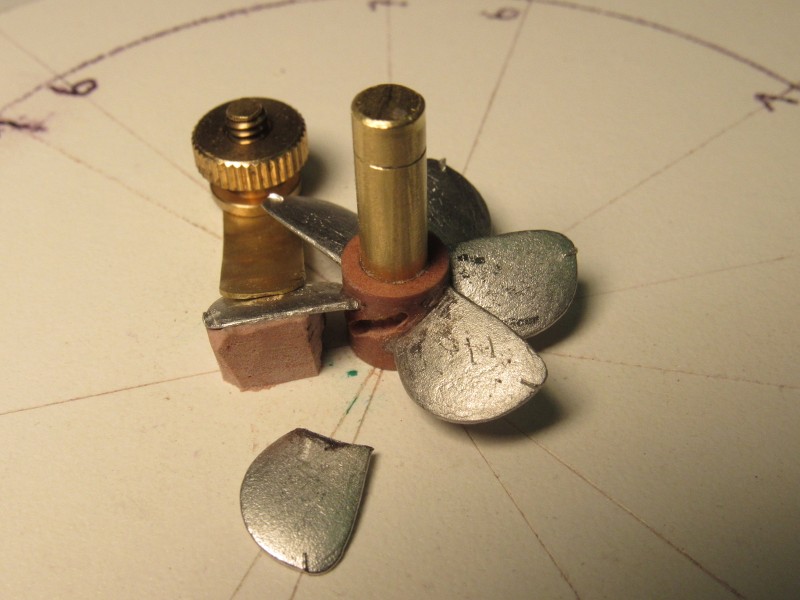
    The crutch and indexing marks insure symmetry of pitch, rake, skew, and spacing of the blades.


    A ‘finger’ holds the blade securely atop the crutch as CA adhesive is applied to fill the gap between blade and hub. Note the blade indexing marks at the tips of the blades. These line up with the engraved lines on the bed of the propeller assembly jig.


    David
    Leave a comment:


  • RCSubGuy
    replied
    Beautiful work from two master builders. This type of collaboration is pretty cool, and it makes me wonder at what other opportunities there are for other kits if we break up the work into manageable bites between the membership here.

    I'm going to start a new thread and let my thoughts wander there rather than clutter things up in this thread.

    Great work, guys!


    Bob

    Leave a comment:


  • HardRock
    replied
    This is wonderful. Meanwhile I have been filling and sanding; filling and sanding; filling and...oh, sanding.

    Leave a comment:


  • He Who Shall Not Be Named
    replied
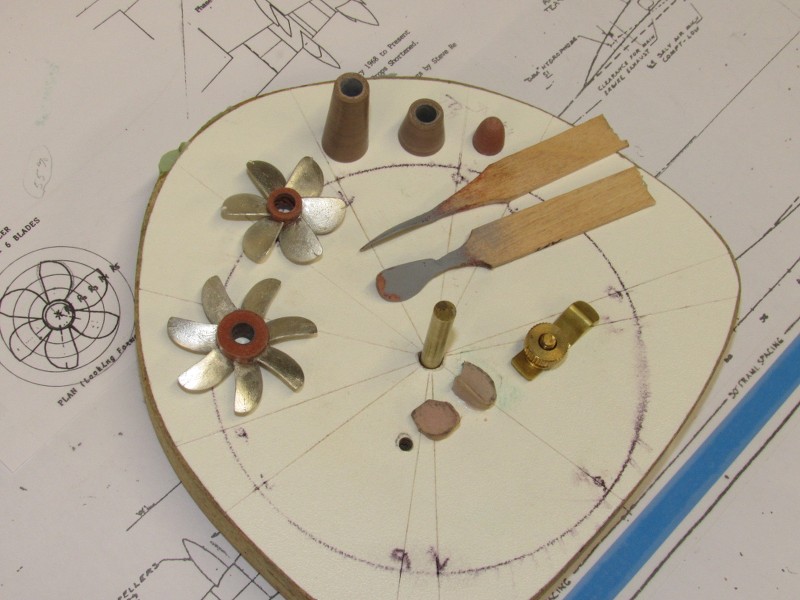
    Finished the propeller hubs and the two different lengths of stand-off’s that fit between the hubs. Only thing I worked on today were the propeller masters. Which started with casting white-metal blade blanks.

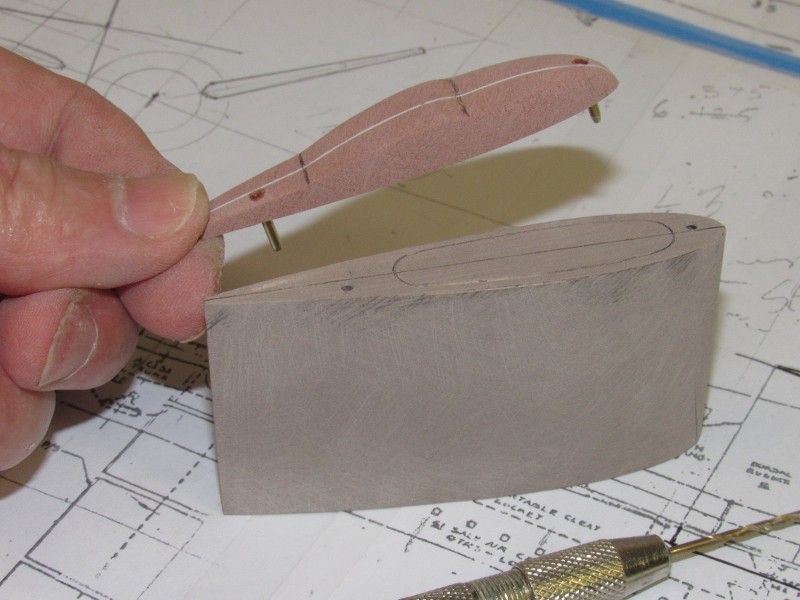
    The forward and after propeller blade masters can be seen at the top. These were used to give form to the RTV tools used to cast up the required number of blades that would make up the two propeller masters.


    Most marine propeller pitch measurements are taken at the 70% blade span point. And that’s where I set an inclined piece of plastic to set the pitch on the propeller blade blank, that one-of-a-kind blade sized to fit to the surface of the hub. This is not permanent – the blade there only long enough to create the blade assembly jig crutch. This crutch later used to set the pitch, rake, and skew of the six permanent blades – all set into depressions cut into the hub. The crutch was formed from Bondo.

    That particular blade would later be used to mark off the hub where the permanent blades would have their roots insert into opening cut into the RenShape hub.


    The completed crutch. Before slathering on the Bondo I first waxed the underside of the temporarily mounted blade – making it easier to pull the blade off the Bondo once the filler had cured hard.


    With care the entire mandrel-hub-blade assembly was lifted off the propeller assembly jig. This particular blade was then broken away from the hub and the hub cleaned up, readying it for the job of assembling the six permanent blades around it. The removed blade would later be used to mark the hub were the depression had to cut to receive the roots of the permanently mounted blades.


    Tomorrow I hope to have all blades mounted on the hubs of the two propellers.

    David
    Leave a comment:


  • He Who Shall Not Be Named
    replied
    As I need multiple copies of the stern control surface, I made a rubber mold. Same with the two propellers -- each requiring a number of identical blades. The control surfaces will be eventually cast in resin, and the propeller blades cast from white-metal.


    Here's a shot of a 1/60 ALBACORE I did decades ago, to give you an idea how bizarre looking this type running gear is:


    To the right you see RenShape masters for the forward and after propeller hubs and the stand-off piece between them. Illustrated here is the extreme propeller distancing first employed with the counter-rotating, concentric shaft running gear. I've also produced a propeller stand-off master representing the eventual five-foot distancing of the two propellers.


    Extracting the propeller masters from the rubber tool that will be used to cast white metal blades -- these assembled around their respective hubs to form production masters.


    David

    Leave a comment:


  • HardRock
    replied
    You are going like a house on fire. I'd better get moving on my bits or I'll be left behind - no pressure then.

    Leave a comment:


  • He Who Shall Not Be Named
    replied
    Originally posted by HardRock
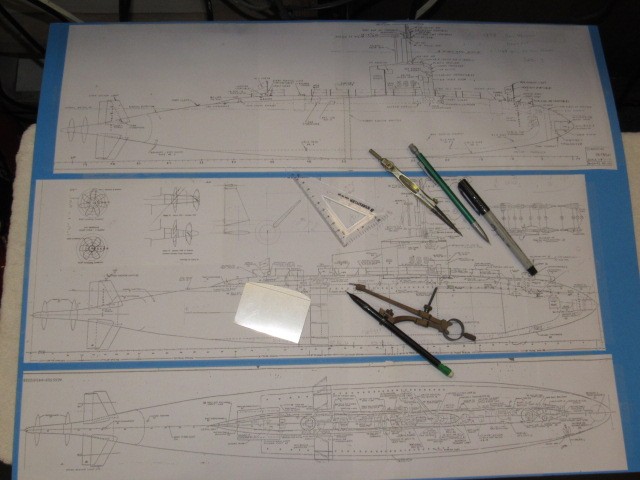
    I love those drawings. The plan is to mount the hull on the jig and do all the marking out then decide on the best place to make the tail cone seperation point. I'll hollow mould the tail tone with options for each version ( which will reall just be the locations for plane shafts, I guess). I'm still battling with the National Broad Band Network to get some sort of bandwidth down here. Frustrating.
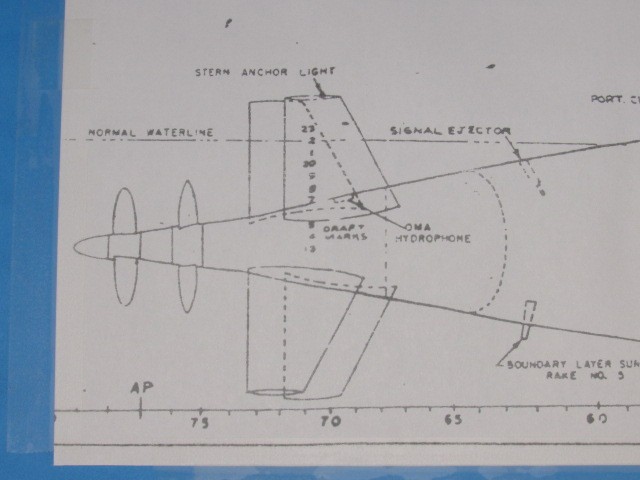
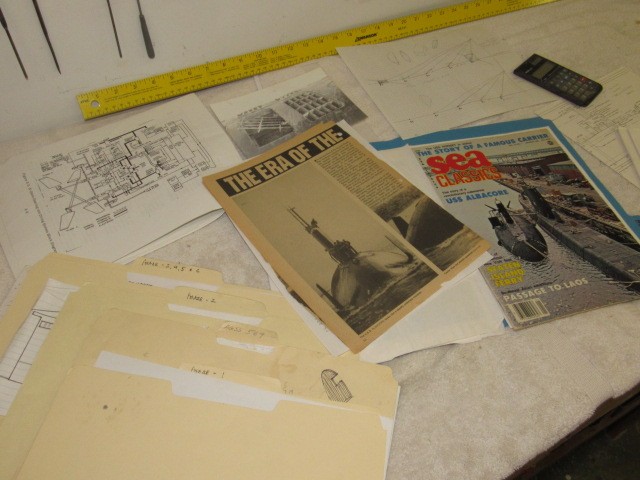
    Yeah. They're BuShips/NavSea drawings from the piping training aid book (TAB). A few flaws I've found have been corrected and on the copies I sent you, Scott. In that package are also copies of pictures Ellie and I took from a visit to the boat, now a tourist attraction off I-95. Also enclosed is a copy of an article I did for Sea Classics nearly forty-years ago …. yikes!

    Send me three copies of that tail-cone and I'll build up phase-1, and phase-2 tail feathers and turn those units into production masters. Of course that means I'll have to build masters, tools and parts for the bow planes, and two more versions of the sail.

    GOD!... I LOVE THIS ****! I haven't really built anything in years! This is real, honest to goodness fun.

    Today's work:

    Made good progress in the sail master. All done in high-density RenShape. Note the use of indexing pins for the removable top piece. Later, after I hollow out the sail proper I'll work out a platform to act as a foundation for the scopes and masts. Then it's on to separating the trailing edge and turning that into a practical dorsal rudder.


    Here's a shot of the 1/60 ALBACORE model I stuck together. The practical dorsal rudder really makes this structure stand out. And to make it work all you need is a dedicated servo and an angle keeper oriented to detect motion about the roll axis.


    The X-tail control surfaces are all of the same shape and size, so one master is made to produce a pre-production tool, from which four cast resin masters will be made, and those used to make a production tool.


    David

    Leave a comment:


  • HardRock
    replied
    I love those drawings. The plan is to mount the hull on the jig and do all the marking out then decide on the best place to make the tail cone seperation point. I'll hollow mould the tail tone with options for each version ( which will reall just be the locations for plane shafts, I guess). I'm still battling with the National Broad Band Network to get some sort of bandwidth down here. Frustrating.

    Leave a comment:


  • He Who Shall Not Be Named
    replied
    Damned good start on the hull there, Scott. Are you going to cut off the tail-cone and produce that as a separate, hollow cast resin piece like what you did with the BALUGA? Doing so will give you the options of producing not only the phase-3 on up versions, but also the phase-1 and phase-2 versions with their very own unique features at the stern.

    For the uninitiated: I'm working with Scott on this 1/96 ALBACORE kit. I'm working up the propellers, sail, masts, hatches, and control surfaces.


    David

    Leave a comment:

Working...