-
Who is John Galt? -
When I don't like it, I kill it.
The creeper shafts were not perfect as I wanted them to be......the inevitable happened.
De most difficult in the built process is symmetry PS & SB. In this specific case another plane had to be encountered for �Upper & Lower� part of the tailpiece.
Grtz,
bart
One done
Both done
Test fitting lower and upper
Practical wisdom is only to be learned in the school of experience.
"Samuel Smiles"Comment
-
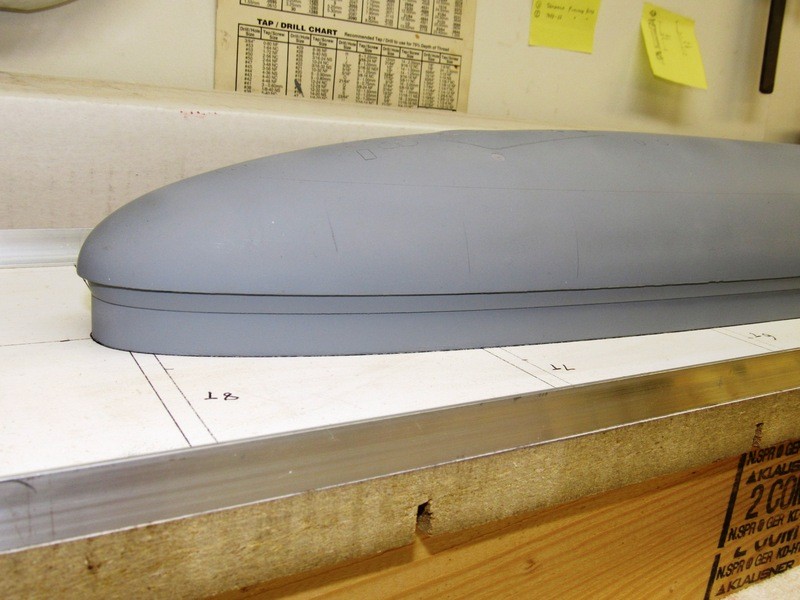
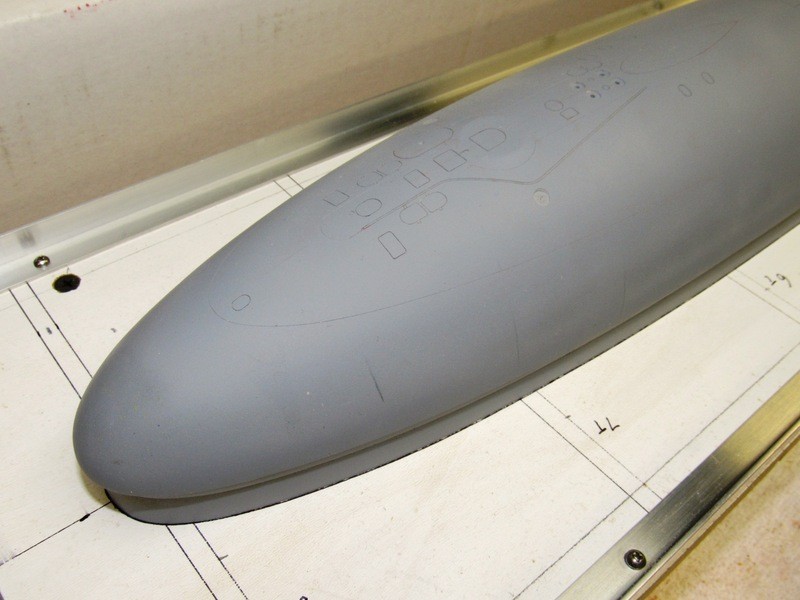
Apart of the above tail pieces and Scott's BELUGA....I BUSTED MY ASS PAST WEEK ON THE VICTOR III
I just finised the upper middel sections and the transsition sections. Yes I try to name every part so I can keep the overview.
After months of R&D and buiding you can't beat the feeling when you line up all the parts and you actually see the upper part of a submarine apear, It's better then morningwood.
Both subs are 1/96......I'm so happy with the BELUGA......it must be awesome if they lay beside each other in the water, can't wait to see that.
Grtz,
Bart
Last edited by bwi 971; 10-20-2018, 04:13 PM.Practical wisdom is only to be learned in the school of experience.
"Samuel Smiles"Comment
-
That Victor looks FANTASTIC!!! (Also, it looks like your Beluga has measles. Better not let them get too close.)Comment
-
wow, that looks great! I know a gentleman in Colorado that is itching for your Victor III.If you can cut, drill, saw, hit things and swear a lot, you're well on the way to building a working model sub.Comment
-
Looks like the measles are spreading!Comment
-
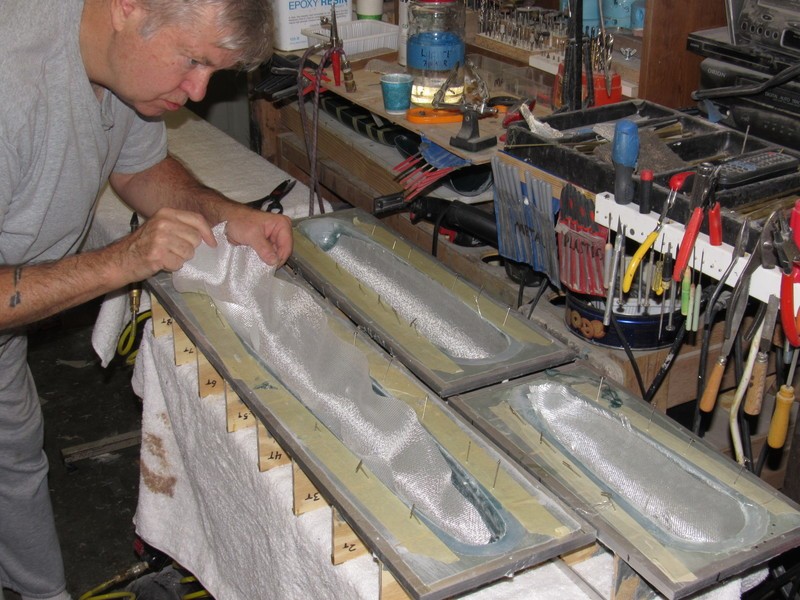
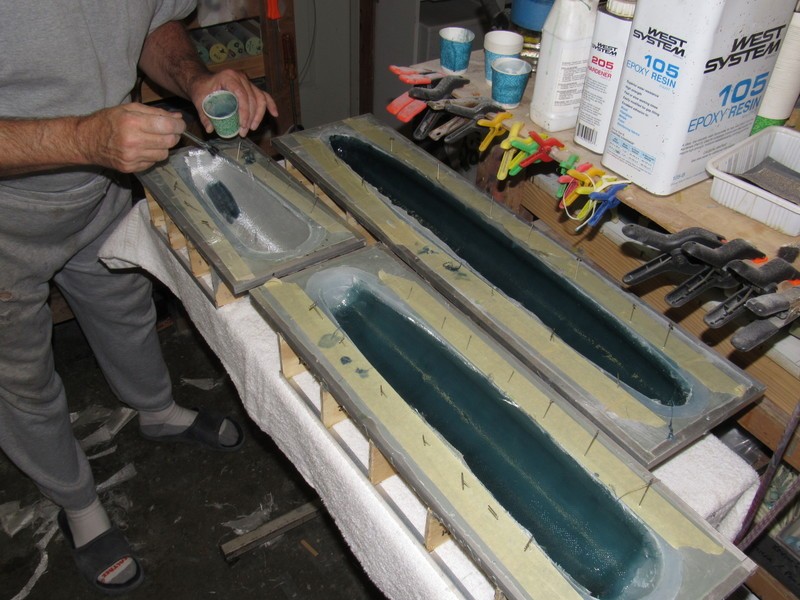
I finished the lower hull master, the new creeper shafts are in and adressed the holes for the rudder which were not centered.
Grtz,
Bart
New creeper shafts
Made a tool to drill the new ruddder holes
And last but not least the lower hull side by side with the upper.
Practical wisdom is only to be learned in the school of experience.
"Samuel Smiles"Comment
-
Jaw dropingly good looking work there, Bart. Beautifully designed fixtures and lay-out. Real good stuff, sir.
DavidWho is John Galt?Comment
-
Absolutely 1st class Bart. It looks every inch (25.4mm) a Victor III.
PeterComment
-
Thank you guy's, I'll take it........still have nightmares because of the flat deck......the fwd dropdown, the width, the concaveness......I think I changed it a trillion times.
Grtz,
Bart
Practical wisdom is only to be learned in the school of experience.
"Samuel Smiles"Comment
-
yowza - that is beautiful!
If you can cut, drill, saw, hit things and swear a lot, you're well on the way to building a working model sub.Comment
-
I saw the D&E video a few times now.....I have a question.......how you integrate the index lip into the hull like the picture below?
it looks like a gelcoat is also applied in the index lips....can't figure it out.
thks, grtz,
Bart
Practical wisdom is only to be learned in the school of experience.
"Samuel Smiles"Comment
-
The indexing lip is homogeneous with the rest of the rubber glove-mold used to give form to the hull half. The hull half master with the lip is formed from three-pieces: The hull half master itself, then attached to it the thin indexing board, and to that the stand-off board. The work goes down on a mold-board and the rubber glove-mold built up over the three-element master, followed by the hard-shell mother-mold.
Normal GRP layup is done in the assembled mother-mold and glove-mold tool. And that's it.
A heavily filled gel-coat is applied to the tool where the lip will be formed -- this to radius the right-angle faces between hull edge and face of the indexing lip. Once the sharp edges have been radiused smooth I proceed with a normal gel-coat followed by laminates of glass in the normal manner.


David
Last edited by He Who Shall Not Be Named; 10-29-2018, 04:01 PM.Who is John Galt?Comment


Comment