
Outrider, I would love to be able to use one of David's SD on this but at the moment it is out of the question. After seeing there build quality in person (one of my club members just got one) and using some of there other products has got me dreaming of one day getting my own SD from Caswell.
The Lindberg kit is very heavy especially above the water line and need a lot of volume in the ballast tank to get it to sit at the correct water line. So it would need extra ballast area in the Gato SD. But that is nothing that the "Wiz" could not handle.
redboat219, I don't think a boat this size made of plastic would be strong enough to handle the extra weight needed, and it would limit any future additions or alterations to the monster. The way it is going to be set up is flexible enough to allow me to change any thing inside the hull without any damage to it. I could even replace my water tight thingy with a good SD when things change for the better.
-
If I ever get around to it, I'm using a Gato SD, as David suggested. The Wiz posted somewhere that he thought all he'd need to do is lengthen the ballast tank on the Gato SD to get it to support Lindberg's monster. The scratch-built system is interesting and I'm glad to watch it being built, but I'd rather get the SD and be done with it. I think a dry hull would be a problem for this kit, since it's polystyrene and not built with any R/C use in mind.Leave a comment:
-
Wouldn't it have been easier just to go with a dry hull with this boat?Leave a comment:
-
I forgot to mention that I am using the 1/16" push rod seals and the 1/8" prop seals that Caswell sells and DM produces on this project. At least I know that they will work without leaking.Leave a comment:
-
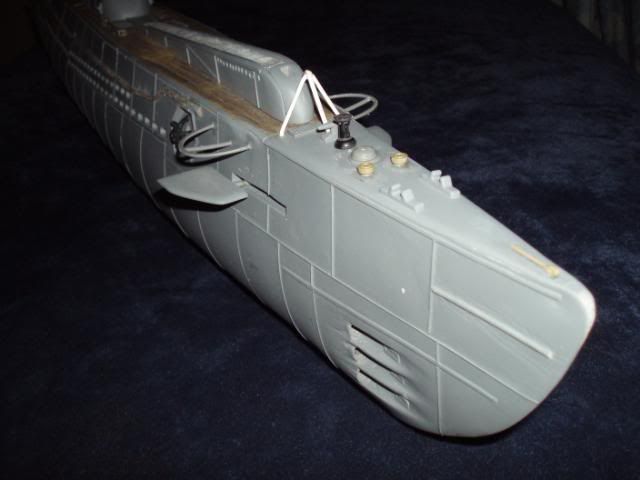
OK, did a bit more on the hull detail while the glue was setting up on the water tight thingy.
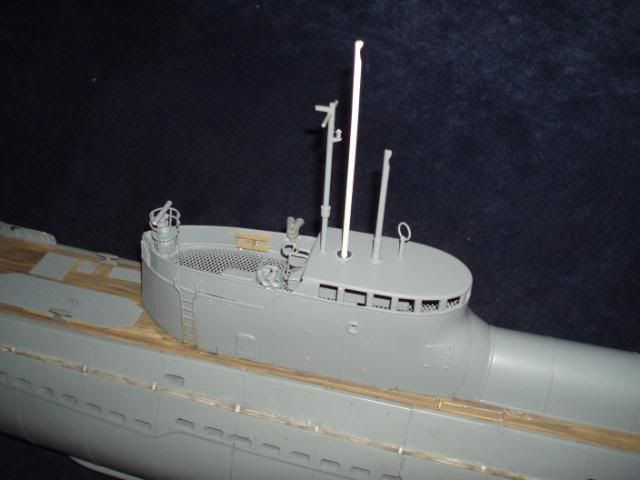
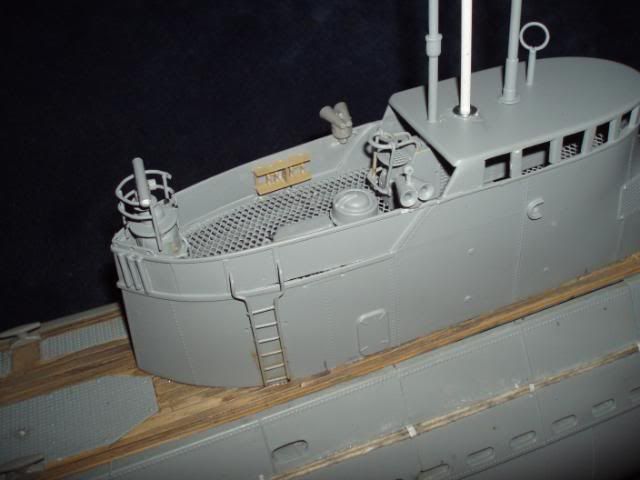
Knowing how much space I had to have for the ballast tank and limited to an overall length of 28" (the hull shape thins each end)
all I had to do was move things around till it all fitted and could be easily worked on.
The ballast tank bulk heads and the communication tube were set in place and made fast with super glue and epoxy, also some plastic glue.
They were set aside to dry and while they were drying I made the retaining/strengthening parts that the lids bolt against.
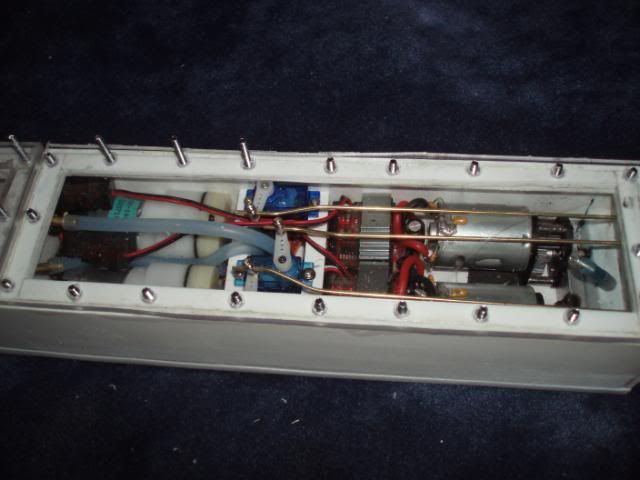
So far I am happy with the way it is working out and looking forward to getting it wet again but this time with the drive unit installed.Leave a comment:
-
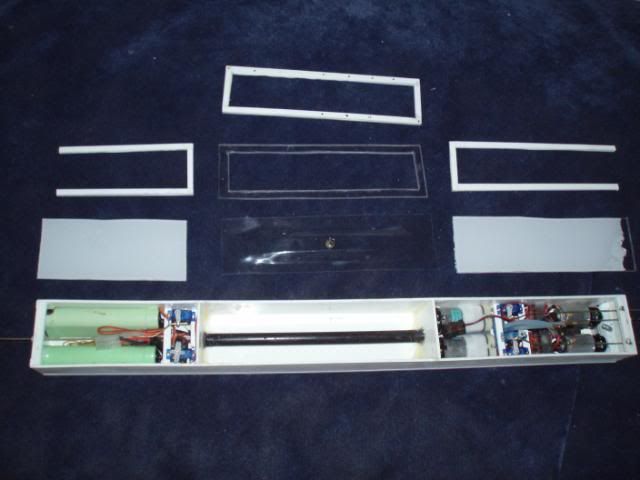
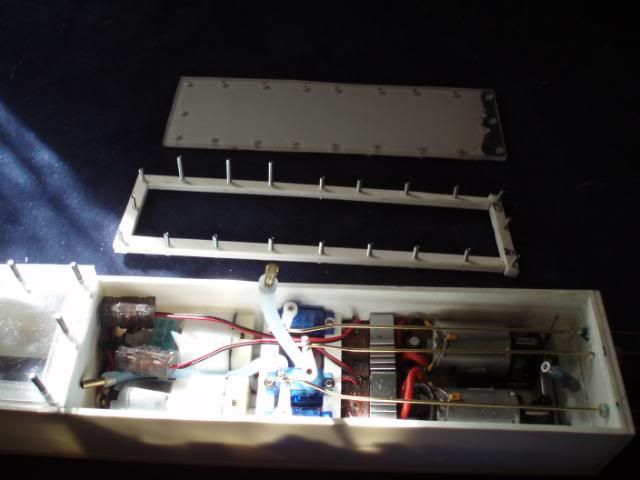
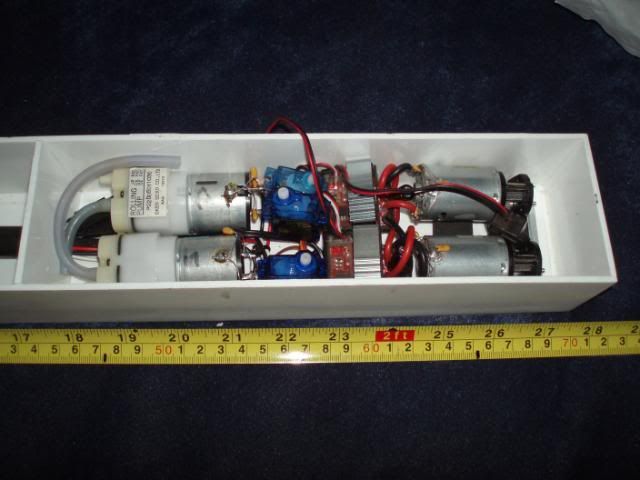
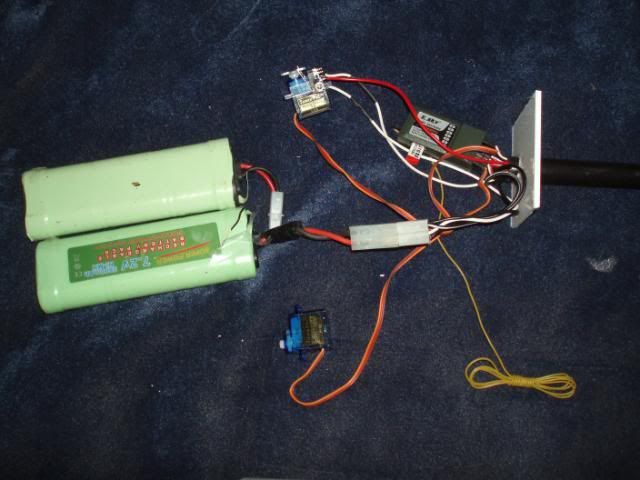
This is a mock up of how it should look like. There is still other other vital parts that I need to find room for. The auto trim leveler, the fail safe, the emergency ballast blow gas and the ? for the recovery float.


Leave a comment:
-
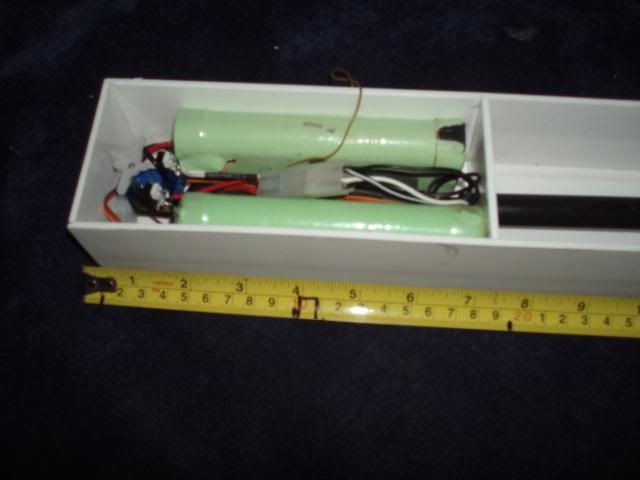
Ok this is what I have got to fit into my dry area.
2 x 7.2 stick batteries
2 x electric motors and gear boxes
2 x ESC's
2 x Air pumps
1 x receiver
4 x servos
And still leaving enough room fo my ballast tank
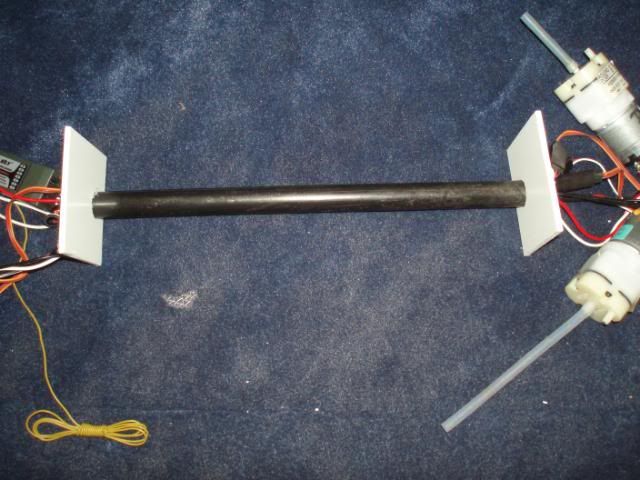
Will it all fit?Leave a comment:
-
"And why are you using a box shaped WTC? man I did one of those once, never again!"
It's more like have to, than want to. But that is a long story.
Any way there are no places around here where I can use my boats that are more than 4' deep. So a box is strong enough for thatLeave a comment:
-
Looking cool, and worth the work when its done.
And why are you using a box shaped WTC? man I did one of those once, never again!Leave a comment:
-
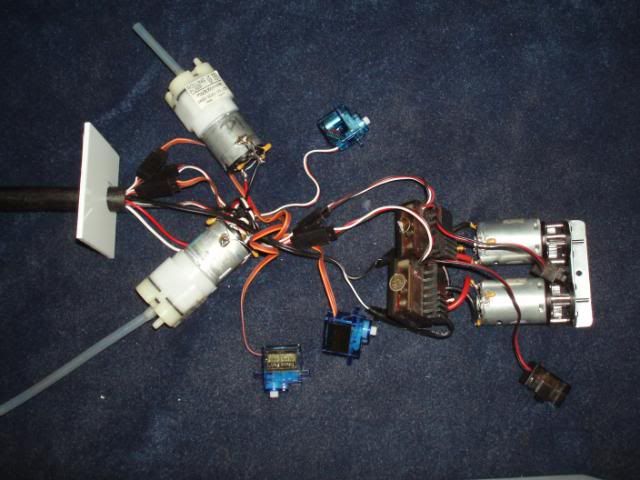
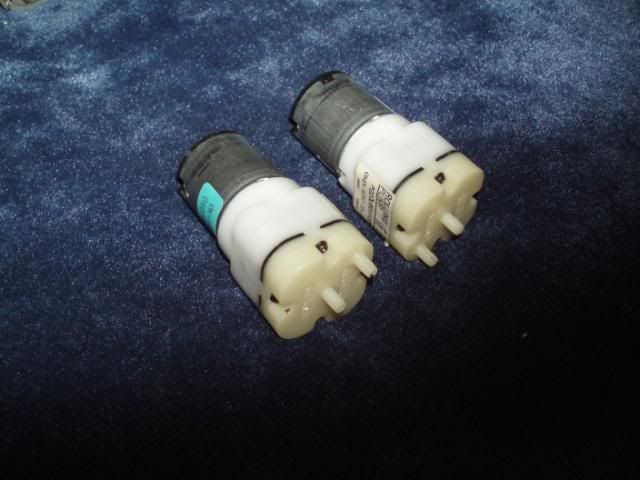
These are the air pumps that I am going to use on this project. They are large 4 diaphragm air pumps. I will need BIG pumps because of the volume of air that has to be moved.
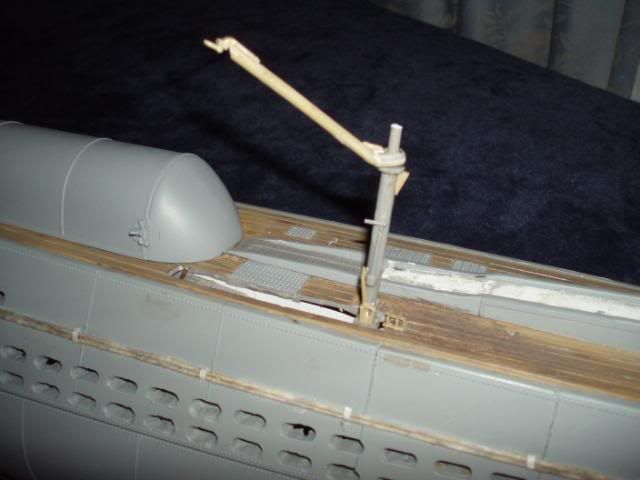
Built the air craft lift crane and it's storage bin. Seems like there is always something to do on this one

Leave a comment:
-
Your guess is correct. What you see is a long box that I have started using 3mm plastic HIP. I will follow up with more photos in the next few days.Leave a comment:
-
Looks like youve got something in mind like doing what Engle does in their subs with a top that is held down by a bunch of screws? Inquiring minds need to know.Leave a comment:
-
Yes, "re-establish submerged trim with the WTC in place", less the ballast tankLeave a comment:

Leave a comment: