-
You did the prep work right.
Did you cut the acrylic with thinner, water or clear acrylic? The more you cut with thinners, the weaker becomes the bond. If you want to make an opaque paint more translucent you cut it with a clear resin bearing medium (in this case another acrylic), not a thinner.
A clear coat over the acrylic would have wicked in some to increase the bond between the acrylic and the base coat.
DavidLeave a comment:
-
The parts were washed, scrubbed, washed, scrubbed and sanded and washed. Then primed, lightly sanded, base color, lightly sanded then clear coat, then washed. The acrylic shading was applied on top of the clear coat.Leave a comment:
-
Did you scrub the raw plastic parts with scouring powder and an abrasive pad? Did you prime the surface before the black base-color? All injection kit parts arrive with a coat of oil on them -- this has to be completely removed to insure proper adhesion of primer and paint.
DavidLeave a comment:
-
Another question.
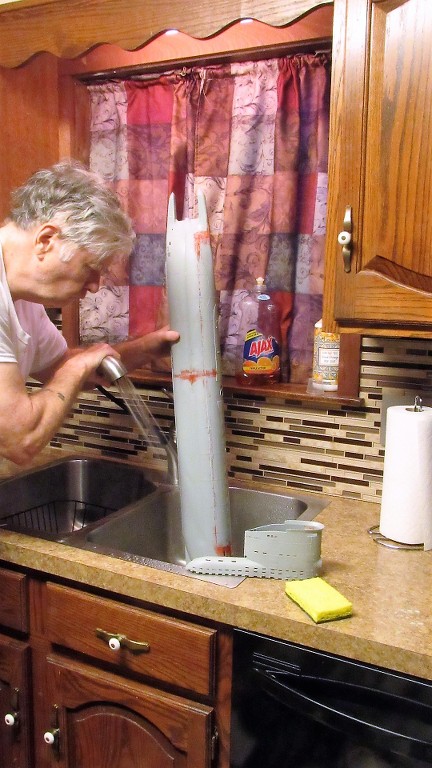
The first attempt on this side I had the registration off. I needed a do-over, was not happy with it. I started to remove the 'oil canning' by using water and a scrubby. Surprising, it came off very easy. Little to no effort except wiping it. Why? Was the surface not prepped properly? Was the paint diluted to thin causing it's holding power to change? Curious as to why this was. If this was used as is with no protective clear coat I would think after running a while it might come off on it's own. But, we do clear coat to protect it.
Leave a comment:
-
-
What I did this week.
I happy on the results. Next up, practicing on streaking.
Questions. I now need to spray a base color to darken it. But I also need to do streaking on the sail. Do I spray base color now but maybe not to dark, then do streaking, then spray more base color which will further darken both?
Leave a comment:
-
Correct ken, water soluble acrylic paint. You only put a clear coat down between layers if you think the current application might have to be abraded off because of mistakes or part of the weathering process (streak with brush followed by streak with #000 steel-wool, etc.) -- the clear coat protects the work beneath it.
I usually don't clear coat the completed oil-canning but will take care not to overdue the streaking. Start the streaking with a big ugly 2" house-brush but make it a new one; thoroughly soak it with well diluted white then wring the hell out of it with rags/paper towels. You want the streaking to go down as though you were dry brushing on highlighter (which is pretty much what you're doing).
Go ape-****, Ken! Show that test-article who's boss!
DavidLeave a comment:
-
In the meantime, had a warm day that I could prime my 'test hull' for doing the streaking and below waterline practice. Still need warm days to spray the hull base color and clear coat.
David. Looks like you used diluted white acrylic paint for the streaking?
I'll also be doing the streaking on the sail. Is the streaking done over clear coat which is over the base color & 'oil canning' coat on the sail?
https://forum.rc-sub.com/forum/tips-...arkings-part-2Last edited by Ken_NJ; 01-24-2022, 06:05 PM.Leave a comment:
-
I think I'm done practicing.
This is before applying the base color (black).
This is with the base color overspray. Without a clear coat.
One of the five practice sessions with the base coat overspray.
This last one in the upper left (top bow of the sail) I tried the smaller 'oil canning' effect you can see in David's example.
I guess that smaller framework is there for reinforcement for the forward motion of the boat against the forces of the water?
At this point I'll be cutting new tape strips (3/8 inch) to actually do the sail. Don't think I'll do any better than this.Leave a comment:
-
The USS Orleck (Gearing class destroyer) is becoming a museum in Jacksonville FL. She's in drydock getting the hull inspected & painted. They posted these pics on the FB page which show a great example of 'oil canning' on a surface vessel. Interesting to see this. I'm sure there plenty of these pics for submarines.
I'll return to Pasche testing on Monday, thanks David.
Attached FilesLeave a comment:
-
-
-
Got the Pasche airbrush working. Probably a combination of things. Nozzle adjustment, air pressure and thinned the paint further. But I'm getting spittle, not a smooth outflow. Maybe that's due to the paint being to thin?
Learned a few things.
Have a few strips available as spacers.
First spray, laid the vertical & horizontal tape.
Second spray, move the horizontal tape down a row. That completes one vertical row.
Remove all tape and place the vertical strips over the completed row.
Lift the top of the first and last vertical strips and use the already sprayed squares to position the horizontal strips, place vertical strips back.
Do the same with the bottom of the first and last vertical strips. This will give you perfect (almost) positioning.
Spray the third set of squares.
Forth set, move the horizontal strips down one row. Wallah.
So I did not get over spray on adjacent squares, I made a spray template to keep the over spray confined. When I sprayed a square I aimed on the template allowing the outside edge of the spray to hit the square. This helped not making the density too heavy. BUT, I still need to experiment-adjust the airbrush so I can control the spray better. This is new to me so figuring things out here. Trail and error.
Better consistency and registration. Still have to work on the registration.
Up close, its spotty, like the airbrush is spitting. Paint to thin maybe? Spraying over with black may help.
My way to control where I'm spraying.
Leave a comment:
-
No. You make a valid observation, Casey. As one has to get closer to the smaller model, one can begin to pick out the flaws, such as the weathering and other items either over-done or are just plain wrong. I agree, weathering a smaller model -- that will survive close and distant observation -- is a tall order.
The scale r/c plane guys took the cowards way out of this situation by, at least a half-century ago, adopting a new competitive category, stand-off scale, where the model is judged from a specific distance away from the display. Lazy! Why even try? Either do it right... or don't do it at all!
DavidLeave a comment:
-
Personally, I think the smaller scale boats can be overdone weathering wise. 1/96 is hard to get correct. I’m not talking about the scum line, I’m speaking of the oil canning, and streaks of white. While it may look good at a distance, up close it seems out of scale. Let the chiding begin.Leave a comment:

Leave a comment: