-
Your fine, Ken. The black/dark-dark gray over-spray will kill the white streaking till it's just a suggestion -- what you're after. Looking good! -
Steve H, if you see this I missed what you said both times in the Dive Tribe about the below water line weathering. My internet connection caused what you were saying to be garbled.
I am done with practicing. Time to start on the real deal. I first went thru the upper hull looking at items that would cause water to collect which would cause water runoff under those items. Then I went crazy on the rest of the hull. The port side of the sail would have the water runoff go right down the hull so that was put on the way I did. The starboard side has the safety rail on the deck so that side is different with the streaking. At least that was my theory about water runoff. The paint went on too heavy so this will require more spray of the base coat over it all. I am still learning!
The next post will show the final finish.
Leave a comment:
-
Thanks Sam. Some a bit too much growth on the hulls for me.
I have two practice sections on this test article. On both I did too many coats and the base coat is hidden. Although I like the double waterline on the second one, I like how the first one came out better. With the final coat before the algae green I gave a light spray of white.
Please give me constructive critique. What should I change in my technique?
Leave a comment:
-
That's one way to do it. I will also free-hand the air-brush to achieve this 'parfait' effect. Or, I'll dab/stipple on a 'parfait layer' just below waterline with oil 'artists' paint and dry-brush it to smudge/blend it to a feather edge at the bottom of the band, but a bit of a harder edge at the top of the band. Another medium is oil based crayon, you dab it on then work it with a texture stick, cotton swabs, rags and fingers.
Daivd
Leave a comment:
-
Welcome back from the trim party David. Please take a look at my previous posts of my BLW weathering.
On David's Skipjack, I noticed an additional scum line which would be the boat sitting with a different displacement. I taped a piece of paper at the waterline of my test article to mask this area and gave it a spray coat. I left the paper sit proud of the hull so that the spray from the AB would create a gradual transition to the masked part.
Leave a comment:
-
I used needle nose pliers and pulled out bits of sponge to make it less flat. Iâve been using white and beige-tan to make a lighter color tan. For this test subject, been making my mixture in small cups for the airbrush. To lighten the main color, found it better to start with white then add tan to the desired shade. After the paint dries, with the help of slight heat, I used a piece of styrene as a squeegee to scrape the bulk of the toothpaste away, then wiped with a damp paper towel.
For this test, the following was done with 5 coats so far. Donât want to totally obliterate the base color.
1 Mask, tan
2 Mask, tan
3 No mask, lightened the tan with white
4 Mask, lightened the tan even more than #3
5 Mask, about the same as #4
In this picture it looks darker than it does in person. Wonder why that is?
Does it look to splotchy?Last edited by Ken_NJ; 03-18-2022, 02:04 PM.Leave a comment:
-
Thanks Casey.
Moving on to below the waterline on the test article. I diluted toothpaste and used two sponges so the patterns of mask are mixed. The last picture is two coats of light coat of spray. I think I applied two much toothpaste making it to splotchy. Also, the BLW is too dark due to the dark base coat. I'll lighten the tanish color up a little. Also may cut the sponges smaller and apply the mask further apart.
Your thoughts?
Once I get this down, I intend to spray a brighter green at the waterline to simulate algae at the surface and I'll do a scum line at the immediate waterline.
Last edited by Ken_NJ; 03-16-2022, 11:52 AM.Leave a comment:
-
Off topic. I'm going to brag a bit.
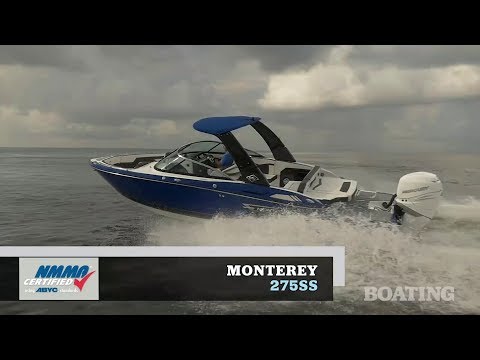
In 2019 we bought a Monterey M65. 27 foot boat with 300hp Merc outboard. Traded this boat in last September for a Monterey 275SS with a 400hp Mercury outboard. Tops out at 30 feet. Our boat came in to the NJ dealer a few days ago from Florida. Going to be dropped in the water end of April.
The outboard looks huge.
Here's a promotional video on the boat.
Attached FilesLeave a comment:
-
-
-
WOW, there is a huge vote of confidence! Thank you David!
Here is the BWL work. Sanded, cleaned, taped, sprayed with lightened hull red, sprayed with regular hull red, removed tape and sprayed again with regular hull red. Still have to spray flat clear.
Sprayed with a lightened version of the hull red. Added white to the red to lighten it.
Tape removed and over sprayed with Tamiya dull red.
Leave a comment:
-
Your first real weathering effort. I make this observation: you, sir, are a quick study. Well done, Ken!
Each new projects will see refinements of method, tools, mediums, and an ever more critical eye as to what our environment bestows on Man's creations over time; each new model will be better than the last. You are transitioning from toy-maker to model-maker.
You are on a new path now. You no longer just stick things together. No. You are starting to emulate 'reality'. I too was an understudy and immersed myself in the work of my betters -- those men who took the time to teach and pass on the Craft. As I do today. Now, Ken, I deem you qualified to take the mantle of, 'teacher'.
Go get 'em, Tiger! Fellow servant of the, Craft.
DavidLeave a comment:
-
Have a bunch of pictures to post to bring this up to date.
First. Painted the lower sonar dome and gave both dome's a light over spray to soften the lines.
Following the pattern I drew on paper, placed 1/16th strips of low tack tape in position.
Using the same paint I sprayed on the sonar domes, I gave a shot to the center of each squared off area. At first it was difficult to get the center with the airbrush, but after a few tries I got into the groove. I lowered the compressor pressure down to 10-15 psi as per David's procedure.
I then sprayed the base color over the works to soften the effect. I started this over spray with the tape still in place, then removed the tape and gave it another over spray of the base color.
The following is the final appearance after the tape was removed and the final base coat over spray. I'll be spraying a light coat of flat clear to protect it all before I remove the rest of the masking.
Once the clear is applied, tomorrow, I'll tackle doing the lower rudder and underside of the aft dive planes, both red.
I hope this looks right, as I do not want to have to do anything over!Last edited by Ken_NJ; 03-09-2022, 07:52 PM.Leave a comment:
Leave a comment: