
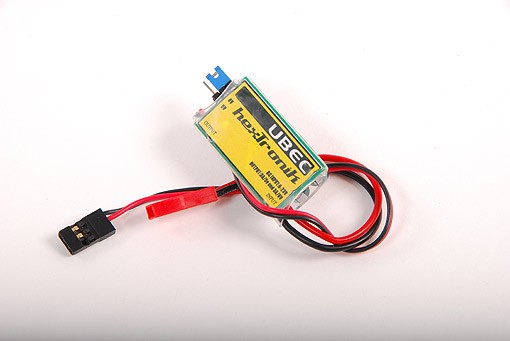
51A rating- must be running a weapon!. One more thing to bear in mind is that most of these controllers come without a BEC. In my mind that's not a bad thing, as many built in BEC's aren't up to the task for model sub use, and separate switchmode BEC's with a 3A rating cost about a pound on ebay.
-
-
this one i use this does not generate radio interference
Regards GantuComment
-
I don't mind at all, David. It's my pleasure to pass on what others passed on to me.
The spur gears come from Stock Drive, part number A 1N 1-48036. https://www.sdp-si.com/
The pinion wire, from which I cut to length and bore on the lathe is only available special order from Nordex, Inc. Minimum order is 74" and runs about $400.00 https://nordex.com/
I do get the cup-seals in bulk, typically 100 to the bag. I don't remember the cost, but it was not much. My source is Precision Associates, Inc. https://www.precisionassoc.com/ They call them, 'U-cups'.
Cup/U-seals state a specific shaft size they are designed for and the contact lip of the seal is undersized to be a slight interference fit to the shaft -- the elasticity of the seal permits the lip to rebound off the shaft, but maintain a steady watertight seal around the shaft. Keep in mind that they leak in one direction (from within the SD), and seat tighter in the other direction (the water side). Simerits seal in both directions, hence their utility in piston type ballast sub-systems. But, if you put two cup/U-seals back-to-back you seal against differential pressure, no matter its direction.
I've never been able to get the Oilite bearings in bulk. I typically pay .030 - .060 cents a piece. My principle source is McMaster-Carr https://www.mcmaster.com/#
Imperial measuring system here. What is this 'metric' you speak of? Never heard of it!!!!!
We're doing fine, David. I toil away in the shop and Ellie slips through the jail-house door the occasional slab of raw meat and mason-jar full of brackish water. Life is good!
DavidLast edited by He Who Shall Not Be Named; 12-28-2019, 02:33 PM.Who is John Galt?Comment
-
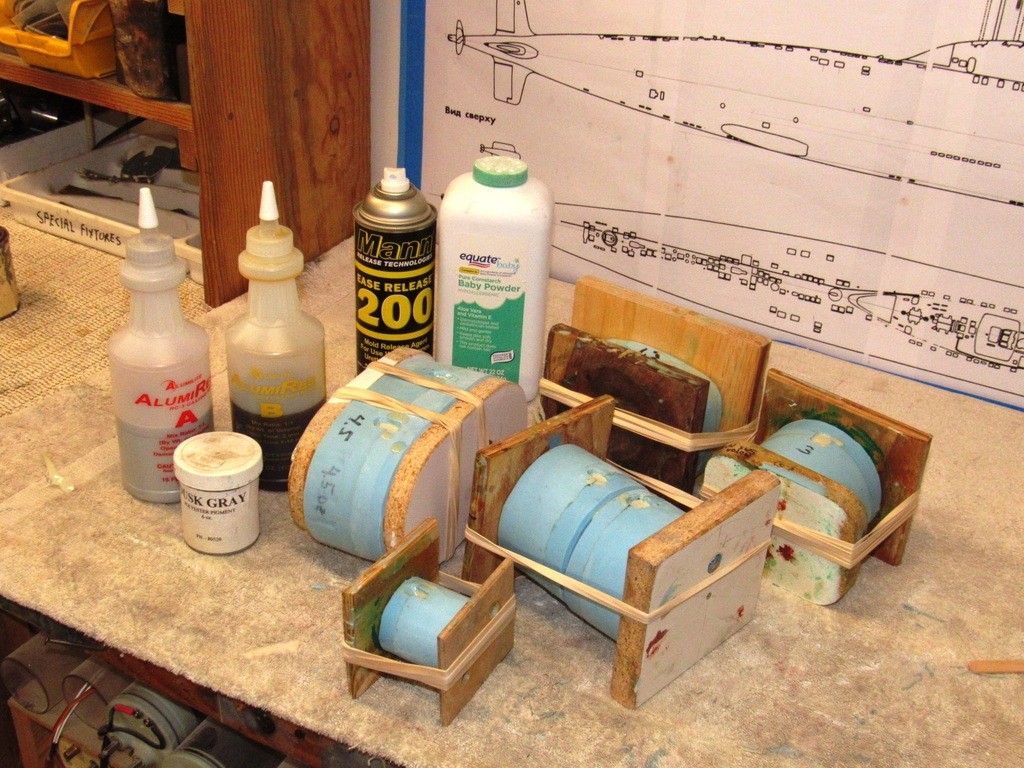
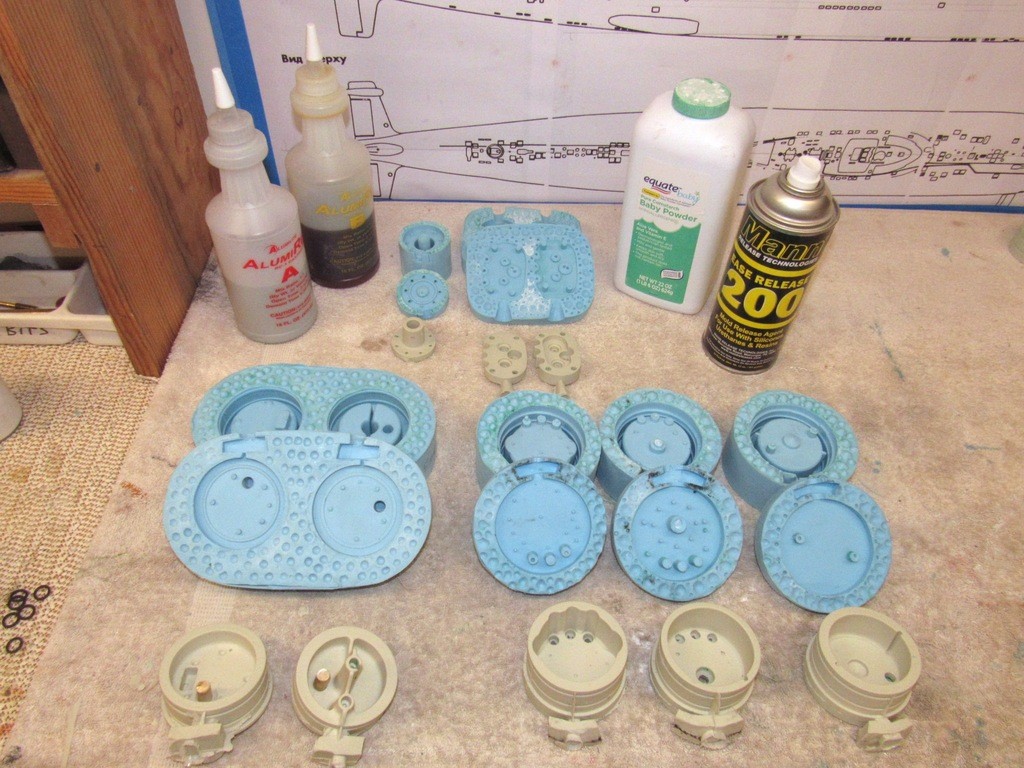
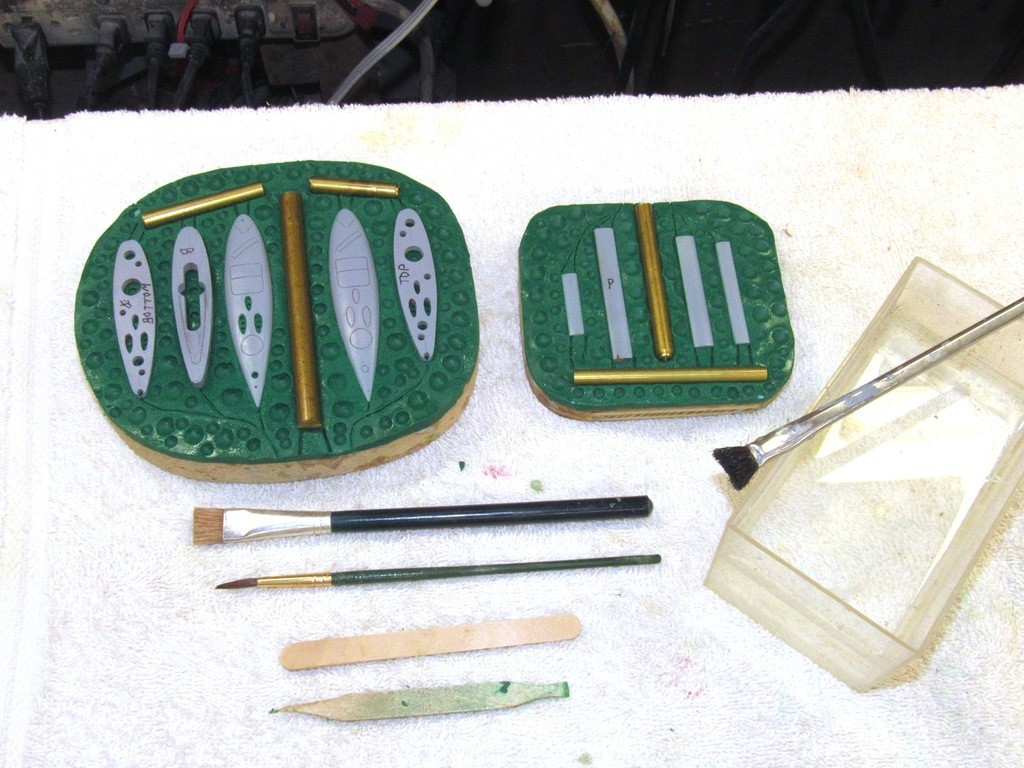
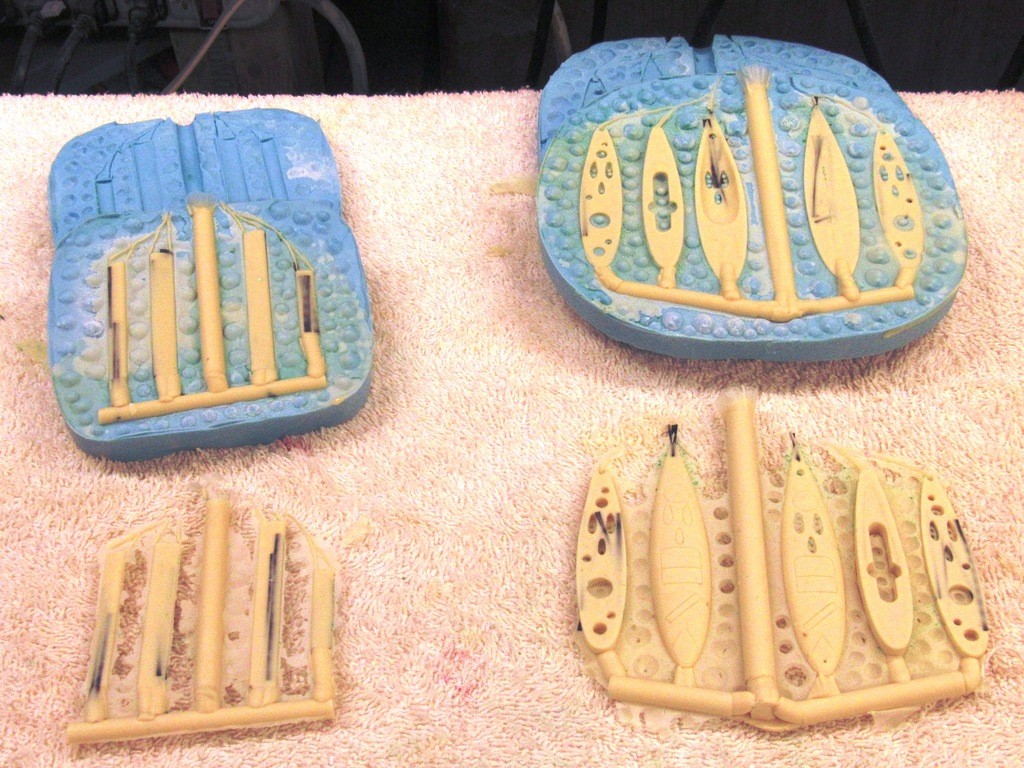
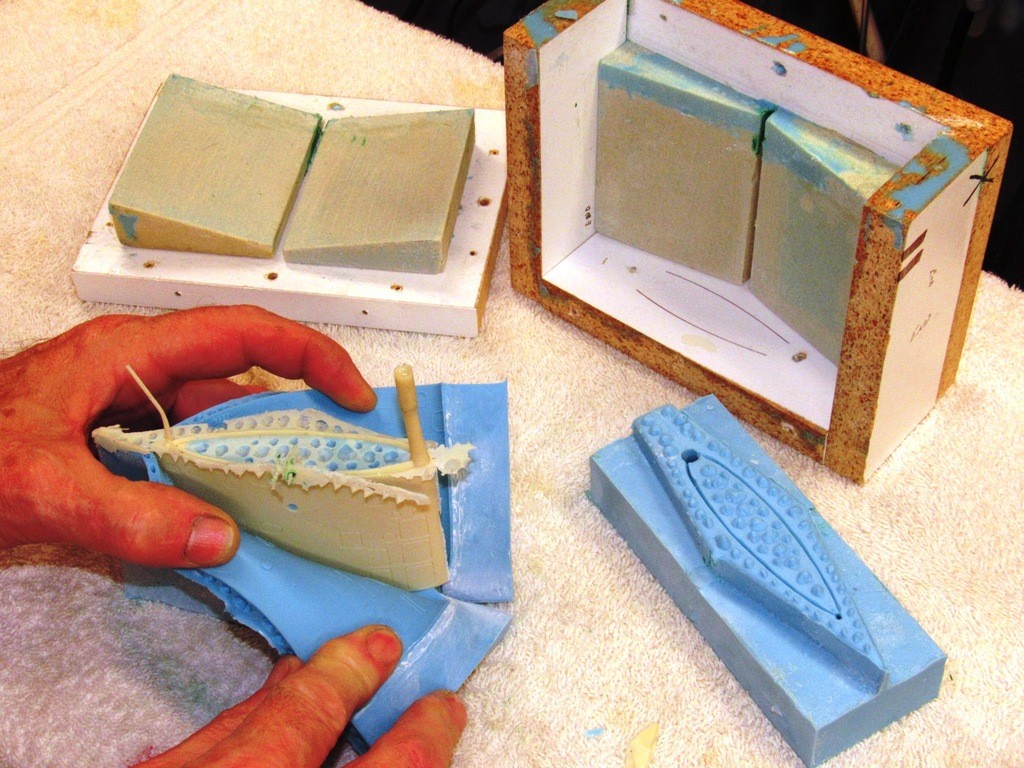
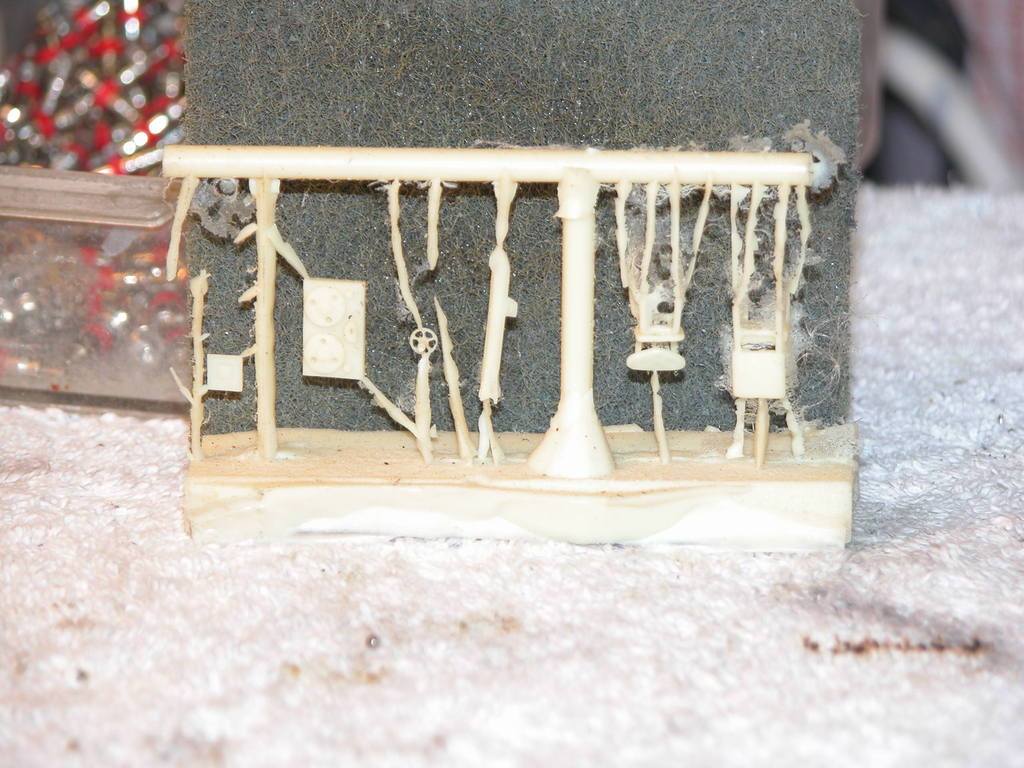
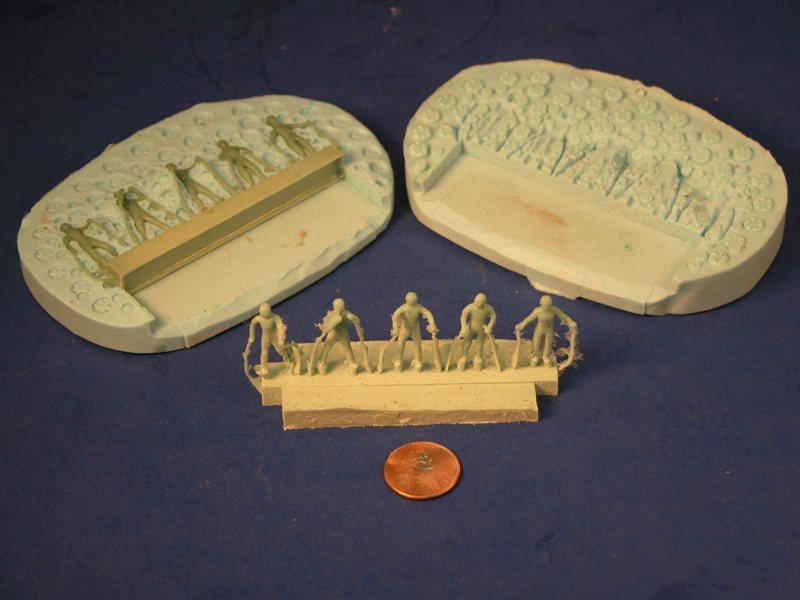
The last half of the two-part tools poured and cured, the masters were removed and placed into safe storage for possible future use. I then cut out the sprue and riser cavities, and the tools were ready for use.
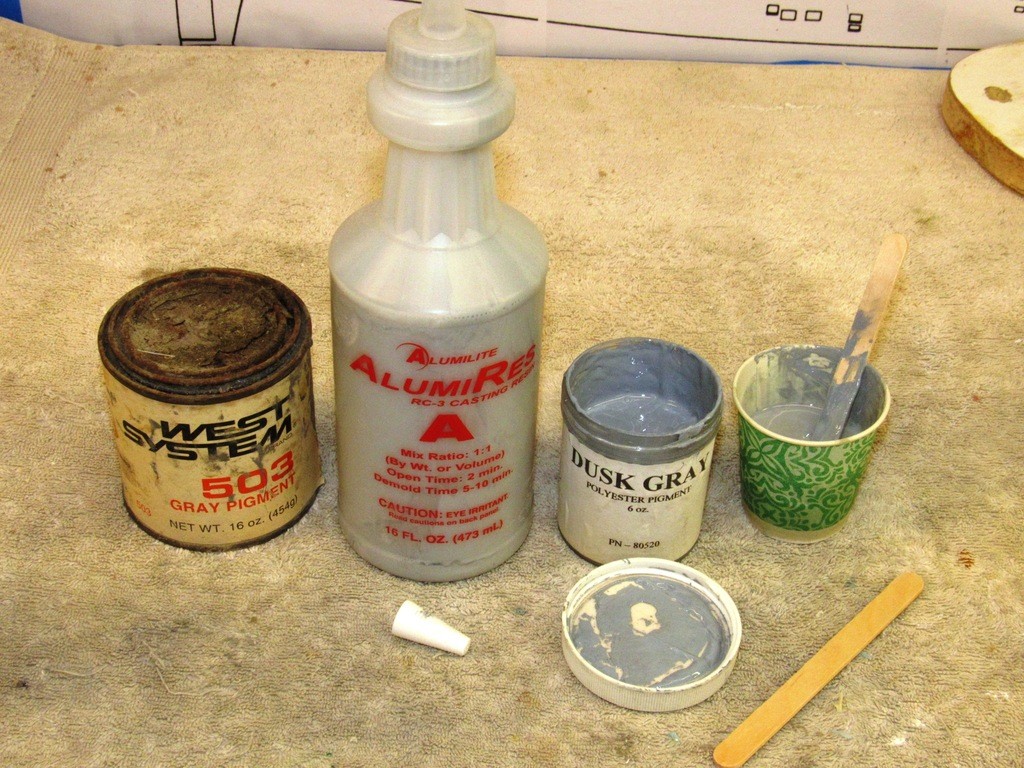
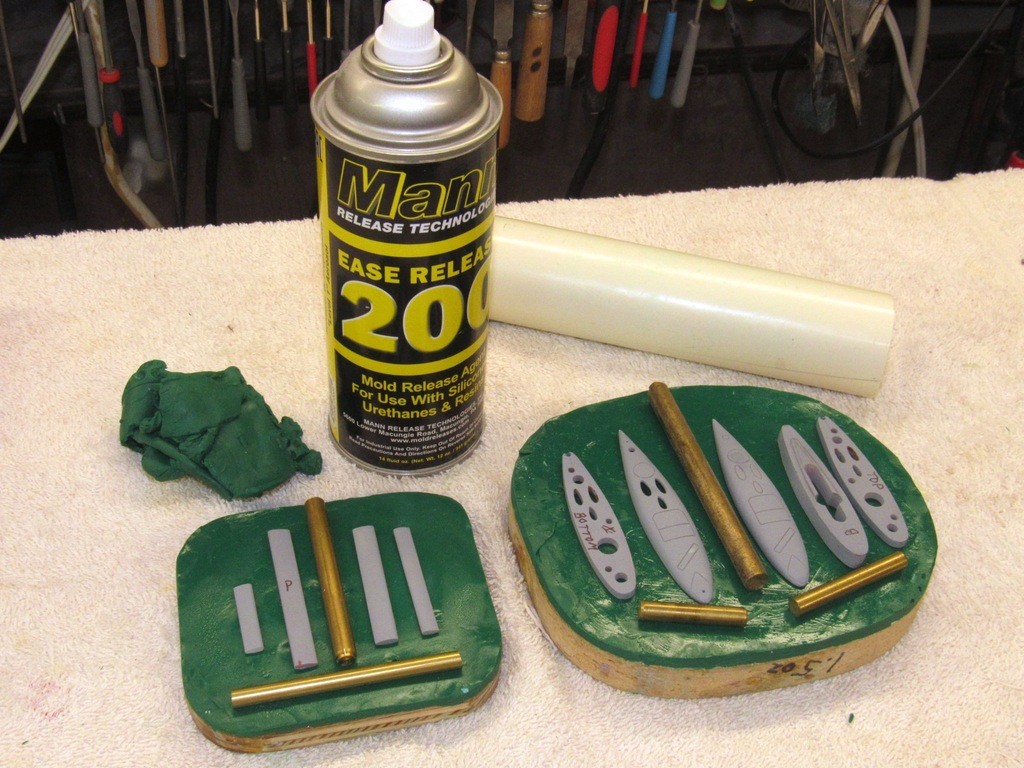
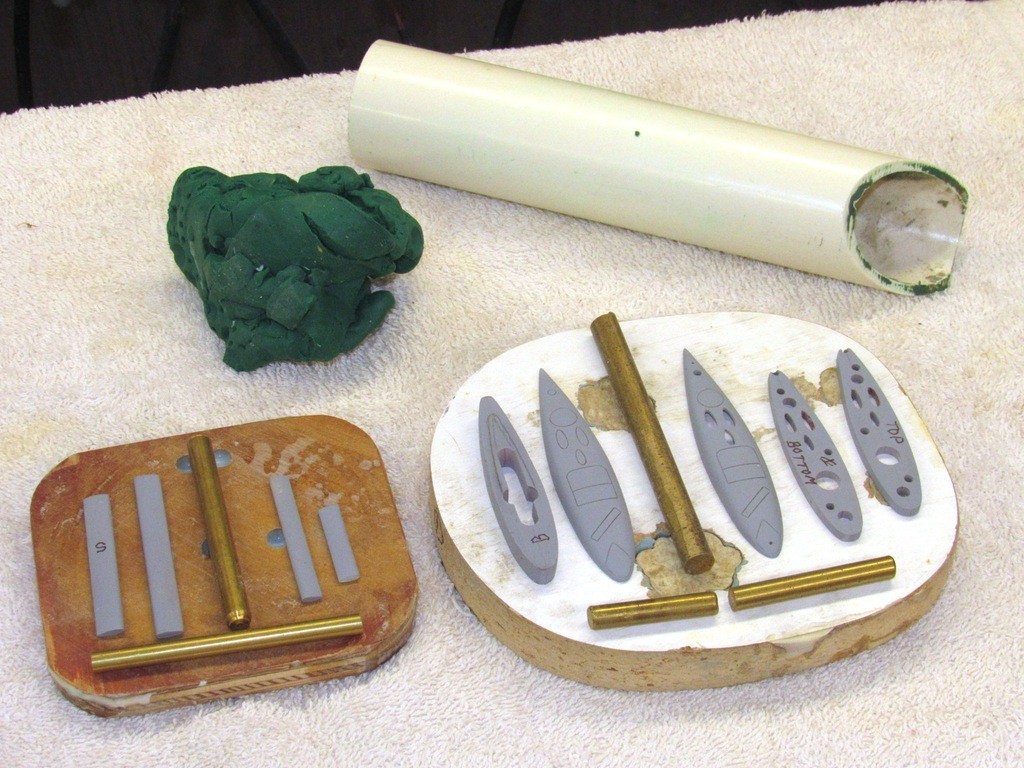
My client directed me to denote this new product with a proprietary color (or, if you will, no color at all), gray. Breaking out the tint I doped a sample quantity of my production resin and made the first shot of the new tools with this … ugh! … color. I dub thee, 'puke gray'!
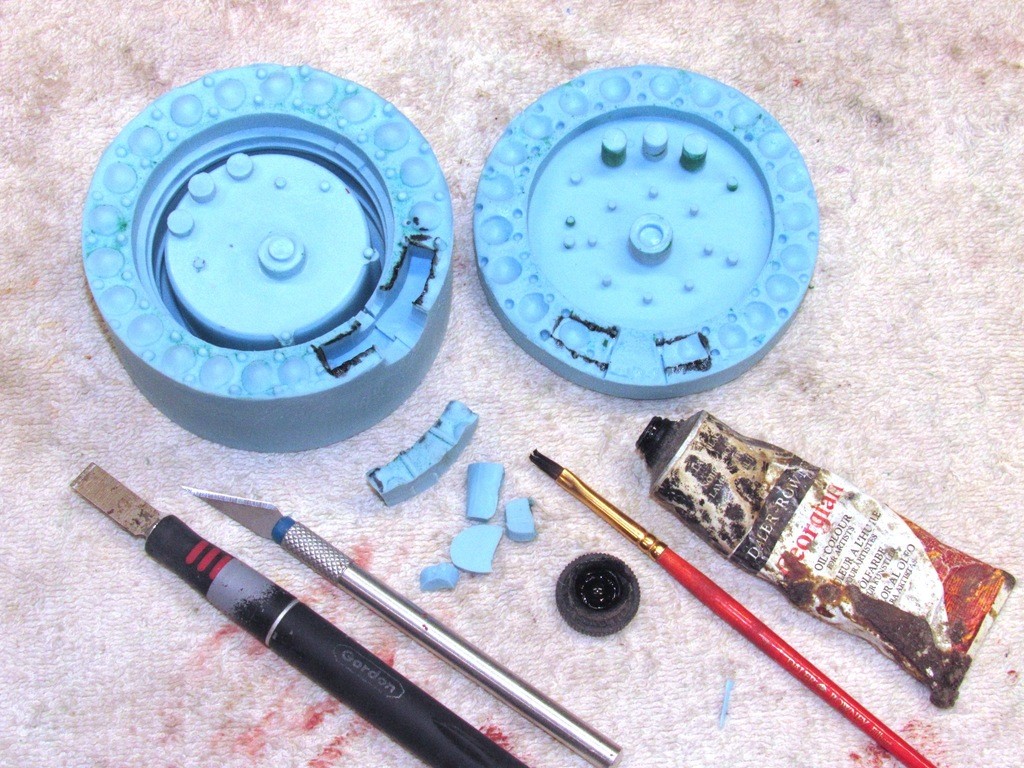
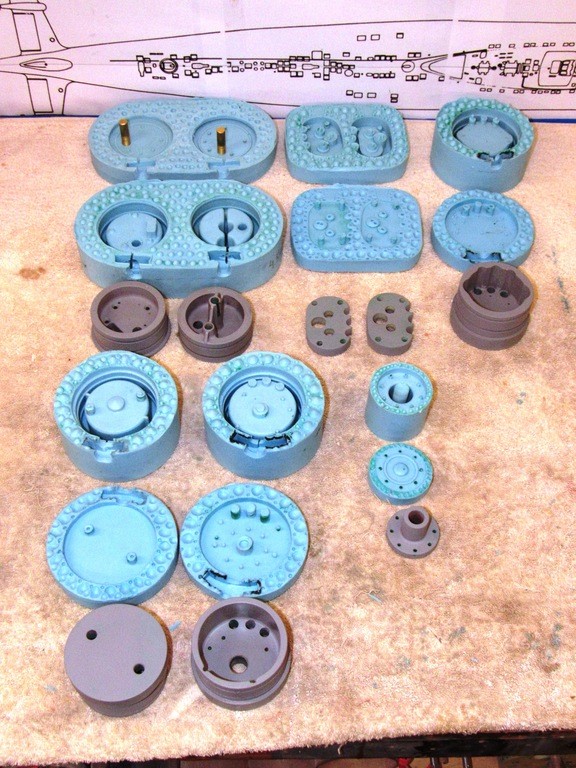
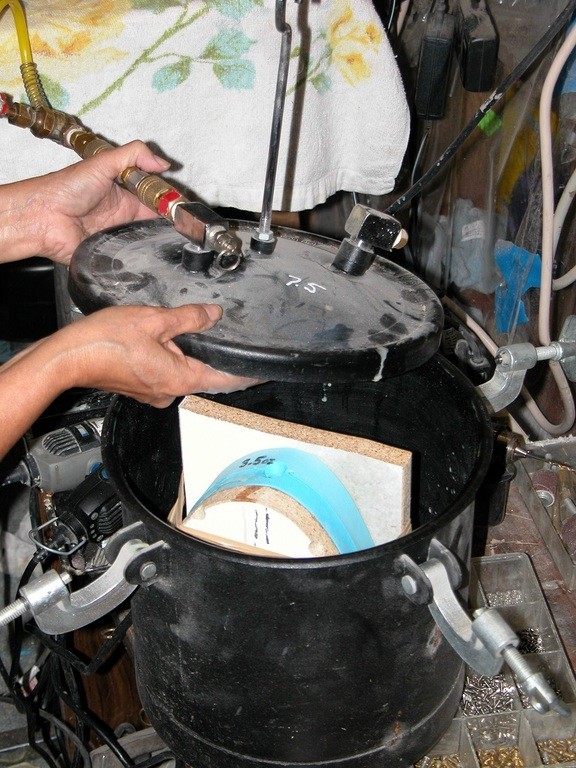
The tools were filled with catalyzed resin, pressurized, and once the castings were hard enough, they were extracted from their respective tools.
Who is John Galt?Comment
-
Thanks David,
Just got back from taking the PAPA for a spin. Quick little sucker, and then I saw your post.
Just great info, .. as usual
David H
( Now I’m off to the beach..)Comment
-
Gray? Yeah I like it, that color is a nice neutral color. I have been using it on my piston system.
If you can cut, drill, saw, hit things and swear a lot, you're well on the way to building a working model sub.Comment
-
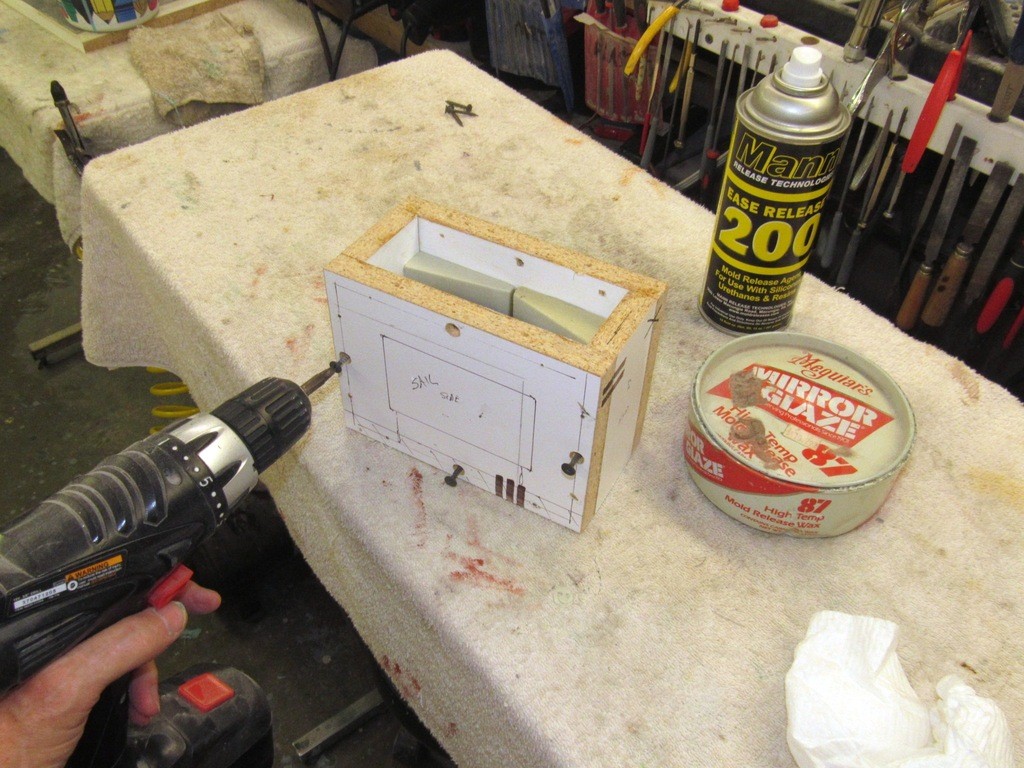
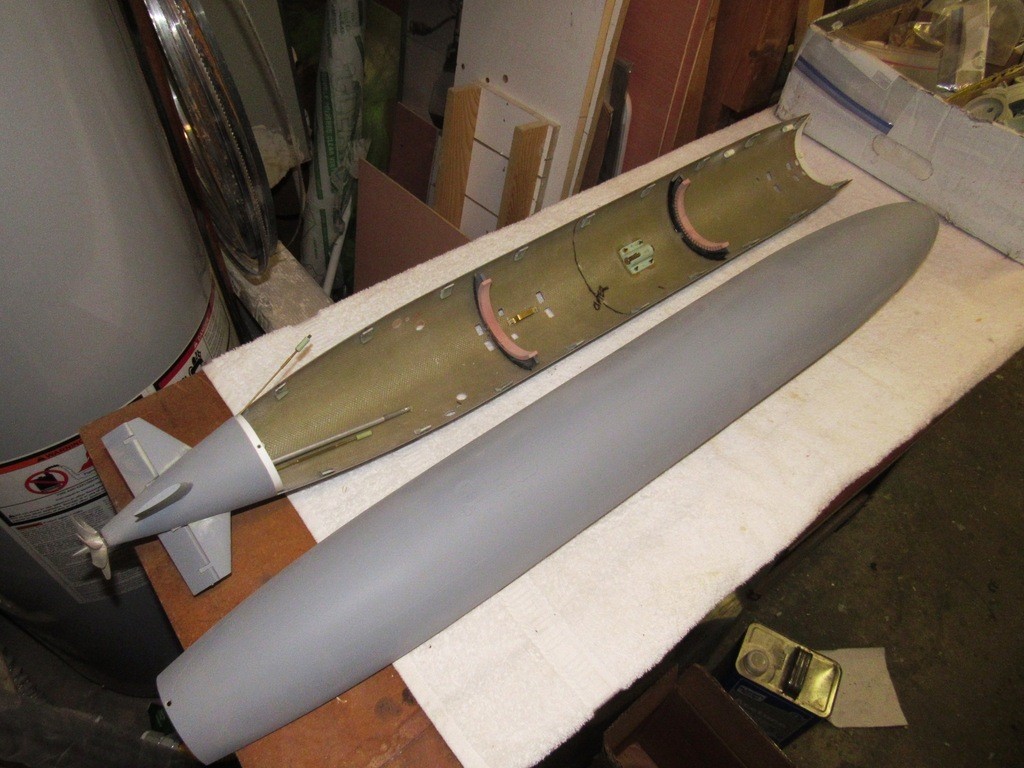
Time had come to find a model submarine to serve as a test-mule for this new type SubDriver.
I selected a nearly completed 1/72 scale THRESHER class model that has been sitting on the wall for a few years waiting for me to finish it. Now was the time.
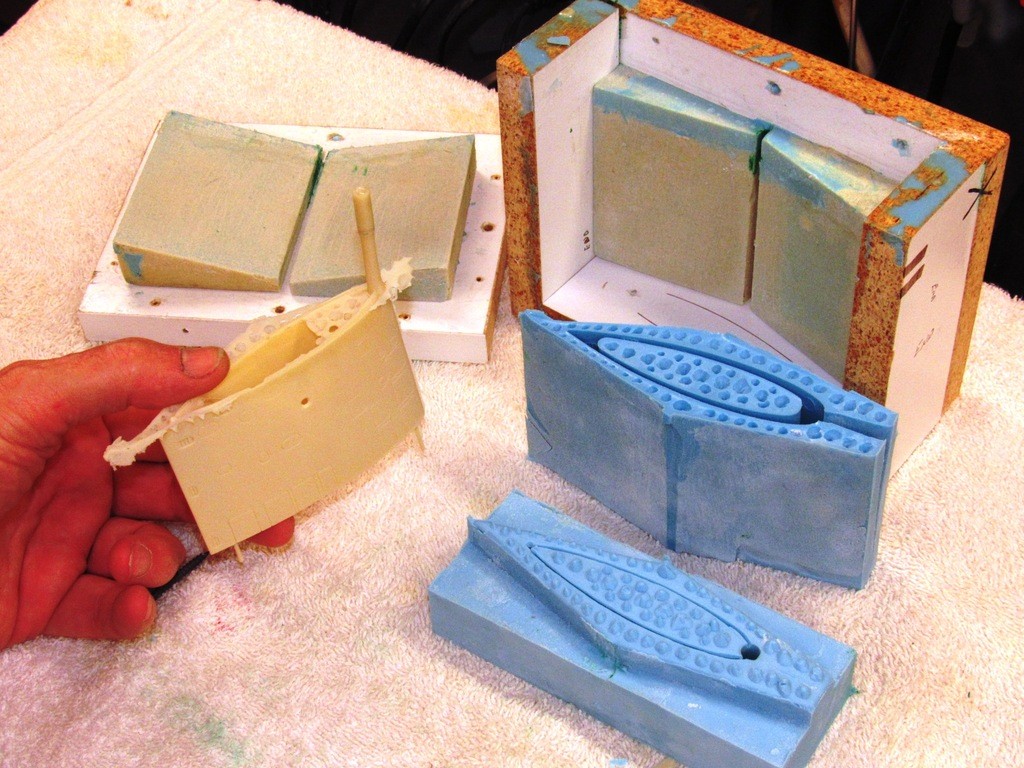
Here I'm preparing the sail master by fitting it inside a flask. The job of the flask is to contain the rubber that forms the tool (mold) and give it rigidity during the eventual casting process. The trick is to make the flask stout, but of a geometry that will prevent excessive use of the expensive tool making rubber.
The best way I've found of determining how much rubber to prepare is to first pour rice into the flask, with master in place, to the desired level, then pour the rice into the rubber mixing pail and mark the level of the rice. That tells me how much rubber to use. Neat trick I got from a local chapter of the Nautical Research Guild. A rather stuffy group of old farts, but populated by some real sharp model-builders.


And this is when the wheels came off!
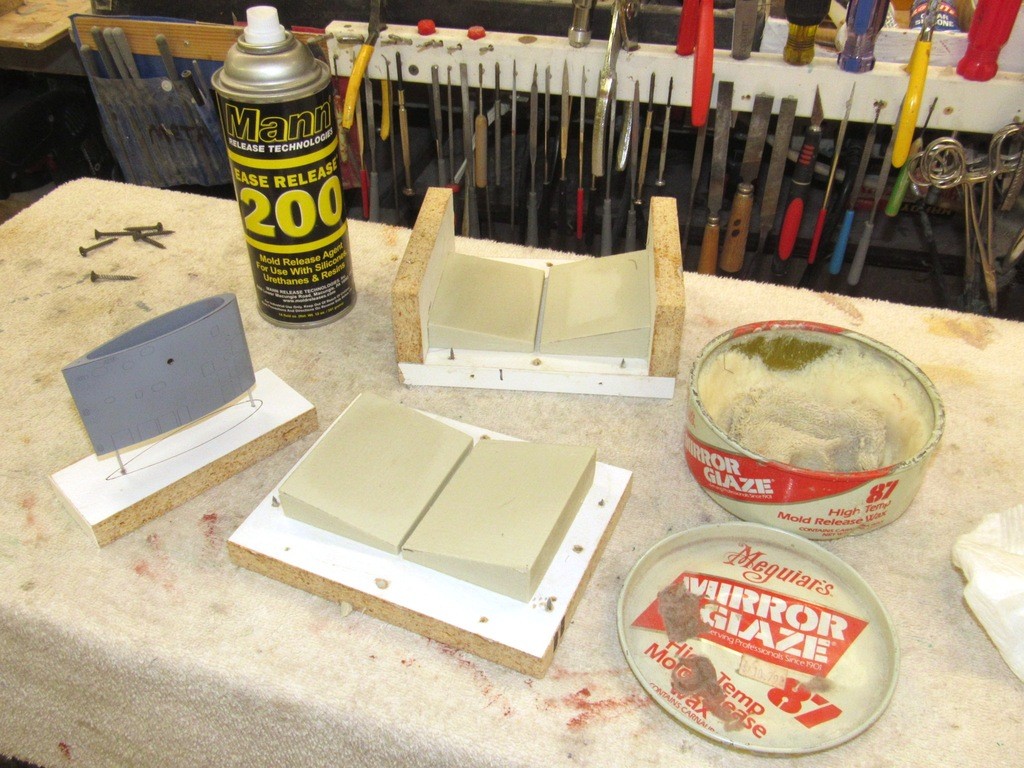
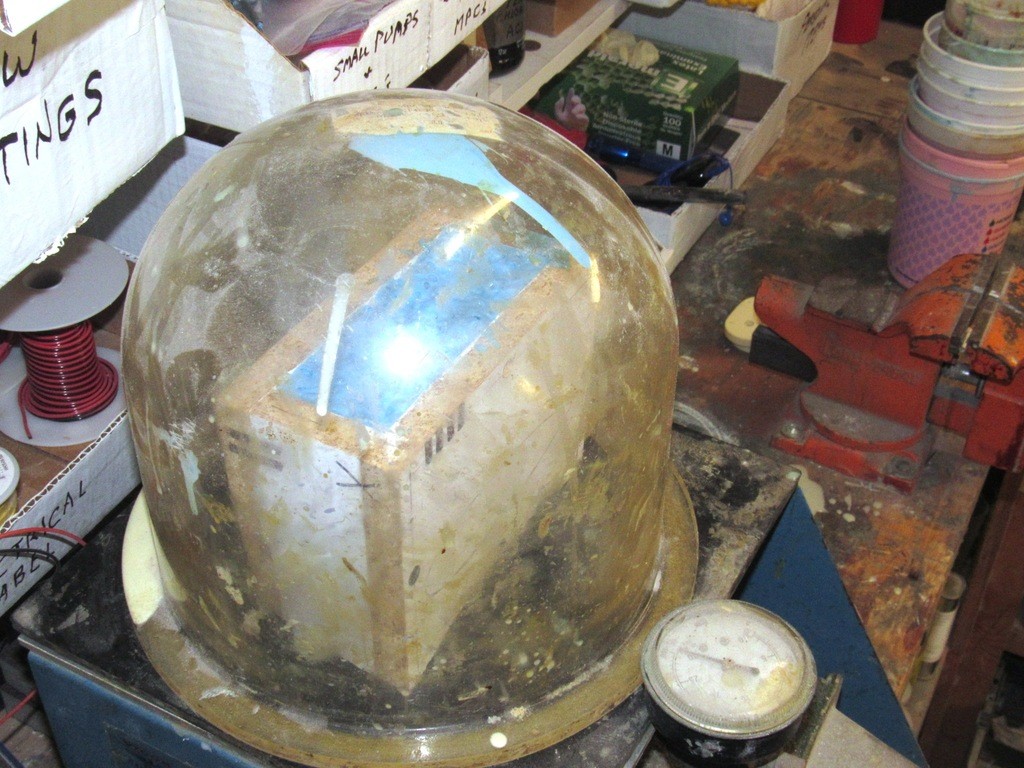
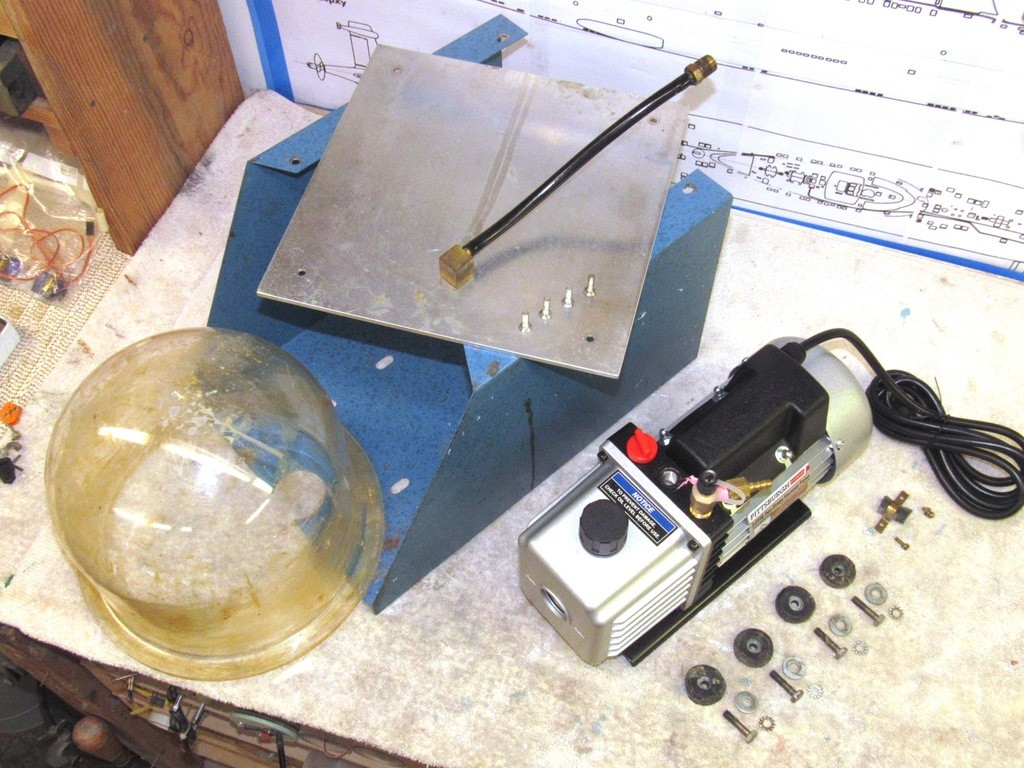
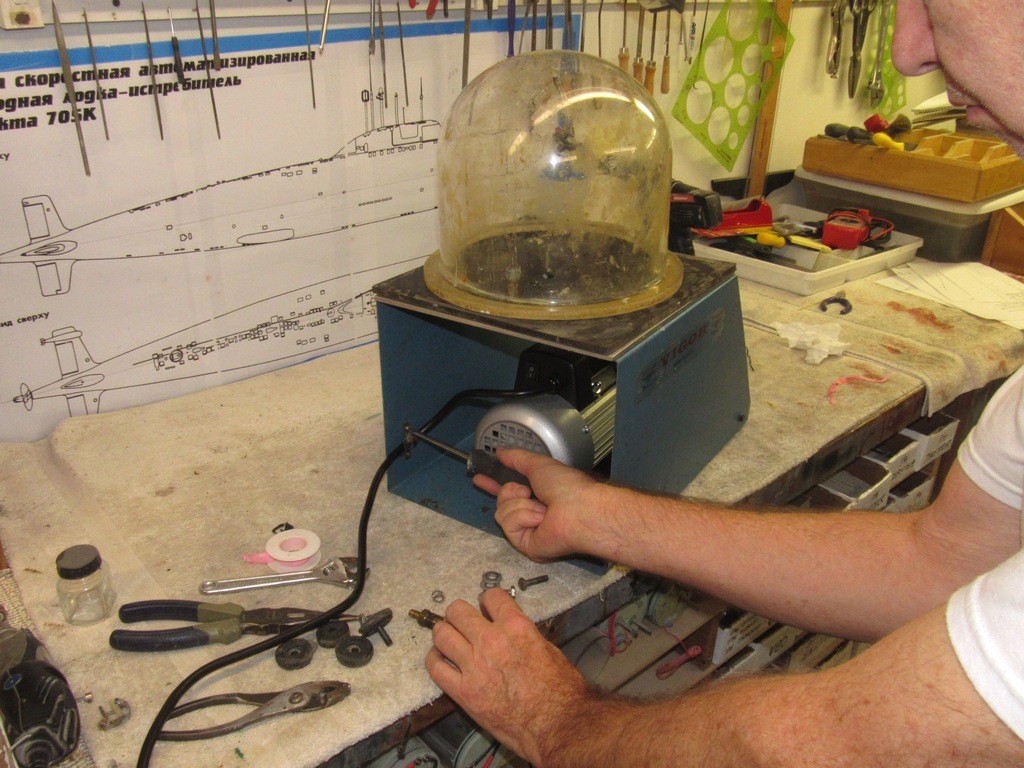
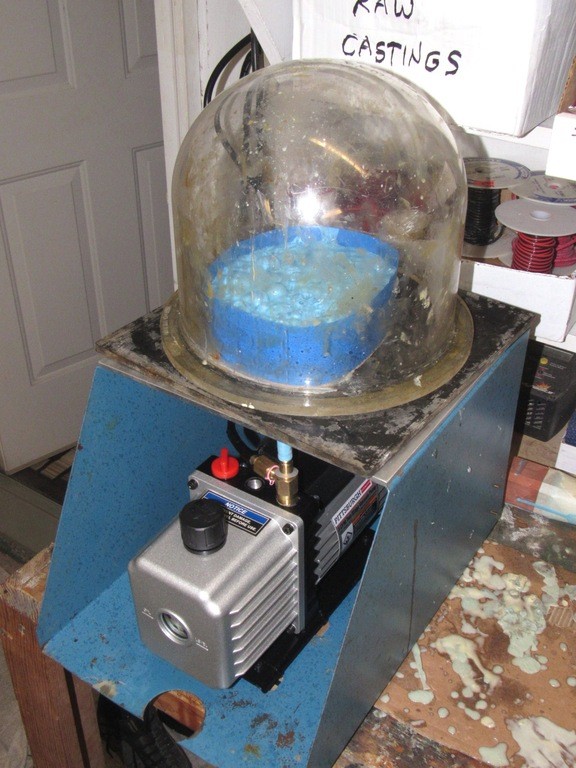
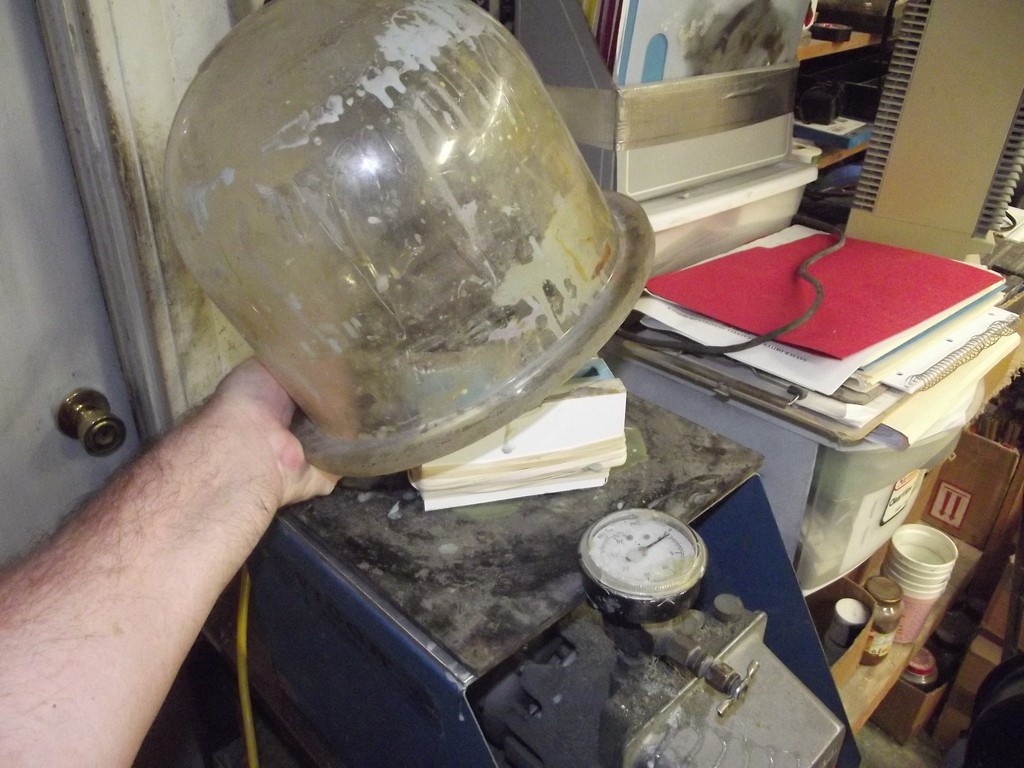
My over forty-year-old Vigor (they make machines and tools for the Jewelry trade) vacuum de-airing machine ****-the-bed! One use of this vital shop tools is to deair entrapped bubbles in the thick rubber mix before pouring it into a flask. Failure to do so will result in entrapped bubbles in the hardened rubber, which will evidence as positive dimples on the surface of a pressure cast resin piece. Can't have that! Must fix … must fix now!
I took the machine apart and found that the coupler between vacuum pump and motor had stripped out. I've ordered replacement parts, but can't wait. I've got jobs to get out of here! So, I ran over to Harbor Freight -- I LOVE HARBOR FREIGHT! -- bought a cheapy low CFM vacuum pump and pressed it into service using the old Vigor's table, plumbing, and bell-jar.
Back in business!
Who is John Galt?Comment
-

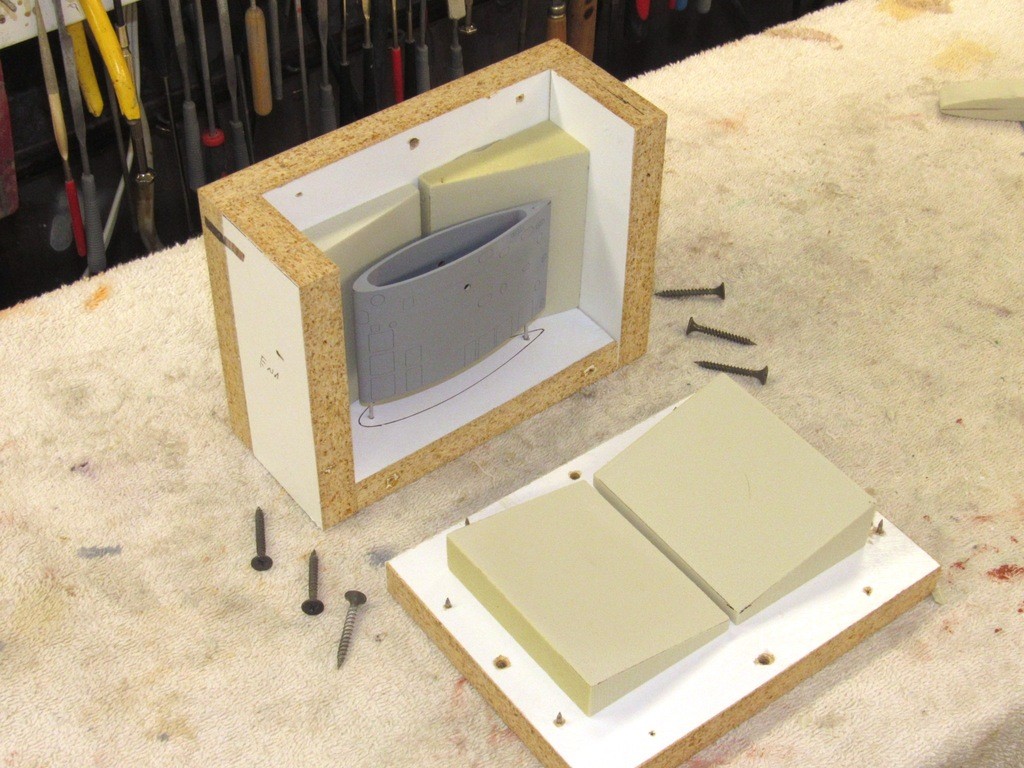
All fixy-poo, I went on to finish the THRESHER sail tooling by claying up the smaller sail masters. One sail top representing retracted masts, the other sail top representing extended masts; internal platforms; and masts. I'll pour the rubber to complete the sail tooling tomorrow, I'm dead tired and its getting late.
 Who is John Galt?
Comment
-
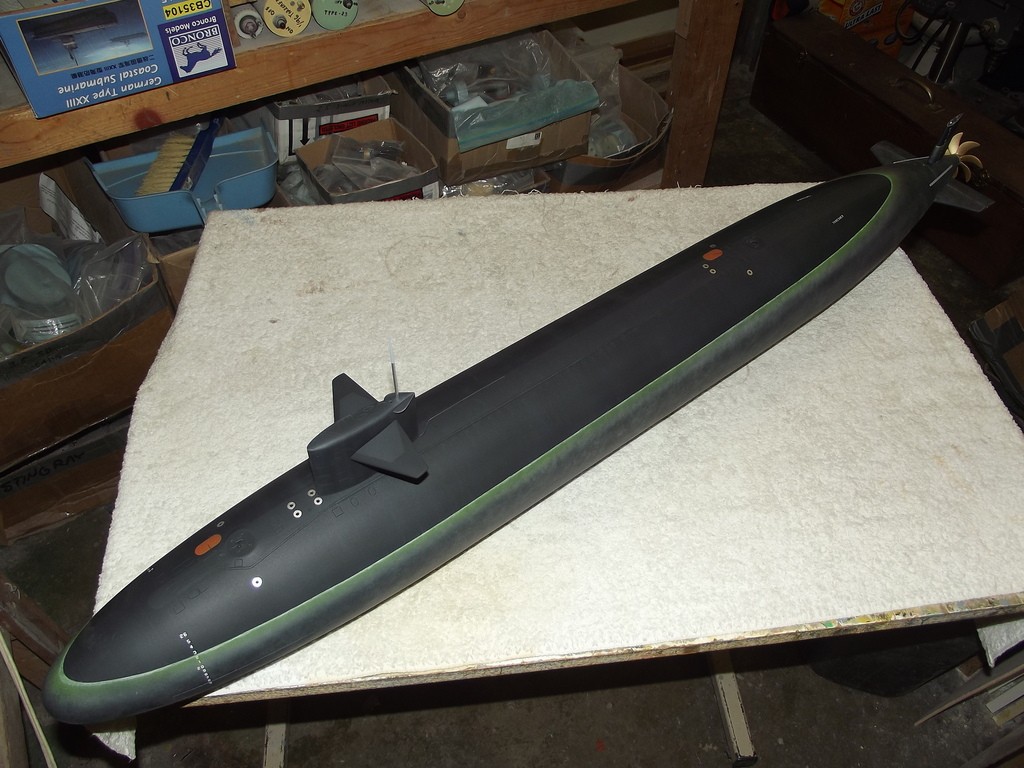
The test-mule for the new modular SubDriver will be this 1/72 THRESHER class model that has been sitting idle for a few years. I'm now working to complete it to the point where it will be water ready and outfitted with the MSD for a proper evaluation of the system. I've also included a shot of a previously completed model to show you what it will eventually look like.
My model is based on the HMK Creations kit produced by Joel Stadnick. Though it's not currently in production there is talk of it being re-introduced to the market with new features.
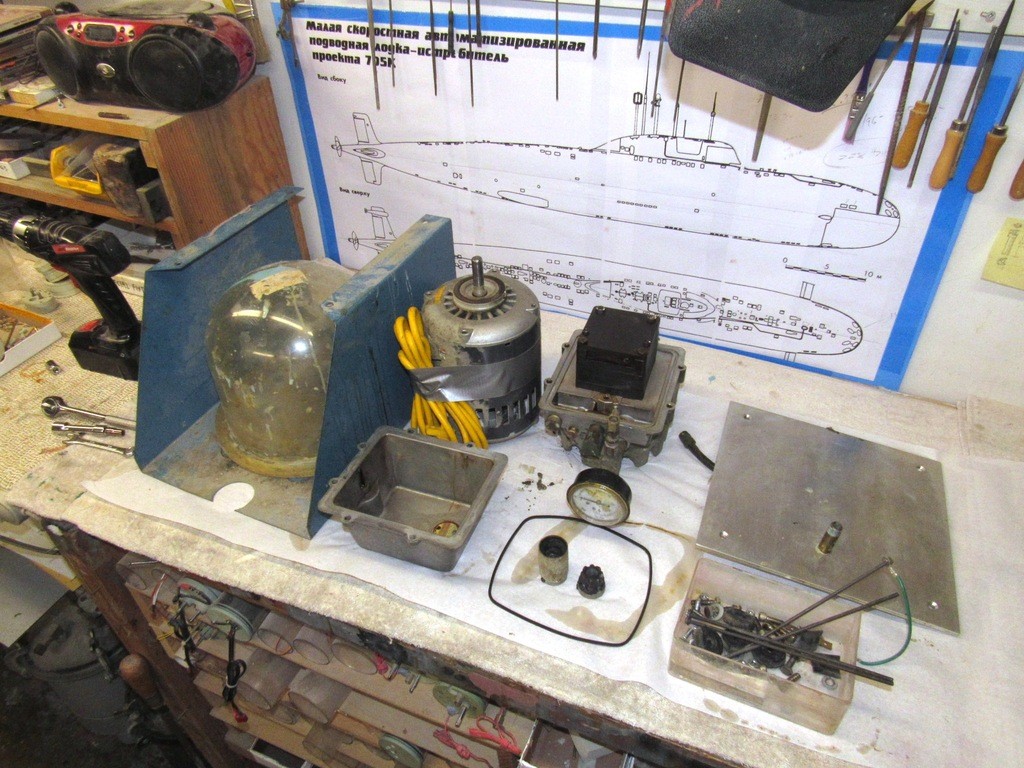
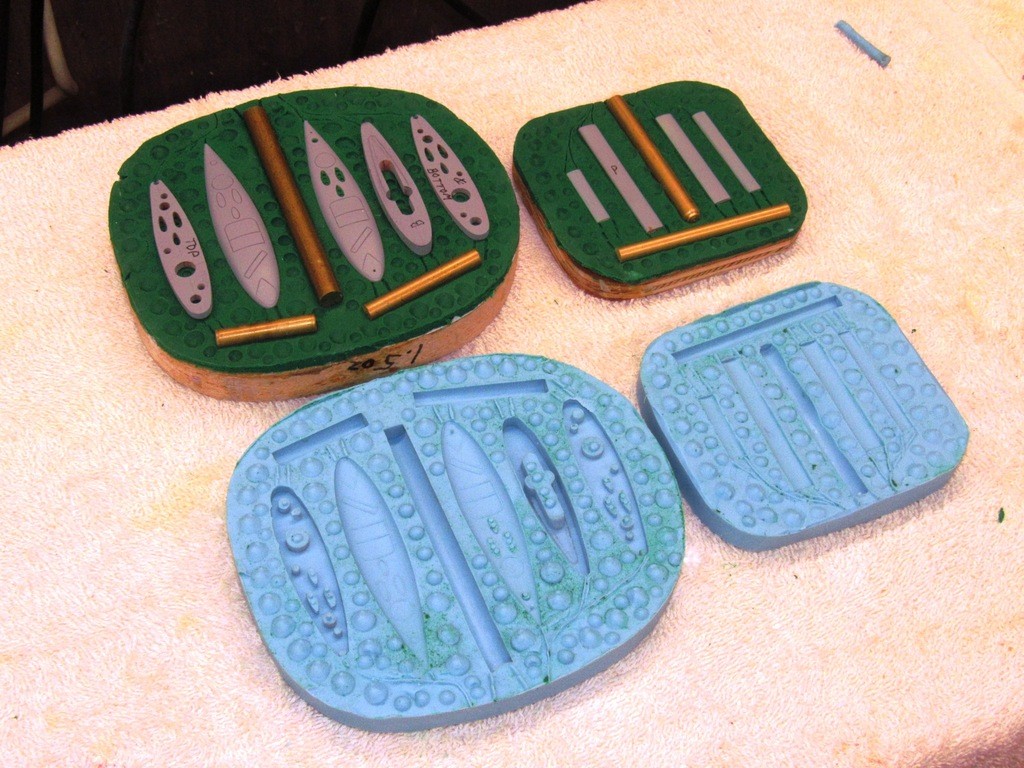
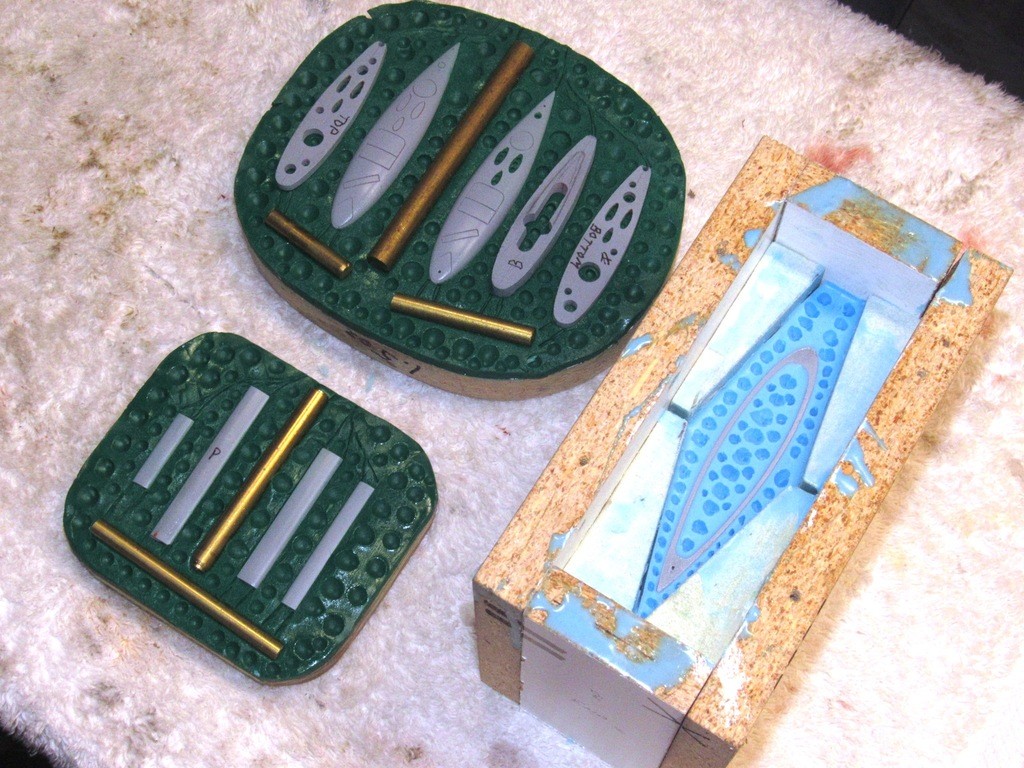
I spent the last two days finishing up the tooling for all the parts that make up the 'improved' sail structure. And from that I produced the cast resin parts, just a few hours ago. Tomorrow I assemble a sail unit and integrate it with the hull.


Who is John Galt?Comment
-
Hello
Happy New Year first.
Now given a choice, either or which would you use for making castings/molds? Pressure Pot OR Vacuum chamber and why?
Thanks for the lessons
Comment
-
Hello David,
Thanks for your latest write up. You may remember months ago, how I asked you about Vacuum pumps and critical specs for pulling enough vacuum to de-gas silicon. You mention in your last write up how you quickly purchased from Harbour Freight a new ‘ cheaply low CFM vacuum pump’. I thought these pumps had to pull a relatively high CFM to do the job? I am confused. Could you give me the crucial specs for this pump? I have a chamber but Am still trying to get my head around the right pump.
thanks
David hComment
-
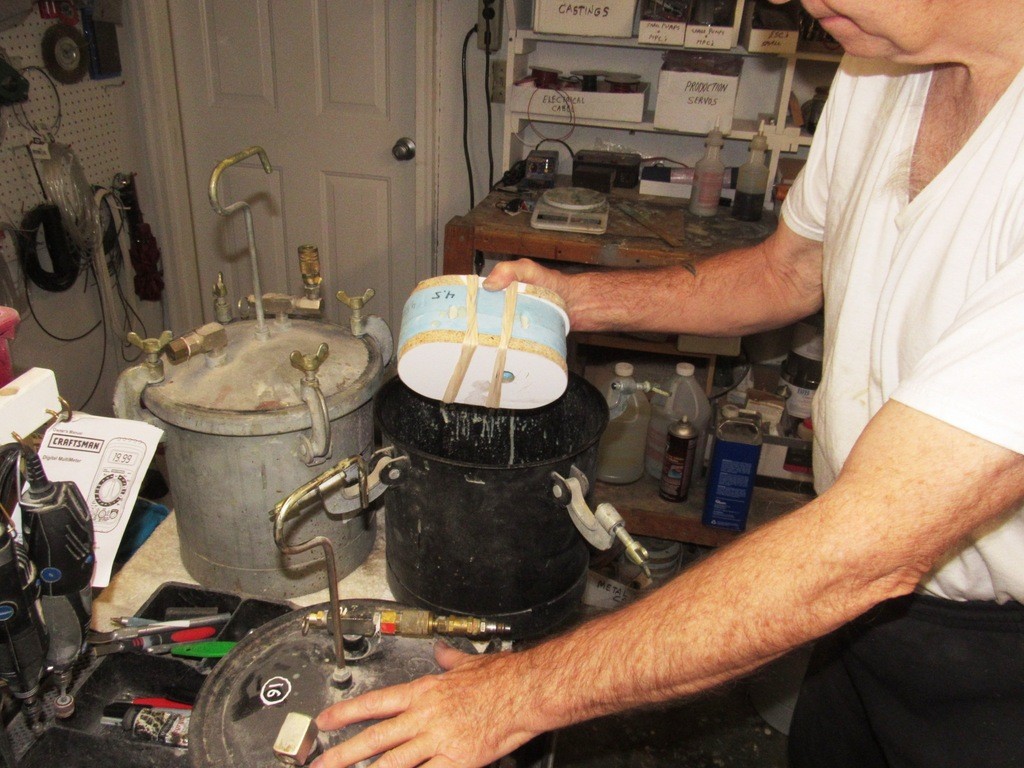
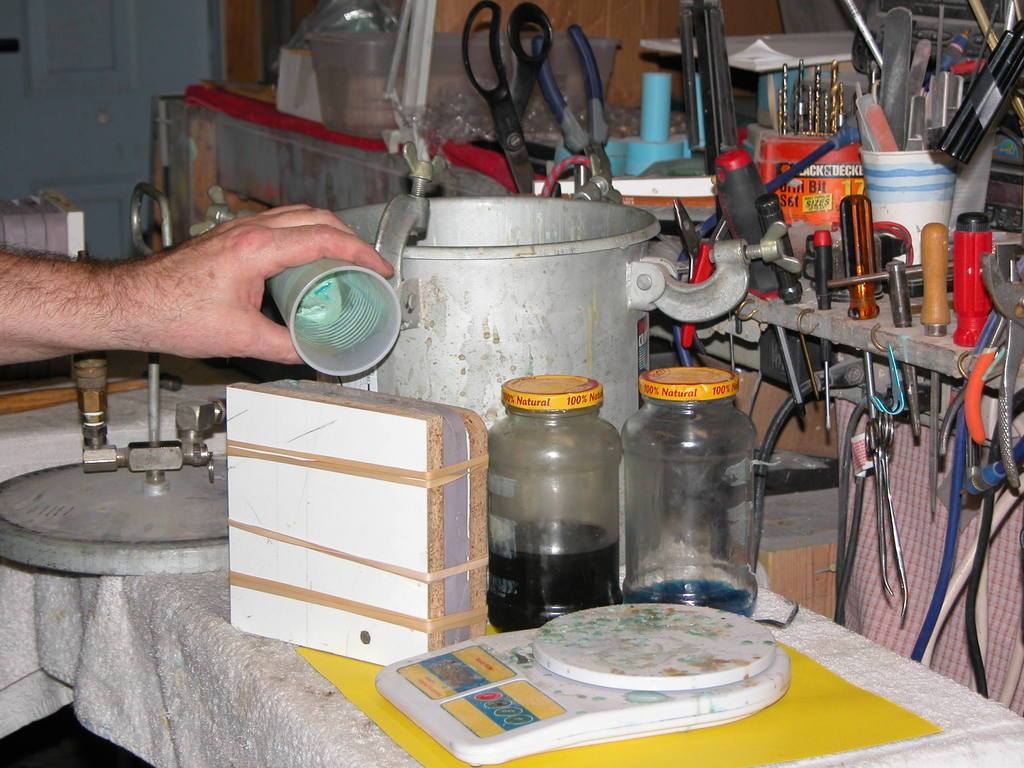
I typically use a vacuum to extract air-bubbles from a mix of tool making rubber as air invariably gets folded into the mix.
Bubbles, which if retained in the mix, present as voids that collapse slightly under pressure (during the pressure casting process, which I prefer) resulting in 'dimples' spoiling the surface of the cast resin part.
The rubber mix, before it changes state, is briefly subjected to a hard the vacuum (at least 28 inches of Mercury) to enlarge the bubbles to a size where they rapidly rise to the surface of the mix, pop, and the air extracted by the vacuum pump.
On occasion I will employ vacuum to assist in the fill of thin walled casting tools. Like this:
On rare occasions I will us air pressure to crush bubbles back into solution when processing RTV rubber into a tool, but that means holding the pressure for the length of the state change, which can be half-a-day. Dumb.
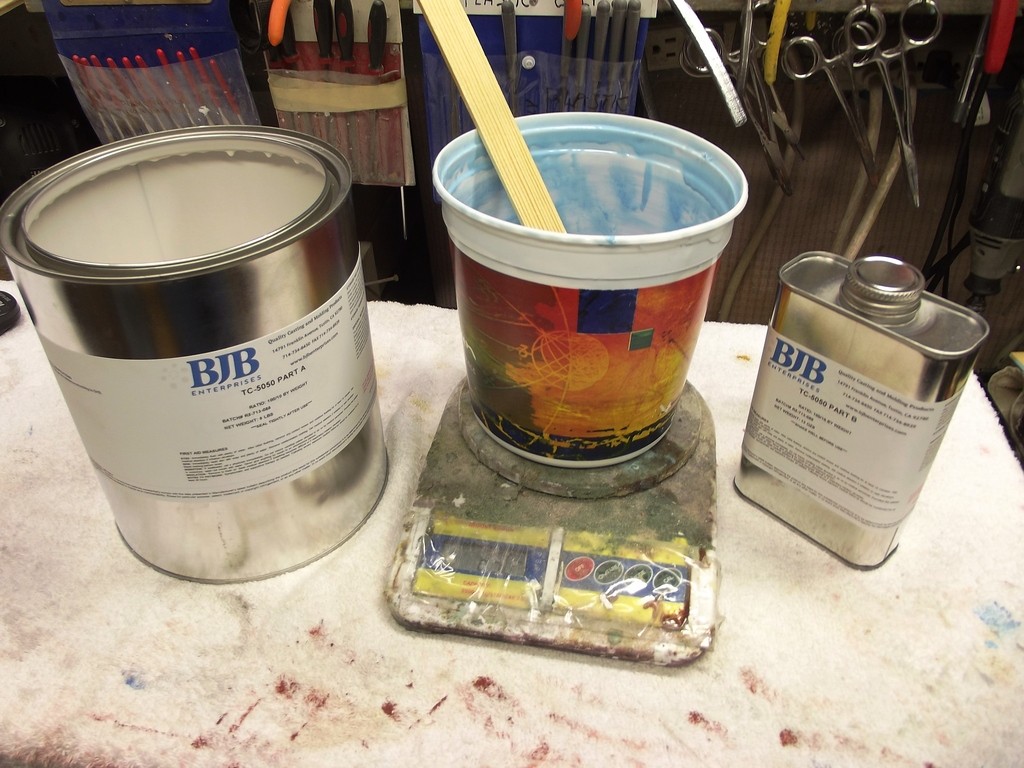
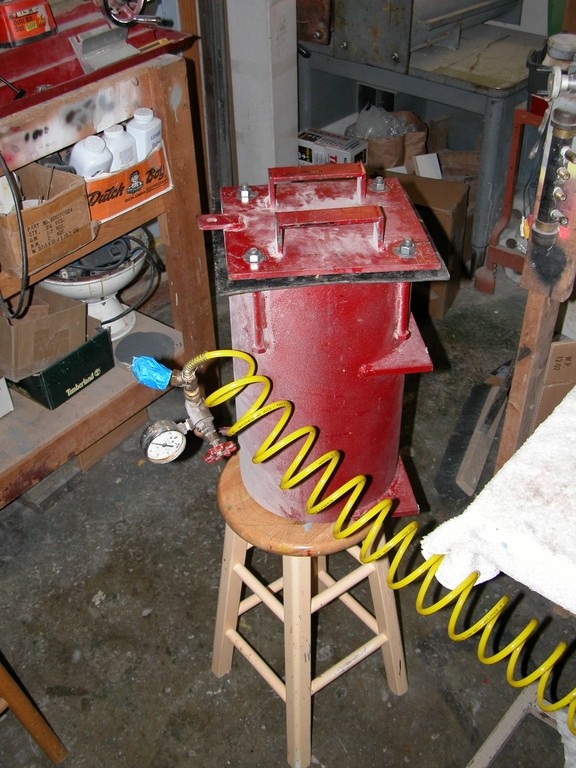
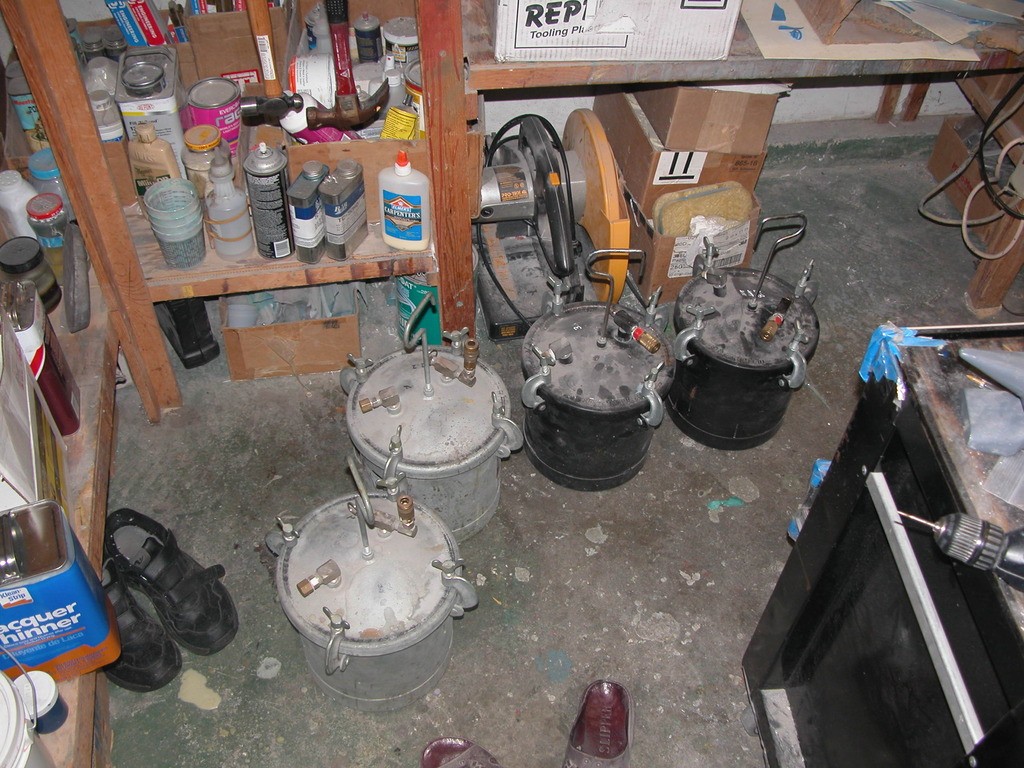
Pressure is almost always used to crush bubbles in quick curing resin parts. Typically one or two atmosphere (gauge). Pressurization time is about twenty-minutes. Most of my pressure-pots are commercially available paint-pots that can be had for about a hundred-bucks each. I've also have on hand custom pots I had manufactured for the bigger projects around here.
Who is John Galt?Comment
-
1 January 2020
David and Ellie,
Happy New Year. Stop teasing me with these 1:72 scale US boats that are no longer in production.
Thanks
Ernie
Comment
-
I am making the molds to sell kits for a 1/72 688. How about those Happy New Year apples? Should be done with molds in 2 weeks.Comment


Comment