
Just read thru all 21 pages of this Tom. Lots of good information, thanks for posting all the details, will help on my Skipjack. Technology changed from when you first started. One thing I have not embraced is 3D printing, maybe someday.
-
-
Ken, Thank you. If it helped, mission achieved! One thing I am certain of, you will take this to the next level! Technology does change, but the basics are still the same. Look forward to your build and maiden voyage!
Peace,
TomIf you can cut, drill, saw, hit things and swear a lot, you're well on the way to building a working model sub.Comment
-
If you can cut, drill, saw, hit things and swear a lot, you're well on the way to building a working model sub.Comment
-
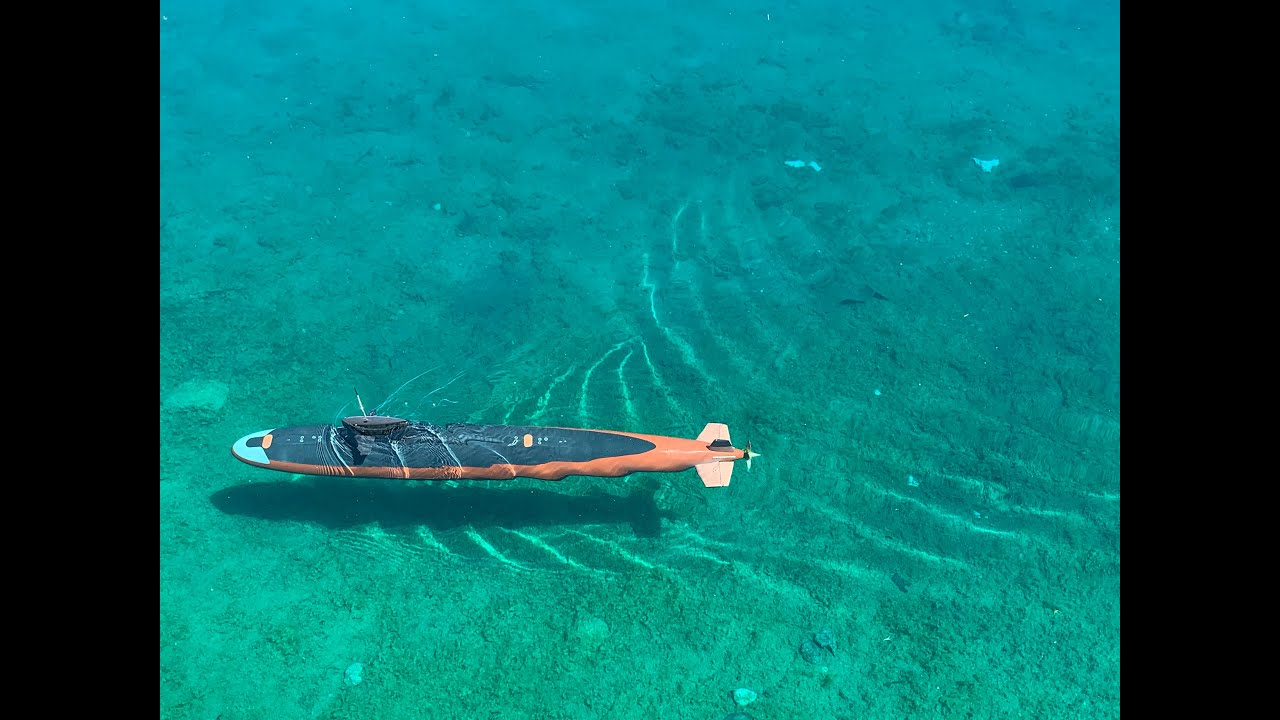
Today was the open water shakedown cruise. I get really nervous the first few times I run a new sub.
The run was made easier for two reasons. Neil Schmidt now lives in Las Vegas and came down to watch the sub run. Hanging with friends just makes it that much nicer. Second, the water was very clear. Had great visibility (except for two times when I was goofing around with speed and maneuvers - went deep) and the temperature as not surface of the sun hot!
The sub ran well. The only issue is a little porpoising and I will change the sensitivity of the leveler and see how it goes next time out. After one hour, I brought my sub in and at the shore the power light on the Zepsus switch was off. Odd, just figured that was that. When I got home to charge the batteries, as I opened the tube, the power came back on. Still had 12v+ left. Fully charged thee NiMh show 14.2v, so to only drop 2v after an hour that was cool to me. Now I got to find what caused power to go off. Once opened the WTC was bone dry!
As far as trim goes, I think I am there.
Here is the way it is as of today
Magnetic connector and my own pro shaft connector. Magnets were used on the prop shaft connector, but probably not necessary.
Most of the weight was below piston tank. There is a small slice in the bow.
All for that I used was in the aft of the sub.If you can cut, drill, saw, hit things and swear a lot, you're well on the way to building a working model sub.Comment
-
Thank you!
I cannot take credit for the paint job or a majority of the assembly, Rob, that was David Merriman's handiwork. I added some "stuff" and got it running. That I can take credit for.If you can cut, drill, saw, hit things and swear a lot, you're well on the way to building a working model sub.Comment
-
Looks great Tom! Nice run!Comment
-
Thanks Ken!If you can cut, drill, saw, hit things and swear a lot, you're well on the way to building a working model sub.Comment
-
That looks good Tom, i wish i had such clear water nearby, how did your ballasttank preform?
Manfred.I went undergroundComment
-
The ballast tank ran very well! The only issue I have is my battery pack. For some reason, if the pack gets squeezed too much, it will cut off which happened after it ran for an hour. I may redesign it or get rid of the plastic holders and put the contacts on the bulkheads.
I look forward to getting this out again and seeing what it can do or better put how long it can run. Right now I am adding decals and will finish the exterior.
I do like a piston system.Last edited by trout; 06-28-2020, 05:49 PM.If you can cut, drill, saw, hit things and swear a lot, you're well on the way to building a working model sub.Comment
-
I need to apologize first about this video, I was playing with speed and depth so doing two things at once was not my gifting.
 If you can cut, drill, saw, hit things and swear a lot, you're well on the way to building a working model sub.
Comment
-
Nice, wish I had a clear lake like that here in NJComment
-
Mostly finished with exterior. Decals added and Matte coat finished.
It took a little very fine sanding to remove some minor issues.
To finish, I need to work on wiring the lights and then I can move onto the next sub.
Peace,
TomLast edited by trout; 07-19-2020, 01:48 AM.If you can cut, drill, saw, hit things and swear a lot, you're well on the way to building a working model sub.Comment
-
I like the paint job, I cant tell if there is weathering or not due to the glare?Comment
-
David, how long did the Skipjack subs have the at launch paint scheme?If you can cut, drill, saw, hit things and swear a lot, you're well on the way to building a working model sub.Comment


Comment