1/48 scale Type VIIC U-201 build

Collapse
X
 
  • Time
  • Show
Clear All
new posts
  • Monahan Steam Models
    Captain
    • Apr 2020
    • 755

    1/48 scale Type VIIC U-201 build

    The beginning of a long project.

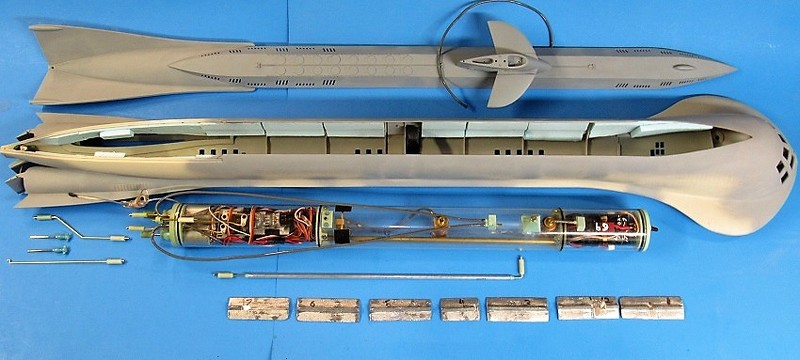
    I started this project about a year ago. After acquiring the Arkmodels type VII basic hull kit I started work immediately on developing 1/48 scale torpedoes. After that I put design efforts into developing the launch mechanisms to fit into this particular model’s hull. Then I spent months on developing and testing a custom WTC to fit into this builds hull.

    Im now finally switching attention back to the basic hull and beginning that part of the build.

    The Arkmodel kit is for the most part great. During the design phase of the torpedo launchers and WTC I was trying to come up with something that dropped right into the originally designed castings. I stuck to this discipline for the most part.

    Today finally after a long needed rest from this ongoing project I drew a line in the sand or better yet this
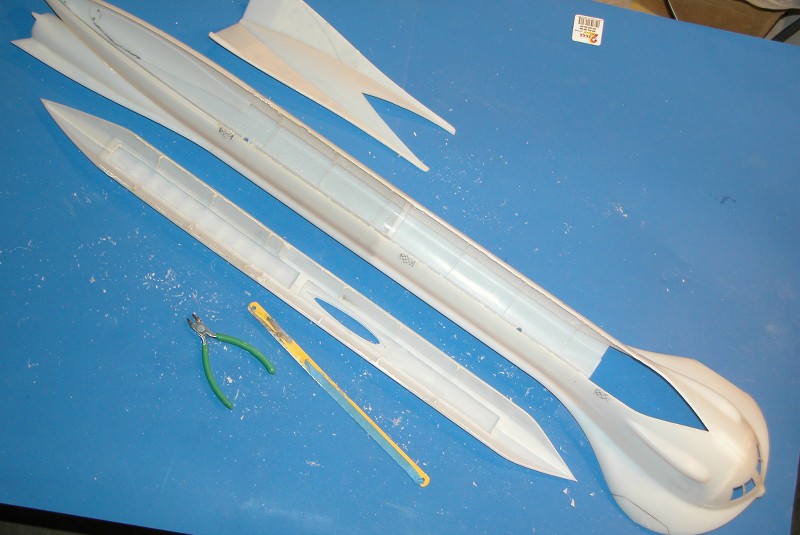
    build. Instead of working with the multiple sections this kits hull and deck are produced in (9 sections including port and starboard hull pieces and deck), I decided to join all the pieces and split the hull at the waterline.

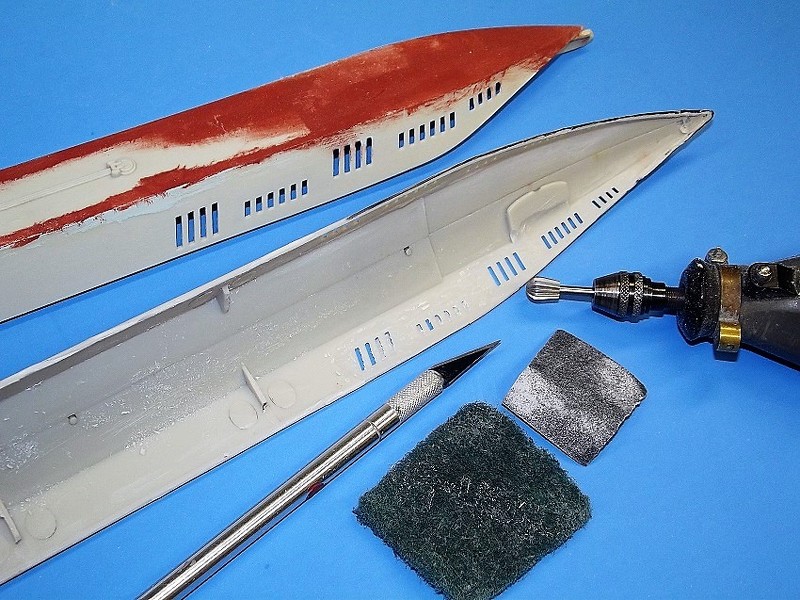
    WW2 boats have a ton of junk that is easily broken off when messing with the hull and I wanted to reduce the main components to two sections. The below waterline hull with all its junk and the upper deck with all its other junk. blasphemy I know with a kit that is already so sectional. Don’t judge and I won’t judge you.

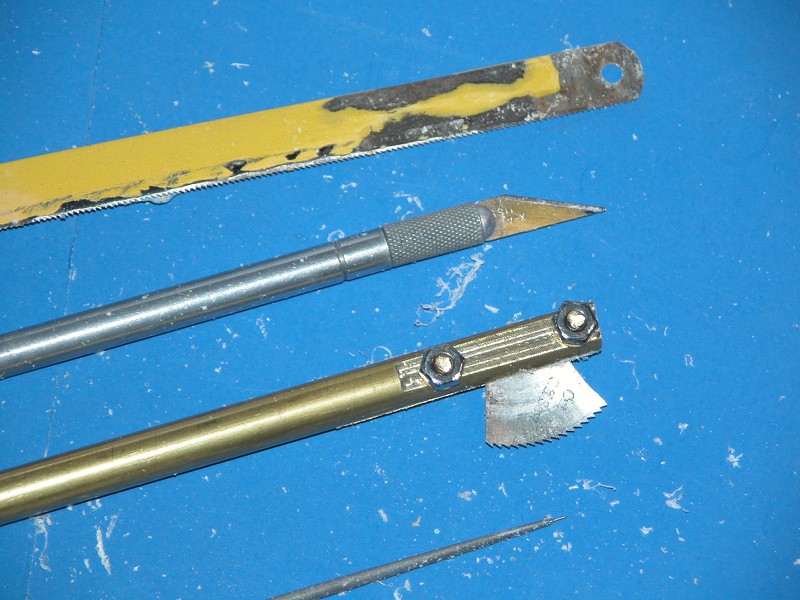
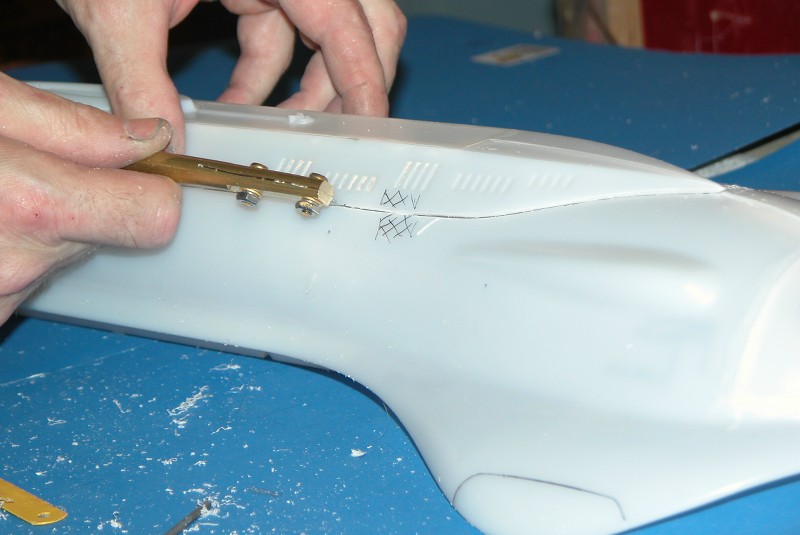
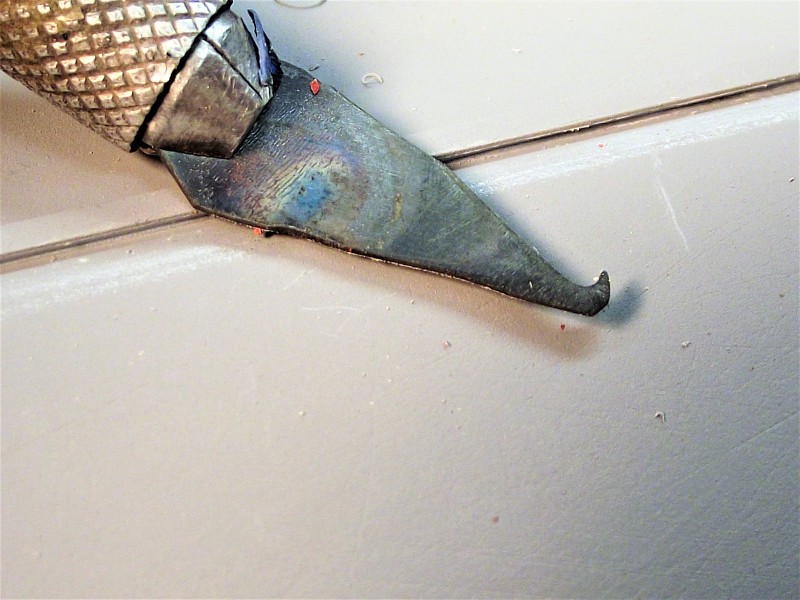
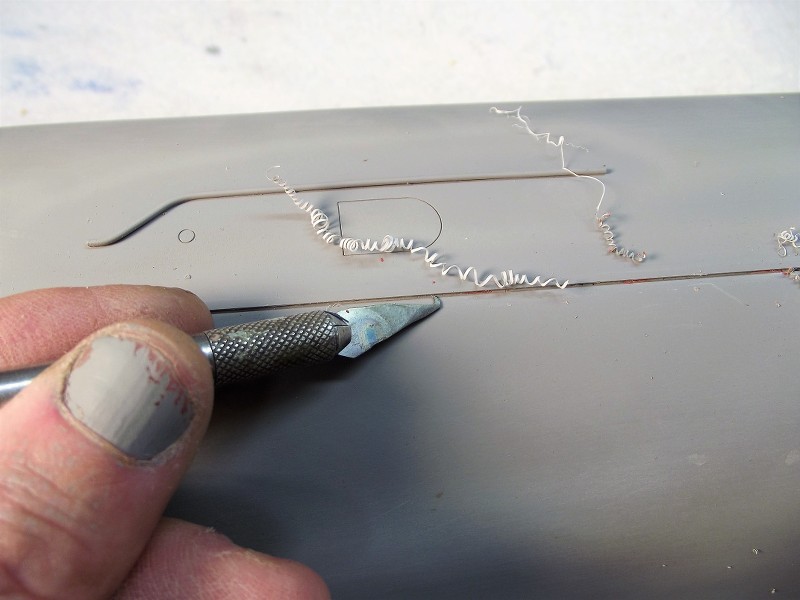
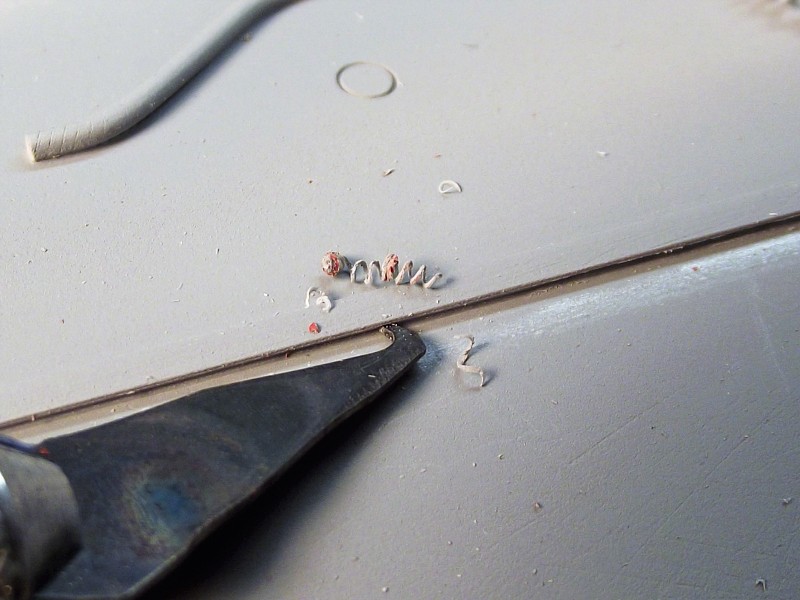
    The dreaded horizontal cut. Pussy’s walk away now as you’re not cut out for this.

    Those who are not afraid I will post more shortly.
  • Monahan Steam Models
    Captain
    • Apr 2020
    • 755

    #2
    Planning and starting out the horizontal waterline cut.

    Click image for larger version

Name:	75873F09-A9FA-4C99-A596-CCF753E0DEC8.jpeg
Views:	1111
Size:	66.5 KB
ID:	156121

    The first step I take is getting the hull firmly set up in a fixture or in this case the cradle the kit comes with will do. The kit’s cradle works fairly well to hold the hull firmly enough from moving around once I inserted small pieces of firm rubber tubing in the gaps between the hull and areas of the cradle. The next step was to get the hull level from starboard to port. Then adjust the hull so that the waterline from bow to stern is parallel to the flat smooth work surface it is placed on.

    Click image for larger version

Name:	1311B418-F3ED-4DEE-AA13-6BC305D54393.jpeg
Views:	1100
Size:	66.0 KB
ID:	156120

    For the next step of drawing the waterline onto the hull, I use a automatic pencil with a fine lead size mounted in a Mitutoyo universal magnetic base fixture that is normally used for holding precision dial indicators for machining work. Using one of these is not necessary. You just need something to hold a pencil or pen rigidly, set up to the correct height from the work surface to the waterline height and can be moved around the model easily to mark the waterline.

    Click image for larger version

Name:	D9FBDC41-D62D-4317-A826-882B8313701F.jpeg
Views:	1103
Size:	68.1 KB
ID:	156122

    Once the waterline is drawn onto the hull, I carefully scribe the line into the hull pieces by using a thin flexible metal straight edge placed along the pencil line and a x-acto knife to scribe the line. The first scribed pass with the x-acto blade along the straight edge is done very lightly. This helps to reduce chances of the blade wondering away from the straight edge I find. I then make more multiple light passes while using the straight edge to establish a deeper scribed line. Each pass using slightly more pressure than the last but not too much pressure.

    The hull can be cut completely through using this method I you take your time and don’t rush it. Given that the Arkmodel’s hull is much thicker than a standard plastic model’s hull would be, it is not very practical to cut the hull this way. For now I’m using this method to establish a fine groove that is not easily wiped away like the pencil marks would be and also to use this groove as an initial guide for completing the cut using a different tool such as a fine kerf Zona or razor saw or such.

    I’ve never attempted to make a hull cut this long and with this many contours using a razor saw before now. Normally depending on what hull I was trying to cut, I would use just the x-acto and straight edge method or a rotary saw set up in a dremel type tool. I thought it would be interesting to try the razor saw option myself and see if it is a successful option for making the much dreaded horizontal cut feared by many. If it goes badly, there’s still plenty of room in the garbage can before garbage day this week.

    Comment

    • Ken_NJ
      Captain
      • Sep 2014
      • 744

      #3
      Good to see peoples methods splitting the hull like this. Watching and learning before I attempt this on my Bronco XXIII, which won't be for a while.

      Comment

      • He Who Shall Not Be Named
        Moderator
        • Aug 2008
        • 12253

        #4
        Here's a variation on your theme:


        With this 'movie' SEAVIEW kit I did your knife trick, but had the advantage of the deep groove between missile-deck and hull proper. Where ever possible I go for the upper-lower hull split -- no better way to access the interior of the model.

        David
        Who is John Galt?

        Comment

        • Monahan Steam Models
          Captain
          • Apr 2020
          • 755

          #5
          David,

          I like your custom made rotary saw blade tool holder. That is slick, clever and clearly very handy. Thanks for sharing that!

          I do like the idea of the vertical hull split but the horizontal split like you said offers by far the best and easiest way to access the interior of the model. Well worth the task of making the hull separate this way.

          Before I attempt to use any of the various razor saw tools that I have on hand currently, I do plan to make the scribed line a bit deeper with the x-acto blades than it is currently. Hopefully that will provide a good enough guide to keep the saws from walking off course.

          Nick

          Comment

          • Monahan Steam Models
            Captain
            • Apr 2020
            • 755

            #6
            Originally posted by Ken_NJ
            Good to see peoples methods splitting the hull like this. Watching and learning before I attempt this on my Bronco XXIII, which won't be for a while.
            Ken,

            I’m in the same boat so to speak. I begun to work on the Bronco type XXIII and was planning to first attempt this cut method on that project but decided to give it a go on the Arkmodel kit first. We’ll see how it goes

            Nick

            Comment

            • He Who Shall Not Be Named
              Moderator
              • Aug 2008
              • 12253

              #7
              Originally posted by Monahan Steam Models
              David,

              I like your custom made rotary saw blade tool holder. That is slick, clever and clearly very handy. Thanks for sharing that!

              I do like the idea of the vertical hull split but the horizontal split like you said offers by far the best and easiest way to access the interior of the model. Well worth the task of making the hull separate this way.

              Before I attempt to use any of the various razor saw tools that I have on hand currently, I do plan to make the scribed line a bit deeper with the x-acto blades than it is currently. Hopefully that will provide a good enough guide to keep the saws from walking off course.

              Nick
              You might consider shifting from the #11 blade and use a pull-engaver/scraper like this:


              Five to ten firm pulls on this tool and you'll see daylight. Kerf is the width of the tool -- a re-ground #11 used as a blank.

              Razor saw?... we need no stink'n razor saw!

              (on this job I turned squar-section styrene into T-section to represent external safety-track, but cutting through the hull is another application of this pull-scraper).

              David
              Last edited by He Who Shall Not Be Named; 11-24-2021, 02:35 PM.
              Who is John Galt?

              Comment

              • Monahan Steam Models
                Captain
                • Apr 2020
                • 755

                #8
                David,

                Very cool. I will definitely need to make one of those scrapers. Have plenty of dead #11 blades sitting around.

                Click image for larger version

Name:	4DC33D9F-C045-4BCC-9D5A-E48F540B0076.jpeg
Views:	1047
Size:	66.5 KB
ID:	156139

                I’ve been using one of these Zona saw blades as a scraper after the scribed line was established enough to begin scraping.

                Click image for larger version

Name:	055CBA6F-C6CC-4FB1-8E4F-B471DCFAED40.jpeg
Views:	1093
Size:	69.2 KB
ID:	156138

                I used the red handled x-acto knife to get the initial scribed line a bit more established. Taking the time to establish and maintain as perfectly a line as possible from the start is key to the following steps. Lots of lightly pressured slow repetitive scribing with the a-acto blades to establish a good initial line wins the war. If the blade wonders off course during the scribing but the initial scribed line was true, switch directions and lightly pull the blade back the opposite direction a few times to correct the groove.

                Click image for larger version

Name:	6FCD4CCB-69F7-497C-8896-C00D92016F50.jpeg
Views:	1076
Size:	65.0 KB
ID:	156140

                Once the scraping with the tool that David has shown or the Zona blades I am using currently establish the cut groove more so, you can keep going with that method or switch to a razor saw again not being in a rush and making sure the blade only travels in the groove. Here is where I’m at today with the first hull section. Already seeing daylight in sections of the cut and almost finished with this part. Nice thin kerf (.010”) straight parting line.

                Now that I said that, I’m sure I’ll “F” up the next part!

                Comment

                • He Who Shall Not Be Named
                  Moderator
                  • Aug 2008
                  • 12253

                  #9
                  That Zona blade-tip will get it done. Lookin good, pal!

                  David
                  Who is John Galt?

                  Comment

                  • Monahan Steam Models
                    Captain
                    • Apr 2020
                    • 755

                    #10
                    Originally posted by He Who Shall Not Be Named
                    That Zona blade-tip will get it done. Lookin good, pal!

                    David
                    Thanks bud! It’s just what I had available on hand but yes the scraping is the way to go. I will definitely be making one like you have demonstrated.

                    Click image for larger version

Name:	BEE05695-9341-4440-9914-35B610FC029F.jpeg
Views:	1067
Size:	66.9 KB
ID:	156145
                    Here’s the newly separated pieces.

                    Click image for larger version

Name:	1CA154BB-BDBD-4843-9D97-11539666571A.jpeg
Views:	1063
Size:	63.6 KB
ID:	156146

                    And how they fit back together after the cut. Not bad for a first go at doing this. Taking your time from laying out the pencil line to making the first very light scribed line following the pencil mark, and each additional pass pays off. Things don’t happen quickly and get out of hand even quicker. You have time and a chance to correct course with this method is what I am seeing.

                    Comment

                    • Monahan Steam Models
                      Captain
                      • Apr 2020
                      • 755

                      #11
                      Other side of the bow section cut now too.

                      Click image for larger version

Name:	4BD718ED-9DB8-44D5-BF7D-FCE9405B3D2D.jpeg
Views:	1053
Size:	66.8 KB
ID:	156150

                      Click image for larger version

Name:	7FD7CE49-48C0-4AE8-83CD-0DDFD77807CF.jpeg
Views:	1038
Size:	57.4 KB
ID:	156151

                      And fit back together. The parting line almost disappears completely

                      Comment

                      • Monahan Steam Models
                        Captain
                        • Apr 2020
                        • 755

                        #12
                        One more of the total six hull sections cut today.

                        Click image for larger version

Name:	9FBB14F3-F901-4F1C-9118-D4CA7488D622.jpeg
Views:	1051
Size:	68.6 KB
ID:	156160

                        A bit longer and more tedious cut but still went really well overall. The careful scraping along the initial scribed line with a tool like David shared earlier establishes a very nice groove for the razor saw to follow.

                        Click image for larger version

Name:	8BF32584-81F4-4525-BFA6-C647C1179888.jpeg
Views:	1064
Size:	56.2 KB
ID:	156159

                        Stern section parts fit back together. Overall I’m very happy with this method and feel comfortable using it to make the dreaded horizontal cut. I did experience the saw, scraper and x-acto blade walk off course during each of the cuts made in these three hull sections today, but the error was quickly noticed and corrected by following cuts. The minor blemishes from those errors were reduced by going slow and correcting when needed. The repair to the minor blemishes will be easily be fixed later with a a small amount of filler and a bit of light sanding.

                        Comment

                        • SubDude
                          Captain
                          • Dec 2019
                          • 803

                          #13
                          Very clean Nick! Can't beat that...

                          Comment

                          • Monahan Steam Models
                            Captain
                            • Apr 2020
                            • 755

                            #14
                            Thanks Steve! I’m very happy with the way the splitting of the hull has gone.

                            Check out all that access now!

                            Click image for larger version

Name:	image_49721.jpg
Views:	1152
Size:	77.7 KB
ID:	156181

                            By far the single best modification that I could’ve done to this build.

                            Nick
                            Last edited by Monahan Steam Models; 11-25-2021, 06:10 PM. Reason: Add photo

                            Comment

                            • Ken_NJ
                              Captain
                              • Sep 2014
                              • 744

                              #15
                              Nice job. Encouraging method!

                              Comment

                              Working...