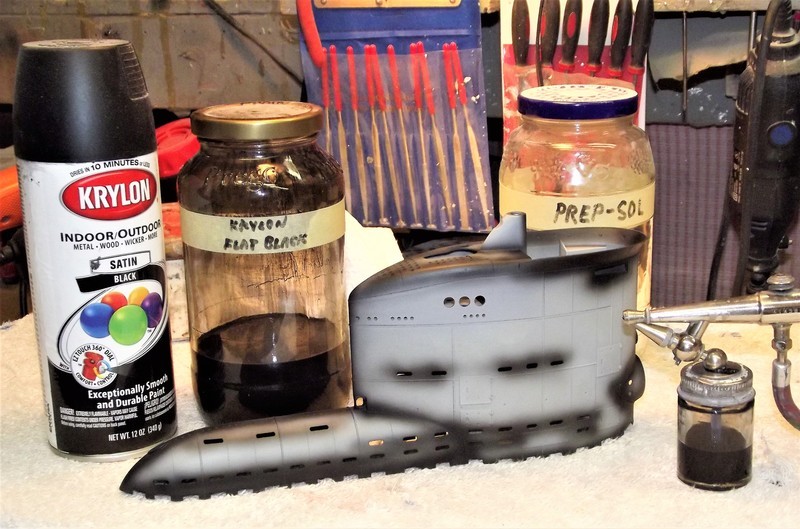
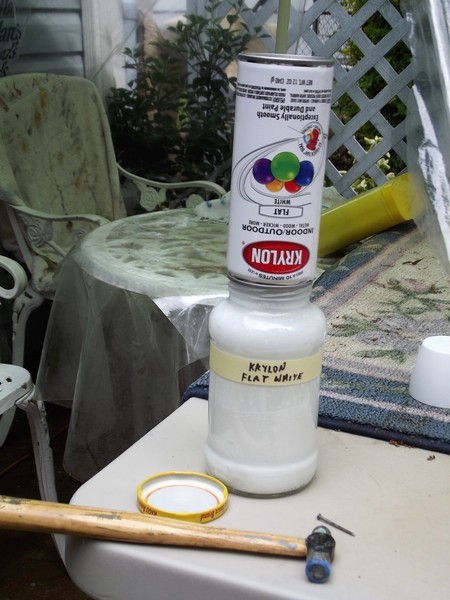
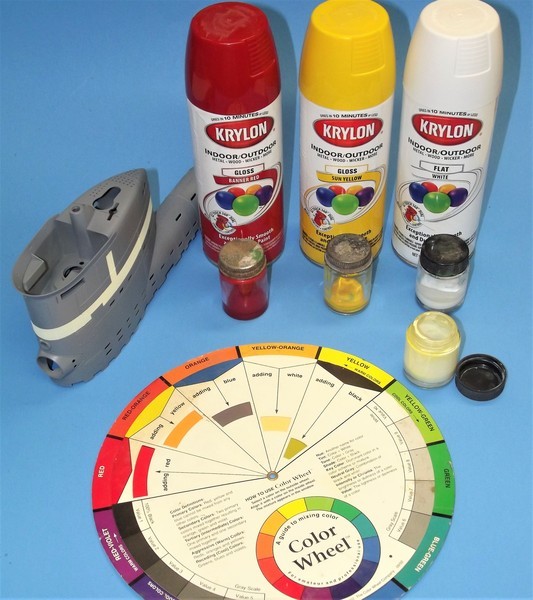
Buy FLAT red, blue, yellow, black, white and clear, all the same brand (I already have Rustoleum)
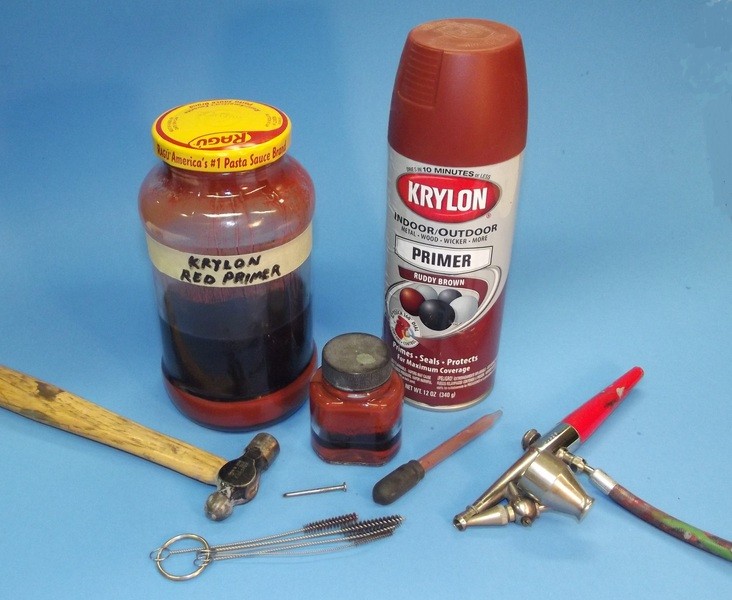
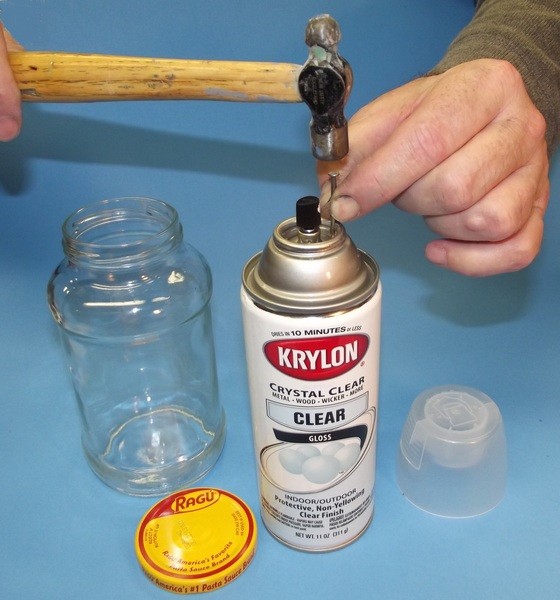
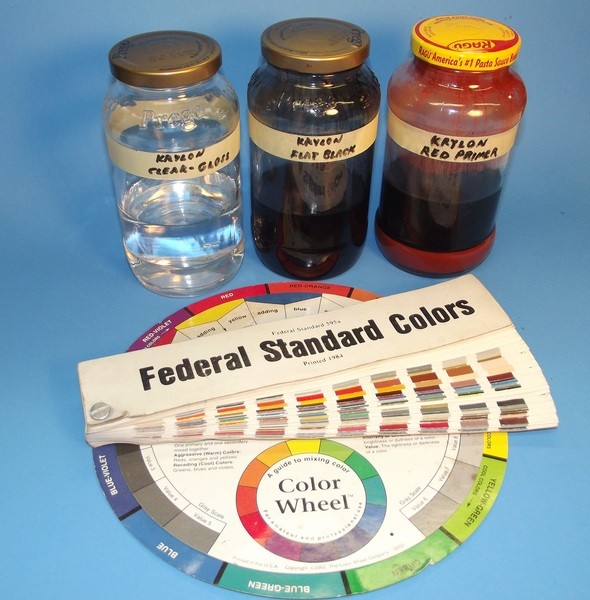
Decant
Mix to desired color (I am LOUSY at colors)
Spray from my new air brush, that I have not used yet
My lower hull (red) is fine!
The upper hull which I have not painted yet, I have all the same brand rattle can paint. BUT, my test with clear on the charcoal gray turns the charcoal gray to black. So I won't be clear coating or just paint it black. Unless someone can tell me otherwise.
-
Of course I'm right. YOU PEOPLE!...
You, like so many others, have permitted yourself to become a slave to the rattle-can, its so-called convenience in turn denies you the ability to color match to suit your wants. Staying with the same chemistry is vital, as you've found out.
Try this: buy all the primary colors, and black and white, and clear-coat in the rattle-can chemistry of your choice. Decant them and break out your trusty MK1 Mod0 air-brush and mix and shoot as required.
Leave a comment:
-
I soldered three sections of brass tube together to get the diameter of ballast blow vents. I used Dremel grinding bits to make a custom end mill, not sure what I was doing. Was able to get two decent cutting edges. I chucked up the custom end mill and floated the drill bit in the handle as a guide. Only problem is the tubing does not come in 7/64 inside dia so I went down to 3/32 for the drill bit guide. The bit has a little slop in the already drilled vent holes which are 7/64. If I try to drill the end mill tubes out to 7/64 I'm sure it fall apart.
Holy cow! It actually worked! But it's only good for this one size. I did the sample by hand. Only have to remove a few thousandths.
Leave a comment:
-
David, package received, thank you. More work to do.
Yea was thinking something water based. You're right of course, keep it to one chemistry, but finding the color I liked, the charcoal gray was my issue. But I could have used Tamiya primer, Tamiya red, and it still could have that surface bleed thru or what ever its called.Last edited by Ken_NJ; 08-03-2021, 06:24 PM.Leave a comment:
-
I've found a water-soluble (acrylic/latex) paint serves as a good interface barrier in these situations. Remember the one FloQuil Railroad Colors produced in the days of the Dinosaurs?
Of course, all this could have been prevented had you stuck with only one chemistry for primer and paints. But, what the hell do I know...
DavidLeave a comment:
-
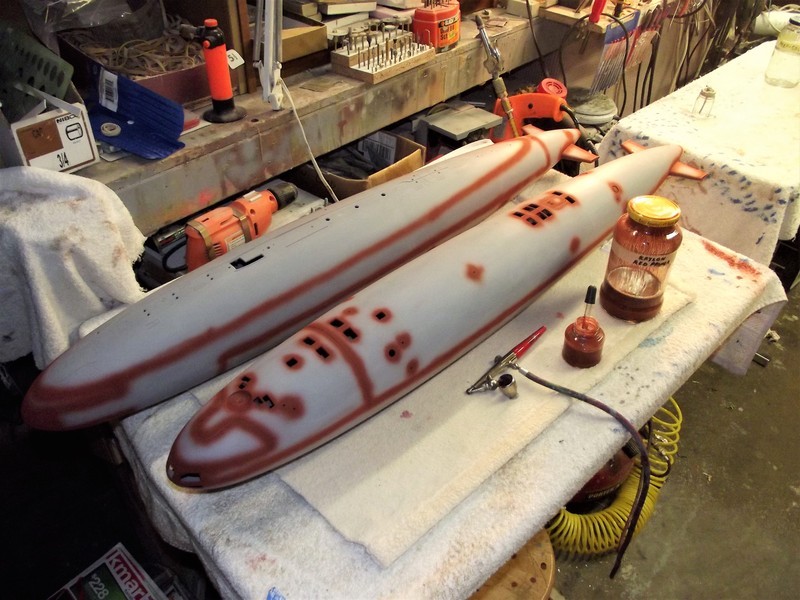
While I'm screwing around working on the PE, I'm also painting some parts. After spraying the primer on the lower hull things looked good. Then sprayed the red Tamiya paint, some of the spots that where filled, screws, and some other body work are spotty thru the red paint. I'm OK with the lower hull looking like this, but I have not sprayed the upper hull yet which also has some touch up spots with Nitro-Stan. Is there some sort of pre-primer stuff or a sealer I should use before any paint is applied to prevent this abnormality?
Leave a comment:
-
Yes, drill those pilot holes -- again, no sweat at they will eventually by covered by the PE part. If you're dealing with an ovoid access-plate then two pilot holes, appropriately distanced from one another, will produce a near perfect recess for the PE part. Only additional operation is to chisel away the substrate not addressed by the mill. Here's an extreme case of, 'chiseling away':
Oh, and if you get sloppy, and the engraved portion is tool big, just coat the back-side of the PE parts, slather on some Bondo to the cavity, press the PE part in till it's surface is flush with that of the surrounding substrate and pull out the PE part after the Bondo has cured. Clean up the surrounding excess Bondo and you now have a perfect, glove fit between cavity and PE part.
DavidLeave a comment:
-
So for the sail, there are no pilot holes. Should I follow the same procedure for the sail? Make some piloting holes? Or create a jig-guide for the real end-mills that I should be getting today?
Sat & Sun is a no modeling day. Will get into this on Monday.Leave a comment:
-
Leave a comment:
-
So I take a drill bit the diameter of the vent hole to use as the guide (arbor). Add one-two-whatever number of brass tubes over the drill bit to get the necessary outer diameter. Solder the brass together. Using whatever tools to make a mill end on the brass tubes. Keeping the mill end 90 degrees to the bit. Chuck it up in the drill press.
Thanking in terms of what I have on hand. Double this way?Leave a comment:
-
Works for any disc shaped PE, not just jobs where there's a pre-existing pilot hole. All you need is the pilot hole for the arbor -- that hole is eventually covered by the PE part anyway. So, what the heck?
However, If you're going to go without the arbor then work out a sound, ridged holding fixture secured to the drill press bed to mitigate the possibility of the end-mill 'walking' away from its assigned position over the work. Though these holding fixture are used with the milling machine, they are also transferable to the bed of your drill press.
DavidLeave a comment:
-
David, sounds like a good idea, especially for the ballast vents. Not sure if I can make that sort of tool, don't have some of what is needed. On that note I ordered a 1/4 and 3/16 end mill from Amazon, probably cheap ones but the should work for the PE on the sail. They were only $5-$6. Then I can get something similar for the Dremel to hit the smaller spots on the deck and sail. Will have to be careful either doing it by hand or in the drill press. Of course try on test pieces first.
https://smile.amazon.com/gp/product/...?ie=UTF8&psc=1
DrSchmidt, looks interestiing. Will have to try that on some scrap materials.Leave a comment:
-
For styrene kits like the Skipjack the way to get the PE flush ist to heat it with a soldering iron and melt it into the surface until flush. Remove the squeezed-out plastic, cement the PE into place and fill the seams. The method is described on page 4 of this manual: https://www.rcsubs.cz/images/072.pdf
I tried it with my static Trumpeter VIIc and it works. Takes some experience and grit but quite doable.....Leave a comment:
-
How about a home-made end-mill with a central arbor to fit the vent hole -- the arbor keeping the rotating tool from drifting out of round.
Select a length of tool steel rod (or softer metal in a pinch) of the diameter of the PE disc. Chuck it up and bore a central hole in one end to fit the arbor rod. With a small cut-off wheel score the face of the big rod to create radial flutes that will do the cutting. Insert the arbor, chuck the tool into a variable speed drill and go to town!
Here's what the finished work should look like. A slight circular depression to a depth equal to the thickness of the PE part.
If you're doing this to GRP you will have to periodically remove the arbor and re-dress the cutting flutes to raise a cutting burr. If you're cutting styrene you want to immerse the work in water and keep the tool speed way down.
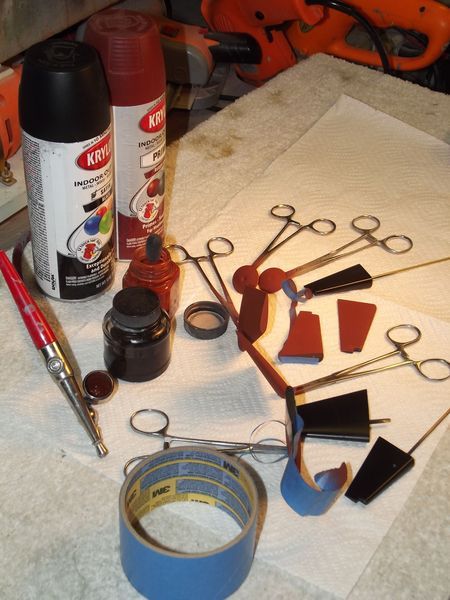
Two of these 'circle cutters' are to the extreme right of the other engraving tools -- sorry about the fuzz, but this is the best picture I have of that type tool.
David
Leave a comment:
-
Today I tried to add the PE ballast vents on the deck. Like Bill said they need to be inset. Just gluing the PE they stick out and as thin as they are they don't look right. I may have to do what Bill said and just add the lower hull PE and not use the rest. So my first attempt at PE is not a good one. It would help if I had end mill cutters that size to do the inset but I don't have anything like that.Leave a comment:

Leave a comment: