-
Yeah. That Bart guy is nothing but trouble! Don't know why we put up with him.
Stoner part-release is OK. Mann 200 is better. But, the difference is negligible. And Andy's good advice on glass weave for your application is (as usual) right on the mark.
Glad you found a West System source. Get the 'fast' cure hardener.
And from your RTV silicon rubber guy: get some thickening agent. Add it to the catalyzed rubber -- it makes it so the rubber won't run off of vertical surfaces as you lay up the rubber glove element of the tool. Experiment to determine the amount of thickening agent before committing to the masters.
Yes, do a proper WIP on this project, Scott. Love your work. Your work has improved markedly, pal.
David
Leave a comment:
-
OK. Got it. There is a release product available here for use with silicone tools called "Stoners" (Great name huh? - pass me the stoner, man etc etc). I assume that its silicone oil. I've found a supplier of West System epoxy, and once again its Bart's fault; he sent me the link. I'm still searching for twill weave glass which I am told is better for use with muli-curved surfaces; failing that I have some 6 oz and some chopped strand. The moulding silicone is on its way from Melbourne (about 800Km south of here) and I have made up two moulding boards, as instructed. I'm thinking of writing a sequence in note form as a check list so I don't **** this up.Leave a comment:
-
When using the silicone glove method are you also applying a release agent or just relying on the silicone? Also, if using a polyester gell coat are you allowing it to completely harden before applying cloth and epoxy of laying down cloth on tacky gell coat?
Yeah. You don�t want to go through too many GRP lay-up cycles without protecting the silicon rubber � be the silicon RTV rubber for a glove-mold GRP lay-up tool; or solid RTV rubber for a resin casting tool.
Part release system for RTV rubber (silicon) glove-mold as used to give form to GRP parts -- The best method is the old tried-and-true wax and PolyVinyl Alcohol (PVA) part release system. The application of this part-release system, however, differs between rubber and hard-shell type tools. (I�m expanding a bit on your basic question � sue me!).
[IMG]file:///C:/Users/David/AppData/Local/Temp/msohtmlclip1/01/clip_image002.jpg[/IMG]

[IMG]file:///C:/Users/David/AppData/Local/Temp/msohtmlclip1/01/clip_image004.jpg[/IMG]
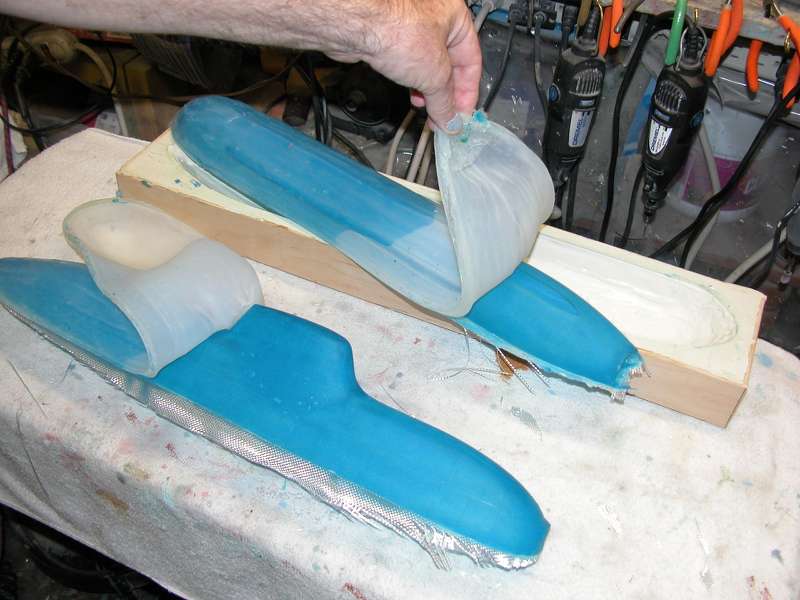
These two glove-molds were prepared with a coat of wax, followed by two coats of PVA. Unlike hard-shell tools, the flexible rubber does not take to polishing. What I do is heat up the rubber, place it into the mother-mold and quickly apply the wax, removing as much excess as possible before the rubber creeps back to room temperature.
Once the Wax hardens I brush in a moderately heavy coat of PVA; hit the cavity with a heat-gun to dry the PVA; then spray on a second coat of PVA and let that dry; then proceed with the gel-coat and glass laminates.
Sure, you don�t have to go with a part-release if you don�t want -- and nothing seems to stick to RTV silicon, other than more RTV silicon. However, after a few cycles you�ll note a marked distortion to the surface finish of the tool, which gets worse with each new cycle.
So, use the frig�n part-release, damit!
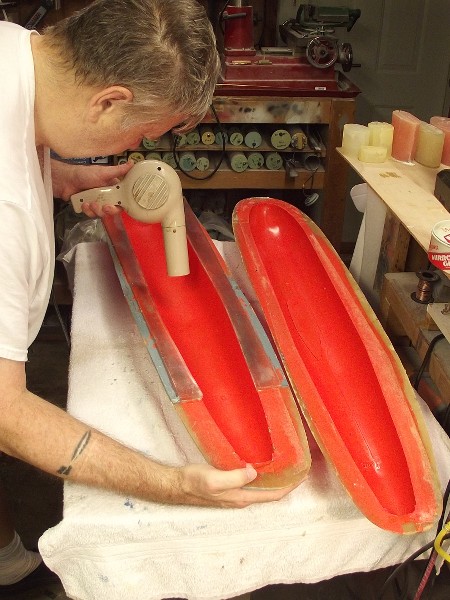
Part release system for RTV rubber (silicon) hard-shell mold used to give form to GRP parts --
[IMG]file:///C:/Users/David/AppData/Local/Temp/msohtmlclip1/01/clip_image006.jpg[/IMG]
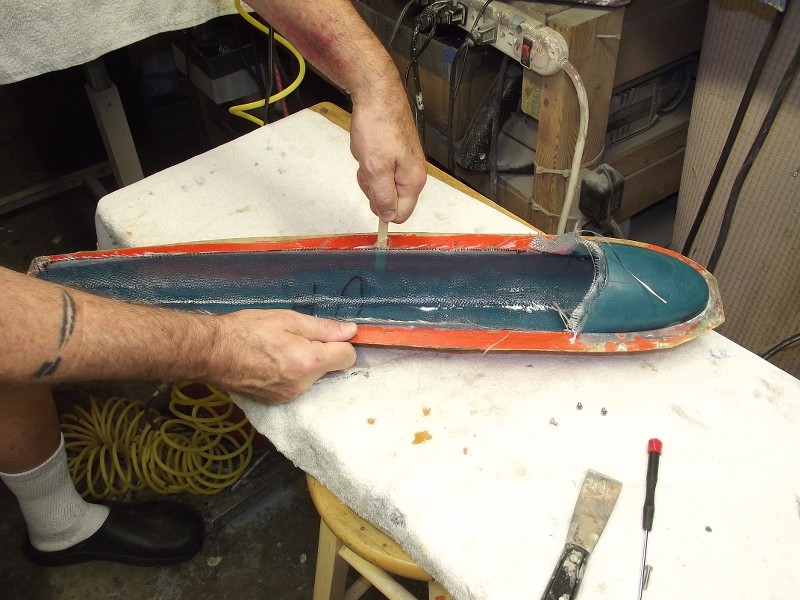
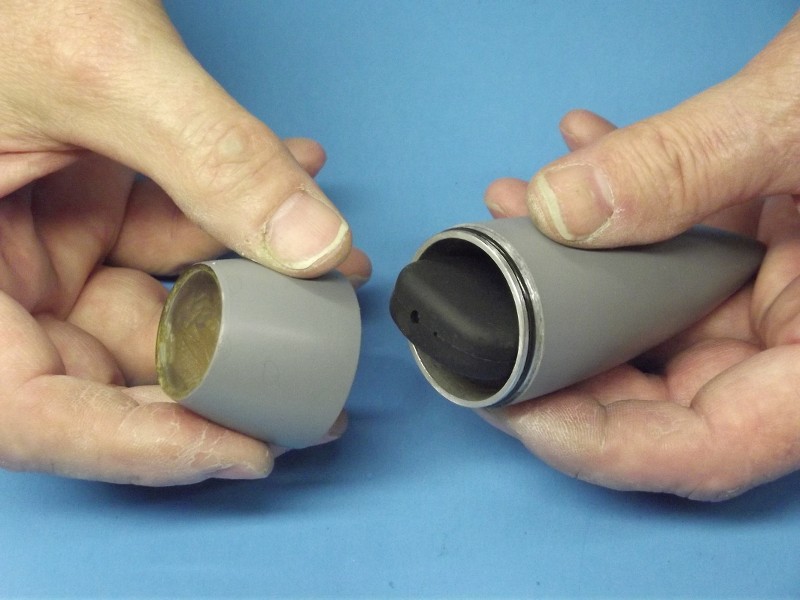
The part-release system ingredients are the same, but their application is a bit different for hard-shell type tools. Here you see me flexing the tool, and undermining the GRP part with a wooden Popsicle stick.
Seconds after this shot was taken I was rewarded with the pleasant sound of, �pop� as the GRP part, with its bonded coats of PVA clinging, jumped out of the tools cavity. I�ve been doing GRP part lay-up for decades yet my �sweat-pumps go to high� each time I have to yank something out of its tool.
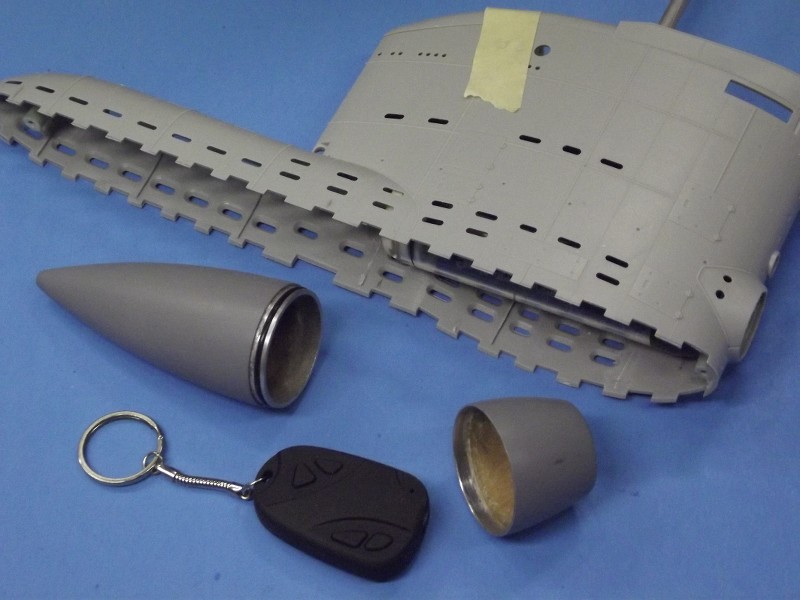
[IMG]file:///C:/Users/David/AppData/Local/Temp/msohtmlclip1/01/clip_image008.jpg[/IMG]
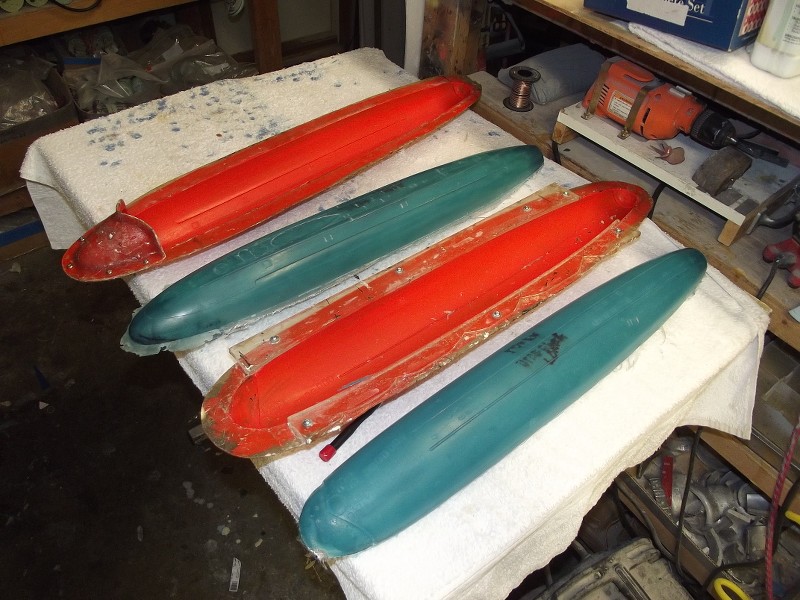
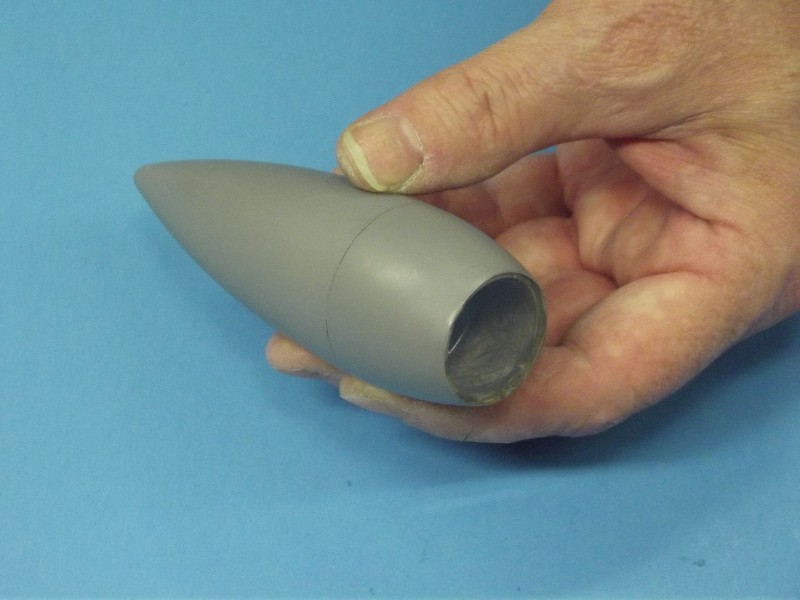
The end result of lay-up and removal of the GRP parts without damaging the tool or part. Here we�re looking at 1/96 TRENCHANT hull parts pulled from the excellent Dave Manley (Small World Models) tools.
Things only go well if you select the agents and apply them correctly. How many horror stories have you heard -- or experienced -- because either a master or a part inadvertently bonded permanently to the tool? Get the part/mold-release system right, or go home!
[IMG]file:///C:/Users/David/AppData/Local/Temp/msohtmlclip1/01/clip_image010.jpg[/IMG]
OK, we�re talking hard-shell tools now and how to apply the part-release system.
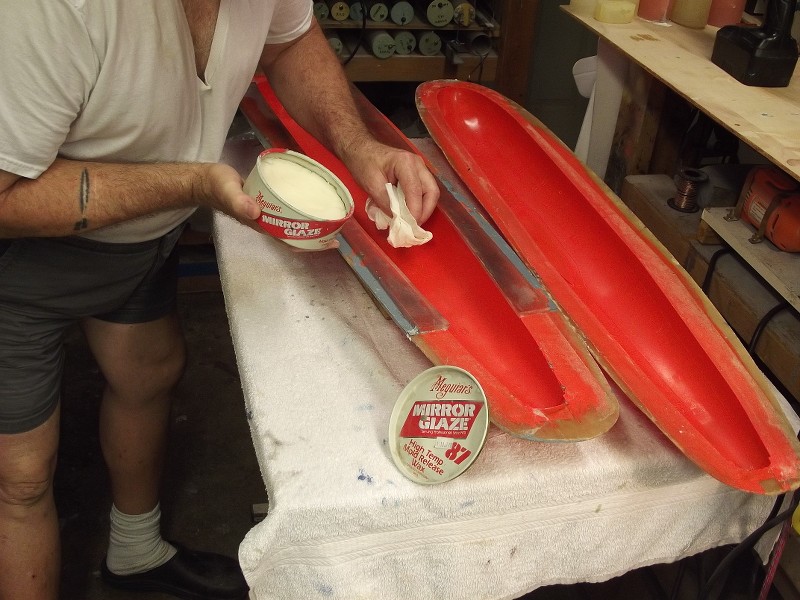
As Andy pointed out in another post, the wax is laid on in layers, buffing the hardened wax to a gloss appearance before proceeding with the next coating of wax. The preferred wax is Carnauba based. You smear some wax into the tool, wipe away the excess, wait, and then polish the **** out of it! Even bright-shiny buffed out wax has some tack to it and is the perfect substrate over which to apply the next part-release agent: PVA.
[IMG]file:///C:/Users/David/AppData/Local/Temp/msohtmlclip1/01/clip_image011.jpg[/IMG]
Two spray coats of PVA are applied, drying each with the aid of a heat gun. The first coat a misting or you�ll get �fish-eye�. The second coat of PVA goes on heavy, but not so heavy as to run along vertical surfaces. And the hard-shell tool is ready for GRP part production.
The PVA will cling to the eventual part and cling to its surface as the part is extracted from the tool, the wax remains in the tool. As a practical matter I only lay down a wax layer every third or so cycle. It�s the PVA that does the work of forming a barrier between tool and work.
As the PVA is water soluble, it�s an easy task to remove it from the part by a simple water soak and scrubbing with a low grit abrasive pad.
Part release system for RTV rubber (silicon) tools used to give form to cast resin parts -- Scott, though you didn�t ask about polyurethane resin casting in RTV rubber tools, I thought I would jump ahead of you a bit and describe the part-release system for resin casting.
[IMG]file:///C:/Users/David/AppData/Local/Temp/msohtmlclip1/01/clip_image013.jpg[/IMG]
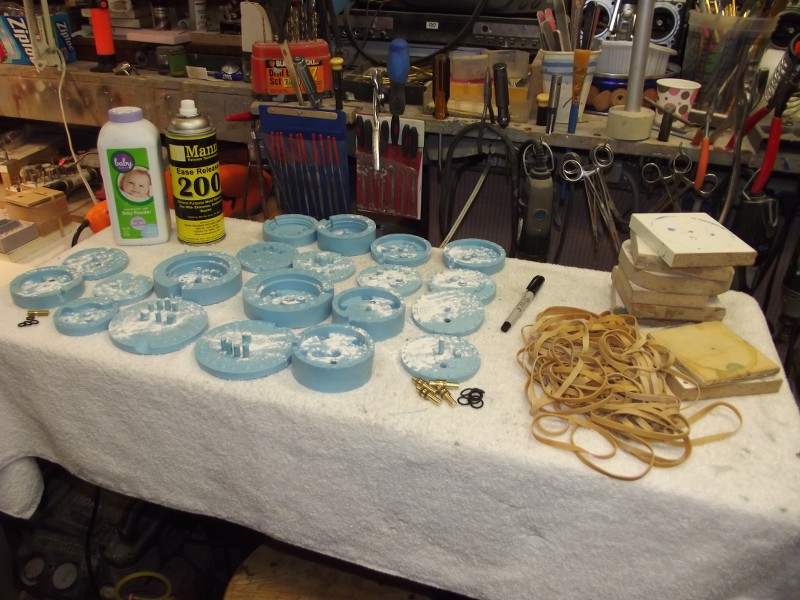
Wax is not suited as resin casting is a quick production process, and wax application and manipulation is just too labor intensive. Instead, a part release system of spray silicon oil and powdered talc is used.
Here you see the just talced tools, ready for shake-out and removal of excess talc; assembly; and pouring of the catalyzed polyurethane casting resin.
The talc does three things:
It goes a long way in protecting the RTV silicon rubber from attack by the polyurethane (sometimes epoxy) casting resin.
Talc is hydroscopic � it absorbs water; it pulls any excess moisture (from the air and handling) into itself and off the face of the cavity.
And, the fine powder, clinging to the face of the tool cavities, acts as a wick that pulls the resin into the work, reducing the likelihood of the part evidencing air-voids (pin-holes).
Also makes the shop smell nice � a delightful change from the usual burnt flux and egg-fart stink.
(OK � four things!).
I don�t detect any difference in a cast resin parts substrate, with or without the talc application.
Ron Gross taught me the talc trick.
[IMG]file:///C:/Users/David/AppData/Local/Temp/msohtmlclip1/01/clip_image015.jpg[/IMG]
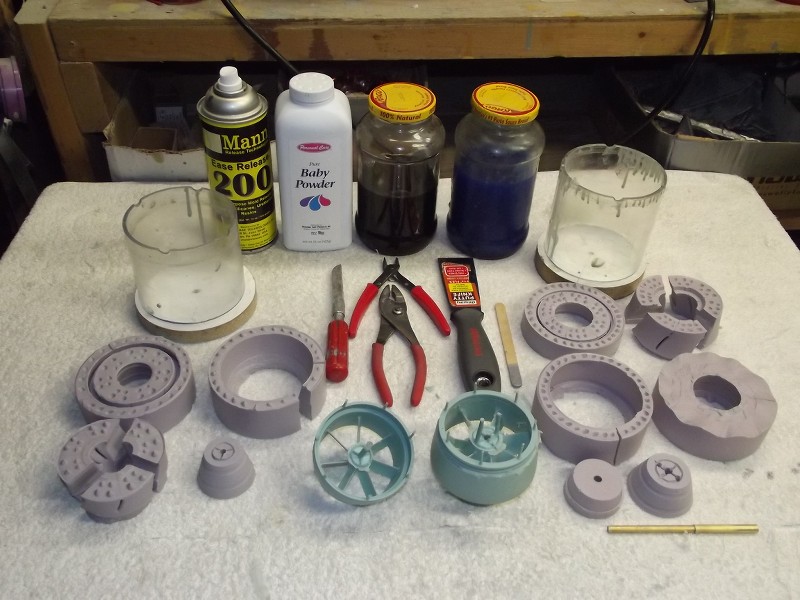
For terribly complicated tools the ability to get the part-release into the cavities becomes problematic, that�s why the part-release system embodies agents that can get into all the nicks-and-crannies. Spray silicon oil and powder talc meet this requirement.
First, the tool cavities are sprayed with silicon oil, and then the talc is sprinkled on the open cavities. The tool is temporarily assembled and shaken and banged on the bench to spread the talc around, coating all cavities with a fine layer of talc, the oily surface of the cavities holding onto some of the talc. The tool is opened and the excess talc dumped to the floor (when Ellie�s well clear of the shop).
Doing all this increases tool life to about double the number of casting cycles if only the spray part-release is used. There are some tools, as above, that I only want to create ONCE! One set of cycles and done.
Epoxy-glass laminate over a polyester gel-coat -- You handle the interface (bond) between a polyester resin based gel-coat and the first epoxy-glass laminate as you would an all epoxy GRP part.
With the following exception:
As some polyester resins contain wax (to form an air-barrier between the surface of the catalyzed resin and air), and the gel-coat has set hard, you have to remove the wax surface. This done with a lacquer saturated abrasive pad. If the polyester resin gel-coat still has some tack to it, you can lay down the following epoxy-glass laminates directly, without the lacquer scrub.
David
Leave a comment:
-
-
West Systems don't sell an epoxy gelcoat. You use the one type of resin and mix it with colloidal silica, which is a thixotropic additive. West Systems are difficult to find outside of the US. I use locally sourced epoxy resin, and it's perfect. You can various hardener types for fast to slow cure time, depending on your desired pot life. I find the faster ones work for me, but bearing in mind your climate, you may want to go for something a bit slower
I would suggest googling for epoxy resin suppliers in your own locale.e.g. https://www.fibreglass-resin-sales.c.../epoxy-resins/
Something like their R246 and some colloidal silica should work for you. Along with cloth and normal fillers like chopped strands and micro balloons for fairing etc.Leave a comment:
-
Yes lots of Drinking because its "Straya day" (Australia Day) for those non antipodeans.
Scott, you are a machine....
Dave...Leave a comment:
-
I'm trying to find some place up here that sells West System epoxy and gelcoat. Holiday here today so no shopping ( but lots of drinking, aparently).Leave a comment:
-
-
-
That's just a bit of cheapskate polyester work. Does the job though.Leave a comment:
-
Good stuff, Andy. You've taught me a few new tricks.
I can attest to his mastery of glass work: that little towed camera case I use today was created by Andy -- a very neat job of glass work.
DavidLeave a comment:
-
When using the silicone glove method are you also applying a release agent or just relying on the silicone? Also, if using a polyester gell coat are you allowing it to completely harden befor applying cloth and epoxy of laying down cloth on tacky gell coat?Leave a comment:

Leave a comment: