-
I've been sticking the brass etched bits onto the plug today. This will make the final top section of the hull. I made a top section a while back that did not incorperate the brass bits as a practice run.
-
I've been away for two weeks and, man, is it good to be home. A few hours in the shed this afternoon produced this;
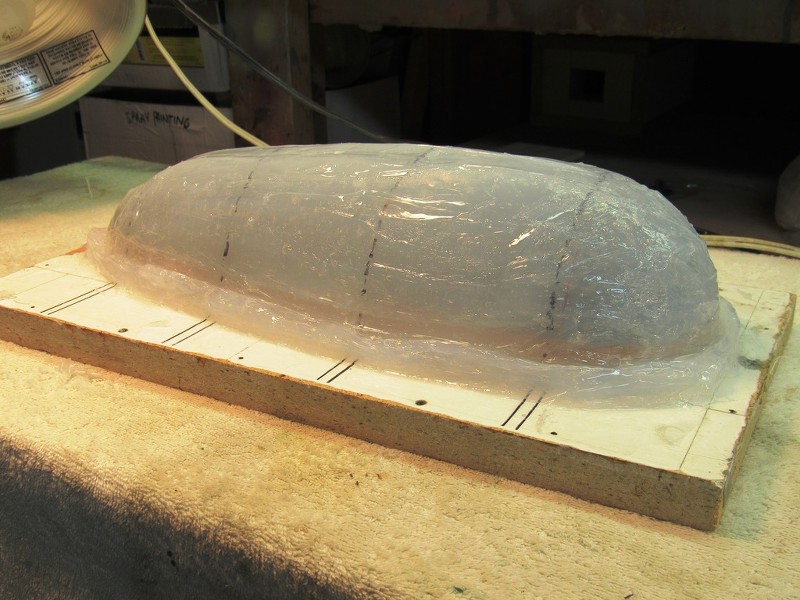
The rubber glove is thick and firm and its captured all of the detail, I think.
I cut the formers for the "egg crate" that will reinforce the hard back to the lower glove mould. All seems to be going according to plan at the moment.
Leave a comment:
-
Good, sound tool design on display here, pal.
DavidLeave a comment:
-
Excellent start on the tool, Scott. Slow, carful and easy does it, pal.
DavidLeave a comment:
-
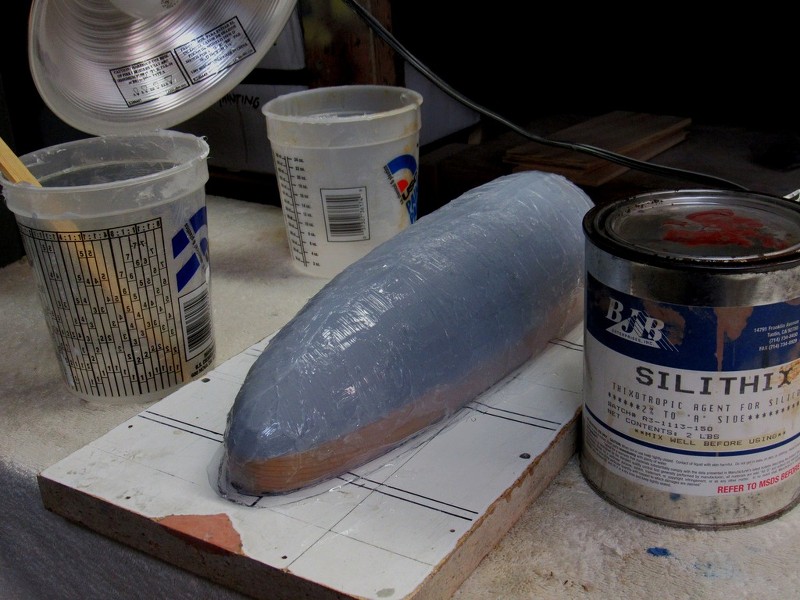
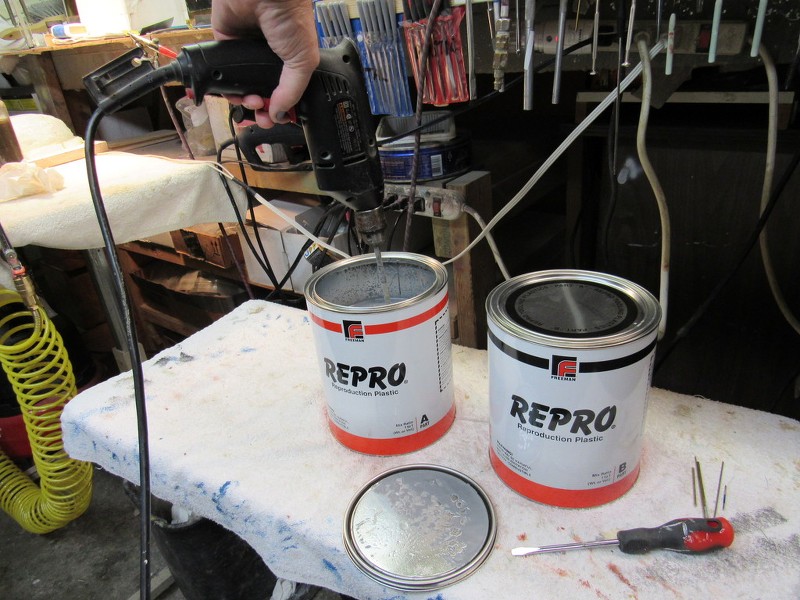
I haven't been able to find anything like glass shard reinforced tool making polyurethane but I can get lots of standard laminating resin and chopped strand cloth, fortunately. I found some great mounting boards a while ago that are just the right size, very well finished and absolutely stable. High gloss, white shelves @ $2.00 each from the local hardware store.
Here are the mounted plug halves covered in the first layer of brushed silicone. I didn't thicken this layer up at all; just mixed it with the catalyst and brushed it on to avoild any surface air bubbles. Its only a few mills thick but it should ensure that the eventual mould is clean and bubble free.
Leave a comment:
-
Yes.

And the home page of the outfit that offers the above, and many more, products for the tool-maker: https://www.freemansupply.com/
David
Leave a comment:
-
"glass shard reinforced polyurethane tool-making resin"? Is this specifically for making moulds?Leave a comment:
-
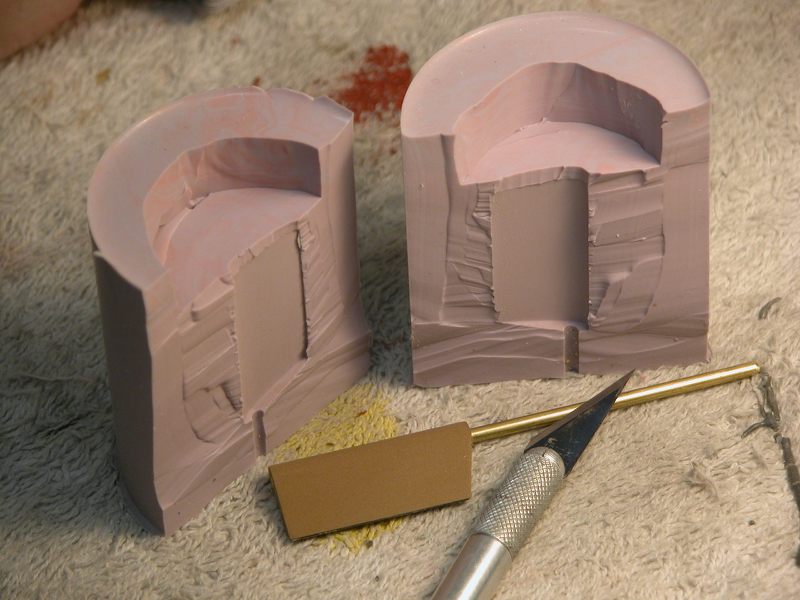
That's right, Scott; we're talking about a classic set of glove-mother mold tools here.
As to those negative tabs you see in the flange of the rubber gloves:
The rubber was formed without the stiffening 'egg-crate' structure in place.
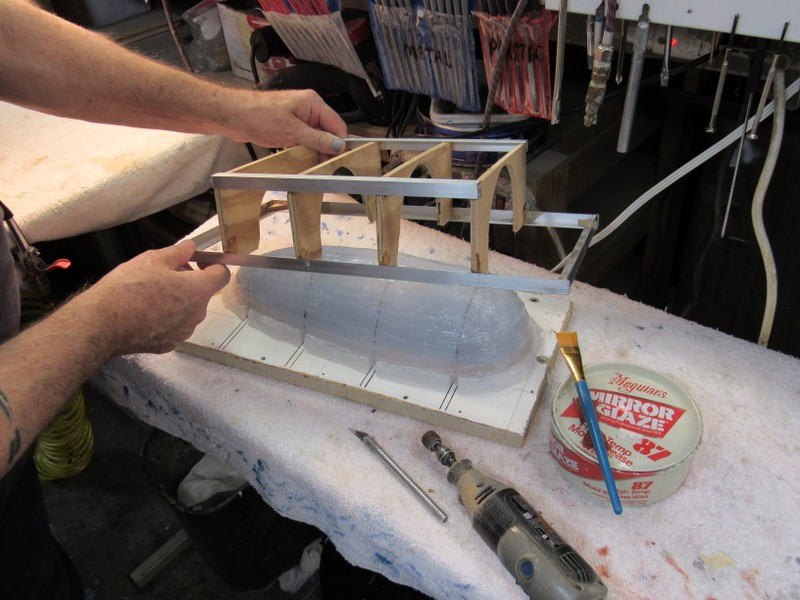
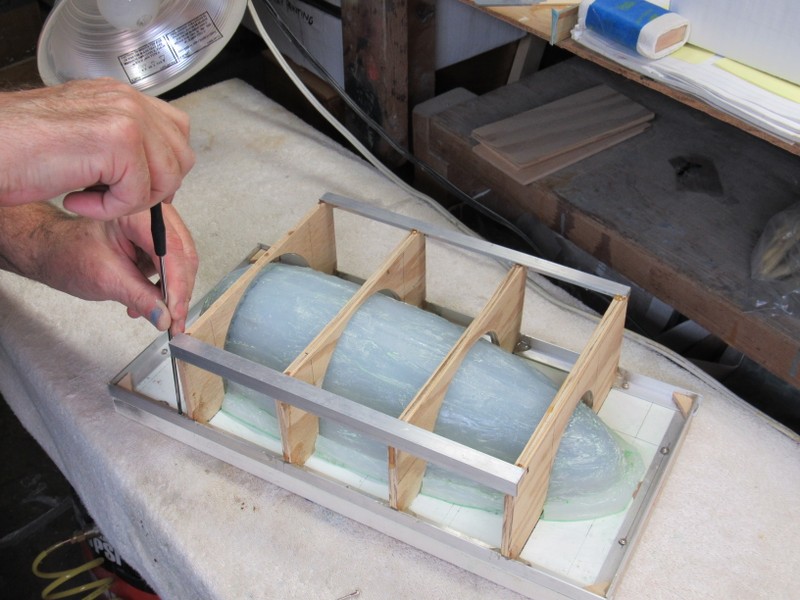
The egg-crate went down only after the rubber was formed over the master.
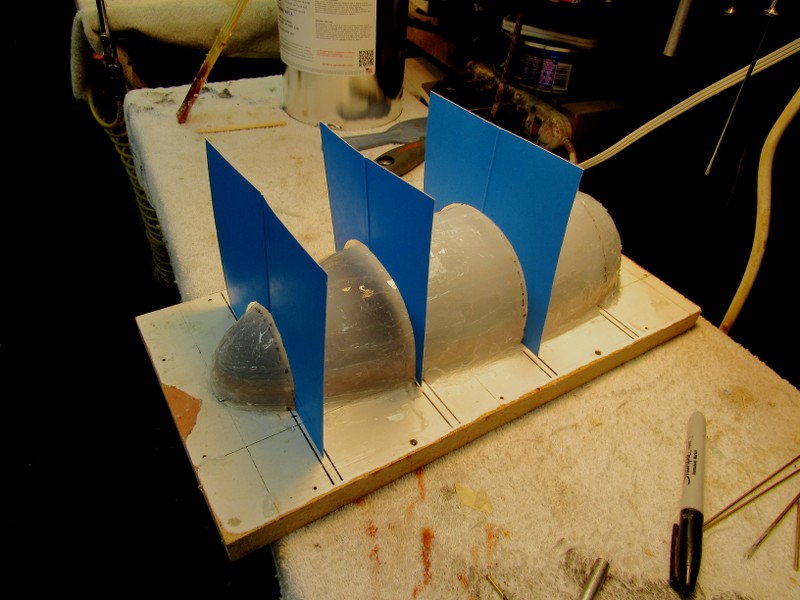
I used cardboard templates to guide me as I laid down the many coats of RTV silicon rubber, building things up till the outside surface of the rubber assumed roughly the same radius as the templates.
I found that the flange extended a bit farther than planned, which compelled me to cut away some slots from the RTV flange so the egg-crate could set down flat on the mold board.
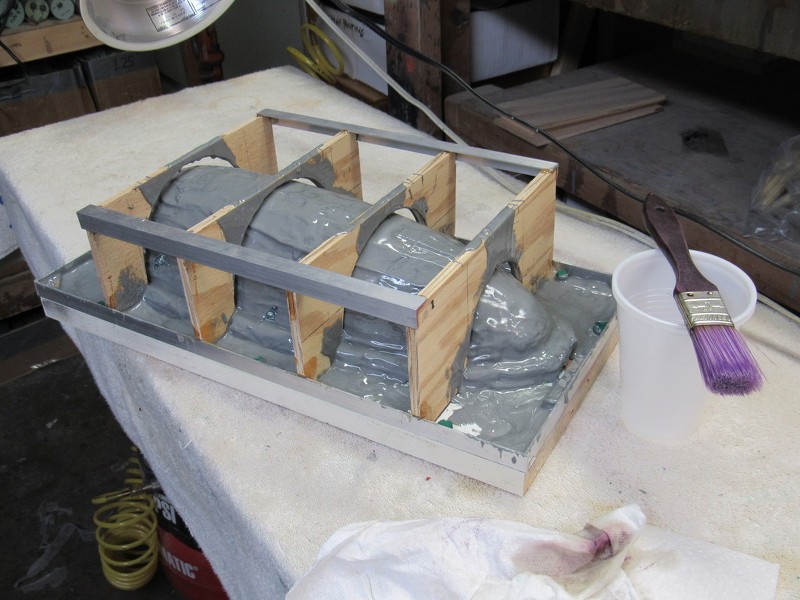
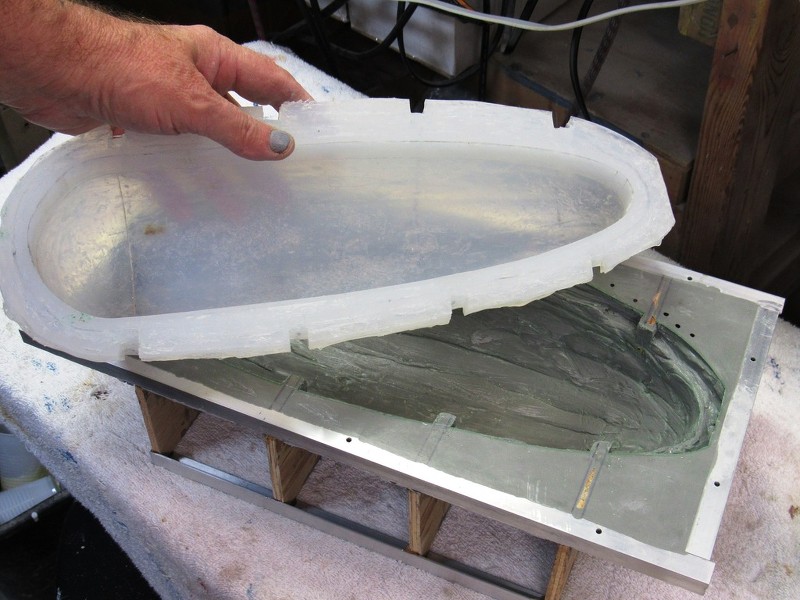
Once the egg-crate was screwed down onto the mold board, I gopped on the glass shard reinforced polyurethane tool-making resin to form the mother-mold.
DavidLeave a comment:
-
Tom. I think they are the tools for the 1/96 Thresher and I think its rubber not hard shell.Leave a comment:
-
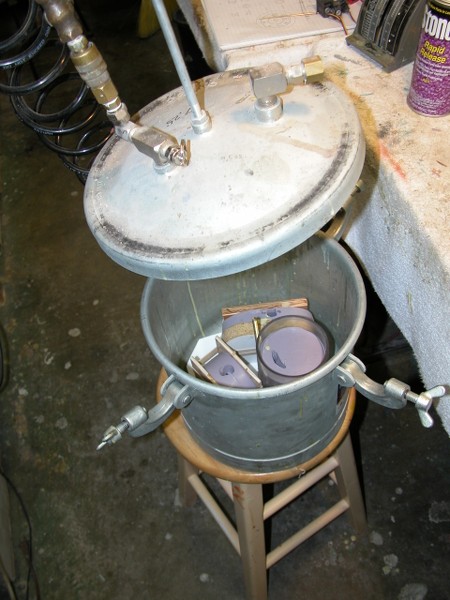
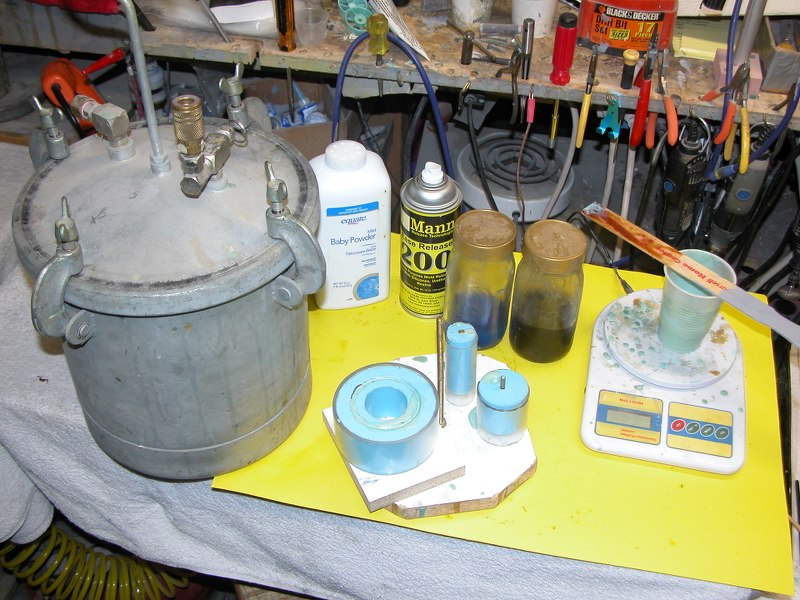
I decant from the big bottles (Alumilite polyurethane casting resin). The dark bottle is catalyst, the blue bottle is the clear resin doped with some blue pigment.
The mold slips right out of the Lexan cylinder after the rubber cures hard -- which in this case is the, 'flask'. Yup, I form the rubber in the flask, and use the flask again during the pour of resin. The rubber will not stick to the Lexan.


DavidLeave a comment:
-
Scott, I think that stack is hard shell molds.....I could be wrong (would not be the first time)
David, on your casting resin portion the photo shows the silicon release, baby powder, and two jars of a dark liquid. What is in this jars?
Also, you use a cylinder for your mold....how do you get the mold out? When you cast, do you put them back in there?
Leave a comment:
-
Thanks for the help men, and David; thanks for taking so much time to put this down in so much detail. I have a question on the process of making the moulds. In this photohraph it appears to me that the mould supporting timbers are impinging the edges of the rubber glove. Am I optically deluded or do they, in fact inturde into the edge of the glove. If they do, then; a) how do you make that happen? and b) won't that stop you pulling the inner glove out of the hard shell backing?
Leave a comment:
-
Thks for all the info David and Andy......I will take it into practice soon.
I was told that the Bart guy went to the dark side.
Grtz,
Bart
Leave a comment:
-

Leave a comment: