Listed at this website under fillers and modifiers
- http://www.compositeswarehouse.com.au/resin/
Silica is best as a thickener for a gelcoat, micro-balloons certainly thicken, but if you have reason to sand the castings, you tend to get lots of tiny pinholes in the surface as you break into the balloons, which then need to be filled. Talc can pile on the weight a bit. The main issue with silica is it's not the easiest thing to mix evenly into the resin- the pros have special equipment to provide plenty of shear as it's mixed, so it's difficult to get the same results as a premixed gelcoat, that's been my experience anyway.
-
[QUOTE=HardRock;n125345]So I took Bart's advice and started with three beers. Not long enough - more beers required. Strangely, things began to get fuzzy. She Who Must Be Obeyed enquired as to my disheveled state and I proudly told her, "ITS BART'S FAULT"!
LOL
grtz,
Bart
Leave a comment:
-
grtz,
Bart
Leave a comment:
-
I've been having a play with the practice hull while I wait for a new lot of silicone to arrive. Its going together quite well so far.
Leave a comment:
-
-
Yes I should, but no, I can't. For some strange reason its just not here - don't know why, but its not.Leave a comment:
-
406 silica is just colloidal silica- you should be able to purchase it easily from any decent supplier of resins.Leave a comment:
-
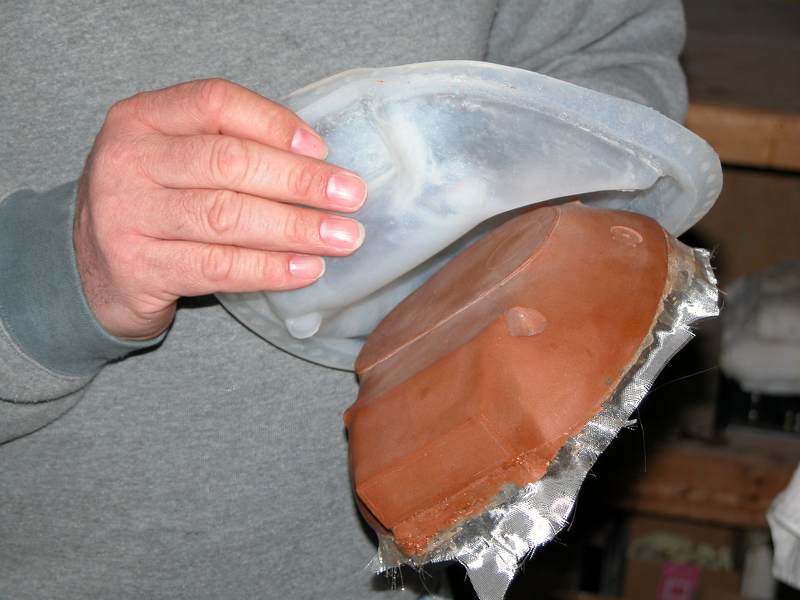
I brushed a thin coat of silicon onto the plug to avoiud any surface bubbles but, uinfortunately I don't (yet) have a vacume pot. As an alternative I'm going to mix up the silicone in a ratio that will give me a very slow cure. I'll let it stand for an hour or so before applying the next layer to the pug. I forgot to mention that although West System epoxy is available here, there is no 406 silica. They just don't sell it here for some reason; hence the decision to go with a polyester gellcoat.
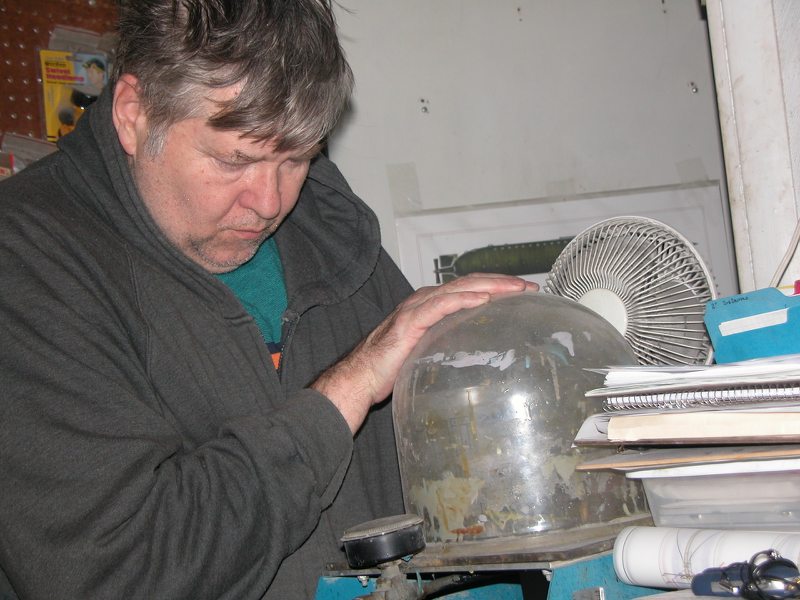
And what in the name of all that's holy is that thing that you are holding in the last photograph. Looks like a helmet for an unfortunately shaped head!Leave a comment:
-
-
That's polyester gelcoat with epoxy backing. Hopefully the finished upper hull will be better as long as I can get the air bubbles out of the silicone glove.Leave a comment:
-
So I took Bart's advice and started with three beers. Not long enough - more beers required. Strangely, things began to get fuzzy. She Who Must Be Obeyed enquired as to my disheveled state and I proudly told her, "ITS BART'S FAULT"!
This is the first pull from the practice mould. The detail is pretty good but I managed to get some air bubbles in the silicone - actually IN the silicon, not on the surface of the plug. The result is that there are some soft spots in the mould which translate into bumps on the finished item. I'm going the slow the cure time on the silicone next time to allow all the bubbles to work their way to the surface before the silicone sets up.
Leave a comment:
-
-
I finished the lower hull hard back this afternoon. I'll let it sit for a few days before pulling it off the moulding board.
Meanwhile there has been a lot of swearing and a small amount of etching. Talk about a black art - its taken me three goes to get this right. I'm not sure if the photosensitive paint has become insensitive of if I'm not giving it a long enough exposure (or if the developer has gone off) but its been a struggle. I finally managed to produce the sail grates:
Leave a comment:

Leave a comment: