Weathering and Markings, part-2

Collapse
X
 
  • Time
  • Show
Clear All
new posts
  • He Who Shall Not Be Named
    Moderator
    • Aug 2008
    • 12253

    Weathering and Markings, part-2

    WEATHERING AND MARKINGS, PART-2


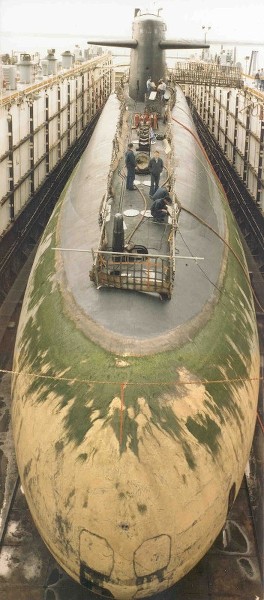
    Oil Canning Relatively thin, non-pressure hull portions of the submarine are subject, over time, of the phenomena of 'oil-canning', not always the sole result of wave action, but most often given as the cause. What is evidenced is the dishing in of the plating over the supporting network of stringers, platforms, frames, ribs, and bulkheads. On modern submarines oil-canning is most evident on the control surfaces, stabilizers and sail. A most effective way of representing oil-canning is to shade in a pattern that conforms to the understructure -- the darker portions of 'shade' to be behind the imagined raised portions of plate held proud from the understructure. To do this you have to assume a point in the sky from witch sun-light is striking the surface. This is the sort of thing you want to practice extensively on a handy test-article.

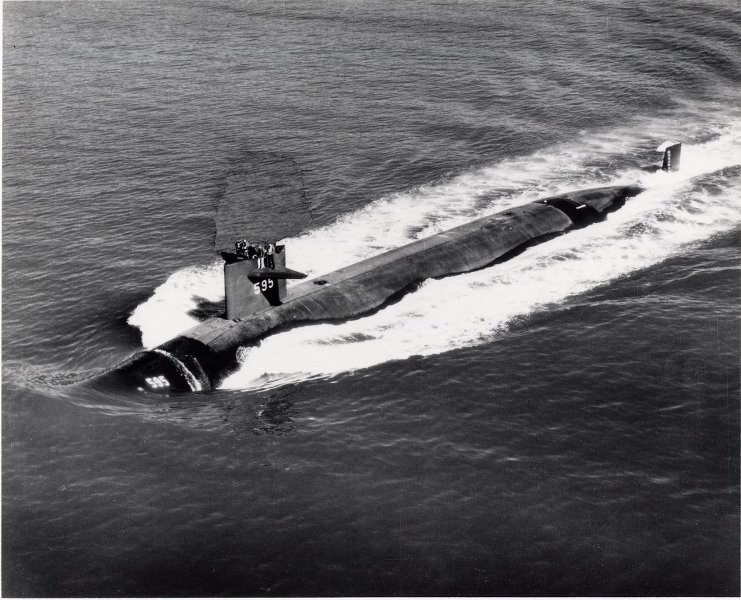
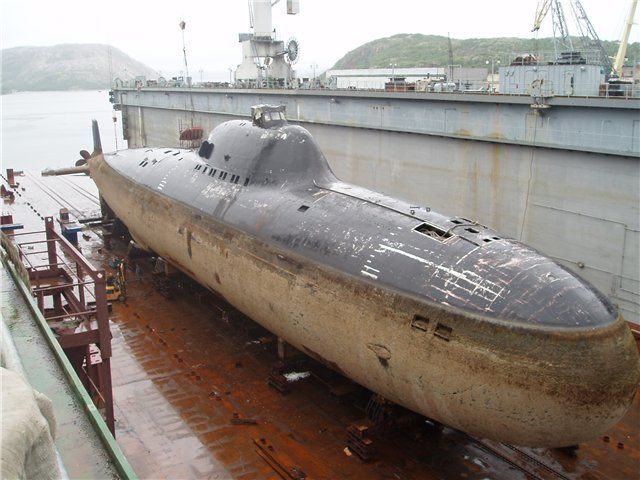
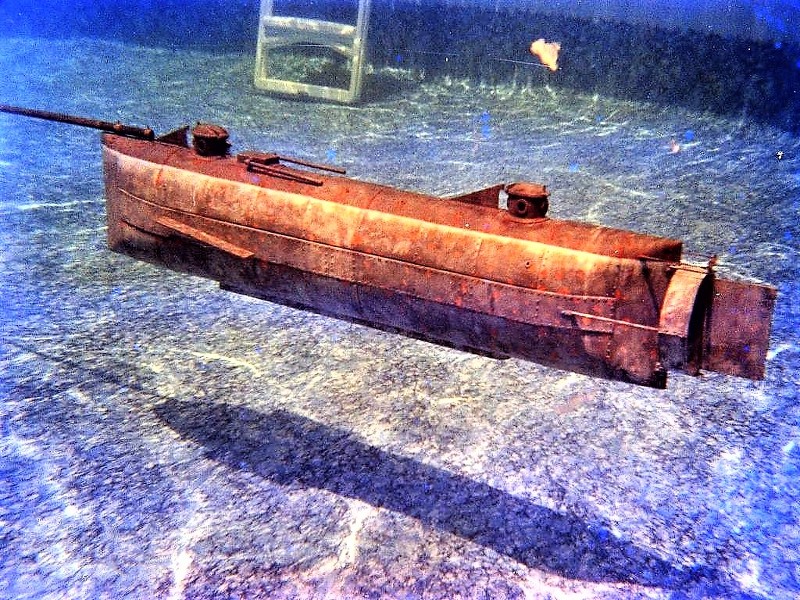
    Information on plating understructure for modern submarines is hard to come by. One rather grisly source for working out such structures are the recently declassified detail survey photos of the sunken SCORPION. In that case the extreme deformation -- the result of sea pressure and the shock of the implosion event(s) revealed the locations and pattern of such dishing.

    Studying sunken SCORPION photos I worked out where the frames, spars, ribs, frames, and stringers went for the rudders, horizontal stabilizers, stern planes, sail planes, and sail. It was all there.

    The stuff of nightmares. Nobody drowned!


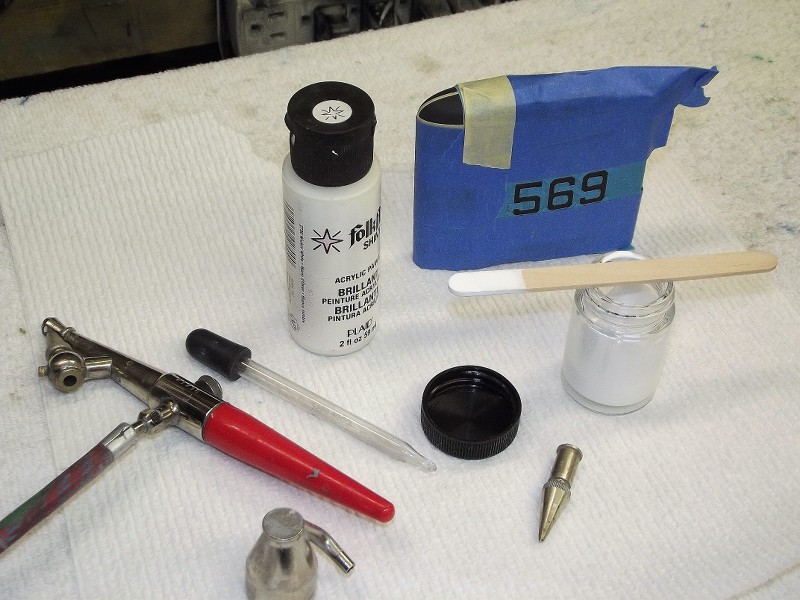
    Masking is simply a checker-board array of strips of masking tape whose width is that of the spacing between stringers and frames. Once the squares are masked off a lighter shade of the black-gray or anti-foul red primary paint is mixed up, loaded into the air-brush, and applied to those areas of each square in line-of-sight with the imagined sun source.


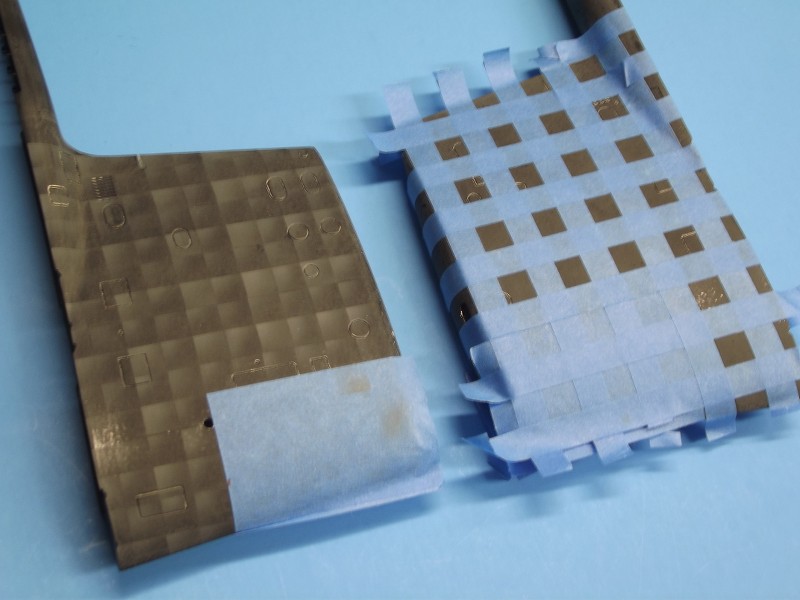
    Removing the masking inevitably reveals uneven applications of 'shading'. This is corrected by loading the gun with the primary color and shooting selected areas of the work till the oil-canning has been evened out and toned down to an acceptable level.


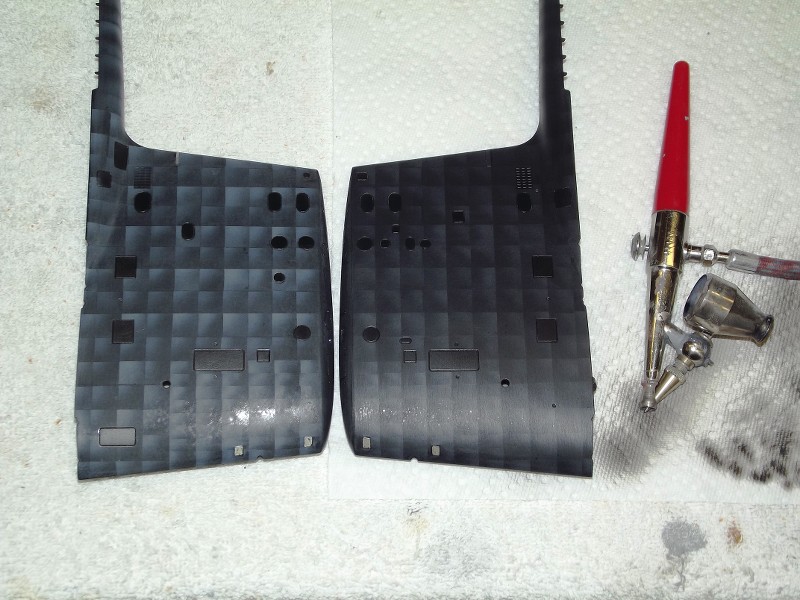
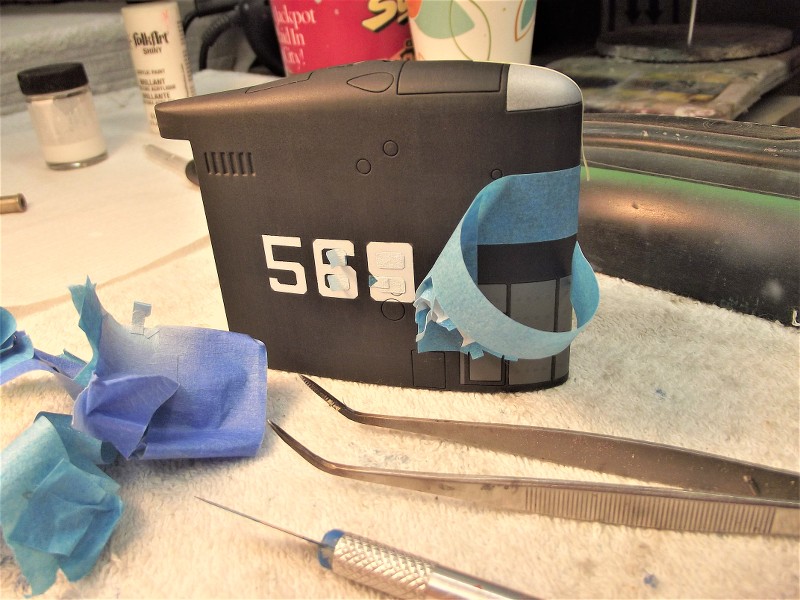
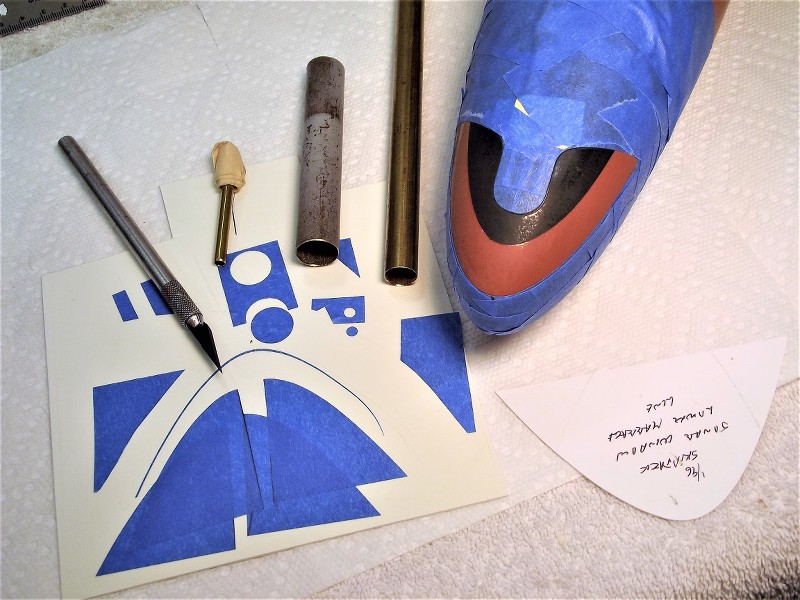
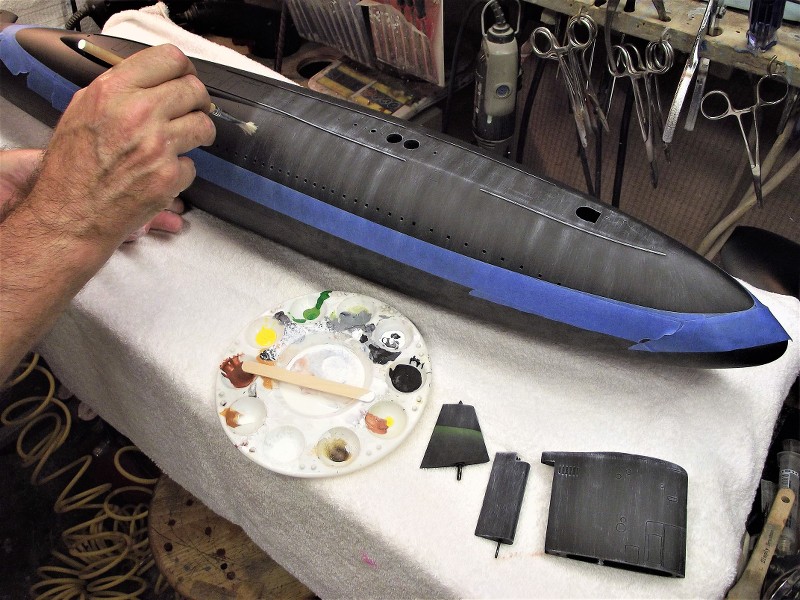
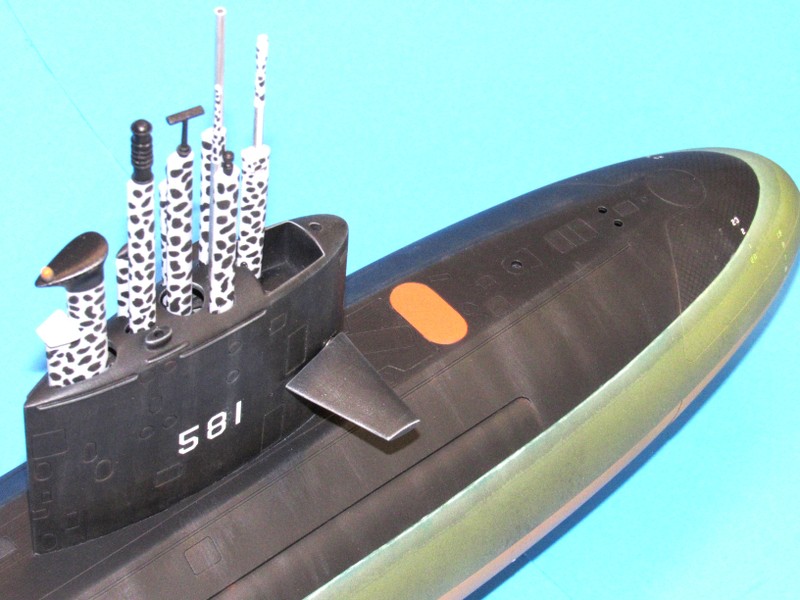
    As doors, access hand-hole plates, and other points with removable plating will not conform to the run of frames and stringers, those are masked around and the base color applied. The same stencils I use for scribing serves here as quick and dirty painting masks to cover those access areas on the sides of the sail


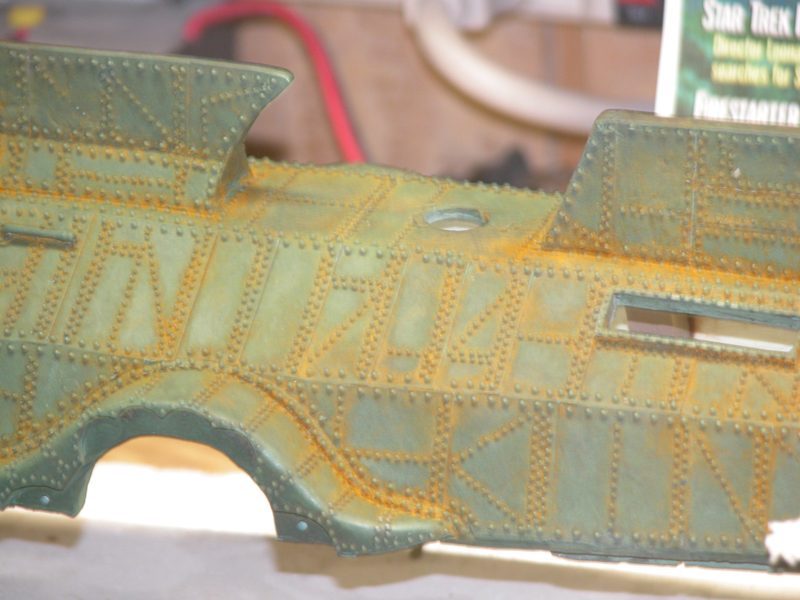
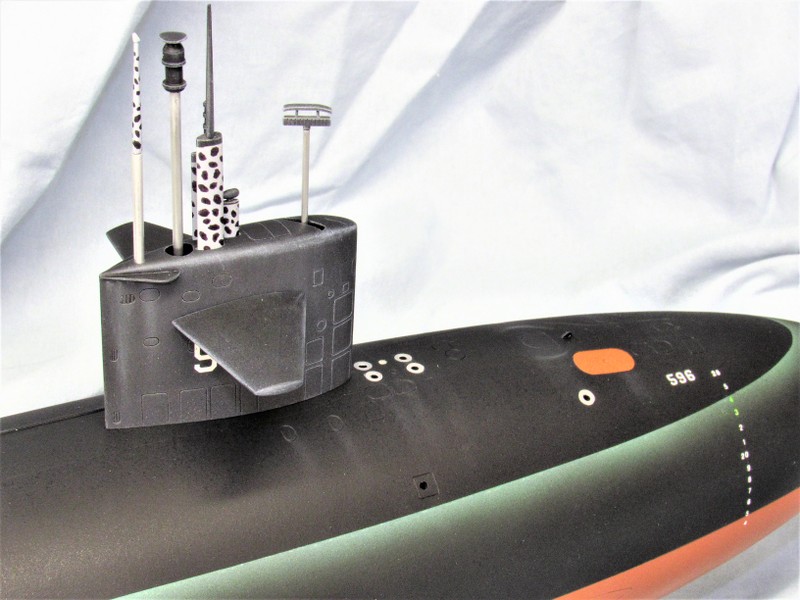
    Like metal plate oil-canning, the phenomena of sonar window sagging over its geodetic underworks is a look you should exploit. This is best achieved by using plastic window screening as a mask.


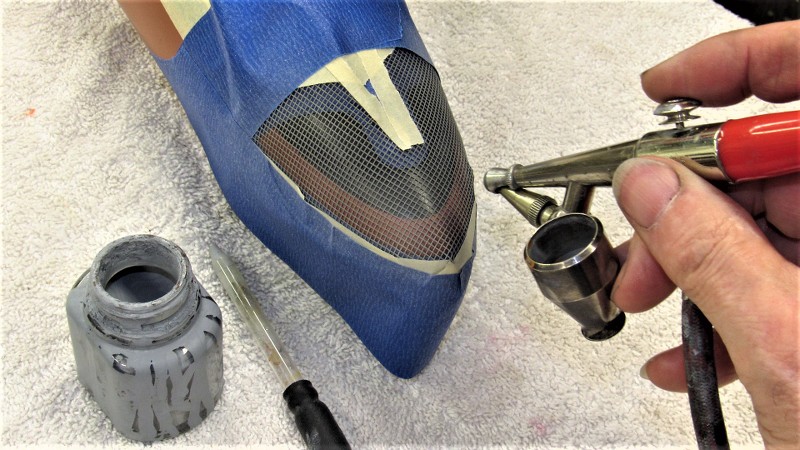
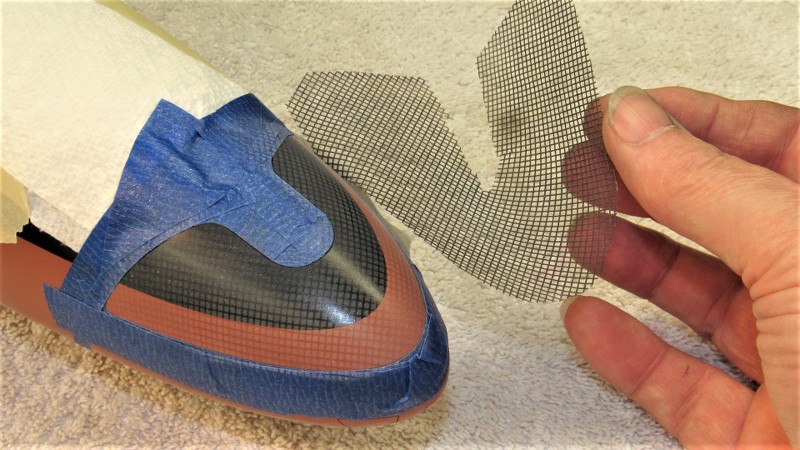
    Here you see it not only used to suggest GRP sagging into the voids between understructure bracing, but also used to suggest anechoic tiles on hull and sail.


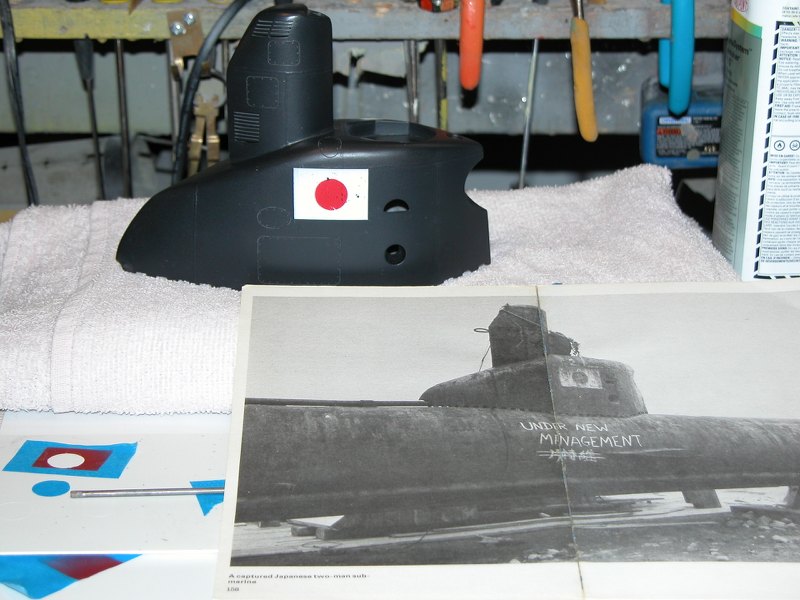
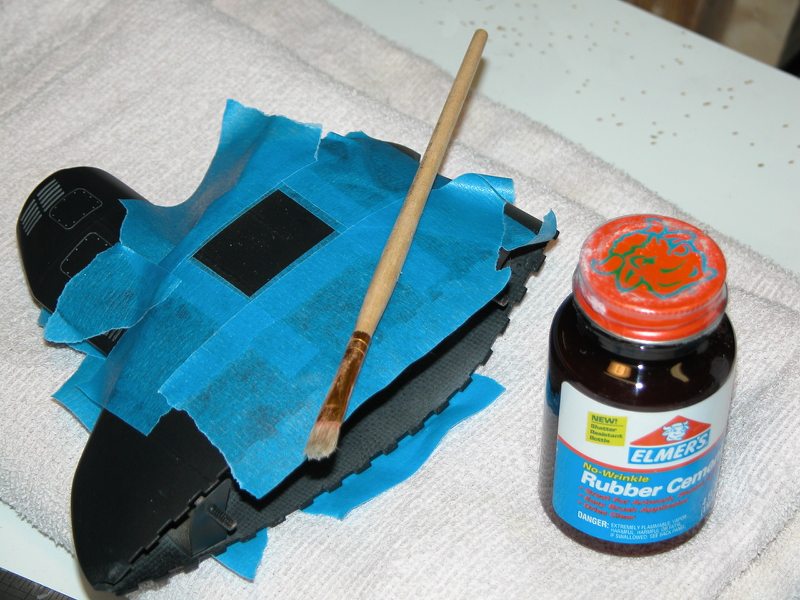
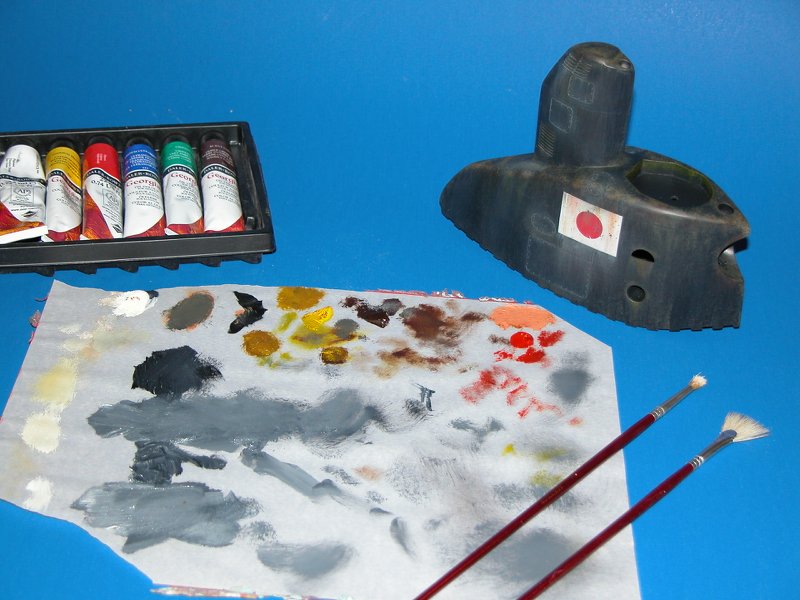
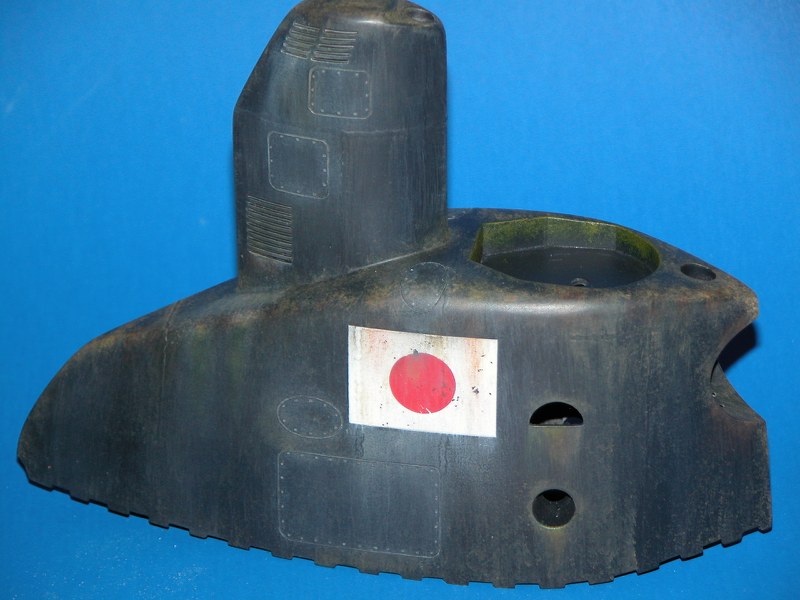
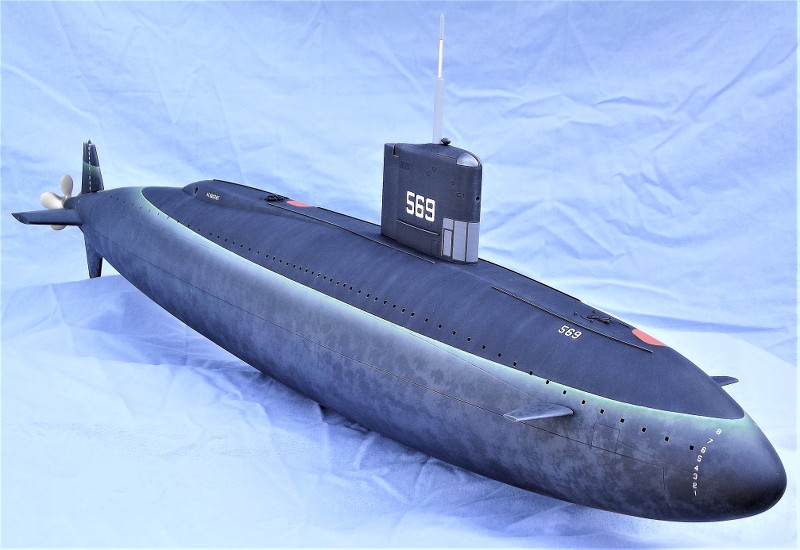
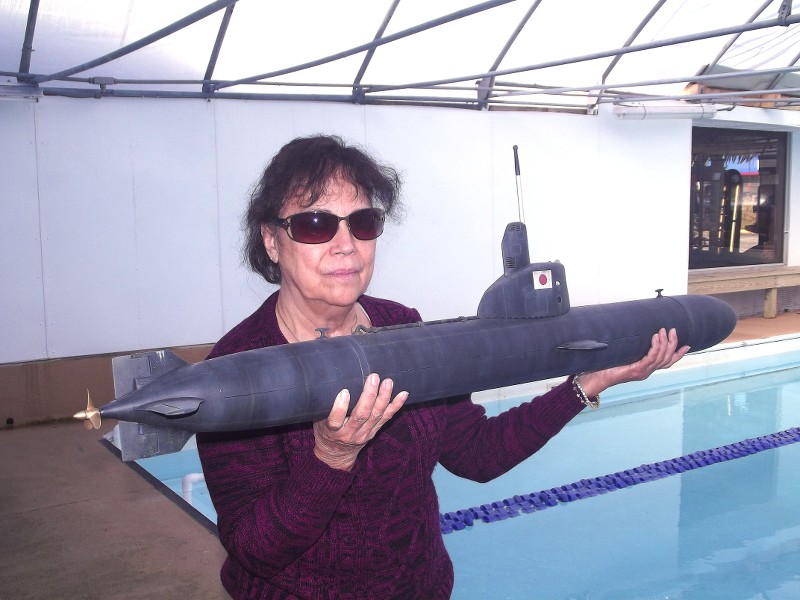
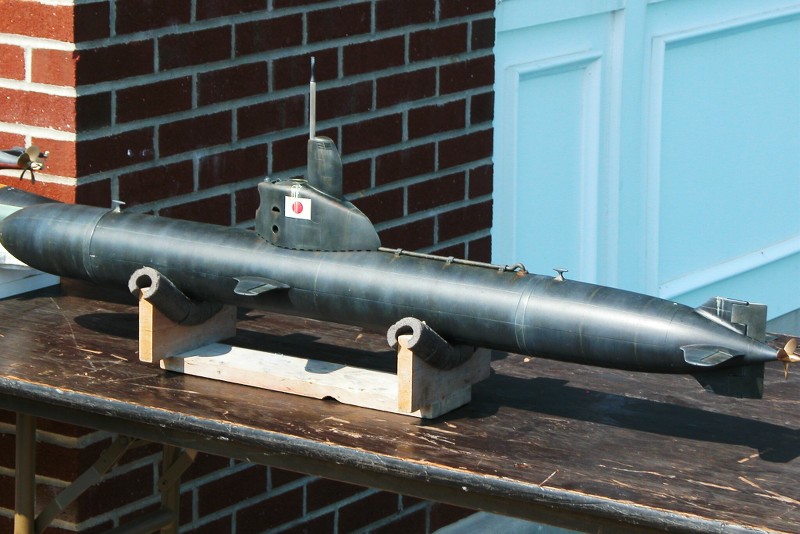
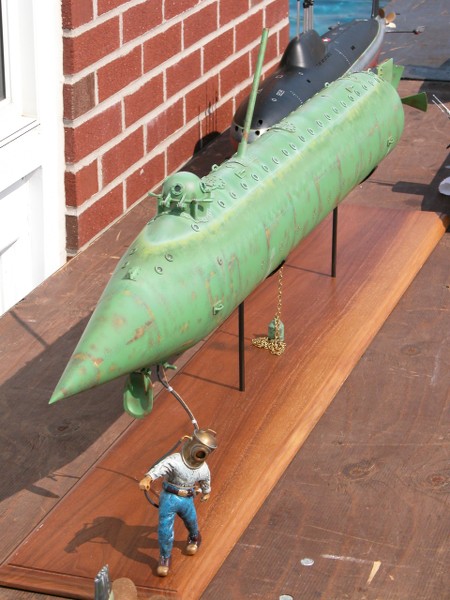
    An old-school masking medium is rubber cement. You dab it onto the model surface, paint, then lift the mask off with sticky masking tape. A good example is the paint-failure effect seen on the Japanese flag that adorns both sides of this 1/16 KAIRYU midget submarine model.


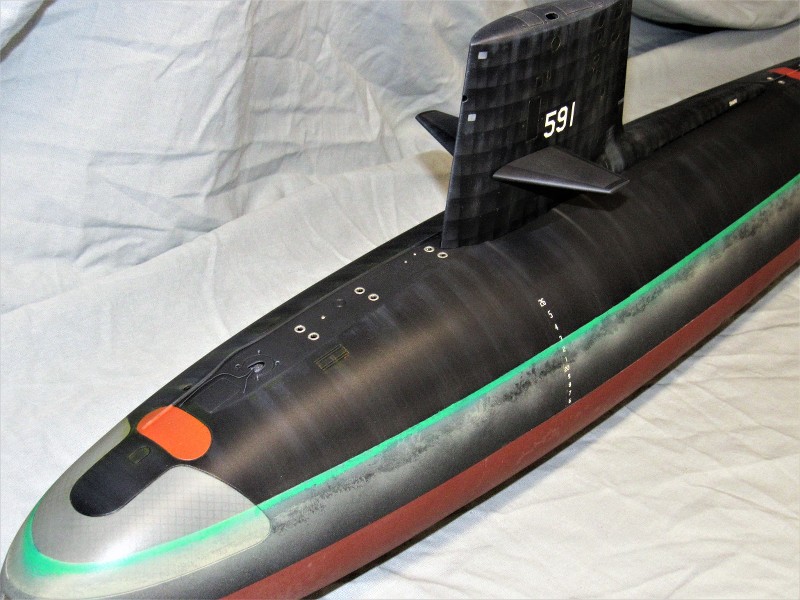
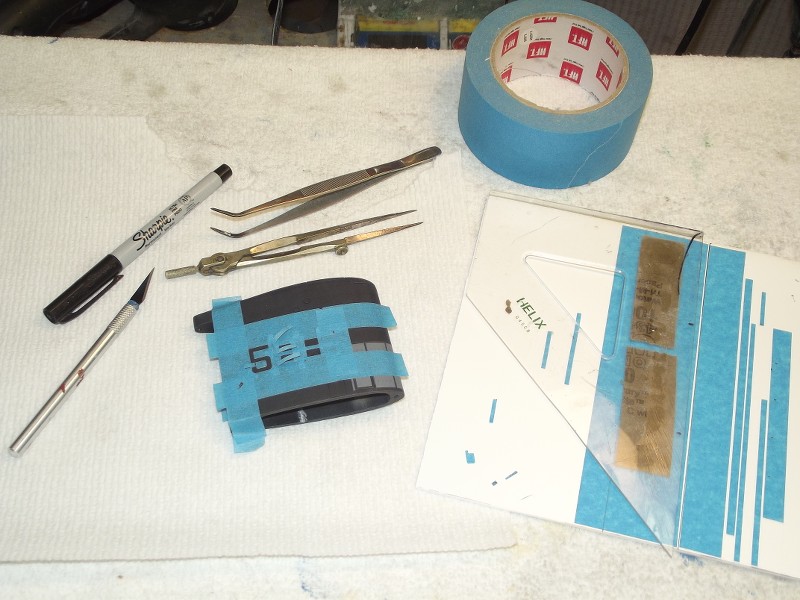
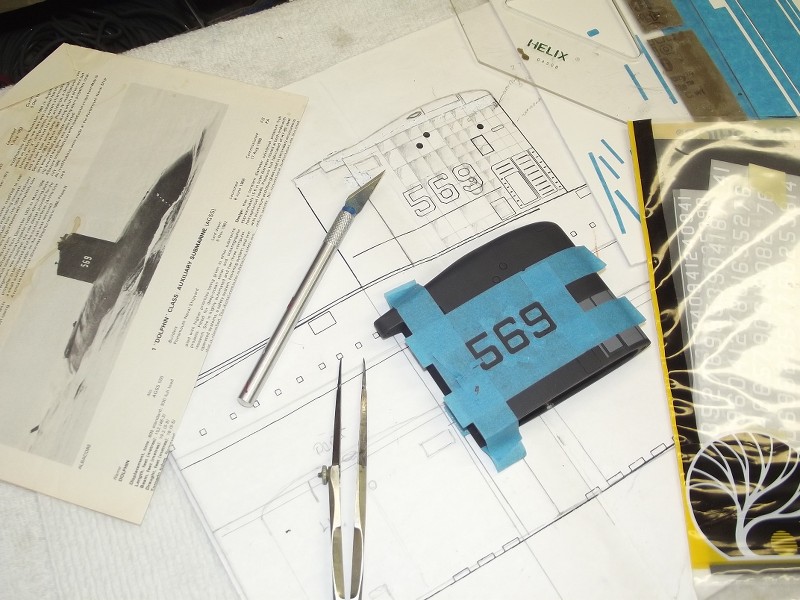
    Markings Hull numbers, draft numbers and bars, hull name, technical markings, high visibility items like marker buoys, and the like, though not 'weathering' go hand-in-hand with those operations as the two activities are right next to one another if your chronology of events is a rational one. And many of the marking techniques do involve one form of masking or another.

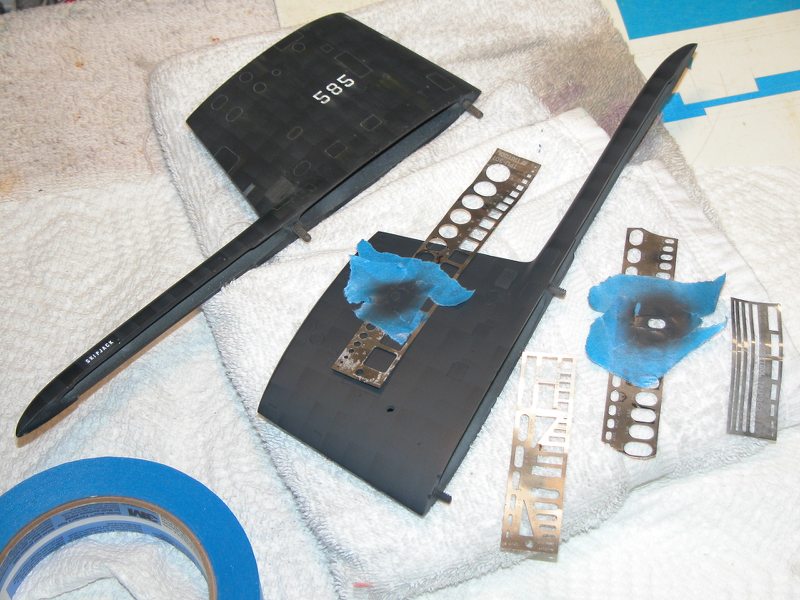
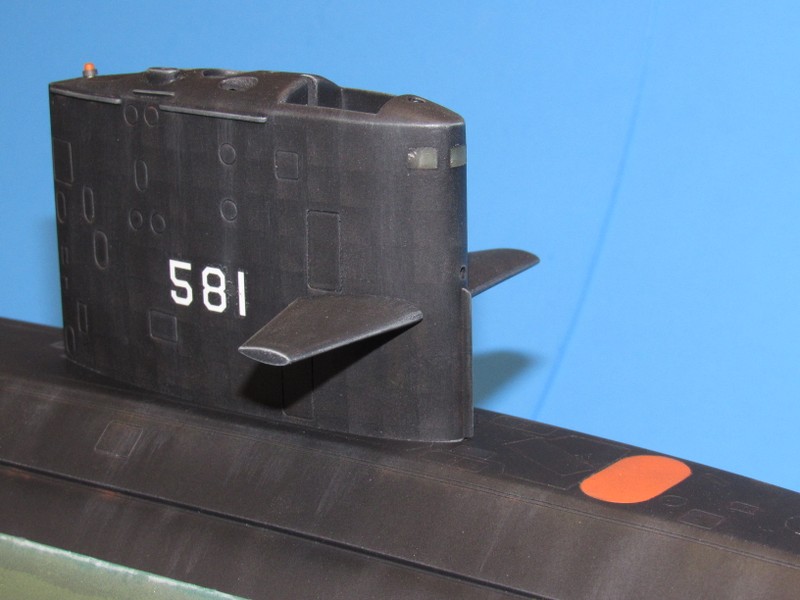
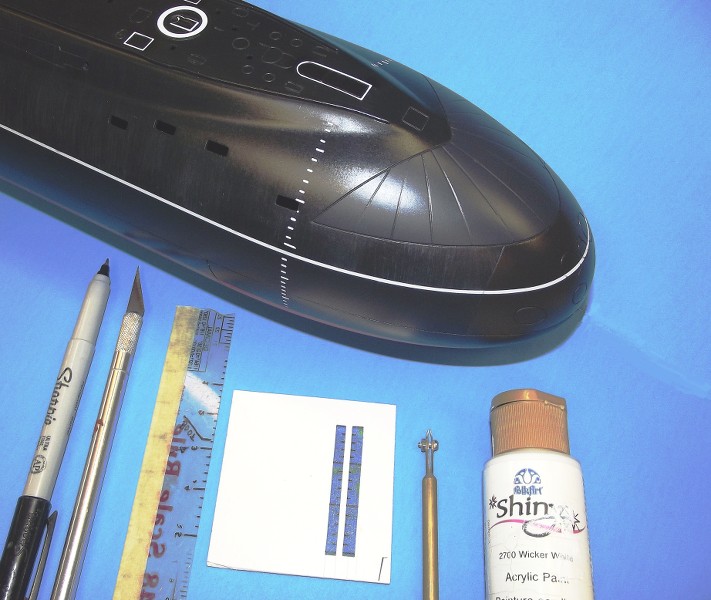
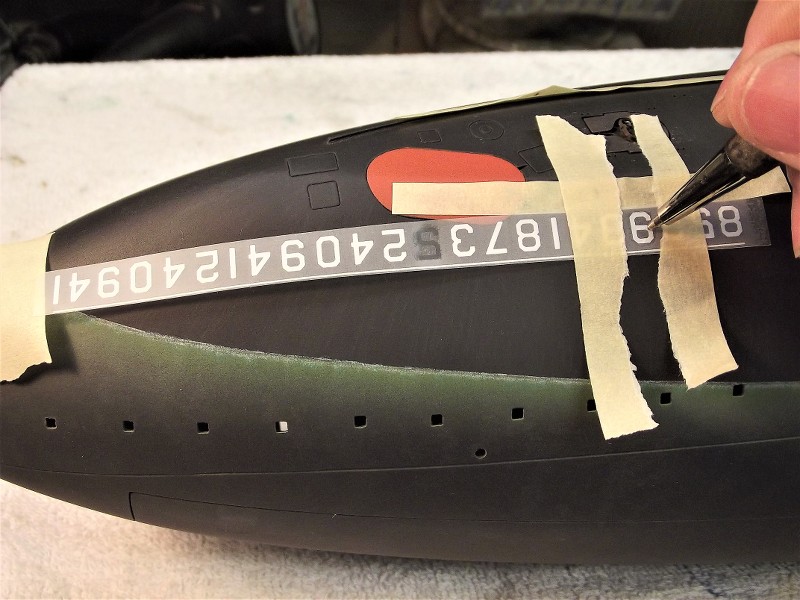
    There is the old standard for markings: masking tape. Here you see it used to mask out Roman Gothic font hull numbers. You plot location and size, put down the tape, paint, remove masking and wa-la, the desired numbers in the color of choice.


    And going the masking tape route of producing the European style of horizontal bars that denote draft level of the in-port submarine.


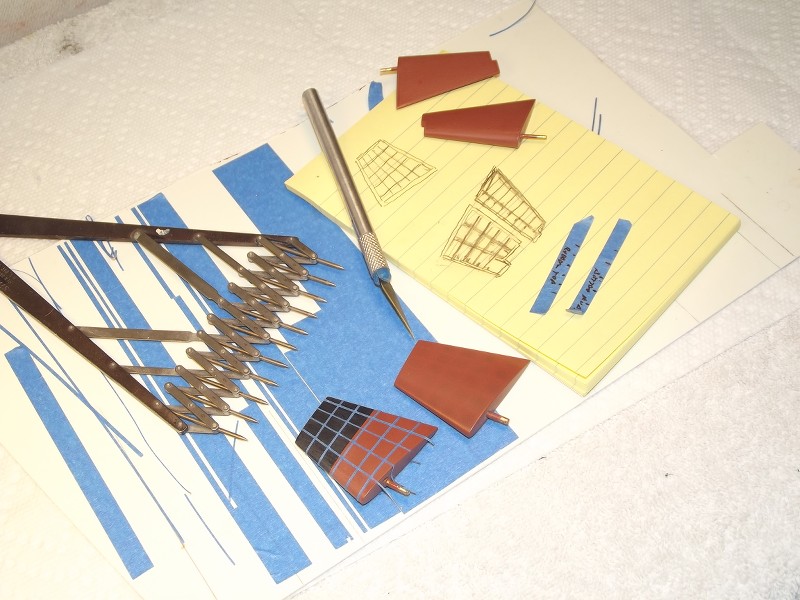
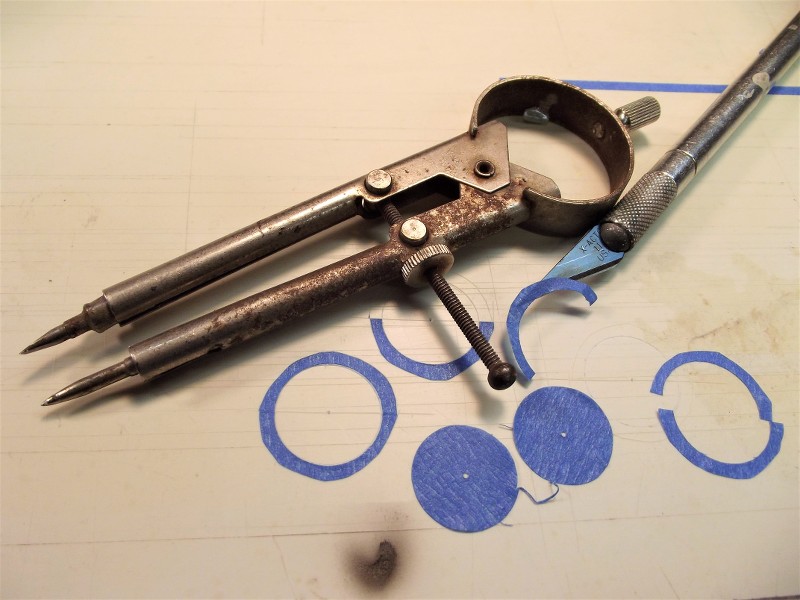
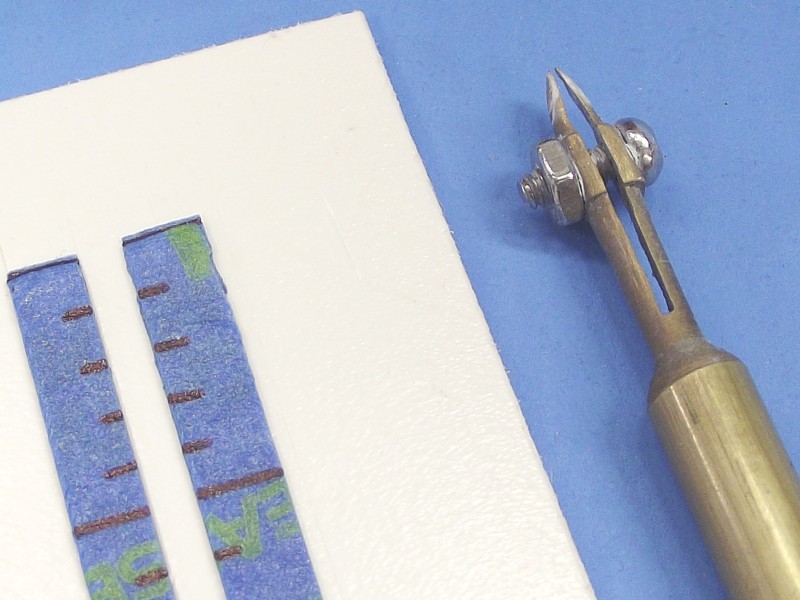
    Cutting out circles onto masking tape is either done with brass tube punches, or a compass cutter.


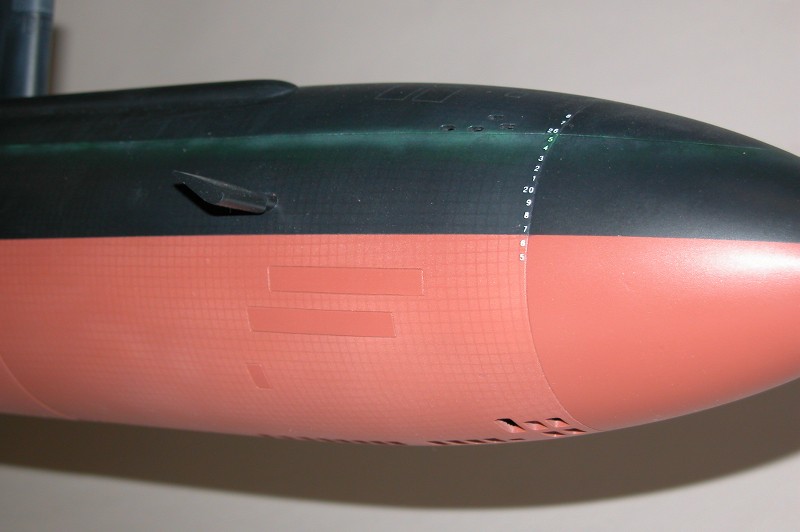
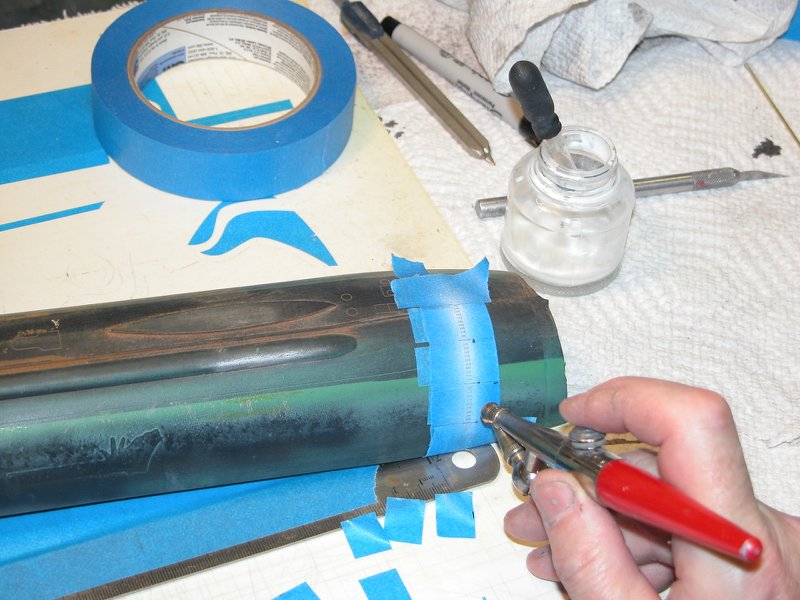
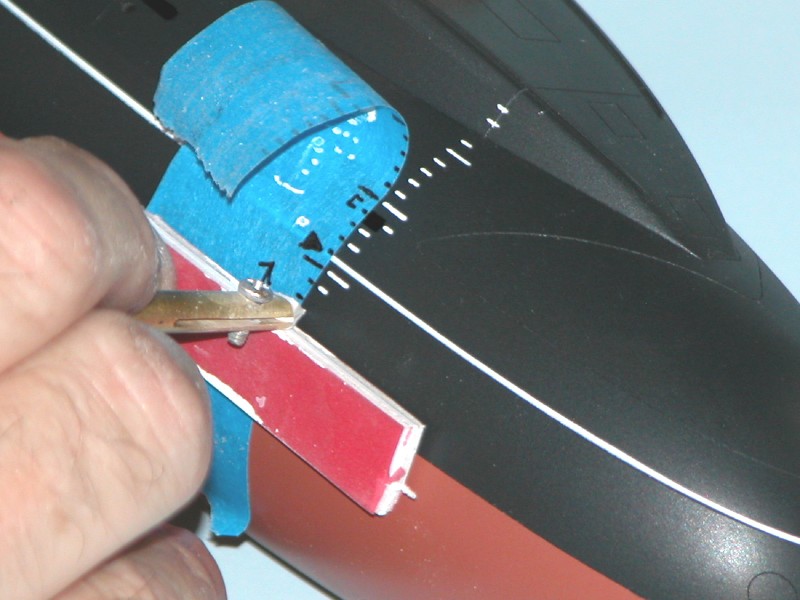
    I've found a home-made 'drafting pen' very useful when I need to lay down narrow, uniform lines. Such as European draft markings, technical markings, and mild radius boot-topping. Here you see the use of the drafting pen as I put down horizontal lines denoting draft heights on the sides of this 1/96 KILO hull.


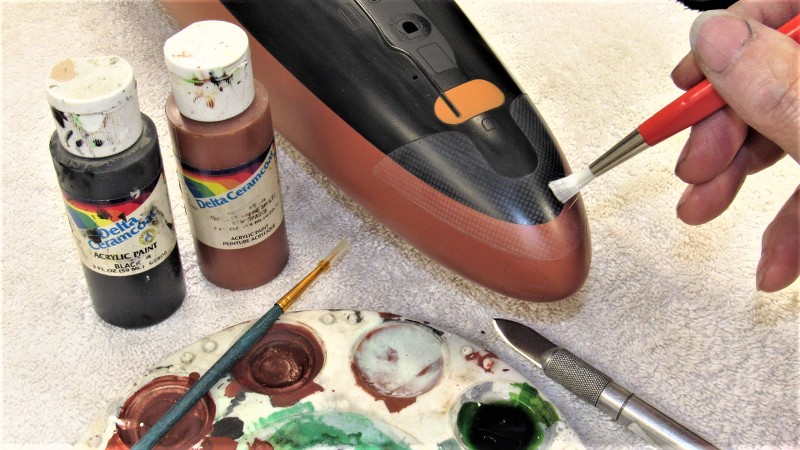
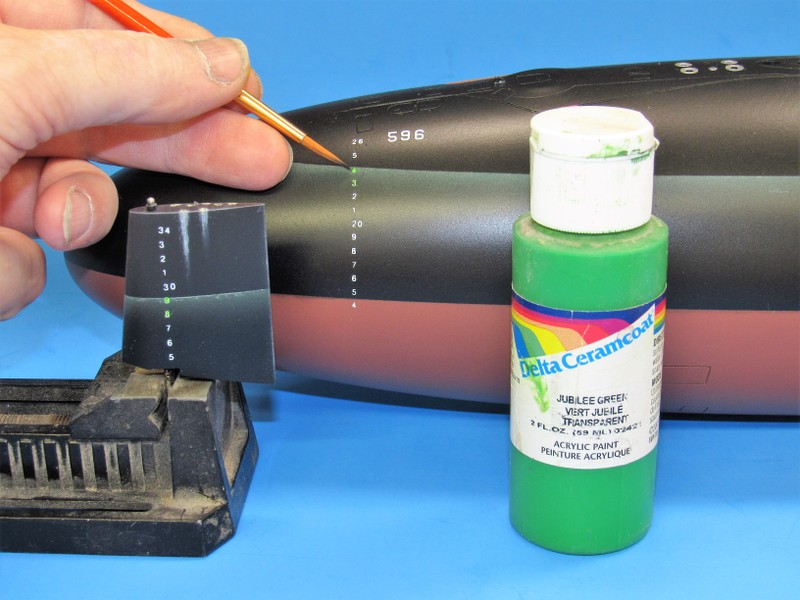
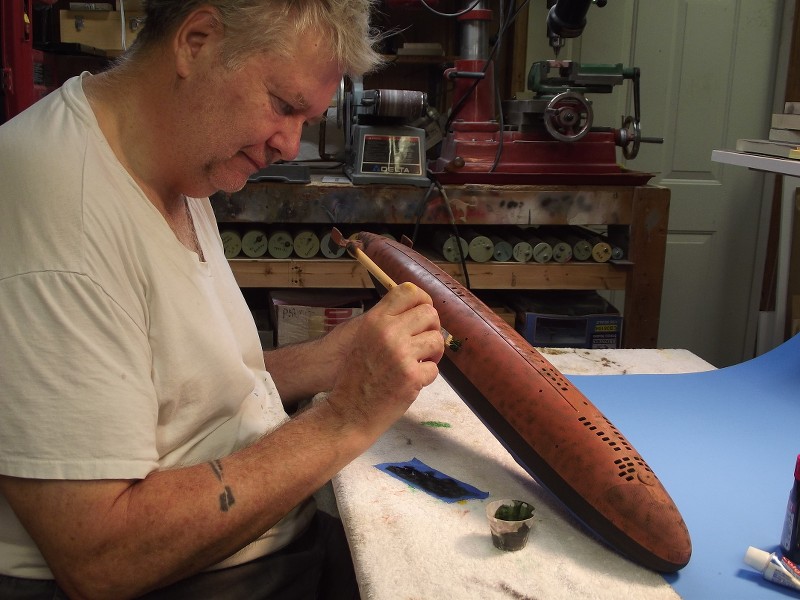
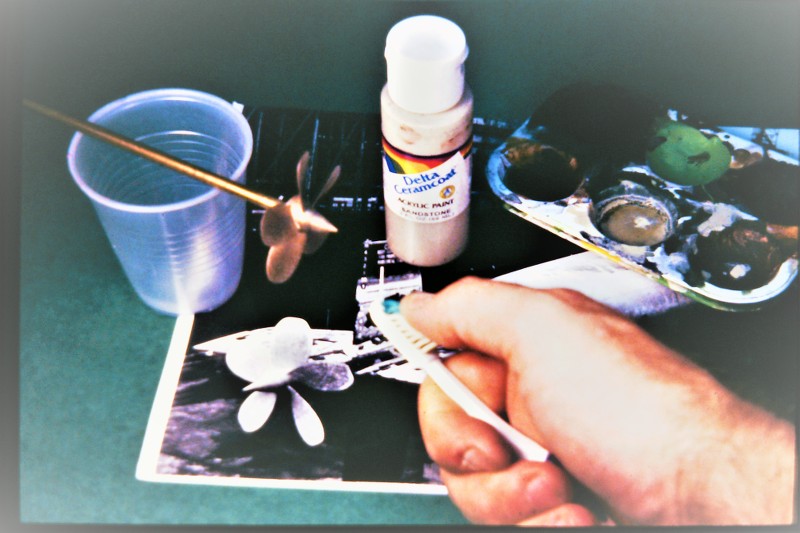
    A concern with using dry-transfer and water-slide type decals is that they, because of their week adhesive bond to the models surface, is the need to defer their application until all the gross weathering has been applied. That's because some weathering techniques require use of high-stick masks and abrasives -- techniques that easily damage fragile markings. That results in the need to spot weather those markings to match the surrounding colors of the weathering. That's what I'm doing to the hull draft numbers (that job already done on the foreground upper rudder draft numbers. The job done with water thin acrylic paint applied in multiple coats, drying with a heat-gun between coats dill the desired opacity is achieved.


    Dry transfers themselves, taking advantage of their weak bond to the models surface, are also employed as painting masks. Once the work is done, masking tape is used to lift off the dry-transfer revealing the underlying color in a perfect pattern of the dry-transfer that protected the underlying paint. A neat trick when you need numbers/letters in red but only have white dry-transfers.


    Or, dry-transfers can be used as God intended: press-on type markings.


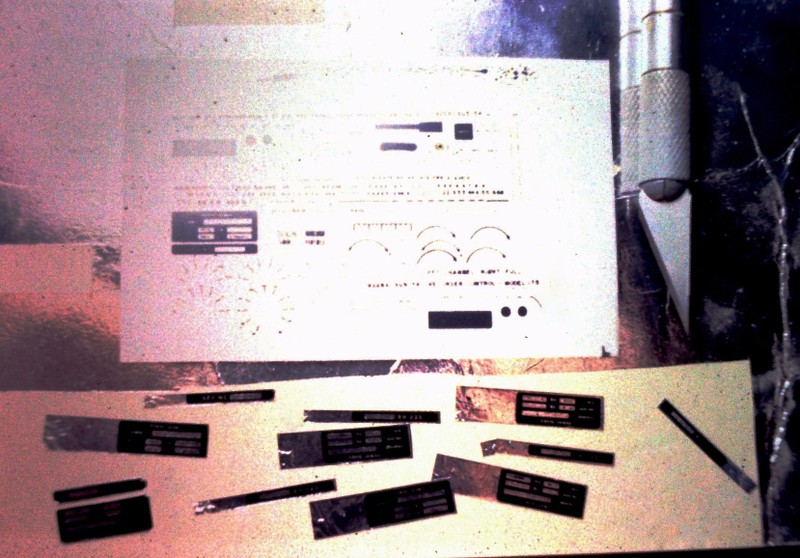
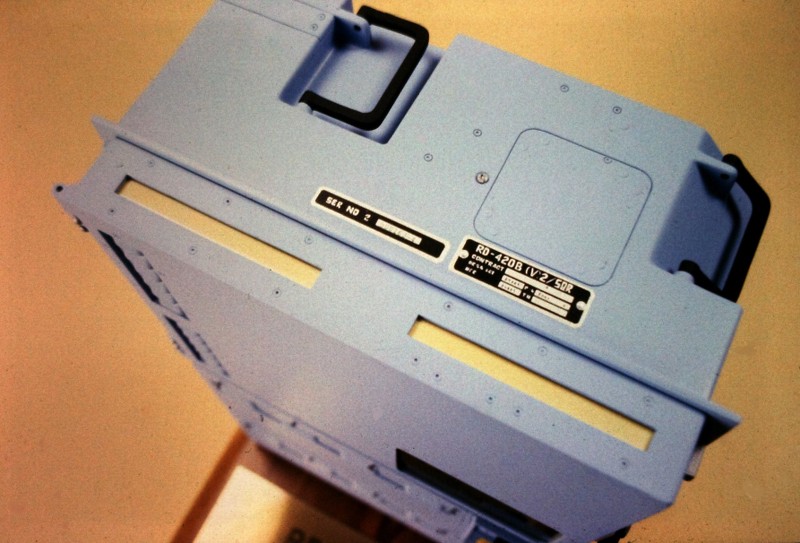
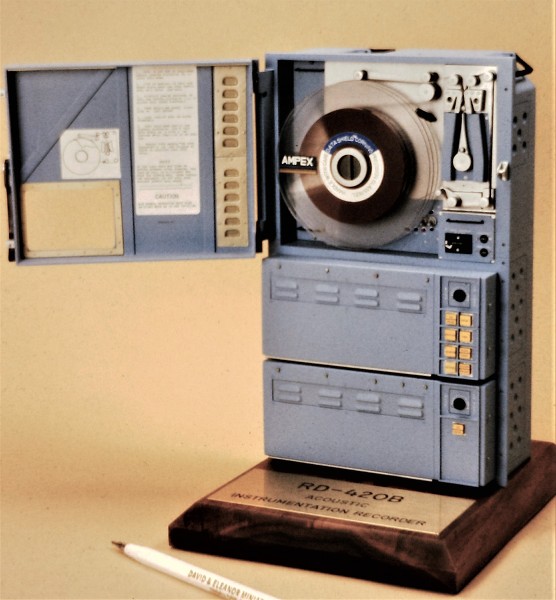
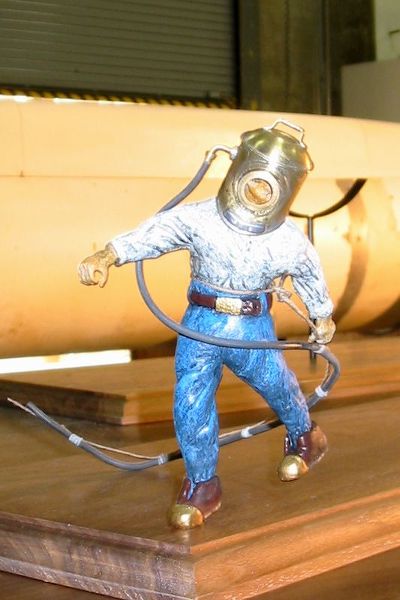
    If you need 'information plaques' or 'machinery nomenclature plaques' you burnish down dry-transfers to self-adhesive aluminum foil and apply that to the displays surface, which is what you see done for this industrial promotional model.


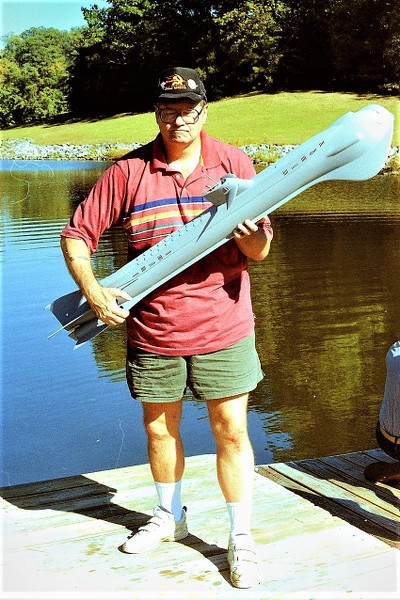
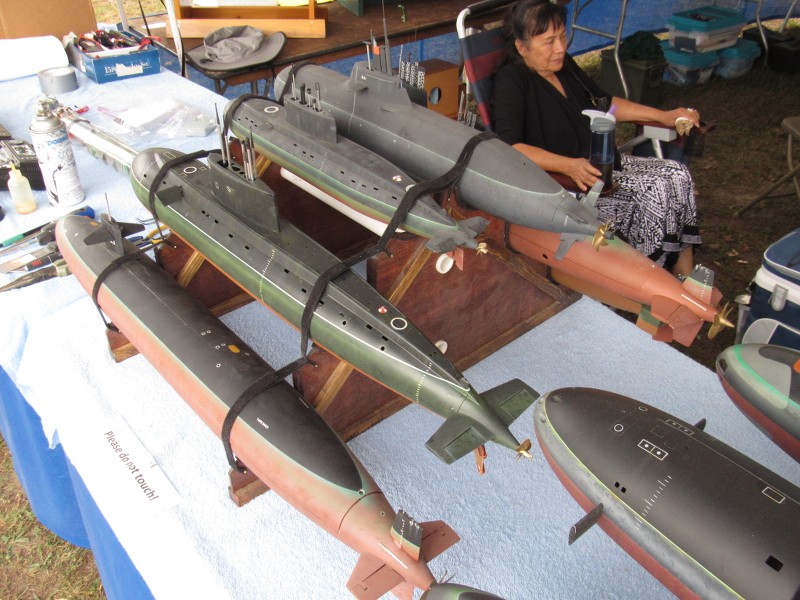
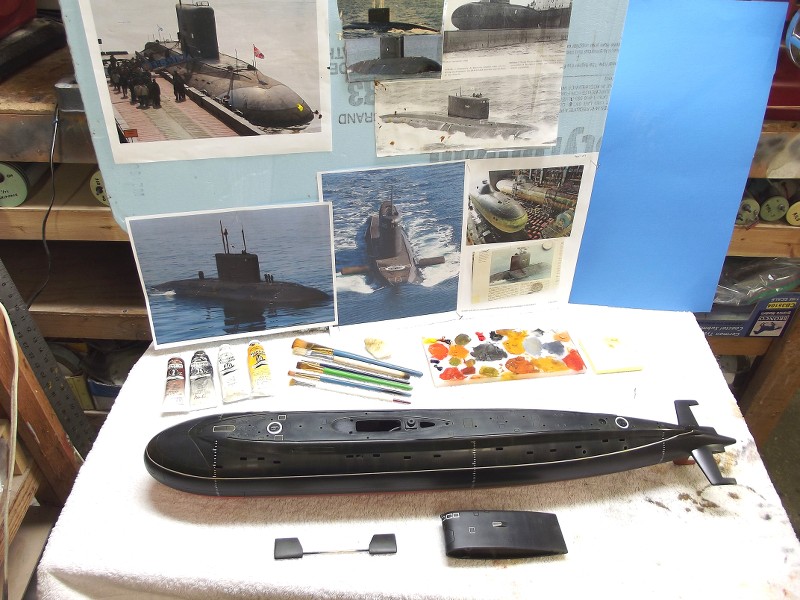
    Streaking Before launching into this most useful, and difficult to master, weathering technique let me circle back a bit: I've mentioned the use of 'test-articles' before. These simply are training-aids you keep at hand; discarded hulls you may or may not complete in your lifetime. But hulls representative of the geometries of the type models you enjoy working on. These test articles are what you practice a painting, assembly, weathering, or marking technique on if you are unsure of yourself and don't wish to bugger up the project at hand.

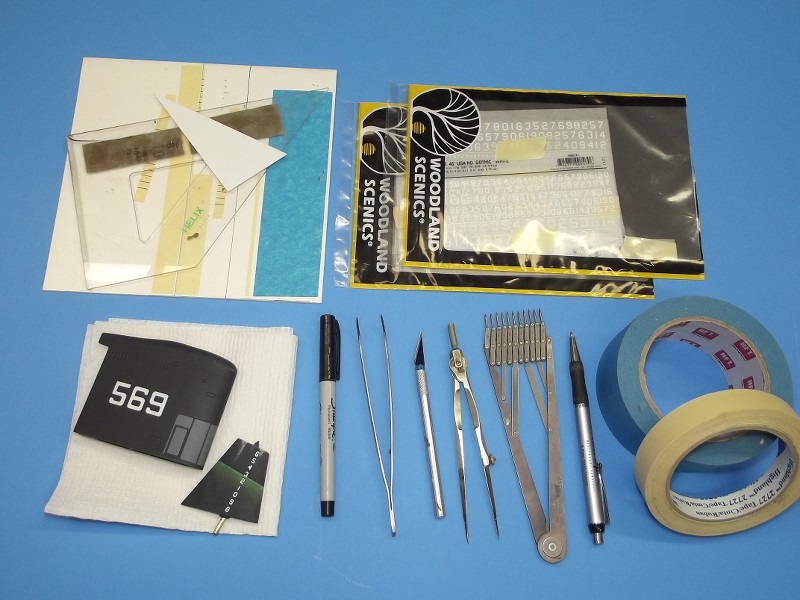
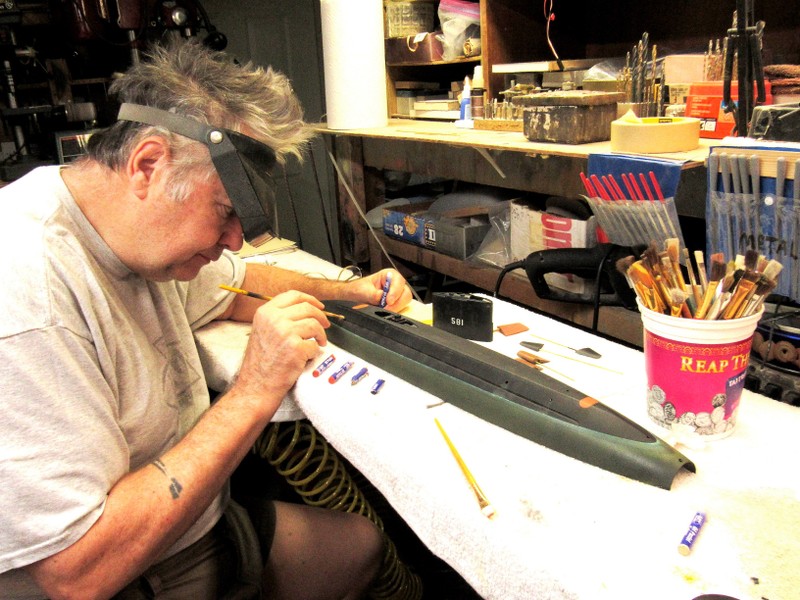
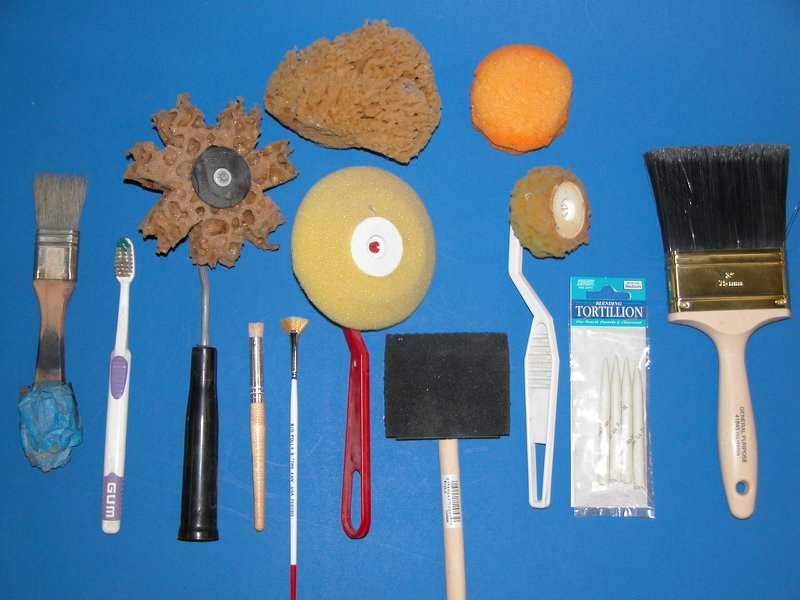
    You practice and perfect your techniques on the test-article and only move on to the display piece when you're ready. Here are some examples of test-articles in my shop and some of the training I've done on them:

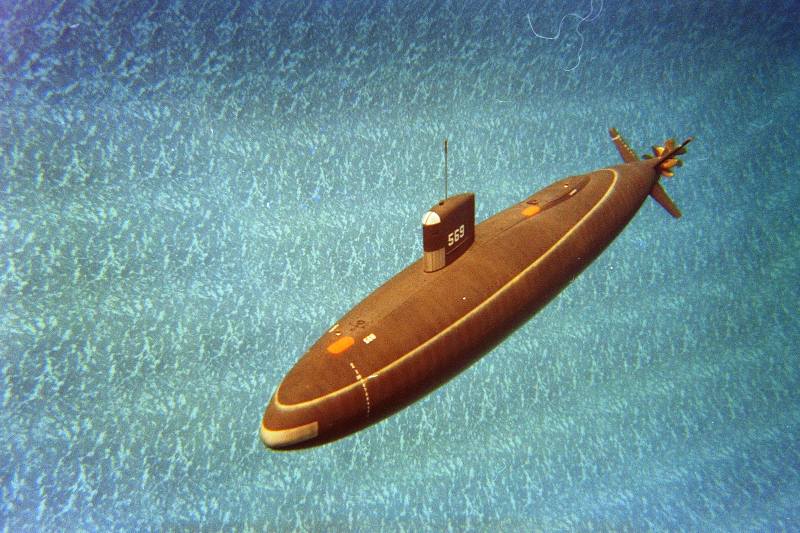
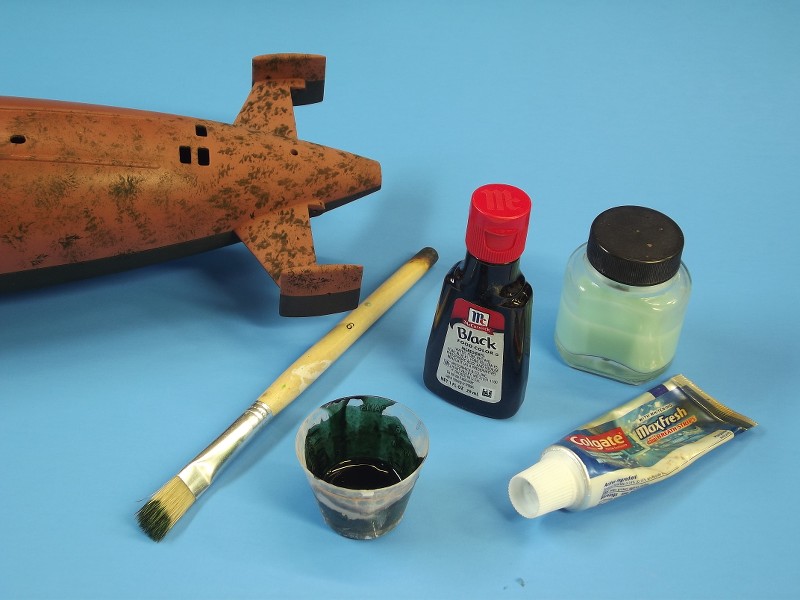
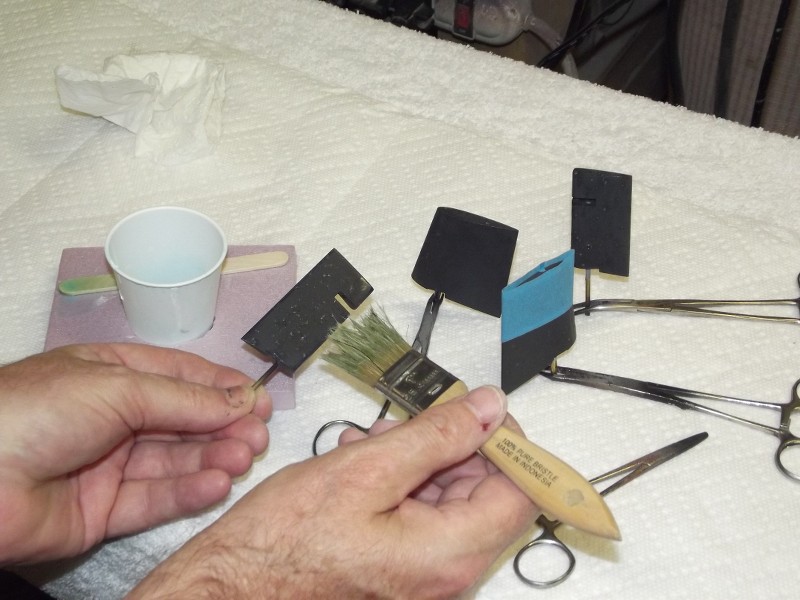
    During my formative years I began to experiment with the more exotic masking materials and application techniques. This was one of my first test-articles, a never finished 1/96 USS NAUTILUS hull section. Note that I've segregated into sections where I could test specific masking mediums. Evaluation taught me that good old tooth-paste was the best for the work I did; PVA came in a very close second place.


    That same test-article used to explore different tools and techniques for laying down water-soluble acrylic paint for WL scum and vertical streaking study. Awful looking work here -- that's why you commit your worst work to something people will ever see. Nuts!... I should have thought that through before posting that picture. Now I will have to kill you all! Sorry.


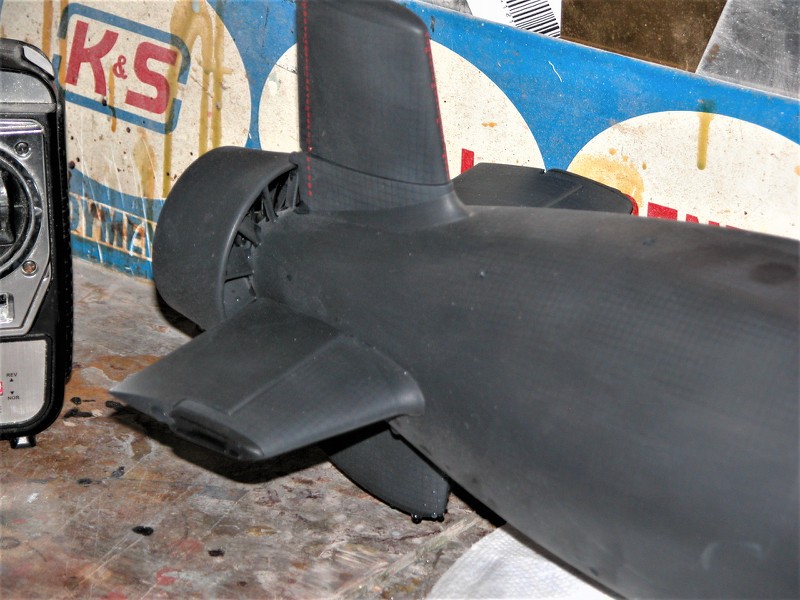
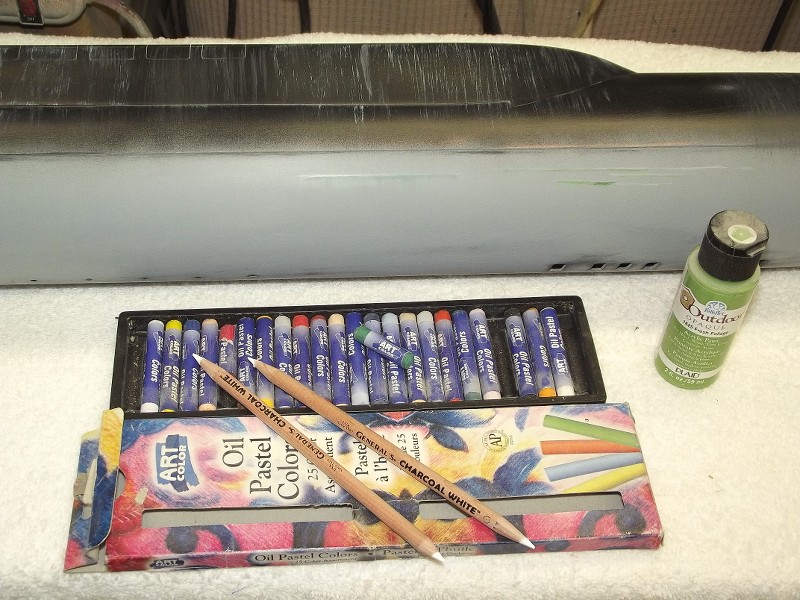
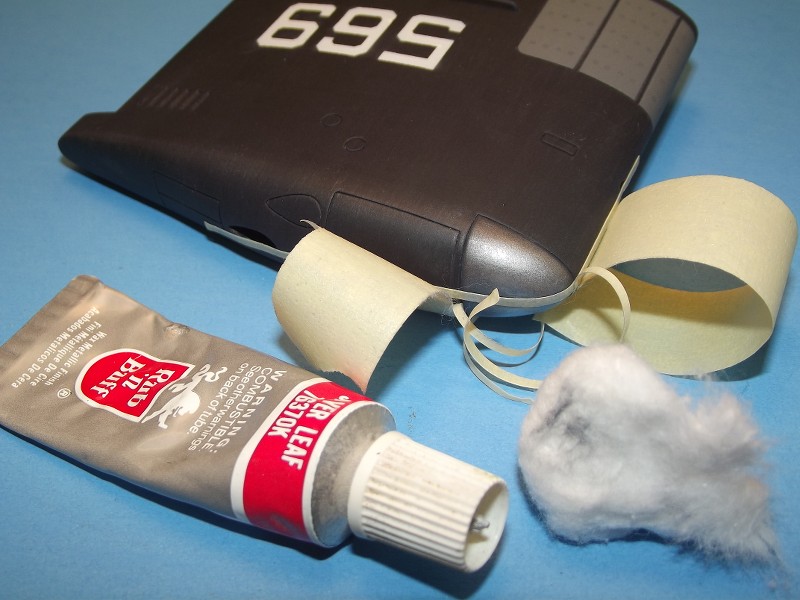
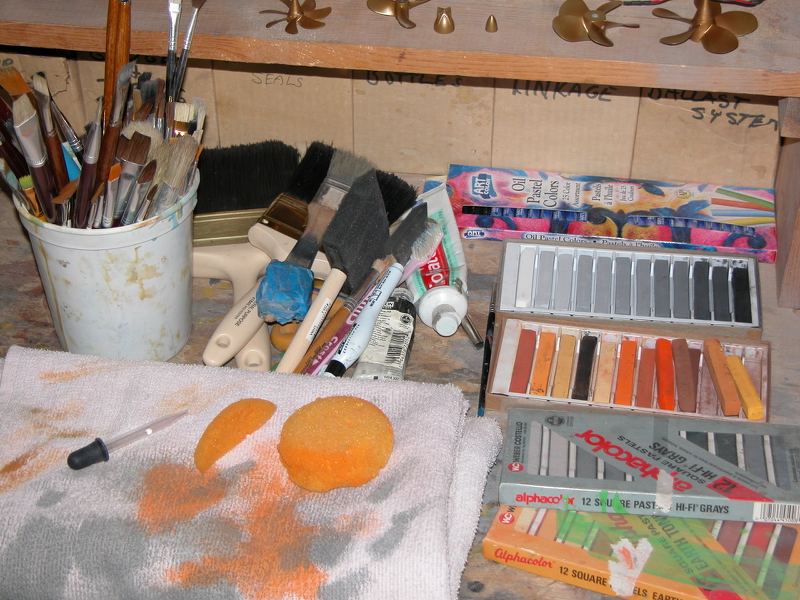
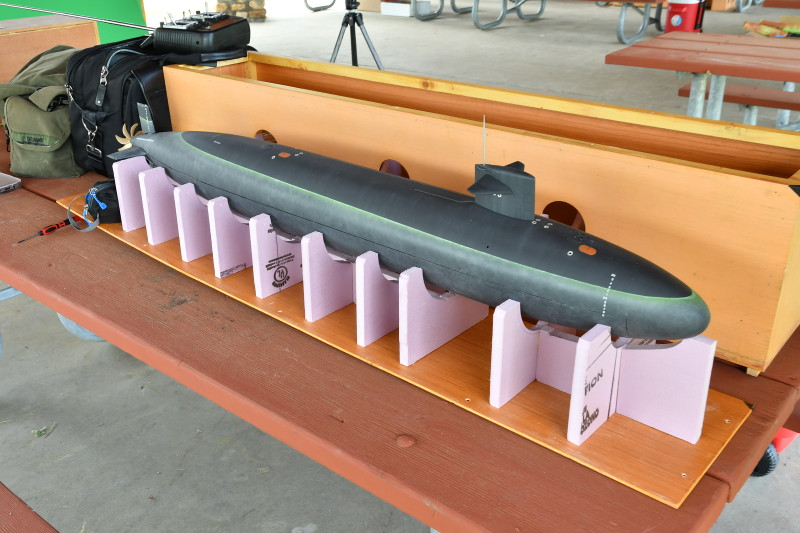
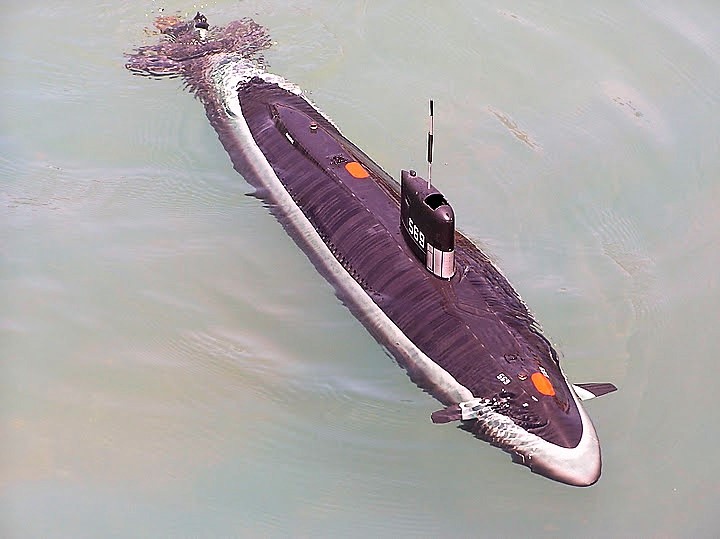
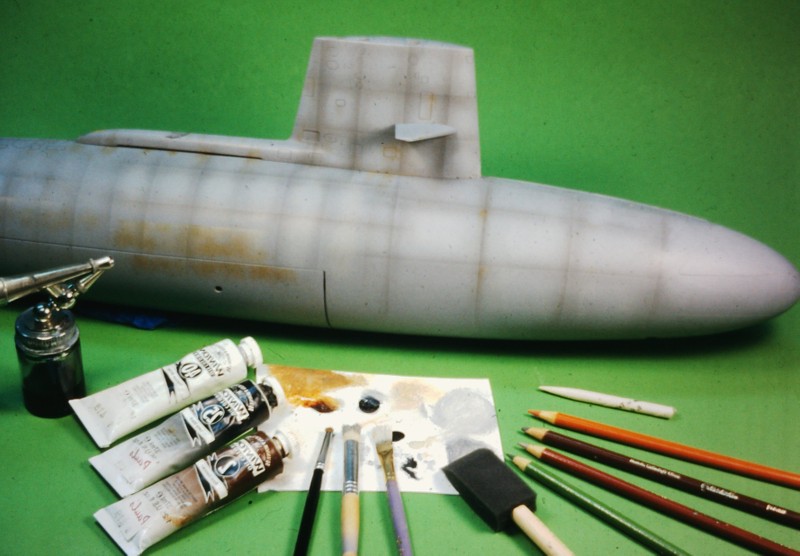
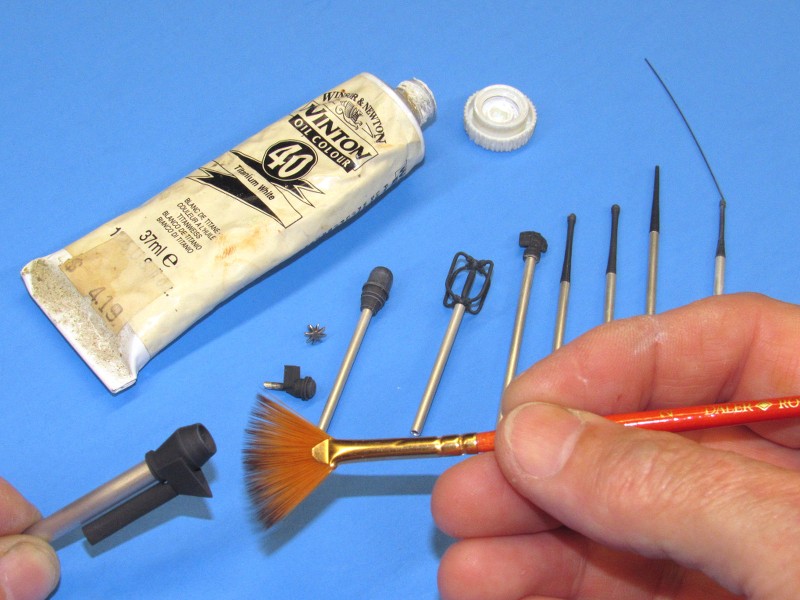
    I temporarily pressed one of my 1/96 SKIPJACK hulls into service as a test-article. Here I'm playing with pre-shading techniques as well as working on my blending skills with oil paints using a variety of brushes, texture sticks and cotton balls. I also played around with Artist's pencils exploring their utility at representing scum lines and marking touch-up tasks.


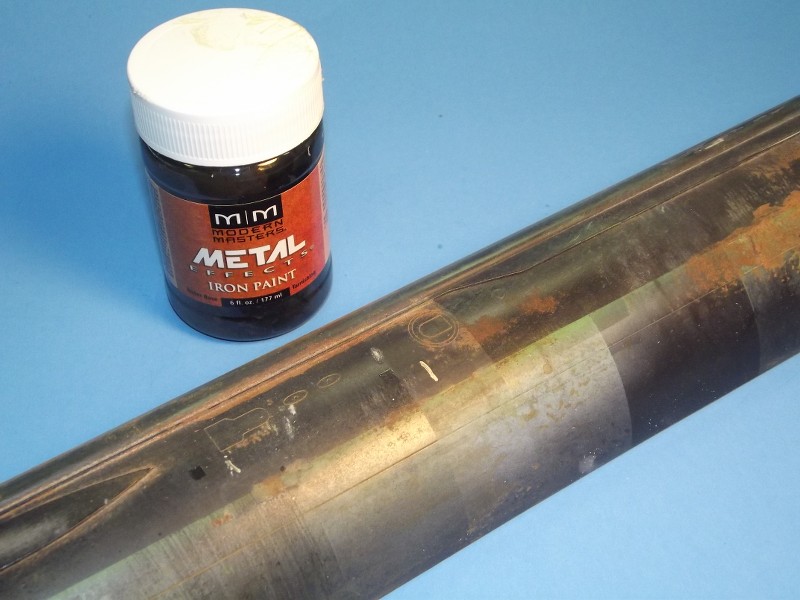
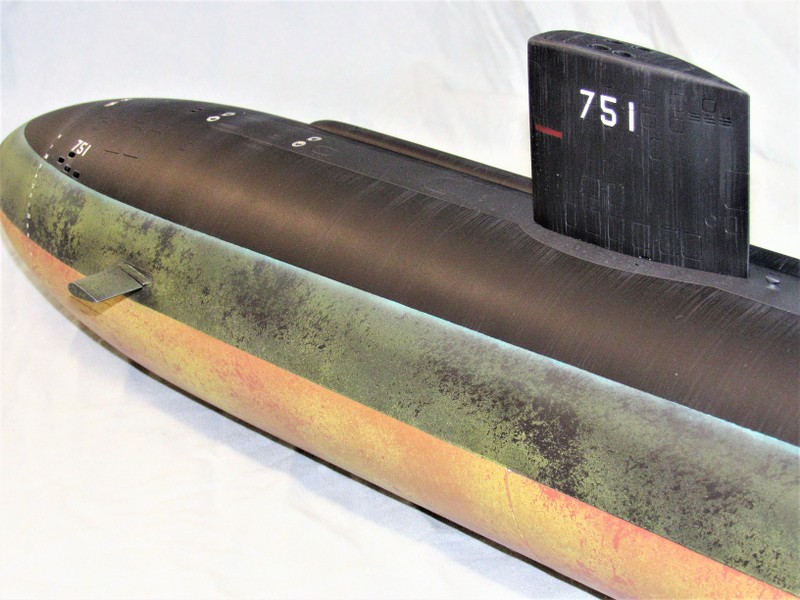
    This long suffering 1/144 Trumpeter SEAWOLF kit hull has seen it all! At this point I was evaluating several brands of 'real rust' medium. With the right acid, and some skill swirling it around, an astoundingly real look of rust can be achieved. Because, duh, it's real rust!


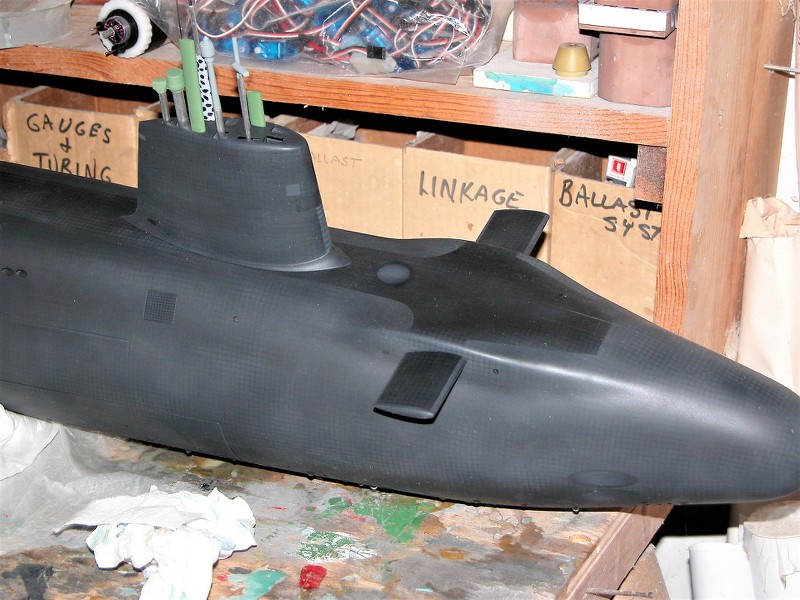
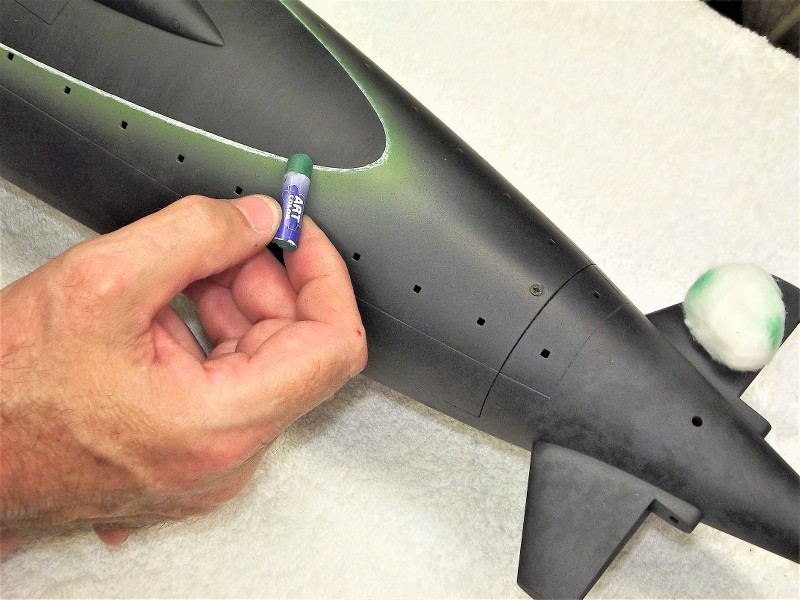
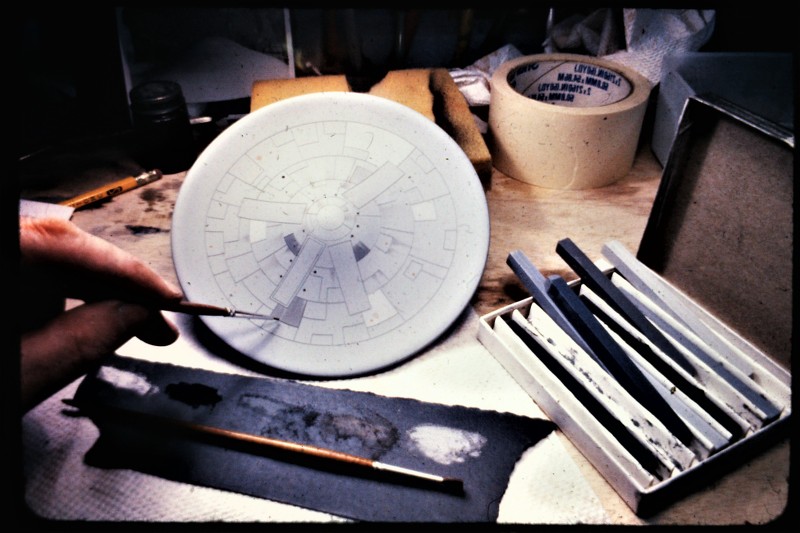
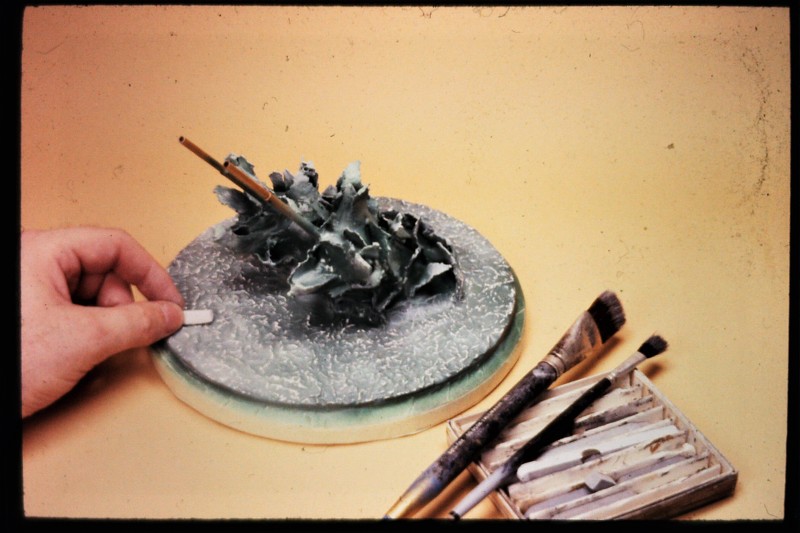
    I'm using the SSBN test article to play with oil pastel crayon smears. You put a glob of this medium on the model then pull it into a streak or localized pile of gunk with stiff chisel brushes. I've found the crayons good for that off-color band(s) seen just below the WL. Dip your brush into linseed oil and the work goes a lot quicker.


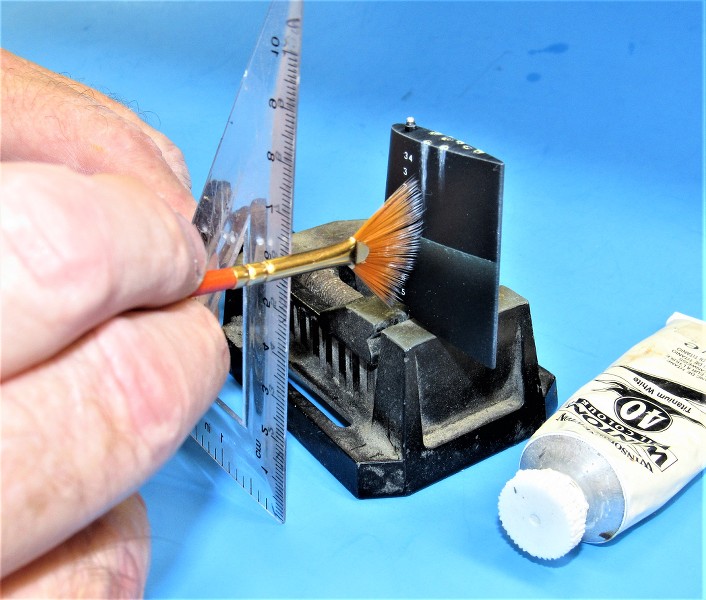
    And this look at the use of test-articles leads us right back into the technique of 'streaking'. Here I'm investigating the means -- through use of a right-triangle guide rail (a length of channel running the length and parallel to the hulls longitudinal axis) -- of achieving near perfect vertical sweeps of the lightly loaded brush as I lay down vertical paint streaks.


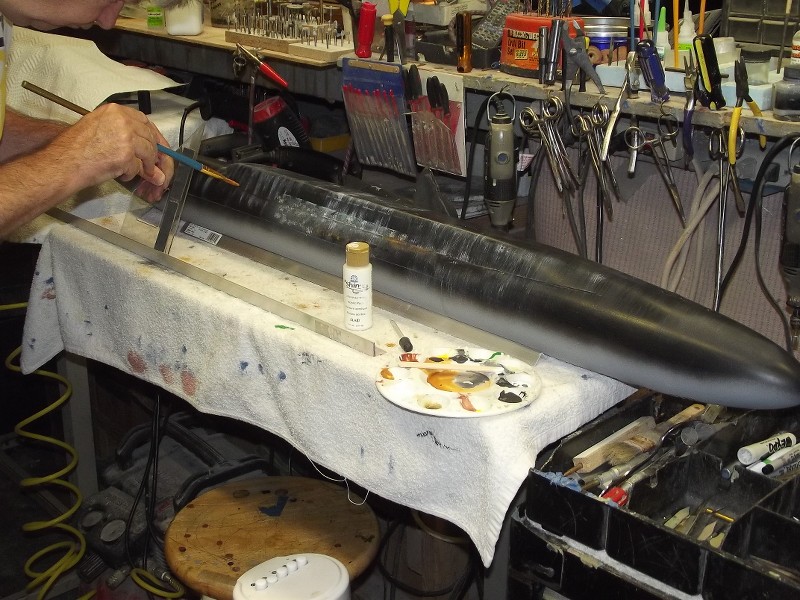
    The streaking effect represents rain-water run-off along the sides of the hull and down the upper rudder and sail (and any other structures AWL unique to the subject). Streaking goes down in two stages: the light colored streaking followed by a misting of the base color to soften the effect as, like oil-canning, the application will always be a bit too stark than desired, so you tone it down with a well cut mixture of the base color.

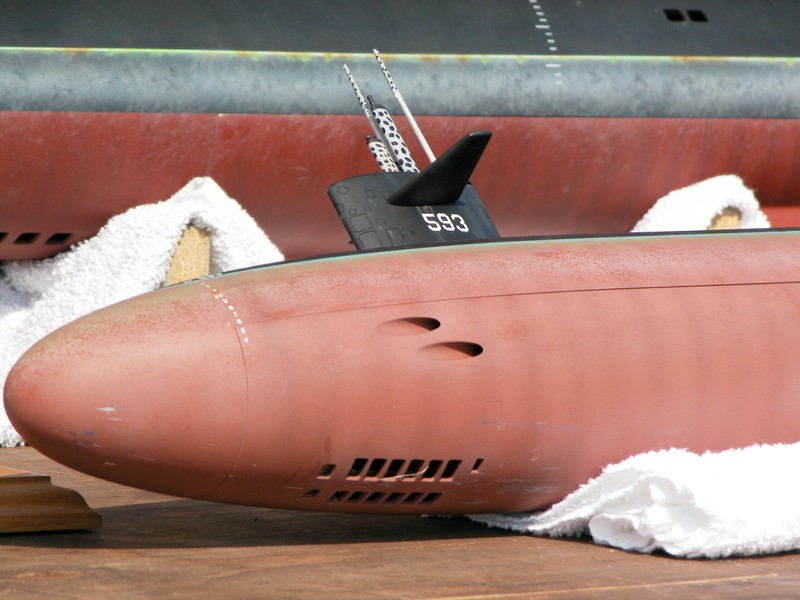
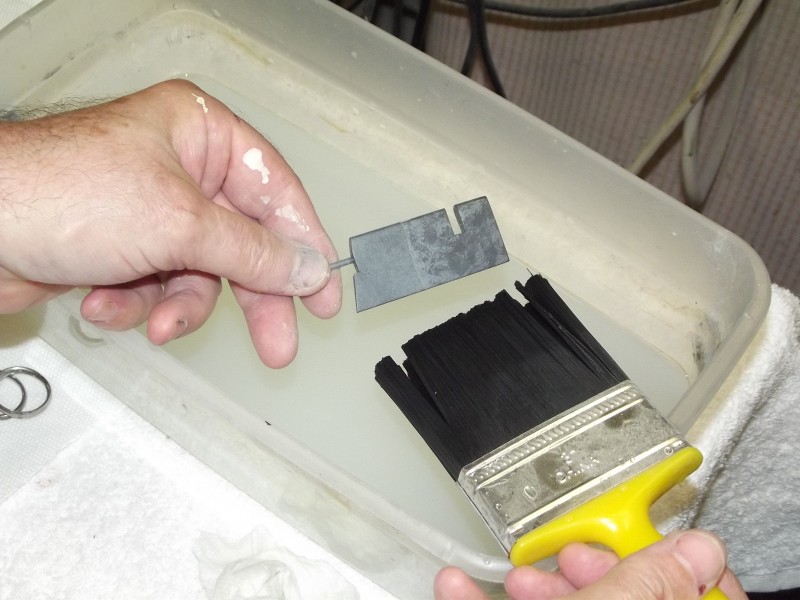
    NEVER represent vertical streaking on the BWL portions of hull. Just don't happen! (Other than water run-off from discharges still active in dry-dock, but that's an exception to a boats natural in-water look). That's why the masking from WL down on this 1/60 ALBACORE hull I'm streaking with acrylic paint. I prefer the quick-dry, water-soluble paint for this work as the steaks will not blend with one another when dry; nor is this paint soluble once dry. For that reasons I don't use oil paint or other blindable mediums when doing this type work.


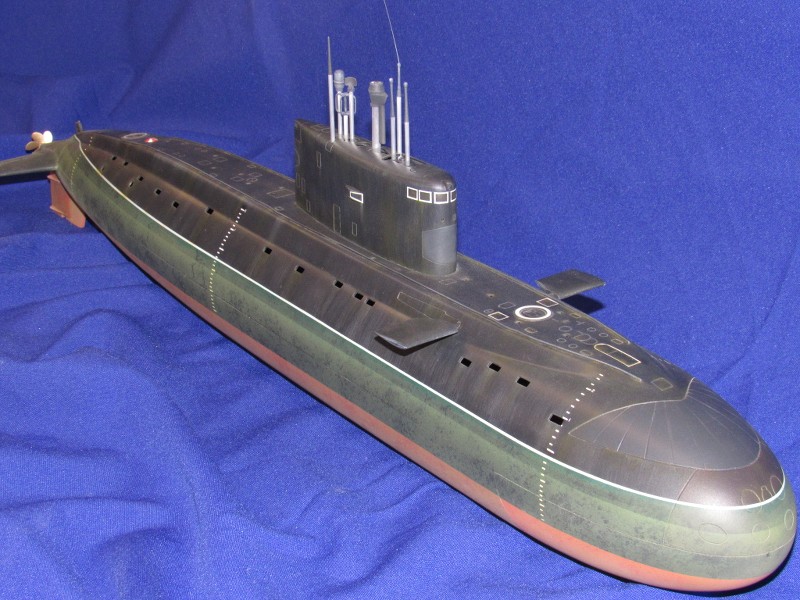
    I've demonstrated here on this 1/144 Trumpeter KILO how to de-emphasis the streaking by misting on the appropriate amount of base color to knock down the contrast. The misting is done with vertical passes of the air-gun. NEVER horizontal sweeps!! To the left is virgin streaking; to the right I've misted on some base color to present a more credible look to the effect.


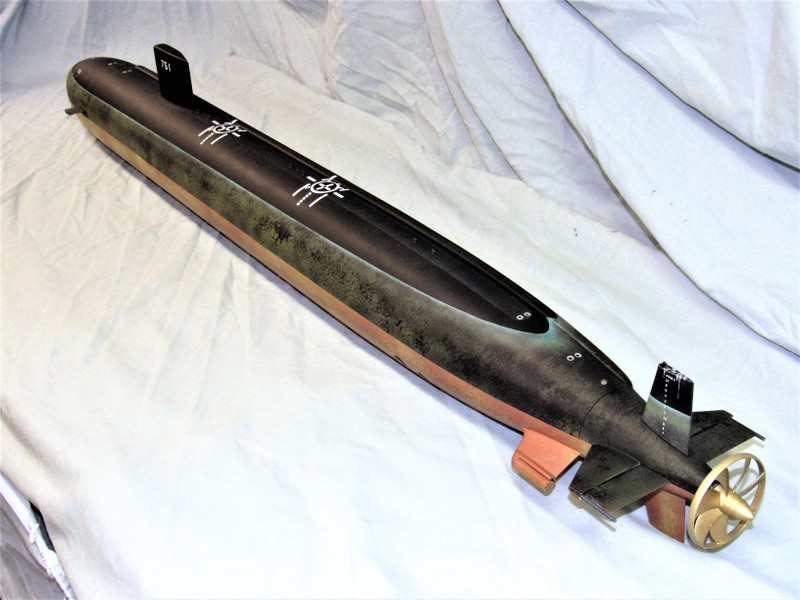
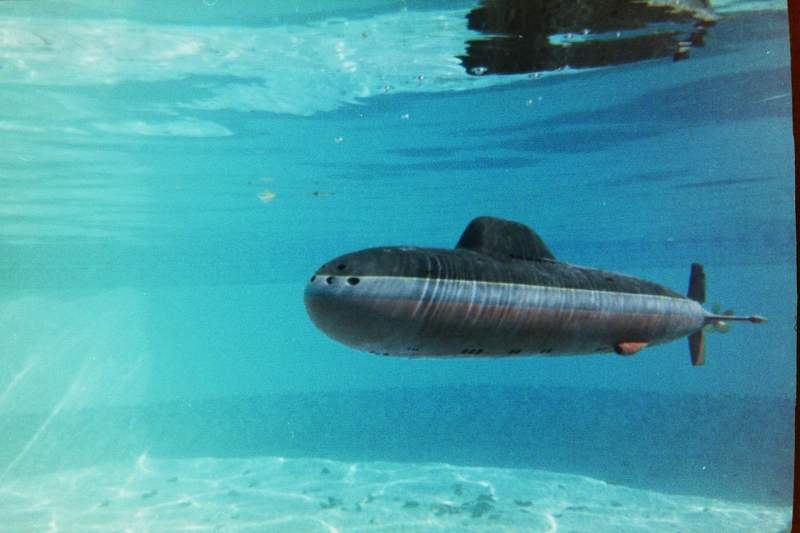
    And the result. Not a pristine, toy looking model. But an honest to God, attractive display piece representing a REAL, operational, weather beaten submarine. That's what weathering is all about -- that final step taken to breath life into the work; a living, breathing thing subject to the effects of the environment it operates in.


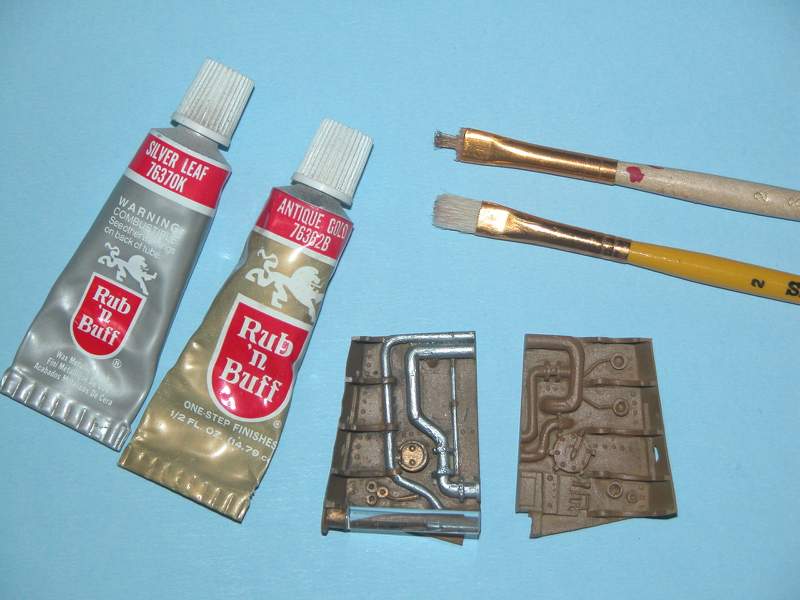
    Metallics Nothing looks like bright metal like bright metal. The best medium is self-adhesive aluminum foil. You can make your own from Reynolds Wrap and contact cement, or you can buy the commercial stuff at the local hobby shop (rotsa ruck!). Second best medium are the metallic particle bearing waxes like the old Rub n' Buff products.

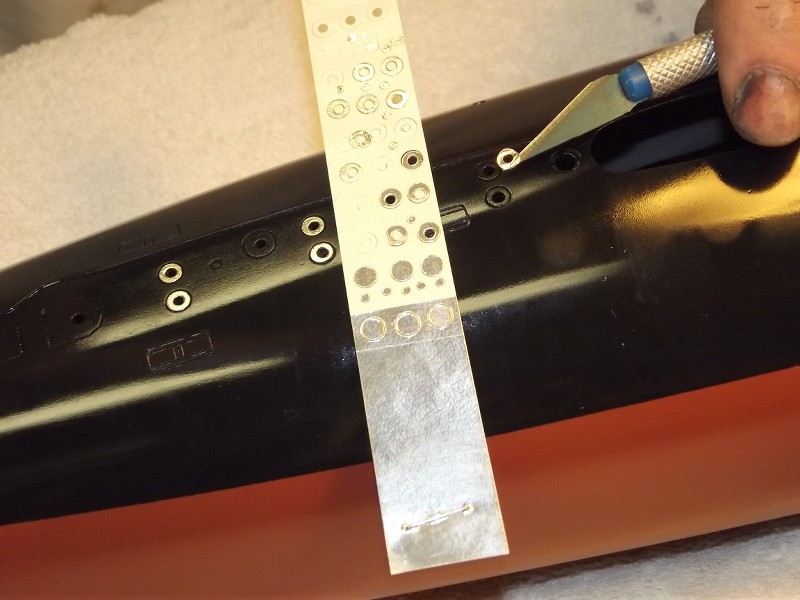
    Self-adhesive aluminum foil is usually used to represent the stainless steel flange rings around main ballast tank vents as well as the the cover plates of compartment salvage deck fittings. On the real boats these items are usually painted black, but I show them this way to increase visibility of the submerged model.

    Here I'm using brass tube punches to cut the concentric circles that produce MBTV flanges.


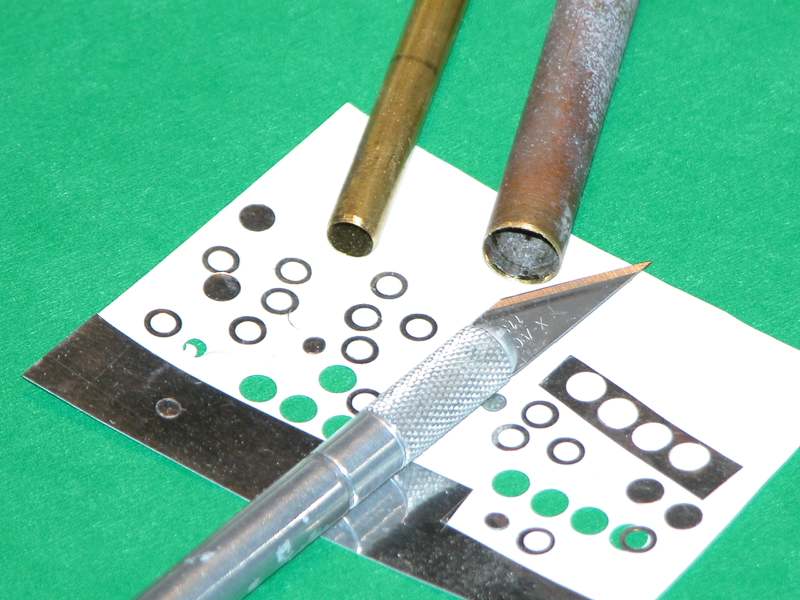
    Once the flanges are cut to shape they are lifted off the backing paper (wax or parchment paper) with a blade tip and transferred to the model.


    Use of Rub n' Buff silver wax to render a 'clear deadlight' look to a 1/60 ALBACORE's bridge wind-breaker. Care is taken to mask around the work as once the wax gets away from you it can only be removed through abrasion or scraping.


    The metallic wax, with care, can be worked onto the model surface with a stiff chisel-brush with surprising accuracy. And the more you brush and buff it out, the brighter becomes the metal flakes suspended in the wax binder.

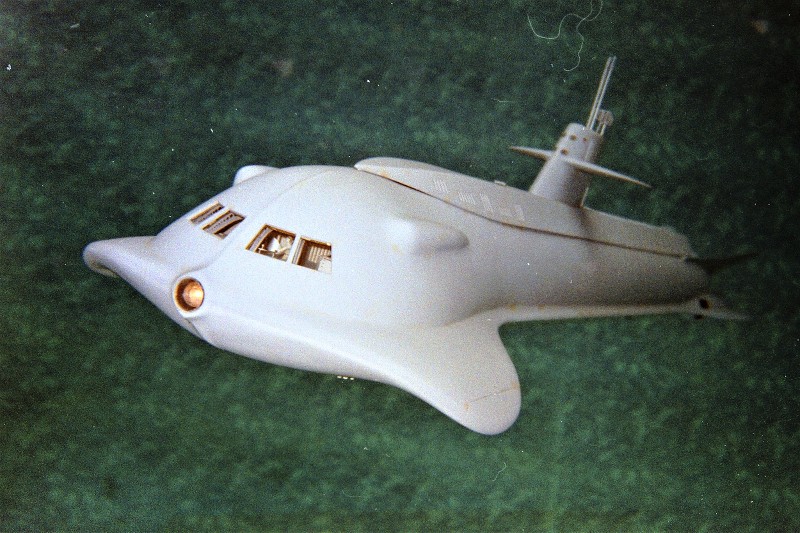
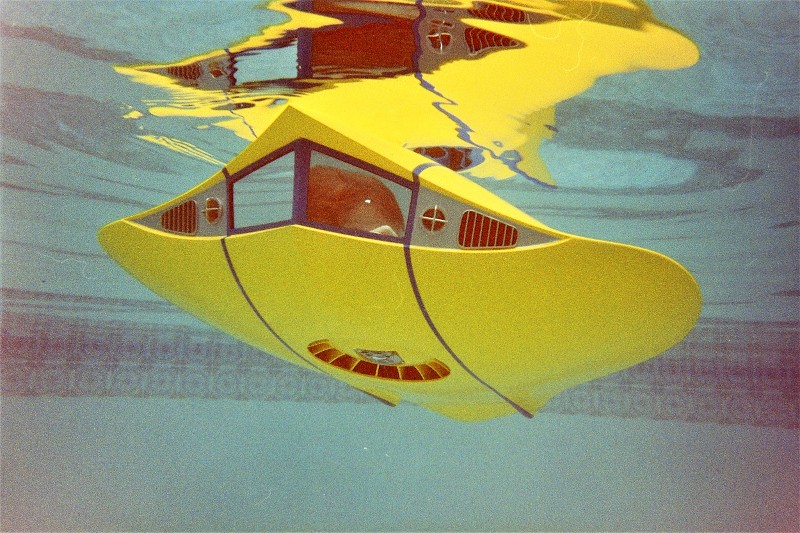
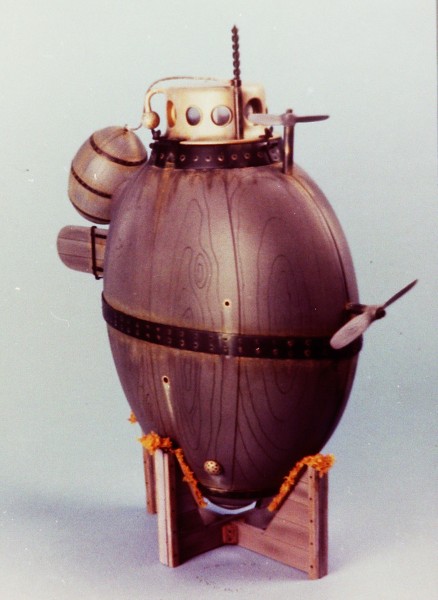
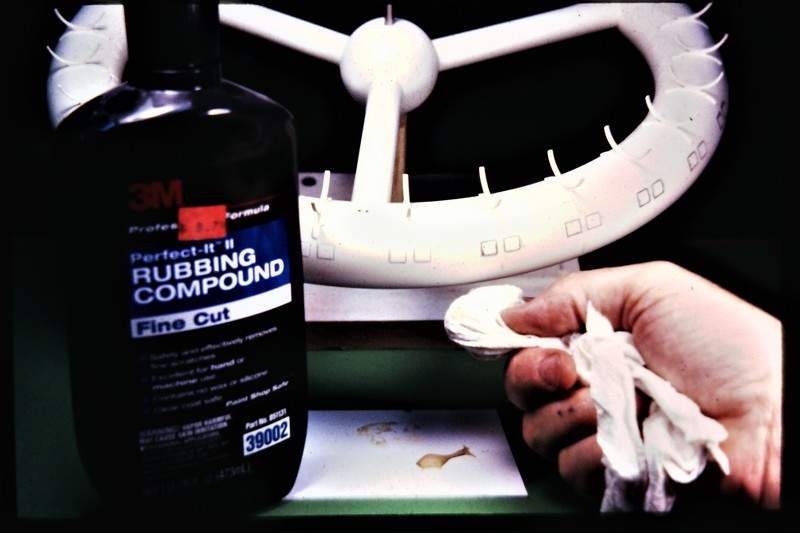
    Such as the pipe runs on this Disney NAUTILUS wheel-house interior.


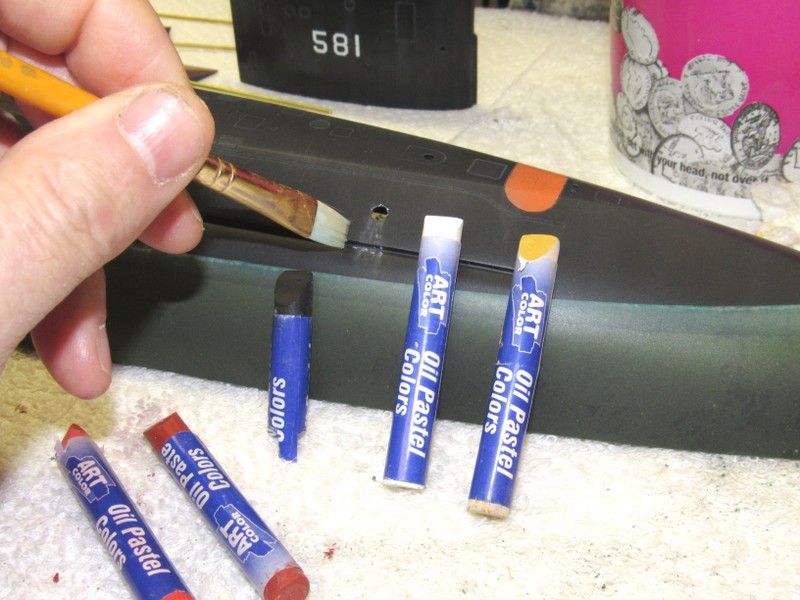
    Oil Pastel Crayon Solid sticks of oil paint, if you will. You position a hunk of this stuff where you want it then knead and pull the medium with stiff brushes to feather it out. Good for spot-rust effects, cathodic bleaching, verdigris and the like.

    The bleached band at the top of the WL scum band -- representing dead flora at the water/air interface -- was too stark so I softened that band down with smears of green oil pastel crayon and then feathered it into the work with brushes and a cotton ball.


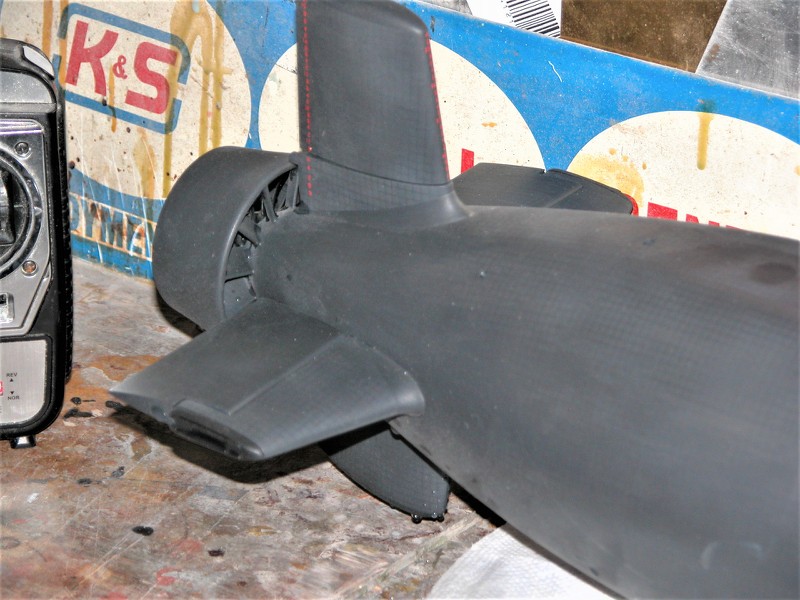
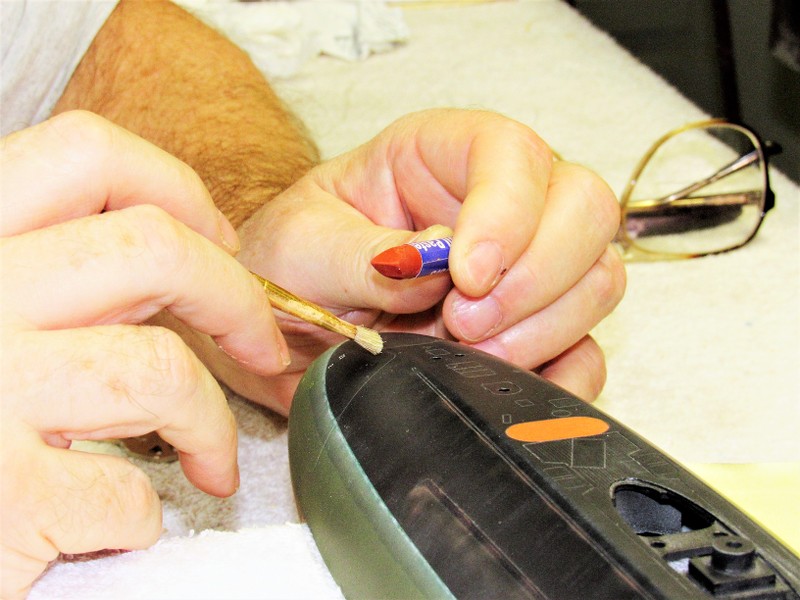
    Carbon exhaust streaking from one of the main engine exhaust ports is done with crayon -- little wads of the stuff is placed under the exhaust port and streaked downwards with a stiff brush. I've just started the blending here, it will become more of a unified, coherent streak by time I'm done with this task.


    Rusting on modern submarines is hardly apparent, so this is an effect you either don't do or do with a very light touch. I can assure you, if I don't see it on the prototype, I don't do it on the display! Less is more.


    Chalk Pastel and raw chalks have their place. They go down and when ground to a powder can be manipulated into harsh streaking or soft, feathered runs. However, once overcoated with the clear-coat they will diminish greatly in density, so to be effective the chalk has to be laid on thick to compensate for this. An acquired art.


    Chalk is also used, in lieu of dry-brushing, to pick out light gathering projections, such as these white-caps on this water scene.


    Who is John Galt?
  • He Who Shall Not Be Named
    Moderator
    • Aug 2008
    • 12253

    #2
    WEATHERING AND MARKINGS, PART-1


    Faithfully capturing the look and 'feel' of a modern in-service submarine in model form demands that you push your inventory of modeling tricks to include the... dare I say it... art of weathering. If you, as the model kit-assembler/maker fail to represent, in a realistic manner, the topside streaking, deck scuffing, oil-canning, rusting; if you ignore the at-waterline marine growth and stratification of marine grass and other flora; and if you half-ass or even neglect to represent the below waterline fouling and discoloration of the anti-fouling paint -- if you fail to do some or all of those things, then you are the proud owner of one very boring looking display piece, you've produced a simple tapered tube with a few inconsequential appendages sticking off of it. You... you idiot!! You did not follow through! Your display is not finished. You suck!

    You must weather your model to bring it to life. And that job starts with study. The Internet is your friend here. But note this, a drydocked submarines below waterline (BWL) structure that has dried out for a couple of days bleaches out through oxidation and UV attack, the BWL assuming an overall blotchy tan color with pronounced variations present in bands near the waterline (WL). On the other hand, a model depicting a submarine still in the water will show a pronounced green at and just below the waterline. Aside from SSBN's returning from a two-month patrol, the above waterline (AWL) portions are the same for a drydocked or in-water representation.

    This Soviet ALFA has been in the water without a drydocking or hull scrub for some time. The look of the BWL is typical for a submarine operating in cold waters that has been in drydock long enough for the marine growth to die and bleach out. Note how uniform the crud is till it gets near the WL. Also take note that there is near zero vertical streaking or running rust below the waterline. A common mistake by modelers who attempt a credible weathering job to those portions of the hull. A mistake I've made myself.


    ​​​
    Here's an American SSBN out of the water a day or two. The 'grass' has not died yet so has either bleached out or fallen off. This transitory state is only seen by sand-crabs and crew and if represented on the display will only confuse the audience. Avoid this look.


    ​​​
    This boat is cruising by at a depth of about 60-feet (measured to the keel), so some of the red has already dropped out of the spectrum to our eyes and most camera emulsions and CCD's. But, this is representative of a boat that has been in temperate waters for at least a year with maybe one hull-scrub under its belt.

    ​​​

    And, I'm afraid to say, this is what the AWL portions of hull look like before getting underway. Vertical streaking as the result of rain-water pulling all the air-born pollutants, bird-****, foot scuffing, spilled stores, paint-thinner and other crap that collects on the deck and sides of the hull as the boat is being worked up for patrol. Ain't pretty, but plenty of opportunity for the inventive model-builder to jazz up the display. A boat only looks sharp when launched, when commissioned, and during a change-of-command. Trust me... I worked Deck long enough to know! (Torpedomen were to submarines what Boatswain's are to the Fleet -- Marline Spike Sailor's).


    ​​​
    OK, a quick look at some of my displays to illustrate the weathering process, then a detailed discussion of the mediums, tools, and techniques employed to render the effect.


    Who is John Galt?

    Comment

    • He Who Shall Not Be Named
      Moderator
      • Aug 2008
      • 12253

      #3
      PART-1 (continued)

      But, first, a side-note: If you expect to be operating an r/c model submarine in dark, deep waters it's wise to chose a prototype paint scheme that gives the maximum visibility from the air. Such is the case with this 1/96 SKIPJACK painted with the red-black demarcation line at the waterline. The pre-commissioning scheme. This offers much more high-visibility red than you would see if the red-black demarcation line were placed at centerline -- as is the case with boats ready for patrol. I also paint on the international-orange marker buoy; metallic main ballast tank vent flanges, and salvage plates; and represent the draft, name and hull numbers -- all features that help you see the submerged model.


      ​​​
      When you settle on a subject, like this KILO, you first look at all the pictures you can find of the subject. Boats operating out of the Northern Fleet will weather slower than boats working more temperate waters. Sometimes you want to focus your search to boats (say, a flotilla or squadron) that operate in the same waters at the same time of year to insure your subjects are representative of how those units take to marine growth that is unique to their environment. Research, research, research!​​​

      ​​​​

      Demonstrating that when you work for a customer, you do what the customer wants. The three top models were built for the Submarine Force Library and Museum back in the day -- two of them while I was TAD to the museum (when it was located on the upper base). These display pieces added to an existing display chronicling the evolution of American combatant submarines, all of which featured the gray-black scheme. The lower one, the SEAWOLF, was one of the first professional jobs I had as a model-maker. A while back. Still in good shape, still on display!

      "Hey! Round-eye, take my picture!".


      ​​​
      Some prototypes are all black. You don't have the red anti-foul paint to help you see the submerged model. However, a dense BWL discoloration will more than make up in otherwise lost visibility. So demonstrated on the 1/60 SubTech ALBACORE phase-2 model going astern on the surface.


      ​​​
      Be ever mindful of the operational history of your prototype -- did it see a lot or little water time? The short lived Union ALLIGATOR did not survive long enough to see much marine growth. Therefore when I weathered this 1/12 model I took care to render the WL lightly and to scum the BLW portions modestly.


      ​​​​​
      It looks sexy, but the radial dark bands BWL on this 1/96 THRESHER -- intended to denote hull dishing between frames -- is entirely bogus. First off, frame spacing on the THRESHER class boats was much tighter, and I have NEVER seen any drydock evidence of this supposed dishing of these single-hull boats.


      (This is as stupid as the model airplane guy's who practice 'pre-shading' on panels and other engraved lines that adorn fuselage and wings -- prototypes just don't look like that. Yet, to this day, such weathering techniques still cause IPMS judges to ejaculate all over themselves and toss ribbons and trophies at the idiots who do this).


      ​​​
      Working from the great technical illustrator, Frank Tinsley's drawings I weathered this 1/6 display model of David Bushnell's TURTLE to reflect the reality that this vehicle spent the majority of its time riding a wagon or sitting on blocks at some pier awaiting the ideal conditions for a night attack on a British warship anchored off New York city.

      Some rust running down from the three wrought-iron bands girdling the wooden hull, and bomb. I simulated verdigris (oxides of copper) running down from copper-pipe depth-sensing and flood ports. Consider the materials your prototype was built from and how they react to oxygen, salt water, and other environmental factors. Electrolysis would also be in play -- the close proximity between brass copula and upper iron band are no less than anode and cathode: expose to sea-water and you have a frig'n battery! Study. Analyze. Think. Do.

      ​​​​​

      The Goff NAUTILUS is so full of facets, hard-edges, and protuberances that's it's almost impossible not to see when submerged -- the one r/c submarine I can think of that does not need paint or weathering to make it more 'visible'.


      ​​​
      What is clearly visible here, down in the water, is, when observed from the surface, an indistinguishable blob of black. So, as an aid to navigation (if I can't see it, I can't drive it) everything I can do to make this 1/72 Thor ALFA more visible, the better. The marine growth, the white-red marker buoy, white draft markings, bird-**** on the rudder, streaking down the sides of the hull, and 'technical' markings (in the form of white boarders around access hatches, line lockers and salvage fittings) are put down. All these and more are scale features of the class. And all aids to visibility.

      ​​​​​​​​​​​​​​​​​​​​​​​​​​​​​​​​​​​​​​​​​​​​​​​​ ​​​​​ ​ ​​​​​​​​​​​​​​​​​​​​

      In the context of this discussion 'medium' describes the agent being applied to the model to render a specific type of weathering effect as well as the tools and process of application. Here's a short-list of the mediums I will use to paint and weather a model submarine: base colors (automotive refinish grade stuff, none of that hobby-store crap for me), metallic wax (Rub 'n Buff), acrylic paint, oil paint, iron-acid (true rust), oil pastel crayon, chalk, Artist pencils, drafting inks, water soluble acrylic paint, and clear-coat and flattening agents of various chemistries.

      A 'mask' is any film or object used to protect the models surface from the next application of paint or weathering agent. Masks range in type from plastic window screen, masking tape, chart-pack tape, dodging sticks, fingers, rubber bands, dry-transfers, tooth-paste, PVA, Vaseline, to rubber cement. Type and use of masking is limited only by your imagination and need.

      'Tools' are used to lay down your weathering, markings, and paint include: drafting pen, fan-brush, stencil-brush, chisel-brush, tooth-brush, air-brush, sponges, texture pads, and cotton balls. And, yes... your fingers.

      'Technique', the means by which your tools, masks, and mediums are laid down and worked to achieve the desired look of 'use': dry brushing, stippling, washes, splatter, streaking, abrasion, and markings.

      It's good practice to lay down a protective clear-coat after each major session of base color painting and weathering agent application. This permits you, if you screw up a following medium mistake, to polish or otherwise abrade away the error without ruining the previous work; that clear coat is your armor against further damage. Some of my models have as many as five coats of clear coats on there. Other than wash application does it matter much if the underlying surface is a flat or gloss -- its that final clear-coat that matters, typically a very flat for operational submarines.


      OK, nitty-gritty time. This is how it's done:

      Dry brushing The process of depositing paint at the tip of projects and along the edges of sharp corners; the effect is to give the illusion of light collecting and bouncing off such items as it would be in full-scale, but too subdued at small-scale. Dry-brushing is a cheat to make you think light is collecting in areas where you expect it to be; you take the light colored paint to be a concentrated reflected light source; the display becomes a bit more believable; you drop your suspension of disbelief. The best tool of application is a brand new, virgin, fan-brush.

      Notice how the edges of the sail planes and sail proper have been high-lighted by dry-brushing with white oil-paint. Nice thing about the oil is that if you overdo it you can scrub off the highlight with a thumb and give it another go. It takes weeks for the oil to dry, so you're not in a rush. But, once you overcoat the work with a flattened clear, the dry-brushing work is there to stay. The antennas atop their masts would be hard to make out detail without the dry-brushing. But, use a light touch, this, like all things, can be over-done. Remember the old tenet: Less is more.


      ​​​
      This is how the fan-brush is used to lay down vertical streaking and dry-brushing effects. Note the use of a right-angle triangle to insure the vertical strokes of the brush are true, unwavering pulls. You first load the brush with a light colored oil-paint, then scrub off the excess paint on a rag. Make the first passed on a test-article and once happy with the accuracy and density of your work, switch over to the display and go for it.

      ​​​

      Without dry-brushing these antennas and snorkel head would be simple black silhouettes to the casual observer. But, once picked out with white high-light, they pop to life.

      ​​​

      ​​​​

      Stippling The splotched surface of the submarines BWL structure is best represented by multiple layers of water-soluble mask and translucent colors of tan representing the majority of marine fouling seen on drydocked submarines. The preferred masking agent is tooth-paste thinned with water, this liquid mask stipple applied to the surface of the model with stencil-brush, texture-pad, rag, or sponge. You mix the goo to a hot-syrup consistency and stipple it onto the model. When dry the water-soluble mask prevents paint adhesion in the areas applied. The type tool/applicator will dictate the density and pattern of the splotched masking applied to the model.


      ​​​
      Just some of the mask application tools I've played with. I always try a tool out on a test-article first, and once happy with the pattern of mask laid down, I'll switch over to the display piece.


      ​​​
      Here I'm applying the tooth-paste liquid mask with a nasty old brush. Sometimes the best tools are the crummiest looking things in the shop. Never turn your nose up at 'old' tools.


      You stipple on the masking liquid, let it dry (a hair-dryer or heat-gun quickens the work), then spray on a version of the tan BWL color you think appropriate for the first coat. When that dries you scrub off the mask with a damp cloth, dry, and apply more mask, off register to the first. Repeat the process till you have about four coats of various colors of tan. The result is a very splotchy tan coloring of the BWL portions of hull. Don't forget the stern planes, bow planes, lower rudder, and BWL portions of the upper rudder!


      ​​
      The left side of this stern plane has not had its mask scrubbed off yet. The right side has. This is the first cycle but demonstrates how the mask produces the splotchy unevenness of the marine growth that fouls the underside of ships and submarines.


      ​​​Washes A wash is typically an extreme color opposite of the base color surrounding it. A black surface will get a white or off-white wash. A light colored surface will receive a dark or even black wash. Capillary action is the prime-mover that forces an application of wash -- typically performed with a brush, sponge, or eye-dropper -- to seek and fill all deep or negative draft structures on the models surface. It's good practice to chose a wash chemistry that will not dissolve or bond with the paint its applied over. Most washes are water soluble acrylics, ink, or casein. Excess wash is soaked up off the model with a rag, or sponge while still in the wet stage. Or, after the wash dries out it is abraded off the work with a fine-grit polishing compound.


      Washes are best applied over gloss-finishes as there is little surface grittiness to mechanically hold the wash against wet or dry removal efforts. However, if the wash has dried hard, or you can't get it thoroughly off the surface of a flat or matt finish, the job can be done by abrading off the dirty areas of structure with an abrasive polish, which is being demonstrated on this wheel type space-station model. I wanted the black wash to high-light the edges of these square thermal-control panels. The very light tan colored paint of the toroid had a matt luster and just would not wipe clean. Hence the need to abrade the excess wash off the model.


      ​​​​​​​​​​Splatter Propellers of operational ships and submarine often evidence a random speckle pattern of discoloration on both faces of the blades. I don't know what to attribute this to, maybe electrolysis. Maybe marine growth. Whatever! I represent this speckling by flinging little droplets of water-soluble paint with the aid of a stiff tooth-brush. You load of the brush with well thinned paint, wipe off the excess, fling some at a test article and when happy with the density of the pattern, and speckle size, you take aim at the propeller and have at it. Your thumb is your friend.

      ​​​​​​​​
      Who is John Galt?

      Comment

      • JHapprich
        Captain
        • Oct 2017
        • 712

        #4
        Thank you, right in time!
        Jörg

        Comment

        • biggsgolf
          Captain
          • Jan 2020
          • 720

          #5
          Thanks David, wonderful presentation

          Comment

          • He Who Shall Not Be Named
            Moderator
            • Aug 2008
            • 12253

            #6
            Originally posted by biggsgolf
            Thanks David, wonderful presentation
            My pleasure, sir. If you need any amplification, just identify the problem and I'll address it in excruciating detail.
            Who is John Galt?

            Comment

            • biggsgolf
              Captain
              • Jan 2020
              • 720

              #7
              Lol, I know you will!

              Comment

              • SubDude
                Captain
                • Dec 2019
                • 803

                #8
                This has been such a helpful thread. I tried most of the techniques outlined on my Thresher and I really like how it turned out. Thanks again David!

                Click image for larger version

Name:	20211106_090239.jpg
Views:	458
Size:	79.4 KB
ID:	157617
                Click image for larger version

Name:	20211104_171557.jpg
Views:	436
Size:	52.3 KB
ID:	157618
                Click image for larger version

Name:	20211103_233459.jpg
Views:	422
Size:	52.8 KB
ID:	157619

                Comment

                • Das Boot
                  Rear Admiral
                  • Dec 2019
                  • 1149

                  #9
                  Blueback rudder.
                  Attached Files
                  Of the 40,000 men who served on German submarines, 30,000 never returned.”

                  Comment

                  • rwtdiver
                    Vice Admiral
                    • Feb 2019
                    • 1768

                    #10
                    David,

                    Remarkable workmanship! I know I have made this statement to you many times, but your skills are so appreciated, and the fact that you are so willing to share these wonderful skills, with explanations, and photos with us is fantastic!! Thank you very much David!!

                    Rob
                    "Firemen can stand the heat"

                    Comment

                    • Das Boot
                      Rear Admiral
                      • Dec 2019
                      • 1149

                      #11
                      The master. No doubt.
                      Of the 40,000 men who served on German submarines, 30,000 never returned.”

                      Comment

                      • trout
                        Admiral
                        • Jul 2011
                        • 3545

                        #12
                        David, after a decade, I still learn something new from you. Thank you for your heart to share your knowledge.
                        If you can cut, drill, saw, hit things and swear a lot, you're well on the way to building a working model sub.

                        Comment

                        • He Who Shall Not Be Named
                          Moderator
                          • Aug 2008
                          • 12253

                          #13
                          Originally posted by trout
                          David, after a decade, I still learn something new from you. Thank you for your heart to share your knowledge.
                          ... just wait till you Bum's get the bill!
                          Who is John Galt?

                          Comment

                          • SubDude
                            Captain
                            • Dec 2019
                            • 803

                            #14
                            Originally posted by He Who Shall Not Be Named

                            ... just wait till you Bum's get the bill!
                            Bill? We call it 'tribute'.

                            Comment

                            Working...