D&E Skipjack Trim

Collapse
X
 
  • Time
  • Show
Clear All
new posts
  • llangston1
    Lieutenant
    • Sep 2013
    • 84

    D&E Skipjack Trim

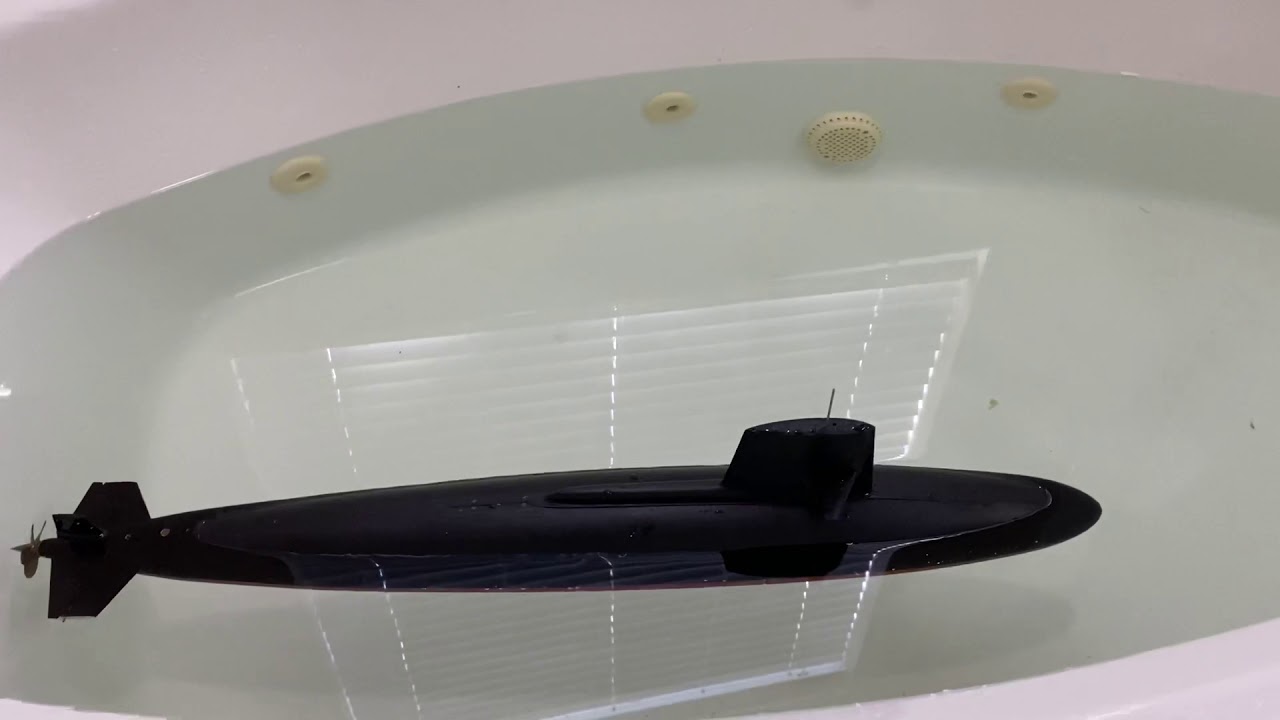
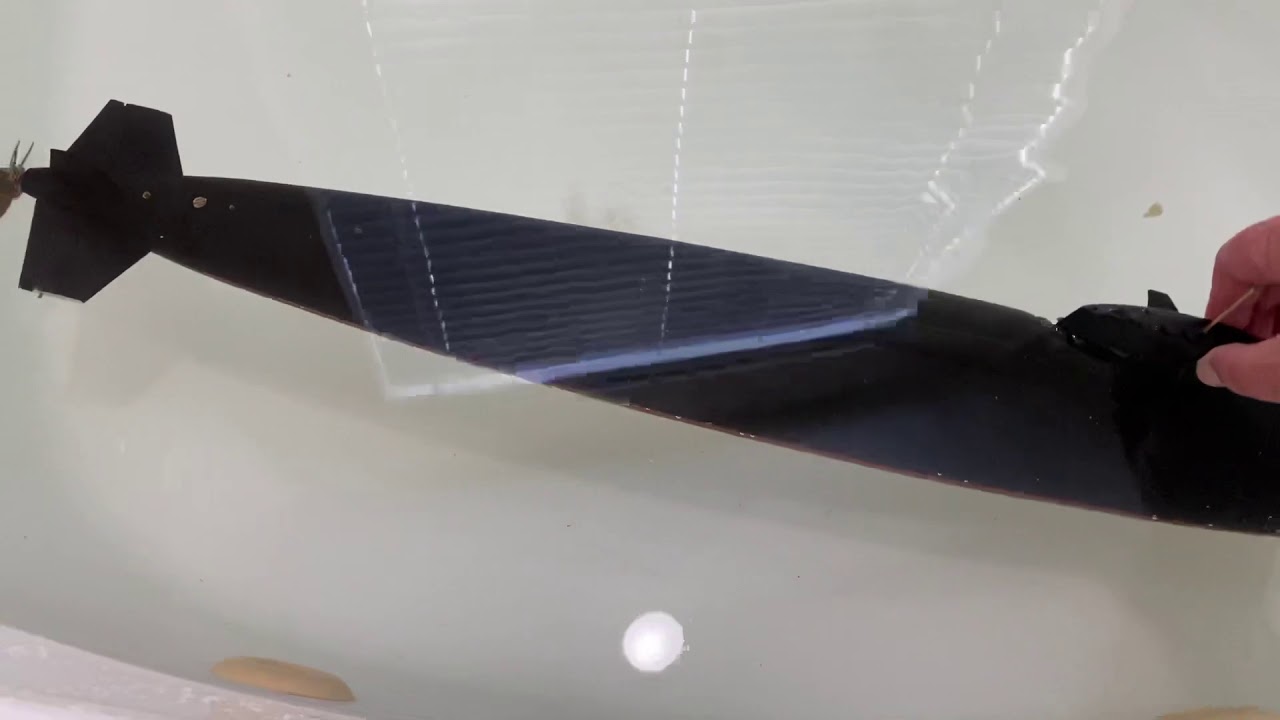
    In my rebuilding of my D&E Skipjack I am trying to rework the trim. I removed all the open cell foam I had used back in ‘96 that I feel was holding som water. I had the entire nose of the sub in front of the WTC filled with foam. Now with the inner hull empty I started attaching foam blocks outside the hull to set the trim. From the attached pics I am not sure I can fit all that foam I side the nose of the boat. Could I use the Spray on expand O foam to fill the nose or will that stuff melt the hull? Does the Almighty remember if the entire nose needed to be full of foam for this sub? There were 2 semi circular strips of lead that are glued to the hull for Dynamic stability. Should I remove some of that lead that was glued just up toward the front of the WTC so I don’t need so much nose foam? As can be seen from the submerged pic the boat is nose high when under water. So now I am scratching my head on how to proceed.

    Suggestions?
  • llangston1
    Lieutenant
    • Sep 2013
    • 84

    #2
    Here is a submerged trim pic

    Comment

    • RCSubGuy
      Welcome to my underwater realm!
      • Aug 2009
      • 1768

      #3
      Any pics of the interior layout? That seems like a sh1t-ton of foam to need up front. Sumpin fishy here...

      Comment

      • trout
        Admiral
        • Jul 2011
        • 3545

        #4
        Without seeing the inside, like Bob said, it seems like a ton of foam. So, I think a redistribution of weight might be necessary (if you can). Did you attach your weights with silicon?
        Last edited by trout; 06-10-2020, 08:40 AM.
        If you can cut, drill, saw, hit things and swear a lot, you're well on the way to building a working model sub.

        Comment

        • llangston1
          Lieutenant
          • Sep 2013
          • 84

          #5
          Here are some pics of the inside of the upper and lower hull. You can see the curved lead weights that came with the model back in ‘96. I have removed all the foam that was in the nose section since it was more of a floral arrangement type of foam. The WTC extends up into the upper hull at least to that first lead weight. I was trying to make a large foam block out of those blue foam blocks that I could carve into a bullet nose Shape but failed miserably at that. That is when I thought of the expending foam. I bought some Loctite brand Spray foam at Home Depot and sprayed it into a styrofoam cup and it didn’t crack the cup or ever get hot while expending. I have also purchased a small purplish/pink foam project panel from HD that I can use to cut up foam pieces once I figure out how to proceed. I guess I should have left well enough alone but I thought I could make it better.
          Attached Files

          Comment

          • llangston1
            Lieutenant
            • Sep 2013
            • 84

            #6
            I took that cup of Loctite foam, cut it out of the cup and shaped it to fit in the nose of the sub. It got really close to the desired surface trim but no where near the submerged trim. Here are the resulting pics. You can see the sub sunk to the bottom of the tub whereas before I had it so the sail was about 1/2” above the surface

            Comment

            • llangston1
              Lieutenant
              • Sep 2013
              • 84

              #7
              Here is my latest iteration on trim. It looks pretty good at submerged trim and acceptable at surface trim. Now to see if I can get all that foam glued into the upper hull. I might need to cut the purple foam in half to get it inside between the hull and the WTC.

              Comment

              • llangston1
                Lieutenant
                • Sep 2013
                • 84

                #8
                Arrrrrrrgh! Well my experiment with the expando foam was a failure. Even though it appears closed cell it’s not and absorbs water. You can squeeze it out like a sponge. So now I am back to trying to sculpt a bullet shaped foam block out of the pieces that I have. Also the strips along the sides are going to have to be about the thickness of a styrofoam cup in order to fit between the hull and the WTC. The saga continues......

                Comment

                • llangston1
                  Lieutenant
                  • Sep 2013
                  • 84

                  #9
                  I just don’t remember it being this hard to trim out when we first got it back in ‘96. But I also didn’t trim it to keep the top if the sail above water when submerged either. I believe I epoxied those lead weights in the nose so it will be difficult to remove them to shave them down. I could grind them down with a dremel if you think I should. Another thing might be to grind down the back stop on the bottom hull to move the WTC further back in the hull. There appears to be about 1/4” left before the Drive shaft front dogbone would bottom in the motor coupler slots. The virus shutdown has given me the time to keep playing with it to get it right. Otherwise I might have put it aside for something else.

                  Comment

                  • llangston1
                    Lieutenant
                    • Sep 2013
                    • 84

                    #10
                    Any suggestions on how to glue foam together to make a 4” cube that I can shave down to try and make this bullet shaped nose cone filler. My last attempt with CA gel didn’t really work well. The smaller blocks started splitting apart as I shaped the larger block. Another way might be to build the nose block in layers inside the hull starting with the very front block in the tip and then adding shaped blocks behind that in multiple layers until I fill up the nose area. Any other suggestions or recommendations?

                    Comment

                    • llangston1
                      Lieutenant
                      • Sep 2013
                      • 84

                      #11
                      Ok I will remove those nose weights first. Thx.

                      Comment

                      • Scott T
                        Commander
                        • May 2009
                        • 378

                        #12
                        When I was a kid my dad cut arrow fletching / feathers with a hot wire. You could do the same to the foam. Form the hot wire to the shape and spin the foam against it.

                        Comment

                        • llangston1
                          Lieutenant
                          • Sep 2013
                          • 84

                          #13
                          What’s the difference between the blue RTV you use and the Clear RTV other than color? Is there a specific reason to use the blue?

                          Comment

                          • llangston1
                            Lieutenant
                            • Sep 2013
                            • 84

                            #14
                            Ok I made my foam block for the nose and added some thin pieces of foam along the upper hull under the sail area. I had to remove foam in the tail area and add some lead weights. Here is where the trim stands right now. I need to open the vent holes in the rear upper hull so the air escapes easier. My issue right now is getting the ballast lever set correctly. I have it set so it only activated the blow valve when the gas saver float is up high. However when the subsaver emergency blow is activated the valve remains activated and blows all the gas out even after the sub has fully surfaced. I don’t remember it ever doing that in the past. I have only noticed this behavior after I removed the servo to dry it out and replaced it. Any ideas on how to fix that? I can live with it since a full blow is better than no blow. Here is part 1 and here is part 2

                            Comment

                            • llangston1
                              Lieutenant
                              • Sep 2013
                              • 84

                              #15
                              Please explain how I tighten the gas flow restrictor. I see it installed in the gas line but have no idea how to mess with it? Just squeeze it more? Do you have any videos I could watch for this? I wonder if this is due to using a different source of propel gas? Before this all I ever used was Testor brand propellant. Now I am using Paasche Brand from a larger can. Could that have a higher pressure than the Testor brand?

                              Comment

                              Working...