Good, innovative stuff, Rob. Keep at it.
David
-
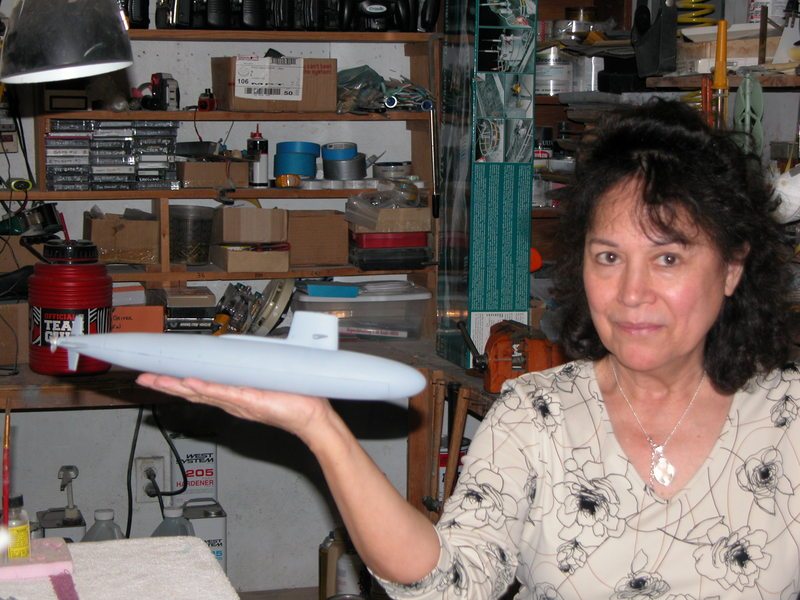
I am now working on the stern section of my 1:96 scale 3D printed Russian Alfa.
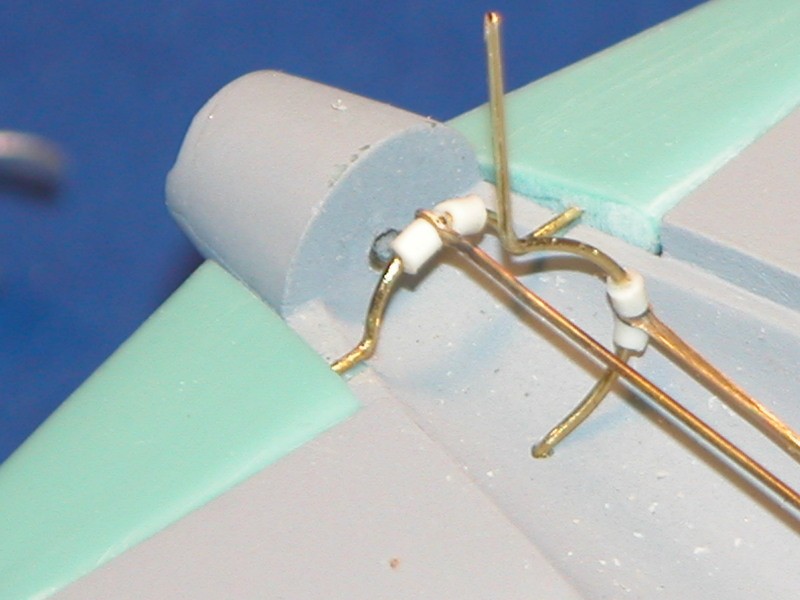
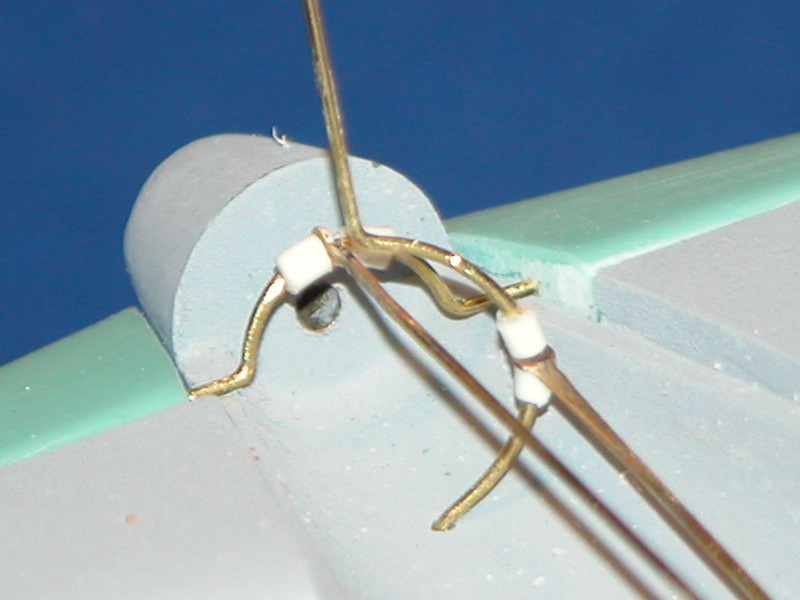
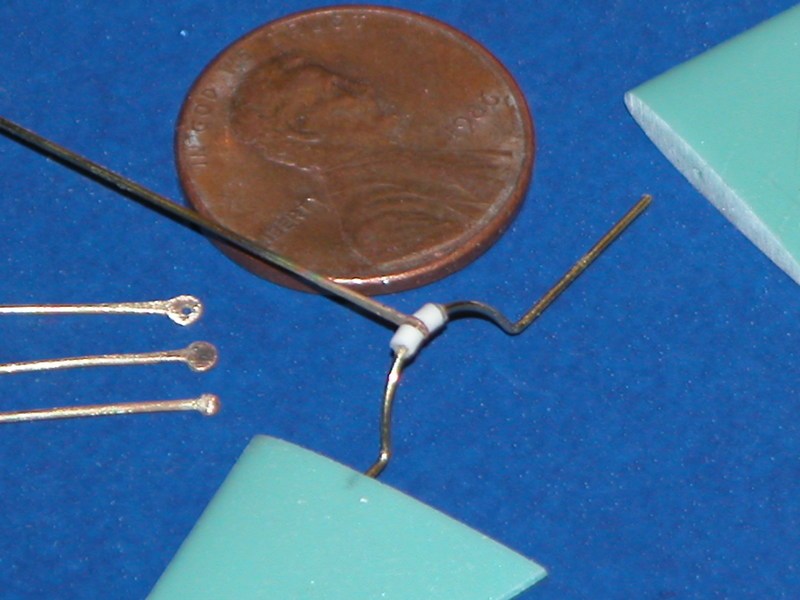
David M posted up as to possible method of installing the stern dive planes and rudder system on this boat.
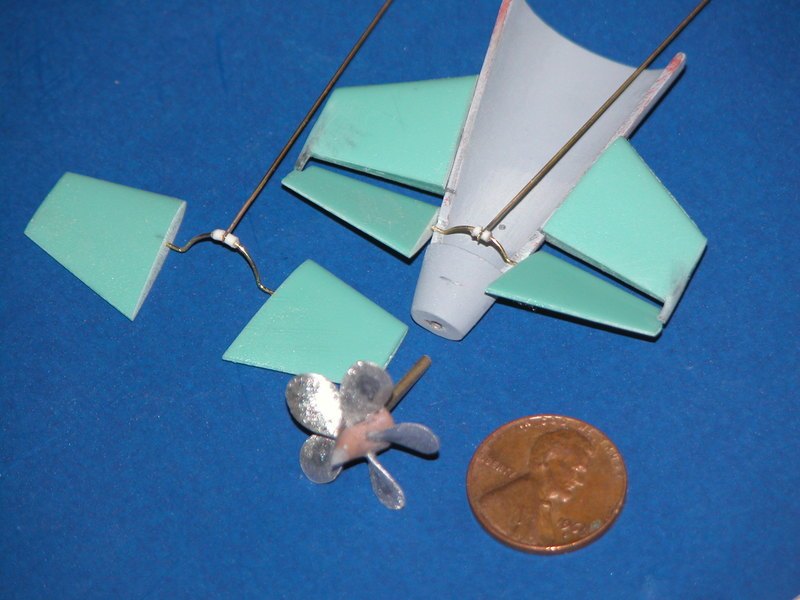
I have only 5/8" clearance to install two yokes! It did not work!
My solution, as per photos from David. Cut the stern section as per the photo above so that I can install the dive plane and the rudder yokes, (Photo shows possible yoke designs) and then glue the stern section back together. There just was not anyway to install the linkage in that space and get good solid operation of the dive planes or rudder.
I am doing all this on this 1:96 scale Alfa in hopes of using the 70 mm WTC that is coming with my 1:96 scale Russian Kilo kit.
Rob
"Firemen can stand the heat"
RLeave a comment:
-
Today, besides ordering my new Arkmodel 1:48 scale submarine kit with an 80mm WTC from Nautilus Drydocks, I did find time to finish up the main hull sections on my Alfa boat.
Sorry my photos are a little dark! Still screwing around with my old camera! None the less I got both the top and bottom hull sections glued up.
My next step will be to install the brass guide pins to bring the two sections together as close as possible.
Also, my 3D printer will be at work finishing the remaining hull sections to my German Type XXl U-2540 submarine.
Rob
"FiremenLeave a comment:
-
I have the top hull section all glued up, and now ready to start on the bottom section.
I spent some time cutting 1/8" brass rods to use as locking pins between the bottom and top hull sections. These pins will help make a good tight and straight seam between the hulls. This boat is printed using PLA filament, and as you are all aware PLA does not like the heat and is prone to warpage, so these pins will also help to hold the hull in place and reduce the chance of a warp.
Rob
"Firemen can stand the heat"Leave a comment:
-
Thank you very much Ramel!
And a very "Merry Christmas" to you and your family.
Rob
"Firemen can stand the heat"Leave a comment:
-
-
Detting ready to start putting the Alfa together.
I have the gluing table prepared and covered with saran wrap so the parts will not stick to the gluing board. I also have the Alfa 1/72 that I have already built in the background to be used as reference if needed!
Rob
"Firemen can stand the heat"Leave a comment:
-
A little more update on the progress of the Russian Alfa.
I still have a little more section edge sanding to true up section joints before gluing. As I have stated before, the print files on this Alfa are excellent. Very little tune up on the section line ups!
Rob
"Firemen can stand the heat"Leave a comment:
-
Today I finished up the upper and lower hull sections on the Alfa! The completed sections took a total of 158 hours print time
The only items left to print out are the controls surfaces. (Upper and lower rudders, forward dive planes, and the stern dive planes)
After the printing process is complete and I have all the parts, I will put my attention to the stern section control linkage systems.
Rob
"Firemen can stand the heat"Leave a comment:
-
Thank you, Nick!
I really do enjoy building submarines, I do like the challenges involved. I will finish up the Utility Boat that I started, but as a break-away project.
I took the above photo of the Alfa Bow, just to show how much detail is coming through on the 3D printed files. The detail on this entire boat is one of the best that I have built from Nautilus Drydocks files!
Rob
"Firemen can stand the heat"Leave a comment:
-
Looking good Rob! Happy to see you back at the submarine projects.Leave a comment:
-
Go with the 3-inch. You'll appreciate the extra annualar space when it comes time to trim that bad-boy.
DavidLeave a comment:
Leave a comment: