Type XXXI U-2540 1:72 Scale Sub Build

Collapse
X
 
  • Time
  • Show
Clear All
new posts
  • rwtdiver
    Vice Admiral
    • Feb 2019
    • 1770

    #31
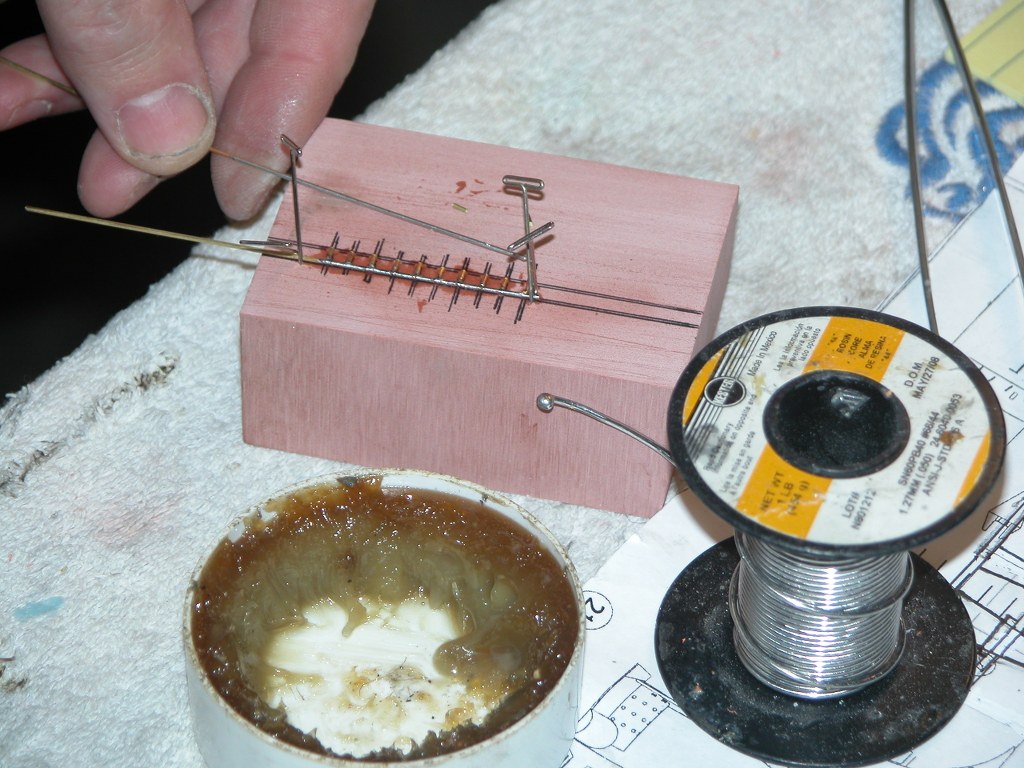
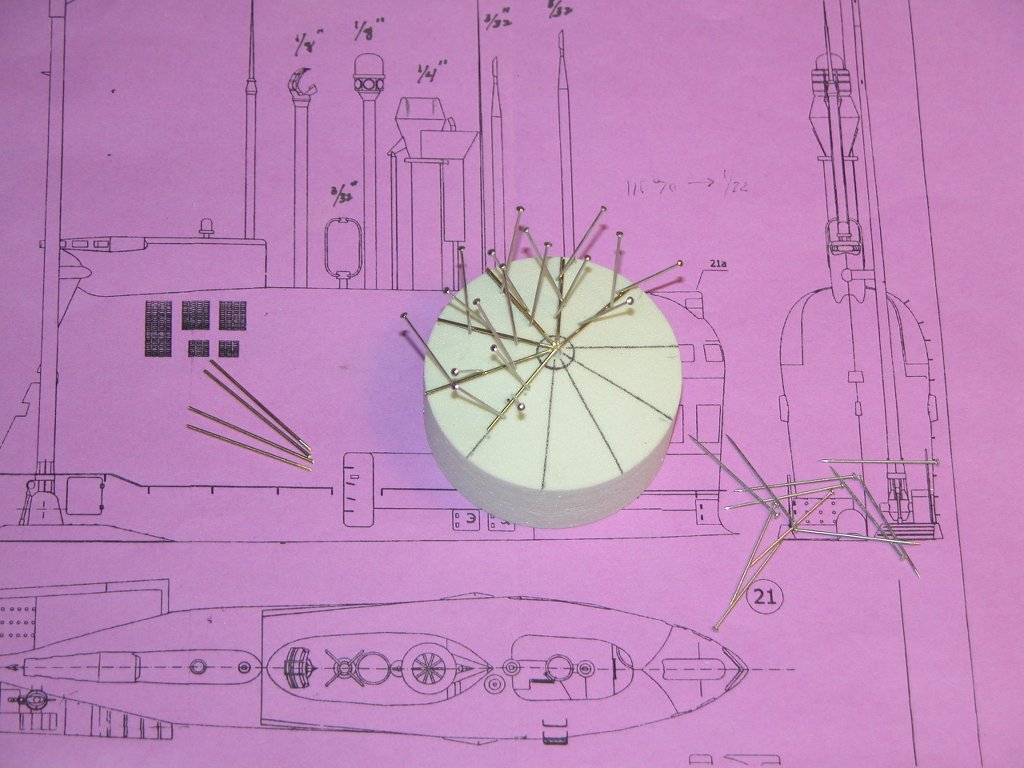
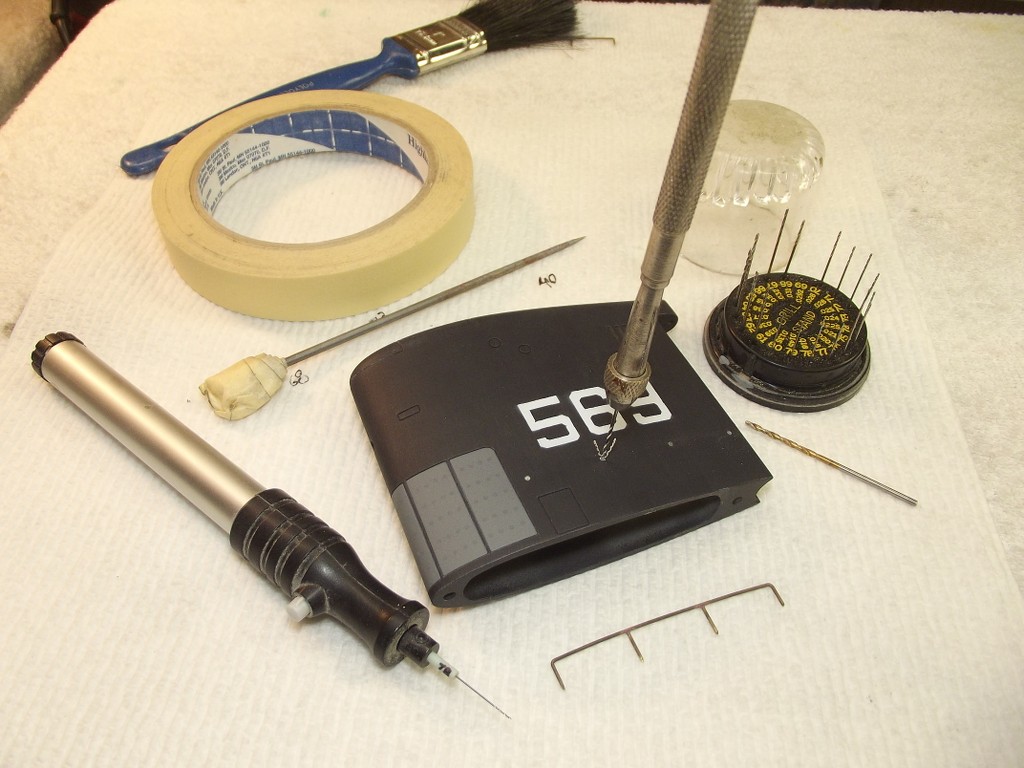
    Now that I have the U-2540 built I can start on the brass work!

    Click image for larger version

Name:	P1000095.jpg
Views:	387
Size:	69.1 KB
ID:	151341Click image for larger version

Name:	P1000093.jpg
Views:	387
Size:	62.5 KB
ID:	151342

    Click image for larger version

Name:	P1000096.jpg
Views:	370
Size:	70.0 KB
ID:	151343

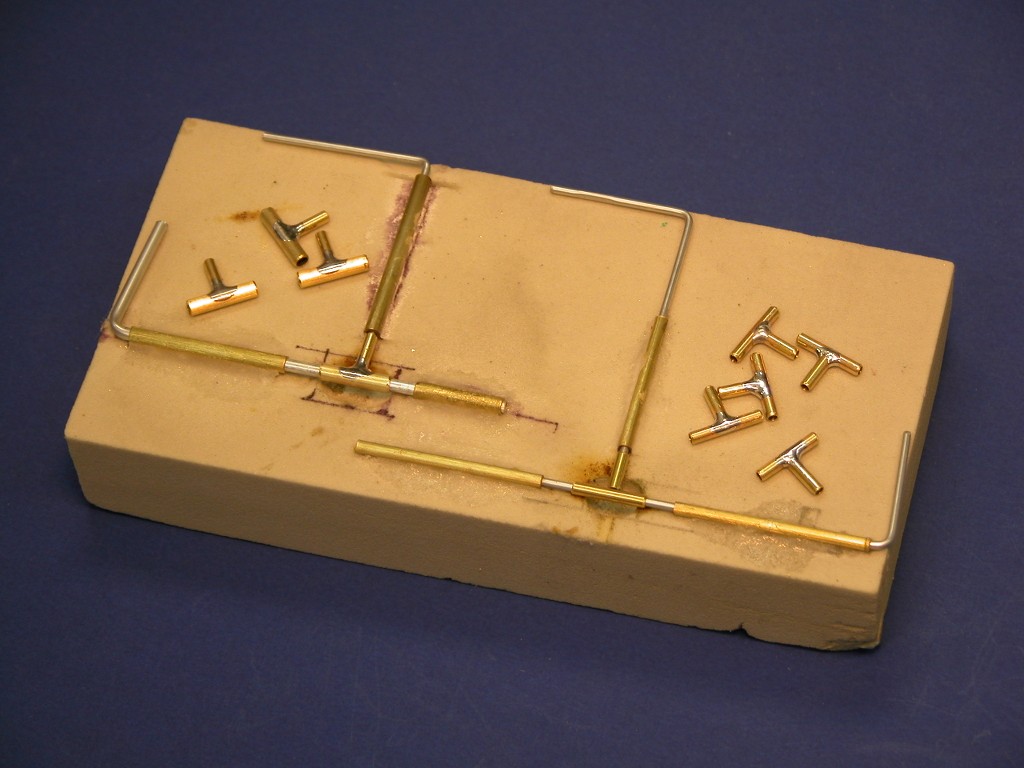
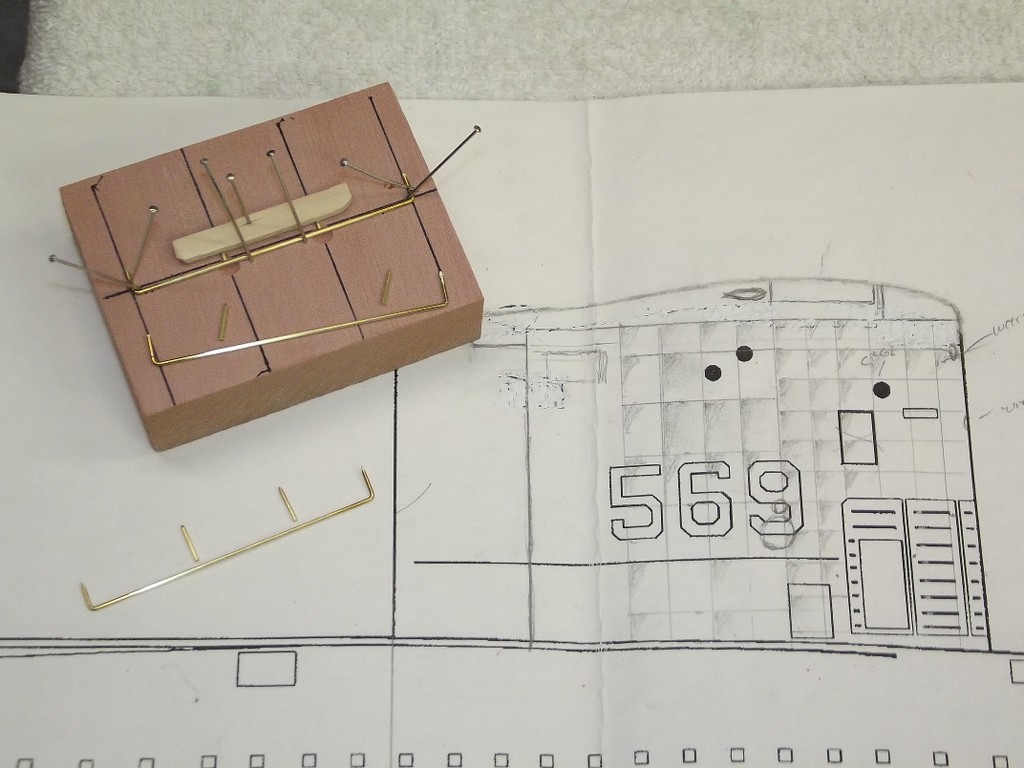
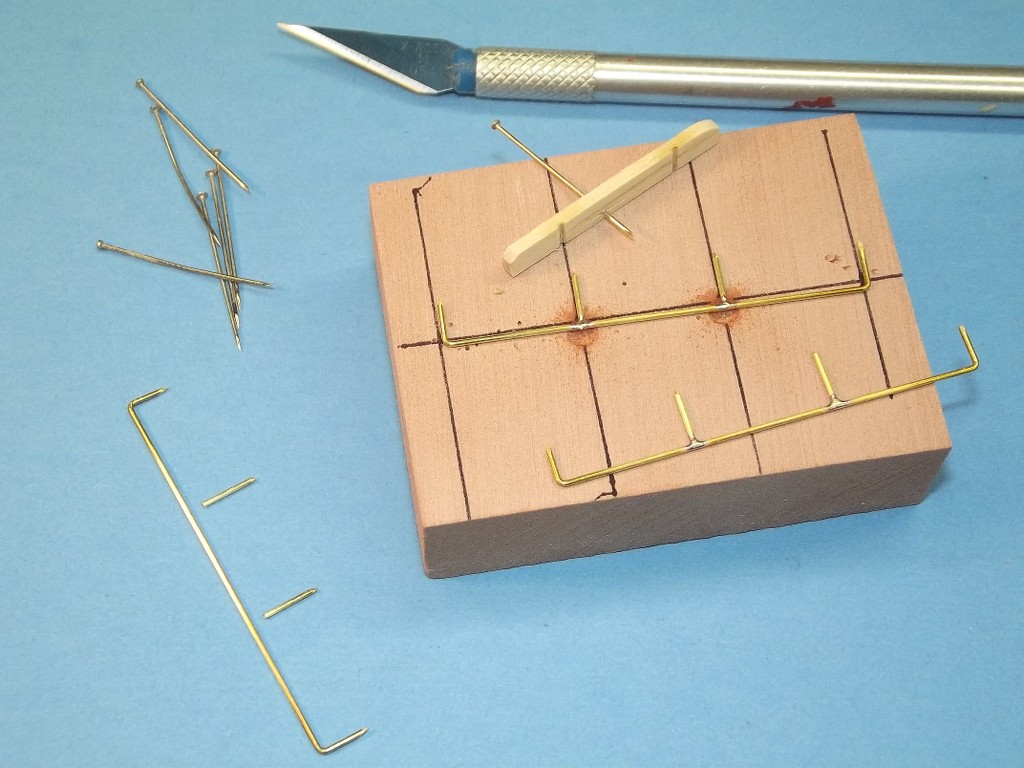
    There are individual plan details as to where each piece of brass is to be placed on this model! The detailed sheet has every piece of brass numbered and each number corresponds to the two plains (Sail & Hull)

    In my opinion! As a 3D printed boat, (quality print files) and how well it is laid out, it will build into a really nice static boat if one where to put in the time and effort! I am really looking forward to this model build!

    Rob
    "Firemen can stand the heat"

    Comment

    • rwtdiver
      Vice Admiral
      • Feb 2019
      • 1770

      #32
      This I believe will be best answered by David M. (The Master)

      Click image for larger version

Name:	856fdf_3a2e95ca18b54988a46d221e57b8941e_mv2 (1).jpg
Views:	362
Size:	62.1 KB
ID:	151369

      David! The above photo shows the brass hand rails and the brass steps!

      Click image for larger version

Name:	P1000092.jpg
Views:	294
Size:	61.3 KB
ID:	151370

      This next photo shows the brass steps and the hand rails!

      My question to you sir is? Would you use these hand rails and the steps that came with the kit? Or purchase some very small brass rod and fabricate your own?

      It seems to me the sheet brass is really very thin and to fragile to use!?

      Your input would be greatly appreciated David!! Thank you in advance!

      Rob
      "Firemen can stand the heat"

      Comment

      • He Who Shall Not Be Named
        Moderator
        • Aug 2008
        • 12256

        #33
        Originally posted by rwtdiver
        This I believe will be best answered by David M. (The Master)

        Click image for larger version

Name:	856fdf_3a2e95ca18b54988a46d221e57b8941e_mv2 (1).jpg
Views:	362
Size:	62.1 KB
ID:	151369

        David! The above photo shows the brass hand rails and the brass steps!

        Click image for larger version

Name:	P1000092.jpg
Views:	294
Size:	61.3 KB
ID:	151370

        This next photo shows the brass steps and the hand rails!

        My question to you sir is? Would you use these hand rails and the steps that came with the kit? Or purchase some very small brass rod and fabricate your own?

        It seems to me the sheet brass is really very thin and to fragile to use!?

        Your input would be greatly appreciated David!! Thank you in advance!

        Rob
        "Firemen can stand the heat"
        Capillary action is our friend.

        Providing the brass railing and steps register with the holes in the sail, I would go with these acid-etched parts.

        Yes, they are flat, and the objective is round cross-section rails and steps. Providing you don't abrade away the existing photo-resist resin that covers each side of an etching, leave the parts as is (that resin coating is a good substrate for the primer to grab onto) and glue them into place.

        To magically turn these flat pieces into round pieces simply mix up some heavy-fill primer and brush it onto these parts thickly. Don't spray, we want to preserve all that nice detail on the sail. As the primer 'levels' it will avoid the edges of the flat railing and steps, but will pool up on the flats. Two coats and you have items that are now kinda round of section.

        Presto-chango! Flat to semi-round. Good enough for Government work.

        David
        Who is John Galt?

        Comment

        • rwtdiver
          Vice Admiral
          • Feb 2019
          • 1770

          #34
          Originally posted by He Who Shall Not Be Named

          Capillary action is our friend.

          Providing the brass railing and steps register with the holes in the sail, I would go with these acid-etched parts.

          Yes, they are flat, and the objective is round cross-section rails and steps. Providing you don't abrade away the existing photo-resist resin that covers each side of an etching, leave the parts as is (that resin coating is a good substrate for the primer to grab onto) and glue them into place.

          To magically turn these flat pieces into round pieces simply mix up some heavy-fill primer and brush it onto these parts thickly. Don't spray, we want to preserve all that nice detail on the sail. As the primer 'levels' it will avoid the edges of the flat railing and steps, but will pool up on the flats. Two coats and you have items that are now kinda round of section.

          Presto-chango! Flat to semi-round. Good enough for Government work.

          David
          David! Thank you for getting back to me!

          Click image for larger version

Name:	P1000067.jpg
Views:	301
Size:	60.7 KB
ID:	151380

          As I looked closer at the sail and the layout, I see an issue!!

          As you can see by the above photo, none of the holes are pre-drilled on the sail! I would have to try and line them up, mark them and then drill them myself! That is one of the real disadvantages to 3D printed submarines!

          I think based on that it would be easier, and look better if I just took the time to make the railing and steps up myself! Would you not agree?

          Rob
          "Firemen can stand the heat"

          Comment

          • He Who Shall Not Be Named
            Moderator
            • Aug 2008
            • 12256

            #35
            OK. Here are some thought-starters as to how to build-up your own railings and steps. Look at the pretty pictures and come back to me for things you need clarified.


            David
            Who is John Galt?

            Comment

            • rwtdiver
              Vice Admiral
              • Feb 2019
              • 1770

              #36
              David,

              Thank you again for your time and greatly appreciated help!

              Two questions to start? What size and where did you get the brass? I did find 1/16" on amazon!

              Rob
              "Firemen can stand the heat"

              Comment

              • He Who Shall Not Be Named
                Moderator
                • Aug 2008
                • 12256

                #37
                Originally posted by rwtdiver
                David,

                Thank you again for your time and greatly appreciated help!

                Two questions to start? What size and where did you get the brass? I did find 1/16" on amazon!

                Rob
                "Firemen can stand the heat"
                .014" diameter. McMaster-Carr.
                Who is John Galt?

                Comment

                • He Who Shall Not Be Named
                  Moderator
                  • Aug 2008
                  • 12256

                  #38
                  Find some heavy-duty electrical cable, strip away the insulation, unbundle the strands and you'll likely find copper wire of an appropriate diameter. Stretch-harden the wire and you're in business.
                  Who is John Galt?

                  Comment

                  • rwtdiver
                    Vice Admiral
                    • Feb 2019
                    • 1770

                    #39
                    Originally posted by He Who Shall Not Be Named
                    Find some heavy-duty electrical cable, strip away the insulation, unbundle the strands and you'll likely find copper wire of an appropriate diameter. Stretch-harden the wire and you're in business.
                    OK! I have tons of stranded copper wire from my Shortwave Radio days and building antennas and Radios!

                    David! Thank you again for your time! I have downloaded all your articles and photos on this very subject! I will use them to the fullest extent! I will post up photos as progress warrants! I am really looking forward to this new concept of the hobby! And for me to have the master builder (you) in my life, just makes it so much more meaningful for me to be learning from the BEST!

                    Thank you again David for sharing your knowledge, and most of all your willingness to help!!!

                    Rob
                    "Firemen can stand the heat"

                    Comment

                    • rwtdiver
                      Vice Admiral
                      • Feb 2019
                      • 1770

                      #40
                      Originally posted by rwtdiver
                      Thank you guys! Well the printing of the parts is complete! I did tape all the joints together just to get a visual of what it might look like! Sorry about the tape!!

                      Click image for larger version  Name:	P1010009.jpg Views:	229 Size:	59.0 KB ID:	150115Click image for larger version  Name:	P1010010.jpg Views:	235 Size:	57.2 KB ID:	150116Click image for larger version  Name:	P1010012.jpg Views:	225 Size:	57.6 KB ID:	150117

                      I am going to put some time into the Nautilus, and then I will do some more on the Type XXl! I am going to do some engineering work on the hull design in order to install a WTC! Not sure how I will do this, but with some work I am sure I can achieve what I need!

                      Rob
                      "Firemen can stand the heat"
                      It has been sometime since I started building the 1:72 scale Type XXII.

                      Just to refresh where I left off on this build, you can see by the photos that I have not put it together yet. This Type XXII came as a 3D printed set of files that I purchased from Nautilus Drydocks. (No longer available, not sure why?) I am building this boat as a static model and not powered. I am going to put it together as per the instruction's and using the nuts and screws to fasten the 10 sections together. A total of 60 fasteners.

                      Click image for larger version  Name:	Type VII Fasteners 2.jpg Views:	0 Size:	72.1 KB ID:	157594

                      I am also going to use the brass etching that came with the kit as well.

                      Rob
                      "Firemen can stand the heat"

                      Last edited by rwtdiver; 01-04-2022, 06:38 PM.

                      Comment

                      • rwtdiver
                        Vice Admiral
                        • Feb 2019
                        • 1770

                        #41
                        Originally posted by rwtdiver
                        I know this subject matter has been covered before! But I am going to be doing a lot brass work on the Type XXl. And I realize the brass will need some prep work before it gets applied to the model and the finishing work after!

                        Click image for larger version

Name:	P1010099.jpg
Views:	473
Size:	58.5 KB
ID:	150856

                        I know that it should be cleaned with laquer thinner, and then a bath in some sort of acid! I am thinking vinegar would do the job!? I have heard that some like to use a more aggressive acid! Any input would be appreciated! Thank you!

                        Rob
                        "Firemen can stand the heat"
                        This is some of the brass etching that came with the kit.

                        Rob
                        "Firemen can stand the heat"

                        Comment

                        • goshawk823
                          Lieutenant Commander
                          • Oct 2010
                          • 210

                          #42
                          Bob recently told me that he'll have these 1/72 Type XXIs (and 1/48th?) available again shortly. the manufacturer had paused production, I believe.

                          Comment

                          • rwtdiver
                            Vice Admiral
                            • Feb 2019
                            • 1770

                            #43
                            Originally posted by goshawk823
                            Bob recently told me that he'll have these 1/72 Type XXIs (and 1/48th?) available again shortly. the manufacturer had paused production, I believe.
                            I wonder if the design of the one I did has anything to do with the changes!? The files I purchased came with a complete set of brass photo etchings to complete the model. If you look at the photos of the kit you can see just how important the etching is to the complete build.

                            Not everyone is into installing or using photo etching, so the next designs might do away with the brass work! It's a great looking boat, and if he brings it back with a different build design it should do well. And having files for a 1:48 scale is even better!

                            Rob
                            "Firemen can stand the heat"

                            Comment

                            • KumaDog
                              Lieutenant, Junior Grade
                              • Sep 2021
                              • 36

                              #44
                              David,
                              what is the material you used for the rail alignment jig on the Type IX? it looks like Renshape, but I was not aware that it would withstand the heat.
                              Thanks

                              Comment

                              • He Who Shall Not Be Named
                                Moderator
                                • Aug 2008
                                • 12256

                                #45
                                Originally posted by KumaDog
                                David,
                                what is the material you used for the rail alignment jig on the Type IX? it looks like Renshape, but I was not aware that it would withstand the heat.
                                Thanks
                                I use both the dense and lightweight RenShape for soldering jigs. Both can take the heat of the operation. An important consideration is to dig out a cavity under each portion of the jig under which a solder joint will be made -- this to limit the possibility of off-gassed polyurethane products from contaminating the union. The lightweight RenShape is easy to shape and accepts securing pins with little argument. The dense stuff, not so much.


                                David
                                Who is John Galt?

                                Comment

                                Working...