
Thanks Von, this is the slow part, but it has to be done, once i've taken this hurdle i can speed things up by giving the plug a epoxy skin.
Manfred.
-
I did mentioned the tower in the vid, i'll show what i've done sofar,
That shape at the rear of the tower was a bit of a pain in the ass, took some pine-wood and made this piece, kept it a tad smaller as the towercladding, you have to account for the filler.
Taped the surrounding and got me my first layer of filler.
Had to repeat this several times, so each time getting to the endresult, usually it will take three of four passes before you've got it right.
Almost there, one last pass with filler and this little piece is ready, these kind of things consume loads of time, but if done properly you get a good result.
Started with adding the panels for the navigationlights, used my aluminumtape to imitade the panels.
Same story at the other side, now it's time to start with the rivets and weldinglines, it will take a week of so to get this right, goal is still this spring molding the tower.
Manfred.Leave a comment:
-
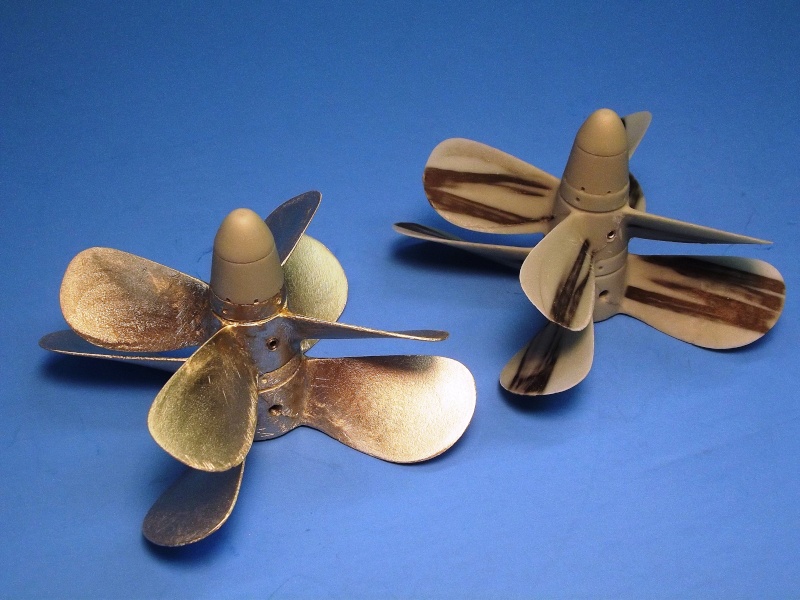
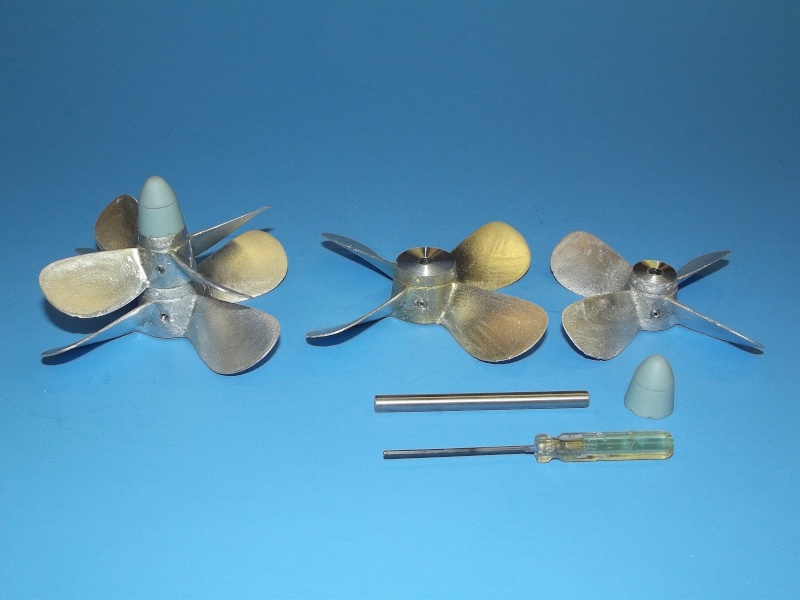
Last week the goodies from David arrived, i must say, some fine work on the props, he's still trying to pull me over to the imperial size, the props where locked with imperial sized grubscrews, thanks David!!!, has to buy a imperial size Allen Wrench, it was that or i couldn't remove the props.
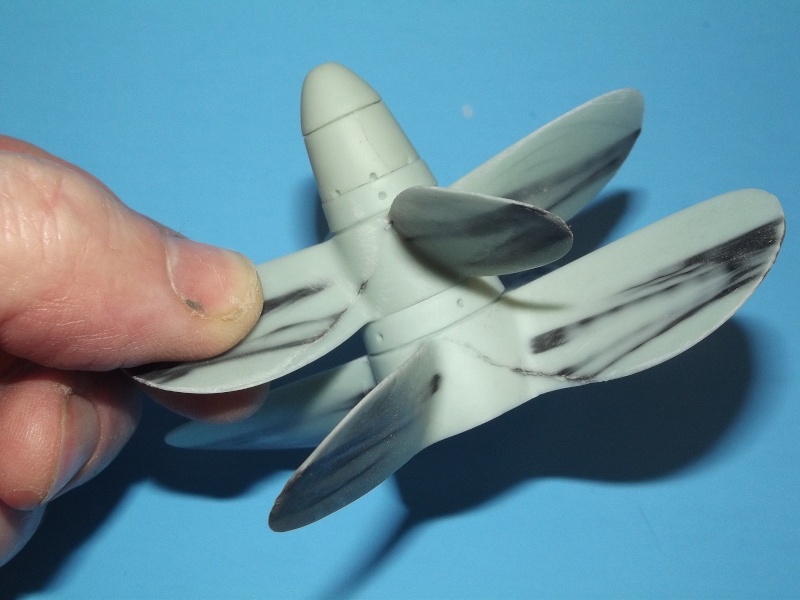
As you guys know, we in Europe are metric lunatics, so i had to rebuild them to metric for fitting on my drive-train, made 5 mm shims and the problem was solved, i tried this first on the white metal set, simply to learn how it would go, then switched to the resin set and did the same trick.
At the end i will use the resin set because of the CG issue, David mentioned before that weight will be a issue on such a tapered hull, you don't have that much room inside to counteract with the foam parts, for now i've made a vid to show the progress and some fun with the props, enjoy
Manfred.Leave a comment:
-
Thanks, that's what I figured.. I didn't blow my drawings up to scale and was working proportionally, on the 1/19th scale model. Have to give Dave a shout out here. I got the package with the props today,, sir. there wonderful!. Both sets to boot. Resin and metal. Perhaps I will make another B type Sydney style.Leave a comment:
-
Manfred, what is the overall liength of your hull plug from the torpedo breach to the aft bulkhead ?Leave a comment:
-
OK Guys, not much done on the sub lately, She Who Must Be Obeyed had some jobs on the list which had to be fixed, for now the rearpart is ready and i did something radical to the tower to solve a issue, pictures
Like the frontpart i can take off the rearpart by unscrewing it from the styrodure plug.
Placed on the workingbench, much more easier handling for placing the rivets.
48 rivets later and some scribing, you get this, i must say it was a bit of a learningcurve, at first i used the mold for drilling holes, had to cut the rivets to size before placing, it worked, but there was a catch, since you have to place the rivets on both sides i ran into trouble to get them even on their places.
The solution was simple but tedious, had to cut off the head of the rivet and just glued the toppart on, more work, but it solved the issue i encountered first.
My radical move on the tower asked for some demolitionwork, took the dremel cuttingdisk, and cutted away the rearpart of my tower, i never managed to get the shape right like i wanted, so i decided to go from scratch, it will take a piece of pine-wood to get me a better shape, the works will be continued on fixing this baby.
Manfred.Leave a comment:
-
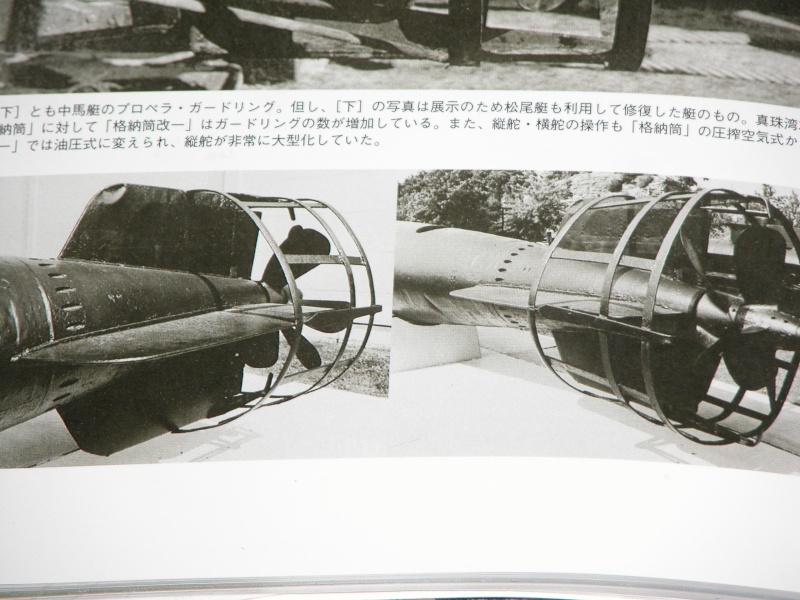
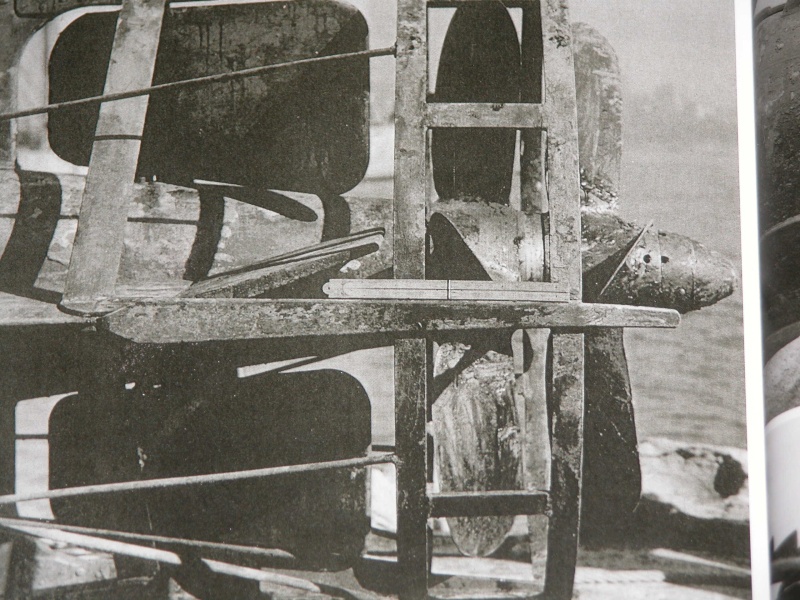
Excellent David, last week i got my grubby hands on that book with the nice pics, it had to come from Hawaii, finishing the detail works at the rearpart.<br />
<br />
Manfred.Leave a comment:
-
Wow! Those are magnificent. And old pictures of the full cage as well. Time for me to get cranking. Field day the shop, today, clear the decks, and stand by.Leave a comment:
-
Manfred and Dave: Your Type-A propellers are almost done, guys. One metal set, and one resin set (if you can't get the c.g. right).

MLast edited by He Who Shall Not Be Named; 03-23-2016, 07:15 PM.Leave a comment:
-
Security Engineer, which has nothing to do with metalwork, i did learn a lot on the highschool, working with a lathe and endless filing on a metal cube to get it square on all sides, one of us guys started with a cube sized 5x5 cm, and ended with 1x1 cm, hilarius!!!
Manfred.Leave a comment:
-
Manfred....what do you do for a living.....if I may ask? Looks like you have some sheet metal experience. Looking Superb!Leave a comment:
-
Frontpart is finished, pictures
Soldered all loose parts and sanded it down, the pyramide part of the reinforcement rod is much more to scale.
Those small rivets are a nice touch, glad i've ordered them, back to the rearpart!!!
Made this as my preparation for placing the rivets at the rearpart, to be continued.
Manfred.Leave a comment:
-
Kairyu is at Yokosuka, much smaller boat then Type A and B midgets. Suiside mission boats with warhead bow, never deployed during the war. Nothing like the Koryu or the Kohyotekis other than being a 2 man operation.Leave a comment:

Leave a comment: