-
Tom I found the anchor was a firm fit so I just glued it in place. As for metal bits I drilled out behind the ones with the holes. I'm pretty sure the represent the open water inlets and outlets so it kinda made sense to open behind them. -
Couple of questions, the mushroom anchor, do you put any holes in it to allow air/water to escape? What about the metal pieces?Leave a comment:
-
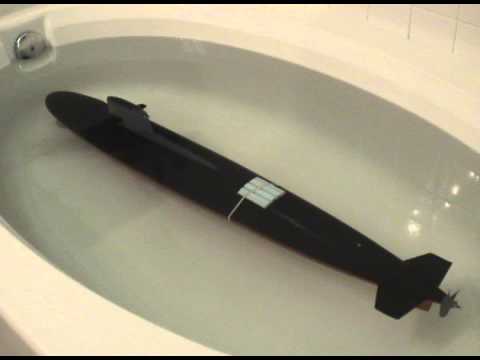
I shaved the foam from the last test down to make the halves come together. Today no additional weight will be added, just enough foam to make it level submerged.
That seems to be O.K. with just a small portion above the water line.
Surfaced the aft was a bit high so I juggled the foam a bit and tested again. Much better.
Then Zoey decided there needed to be some waves. O.K. we are done.
Leave a comment:
-
The foam was too big. David recommended using clay to find the distance between the sub-driver and the deck.
That helped a lot. There will still need to be a bit more fine tuning with the foam.
Once the RTV silicon rubber dries, I will finish the shaping of the foam. Then we will do another round of trimming in the tub.Leave a comment:
-
No pool time yet. It might be fine for some, but it bothered me the way the aft was light on the surface, even though it is level submerged. The other issue is diving air will get trapped in the aft end. Even putting a 1/8" hole did not alleviate the problem (although I have more I can do like taper the inside of the hole and place a light coat of vaseline). Here is a quick video.
When I added enough weight to the aft end, the air escaped properly through the sail.
I actually woke up at night thinking about this, so I decided to shift some of the weight around. First I needed to remove the weight, then cut 1/4 of the aft most weight. This slice I placed under the wtc towards the aft end. Tested in the tub. There was a significant improvement, but still bothered me. So I switched the weights around.
Doing that made a huge improvement, but I needed to add some more foam to give a lift and level it submerged. I also needed to add weight in the center of balance to bring the sub lower.
Bringing the sub up, it leveled really close to the proper waterline with a touch more to spare. Re-submerging it verified the weight added did not change the balance.
This is an area that water collects and stays in my boat. I might add a un-scale hole to drain the water that is there. That area is forward of the shock absorber.
For fun I tried to make a panorama of the interior weight distribution so far (I have exceeded the original weigh put in so forget that post).
I will affix the float and weight. Then test again and make some modifications or adjustments. The reason I think I will need to make adjustment is the foam may not go in as one big chunk in that exact location.Leave a comment:
-
Manfred, the first one was a different camera (808 keychain camera #16). I had three video cameras ready for use, I wanted backup to make sure we captured the sound.
Alec, that would have been the FX departments last resort, if none of the cameras caught the delicate (cough, cough) sound.
David, as long as it works... She can cough up a fur ball for all I care :-)
thank you all for your humor! I like waking up to a laugh.
So, next task get her in the pool. Some items need to be completed first. I affixed the foam into the hull. It had to be shifted from where it was. There will need to be some trimming there. This will need to be retest. I added an extra vent hole in the aft, video later. If the bow dips first, the aft end captures a large volume of air. Moving this would not be an issue because the leveler would allow the air to move forward. Finally set the safety settings upon loss of signal. I need to purchase KMc LiPo-Guard.Leave a comment:
-
That last one ... sounded like the SAS caughed up some flem!
Perfect.
MLeave a comment:
-
Damn touch phones and auto spelling Very AngryI was meant to type hang gliding joy ride ...
Nice slurping sound Tom. or did you have one of the kids in the background sucking the dregs from a glass of water... Umm? :biggrin:Leave a comment:
-
Excellent Tom!!!!, a nice whoosh the second and third attempt, you're now officially releaved from mess hall duty.
I only wonder why i didn't hear the woosh the first time, did the float kept stuck to the inlet?, or it simply levelled the pressure without the sucking noise?
As for my XXIII, first some retracting stuff, testing the SD and take the plunge into the test facility, in that order.
Manfred.Leave a comment:
-
Alec, yes it was done with battery installed. Not sure what a jangling joy ride is, but it sounds interesting!
Vindication......
Maybe the pool today after I sleep.
Now Manfred, the ball is in your court. Type XXIII video in the wet.Leave a comment:
-
Tom did you balance with the sd with battery installed? As for balancing on the bench to test the cob the reaction around the pivot point will be quicker than trying it in water as air and water have similar characteristics. I learned this when my wife and I went on a hang gliding joy ride a couple of years back...Last edited by alad61; 10-13-2013, 07:57 AM.Leave a comment:
-
Thanks guys, I am still chuckling about the puncture to the kiddie pool. It was time for a new one and if anything it brought a certain joy to my wife that it will not be set up on the patio. Anyways, I have been annoyed at the alignment of the front of the sub. One side or the other will pop in rather than stay on the track. I looked through the pictures of David's build and I saw one that I think may have been David's solution.
I added some curved tabs to the top portion of the hull.
That made an immediate difference. This morning when i put it together there was no fighting the alignment, it just fell into place.
As a side note, I balanced my sub and it comes up a bit behind the sail. This is in the air so is this considered the center of gravity? or just center of balance dry?
Leave a comment:
-
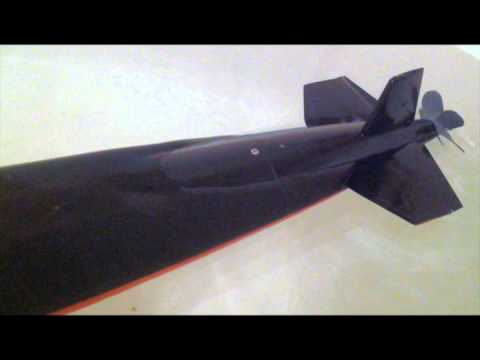
Tom, looks lovely I like that a lot. I keep looking at the prop on the Akula and wondering how vulnerable it looks as all my other subs have propulsors. I did once lose the propulsor off the Trafalgar though, just fell off, military grade loctite now holds it on.
Can't wait to see this buttoned up and hear the slurp.
PeterLeave a comment:
-
You bent my prop ..... you ****!
Plenty of reserve buoyancy in that SD -- you'll learn to goose the pump to get just enough water out to float the boat at the designed waterline.
Almost there, pal!
Yeah, we want to hear that 'slurping' sound the head-valve makes when the float gets above water. And when you do, can you dub in some bump-and-grind porn music?
Thanks.
MLeave a comment:
-
You did what!!!, you armchair admiral!!!, get a broom and wipe the mess hall, when finished get me that whoosh sound.
Manfred.Leave a comment:

Leave a comment: