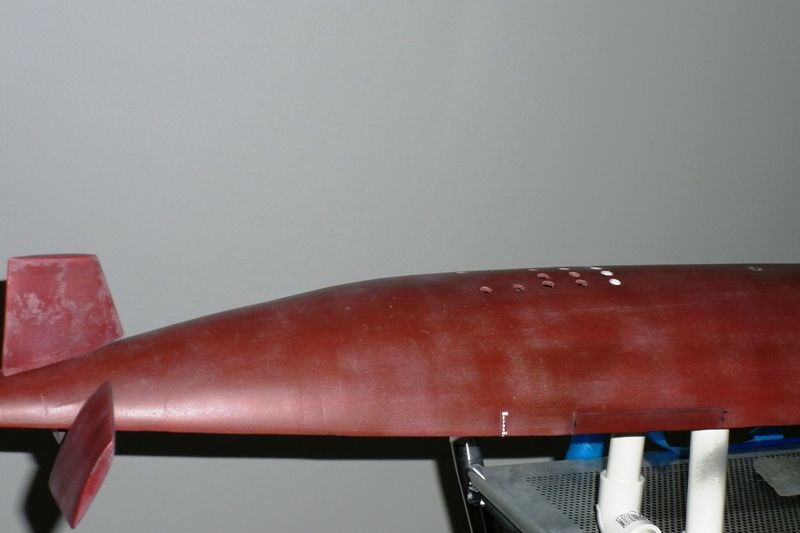
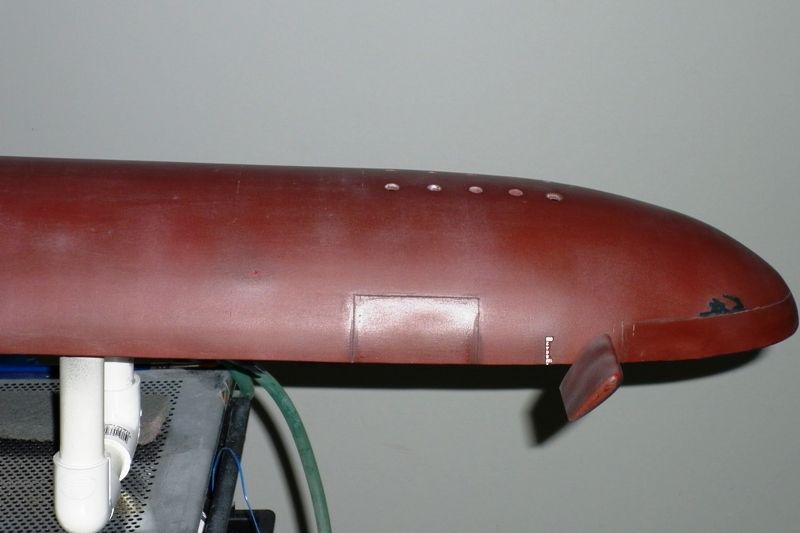
Here is my newest submarine... A Sheerline Akula...

Collapse
X
 
  • Time
  • Show
Clear All
new posts
  • Peter W
    Captain

    • May 2011
    • 510

    #31
    Alec, Nice build and quick too. If you ever buy another GRP boat I learnt that one way to drill through the gel coat is to run the drill bit backwards. I learnt the hard way on my Sheerline Trafalgar luckily only on the lower hull with nice shiny new aggresive drill bits (lots of chipping) but not one bit of damage when running the drill backwards.

    All the best,

    Peter.
    Comment

    • Subculture
      Admiral

      • Feb 2009
      • 2414

      #32
      Not always possible to reverse a drill. You can avoid taking chunks out of brittle plastics by using a indian stone to place a small flat on the drills cutting edge, this redces rake to zero right at the start and helps to prevents it digging in, which results in chippng. This helps when drilling some other hard plastics like acrylic/PMMA, and some metals like brass.

      Best thing to do is is to get a cheap set of drills, and keep them solely drilling GRP and PMMA. You can also purchase zero rake drills, but that's more expensive.

      Comment

      • Albion
        Captain
        • Dec 2008
        • 651

        #33
        Tape over where you are going to drill and use sharp drills
        Next time someone points out it takes 42 muscles to frown, point out it will only take 4 muscles to b1tch slap them if they tell you how mnay muscles you need to smile:pop

        Comment

        • alad61
          Commander
          • Jan 2012
          • 476

          #34
          Originally posted by Albion
          Tape over where you are going to drill and use sharp drills
          I have done that on perspect sheeting & it works. I guess I got caught in the heat of the moment & forgot :'( but Not next time...

          I also tried to get a truer water line when it was in the water as it sits a bit low. All that happened was it got a bit unstable with a tendancy to roll/pitch & then with a full tank it would not settle past the halfway mark on the sail, so I sacrifised some waterline. Tonight I start to detail her with paint & decals now that the base coats have had a few days to really dry.
          Cheers,
          Alec.


          Reality is but a dream...
          But to dream is a reality

          Comment

          • Subculture
            Admiral

            • Feb 2009
            • 2414

            #35
            These boats always tend to sit a bit low, think you'd need a very big tank indeed to reach scale waterline, probably impractical with that type of ballast system.

            Comment

            • Slats
              Vice Admiral
              • Aug 2008
              • 1776

              #36
              A very nice boat Alec. Can't wait to see it first hand. Are you coming to the Regatta on the Central Coast next year?

              J
              John Slater

              Sydney Australia

              You would not steal a wallet so don't steal people's livelihood.
              Think of that before your buy "cheap" pirated goods or download others work protected by copyright. Theft is theft.


              sigpic

              Comment

              • alad61
                Commander
                • Jan 2012
                • 476

                #37
                Work permitting I'll be definatly having a crack at getting there. If they move the queens b/day p/holiday to october what time frame would it be?
                Cheers,
                Alec.


                Reality is but a dream...
                But to dream is a reality

                Comment

                • alad61
                  Commander
                  • Jan 2012
                  • 476

                  #38
                  Originally posted by Subculture
                  These boats always tend to sit a bit low, think you'd need a very big tank indeed to reach scale waterline, probably impractical with that type of ballast system.
                  Yeah I guessed as much. I tried adding some foam then extra lead to get a better cog. But it was getting to a point that with all the extra lead, regardless of the foam. That if it went down the 'leaking' ballest outflow wouldn't be enough to bring it back up :S So it will represnt a true waterline weathering job but sit low in the pond... wisdom gives me the ability to change what I can & the humility to accept what I can't...

                  And if you believe that!! I'll tell you another... LOL
                  Cheers,
                  Alec.


                  Reality is but a dream...
                  But to dream is a reality

                  Comment

                  • Subculture
                    Admiral

                    • Feb 2009
                    • 2414

                    #39
                    You can't get a higher waterline by adding foam and hope to submerge unless the ballast tank has a lot of spare volume.

                    The only way you can get a higher waterline without modfying the tank, is to sand out the inside of the top half of the hull where it sits above the waterline thus reducing displacment. Unfortunately this will also weaken it somewhat, and make it more prone to warping, but if you are careful you can achieve quite a lot by doing this. If you ever get a chance to look at later version of a Sheerline Trafalgar, take a peek under the top half, and you'll see that the moulding is braced in two or three places. This is done to prevent the top half spreading, as Chris reduced the thickness of the laminate to a bare minimum. This was done to reduce volume and top weight. The original Trafalgars were known to be a little bit wobbly, and tended to need a little foam in them to counter instability. The newer ones are nice and stable.

                    You could copy that if you wanted to, it all depends on how far you want to go. Personally, when I get a sub in the water, the first thing I do is hit the ballast switch, trim the boat to dive, and under it stays until either a) I get bored or b) the battery goes flat or c) something goes wrong!

                    Comment

                    • Scott T
                      Commander

                      • May 2009
                      • 397

                      #40
                      Could you add some tanks fore and aft to pump air into for a higher waterline?
                      A couple of syringes (mini piston tanks) might be used to pump air into to add some additional lift once surfaced.

                      Scott T

                      Comment

                      • alad61
                        Commander
                        • Jan 2012
                        • 476

                        #41
                        Scott that would be difficult as it would require pretty much rebuilding the wtc for it all and at this point in my rc sub career that is just a tad past my abilities. Subculture I had not thought about sanding the top hull down. Though I think that is too much effort for a little gain. But thanks to you both for the replies.

                        Now weathering a modern nuke sub!!! It sounds like a simple concept when explained by HWSNBN and others and as I have built and weathered many static builds eg.
                        Store your photos and videos online with secure storage from Photobucket. Available on iOS, Android and desktop. Securely backup your memories and sign up today!

                        My all time favorite sub!!
                        Store your photos and videos online with secure storage from Photobucket. Available on iOS, Android and desktop. Securely backup your memories and sign up today!


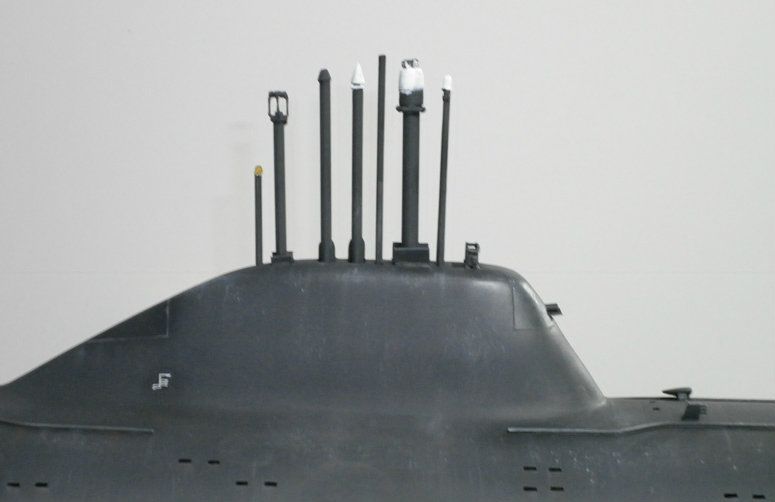
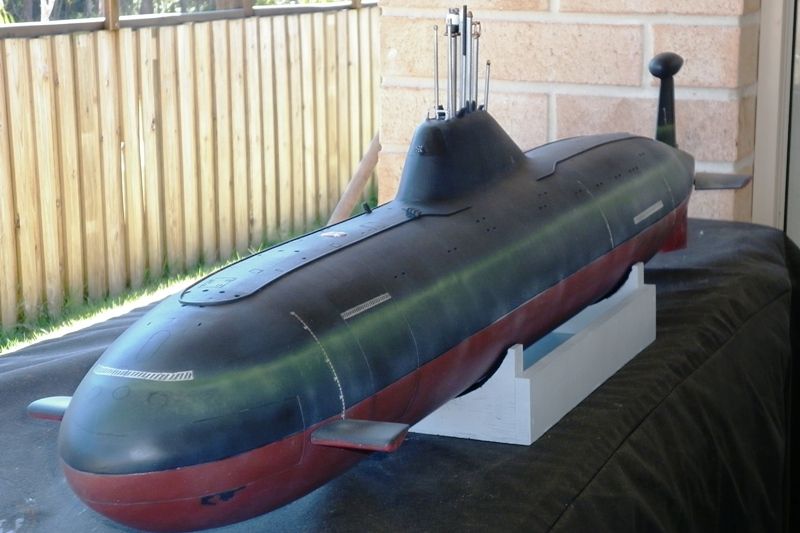
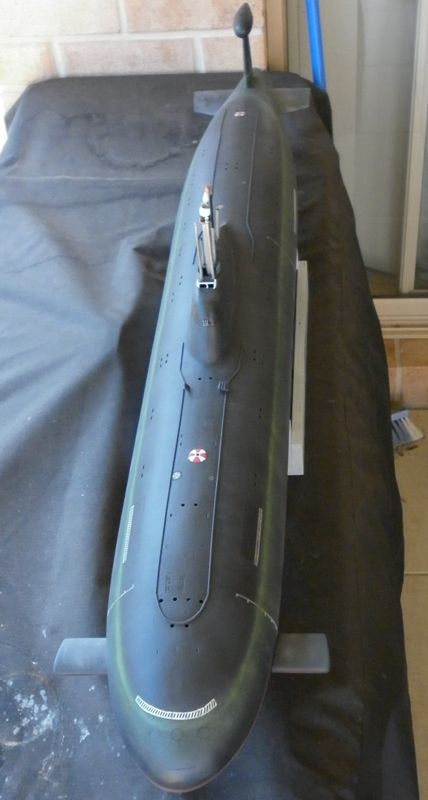
                        Yet I somehow found doing this model a little daunting... However after many hours on the web via the home pc with greenmans sub pictures, my mobile and good old google. I had gathered enough info to prop up my courage to begin. After giving Davids toothpaste bleaching effect a trial I decided against it as it wasn't the look or result I wanted. I think that is because I use a different paint medium to what David does. But before I began any weathering I scribbed in some extra detail such as the front torpeado hatches and some lines for where there would be sonar and sensor equipment in various parts of the sub. This extra detail I got from a schematic I found. This was the first real attempt at scribing my own detail from scratch as well and though a little rough I'm pretty pleased with the end result. Also what I found and read about Russian nuke subs is that they all seem to have that used and neglected look about them. What I didn't want to do with my weathering was end up with an over the top WWII German u boat look. I want something dirty but less dramatic or over stated.

                        These first two pictures show my first pass at "bleaching" the hull.


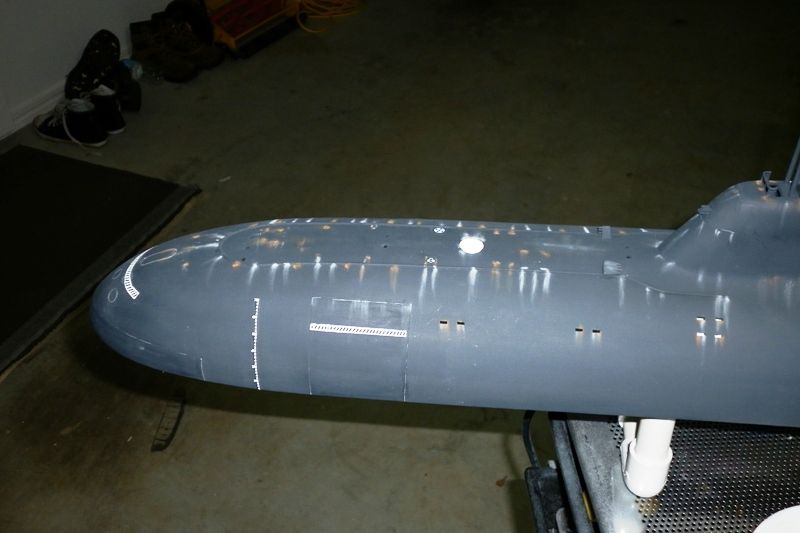
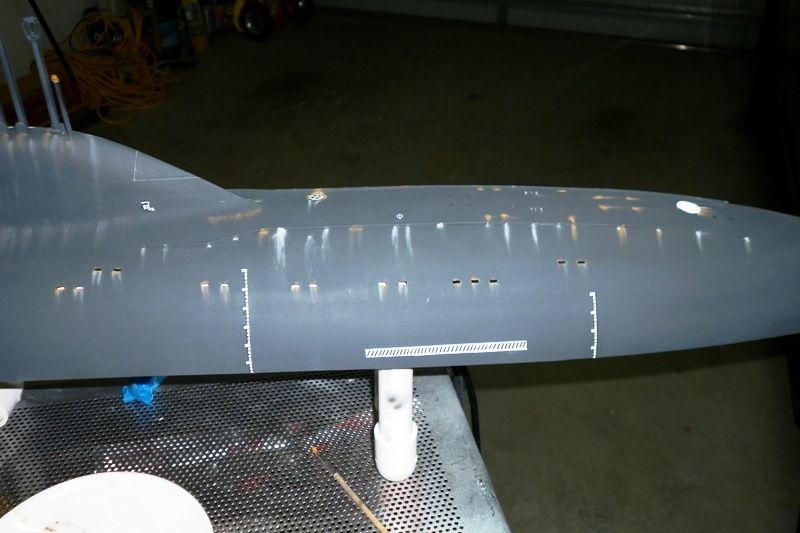
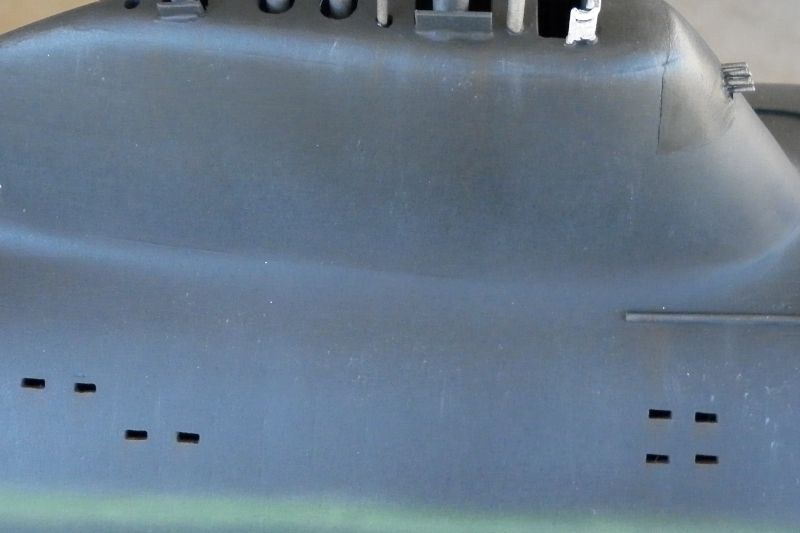
                        For the top hull I made the colour from a mix of dark grey and black at about 80/20 this was then applied ov the flat black base colour after it was rubbed down with a fine 3m sanding scourer. I then started adding the weathering detail with my pastels along with the first pass of white on some mast heads and the escape hatches. A trick to remember with pastels is that they tend to wash down with any washes or clears that are used to overcoat them so in the pictures they look a little vibrant and over the top. It was then overcoated in a good coat of future before three different coloured black washes were applied.


                        This is the first lot of washes over the pastels. Notice how washed down they go which is just whats needed as I redid the pastels three times before I got the desired look. I can't really stress that you need to have a good image in your minds eye as to how you want the final look. It is way to easy to go either side if you let your focus shift. Things to help keep your focus, well mine anyway, is to have some pictures of what you are aiming for and smart phones are great for that now.


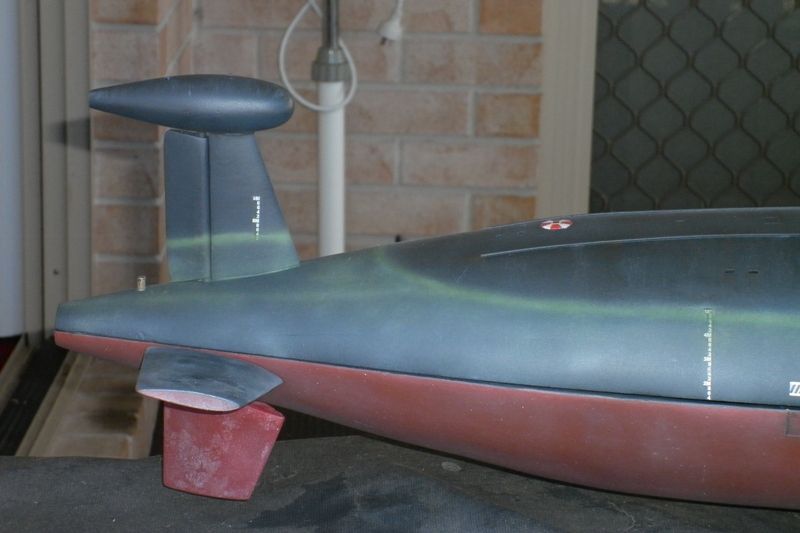
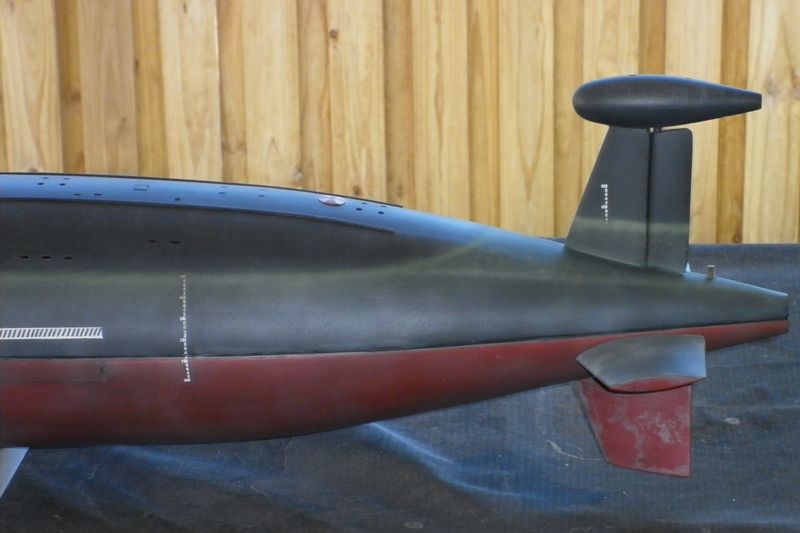
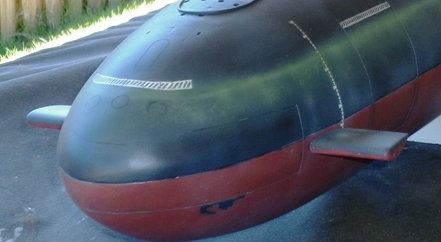
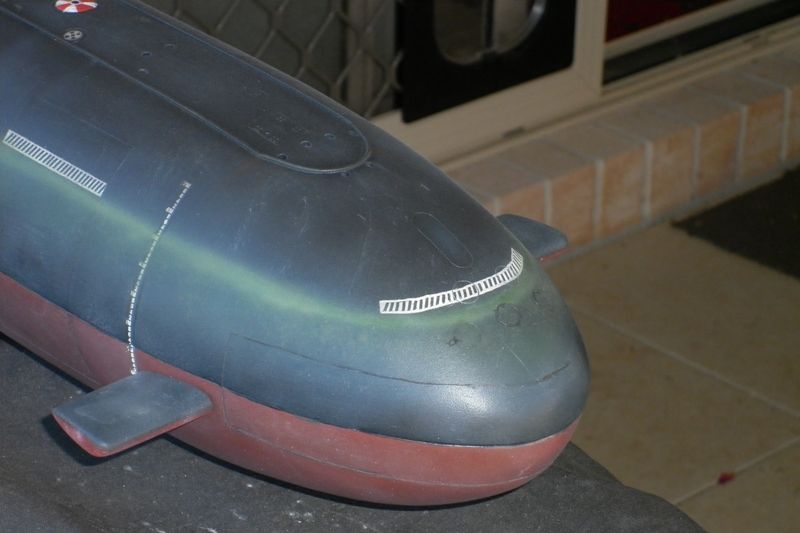
                        I also tackled the waterline and top hull bleaching too. The water line was first done with a line of white flat which was passed over by several shots of varying greens as well as stippling on a light random soft dirty green for older bleached algae, sea-weed etc. This was then 'very' softly rubbed with a piece of fine scourer pad I did the same on the lower hull as well between each of the bleaching applications. All the water level indicators are actually vinyl transfers which I had ordered by mistake!! But did the job anyway and once down they take a fair flogging without the risk of scratching or lifting away like other decals can. I still used the same process on them to seal them in and down so I reckon they are there for the duration... I must admit I was a little cautious on bleaching out the bottom hull mainly because I didn't want it to end up to pink!! Except for the lower rudder all the bleaching and waterline is laid down by free hand airbrush and fine scourer and all the hull chevron markings are masked and painted too and yes I know the front bow one is a bit off.....


                        The only thing that really peeved me off was that the "low"tack tape I got from one of our suppliers at work as a sample is a far cry from the 3m blue tape I normally use. It actually lifted up some hull colour to my black primer!! NOT HAPPY Jan... Mainly as I had run out of my hull red soI decided to keep it as minor hull damage. Not sure if that would actually happen but as the lower hull s pretty featureless so it adds a little extra if nothing else.
                        Cheers,
                        Alec.


                        Reality is but a dream...
                        But to dream is a reality

                        Comment

                        • alad61
                          Commander
                          • Jan 2012
                          • 476

                          #42
                          And to finish off here a couple of full hull shots and some showing the final weathering finish up close. I took these out in the patio with natural light out of direct sunlight but still pictures never seem to show whats really there...


                          Now I just have to wait till next week-end to show it off at the lake... :(
                          Cheers,
                          Alec.


                          Reality is but a dream...
                          But to dream is a reality

                          Comment

                          • vital.spark
                            Commander

                            • May 2010
                            • 304

                            #43
                            Alic, I think your finished Akula looks just like many pictures I've seen of Russian subs in drydock, a first class effort which you can be proud of. The slide show you did of Natulis, is in my mind out of this world as is your Akula and should be viewed and enjoyed by all Forum Members!

                            Regards,

                            Myron

                            Comment

                            • He Who Shall Not Be Named
                              Moderator

                              • Aug 2008
                              • 13405

                              #44
                              Thank you so much for sharing the Road-Warrior car and Disney NAUTILUS. Indeed, you come into this game with rock solid credentials!

                              The AKULA looked good. You missed the correct waterline at the stern. Did you use a surface-gauge/waterline marking tool to establish the demarcation line between above and below the hull and upper rudder waterline plane?

                              A very informative presentation, Alec. Great stuff.

                              David
                              Who is John Galt?

                              Comment

                              • alad61
                                Commander
                                • Jan 2012
                                • 476

                                #45
                                Thanks Myron and David. :)

                                Now as to the water line on the upper tail.... No David it's the camera angle. Umm, no it is the lighing... NOoo!! David is right... I screwed that up by a few millimetres. To correctly answer the question... No guage was used David, just eyeball and free hand. So I know what I am doing tonight. Mmm, and Sandy thought she have me sitting down with her and watching crap tv now that the sub is done, well in her eyes.
                                Cheers,
                                Alec.


                                Reality is but a dream...
                                But to dream is a reality

                                Comment

                                Working...