Here is my newest submarine... A Sheerline Akula...

Collapse
X
 
  • Time
  • Show
Clear All
new posts
  • alad61
    Commander
    • Jan 2012
    • 476

    Here is my newest submarine... A Sheerline Akula...

    Well after tooing & froing I finally made my decision on the next boat for my fleet. An Akula from Sheerline Models in England. It was a close call on the 31 inch Disney Nautilus by Scott Brodeen but the size, inclusions and research led my descision to the Sheerline kit of the Akula. I also looked at the scale ships kit as well but as the one from Chris came with a wtc and running gear bar the esc, reciever and servos it was a no brainer for me and the wallet. Plus keeping thigs in one delivery under $1000 AU helps avoid all those BS import duties and fees our federal & state officials like to apply.

    Now I have to say that Chris from sheerline has been great to deal with and that his passion for the models he does shows in his service, correspondence and delivery of the end product. It's people like David, Caswells, Chris and others that help nurture and keep us in the hobbies we do. But enough butt kissing...

    This is how the kit turns up form Chris... I had it sent to my work because I didn't like the idea of it sitting at the front door left unattended as I'm pretty sure it wouldn't have been around when I finally got home...


    and how it looks inside the box...


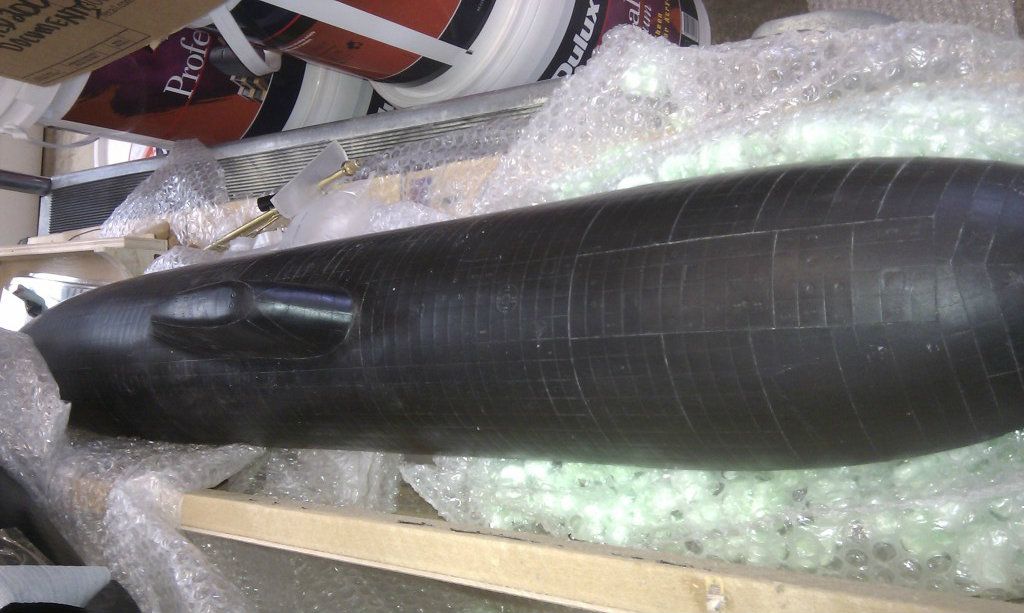
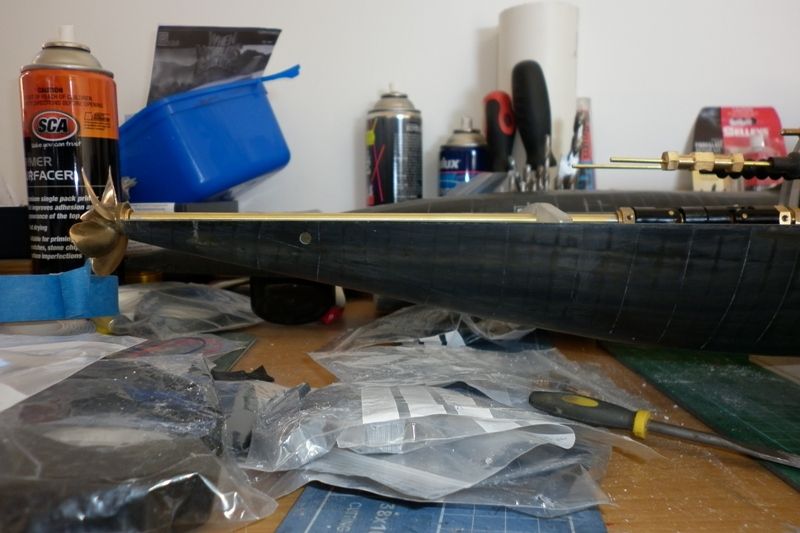
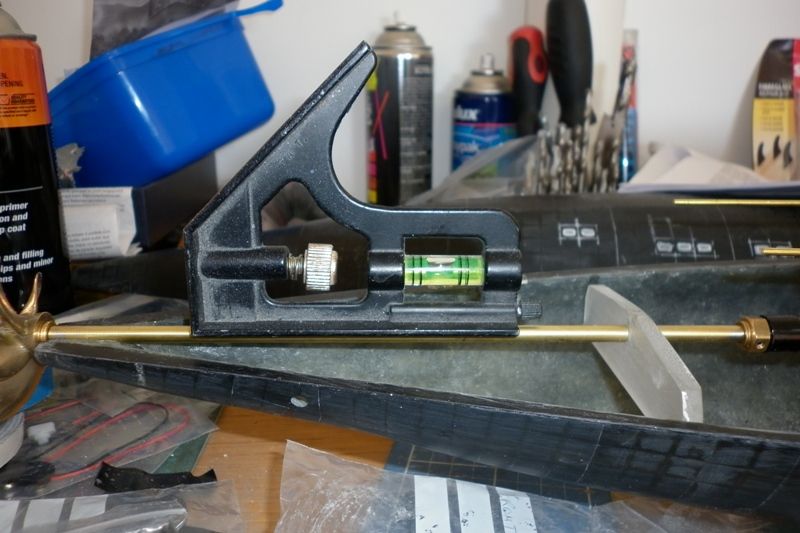
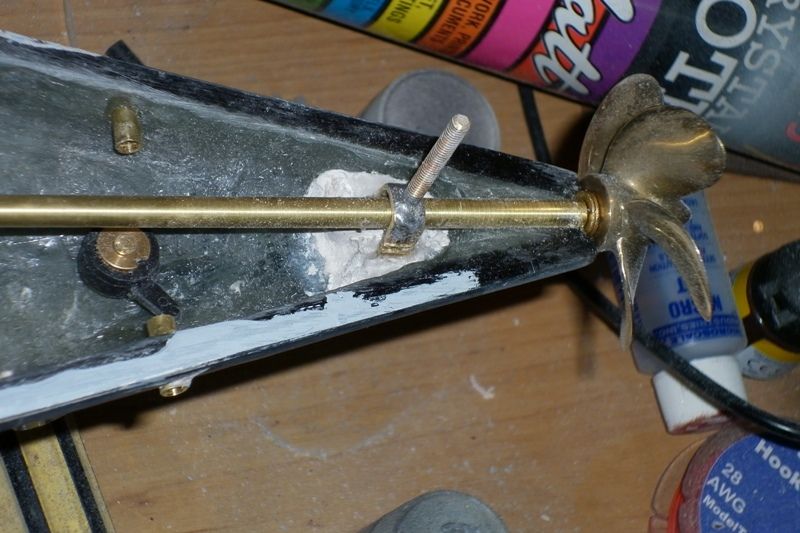
    and this is whats under all that bubble wrap, foam & packing... Everything is bagged and labeled separately. The prop shaft, mounting block and propeller are all supplied ready to fit. Even the push rods are pre shaped along with an assembled boat stand out of timber and as I suck at wood work I'm really liking that addition. Chris even supplies the battery and ballast. Please forgive my enthusiasm regarding this kit but as it is only my third rc sub and it being a grp one to boot is for me exciting...

    Obviously the wtc is different than what David produces but reading what is said about it from forums from over in England it looks good. What I have looked at so far with it looks pretty impressive and adds another flavor to the platter of learning in the rc sub smorgasbord.

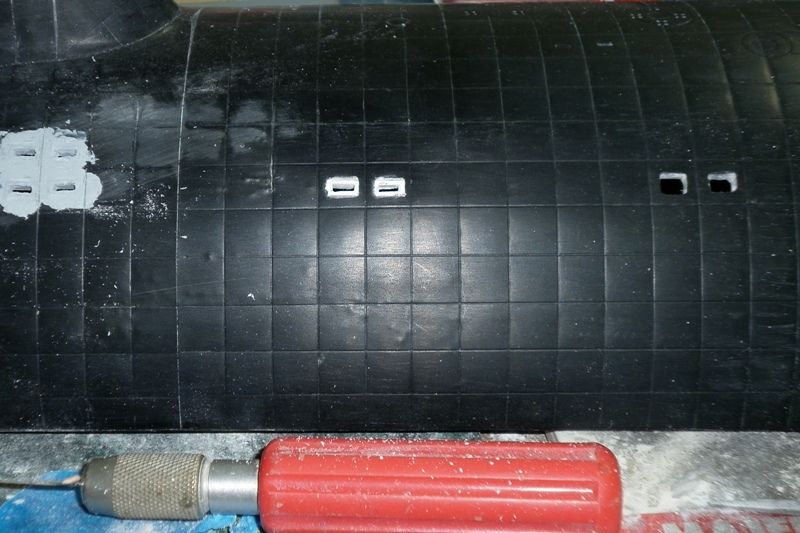
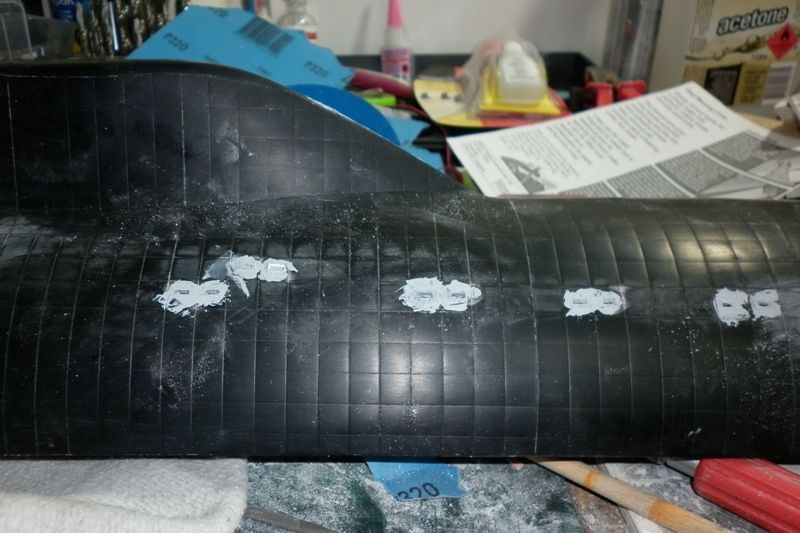
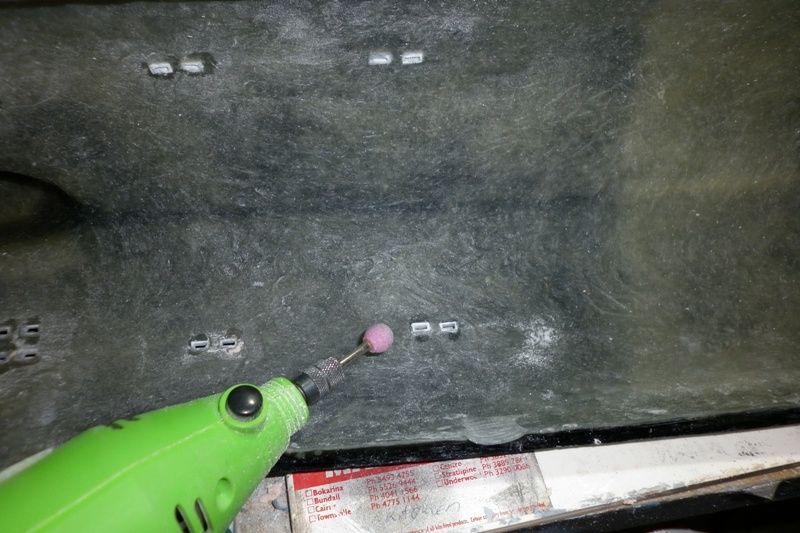
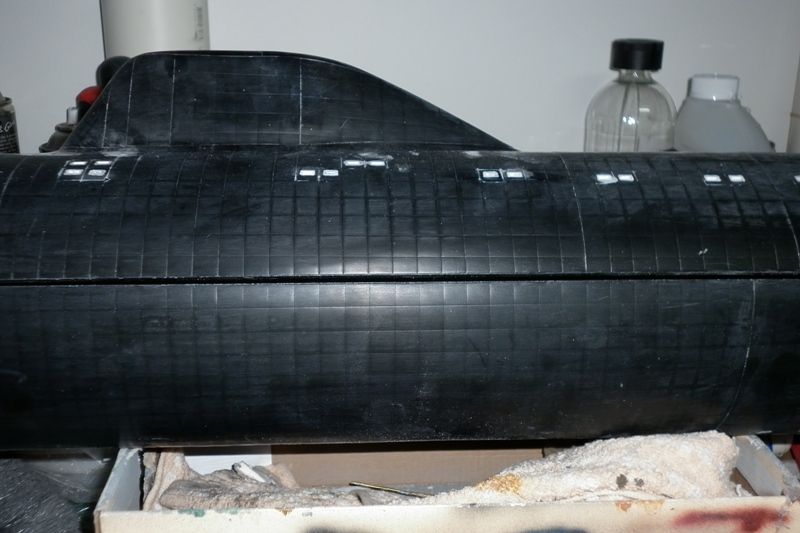
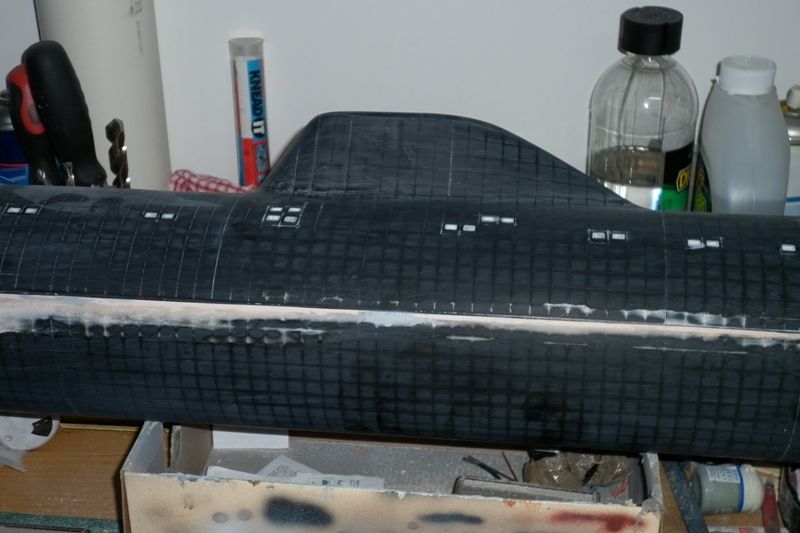
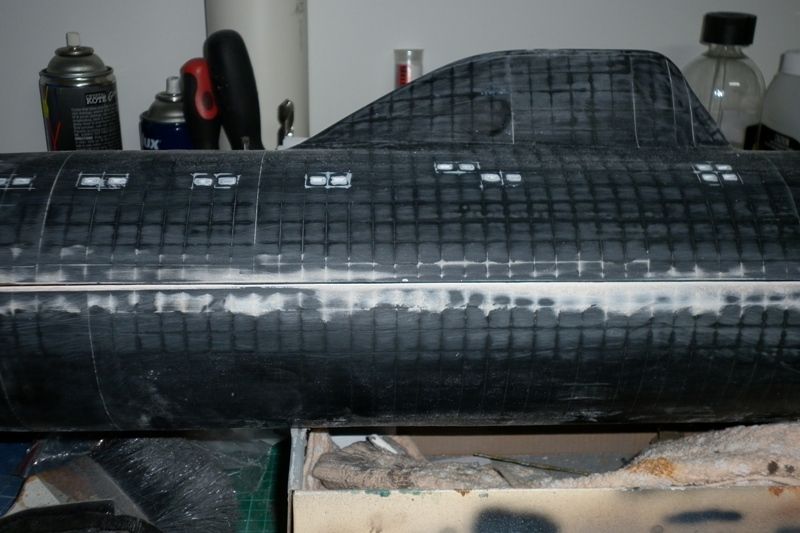
    As for the sub itself it looks pretty solid too. In one of the emails I asked about a mast kit etc to which Chris replied straight up saying that he didn't produce one. All he does is do a good reliable kit that people can get in the water and enjoy. I'm pretty confident I can knock up the masts for it and I might even tackle some of the other hull features.

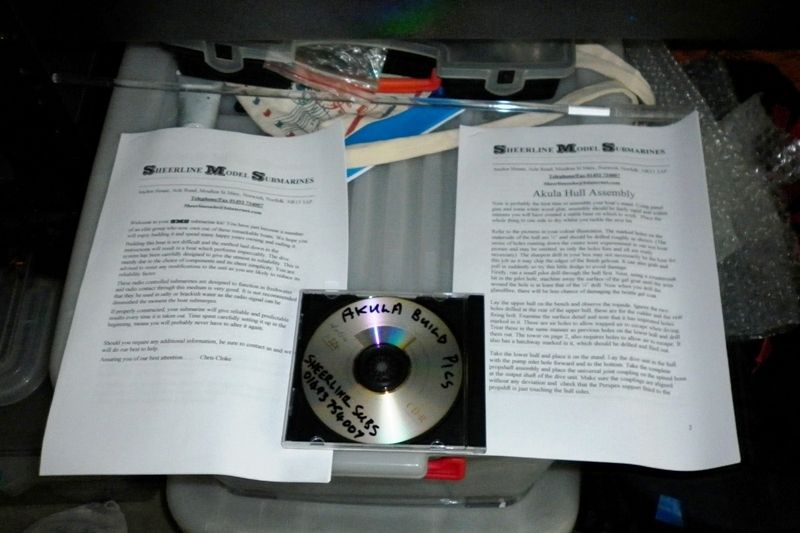
    There are two separate instruction guides. One for the model itself and the other is for the wtc along with a cd of pictures to go with the guide/instruction books

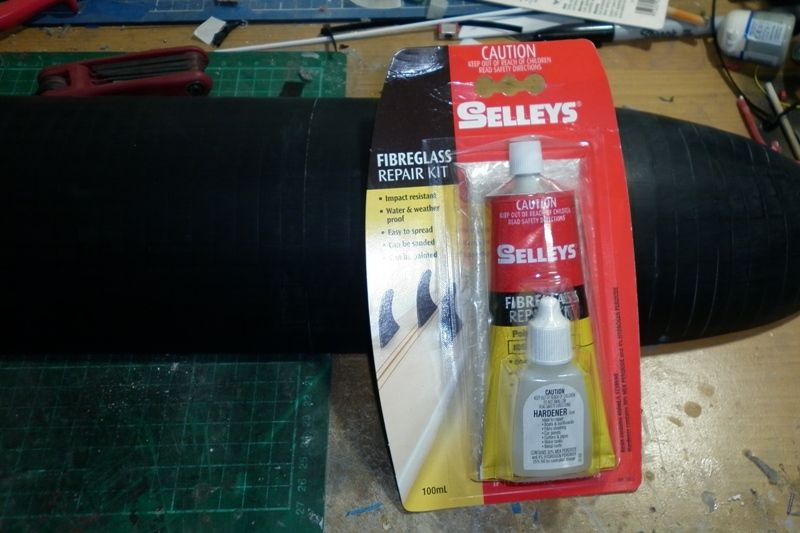
    As this will be my first grp model I am still getting info on what are the best adhesives available down under. Chris has suggested I don't use any epoxy based glues as this is a polyester based resin grp. I know a good quality ca glue is a given but I need to source some good two part stuff. If I were to put a time frame on this kit I would be confident in saying that the basic sub being assembled, primed, tested, ballasted would be in the lake in less than three weeks just working on it at night. As for the proper hull painting and weathering I reckon maybe a week longer weather dependent. So all thing going to plan I should be starting the clock this coming week end.
    Last edited by alad61; 08-01-2012, 08:09 AM.
    Cheers,
    Alec.


    Reality is but a dream...
    But to dream is a reality

  • greenman407
    Admiral
    • Feb 2009
    • 7530

    #2
    Cool!!! The hull has a lot of scribing on it. Your going to have lots of fun! Please, keep your building thread updated so that we can build with you...................You dont mind a back seat driver..................do you???
    IT TAKES GREAT INTELLIGENCE TO FAKE SUCH STUPIDITY!

    Comment

    • He Who Shall Not Be Named
      Moderator
      • Aug 2008
      • 12368

      #3
      Take your time. Enjoy this thing, Alec.

      Nice kit!

      You can use Epoxy adhesive and laminating resins, just make sure NOT to use the five-minute-cure variety! Rough up the surfaces to be joined first and you won't have any problems joining the GRP parts to one another or to other type materials.

      Go get 'em, Tiger!

      David
      Who is John Galt?

      Comment

      • Subculture
        Admiral
        • Feb 2009
        • 2129

        #4
        You can't go wrong with one of these kits. The Sheerline range are very ruggedly built, easy to repair and well proven in the field. Akula is the best boat in the Sheerline range IMO. It's not the most accurate boat they kit- I think the Berlin wall was still up when the original masters were made for this boat- but it's a good size for transport (fits across the back seat), and it drives well thanks to a non scale full flying lower rudder, which gives a respectable turning circle. I think the anechoic tiling was done with litho plate.

        Regarding bonding the parts together, I'm sure what Chris has recomended is polyester resin mixed with chopped fibres. Here in the UK you can buy that pre-mixed in a can and it's called Isopon P40. You can get something similar down under, but under a different brand name. You can usually find it in car spares shops, it's used for bridging holes in rusty panels. A fibreglass specialist will probably sell you some resin and a bag of fibres for you to mix yourself

        You may find this link useful- http://associationofmodelsubmariners...-submarine.php

        You'll see that Mark managaed to construct a set of scopes easily. Well worth the trouble- it enhances the look of the boat considerably, and as the Russians don't seem to like faired masts, you can use off the peg tubing for the masts.

        Comment

        • alad61
          Commander
          • Jan 2012
          • 476

          #5
          Thanks David I plan to enjoy it...& Subculture thanks for the link too. I also found this whilst googling Akula submarine masts.

          The trouble is I can't remember what and where I found to give credit... But it should be a good guide to knocking up some masts. Greenman you can drive from the backseat but be warned all my family and mates know that I'll pull over and let you out if you annoy the driver too much...:biggrin: I also know what you might mean about them there tile patterns. I am thinking the only way to remove them apart from sanding them away!!! Is to fill them with a glazing type putty... Neither of which hold a lot of thrill for me but by using a scratch fill primer some sanding and more primer I can soften the look some.

          What I have done so far is sand, scrub, drill, and grind out the inlet and vent/limber holes and I must admit that I need much more practice at working with grp hulls and it certainly has shown my lack of skill at grinding with a moto tool...
          The first chore was sanding back those areas look like separation issues in the negative mold


          Once I was happy with leveling out the raised ridges I then dry rubbed both top & bottom hulls with a green 3m sanding pad. I followed this with a wipe over of a wet rag to pick up the heavier dust and even after a good scrub with the 3m pad you could still tell that there was some fill on the hull that showed up as water beading.


          So it was off to the tub to get a really good scrub with a cream cleanser and kitchen scourer pad.


          Following Chrises instructions I used one of my least sharpest drill bits along with pilot holes but I still ended up chipping and tearing the grp...Give him a soapbox! But some two part bog saved the day... mostly.

          Cheers,
          Alec.


          Reality is but a dream...
          But to dream is a reality

          Comment

          • alad61
            Commander
            • Jan 2012
            • 476

            #6
            The next this was to start on the limber holes/vents. Well as I said in the previous post my dremel skills are somewhat ordinary. Even with tape as a guide I still had trouble getting them to look more symmetrical. So it was of to the LHS to pick up some rectangular tubing which I then forked into the "carvings" I had done bogged them in and to make sure they held I used thin ca & backing soda on the inside to hold em tight. and to take away any sharp edges that could restrict air & water flow I used the grinding ball on the moto tool to bevel and level them... I think that I may have got the rectangular tube a bit narrow but once installed, glued & filled they are easy enough to open up with a file if they prove a bit tight for air n water venting. Although looking through the web at the different pictures and schematics of the Akula class they were varying sizes in the said vents/limber holes from large almost square ones to slimmer ones in height but still as wide...


            It was also funny how I got hung up on what type of glue to use on the thing apart from ca. You know the saying, how sometimes you cant see the forest for the trees? Well that's what I was suffering from. Whilst I was in the shop trawlling through the glues and getting just that bit more frustrated as these so called mega stores never have what you need and I was also following what David and others have said. Stay away from the fast cure stuff and then I found this...

            It is a polyester fiberglass repair kit and according to the packaging it takes a minimum of 5 hours to go off and a full 24 hours to fully cure. I should be finished drilling and grinding the top hull & sail this week so then I can start adding the tails,rudders and other hull running gear. Then next week it will be fitting out the radio gear in the wtc module. My ultimate goal here is to have it fully wet, tested & running by September and only then will it be detailed, painted & weathered.
            Cheers,
            Alec.


            Reality is but a dream...
            But to dream is a reality

            Comment

            • He Who Shall Not Be Named
              Moderator
              • Aug 2008
              • 12368

              #7
              Good sound kit-assembly going on here, Alec. Keep the reports coming! And you simply gotta lose that tile pattern.

              David
              Who is John Galt?

              Comment

              • Subculture
                Admiral
                • Feb 2009
                • 2129

                #8
                Don't knwo what stuff you have there. I'd be surprised if it contains any glass in it. Hope it's not just filler paste,as that has very little strength. Generally the stuff I was recommending comes in a tin, like paint.

                Polyester resin is very brittle, so it will chip if you drill it with normal bits. Ideally you should resharpen your bits with zero rake, much in the same way that drills are sharpened for cutting acrylic/PMMA. Something else that works fairly well is to use a countersink to open out the hole a little first, before runnign a twist drill through.

                Comment

                • alad61
                  Commander
                  • Jan 2012
                  • 476

                  #9
                  Subculture, the adhesive I showed in above is the poly resin with a fibreglass mat as well. It is really made as a complete repair system. But the resin tubes will make for q good matching adhesive as it is a polyester base not epoxy... As for the light grey filler on the hull, that is an air dry type over my two part polyester filler.

                  David I agree that the tiles are a bit much and I plan to hide them as best as I can. I am going to hit one of the auto shops after payday next week for good spray on putty/ primer that works with deeper imperfections. But this week end will be fitting all the running gear etc...
                  Cheers,
                  Alec.


                  Reality is but a dream...
                  But to dream is a reality

                  Comment

                  • Subculture
                    Admiral
                    • Feb 2009
                    • 2129

                    #10
                    Okay, unusual way of packaging resin in a tube, not seen that before.

                    Regarding the tile pattern, nothing is very accurate about this Akula. Hull, sail, control surfaces- all are wrong, but it works very well as a model submarine, a lot better in fact than an accurate scale Akula. As I said in an earlier post, these moulds are very old now, and information on these boats was far more scarce then (pre-internet, don't forget).

                    I remember the advertising for this boat pitching the tile detail as an extra detail. Seems a shame to rub it all off, the boat will look a little plain without it I think. You will have to abrade the surface for the paint to key in well. With a coat of primer, and a couple of coats of satin black, the tile detail will soon become more subtle. For the rivet counters, just tell them it's a Russian special project boat.

                    Comment

                    • alad61
                      Commander
                      • Jan 2012
                      • 476

                      #11
                      Originally posted by Subculture
                      Okay, unusual way of packaging resin in a tube, not seen that before.
                      Yeah we can do things differently down under.

                      Originally posted by Subculture
                      Regarding the tile pattern, nothing is very accurate about this Akula. Hull, sail, control surfaces- all are wrong, but it works very well as a model submarine, a lot better in fact than an accurate scale Akula. As I said in an earlier post, these moulds are very old now, and information on these boats was far more scarce then (pre-internet, don't forget).

                      I remember the advertising for this boat pitching the tile detail as an extra detail. Seems a shame to rub it all off, the boat will look a little plain without it I think. You will have to abrade the surface for the paint to key in well. With a coat of primer, and a couple of coats of satin black, the tile detail will soon become more subtle. For the rivet counters, just tell them it's a Russian special project boat.
                      Thanks Subculture as I mentioned I knew it wasn't going to be a 'scale' accurate kit but for me I like the shape and it was a good price too... As for the tiles I reckon with all the sanding I have done to knock them back a bit they will still be a noticeable artifact of the model but with the extra little bits I will add and some good coats of primer I will indeed have a good 'project boat...

                      Now as for what I have done over the last week or so...

                      I set and mounted the prop shaft & support, making sure it sat with a level bubble in the hull and I also ensured the hull and wtc sat level in line with the prop as well.


                      I also fitted the forward joining clip and rear mounting screw along with all the bearings for the planes and rudders.


                      Then when the mounting clips were in place and the adhesive set I placed the two hull pieces together to discover one hell of a gap between them for two thirds of the center line. With the widest point being almost 4mm across!! Whipping out the two part bog I mixed up enough to do one side and lathered it between the two hulls as they sat together. Then when it was starting to go off I used a very sharp No11 blade and carefully followed the contour of the top hull. I then slowly and carefully lifted them apart for the bog to fully cure over night before sanding and filing. After which I went back over with an air dried putty to fill in the high n low spots. Then repeated it all again the next night. That whole process took the longest but the result was worth it IMHO...


                      This shows the now filled gap with the hulls just sitting together without any pressure clamping them down to each other.


                      With the center line sorted I then attached the top fin and pod with its rudder. Itself not without some dramas. Note before setting the bearings inplace first remove the rudder & shaft. David would have been proud at the vocal various curses that ensued during the whole affair...


                      I also drilled and filed out the start of the mast and sail bridge openings but I still have some tweaking to do with the openings in the sail...


                      Whilst all the putty n bog were drying I began working on the wtc and mounting the servos and electrics. Chris recommends disconnecting the bec from the speed controller and connecting the rx directly to the 6v gel cell battery terminal block. But I am a little worried that at full capacity straight off the charger the battery will fry the rx unit but of course I am also thinking that after some run time the batteries capacity would drop low and then not power the rx effectively?? I guess I'll give it more thought whilst I work on shaping the servo wheel for running the ballast system.
                      Cheers,
                      Alec.


                      Reality is but a dream...
                      But to dream is a reality

                      Comment

                      • He Who Shall Not Be Named
                        Moderator
                        • Aug 2008
                        • 12368

                        #12
                        Looking good, Alec.

                        The filler you used to tighten the seam between hull halves will be subject to coming off if you don't perform one or both tricks:

                        1. to the inside portion and top of the fill, slather on thin formula CA -- the CA will permeate into the stuff and will effect a tight bond between glass and filler, greatly reducing the chance of the filler later chipping away with repeated handling of the hull.

                        2. glass the inside of the hull around those areas where you built up the filler to tighten the seam, overlapping the filler and glass hull it sits on. This will make your fix bullet-proof.

                        David
                        Who is John Galt?

                        Comment

                        • Subculture
                          Admiral
                          • Feb 2009
                          • 2129

                          #13
                          One other thing- you may have already done it, but I can't see it in the pictures- pin the two halves. Brass dowels work well. Four to half a dozen spaced around the edge will do the trick. This prevents the hull halves spreading, as polyester resin hulls are apt to do if left to their own devices (not that epoxy is entirely immune from this either from my own observations). If you peg them they'll stay as straight as the day they came out of the moulds.

                          6 volt cell staright on is unlikely to fry the ESC. Some servos may play up a bit though, especially if they're older models (the old analogue chips tend to run a bit hot on anything over 5-5.5 volts). Newer servos tend to use PIC or Atmel microcontrollers emulating the old servo ic's, and they're fed via a voltage regulator, so no worries.

                          Comment

                          • Subculture
                            Admiral
                            • Feb 2009
                            • 2129

                            #14
                            Regarding voltage drop affecting the receiver. Most receivers will work on pretty low voltages, in particular Futaba receivers will operate down to about 3 volts. The servos will slow down, but you will strill have control.

                            I'm pretty sure that the Akula is the only boat Chris supplies on 6 volts, the others are 12 volts. I think the pump is a 12 volt model (check with Chris), if so you could think about increasing the voltage later on, as the Akula is modestly powered. BEC's work best on volatges btween 7.2-9.6 volts. On 12 volts the regulator is working a little harder, and should be the maximum voltage you use unless you use a switching BEC.

                            Comment

                            • greenman407
                              Admiral
                              • Feb 2009
                              • 7530

                              #15
                              If you want to detail the bridge, take a look at these:
                              Click image for larger version

Name:	Akula bridge.jpg
Views:	1
Size:	95.8 KB
ID:	68592Click image for larger version

Name:	Akula hatch.jpg
Views:	1
Size:	96.2 KB
ID:	68593
                              IT TAKES GREAT INTELLIGENCE TO FAKE SUCH STUPIDITY!

                              Comment

                              Working...