-
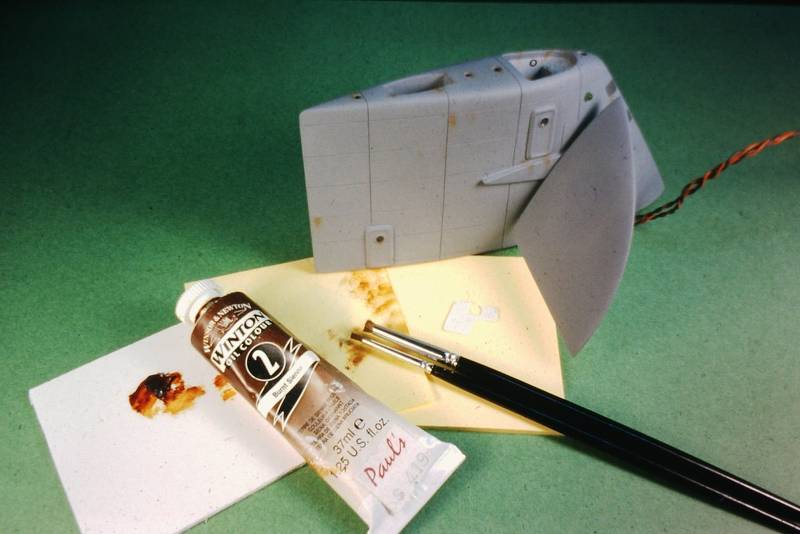
Any linseed oil-based paint brand will do -- just go to an 'artist' store and ask the lisping, blue-haired, cattle nose-ringed, goth freak at the counter where the oil paints are. (Try not to laugh in her/his/it's... whatever's face when you do this). Don't forget the turpentine thinner/solvent.
-
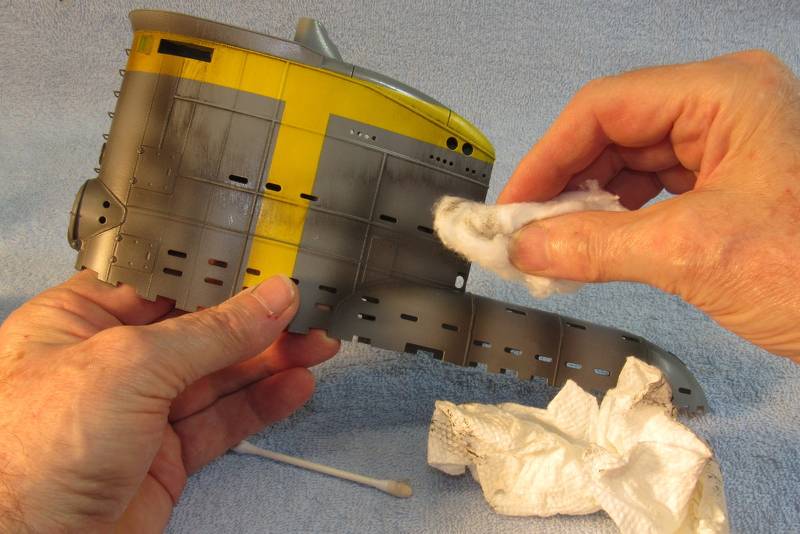
The cotton and soft paper towel are used neat. They wipe away most of the wash from flat areas. Leaving wash around weld beads and into crevasses and negative draft areas. Washes and dry brushing are forms of false high lighting. These techniques used sparingly and to the correct surfaces makes the finished display 'pop' to the observer.Leave a comment:
-
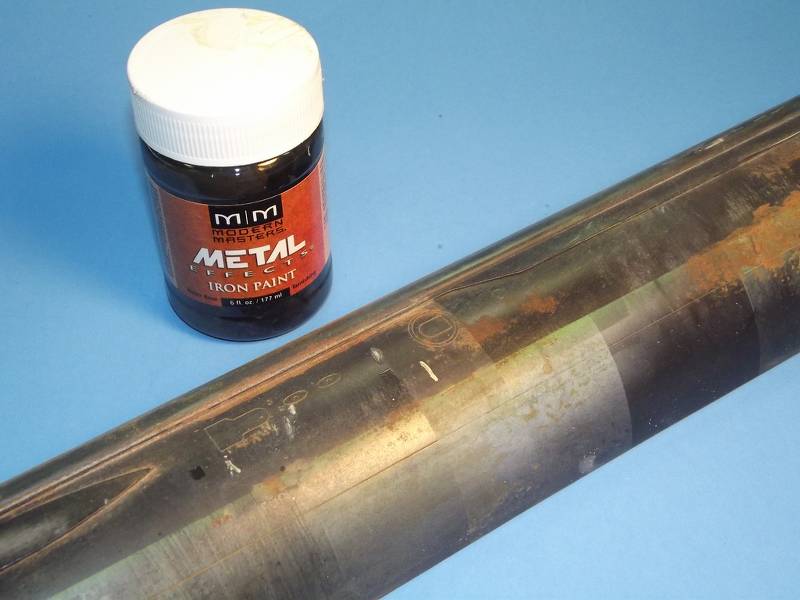
Get this stuff. 1 pt Modern Masters ME208 Iron Metal Effects Reactive Metallic Paint - Walmart.com
Plenty of how-to tutorials on YouTube.Leave a comment:
-
Nope.
Two steps removed from when the wash was sprayed on. After scrubbing the wash into every nook and corner.
I then achieve a very subtle streaking effect with a soft brush following the gravity line. That's what's being represented in this picture.
Oil paint dries very slowly, so no rush. The drying is accelerated with a heat gun (careful, things can go terribly wrong here) and a few days of sitting by its lonesome. At that point I get into the rusting agent application.Leave a comment:
-
-
-
-
-
-
-
-
-
-
REPRESENTING IRON RUST ON SUBMARINE MODELS
I served aboard both diesel and nuclear powered American submarines as a Torpedoman. As such, me and my fellow weaponeers were as close to being a boats 'Boatswain's Mate' as could be found among ships company. Hence, we TM's were in charge of 'deck' – hull preservation above waterline was a significant fraction of the things we did in port. I know corrosion! I know what spot and running rust look like! Me and my fellow troglodytes were grinding, chipping, hammering, painting fools!
Peace-time boats (regardless of nationality or climate) have the luxury of time and facilities – you won't find much rust atop one of today's boats. But, in times of quick turn-around, when job-one was getting the boat ready for another sortie, preservation took a back seat to weapons handling and the many other tasks required to make the boat ready for patrol.
Such was the case with the German Type-23's – little coastal submarines that had to be worked up, commissioned and sent ... without delay... to the Front – explaining the sorry state of their appearance in the few photos we have of operational units employed at wars end. Many of these units evidenced rust on their above waterline portions.
The task for the model kit assembler is to represent the rust, deck scuffing, grime streaking, verdigris, oil runs, and marine growth in a convincing manner.
Today's submarines – even the poorly maintain former Soviet submarine – don't evidence much rust at all. So this discussion, dealing with rust, is pretty much confined to world war era submarine crews who had more pressing concerns than making the boat look sharp for the Commodore or his staff.
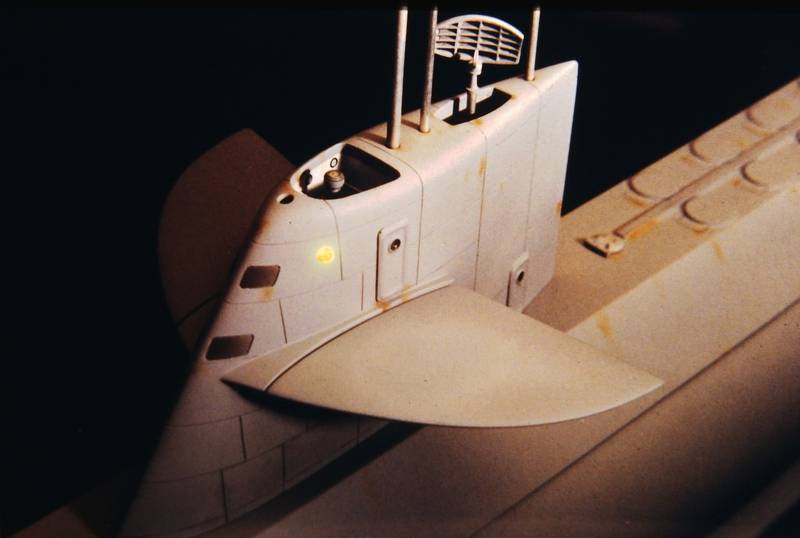
What you'll see in the form of 'weathering' on today's submarines will be light colored (variations on gray) streaking down the sides of the hull and running down from all vertical structures. Just follow the gravity line to know the orientation of such streaking, as demonstrated below.
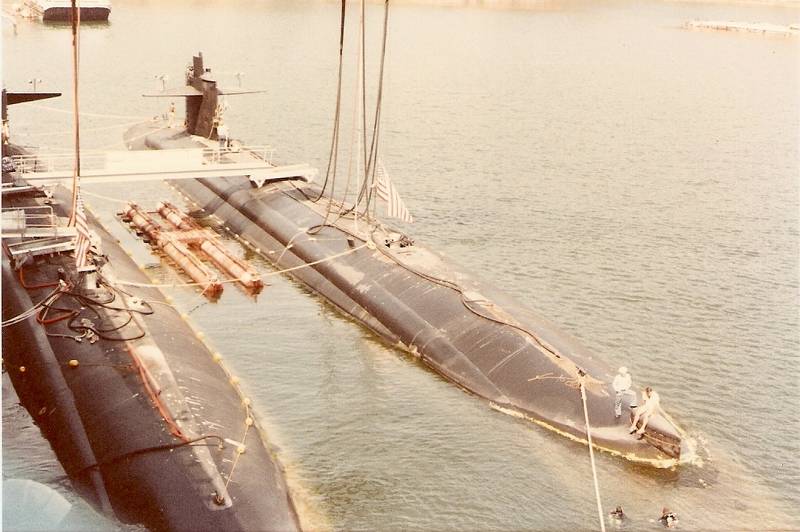
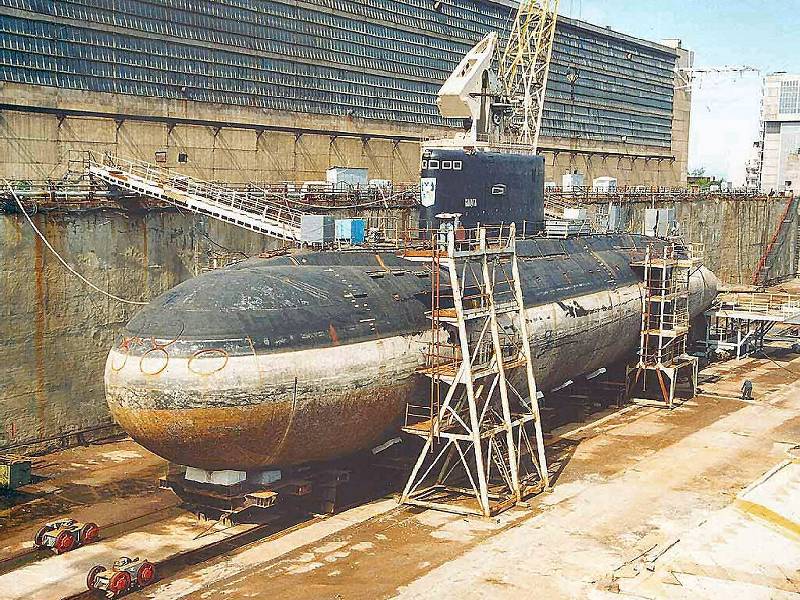
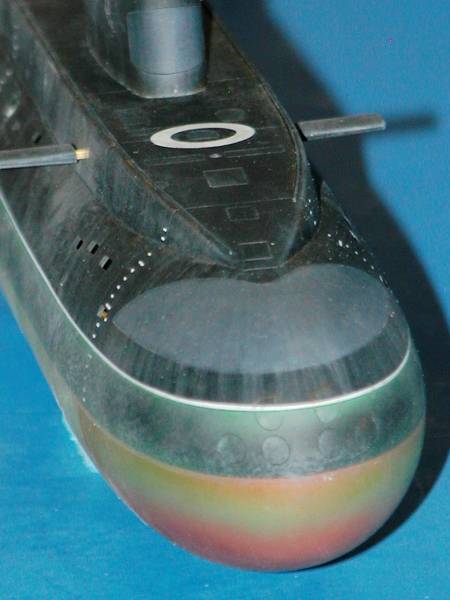
Though in miserable shape (by Western standards), there is little rust to be seen on this KILO. None below waterline, and only a smidgen around the upper torpedo tube shutter doors, and between safety-tracks and deck.
Keep this in mind: NO EVIDENCE OF OXIDIZED IRON BEARING METALS BELOW THE WATERLINE!!!
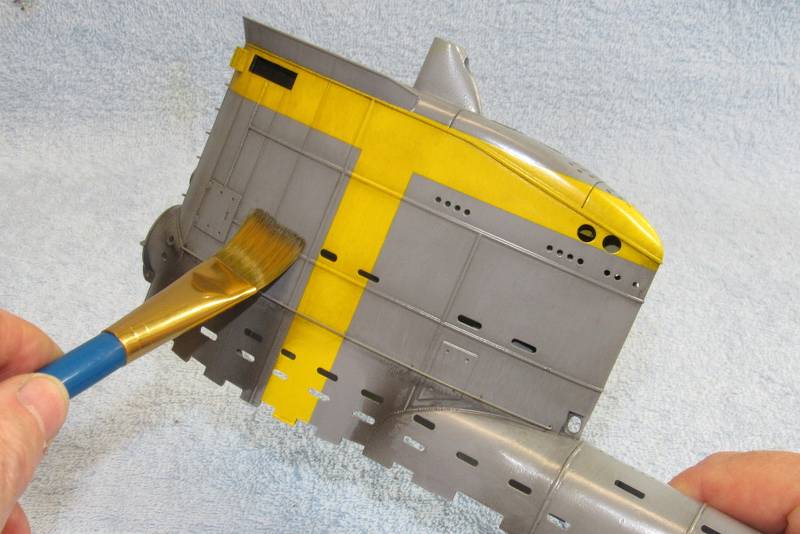
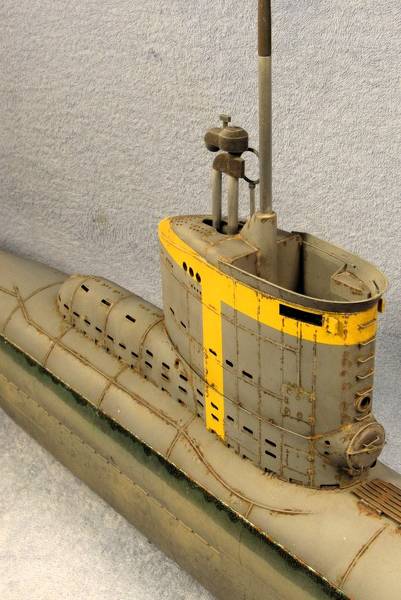
After assembling my Bronco 1/35th scale Type-23 kit I elected to paint and weather the thing as though it was still in work-up, before going out on war-patrols – the yellow bands on the sail denoting this sub as a unit still in the training phase. However, this new unit, only weeks or months out of the building ways, has already started to show a disregard for care of the paint-work. Rust is the rule of the day here. Rust your model submarine with a bit of forethought and study of boats of the time, place, and circumstances that inform the back-story of your display.
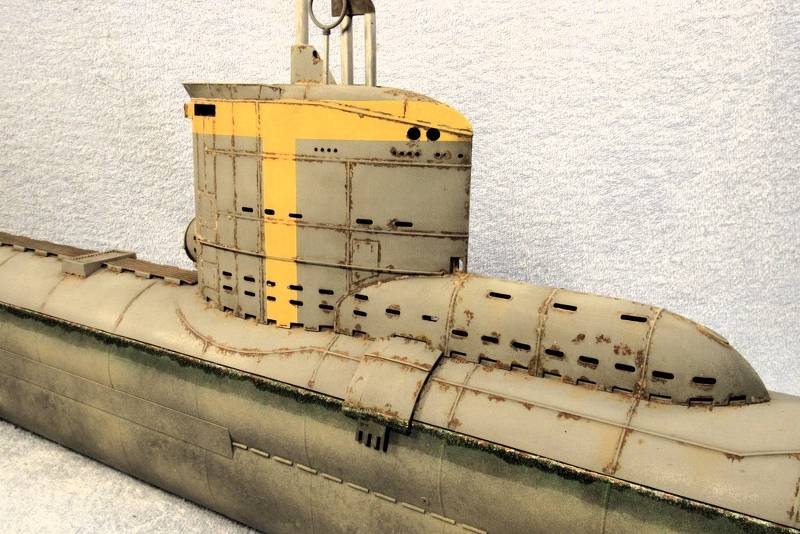
What on a Type-23 would evidence rust?
Rust that originates at weld-beads, between lapped joined plating, and rust originating at any surface featuring a sharp edge (limber holes, breakwaters, ladder rungs, fasteners, deck foundations, etc.).

Research. Research... Research!
The quality of any physical display – and I'm talking miniatures representing real or imagined prototypes – is a consequence of its physical adherence to the original. Is its color, sheen, and representation of weathering a faithful copy of the original i.e., does the model look like the prototype in shape and finish?
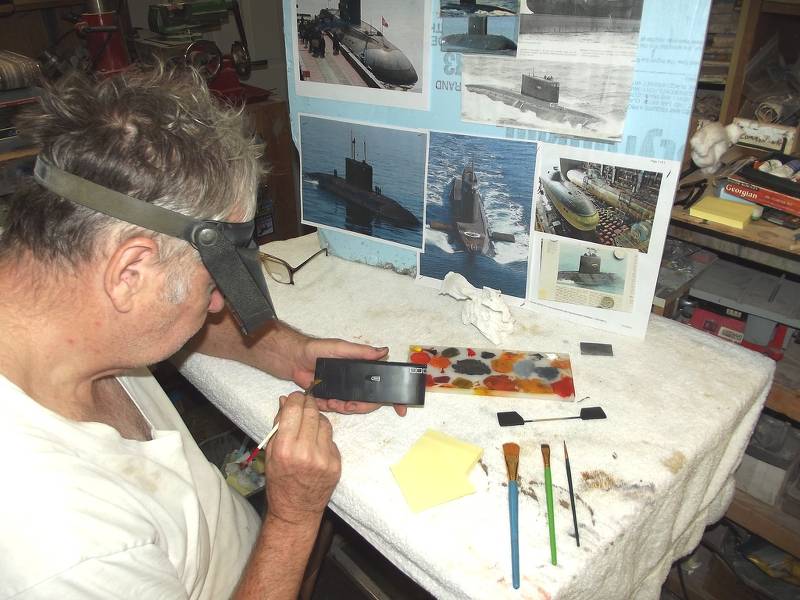
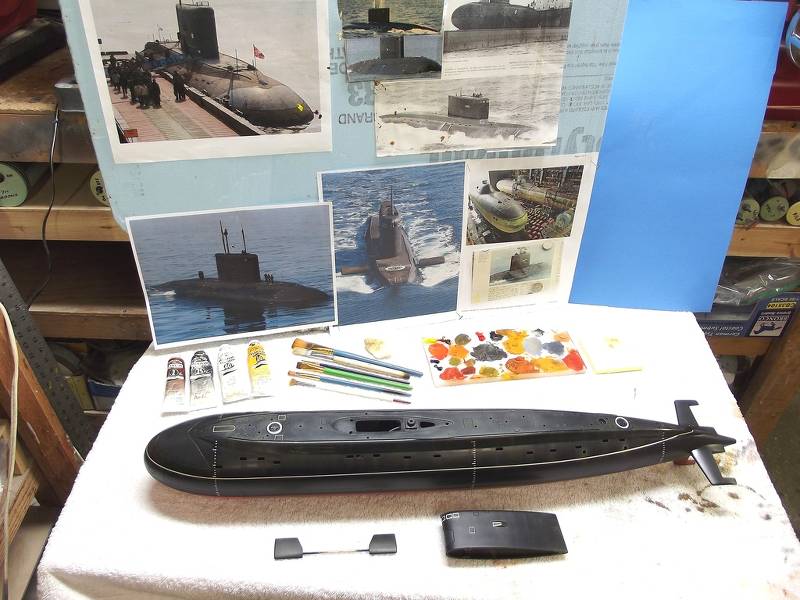
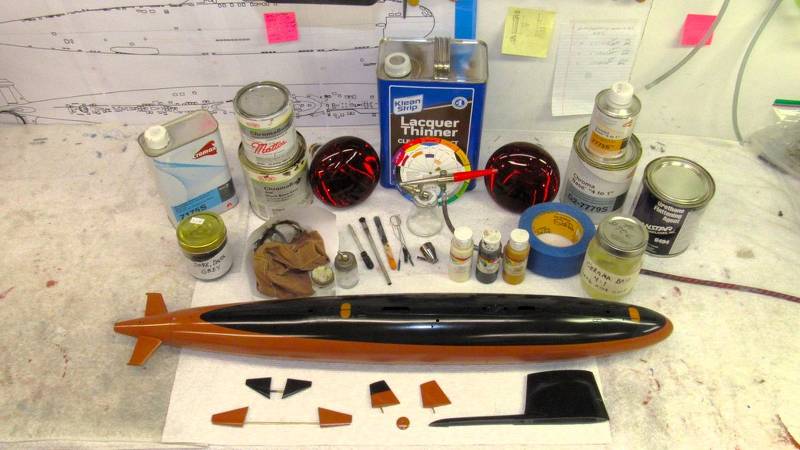
The burden on the model-builder/kit-assembler is to KNOW THE PROTOTYPE! Here you see just a small sampling of the documentation I've gathered and arrayed near a work-station.
Don't wing it... KNOW it! Become aware of the 'look' of your subject.
The Great photo-real Artist worked by studying a subject while it/they were positioned in close proximity to the canvas/slab of marble/hunk of clay. Same goes for your work as you paint and weather your toy submarine.

Less is more, the golden rule of weathering, particularly when applying rust. Can you find the 'rust' in this picture? This display suggests rust – it does not hit you over the head with the presence of rust.
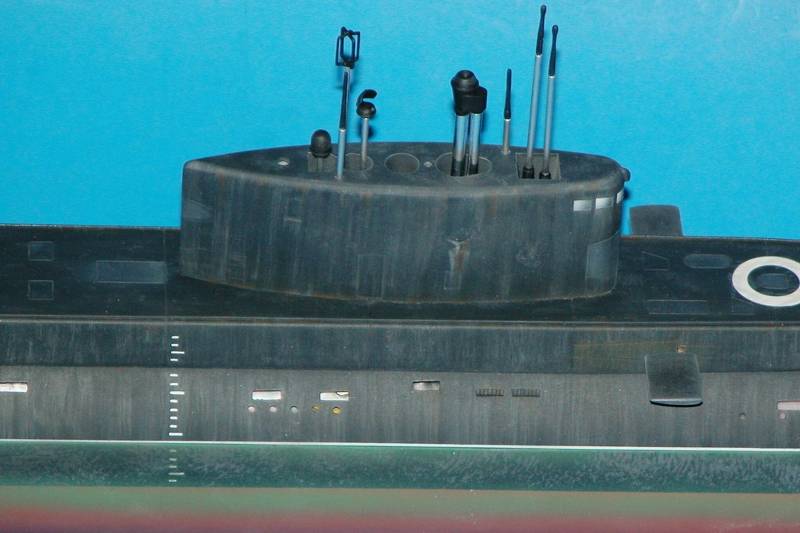
The prominent weathering you see on the above waterline structures is streaking. Not rusting!!!!
A poor rusting job. Wrong subject for the process. And a process poorly applied.
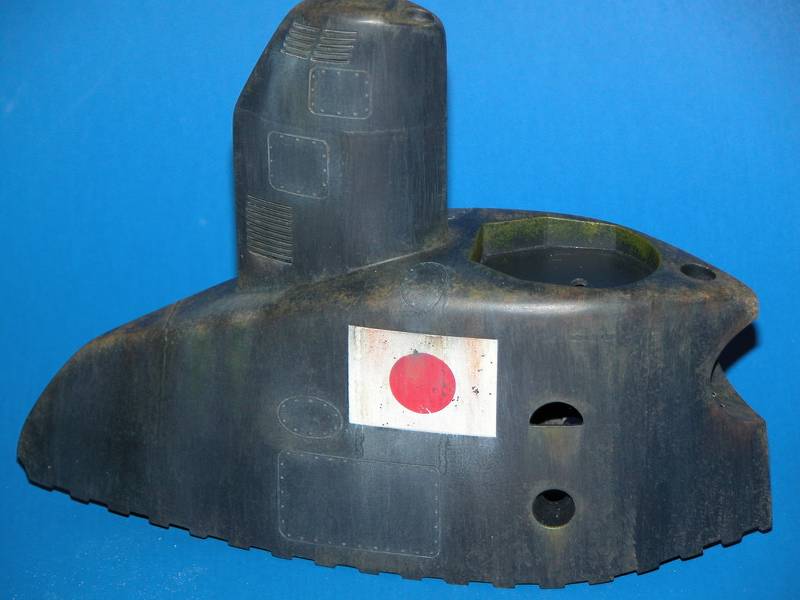
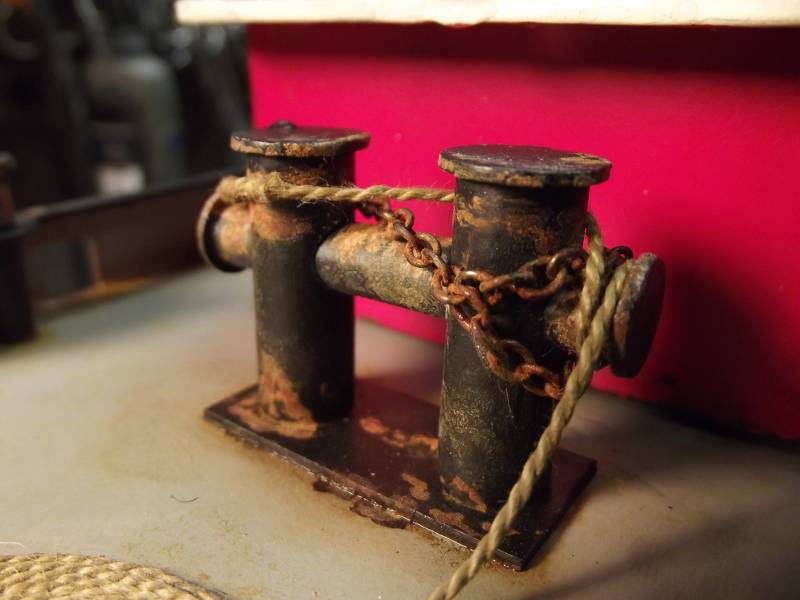
Rust originates where paint and preservative (red-lead) has been worn away. This H-bollard demonstrates the proper use of 'rusting'. The oxidation is happening where bare iron bearing metal is exposed to the elements through rough use.
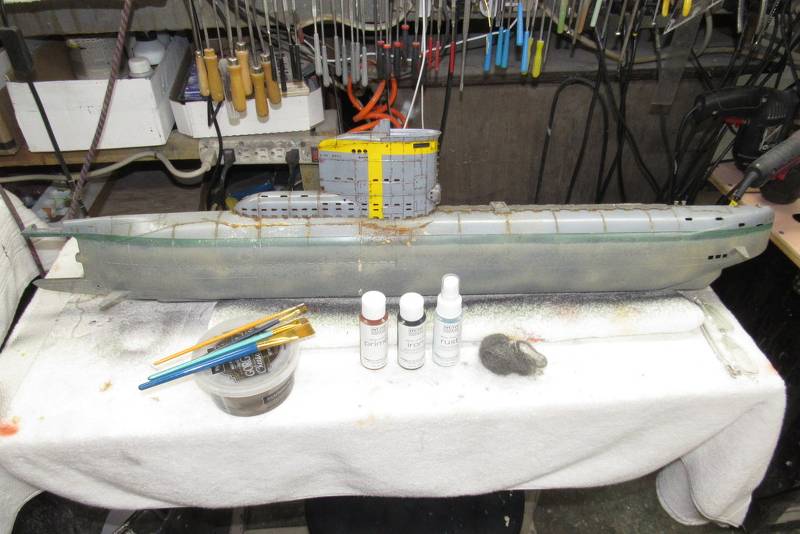
No weathering or markings are applied until the entire display is given a thick clear-coat. This affords the opportunity of 'erasing' mistakes with polish or sand-paper should you err during weathering and/or markings work. The clear coat is a barrier between paint and weathering agents.
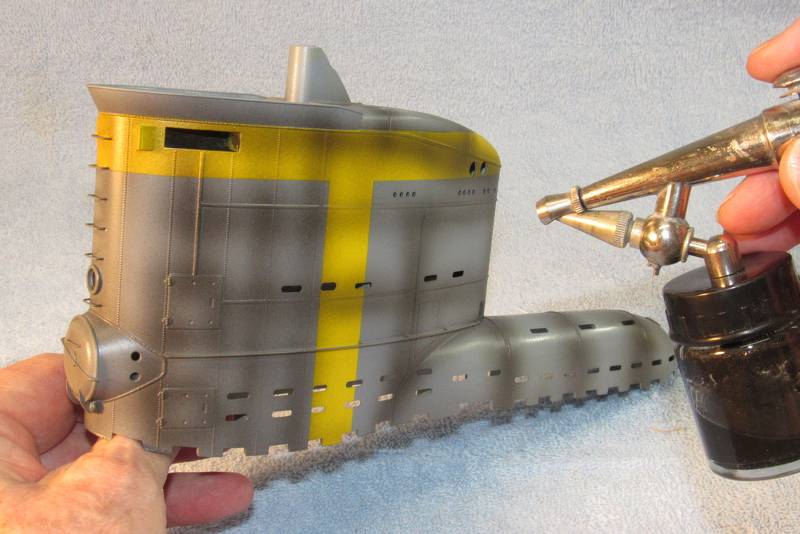
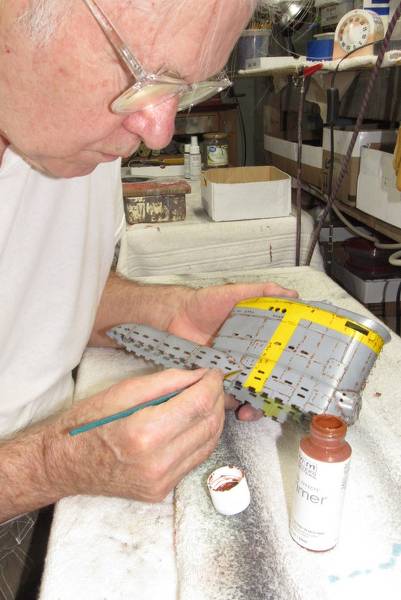
First, highlight all creasing and deep relief areas of the models surface with a well thinned artist-oil black wash. Cut the paint with turpentine – it's chemically benign and will not react with the paint or clear-coat.
Here's how I do it:

Before doing any fancy weathering work, first practice the use of your mediums and means of application on a test-article.
Once you become confident in your ability, commence hostilities on the display...
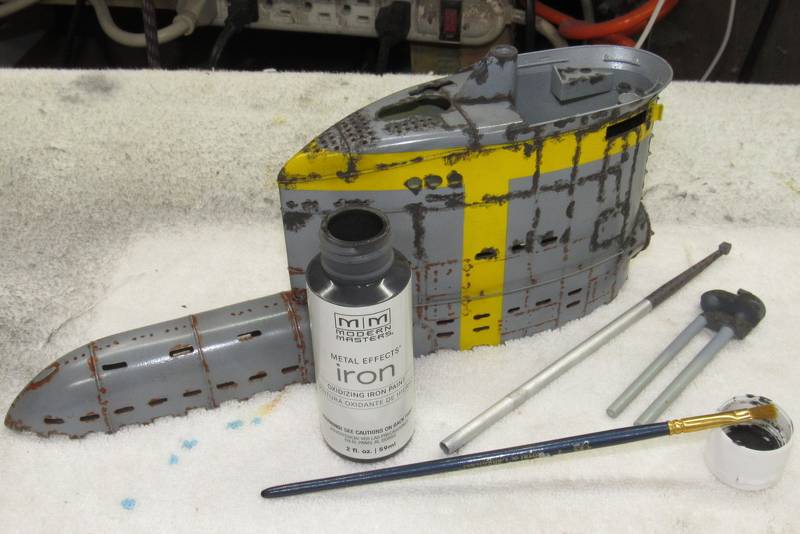
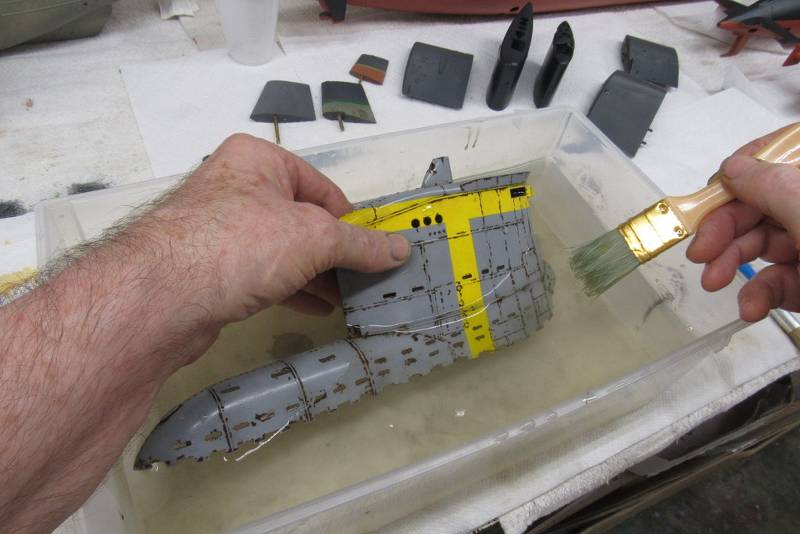
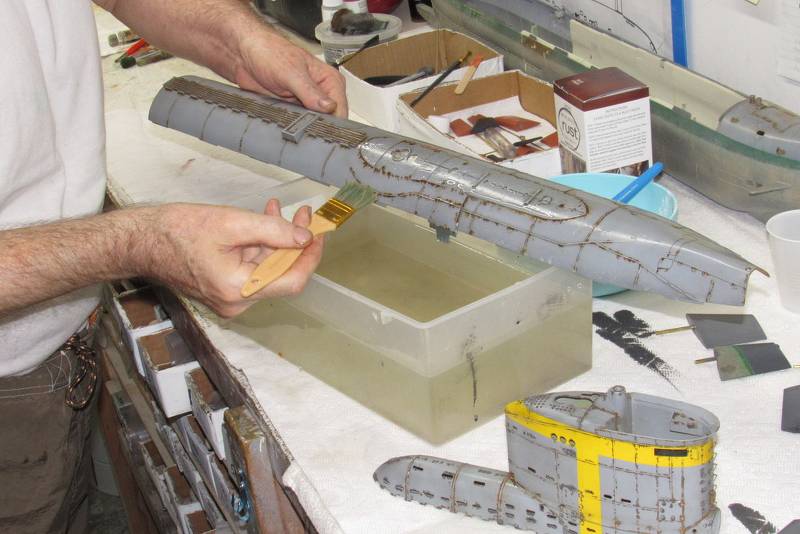
I went over-kill on the rust application – reasoning that by getting rust into each and every crevasse was more important than being careful with the application. Easier to get all the desired rust in place and abrade off the excess than to get crazy with precise application.
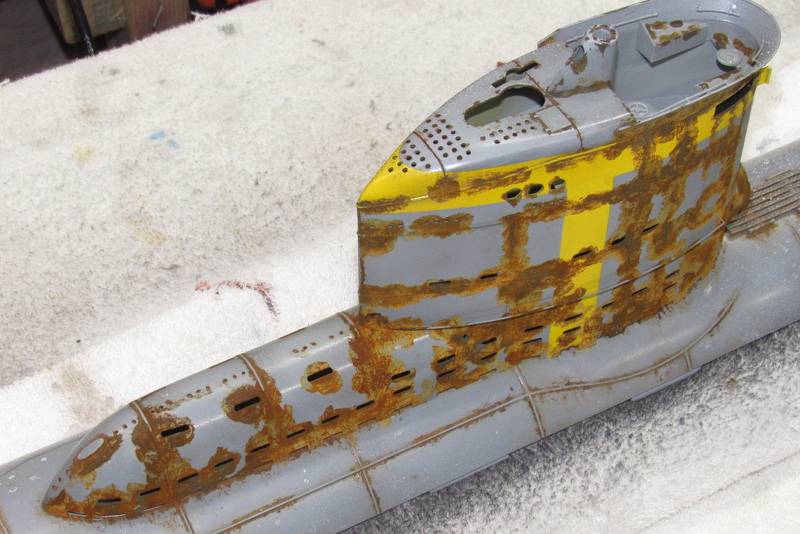
Excess rust would be scrubbed away with a scouring powder slurry, steel wool, 3M abrasive pad, and course polishing compound. Another abrading tool is a fiberglass 'eraser brush' – that item with the red handle to the right. This is where that clear-coat comes in – its the barrier that keeps you from digging into the paint job.
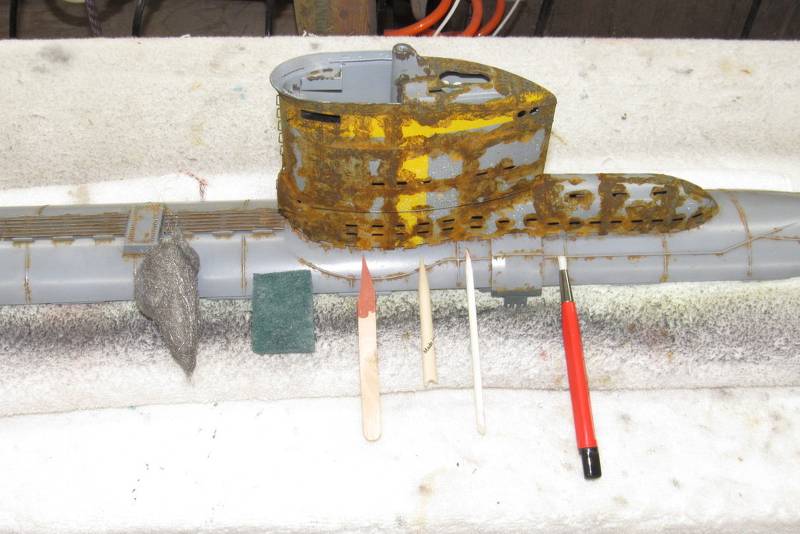
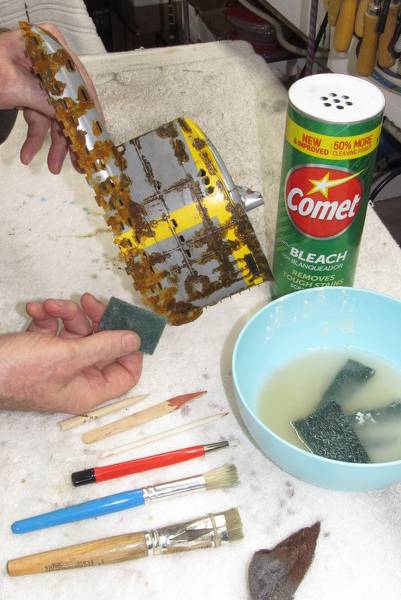
WA-la! Rust ONLY where I want it.
Alternative mediums used to represent rust include linseed oil based 'artist paint', water soluble acrylic paint, ground chalks, smear crayons, color pencils and pens, and lipstick.

Leave a comment:
Leave a comment: