
My first sub was the Trumpeter Seawolf. It is a Rocket. I added a taped on extension to the bottom rudder and still had a turning circle of nearly 20'. But, boy it's neat looking!!
-
-
Many thanks to David for supplying me with some proper fittings. A couple of questions, just because I don�t want to c*ck this up...
* On the stern horizontal planes, I see how the inner and outer segments are intended to be ganged together. What is the recommended method for securing the individual components to the shaft so they move in unison? There�s a number of ways I can think to do it, but I�m just curious what the more experienced voices have to say about it.
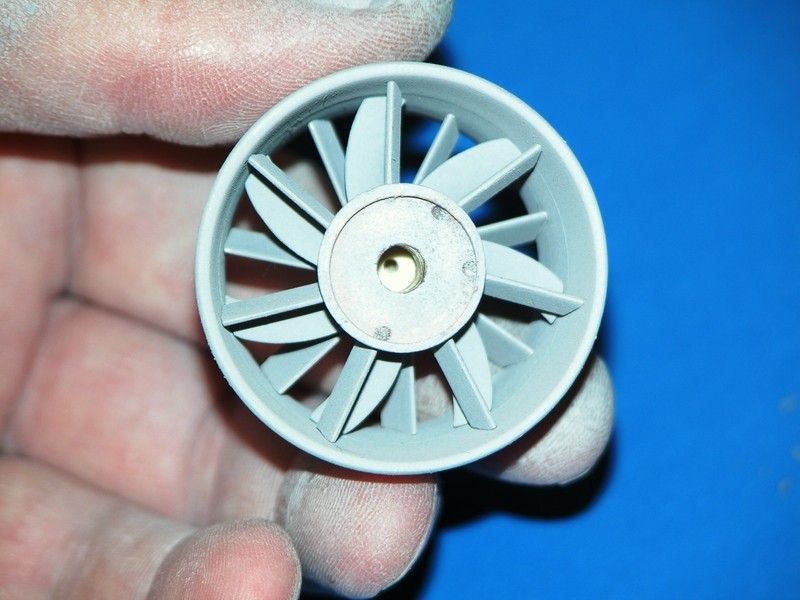
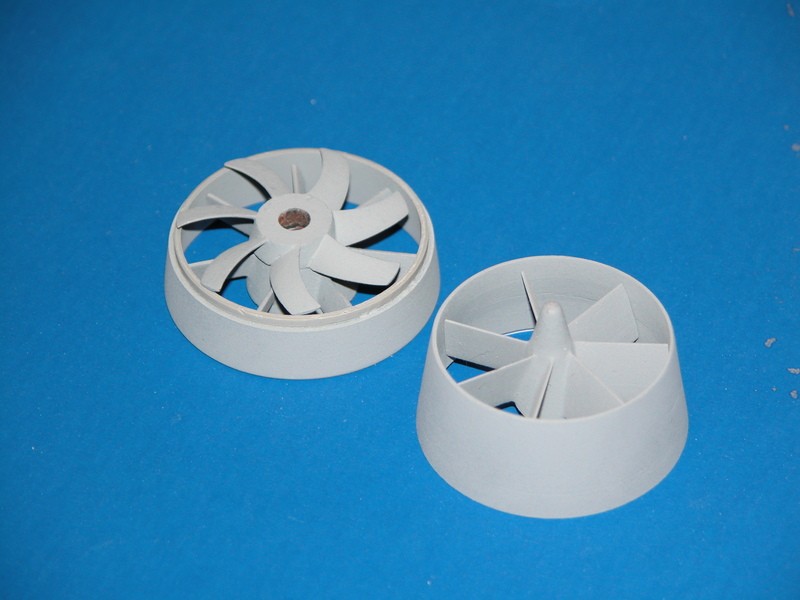
* Regarding the forward and after parts of the pump-jet and the orientation of the stators in relation to the two halves. Looking at the unit from behind, do they need to be oriented in line with each other so they�d form an X-shape, or in such a way that they�d form kind of an asterisk shaped arrangement?
* I�m a pilot, and a worrier, so I sleep good at night with multiples of mission critical parts. David, can I still reach out to you if a component needs replacing some day?
As always, gents, I appreciate your help and patience.Dead men tell no tales...Comment
-
The inboard and outboard elements of the stern planes share a common operating shaft. Turn the shaft, and both elements work in unison. Secure the outboard element with CA and the inboard element with RTV adhesive (easily broken if you have to remain anything back there.
No guidance on the orientation of the two sets of stators. Just wing it, pal. One of the many, many things I don't know about the prototypes geometry.
You need anything, give me a shout.
DavidWho is John Galt?Comment
-
As I was working David's resin fittings kit onto my 1/144 Carter and realized I had enough spare parts left over to throw together a static model of either Seawolf or Connecticut. Aside from the neatness of having the "short hull" boat to compare with my rendition of SSN-23, I thought it would make for a handy test mule of sorts to practice my technique for paint and finishing when it comes time to do it for real. There's not a lot of ways to make an all black boat look interesting, so I've done my best with the waterline algae accumulation and by making the sonar dome a little darker than the rest of the hull.
I settled on Tamiya Rubber Black (TS-82) for an overall color on the hull, and the dome was rubbed with Vallejo carbon powder. I'm thinking of painting the squares in the middle of the WAS arrays something like a flat black, just to add more contrast to the hull. I also tried my hand at some topside streaking, but the gray I used kept getting washed out by the matte overcoat I applied to seal it in. Perhaps something with more contrast, like white, would hold up to that process better. There's a fine line between nailing it and totally overdoing it.
Overall though, I'm pretty happy so far. Comments and criticism are welcome!
Dead men tell no tales...Comment
-
Good balance. Nice.
DavidWho is John Galt?Comment
-
I've been toying around with the idea of how to best represent SSN-23's auxiliary maneuvering devices, which I'm guessing behave something like a combination between bow / stern thrusters and ultra-quiet creeper motors like you see on the Alfa, Victor, and the like.
At first I had an idea to use some round photoetch grilles. I scratchbuilt 4 cavities in the hull for them to sit on top of, but once intalled you really couldn't see anything, which was a shame. For whatever reason, something about that never sat quite right with me. It also didn't jive with the overall look of the boat, and with this picture of Carter rolling out of Electric Boat. Those three taped-off sections are airbrushed out in later photos of her sitting in the sunlight, so I have to assume they're something important.
I cut some squares about .5" x .5" out of thin sheet styrene and attached them to the hull with three pairs forward and two aft. A simple little cosmetic addition, but they blended-in nicely, and I think with some paint on them, will add a nice layer of texture to the hull - hopefully doing the real article some justice.
And finally a little family photo of Carter next to Seawolf, now with some markings on her.
I messed around with it in the tub last night and tried out the new prop from David, and it makes all the difference in the world. I still imagine she'll be a pig in the turns, but it's definitely got some horsepower now. Thank you again for that, sir!
-BradyLast edited by DMTNT; 12-10-2018, 12:49 PM.Dead men tell no tales...Comment
-
While waiting for some supplies to finish the boat to arrive in the mail, I had a little bit of fun making some static bits and pieces to go along with Carter.
From left to right they are...
A loose stand-in for a North Korean Hwasong 15 ICBM. 3D printed off of a model of the Russian SS-28, but you get the picture:
*Modified / operational version of the Boeing ECHO Ranger autonomous underwater vehicle:
* Modified Lockheed Remote Multimission Vehicle (RMMV):
*MK48 ADCAP torpedo:
*ADS2000 Atmospheric Diving Suit:
*BGM-109 Tomahawk Land Attack Missile (TLAM):
*Hypothetical ICBM reentry vehcile:
All are in 1/144 scale. The ICBM parts and diving suit are from Shapeways. The MK48 and TLAM were from a resin set I found on ebay - I modified one of the Tomahawks into the ADCAP. And the UUVs are both from bits and pieces I had laying around from a few WWII airplane kits. Not entirely accurate, but given how little info is out there about what's under the hood on SSN-23, I figured these would be reasonable guesses as to some of the equipment she might carry and some of the things they might be interested in finding on the ocean floor somewhere.
-BradyDead men tell no tales...Comment
-
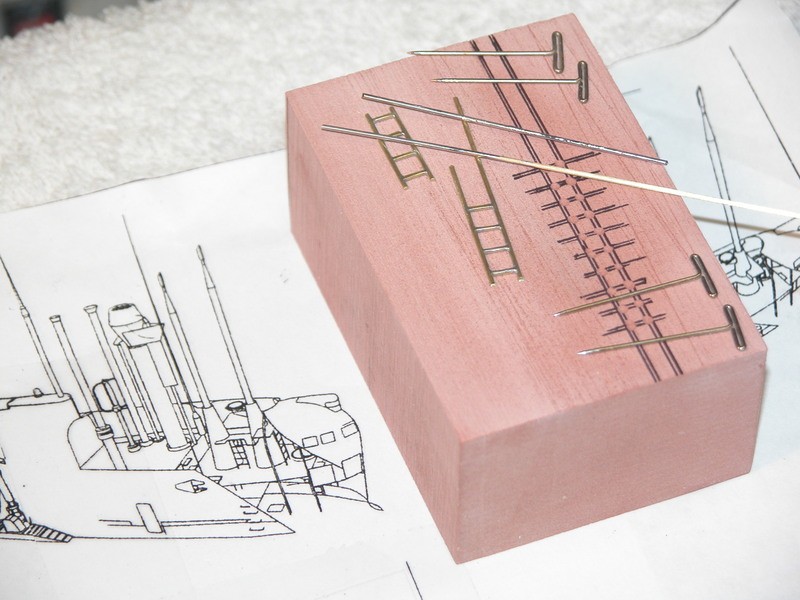
I promise I'm not begging to be spoon fed here, but David, for the life of me I can't make this work:
The design of both yokes is different from what's shown in the Cabal reports. Granted I know those were written some time ago, but shouldn't the horizontal yoke be wider than the vertical one? I'm assuming that the lower one in the photo is the vertical, and the upper one is for the horizontal planes. Maybe it's something so obvious that I'm not seeing it, but I've been at this for the past few hours and I'm confused as all hell.
Thank you in advance.
-BradyDead men tell no tales...Comment
-
Well, I think I've worked out the yoke situation. Long story short, I ended up fabricating a new one out of 1/8" brass, two DuBro 1/16" collars and a piece of 1/4" brass strip for the control horn. I estimate I get approx 20� travel in either direction on the aft planes, which I think ought to be fine with them hooked up to an angle-keeper.
Using David's provided fittings, I noticed that the resin molded outer bit for the shaft to pass through (the rounded black piece in the photo) looked awfully fragile. Of course, I immediately proceeded to break them both in the course of assembly. Borrowing from something I saw on another build thread, I cut two 1/4" pieces of brass strip down to the rough profile of the plane and proceeded to fair them in. The result is much sturdier. At least in my hands!
Of course progress can't come without a price. I found it necessary to un-mount the prop from the shaft. It was fixed in place with CA, so I applied a light flame from my culinary torch to the shaft, hoping to break the glue and slide it right off. Unfortunately that heat caused the metal of the prop to liquefy almost instantly, and it cost me a rotor blade.
David, if you're reading this, I need to beg for mercy and ask for your help on sourcing a new prop - if you're able to. Aside from that one setback, things are steaming toward the finish line. Once I manage to get power restored, it'll be a matter of trimming, then paint, and we should have ourselves a submarine!
-BradyDead men tell no tales...Comment
-
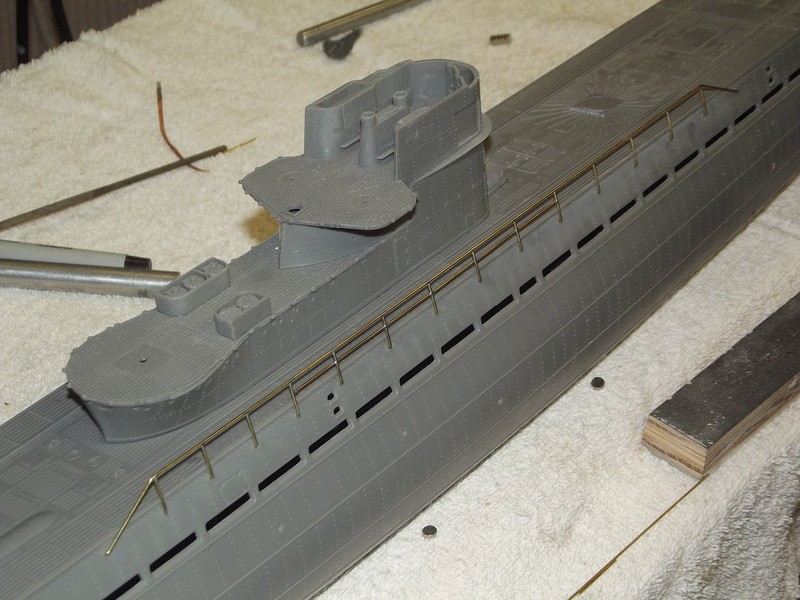
In an effort to maintain as much accessibility as possible, I epoxied a brass nut inside of the sail and attached it to the upper hull with a screw. It seems to work out great, and with the amount of spare parts I had from the extra Seawolf kit, I had an idea... why not make two sails? One rigged for patrol, and the other with the crew up on the bridge, flying the colors (and of course the Jolly Roger.)
I've ordered up a couple of 10mm cloth flags that I'll hang from the port side railing once they show up. I know it's a bit chunky, but in this tiny scale, I nearly went blind putting those railings together! I'm happy with the result, and think it adds a fun element to the boat. Thanks for looking!
-BradyDead men tell no tales...Comment
-
Clunky? �.. CLUNKY!!!! What the hell? Why don't you make the stanchions and rails from Lego blocks!!! Looks like hell on wheels! AWFUL!
Break down, get some magnifying goggles and do that railing right! Don't make me come over there!
You people!
DavidWho is John Galt?Comment
-
Hahaha! I was waiting for that. LEGO blocks? That�s not a bad idea actually... They�ll look great with the shades of crayon I picked out for the hull! :-D
Curious how you�d tackle said stanchions. I have a pen and notepad ready.Dead men tell no tales...Comment
-
Basically, it's a soldering job. I think .014" brass rod would scale well at 1/144. The stanchions and rails basically describe a box atop the sail. So, make a jig so that the rails and stanchions lay on a flat surface, then solder them all together. The base of each stanchion piece 1/16" longer than required. Remove the work and make two right-angle bends. Drill four holes atop the sail to receive the base of the stanchions and you're done, pal.
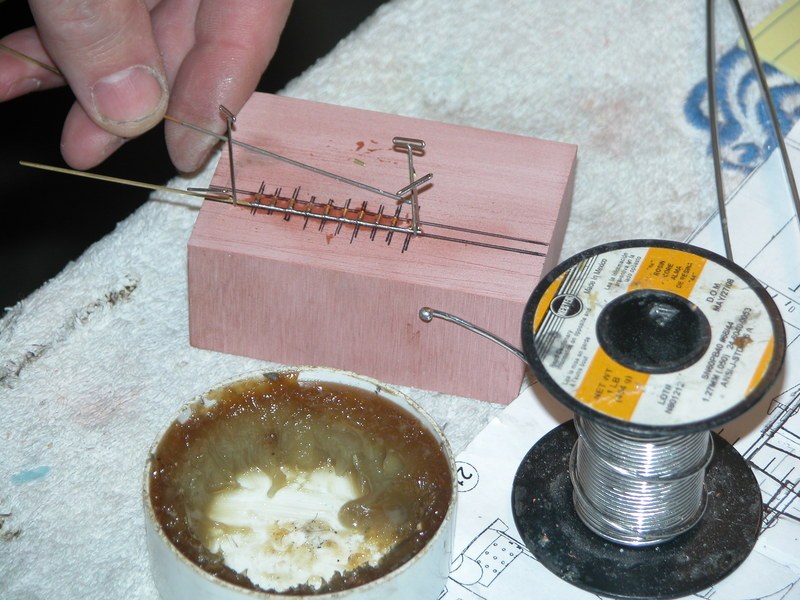
DavidLast edited by He Who Shall Not Be Named; 01-07-2019, 03:13 PM.Who is John Galt?Comment
-
Well that all sounds absolutely terrifying....
I shall experiment and get back to you.Dead men tell no tales...Comment

Comment