Welcome to our forums. For the best in R/C submarine kits, components and accessories, be sure to visit the Nautilus Drydocks
If this is your first visit, be sure to
check out the FAQ by clicking the
link above. You may have to register
before you can post: click the register link above to proceed. To start viewing messages,
select the forum that you want to visit from the selection below.
i I have a new set of questions. As you may be aware I am trying to develop my skills at degassing urethane resins and also RTV silicones. I have a vacuum chamber and have been looking at Vacuum pumps. They are expensive. A friend of mine aware of what I am trying to achieve gave me two small little devices that he said may provide another angle to attack the problem.
He he gave me a small item called a "vacuum ejector" it simply converts a pressure input into an output vacuum by using a Venturi.
we hooked it up to a 2 HP compressor and sure enough to it pulled vacuum, we didn't push it all the was but got up to at least 25 inch of mercury.
have you used one of these? Do you know if it would do the job?
thanks,
David H
As a navy Diver I used eductors to hold patches and coffer-dams against a ships hull, as they are fine for pulling a slight vacuum between ambient and the space you wish to lower pressure. But they are not suitable for de-gassing a mix like what we use for tool making.
The educator is fine if your evacuating most of the air out of a volume tank, but degassing a mix requires at least 28.5 inches of Mercury. And that can only be done with a positive displacement pump. Bite the bullet and spring for a proper vacuum pump, Dave.
Something Greg Sharpe used to do was do inverse vacuuming. He'd use a pressure cooker and an air pump. He'd put his molds in the cooker, seal it up and then pump it full of high pressure air. The excess pressure forced the bubbles in the molds to compress significantly.
I saw a product the other day called "Bubble Buster". It is designed to reduce the surface tension on the moulded piece and allow all the trapped bubbles to disperse. Might be worth a try at $26.00.
As you know, I am developing a pump jet propulsor, my question is regarding the number of moulds I should make to cast the parts. I have posted two pics to show you what I mean.
I decided to mould the front shroud support (the ring with 4 arms coming off it ) as a separate part from the main shroud( big round ring.) bottom photo. However with the rear stator assembly and its own shroud I cannot be sure that you have moulded these separately or as one piece , (top photos) after looking at heaps of your photo bucket images I m not sure. I am thinking through draft angles and air vents and the like and think it's possible but would love your thoughts on it. If I could it would save silicon, time and I could mould in nice filets around the supports, if not I will have to retain the slots and keeps it as a 'fit together afterwards' thing.
i hope this makes sense..
what are your thoughts?
David H
Your making perfect sense there. And the answer is: both the forward and after portions of duct can be engineered to also posses their respective stators. The trick is to provide a 'bubble-catcher' ring at the top of the tools cavity. Like how I dressed out the masters for a 1/72 SEAWOLF pump-jets:
The bubble-catcher of course becomes an element of the casting, but is easily machined off the part on the lath. Here you see before-and-after bubble-catcher removal to the little pump-jets I produce for the Moebius SEAVIEW fittings kit.
I understand your worry, Dave: Will inclusion of the stator within the shroud lead to excessive bubble entrapment during the casting operation. Normally you are right, even if you employ centrifugal and/or pressure steps during the curing process. The bubble-catcher becomes a 'reservoir' to which air-bubbles can migrate to instead of the model part proper. A sacrificial element of the tools cavity, if you will.
This one is for HWSNBN, or any one else who can enlighten.
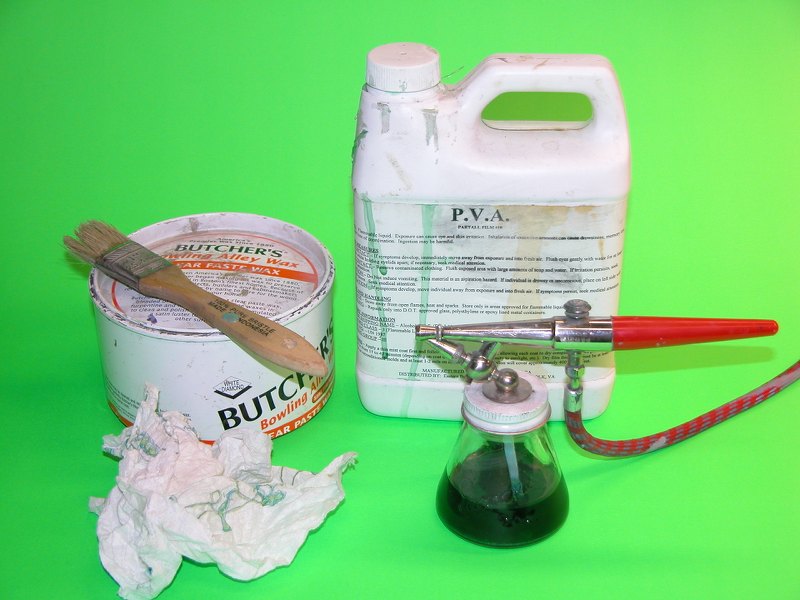
I have been reading all your latest instructional posts David, and took particular interest in the write up that you gave recently for Scott T with his Beluga build up. I live very close to Scott so can actually go and have a look at what he is doing. You wrote up a section recently on preparing fibreglass hardshell moulds for hull production. I have always used PVA but have seen that maybe I need to start using Wax more in my procedures. However what I was really interested in was your write up on how to prepare Silicon hull moulds.
I have been spraying 'Stoners E236 urethane Release agent into the hull moulds before I brush in a polyester Gelcoat. In your Beluga thread response you mention that you use wax in your silicon moulds. I never would have thought, I am now considering it and also the final coating of PVA which I also never would have thought would be good for silicon.
What I am asking about is a problem that I have encountered lately with my hull parts that pop out of my silicon moulds. As mentioned I have been spraying the Silicon mould with E236 and then brushing in a poly gelcoat. Which I let to dry thoroughly. I then layup several layers of weave and resin. often a hull will pull quite nicely with all the detail coming out on the Gelcoat. There are times however when I pull the part out of the mould and there are blemishes and patches where it appears the gelcoat has not fully dried yet. Or has dried, reacted with something on the surface of the silicon when drying that creates a crazed type pattern.
This photo below shows the pattern as it can be seen after the pull. I am trying to make this picture bigger but my drama's with getting photos to be larger is a problem. I hope you can see the detail or imagi of what I'm talking about because you've probably come across it before?
The second photo shows the same spot within the silicon mould itself. There is the thinnest layer of Gelcoat stubbornly stuck to the silicon mould. At this point I then go about cleaning out any thin traces of gelcoat inside the mould. I usually use acetone and brush it around inside to clean up any resin traces left. I am guessing that this blemish pattern is caused by residual chemicals inside the mould at the time of laying up the gelcoat after a spray of the Stoner. Could Acetone be affecting the mould surface and causing a mild chemical reaction that interferes with the smooth flow of the polyester resin over the silicon mould?
The last photo shows some residual bits of gelcoat stuck in the mould. these are what I have attacked with Acetone to remove from the mould. What should I avoid and what other preparation would be advisable?
I also use Talc to thicken up the Gelcoat, could this also be a problem? Do you have any suggestions?
Is this polyester resin gelcoat you're using? If so, you musn't use it in rubber tools, because as it dries slightly it shrinks and pulls away from the tool enough to let air in, and being an air inhibtesd resin, it will stop it curing properly. This doesn't happen in hard shell tools.
The way to get around this is to either use some normal laminating resin thickened with a thixotropic additive like fumed silica, or switch to using epoxy resin.
Hello All,
This one is for HWSNBN, or any one else who can enlighten.
I have been reading all your latest instructional posts David, and took particular interest in the write up that you gave recently for Scott T with his Beluga build up. I live very close to Scott so can actually go and have a look at what he is doing. You wrote up a section recently on preparing fibreglass hardshell moulds for hull production. I have always used PVA but have seen that maybe I need to start using Wax more in my procedures. However what I was really interested in was your write up on how to prepare Silicon hull moulds.
A quick recap on the two part release systems used for the two type of tools used for GRP production: Wax and PVA for the hard-shell tool. And PVA for the rubber (silicon RTV rubber) tool. Note that neither the hard-shell or glove-mother mold type tools employ spray silicon oil part release.
After several coats of buffed out wax, you lay on several coats of PVA. After part extraction, the wax should be OK, so the next couple of shots can be PVA only.
Originally posted by Davidh
I have been spraying 'Stoners E236 urethane Release agent into the hull moulds before I brush in a polyester Gelcoat. In your Beluga thread response you mention that you use wax in your silicon moulds. I never would have thought, I am now considering it and also the final coating of PVA which I also never would have thought would be good for silicon.
What I am asking about is a problem that I have encountered lately with my hull parts that pop out of my silicon moulds. As mentioned I have been spraying the Silicon mould with E236 and then brushing in a poly gelcoat. Which I let to dry thoroughly. I then layup several layers of weave and resin. often a hull will pull quite nicely with all the detail coming out on the Gelcoat. There are times however when I pull the part out of the mould and there are blemishes and patches where it appears the gelcoat has not fully dried yet. Or has dried, reacted with something on the surface of the silicon when drying that creates a crazed type pattern.
Don't use the spray-on silicon oil part-release on tools that will be used for lay-up of GRP. Here's what happens when you do: The oily surface of the tool will be disrupted by the sliding around of the brush as you brush on the gel-coat. The oil mixed with the resin giving you the gummy, pock-marked part surface you have observe. The only time you spray on the oil is if the methodology involves either spray coating the gel-coat on or going the displacing plug method -- in either case the oily surface of the tools cavity will not be lifted to mix with the gel-coat.
Originally posted by Davidh
bla, bla, blablabla.... There is the thinnest layer of Gelcoat stubbornly stuck to the silicon mould. At this point I then go about cleaning out any thin traces of gelcoat inside the mould. I usually use acetone and brush it around inside to clean up any resin traces left. I am guessing that this blemish pattern is caused by residual chemicals inside the mould at the time of laying up the gelcoat after a spray of the Stoner. Could Acetone be affecting the mould surface and causing a mild chemical reaction that interferes with the smooth flow of the polyester resin over the silicon mould?
For a rubber tool used for GRP, just use three coats of PVA. And that's it. Wax would be nice if everything is above 100-degrees, but that process is a pain in the ass. The PVA is a perfect barrier between the tool and the laid-up part. After ejecting the part, soak it in water to remove the water soluble PVA. Nothing to it.
Originally posted by Davidh
bla, bla, blablabla ...some residual bits of gelcoat stuck in the mould. these are what I have attacked with Acetone to remove from the mould. What should I avoid and what other preparation would be advisable?
I also use Talc to thicken up the Gelcoat, could this also be a problem? Do you have any suggestions?...
thank you for the the prompt response. I do however have some more questions. So am I correct in stating that Stoners E326 is just a Silicon oil? If so, I have seen numerous other 'silicon oils' on the market. Would they be just as good for releasing Urethane parts from a silicon mould? ,or does E326 have extra chemicals that make the difference? I have tried to make sense of the MSDS For each and would appreciate some clarity....
Also looking into mould release waxes. I understand that a Carnauba based wax is the go. However how are these release agent waxes different from ones that I could get from an auto supply shop? Yes I understand that they are for polishing cars but aren't we to some extent ' polishing our moulds?'.
have put some PVA in my spray gun and will only use this from now on with silicon moulds and polyester resin lay ups....
Got to be careful using products designed for cars, a lot of them use additives designed to give a quick shine with minimal effort, but not necessarily best for using as a parting agent.
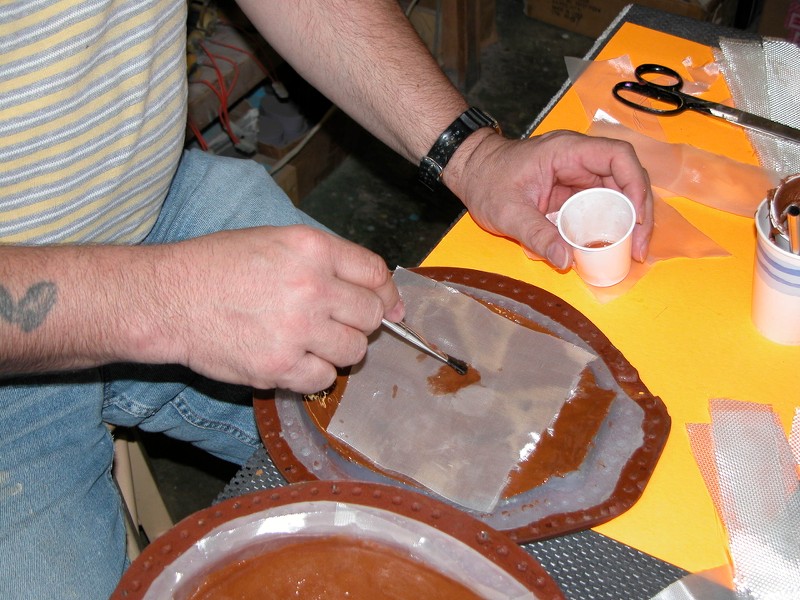
Ok , so I took my large silicon hull mould for the Resolution class and after making sure that the surface was clear of any residue I sprayed down a thin layer of PVA. Then another layer then another. My white mould was now looking decided blue. I mixed up some Polyester resin and grey pigment. I then added a good amount of talc to really thicken it up. After about two days in 32 degree heat from,what's left of summer the gel coat seemed quite hard. Laid up a fine weave. Let dry for another day or so. Then laid up some thicker chopped strand. Hull part now solid.
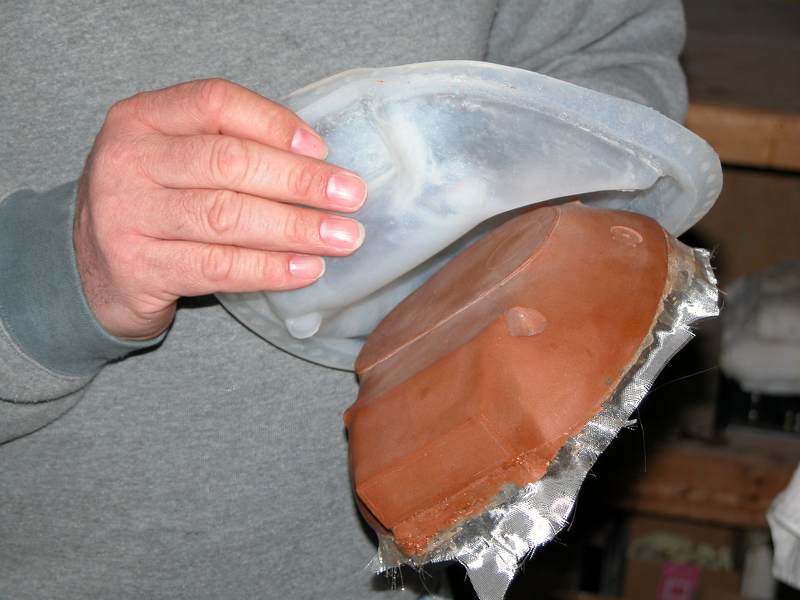
i just pulled the part from the silicon mould and so far so good, no evidence of the crazing effect that we have been talking about, great, BUT, some areas of the gel coat are still GOEY , WHY ?!! 4 days in hot weather. Not enough?!! Not happy.
any enlightenment would be appreciated. I'm thinking there is an issue With the talc?
Ok , so I took my large silicon hull mould for the Resolution class and after making sure that the surface was clear of any residue I sprayed down a thin layer of PVA. Then another layer then another. My white mould was now looking decided blue. I mixed up some Polyester resin and grey pigment. I then added a good amount of talc to really thicken it up. After about two days in 32 degree heat from,what's left of summer the gel coat seemed quite hard. Laid up a fine weave. Let dry for another day or so. Then laid up some thicker chopped strand. Hull part now solid.
i just pulled the part from the silicon mould and so far so good, no evidence of the crazing effect that we have been talking about, great, BUT, some areas of the gel coat are still GOEY , WHY ?!! 4 days in hot weather. Not enough?!! Not happy.
any enlightenment would be appreciated. I'm thinking there is an issue With the talc?
regards,
David H
Talc is hydroscopic -- it absorbs water. Was this fresh, recently purchased talc, or has it been sitting on your shelf a few years? Also, did you catalyze the resin before mixing in the talc?
So, you have a viable part-release (the PVA) system. But, you still have a gel-coat issue. Right?
some areas of the gel coat are still GOEY , WHY ?!!
See my answer in post 54, you don't use air inhibited resin in rubber tools. If you want to use polyester resin, then mix up some laminating resin with some colloidal silica to thicken it, that will cure fine. Or you could thicken some epoxy and coat the tool with that.
What tends to happen is that as the resin cures, it shrinks back, and as the rubber tool can give, unlike a hard case tool, the resin is exposed to the air, and it can prevent it curing properly in places.


Comment