
What do you use to clean your resin parts when it is finished printing?
-
If you can cut, drill, saw, hit things and swear a lot, you're well on the way to building a working model sub. -
Isopropanol ... I use the Elegoo wash&cure machineLast edited by DrSchmidt; 12-29-2024, 06:25 AM.Comment
-
Same here. Thank you.If you can cut, drill, saw, hit things and swear a lot, you're well on the way to building a working model sub.Comment
-
I continued working on the bow torpedo room...I printed and added the fittings for the tube control the winch motor and its worm gear and the respective clutch. The tubes were made of 0,3 mm silver-plated copper wire. Tiny stuff...as reference: the squares of the cutting at are 1 x 1 cm^2.
Comment
-
And with the magic that some color and weathering does....
Comment
-
The front section of the 1/72 scale Type II submarine Vesikko is pretty much done. Still have to paint the bunkers, some touch ups, and the LED lighting, but besides that....I'm happy with it.
Comment
-
Some progress on the workbench....printed the battery tank, which took 4 tries to get it right. The batteries on the other hand worked out in the first try. The base colors were applied down using air brushing and the silver contact strips (about 1 mm wide) were painted by hand. Modest weathering as the battery tanks is a clean, dry and closed off space. The two boxes on the right are for ammo (machine gun and torpedos) and will get some more weathering later on....
Comment
-
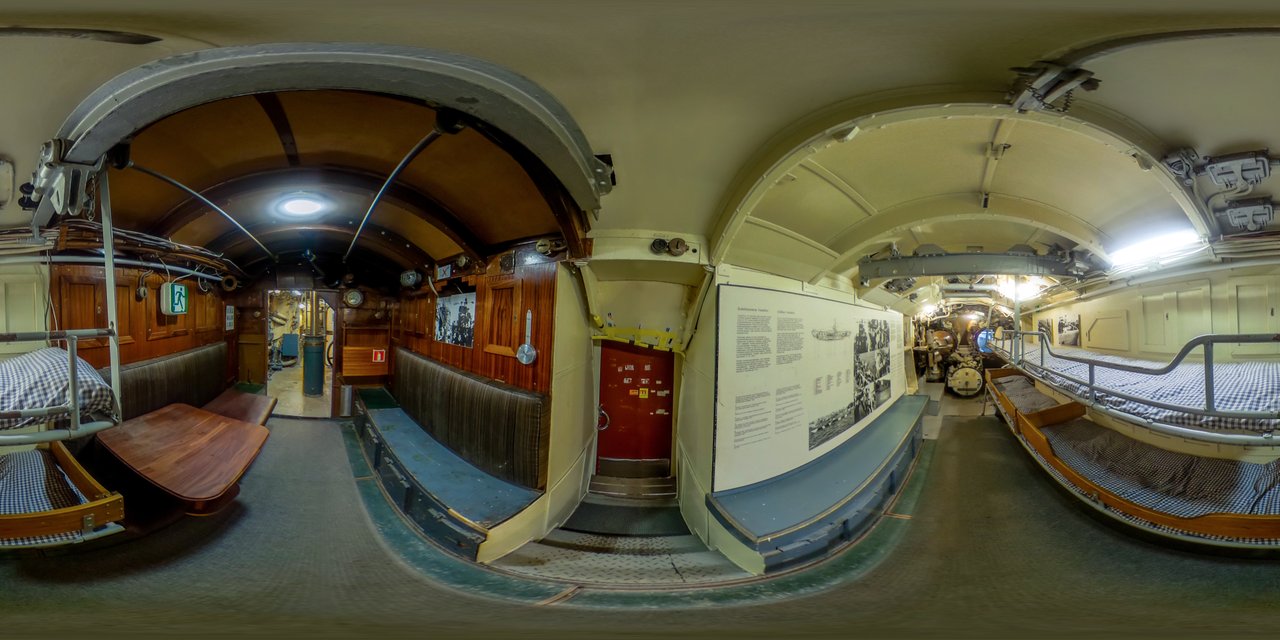
By the way, here you can take a virtual tour through the boat I'm building.
Comment
-
Progress on the interior of the 1/72 scale Type II submarine Vesikko. The crew compartment in the bow torpedo room, just above the battery bunker. The crew lockers were painted white, the section for the officers had lockers clad in wooden veneer. The floor plates were removable and covered in green linoleum.
Comment
-
Progress on my 1/72 scale Type II submarine Vesikko with interior. I finished the bow torpedo room today. I added the bunks and foldable tables between them. The officer section got cupboards broader beds. I added the torpedo loading hatch and allot of equipment below the pressure hull roof, such as support beams for the torpedo hoists, the housing of the optical path to the magnetic compass, the rudder transmission to the conning tower and a few switch boxes. I‘m very pleased with the outcome.
Comment
-
Progress on my 1/72 scale Type II submarine Vesikko with interior. This section holds the control room (right) and the galley (left). The galley was surrounded by the middle ballast tank and therefore the pressure hull was substantially reduced in diameter. Below the floor plates of the control room was the regulation tank and some compressed air bottles on the port side. The small room on the port side of the control room contained the radios and the sonar equipment. Right to the radio room is the gyro compass and the navigation desk.
Comment
-
Finished the control room and the galley. Quite a challenge but I'm very pleased with the result. Sen I connected the section to the bow torpedo room, installed the LEDs and hooked up the current sources. Lights on....I'm very pleased with the first impression. Video:
Photos:
Comment
-
I‘ve been lazy making photos and posting progress, so this is quite a leap from last time. I‘ve been working on the machine room with the Diesel engines, the reducing gear, the electric motors, the clutches and the thrust block. I quickly realized, that in the crammed space of the machine room with its floor plates and lots of additional equipment, allot of the machinery will hardly be visible. So I started a side project and made a clean display of the port drivetrain. I also learned, that putting in the starboard Diesel into the machine room would block too much sight, but leaving it out would look not good either. So I designed a cut-down Diesel, that only shows the crank shaft in its housing together with the shaft bearings. Nice little gem….it is made of 10 printed parts.
Comment
-
Magnificent details evident throughout. The painting, washes, and highlighting makes everything 'pop'. Wow! Museum quality (a term I use sparingly).Who is John Galt?Comment
-
Thanks for the positive feedback, David. I really appreciate it....Comment


Comment