the SubDriver becomes modular

Collapse
X
 
  • Time
  • Show
Clear All
new posts
  • He Who Shall Not Be Named
    Moderator
    • Aug 2008
    • 12253

    the SubDriver becomes modular


    THE SUBDRIVER BECOMES ‘MODULAR’

    Wet-hull type r/c submarines usually employ a removable watertight system to house the devices that need to operate in a dry environment. This Work In Progress (WIP) report chronicles my effort to enhance the utility of my system through modularization.

    WTC is an acronym which originally stood for, Water Tight Container; but today is understood to mean, Water Tight Cylinder. I popularized the WTC through development, production, and sales of the system to the general public. The ‘SubDriver’ name I use today a proprietary device. I claim authorship of the acronym, WTC. Not the concept. For the sake of this discussion WTC, SubDriver, and module describe the same thing.

    The European’s are the real innovators and inventors in this game. The great Nick Burge and others from his side of the world would justifiably challenge any claim on my part suggesting I originated the concept of a removable modular system. I am not. But, I am a dues paying member of the club that, towards the end of the last century, independently devised such systems and foisted them onto the scene.

    OK, clarification of authorship and acknowledgements out of the way. What the hell am I talking about here?
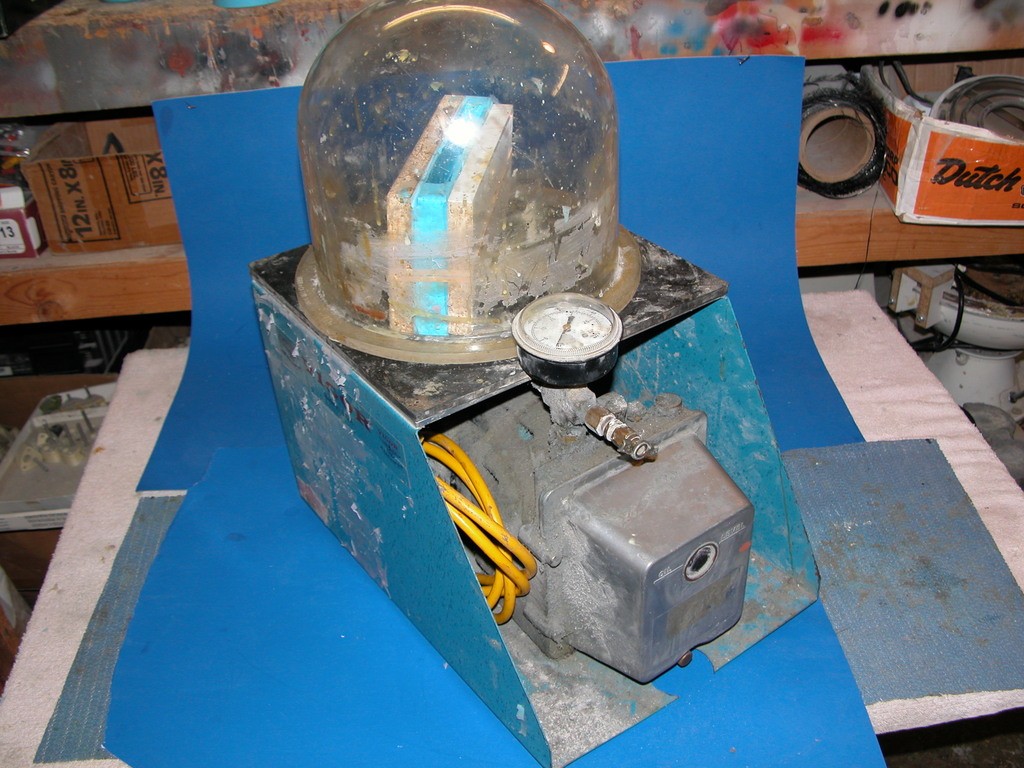
    My WTC started out as a relatively simple, clear, 3” diameter Lexan cylinder; outfitted as a system containing the propulsion, control, and ballast sub-systems needed to operate a wet-hull type r/c submarine. The system is removable from the submarine hull. That ability permitting easy adjustment and repair of the sub-systems, or transfer of the system to another r/c model submarine hull, as illustrated below.

    Note that this single WTC, one of my first, is used to operate any one of these four submarine subjects. The point being, as long as the subjects share propulsion and variable ballast water needs, and can accommodate the system, then one can operate such a fleet with only a single WTC.


    However, a major shortcoming with my design is the use of a single length of Lexan cylinder to form the three specifically sized spaces within. For a given WTC of my design there are only so many r/c submarine subjects that fit its operational perimeters.

    Over the decades I’ve sold a significant number of my WTC’s, and through them and other product I have done much to popularize the hobby of r/c submarining throughout the world. In that time the system has changed little in overall configuration.


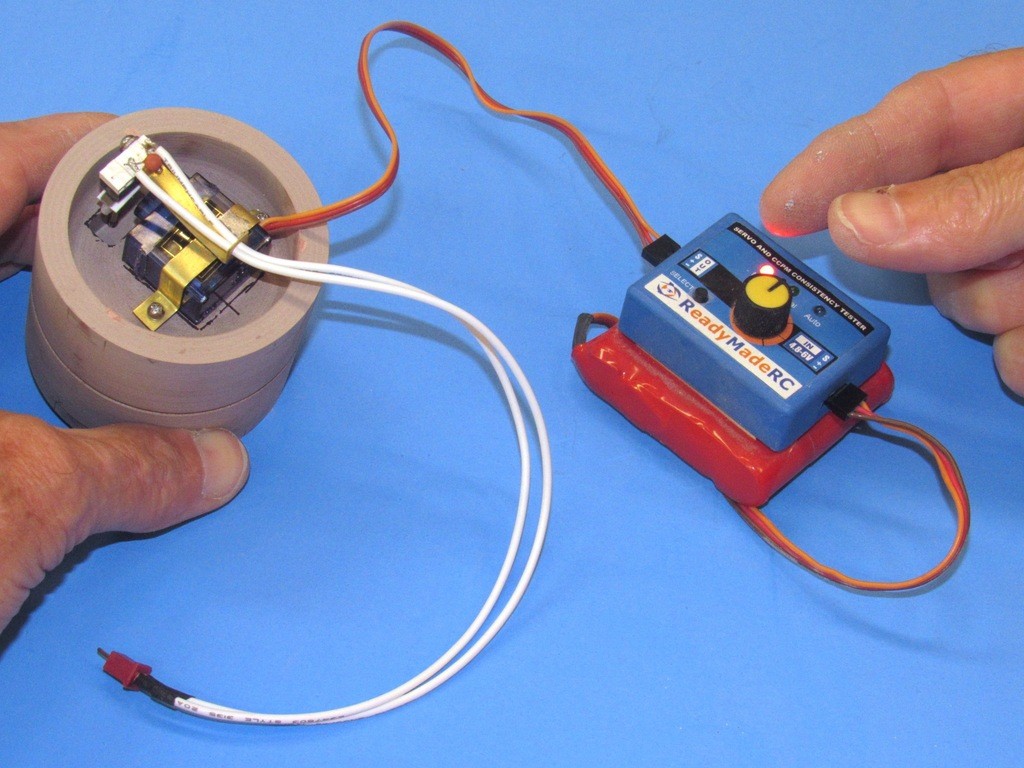
    And that takes us to today. The WTC has matured (in name at least) to, ‘SubDriver’. Pretty much the same internal arrangement, but with the change from a gas type ballast sub-system to one that employs our SemiASperated (SAS) pump-blown ballast sub-system. But with the single Lexan cylinder, this product remains suited to a very limited range of r/c submarine types and sizes. As this picture illustrates – this little SubDriver finds only a few subjects it can be applied too.

    Illustrating why I’ve had to offer a vast variety of WTC/SubDriver systems each suited for a specific range of r/c submarine subjects. Bob Martin, the owner-operator of The Nautilus Drydock, and my Boss has kindly, but insistently, been pushing me to modularize the system to both reduce his inventory and to make the product more ‘user friendly’. Here, I’m chronicling that effort.


    And less anyone suggests that I’m blissfully charging in with this narrative to exclaim my new invention, please be assured that I know of and appreciate the work of those who inspire me. The previously mentioned Nick Burge is a sterling example: that guy modularized the WTC, and published his efforts long before modularizing WTC’s was cool! I stand on his, and the other greats, shoulders here. I am, and always will be, their attentive student.


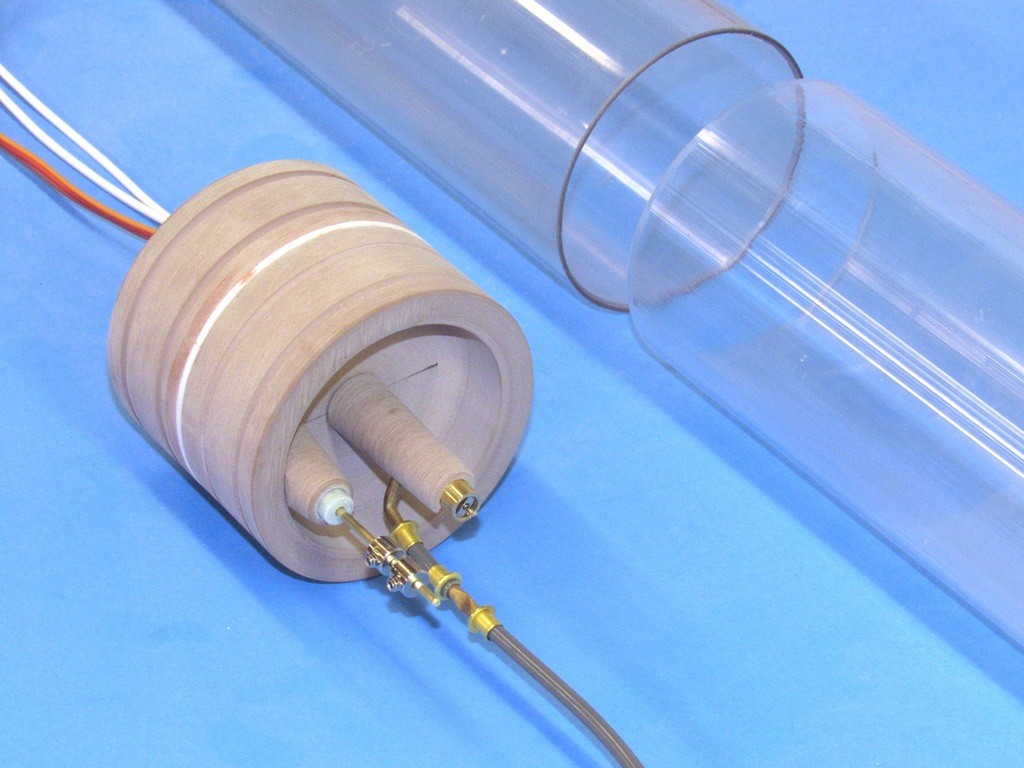
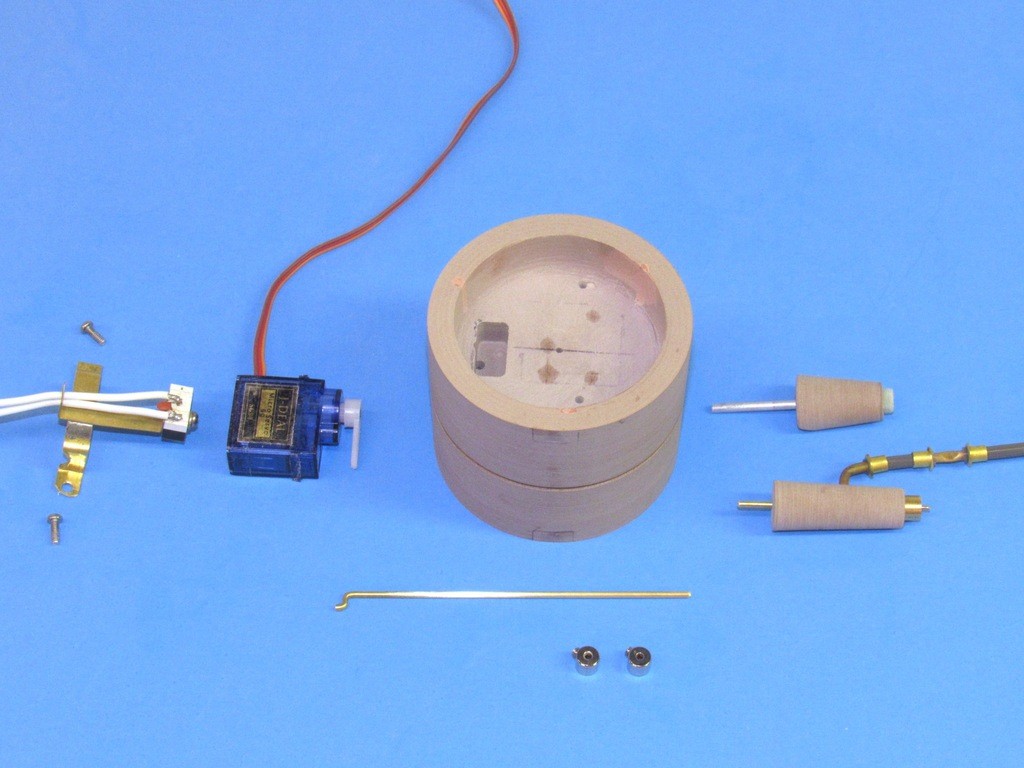
    The objective of the exercise is to cut two lengths of Lexan cylinder, of suitable diameter – one for the after dry space where the propulsion and control devices are; and one, mounted forward of that, to form the ballast tank. These two modules joined by a ‘union’ piece. And by producing different type union pieces we achieve the ability to sleeve different diameter modules into the SD system – the union become the interface point between cylinder sections. This union piece is the key to my method of modularization. The original masters, tooling, and cast parts of the motor-bulkheads, forward closure bulkheads, and other mass-produced parts remain unchanged.

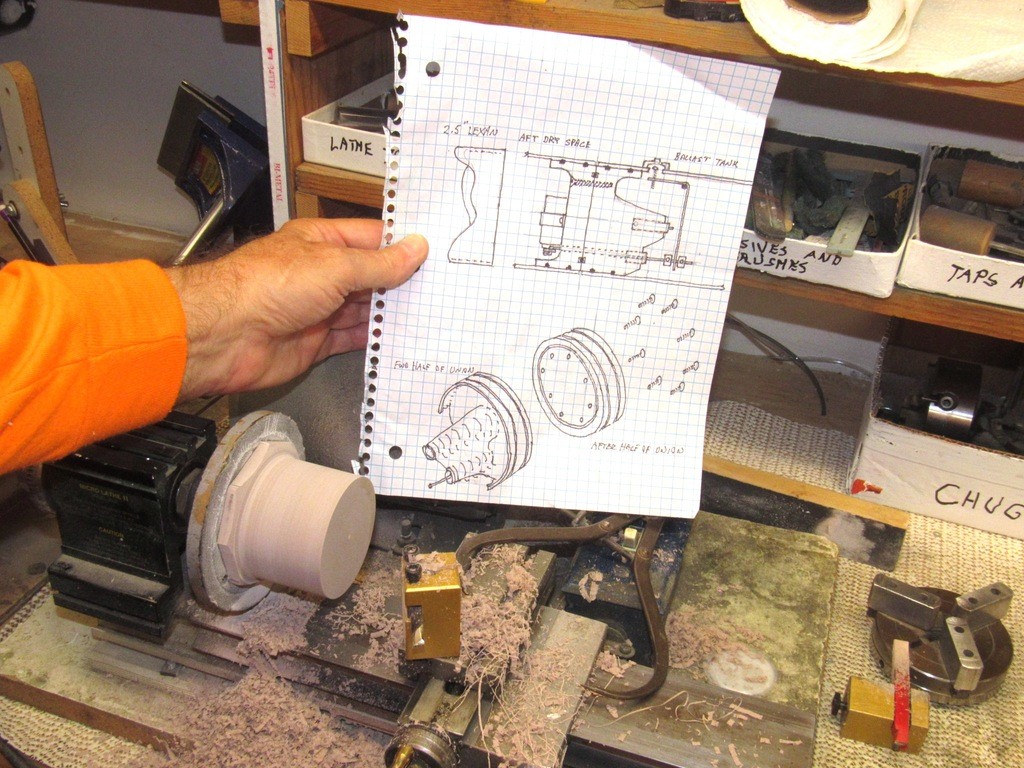
    Work on the union master started with some skull-work and development of a shop-sketch. In this case a union that will permit the joining of two 2.5” diameter lengths of Lexan cylinder. That drawing rendered as proper orthographic and isometric representations of the subject. Enough dope to layout the master and pound it into shape.


    Note that the union itself will comprise a separable forward and after half – the idea being that I retain the after, dry-space half of the union and gain the opportunity to produce a larger diameter forward (ballast tank) union half – giving me the ability to mate any larger diameter ballast tank module to the existing 2.5” diameter after dry space module.

    Bob and I agree that the battery space itself will be a separate length of suitably sized Lexan cylinder, physically removed from the SD proper – its power cable running to the wet side of the SD’s motor bulkhead. That battery module also removable from the model submarines hull.
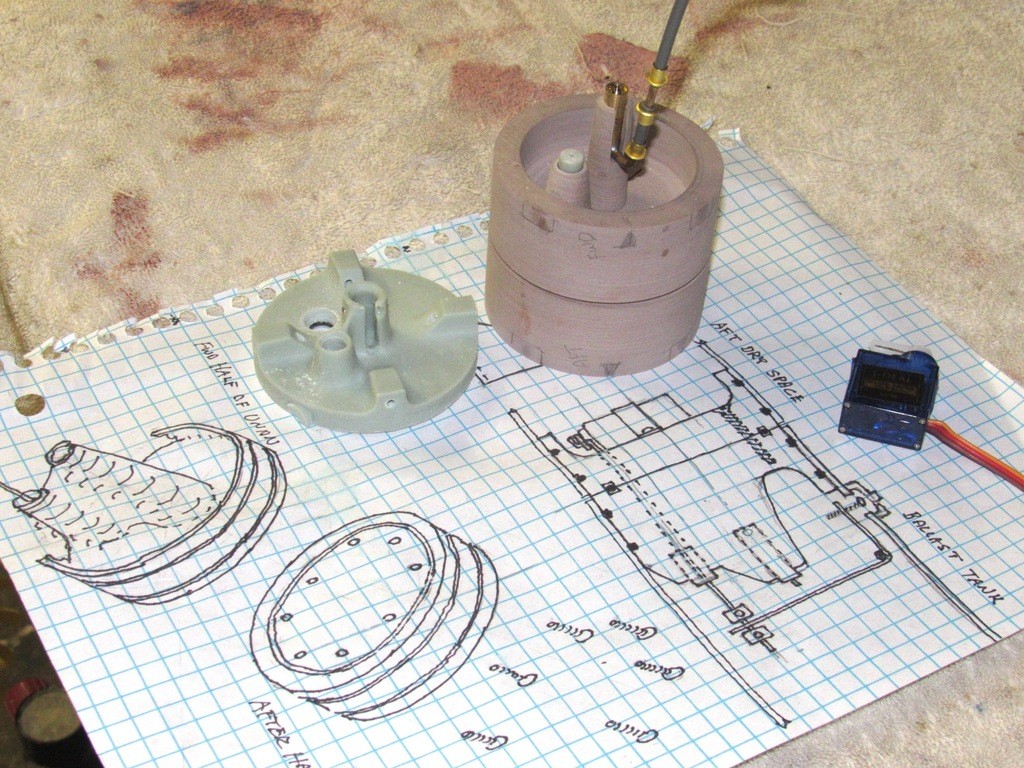
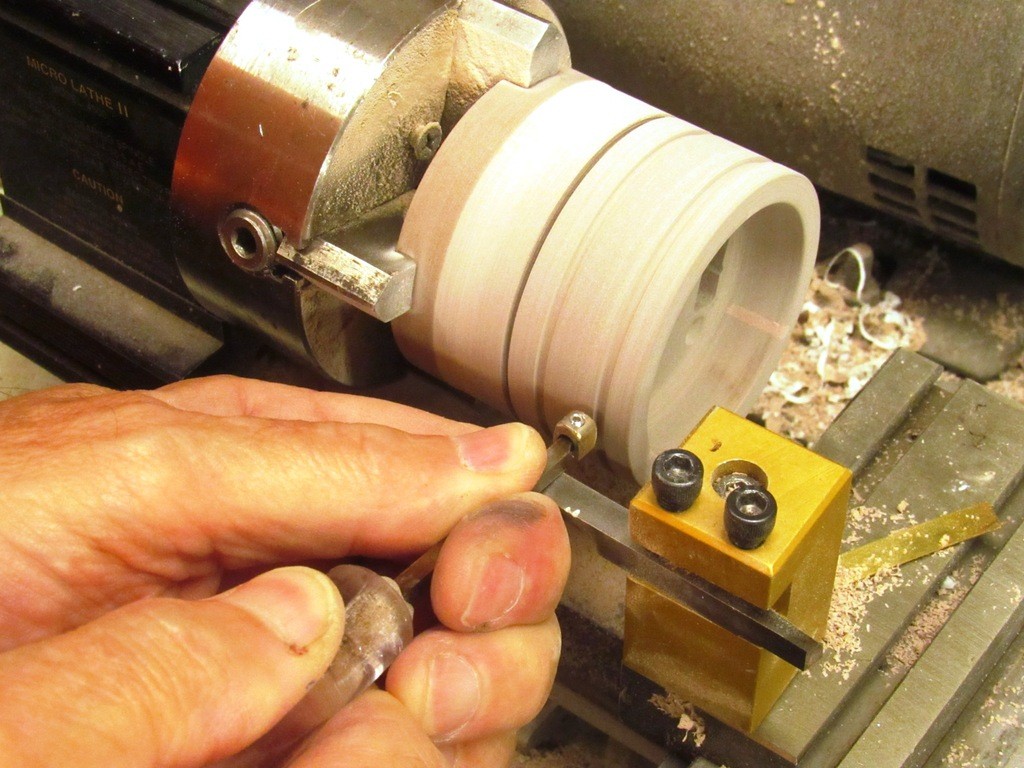
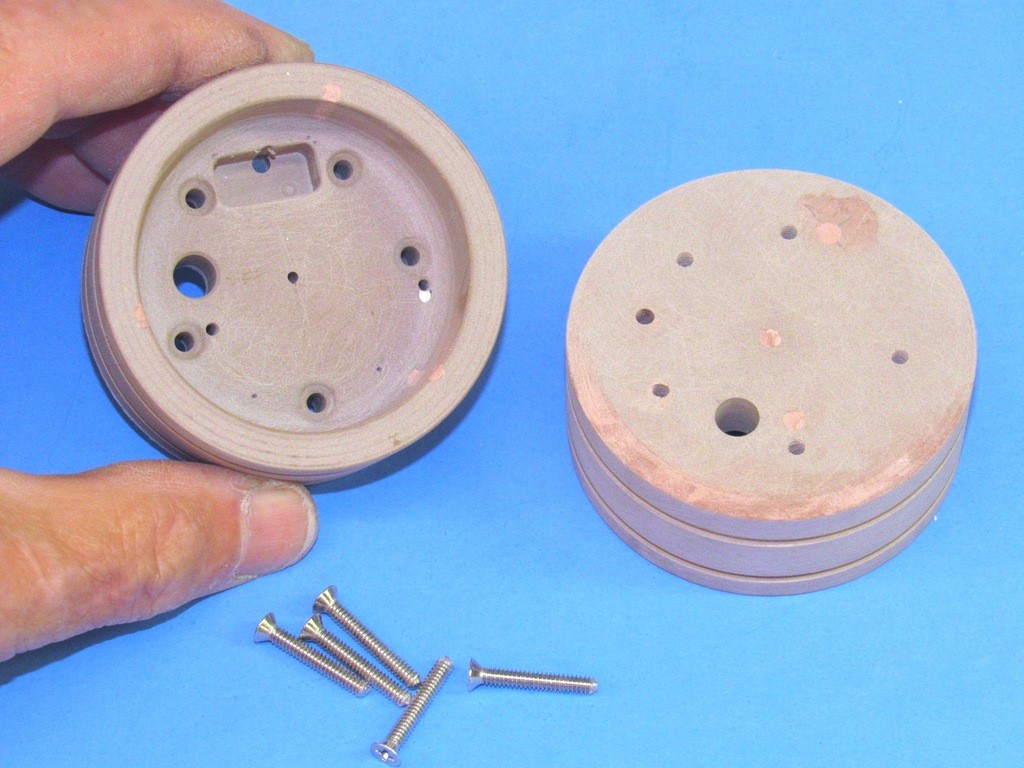
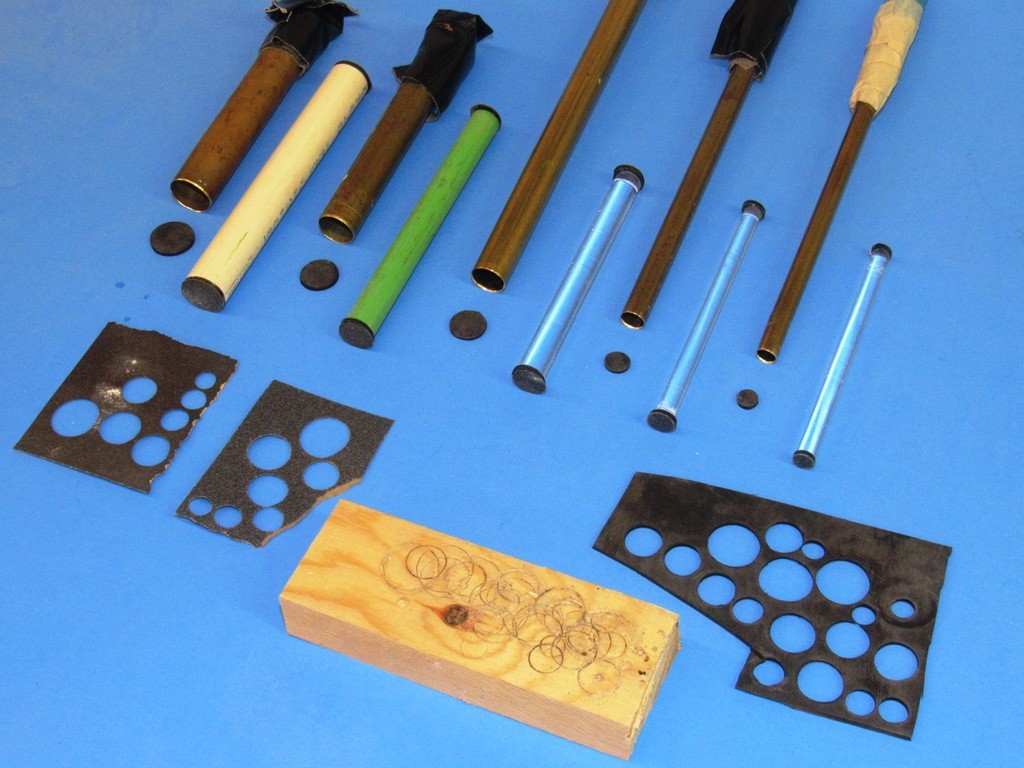
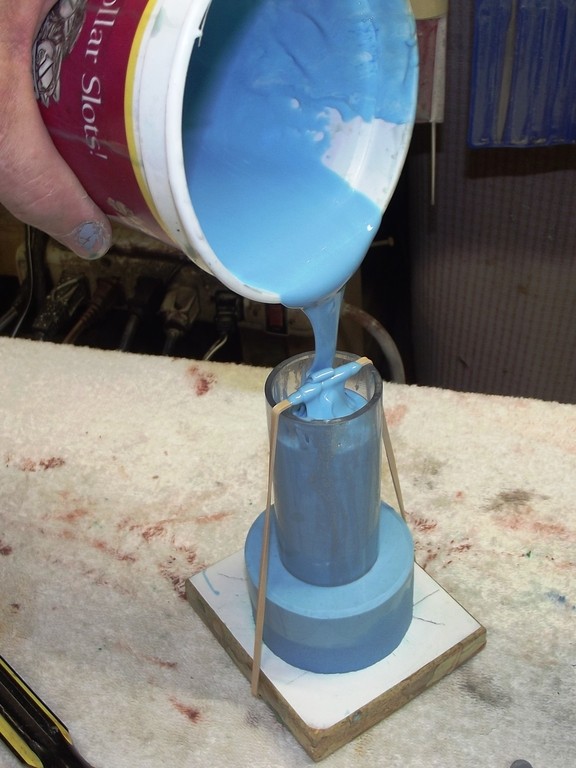
    Work on the 2.5” diameter Lexan cylinder union began by turning a blank of 40 lbs. RenShape to the inside diameter of the cylinder -- oversized a bit to account for tool and casting shrinkage; as well as the sloppy dimensional tolerance evidenced by all sources of extruded Lexan cylinders.


    I started the radial split between forward and after halves of the union right off the bat with a shallow cut with a hack saw blade. Just enough to denote the eventual separation point between the union halves.


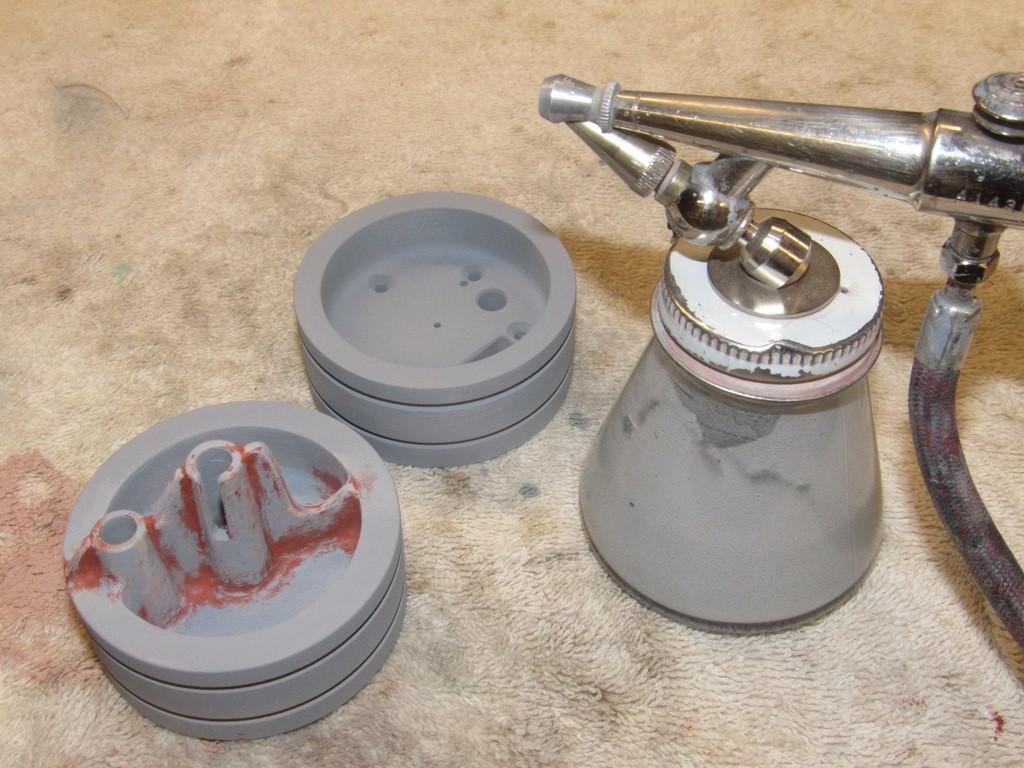
    Note that the blank has been transferred from the face-plate to a proper four-jaw chuck – this so I can turn the work around so I can work both faces while the halves are still attached to one another.


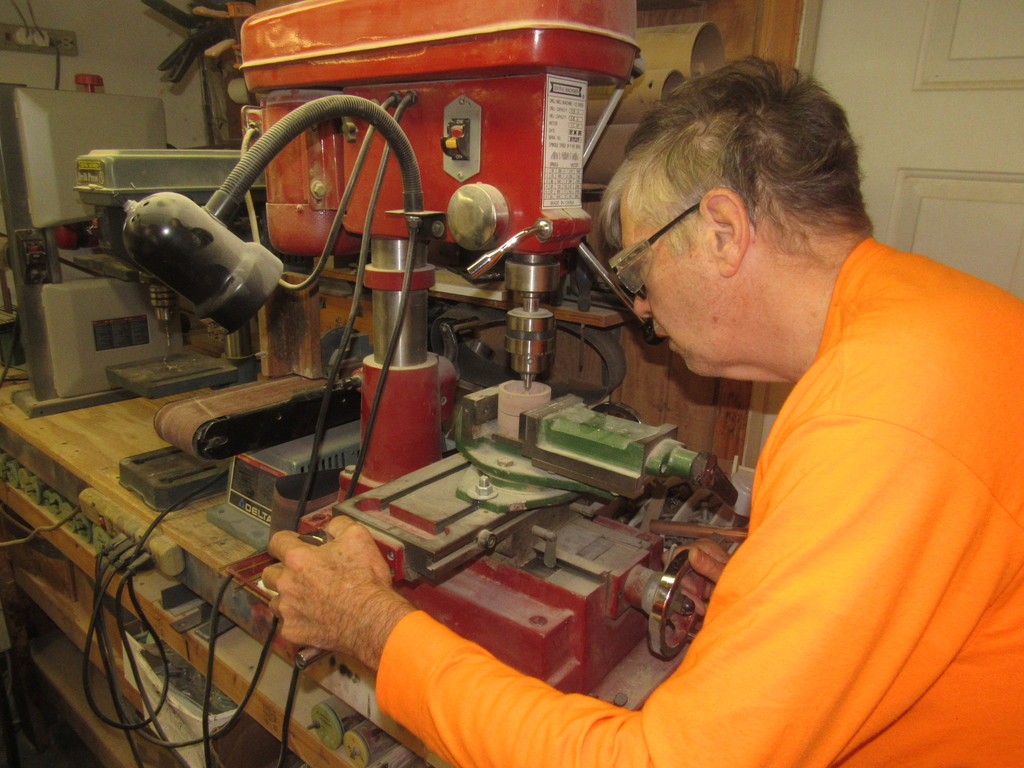
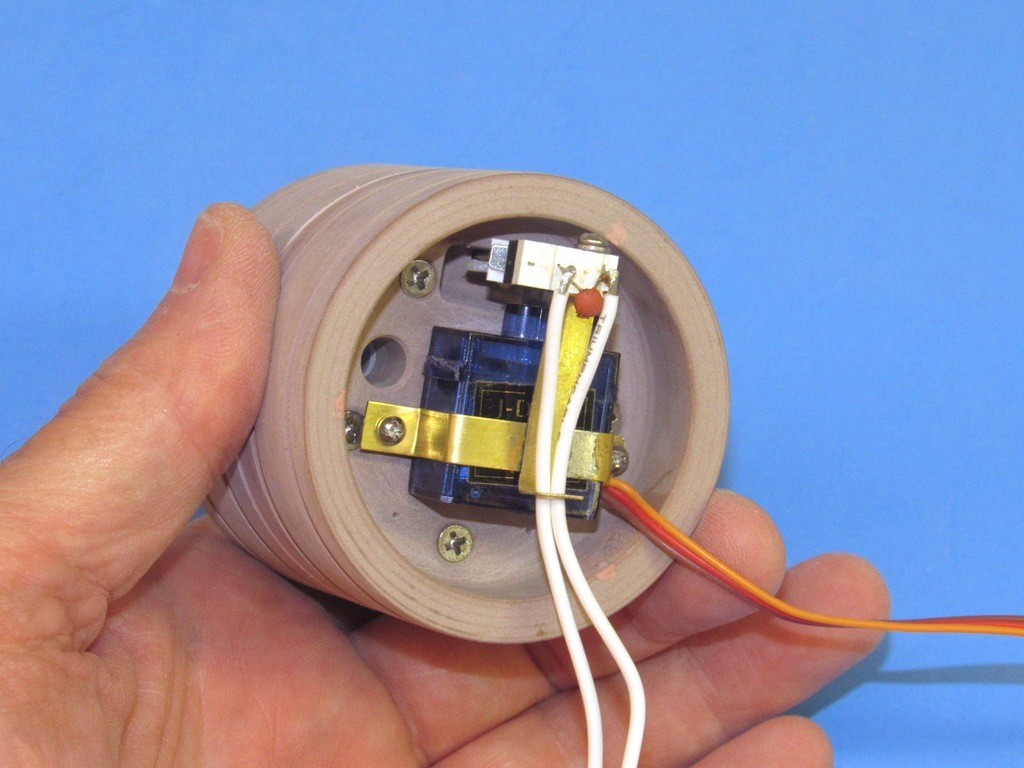
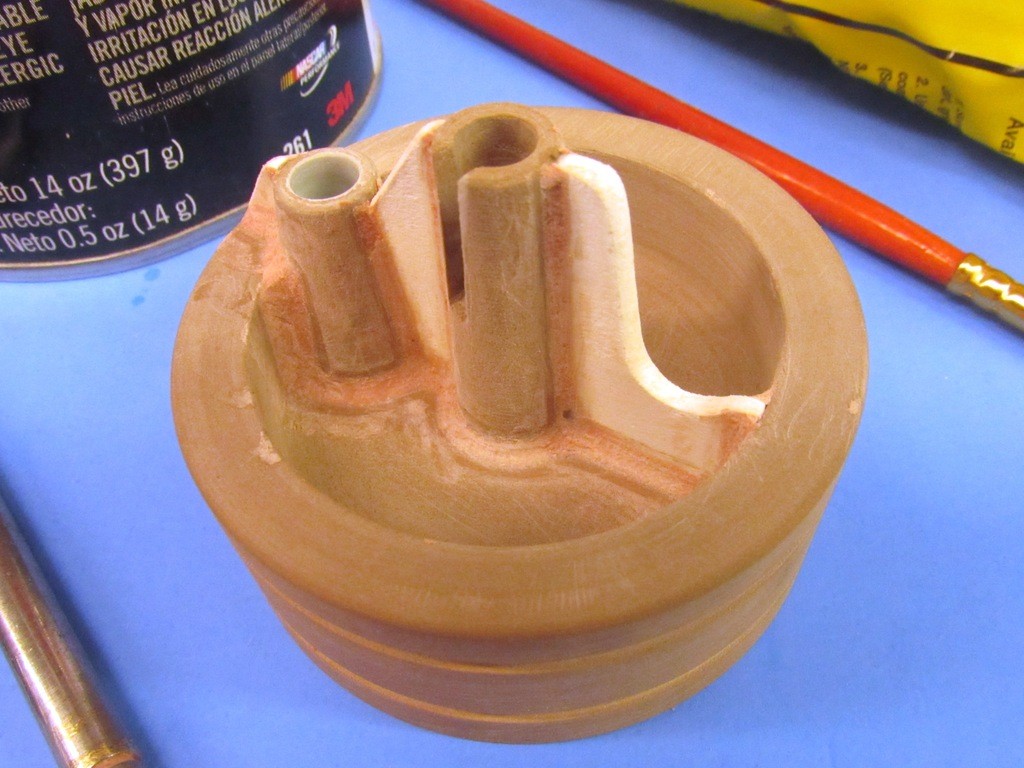
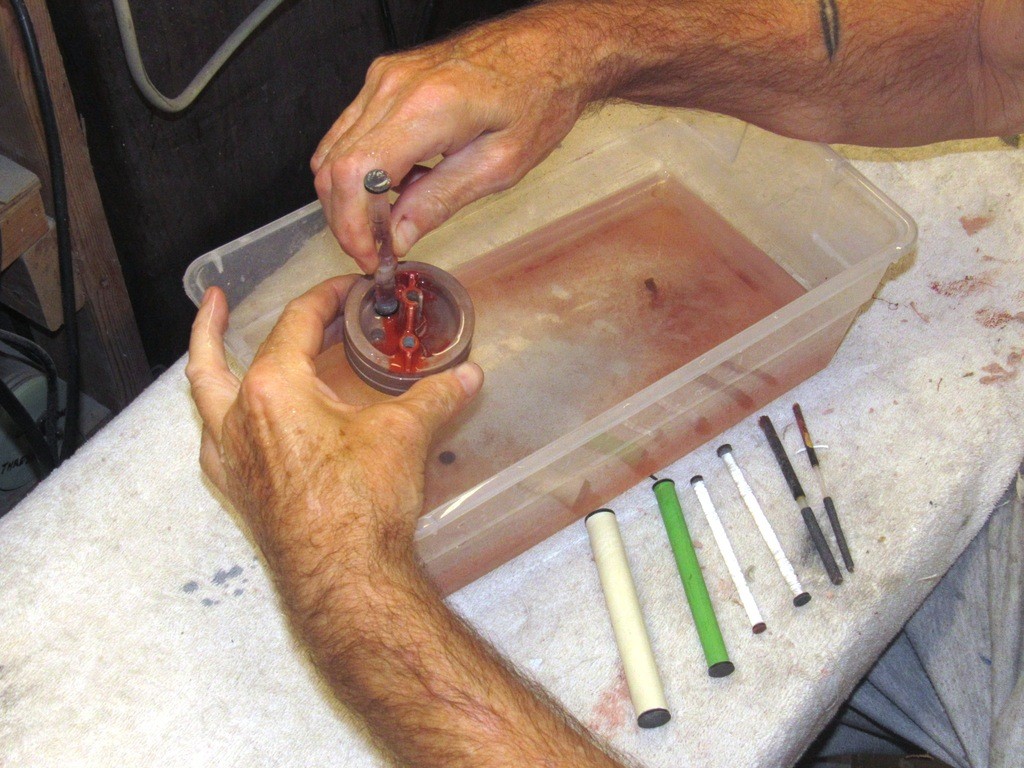
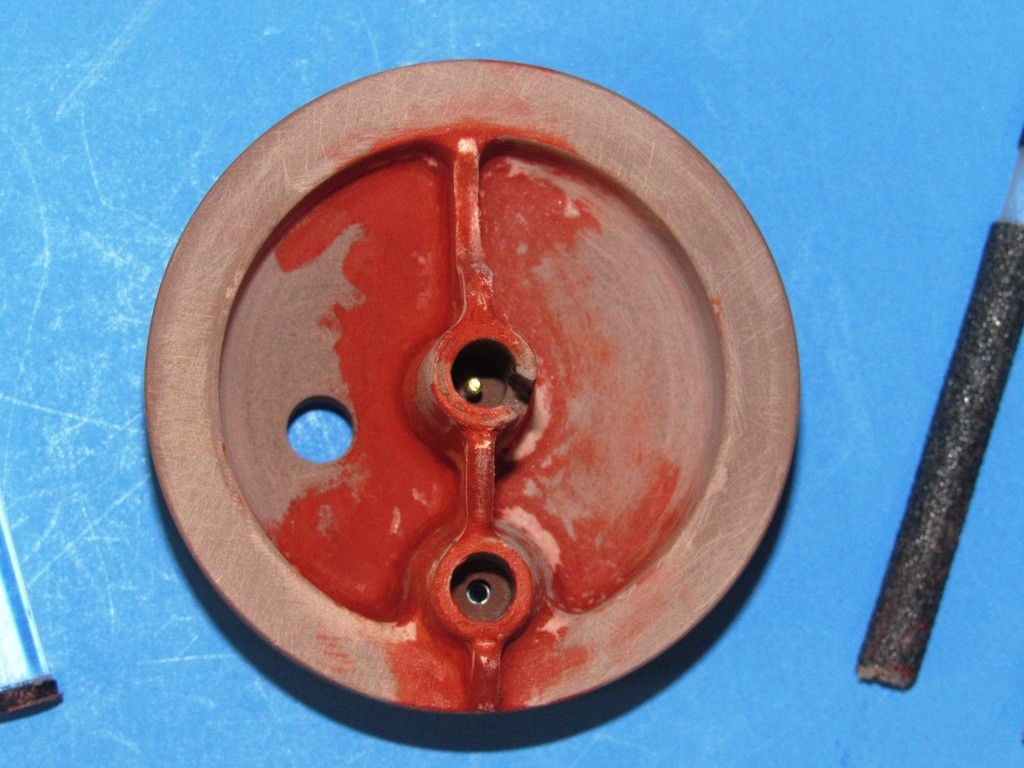
    The ballast tank half of the union being outfitted with the foundations for the ballast servo pushrod seal and emergency ballast blow valve (an optional blow method recommended for open water operations). These foundations temporarily pinned to the union piece so I could affirm non-interference operation of the ballast servo linkage and actuation of the blow valve. If the master can’t be made to operate as designed, then neither will the eventual castings work as intended. Crap in, crap out.


    Who is John Galt?
  • He Who Shall Not Be Named
    Moderator
    • Aug 2008
    • 12253

    #2
    Here, the union master, mocked up and shown next to a cast resin after ballast bulkhead production part. Note how they share the same seal and blow valve positions and function.
    There is no need for a conduit hole through the union, as the separate battery compartment will provide power to the SD through externally running power cables. There will be no conduit running the entire length of the modularized SD’s ballast tank.
    As there are no mechanical fasteners (only a tight wrap of Electrician’s tape) securing the Lexan cylinders together over the union, I’ve eliminated the occasional problem of cracking of the Lexan -- those fractures originating where fastener holes and fastener pressure cracks the Lexan. No holes, no cracking! Note that a watertight seal between union and cylinders is achieved with O-rings, as is the area between the union halves. The union halves will be held together with eight 4-40 X 3/4” flat-head machine screws.

    Last edited by He Who Shall Not Be Named; 10-24-2019, 10:06 AM.
    Who is John Galt?

    Comment

    • RCSubGuy
      Welcome to my underwater realm!
      • Aug 2009
      • 1768

      #3
      Damned spanky start to a project that I"m really looking forward to.

      As a bit of background, basically every boat has a bespoke cylinder to match to it, mainly due to the size of ballast tank needed to bring it to proper surfaced waterline. This is great for sales, as you all need to buy a separate cylinder for each boat. I have to order and stock all those things, which is exceptionally painful to my poor bank account.

      What David and I are envisioning, is a modular approach that will allow one motor section, for example, to mate with a myriad of other ballast tanks and battery compartments, resulting in a ton of flexibility for you guys to tailor the cylinder to your needs. This also means that a single motor compartment could fulfill the needs of a half dozen boats instead of only one.

      Another feature we're playing around with is staging up the ballast tank diameter so that it can be as short as possible.

      Lots of options, opportunity and exploration to do. Obviously, David is the man to get it done. I'm anxious to see what he comes up with!


      Bob

      Comment

      • type7
        Lieutenant Commander
        • Apr 2009
        • 152

        #4
        This is an exciting development, a great evolution. Will the 2 parts of the wtc have to be mechanically connected or just by a waterproof electrical connector?

        Comment

        • He Who Shall Not Be Named
          Moderator
          • Aug 2008
          • 12253

          #5
          Originally posted by type7
          This is an exciting development, a great evolution. Will the 2 parts of the wtc have to be mechanically connected or just by a waterproof electrical connector?
          If you mean between the after dry space and the ballast tank, no mechanical or electrical interface -- the mechanics are within the union piece. If you're talking between the module proper and the separate battery compartment, the only interface is the power cable running to the wet side of the motor bulkhead.

          David
          In Whacko Mode
          Who is John Galt?

          Comment

          • type7
            Lieutenant Commander
            • Apr 2009
            • 152

            #6
            I was just thinking, if the ballast servo bulkhead became one side of the battery compartment with air pump inside, then the ballast tank can be a completely separate module just by adding simple end caps. Just need a 3 or 4 wire harness.
            Since I have a lot of running subs, I have played around with using an easy driver with a 3 wire connection to a completely separate ballast tank. Need to refine it more this winter but it seems to work.

            Comment

            • He Who Shall Not Be Named
              Moderator
              • Aug 2008
              • 12253

              #7
              Originally posted by type7
              I was just thinking, if the ballast servo bulkhead became one side of the battery compartment with air pump inside, then the ballast tank can be a completely separate module just by adding simple end caps. Just need a 3 or 4 wire harness.
              Since I have a lot of running subs, I have played around with using an easy driver with a 3 wire connection to a completely separate ballast tank. Need to refine it more this winter but it seems to work.
              Looking forward to seeing what you come up with. I've made it clear what I'm coming up with; I've shown you mine. Now, show me yours.

              David
              Gauntlet thrower par excellence
              Who is John Galt?

              Comment

              • He Who Shall Not Be Named
                Moderator
                • Aug 2008
                • 12253

                #8

                Though the radial flanges of this union master are too over-sized to fit the inside diameter of the Lexan cylinders – the over-size to account for later tool and part shrinkage – I laid out the cylinders to give you a better idea of what the union piece is all about: a means of joining two separate lengths of cylinder; the union piece affording the ability to size the after dry space and ballast tank to suite a specific need.

                I’ve mocked-up operation of the union by inclusion of the ballast sub-system servo and its pushrod, and temporarily pinning the pushrod seal and emergency blow valve foundations within the face of the forward union half. If the outfitted master will work, so will the eventual cast resin production unions.


                The after dry space side of the union required a little milling to produce a well to provide clearance for ballast sub-system servo bell-crank travel. Other than that the majority of the machining was done on the lathe and drill-press.


                Though what I’m building is a master from which tooling will be made -- from which production union parts will be cast from polyurethane resin -- I do make the master a fully operable device. If I can’t get the master functional, then how can I expect the castings to be functional?

                Case in point is the ballast blow/vent linkage, which is actuated by a little ‘mini’ sized servo. The pushrod travels through both halves of the union and is made watertight at the ballast tank side of the union through a pushrod seal that mounts at the forward end of the pushrod seal foundation.

                Here I’m using a servo-setter to check for unbinding operation of the pushrod through the extreme throws of the servo bell-crank. The machining I did in the above photo was to dig out that square shaped well in which the servo bell-crank travels.


                To the left are the things that fit to the face of the after, dry space side half of the union: the ballast sub-system servo, servo strap with attached low pressure blower limit switch, and pushrod. To the right is the forward ballast tank half of the union which is yet to have permanently attached to its face the emergency blow valve and pushrod seal foundations


                Though not envisioned to see much use, I am providing in the union halves a ¼” hole to accept the after end of a conduit – through which power cables would run – if the end-user decides to graft, through another simpler version of the union, the forward battery space directly to the forward end of the ballast tank.

                Most users will elect to simply plug the conduit hole and house the battery in a separate length of cylinder.

                Note the marking stencil, made from clear acetate sheet, used to guide me as I drilled out the holes for the five machine screws used to compress the two union halves together when assembled.


                Cutting in the O-ring grooves to the radial flanges of the union. The watertight seal between Lexan cylinder and union will be accomplished with the aid of two O-rings for each half of the union. Right after this operation I sawed the union into its respective halves.


                A recent addition to the SAS type ballast sub-system was the substitution of a mechanical limit-switch for the electronic motor controller that formerly operated the low pressure blower. You see the limit switch mounted to the servo securing strap. As the servo bell-crank travels to the ‘blow’ position it closes the limit-switch which completes the circuit to the motor, starting it pumping air (either coming from the SD dry spaces or through the broached snorkel) into the ballast tank, pushing the water out.

                You see to good advantage in this picture the square milled well that provides clearance for the servo bell-crank when it travels to the extreme ‘vent’ position.


                The two halves of the union will be secured with five (initially I planned on eight, but things got too tight within the union for that) 4-40 flat-head machine screws. I have yet to cut in the O-ring grooves that will make things watertight within the tight space between the two union halves.


                Within the forward half of the union .080” Sintra sheet was used to make the three gussets that support and improve eventual resin flow through the tool used to cast the resin production parts. Once glued in place the base of the gussets as well as the two foundations were given Bondo fillets. I used one of Mom’s old dapping tools as a fillet tool, assuring a constant radius fillet all around. After wet-sanding the fillets with a twist of #100 grit sand paper I coated the work with Nitro-Stan air-dry touch-up putty. And after that dried I wet sanded the work with a twist of #220 sand paper. This made the work ready for primer.


                Who is John Galt?

                Comment

                • He Who Shall Not Be Named
                  Moderator
                  • Aug 2008
                  • 12253

                  #9

                  Specialized sanding tools were used to reach into the flat and vertical surfaces within the two union master halves: One type of tool for the flat surfaces, a sanding disc; the other for the vertical, a sandpaper wrapped dowel or twist of sandpaper.

                  By the way, whenever possible, I wet-sand the work. The water helps to keep abraded material from clogging the surface of the abrasive.


                  The right side of this union master half (the ballast tank side) has already been sanded using the specialized tools. The left side is still in the raw, its puttied surfaces yet to be worked with abrasives. What complicates this particular sanding job is the need to preserve the small radius fillets between foundations, gussets, and the flat internal face of the master. That’s why the sandpaper discs are secured to a piece of rubber sheet – giving it the flexibility to ride up the fillet radius, following its contour, not cut into it.


                  This is how the sanding tools for deep flat surfaces (and surfaces that transition from horizontal to vertical through fillets) are made. A round handle (shank, if you will) has glued to its end a disc of soft rubber, to the face of that rubber disc is glued a disc of sandpaper. Each of these tools has a disc of #200 grit sandpaper at one end, and a disc of #220 sandpaper at the other. Note how the edge of the rubber and sandpaper disc extends slightly past the diameter of the tools shank – this permits the flexible rubber to bend, and along with it the sanding disc, permitting the sandpaper to ride up and conform with the curvature of a fillet. Neat!

                  Note the brass-tube cutters used to punch out the rubber and sandpaper discs.


                  Some of the sanding tools I used to smooth out the Bondo and Nitro-Stan filler and putty. The surfaces at right-angles to one another, joined with tight radius fillets presented a special challenge when it came time to abrade them smooth.

                  The handle/shank of each tool is round, be it wood dowel, PVC tube, or acrylic rod. Whatever is at hand.


                  The touch-up putty was carefully abraded back and primer applied. Problem areas got more putty and sanding, and priming – the process continuing till everything was nice and pretty.


                  Steel wool and 3M abrasive pads are excellent abrasives that get into tight radius corners and deep wells, such as presented by the two union master halves. Where fingers can’t reach, hemostats can. These fine abrasives used only on the primer. The course work gets the sandpaper treatment!


                  A quick job of buffing the cavities within the master halves was done by spinning a hunk of steel wool, at slow speed, with the aid of a variable speed electric drill.


                  The two halves of the union master being prepared for creation of the rubber resin casting tool. This will be a two-piece tool. Footing the masters in a layer of clay secures them in place. Additionally the pliable clay is the perfect medium for pressing the dimples that will give form to the indexing network at the flange line between the two eventual tool halves.

                  The containment dam for this first half of the tool is simply a wrap of masking tape.


                  So, how much expensive rubber to prepare for a specific job? A great cheat to determine the exact volume of rubber needed is to substitute a liquid, like water – pouring in the amount needed to cover the masters, and then pouring the water into the container you’re going to mix the rubber in and marking off the waterline within. That waterline mark denoting how much catalyzed rubber you need.

                  Second best cheat, and less messy, is to substitute rice for the water. That’s what I’m doing here.
                  RTV platinum cured silicon mold making rubber is expensive. Rice ain’t.


                  Here I’m pouring the first half of the rubber tool. The two-part tool will give form to the cast resin production union parts. This single tool produces both the forward (ballast tank side) and after (dry space side) of the union.
                  Before pouring the catalyzed and thoroughly mixed RTV rubber over the masters – that process invariably folding in a lot of little air-bubbles into the mix, the mix was de-gassed by subjecting it to a hard vacuum for several minutes.


                  Who is John Galt?

                  Comment

                  • trout
                    Admiral
                    • Jul 2011
                    • 3545

                    #10
                    David, again another exceptional documentary on how you do things. Do you put the half mold in a pressure pot at all?
                    If you can cut, drill, saw, hit things and swear a lot, you're well on the way to building a working model sub.

                    Comment

                    • He Who Shall Not Be Named
                      Moderator
                      • Aug 2008
                      • 12253

                      #11
                      Originally posted by trout
                      David, again another exceptional documentary on how you do things. Do you put the half mold in a pressure pot at all?
                      Thanks, Tom. Nice to be appreciated by a peer.

                      The only differential pressure needed to get rid of the entrapped bubbles (some a consequence of the exothermic reaction, but most folded in air by the mixing process) in the rubber is to subject the still 'liquid' mix to a hard vacuum that increases the gas bubble size to a point where buoyant force drives them to the surface where they break and the gas evacuated by the vacuum pump. De-airing/de-gassing. The mix is brought back to ambient pressure and poured over the masters.


                      If you don't have a hard vacuum source then you pressurize the poured rubber to at least one-atmosphere for the duration of the state change.

                      David
                      Bull-**** Artist
                      Last edited by He Who Shall Not Be Named; 10-28-2019, 09:33 AM.
                      Who is John Galt?

                      Comment

                      • Scott T
                        Commander
                        • May 2009
                        • 378

                        #12
                        David,
                        If you made the vent hole part of your casting you might be able to remove the ballast tube without fiddling with the vent.
                        This would make adding longer or shorter ballast tanks simple push on pull off procedures.
                        Incorporating your vent into the bolt on section would reduce your part count as it would not be a separate cast piece and
                        need attachment to the tube. I have a drawing but cannot upload it for some reason.
                        Also your private message area is full and will not take anymore messages.
                        Will try to send the picture tomorrow.

                        Thanks,
                        Scott T

                        Comment

                        • He Who Shall Not Be Named
                          Moderator
                          • Aug 2008
                          • 12253

                          #13
                          Originally posted by Scott T
                          David,
                          If you made the vent hole part of your casting you might be able to remove the ballast tube without fiddling with the vent.
                          This would make adding longer or shorter ballast tanks simple push on pull off procedures.
                          Incorporating your vent into the bolt on section would reduce your part count as it would not be a separate cast piece and
                          need attachment to the tube. I have a drawing but cannot upload it for some reason.
                          Also your private message area is full and will not take anymore messages.
                          Will try to send the picture tomorrow.

                          Thanks,
                          Scott T
                          Looking forward to your input, Scott.

                          David
                          Who is John Galt?

                          Comment

                          • trout
                            Admiral
                            • Jul 2011
                            • 3545

                            #14
                            David,
                            If I get what Scott is saying, Incorporate your vent into the bulkhead. I drew up this as an example:
                            Click image for larger version

Name:	Screen Shot 2019-10-28 at 3.54.54 PM.png
Views:	607
Size:	47.2 KB
ID:	134616Click image for larger version

Name:	Screen Shot 2019-10-28 at 3.54.10 PM.png
Views:	634
Size:	22.3 KB
ID:	134617Click image for larger version

Name:	Screen Shot 2019-10-28 at 3.53.22 PM.png
Views:	638
Size:	14.3 KB
ID:	134618 The downside is that you would need to route out the cylinder to fit the vent. It is a wet side so a o-ring is really not needed, you could just run a beed of RTV silicon.
                            Does this make sense? Scott is this what you meant?

                            Peace,
                            Tom
                            If you can cut, drill, saw, hit things and swear a lot, you're well on the way to building a working model sub.

                            Comment

                            • He Who Shall Not Be Named
                              Moderator
                              • Aug 2008
                              • 12253

                              #15
                              Originally posted by trout
                              David,
                              If I get what Scott is saying, Incorporate your vent into the bulkhead. I drew up this as an example:
                              Click image for larger version

Name:	Screen Shot 2019-10-28 at 3.54.54 PM.png
Views:	607
Size:	47.2 KB
ID:	134616Click image for larger version

Name:	Screen Shot 2019-10-28 at 3.54.10 PM.png
Views:	634
Size:	22.3 KB
ID:	134617Click image for larger version

Name:	Screen Shot 2019-10-28 at 3.53.22 PM.png
Views:	638
Size:	14.3 KB
ID:	134618 The downside is that you would need to route out the cylinder to fit the vent. It is a wet side so a o-ring is really not needed, you could just run a beed of RTV silicon.
                              Does this make sense? Scott is this what you meant?

                              Peace,
                              Tom
                              Now, that concept has merit. Let me mull over this idea. Neat!

                              David
                              Who is John Galt?

                              Comment

                              Working...