The British T Class 1:72 scale

Collapse
X
 
  • Time
  • Show
Clear All
new posts
  • Kazzer
    *********
    • Aug 2008
    • 2848

    #46
    And then - DISASTER!!!!

    I pulled away the black mold from the plug fairly easily, and the final mold, which was one of the first pours I made - stuck! I heaved, tugged, swore, cussed, heaved and tugged - and eventually, with a lot of creaking, snarling and cracking, the plug came away.

    But it left substantial lumps of drywall and foam stuck well to the mold, as you can see here.

    Click image for larger version

Name:	IMG_0418.jpg
Views:	1
Size:	91.0 KB
ID:	65651

    Arghhhh!

    Click image for larger version

Name:	IMG_0419.jpg
Views:	1
Size:	90.9 KB
ID:	65652

    After soaking the drywall under a tap for 5 minutes, I was able to pick it away from the mold. Fortunately, there was no damage.

    I can repair the plug, and once I've done that, I'll wrap it up and store it - just in case.


    Click image for larger version

Name:	IMG_0421.jpg
Views:	1
Size:	91.0 KB
ID:	65653

    Note the red lines here. Along both of these, the edges are really bubbly. They are easily repaired, but I am a little puzzled as to why they are there. I haven't had this happen before, and I proves I have to get more method in this process to get it 100% every time. I usually tamp the resin in the mold several timnes, and whack the mold box to shake bubbles free. Maybe I didn't do that this time? I can tell this was a sloppy mix, by the look of the finished job, so a drier mix wasn't the problem.

    Anyhow, we have a T class 1:72nd mold. This boat is as good as in the water.
    Stop messing about - just get a Sub-driver!

    Comment

    • Kazzer
      *********
      • Aug 2008
      • 2848

      #47
      Originally posted by Slats
      For those that are interested here is a link to the film I mentioned. Not something I'd race out and buy, but nonetheless I was very happy to see my beautiful wife made such an effort to buy me something I had not thought of.


      It features a fictional 1950's T class "Trojan". The film was almost never released due to the loss in 1950 of a T class, HMS Truculent.

      ....Mike have you seen this film?

      J
      I think I may have, many years ago, along with my dad.

      The crew of a submarine is trapped on the sea floor when it sinks. How can they be rescued before they run out of air?

      I seem to recall it was an unpleasant experience for me, as my dad relived some of his experiences in these boats whilst watching it. It was a T Class (Tactician) that scared him so much, he quit the Navy. I don't think I want to watch it, but thanks.
      Stop messing about - just get a Sub-driver!

      Comment

      • Kazzer
        *********
        • Aug 2008
        • 2848

        #48
        I've decided to give the molds a try and see if I could get a test shot off.

        I put two coats of wax, then sprayed two coats of PVA. I have a neat little spray gun that is simple to operate and clean - see bottom left.

        Click image for larger version

Name:	IMG_0439.jpg
Views:	1
Size:	92.5 KB
ID:	65681

        Next, I made a template for thin card by laying it into the mold, rubbing the edges with my fingers to mark the cut line, and finally cutting out the template shapes.

        I've never got on well with fiberglass cloth and corners. Pulling the cloth around a corner usually means problems for me, so I have cut the cloth along the edges of sections in the mold. For example, you can see where I have cut along the edge of the ballast tank. Lower hull and ballast tank are two pieces of cloth. The layup went well.

        Click image for larger version

Name:	IMG_0437.jpg
Views:	1
Size:	91.6 KB
ID:	65679


        Here, I cut out the fiberglass cloth and after applying a gel coat all over the mold, I laid the cloth in it and applied more resin.

        This isn't a job I'm good at, or particularly like doing, but onward. After I thoroughly wetted out the cloth, I applied a little lacquer thinner and rubbed the whole cloth area with my latex gloved fingers to flatten it out and - hopefully - remove all the bubbles. Now, I've seen bubbles in Darnell (metcalf/MBD) and OTW (No disrespect meant) so it's just a process of the hand lay-up method. Thankfully, these bubbles are usually easily repaired.

        Click image for larger version

Name:	IMG_0438.jpg
Views:	1
Size:	90.8 KB
ID:	65680

        Click image for larger version

Name:	IMG_0441.jpg
Views:	1
Size:	94.2 KB
ID:	65682

        I used a brown dye in the resin, but it doesn't show up too well against the tile red color.

        My 'cunning plan' is to let the two lower hull halves set up, then after cleaning up the edges, mate them together and pour resin and lead shot into the keel. This simple move will join the two halves together, and form the keel with ballast all in one move. Slick eh!!!! What could possibly go wrong?
        Last edited by Kazzer; 12-19-2011, 02:47 PM.
        Stop messing about - just get a Sub-driver!

        Comment

        • trout
          Admiral
          • Jul 2011
          • 3549

          #49
          Nothing can go wrong, it is just a change in course. Can't wait to see it pulled and put together!
          If you can cut, drill, saw, hit things and swear a lot, you're well on the way to building a working model sub.

          Comment

          • Kazzer
            *********
            • Aug 2008
            • 2848

            #50
            I've always hated those tabs everyone uses to get the sides of our models to line up together. They're a pain to install and look like hell.
            I don't have the complete answer to the problem, but I decided to reinforce the edge of my model to hopefully prevent it from flexing quite so much.

            After looking at several ideas to reinforce the edge, including styrene L shaped extrusions, I thought I'd try this - a piece of string! I know, it sounds silly, but ---

            Click image for larger version

Name:	IMG_0444.jpg
Views:	1
Size:	97.2 KB
ID:	65683

            I soaked the string in resin, then laid it along the edge of the hull, on the waterline. It wobbled around a little, so I mixed some Cabosil and chopped strand fiber into a little resin, then laid that up to the string with an acid paint brush. Finally I pulled one end of the string while holding the other end and it straightened out very well.


            Click image for larger version

Name:	IMG_0445.jpg
Views:	1
Size:	94.4 KB
ID:	65684

            The yellow string is just there to show what it looks like before the resin was applied. See the string bead on the right edge.

            The string after it set up is flush with the mold edge, and should make quite a difference to the flexing. The hull at this point is over 1/8" thick. We'll see if it improves things. It was certainly easy to do.
            Last edited by Kazzer; 12-19-2011, 07:35 PM.
            Stop messing about - just get a Sub-driver!

            Comment

            • Kazzer
              *********
              • Aug 2008
              • 2848

              #51
              With the two molds bolted together, I poured black resin into the keel being careful to only let it run directly into the slot and not drip onto the side of the boat. This prevented the shot sticking to the sides and it rolled neatly into the resin. Once the keel was filled, I placed tape over it and wetted it out with lacquer thinner to help it lie flat. Finally, I coated it wath another coat of resin.

              Click image for larger version

Name:	IMG_0449.jpg
Views:	1
Size:	96.6 KB
ID:	65685

              The skeg was filled with resin and a 1/8" bent brass re-bar, just to ensure it withstand the odd beating.

              On the bow and stern, I filled these areas with a mix of resin and Cabosil to give them extra strength. I hope to use the stern to put the securing screw for the upper hull.

              Click image for larger version

Name:	IMG_0451.jpg
Views:	1
Size:	94.4 KB
ID:	65686
              Stop messing about - just get a Sub-driver!

              Comment

              • Kazzer
                *********
                • Aug 2008
                • 2848

                #52
                I couldn't wait to pull the boat out of the mold, and as The Missus woke me at 6am, I dashed to the basement and pulled the mold apart. I was a trifle hasty, as the resin was very raw, and uncured. That's the trouble with epoxy, it needs a good day at 75 deg f. However, I have a boat!

                The string around the edge worked wonders and its obvious this has considerably stiffened the sides. The keel - just perfect!
                I think the cloth I used was too thin, and I'm going to do another one shortly using a thicker material.


                Click image for larger version

Name:	IMG_0458.jpg
Views:	1
Size:	96.6 KB
ID:	65687


                I wiped of most of the PVA film, but this hull will clean up more.

                Click image for larger version

Name:	IMG_0461.jpg
Views:	1
Size:	93.1 KB
ID:	65688
                Last edited by Kazzer; 01-01-2012, 10:22 AM.
                Stop messing about - just get a Sub-driver!

                Comment

                • oztruck
                  Commander
                  • May 2010
                  • 317

                  #53
                  Looks great, luv your work ethic. For me even instant coffee takes to long.

                  Comment

                  • He Who Shall Not Be Named
                    Moderator
                    • Aug 2008
                    • 12368

                    #54
                    Patience, DAMIT! .... patience!

                    David
                    Who is John Galt?

                    Comment

                    • Kazzer
                      *********
                      • Aug 2008
                      • 2848

                      #55
                      Originally posted by Merriman
                      Patience, DAMIT! .... patience!

                      David
                      I ran out of patience a long time ago, waiting for my damned Foxtrot Fittings Kits. (bloody cheek!)


                      Anyhow, here's my latest update.Click image for larger version

Name:	IMG_0467.jpg
Views:	1
Size:	97.6 KB
ID:	65691

                      I couldn't get over the similarities of these two mortal enemies German and British, and it's obvious both parties were guilty of copyright fraud. I wonder if Mr. Churchill filed his lawsuit first, and if Mr Hitler just laughed. Whatever happened, there was obviously a lot of stealing ideas going on. :biggrin: I'll bet Carl Donitz knew exactly what was going on. AND Mr.Merriman has a letter from him, somewhere in his extensive files. I'd love to see it, just to feel the aura of this great German Officer.

                      I'll come back to the hull in a couple of days and pull another model, but first, I want to try the upper hull mold. Then, to figure out the conning tower and control surfaces.
                      Last edited by Kazzer; 12-20-2011, 11:44 AM.
                      Stop messing about - just get a Sub-driver!

                      Comment

                      • Kazzer
                        *********
                        • Aug 2008
                        • 2848

                        #56
                        Over the past couple of days, I've tinkered with the Conning Tower plug.

                        The Wizard told me to make the plug in two halves, left and right, so they would be identical. I hate it when he's right. I used Renshape for the first time. Boy, I'm never using anything else for this job - wonderful stuff.

                        I also split the tower at the deck height. this plane runs from the bandstand aft to the gun platform for'ard. I've always had problems inserting decks into these towers, but with this idea, that won't be a problem. I could also make recesses for the periscope tubes, hatches, and other neat things, all molded into the deck. We'll see!
                        Click image for larger version

Name:	T Class tower.jpg
Views:	1
Size:	60.8 KB
ID:	65796

                        The upper section will sit on top of the lower one. It can also be cut to house the bandstand.

                        The gun dome for'ard can also be cut off if that particular boat didn't have one.

                        This is easier than I thought!
                        Stop messing about - just get a Sub-driver!

                        Comment

                        • trout
                          Admiral
                          • Jul 2011
                          • 3549

                          #57
                          It is really interesting to see this coming along, keep it up! I am learning from you.
                          If you can cut, drill, saw, hit things and swear a lot, you're well on the way to building a working model sub.

                          Comment

                          • Kazzer
                            *********
                            • Aug 2008
                            • 2848

                            #58
                            After a lot of tinkering, and looking at old photos, and scratching my um - head, I've figured out that this plug has to be split up.

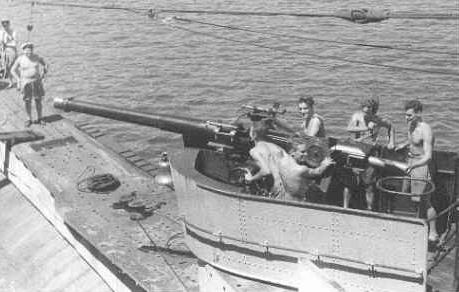
                            The gun platform actually swivels

                            This picture doesn't have the gun armored dome, but you can see how much actually swivels.

                            Here's another photo -

                            You can see how the platform has swung out over the superstructure.

                            Note the low walls running back to the tower/bridge.

                            I've made the plug with the dome on and the walls leading back top the tower. I've had to split the plug unto two pieces, so that we get a conning tower reaching right down to the superstructure.

                            Click image for larger version

Name:	IMG_0493.jpg
Views:	2
Size:	90.7 KB
ID:	65818

                            I used my new Harborfreight scroll saw to cut the arc around the conning tower, and then removed the upper section of the the plug between the dome and the tower.
                            After cleaning up the cut, and doing some minor repairs with Easysand Body Filler,
                            Click image for larger version

Name:	216308_11.jpg
Views:	1
Size:	48.9 KB
ID:	65819
                            I placed some masking tape around the conning tower and coated it with Release Agent (wax). Using more Easysand, I skim coated the inside curve of the forward piece of the plug and pressed it into the conning tower. It molded perfectly against the tower.

                            Note the two forward dive planes cut from a sliver of Renshape. Darn! This is great stuff! Why didn't I think of using this before?
                            Stop messing about - just get a Sub-driver!

                            Comment

                            • Kazzer
                              *********
                              • Aug 2008
                              • 2848

                              #59
                              I'm not happy with the plans I'm working from. I don't think the conning tower is the right height, compared to many photos.

                              Here is one of the Tactician. I've drawn lines along where I the deck levels are. If I'm wrong about the bridge deck, then those men have bloody long legs.

                              Click image for larger version

Name:	tactician bridge.jpg
Views:	1
Size:	58.1 KB
ID:	65820

                              My question now is where the bandstand deck actually goes. I think they step down from the bridge onto the bandstand deck. Therefore it would be on the same level as the gun deck. Of course, Tactician doesn't have a bandstand here, but I'm making a 'generic' boat.
                              Last edited by Kazzer; 01-01-2012, 04:49 PM.
                              Stop messing about - just get a Sub-driver!

                              Comment

                              • Kazzer
                                *********
                                • Aug 2008
                                • 2848

                                #60
                                Click image for larger version

Name:	IMG_0505.jpg
Views:	1
Size:	95.8 KB
ID:	65853

                                "Get that submarine off the dining table!"

                                "Yes dear!"

                                Anyhow, while it's there, I have a T Class hull! It didn't come out easily, and obviously I haven't greased up the mold sufficiently. Good grief!

                                My first attempt had several bubbles in the gel coat. I have now mastered that and have eliminated them. I still need to be more careful along the waterline. In future, I think I'm going to lay that area up with the molds split apart. I can then lay a strip of fiberglass ribbon right along the edge, double it up and get it thoroughly stiffened up, and finally put the two halves together and lay up the keel and remainder of the hull!

                                Boy, this sure is a learning curve.

                                I'd better move that damned boat, if I know what's good for me!
                                Attached Files
                                Stop messing about - just get a Sub-driver!

                                Comment

                                Working...