
Your own construction efforts on your Albacore phase 3?
-
IT TAKES GREAT INTELLIGENCE TO FAKE SUCH STUPIDITY! -
Bingo! Hard learned lessons, Mark.
David,Who is John Galt?Comment
-
Ok , so, Ill file out the bearing holes slightly to give a little slop and to provide space for the glue to hold them in place. Im thinking 100% silicone?IT TAKES GREAT INTELLIGENCE TO FAKE SUCH STUPIDITY!Comment
-
Very good. Now you're talking.
David,Who is John Galt?Comment
-
Here's for inspiration, Mark. I'm just using a drill here to power the single input drive, but it does the trick. Also, forgive the floaties in the sink, they're from the boat just sitting in the shop collecting dust and other floating particulate lol
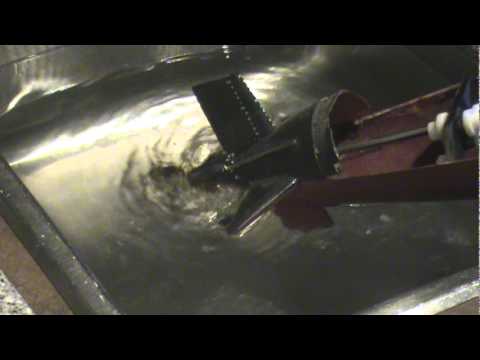
JoelComment
-
Great video Joel, I paused it at the end to get a good look at your gearbox set-up. Nice!IT TAKES GREAT INTELLIGENCE TO FAKE SUCH STUPIDITY!Comment
-
A little bit of progress here. The S.S. secondary shaft would not initially fit the bearings so I had to polish the shaft down using emory cloth and a drill press. Now they have a good slip on fit.
So I was then able to Ca the nylon or teflon gear into place, paying carefull attention to roughing up the shaft and I made a jig to hold the gear in an absolutely straight condition so the gear would not wobble as it was spun.
Then I cut the drive tube to length and installed inside of it on each end the next smaller tube size bushings about 1" long. Thats so that the 3/16" S.S. drive shaft will have a good riding surface where the bearings go. The fit between the S.S. shaft and the tube is such that too much drag would be realized if I used a full length tube. Then to attach those bushings to the inside of the larger tube I employed Permatex High Temperature sleeve retainer. Its like red loctite on steroids. In fact if youve ever used red loctite you can put it on something and then take it right back off because it takes a while to dry. NOT THIS STUFF. Its like thin CA. Put it where it goes quickly because in 3 sec. you wont be able to move it.Last edited by greenman407; 11-11-2011, 09:49 AM.IT TAKES GREAT INTELLIGENCE TO FAKE SUCH STUPIDITY!Comment
-
I also filed out the bearing hole in the far back where the prop is at. Its ready to go as well. Today Ill be paying attention to polishing down the tube so I will have a slip fit on its bearings. Then the real hard part,............... stay tuned.IT TAKES GREAT INTELLIGENCE TO FAKE SUCH STUPIDITY!Comment
-
The hard part was to take the other nylon gear that had a 3/16" hole in it and resize(drill) it to 1/4". Sounds easy, but to get it perfect so that there is no gear wobble will req. extra effort. I built a jig out of 1/4" x 1" flat bar. One for the top and one for the bottom to sandwich the gear and serve as a drilling guide. After long moments of careful alighnment it worked perfect. Sorry, no pictures. After this the newly drilled gear was CAed to the end of my tube shaft. Here it all is in a test fit: Next step will be to attach the bulkheads in place.:
IT TAKES GREAT INTELLIGENCE TO FAKE SUCH STUPIDITY!Comment
-
Ok, we need to shift gears a little bit while I resolve a problem with one of the parts. In the mean time I can start to work on this nasty seem where the upper hull half meets the lower. In some places its worse than in others. Some places will req. filling and sanding with the Evercoat. Others will need pulling or pushing the hull halves into better alignment. Either way we might as well do it now. Here is some pictures of the state of affairs.
IT TAKES GREAT INTELLIGENCE TO FAKE SUCH STUPIDITY!Comment
-
Im going to use the same procedure that I used with the Oscar. Where I will be applying the evercoat Ill do a little at a time and I will apply Petrolium jelly to the upper surface. Just enough to prevent a bond to it from the Evercoat. The bottom will of course be roughed up. This one will be easier because the hull lifts straight up off the top for disengagement instead of having to slide it forward and then up. Then the sanding block. First 120 grit and then when we get close, 220 grit. Also the seem that was made between the upper and lower sail sections has always been an eyesore. Well take care of that as well as the nose section on the bow.IT TAKES GREAT INTELLIGENCE TO FAKE SUCH STUPIDITY!Comment
-
Heres a picture taken about 3 years ago. You can see the offensive seem that Im talking about. Back then I was more interested in the learning curve and getting her reliably operational. Now, lets get her looking good as well. No time like the present. Here you see her in "Hover mode".
IT TAKES GREAT INTELLIGENCE TO FAKE SUCH STUPIDITY!Comment
-
Hopefully this chart is big enough to see now.IT TAKES GREAT INTELLIGENCE TO FAKE SUCH STUPIDITY!Comment
-
Here you can see the state of affairs of the bow seem and the area where the top hull meets the stern.
IT TAKES GREAT INTELLIGENCE TO FAKE SUCH STUPIDITY!Comment
-
And now after application of Evercoat to the stern seem, and some sanding I was able to achieve good results.
Last edited by greenman407; 11-21-2011, 10:03 AM.IT TAKES GREAT INTELLIGENCE TO FAKE SUCH STUPIDITY!Comment


Comment